Step out on a summer morning and notice how the light catches the grain of a cedar post, how the bean vines have found the wire between the rails, and how the gate swings open with a soft creak. A good wooden fence makes a garden feel like a destination instead of just another patch of yard.
Wood stays the favorite material for garden fencing because it is warm, easy to work with, and friendly to plants. It can be painted, stained, woven, charred, or left to weather, and it suits everything from a farmhouse vegetable plot to a small modern courtyard. It also costs less than most masonry or metal, and a handy homeowner can build much of it over a few weekends.
These 25 wooden garden fence ideas cover practical enclosures that keep critters out of the vegetables, decorative borders for flower beds, handsome entry gates, and finishes that range from rustic to sleek. Use one idea for a single bed or combine several to give your whole garden a clear, beautiful edge.
1. Enclose the Vegetable Garden With Wood Posts and Hog Wire
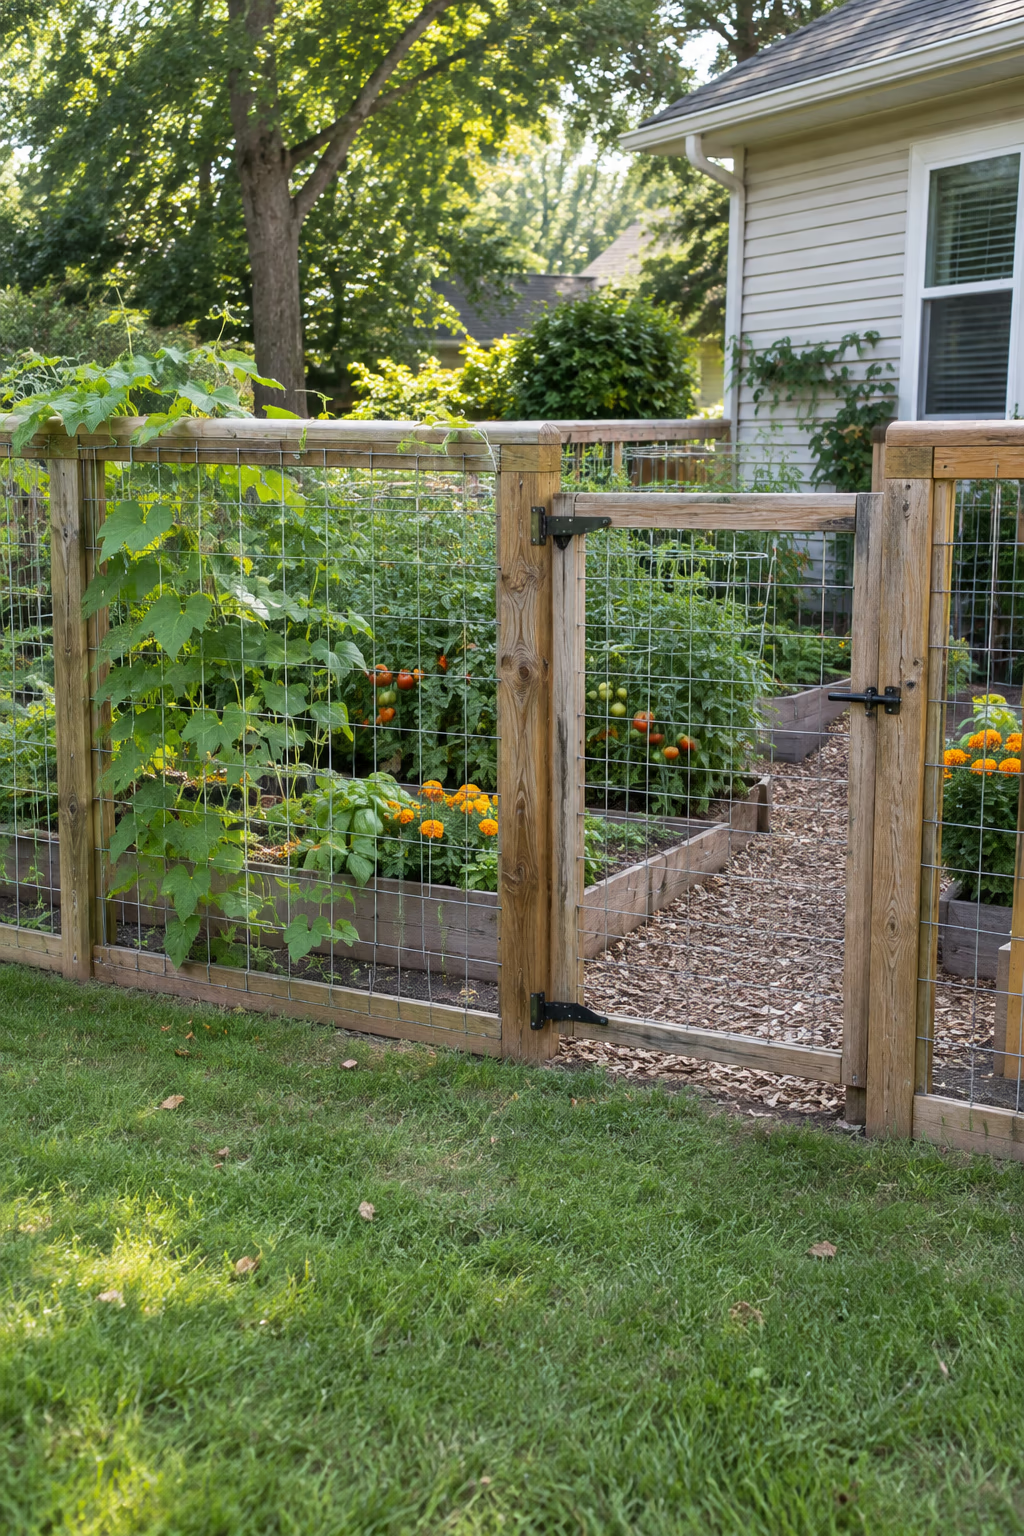
A sturdy, see-through edge for edible beds
This look pairs a simple wooden frame with welded wire panels, often sold as hog wire or cattle panels. Set 4×4 or 6×6 posts about 6 to 8 feet apart, run a 2×4 or 2×6 top rail, and fasten the panels to the inside of the frame with fence staples or screws and washers. A height of 4 to 5 feet works well for most backyard plots.
The open grid lets in sun and air, so plants along the edge grow just as well as those in the middle. It also keeps dogs and kids out of the beds, and the wire doubles as a support for peas, cucumbers, and pole beans.
Use ground-contact rated pressure-treated lumber or naturally rot-resistant cedar for the posts. Welded wire panels have sharp cut ends, so wear gloves and cap or trim the edges where people will brush against them.
2. Frame the Garden Entrance With a Wooden Arbor Gate
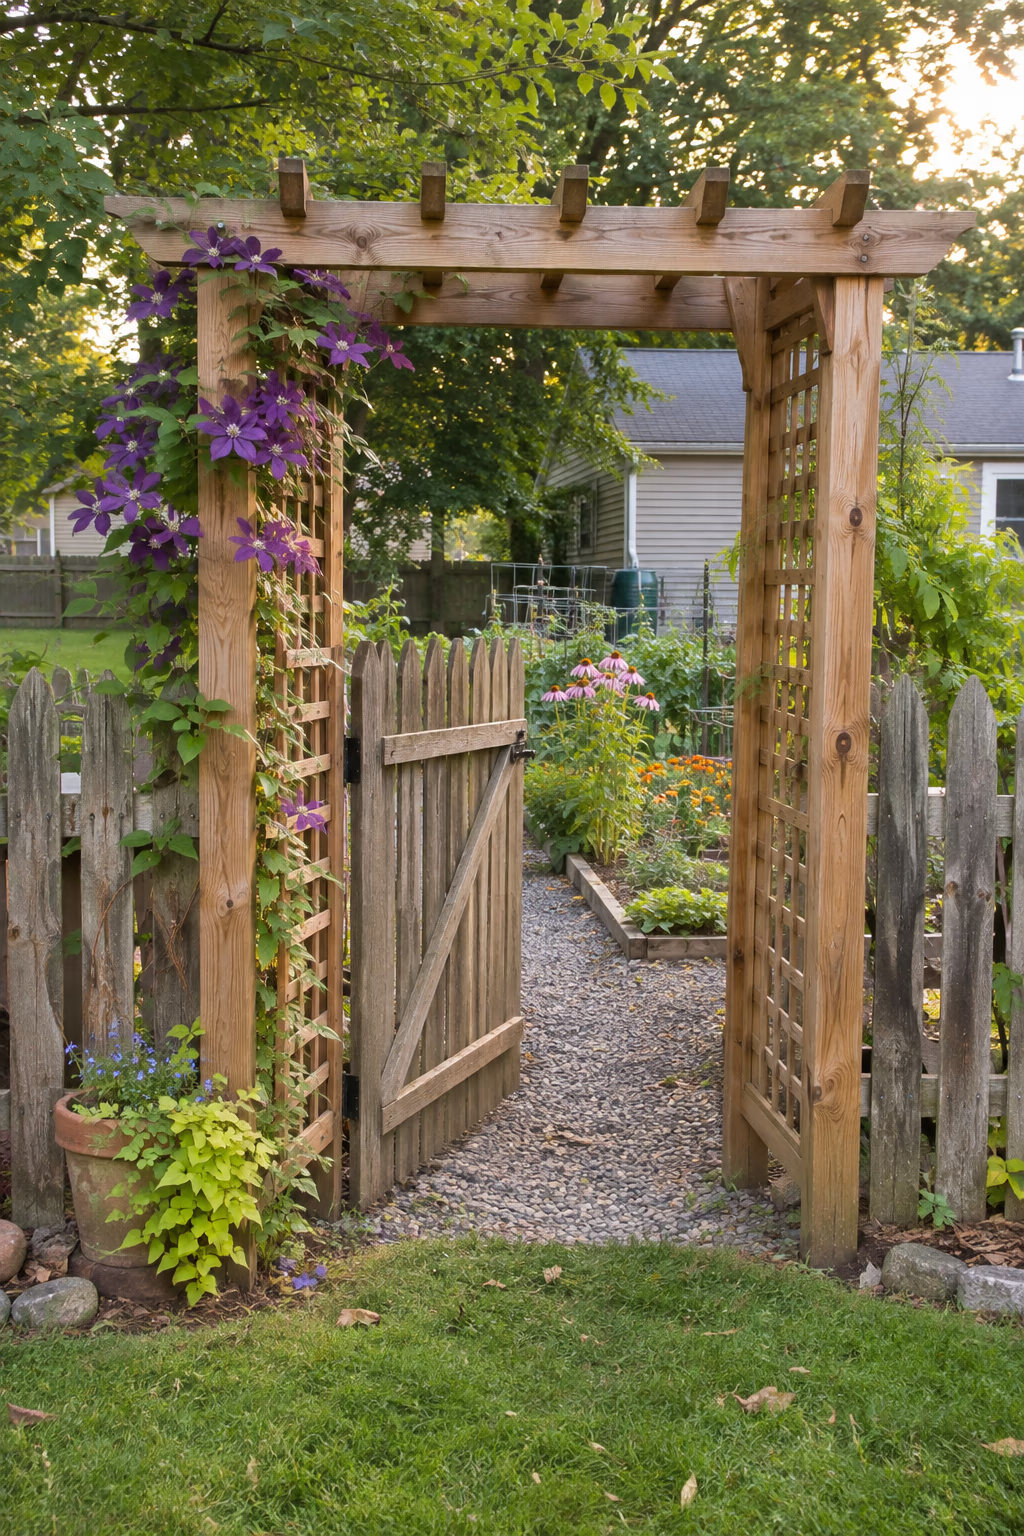
Give the garden a true front door
An arbor built into the fence line turns an ordinary opening into a welcoming entrance. A typical design uses four 4×4 posts, crossbeams on top, and lattice or slatted sides, with a gate about 3 to 4 feet wide hung between the front posts. Clear headroom of at least 7 feet keeps tall visitors from ducking.
The arbor gives climbing plants a place to grow, so clematis, climbing hydrangea, or a hardy honeysuckle can slowly soften the wood. It also creates a sense of arrival, which makes even a modest vegetable garden feel special.
Gates sag over time, so add a diagonal brace that runs from the bottom hinge side up to the top latch side. Heavy-duty hinges and a self-closing latch help keep rabbits and pets out.
3. Top a Board Fence With a Windowed Trellis
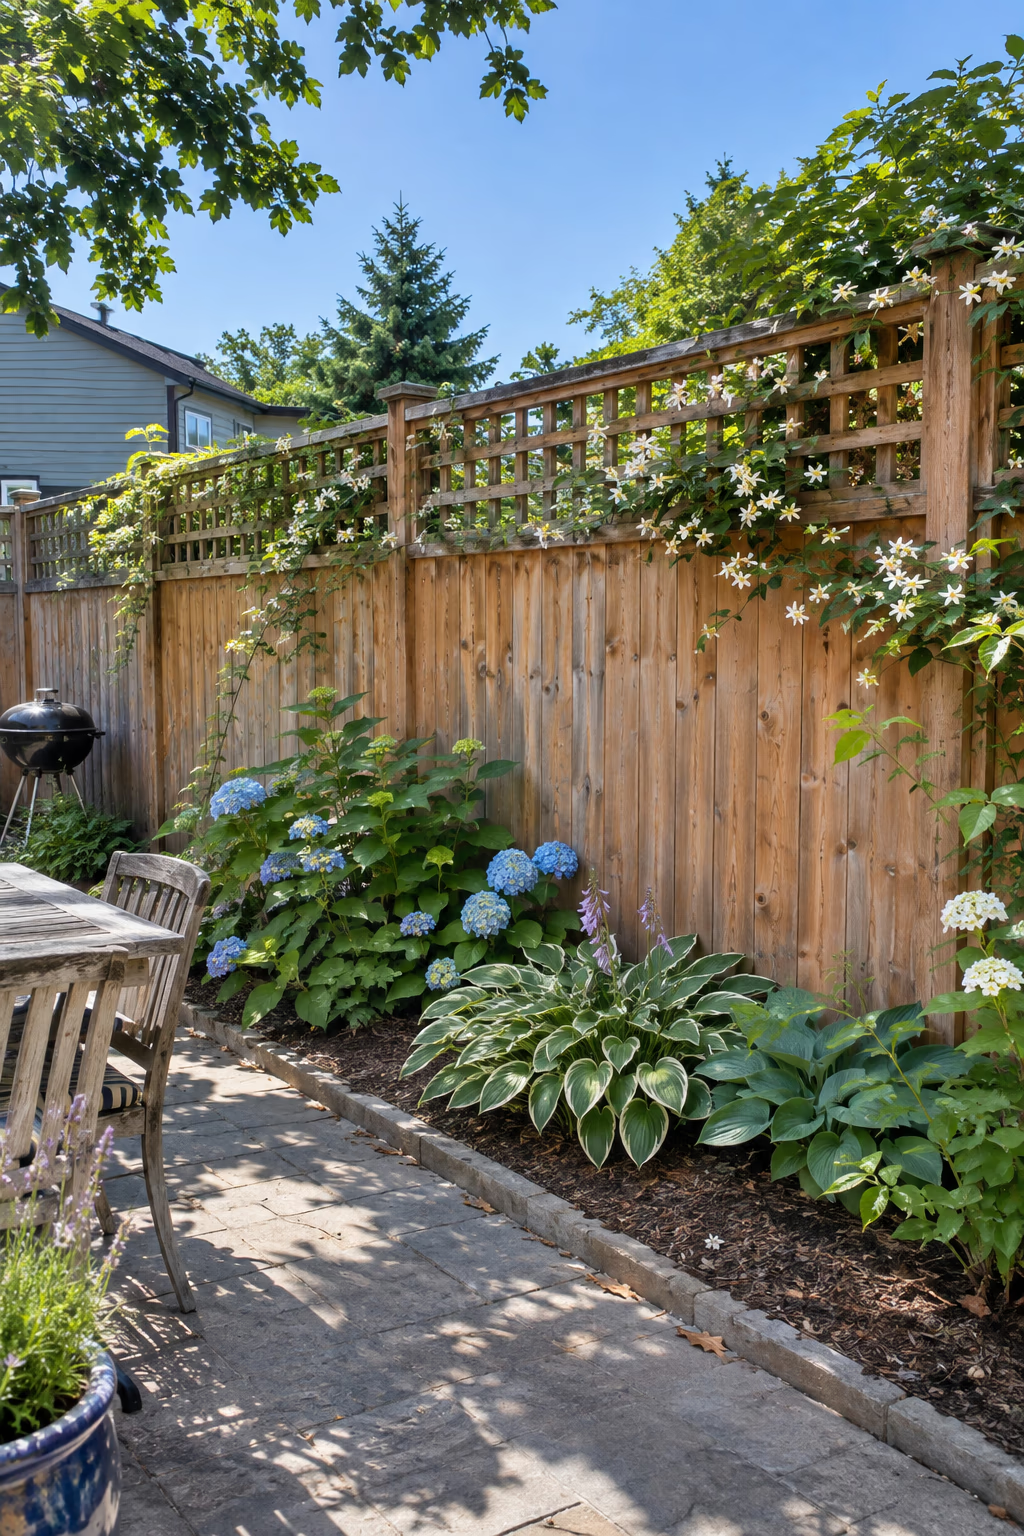
Privacy below, light and blooms above
Build a solid board fence to about 5 feet, then add a 1- to 2-foot trellis band on top. Instead of standard diamond lattice, try square grids or a row of framed openings that read like small windows. The combined height usually lands near 6 feet, a common limit for backyard fences.
The open top keeps the fence from feeling like a wall and lets breezes pass through. Climbers such as star jasmine in warm zones or clematis in colder ones can weave through the openings and frame views of the sky.
Check whether your town measures height to the top of the trellis. Many codes count every part of the fence, including decorative toppers.
4. Weave a Rustic Wattle Fence Around Raised Beds
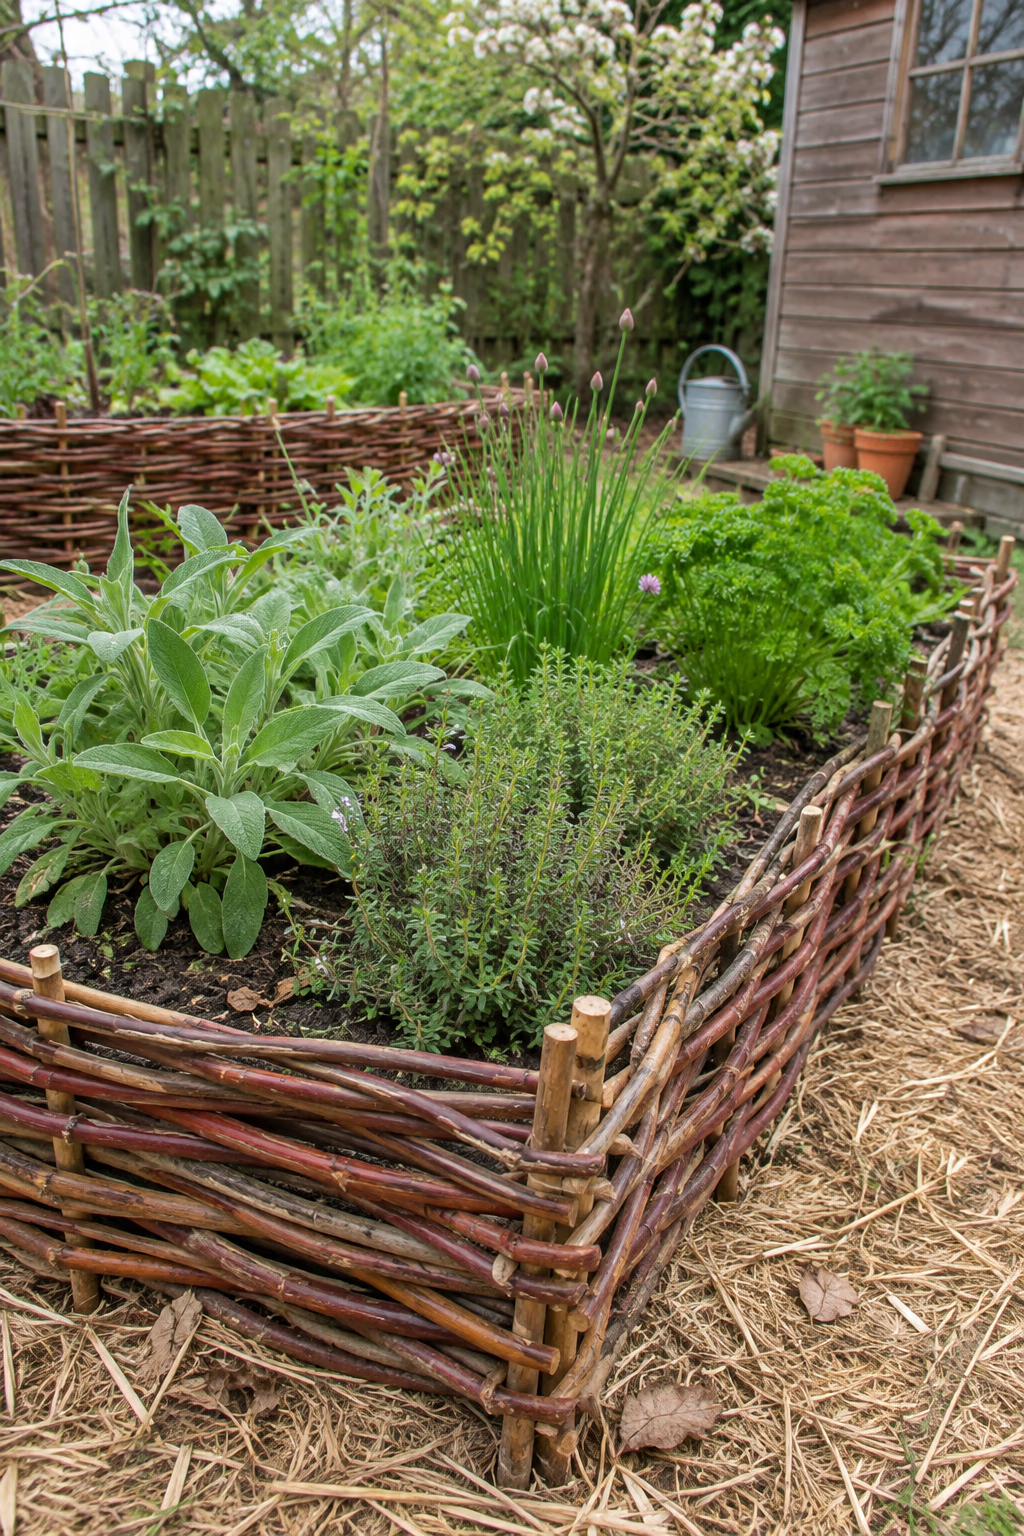
Handmade texture from flexible branches
Wattle fencing is made by weaving long, pliable rods between upright stakes. Willow, hazel, and dogwood prunings work well. Drive stakes about 12 to 18 inches apart, then weave rods over and under, alternating the pattern on each row and pressing them down tightly.
It looks wonderful around raised beds, herb gardens, and cottage borders, and it costs almost nothing if you have access to fresh prunings. The woven surface also breaks up wind gently rather than blocking it.
Wattle is not a long-term structure. Expect a few years of use before the rods become brittle, and avoid planting live willow stakes unless you want them to root and sprout.
5. Mix Board Widths for a Bold Vertical Pattern
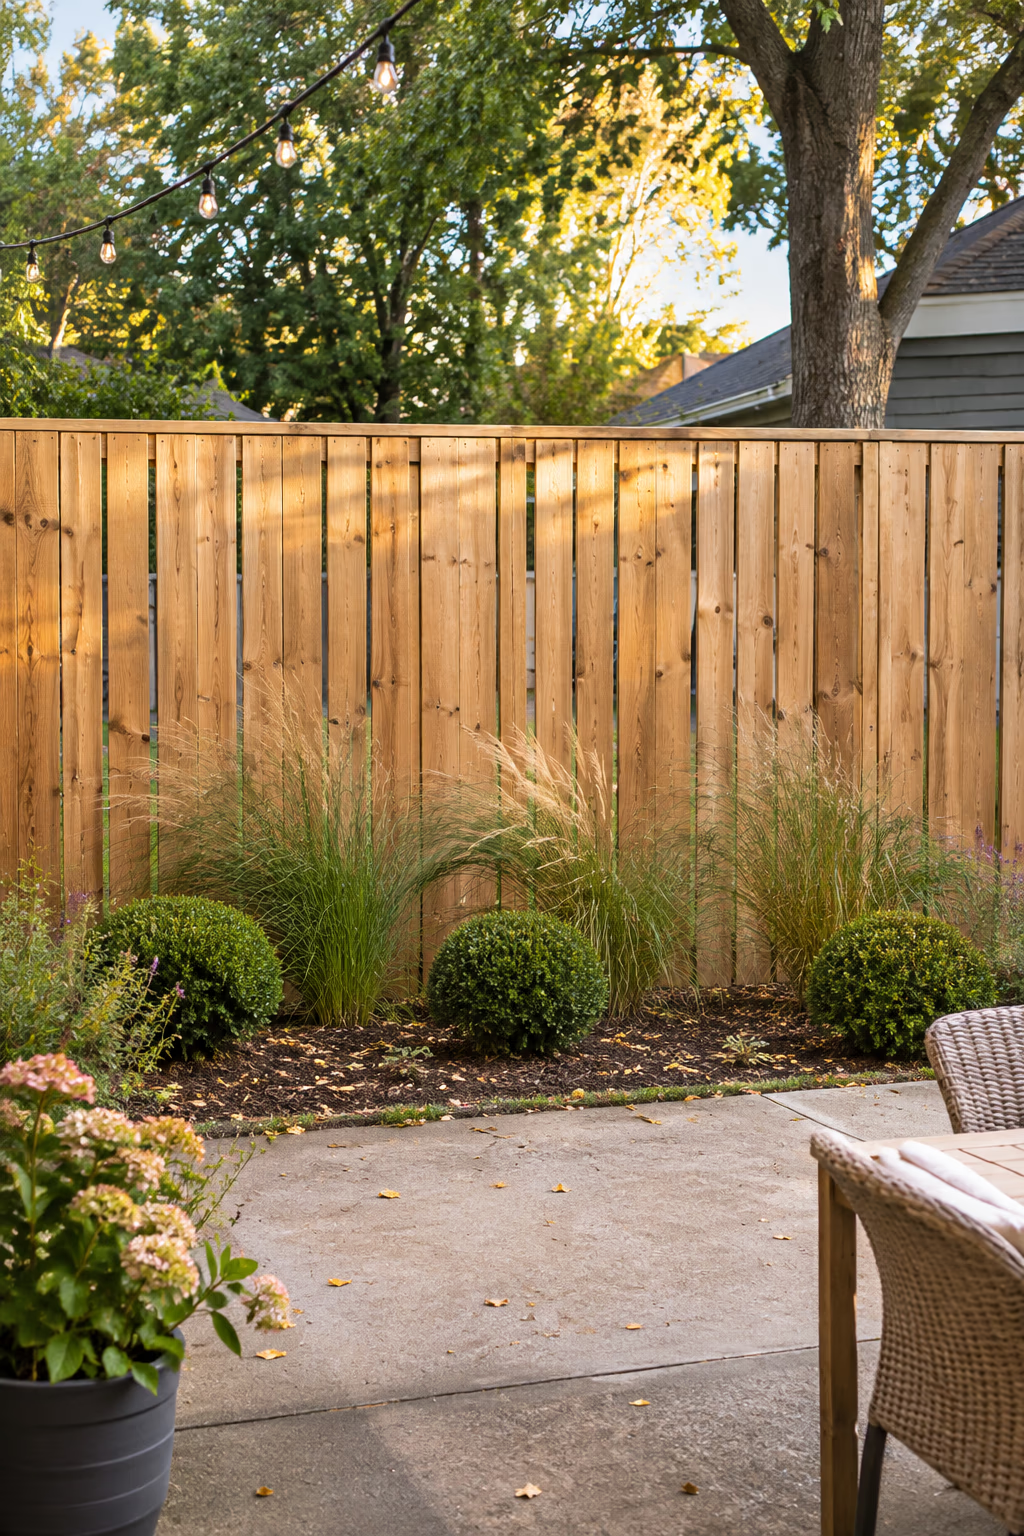
A simple trick that looks custom
Instead of using identical boards, alternate widths such as 1×4, 1×6, and 1×8 in a repeating rhythm. Keep the gaps consistent, about 1/2 to 3/4 inch, so the pattern looks intentional. A clear sealer or warm stain lets the variation in grain show.
The varied rhythm adds interest without paint or fancy cuts, and it suits contemporary homes and modern planting schemes with grasses and clipped shrubs.
Lay the boards out on the ground first to test the pattern before you start nailing. Use exterior screws or stainless steel nails to prevent dark streaks on cedar.
6. Char Cedar Boards With the Shou Sugi Ban Method
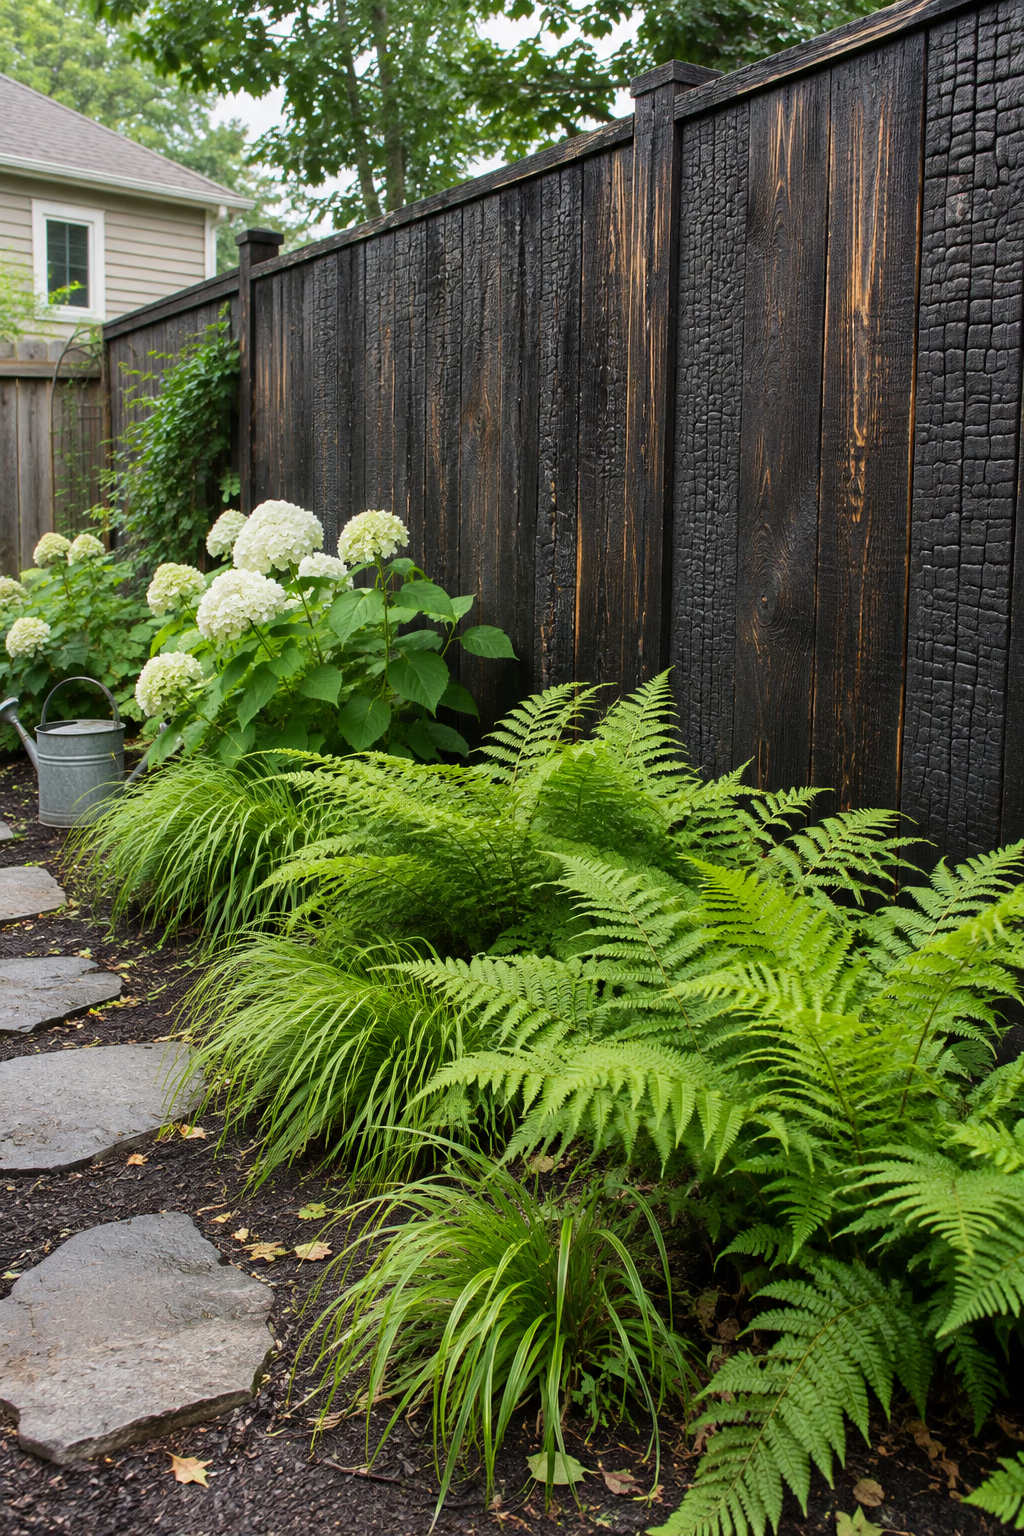
Deep black texture with a natural finish
Shou sugi ban is a traditional Japanese technique that chars the surface of wood with a torch, then brushes and oils it. The result is a dark, crackled finish that ranges from charcoal black to a brushed brown with raised grain.
Charred boards make green foliage and white or pink flowers look especially vivid. The charred layer also resists weathering better than raw wood when it is well done and oiled.
Work on a calm day, away from buildings, with a hose ready, and check local burn rules first. Many homeowners buy pre-charred boards, which cost more but save time and risk.
7. Paint Low Garden Pickets a Soft Sage Green
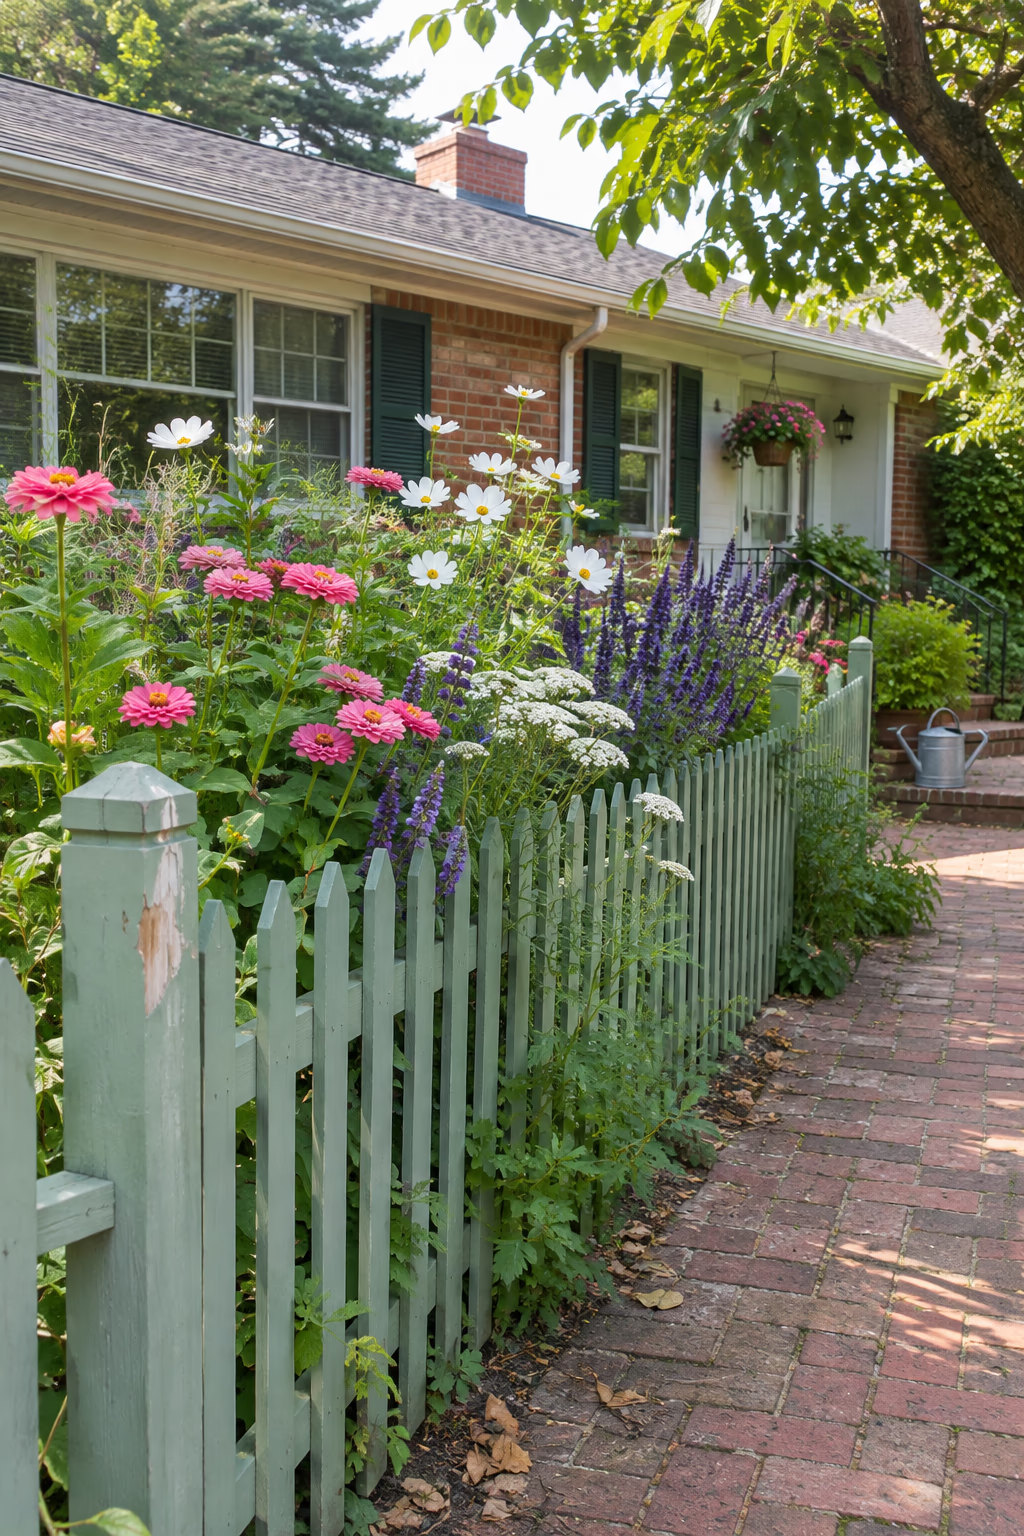
A gentle color that blends into the planting
A 3- to 4-foot picket fence painted sage, olive, or gray-green looks fresh without fighting the garden. Choose an exterior acrylic paint and prime raw wood first, paying special attention to the cut tops and bottoms of the pickets.
Green tones recede into the foliage, so the flowers take center stage. The color also hides dirt and mildew better than bright white.
Painted fences need touch-ups every few years. Keep a small can of the color labeled for repairs, and trim plants back from the boards so they can dry after rain.
8. Run a Split-Rail Fence Along a Cottage Border
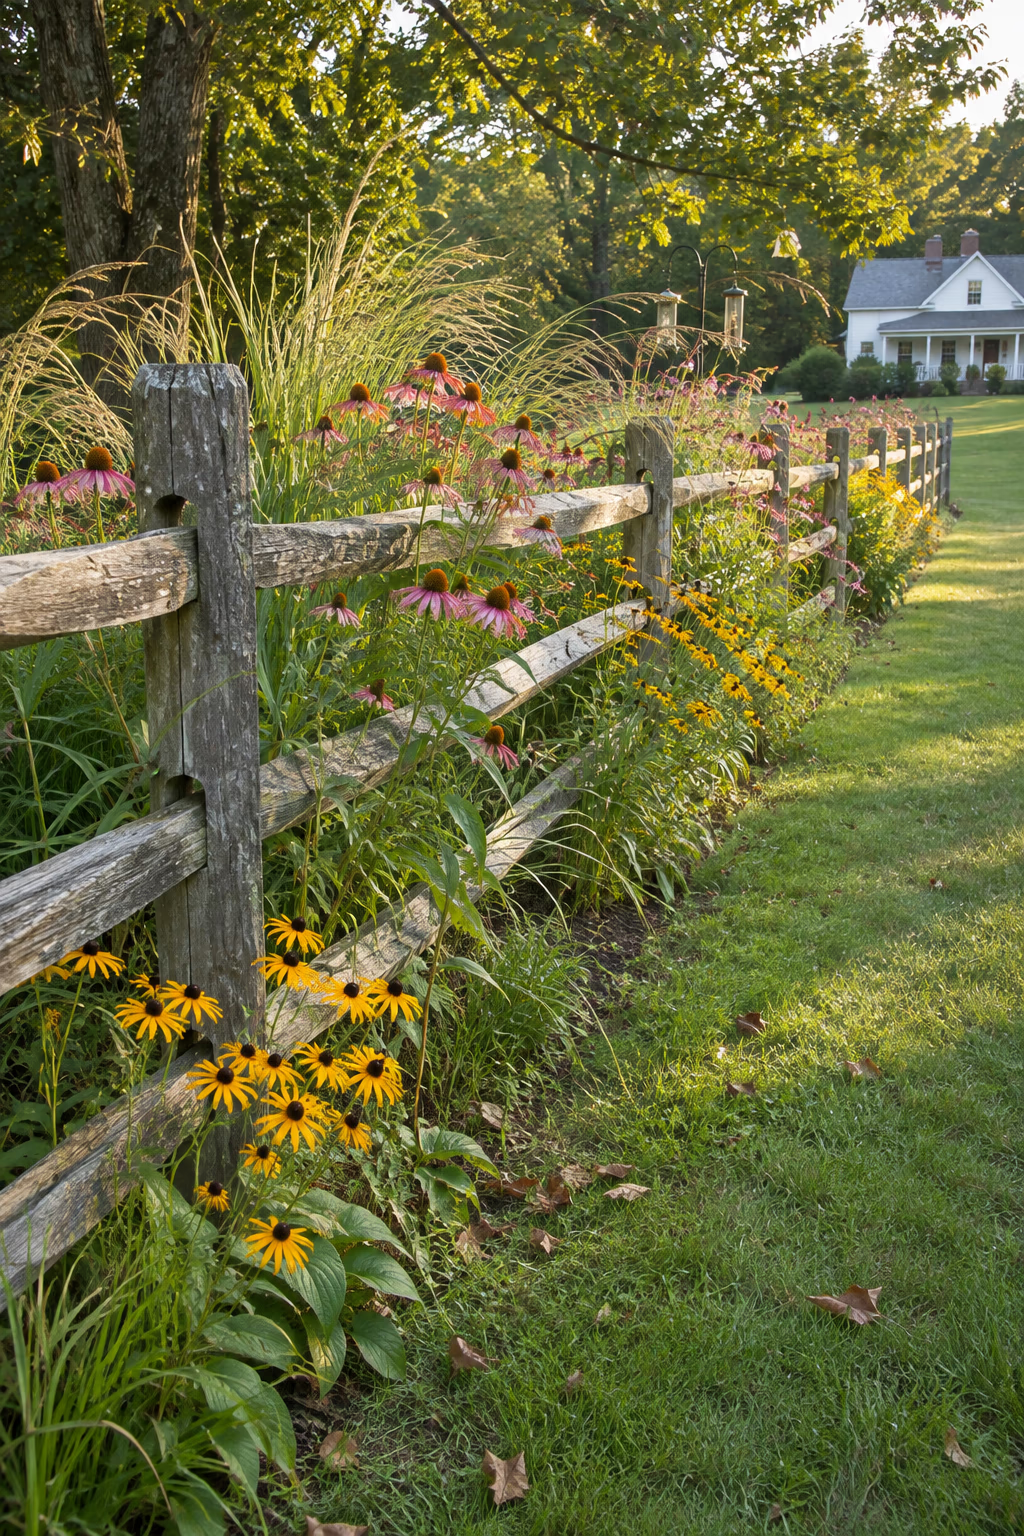
Easy country charm with almost no maintenance
Split-rail fences use rough-hewn rails that slip into mortised posts, usually two or three rails high and about 3 to 4 feet tall. Cedar and black locust are common choices because they resist rot.
The open design frames a long flower border without hiding it. Black-eyed Susans, coneflowers, roses, and ornamental grasses look natural spilling through the rails.
A split-rail fence will not keep out dogs or rabbits. If you need that, attach welded wire to the inside of the rails, where it will be hidden by plants.
9. Build a Shadow Box Fence That Looks Good on Both Sides
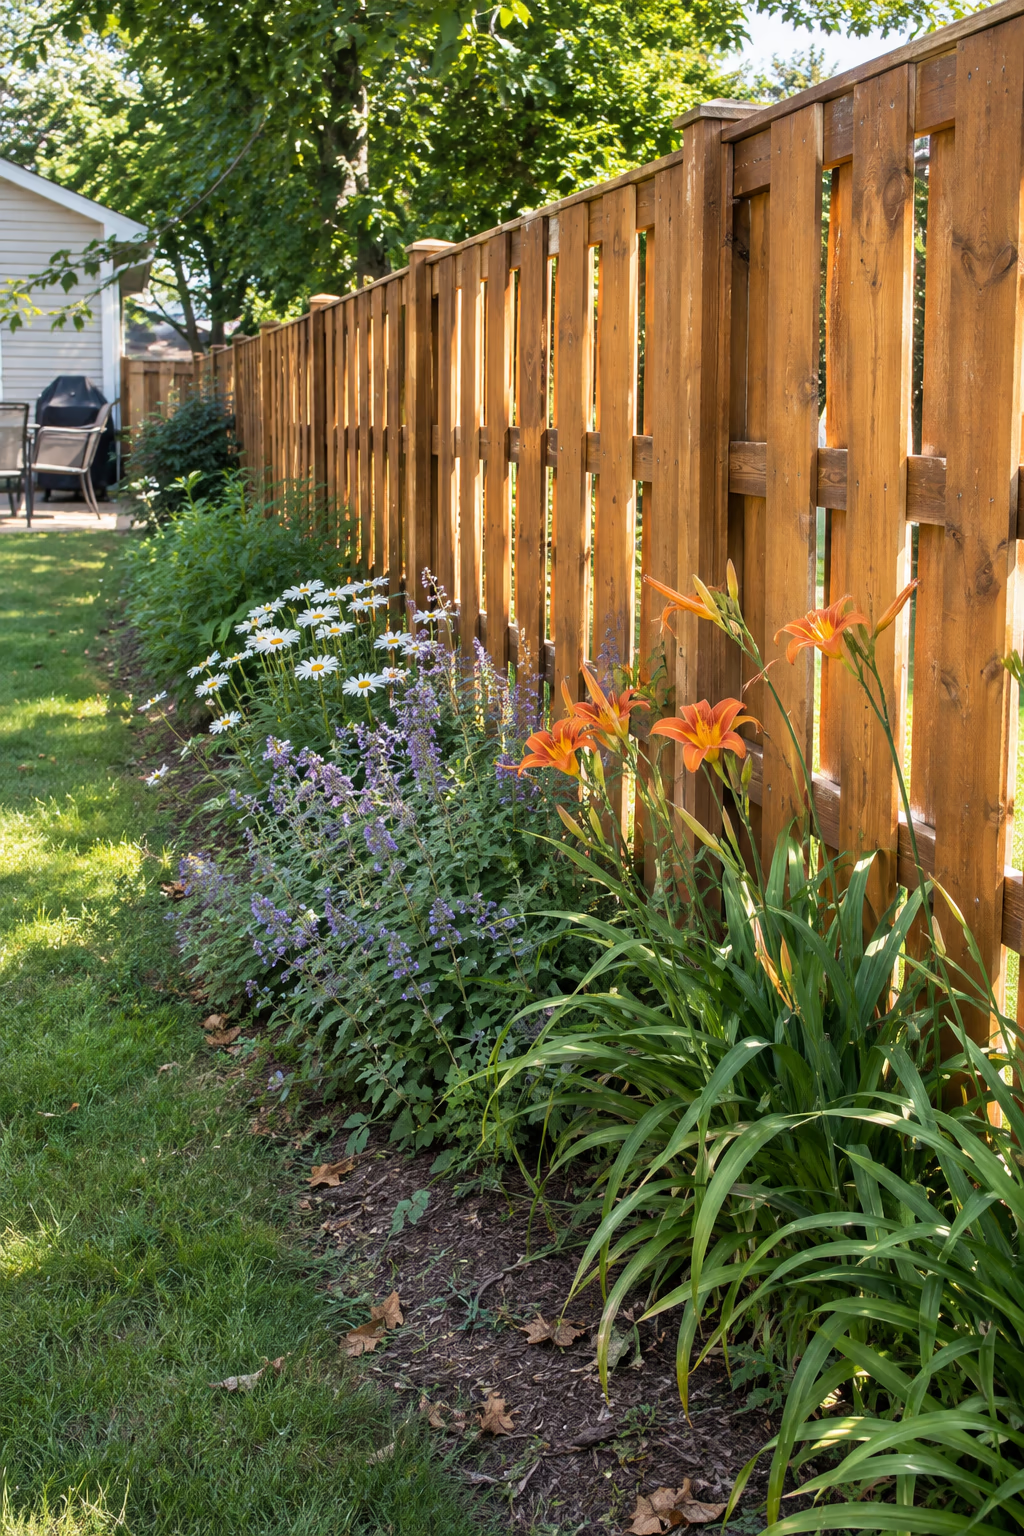
A finished face for you and the neighbors
A shadow box fence alternates boards on each side of the rails, with a gap between them. From a straight-on view it appears solid, but from an angle it allows some air and light through.
Because both sides look the same, it is ideal for shared boundaries where a garden bed backs up against the neighbor’s yard. Air movement also helps reduce mildew on plants growing near the fence.
This style uses more boards than a single-sided fence, so budget roughly a third more lumber. Talk with neighbors before building along a shared line.
10. Set a Short Fence Into the Back of a Raised Planter
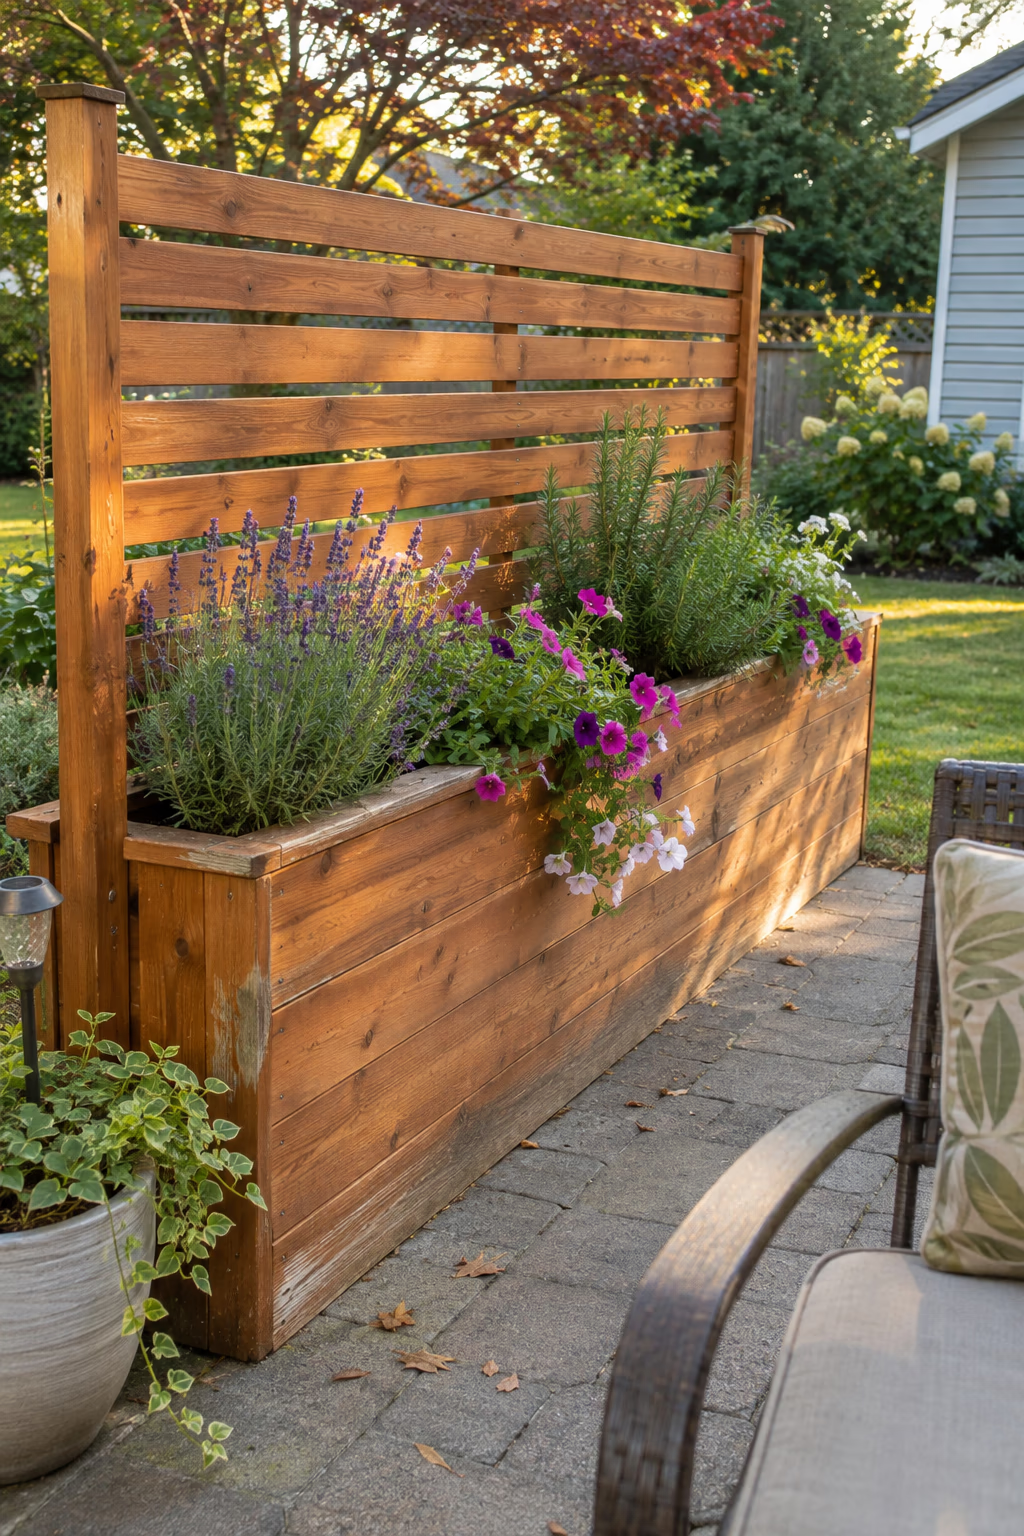
Fence and garden bed in one structure
Build a long raised bed about 18 to 24 inches tall and 2 feet deep, then extend the back posts upward to support a short slatted fence. The bed holds flowers or herbs in front of the fence, and the fence gives the bed a backdrop.
This combination works well along a patio edge or driveway where there is no room for a separate border. It creates an instant layered look of soil, plants, and wood.
Line the inside of the planter with a breathable landscape fabric rather than plastic, and choose rot-resistant wood. Soil in constant contact will wear out ordinary lumber within a few years.
11. Stagger Picket Heights for an Up-and-Down Top Line
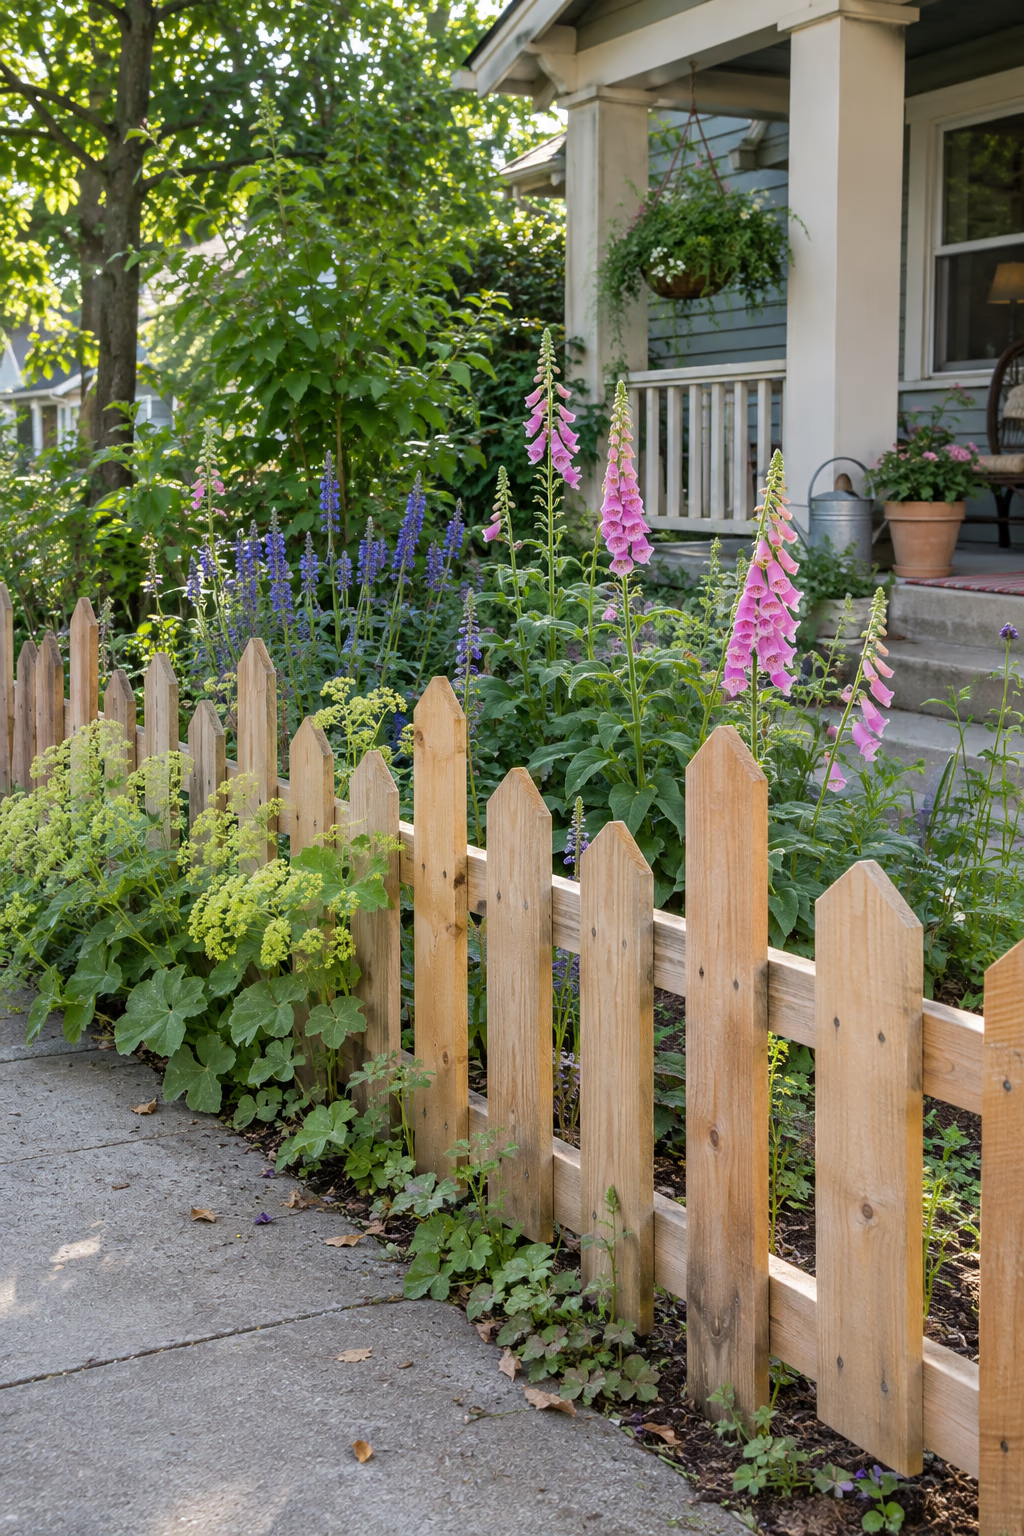
Playful rhythm for a front garden
Cut pickets in two or three lengths and arrange them in a repeating pattern, such as tall, short, tall. Or create a gentle wave by gradually raising and lowering the heights between posts.
The uneven top line makes a simple fence feel handmade and fun, and it echoes the varied heights of cottage-style plants like foxgloves and salvias.
Make a cardboard template for each length so the pattern stays even. Seal the end grain on every cut top to prevent rot.
12. Add Floating Board Shelves to a Slatted Screen
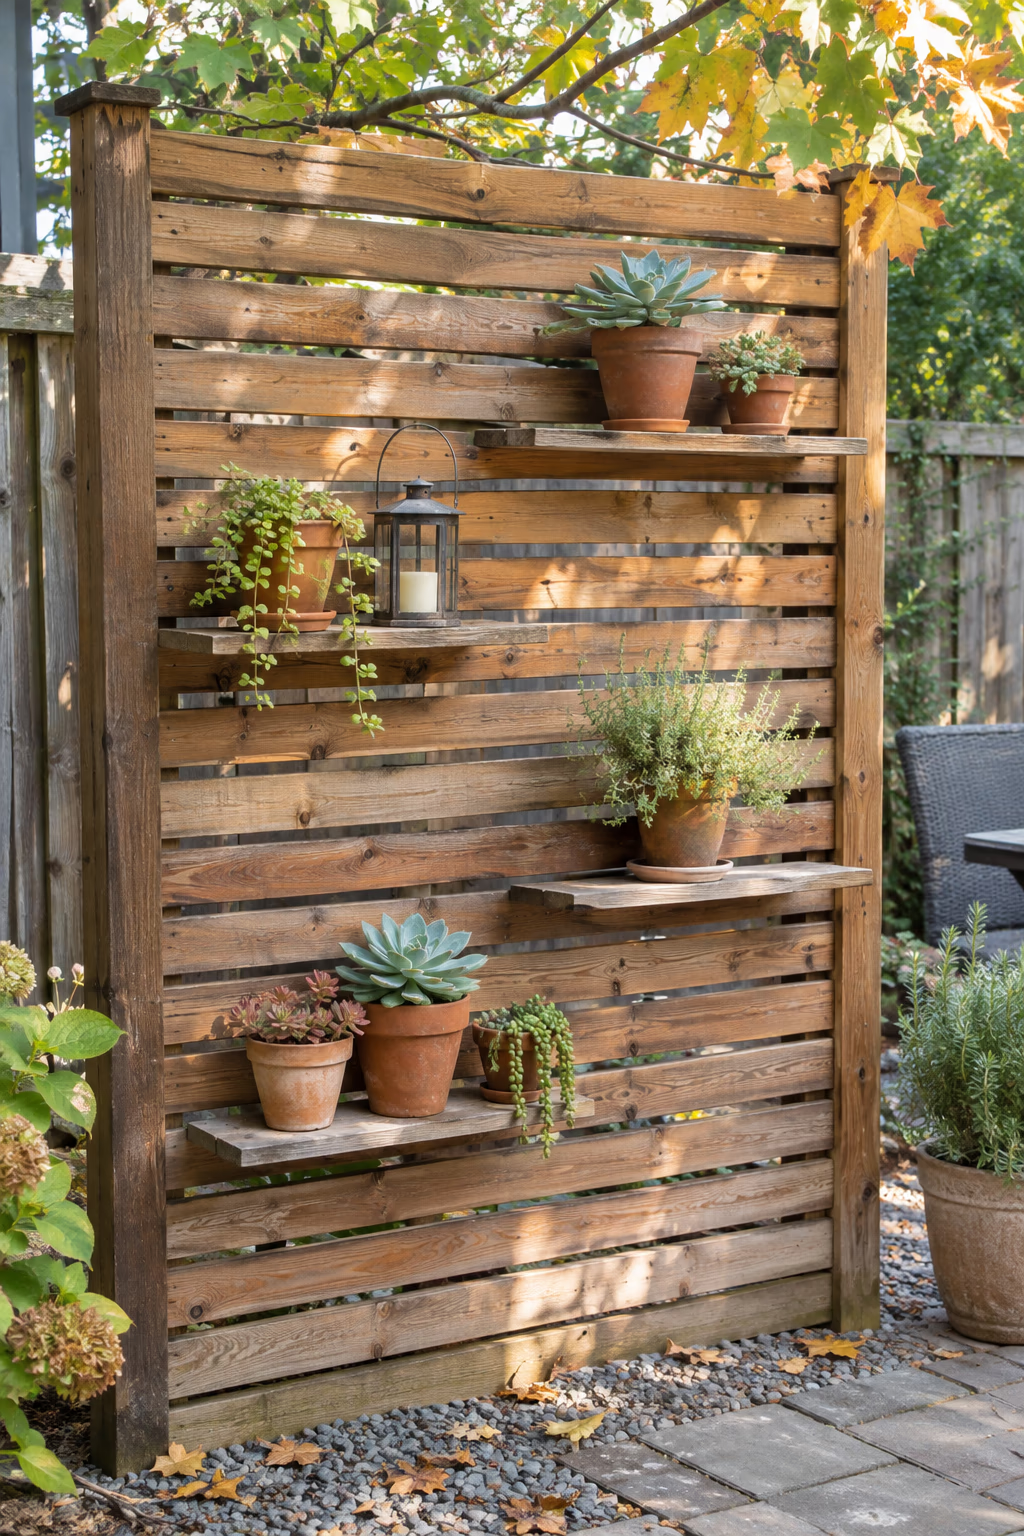
A fence that holds pots and decor
Turn some horizontal boards on edge or attach short ledges between vertical posts so they project a few inches from the fence. These shelves can hold small potted succulents, herbs, lanterns, or garden art.
The screen becomes a display wall, which is especially handy in small gardens with limited floor space. Shadows from the shelves add depth during the day.
Keep shelves narrow and secure, and avoid heavy pots on long spans. Small containers dry out quickly, so pick drought-tolerant plants or plan to water often.
13. Turn Reclaimed Pallets Into a Budget Garden Fence
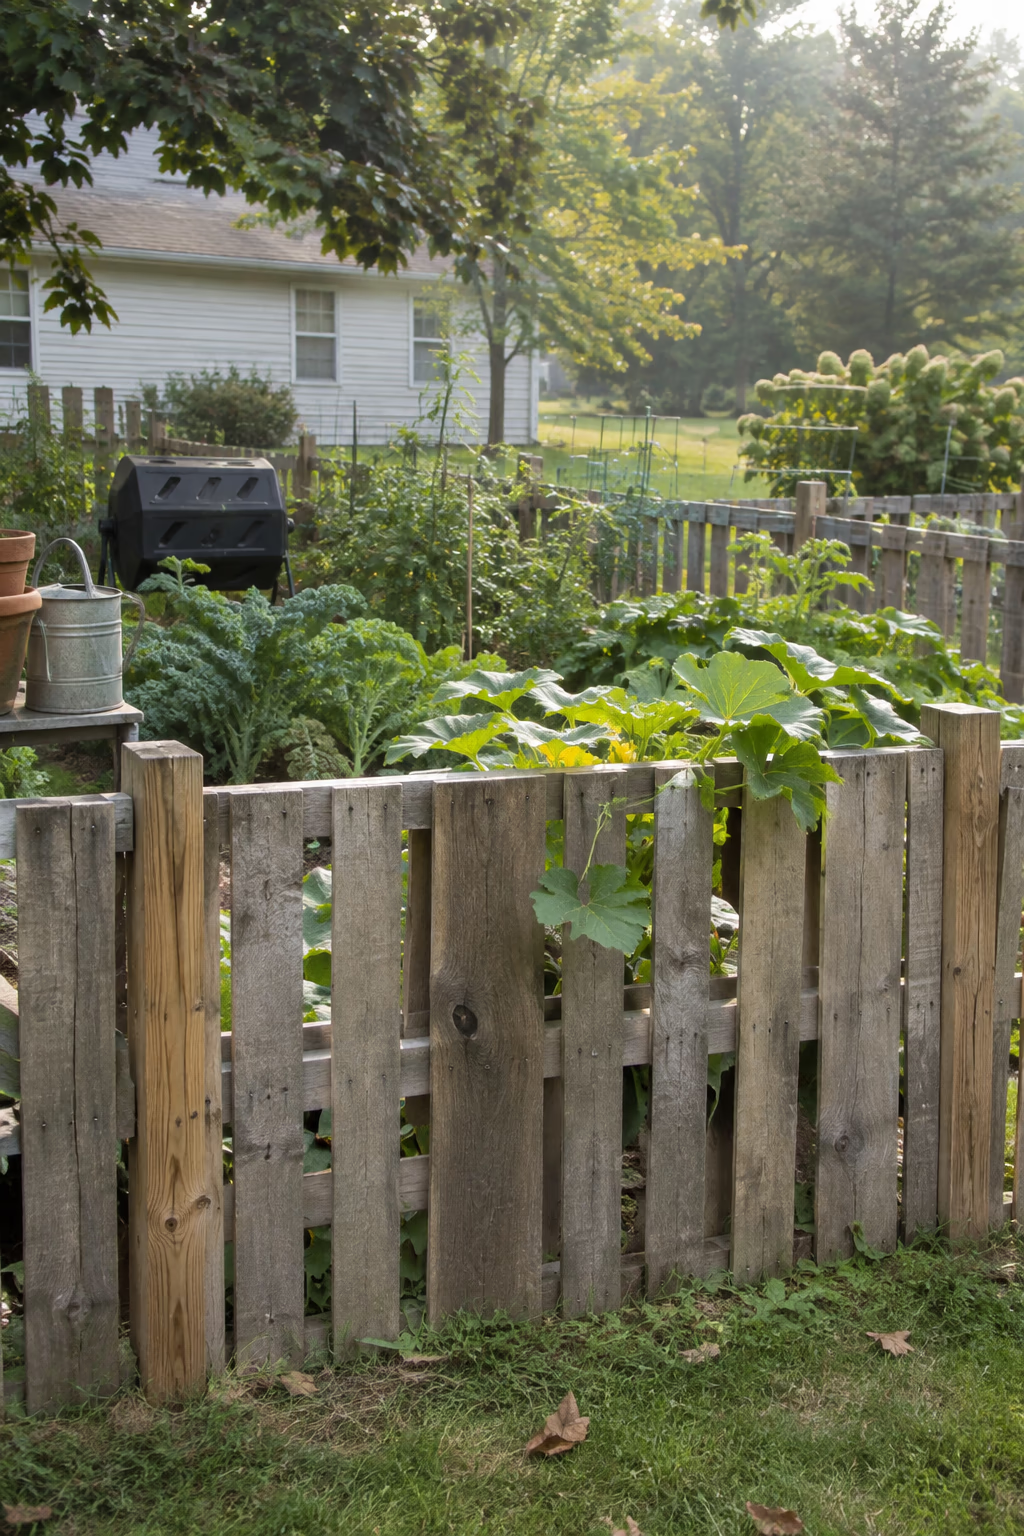
Low-cost rustic boundary for a casual garden
Wooden pallets can be stood on end and screwed to posts, or taken apart and rebuilt as simple vertical board panels. Sand rough spots, cut off protruding nails, and finish with an exterior stain in a warm brown or soft gray for a cleaner look.
Often free or very cheap, pallets are one of the lowest-cost ways to enclose a vegetable patch, chicken run, or compost area. The mismatched boards give farmhouse and rustic yards an easygoing charm.
Use only pallets stamped HT, meaning heat treated. Avoid pallets marked MB, which have been treated with methyl bromide, and skip any with stains or spills.
14. Weave Thin Boards Into a Basket Weave Panel
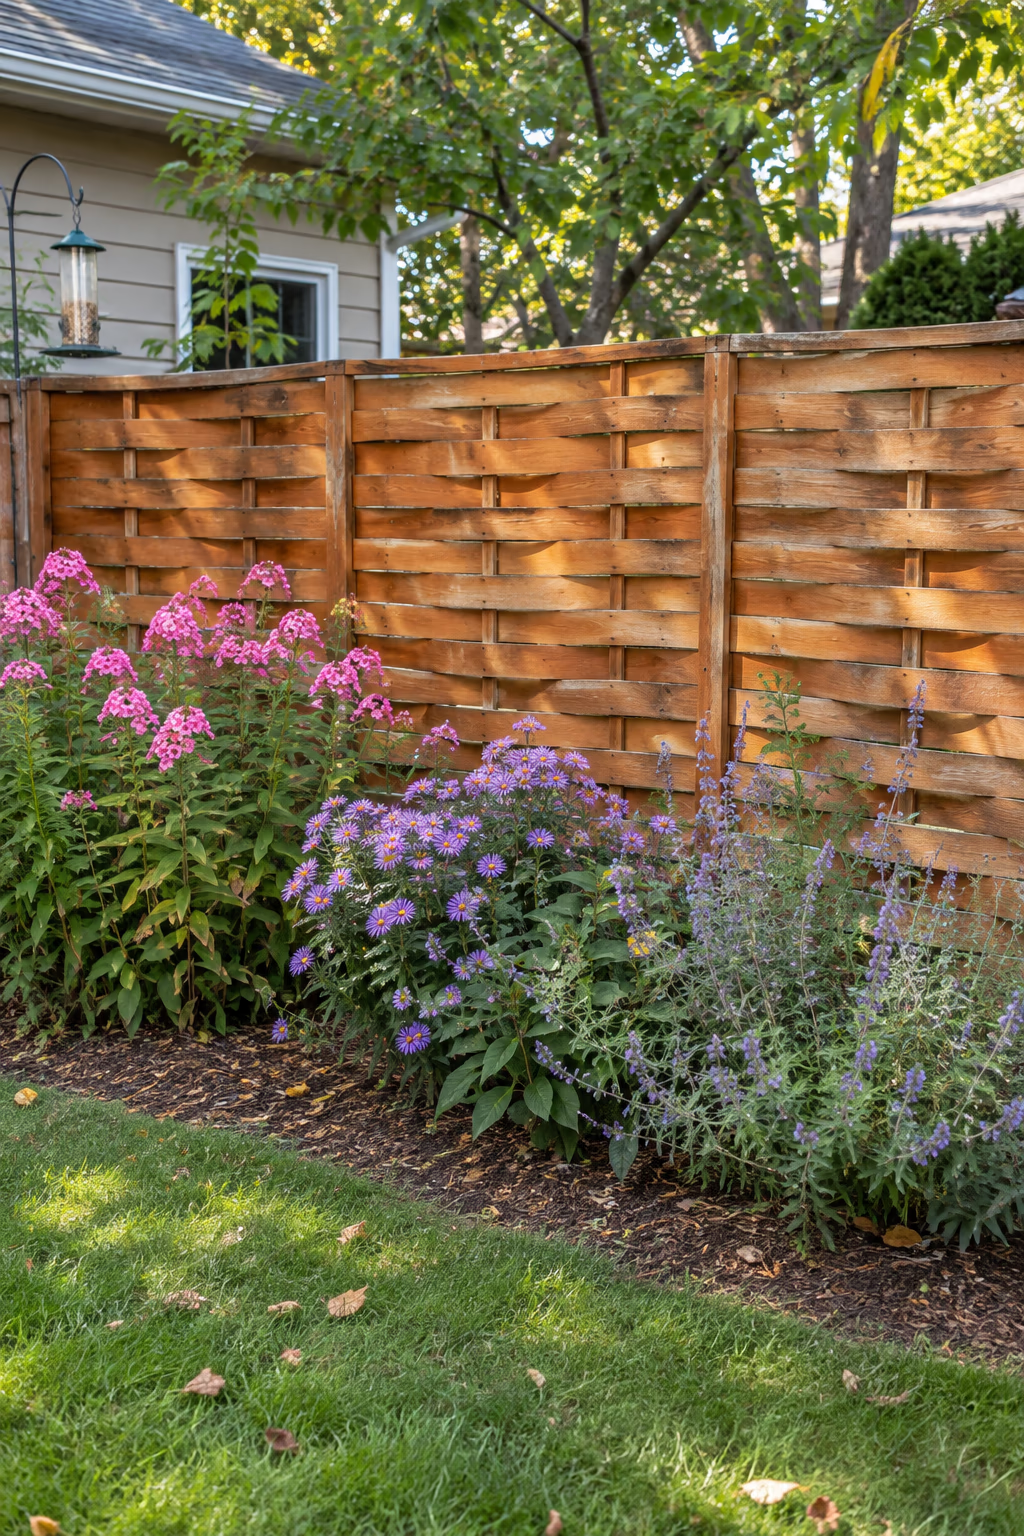
Classic texture with a gentle curve
Basket weave fencing threads thin, flexible boards horizontally between posts, passing in front of and behind a central vertical spacer in each bay. Every board bows slightly, and alternating the direction on each row creates a soft, woven pattern that looks the same on both sides.
The texture catches light differently through the day, so the fence feels lively even before plants grow up against it. It makes a handsome backdrop for a perennial border of phlox, asters, and catmint, or a quiet screen beside a patio.
Use thin cedar boards, roughly 1/2 inch thick and 4 to 6 inches wide, so they flex without cracking. Prebuilt basket weave panels cost more per foot but make the job far easier for first-time builders.
15. Edge a Flower Bed With a Low Crisscross Rail Fence
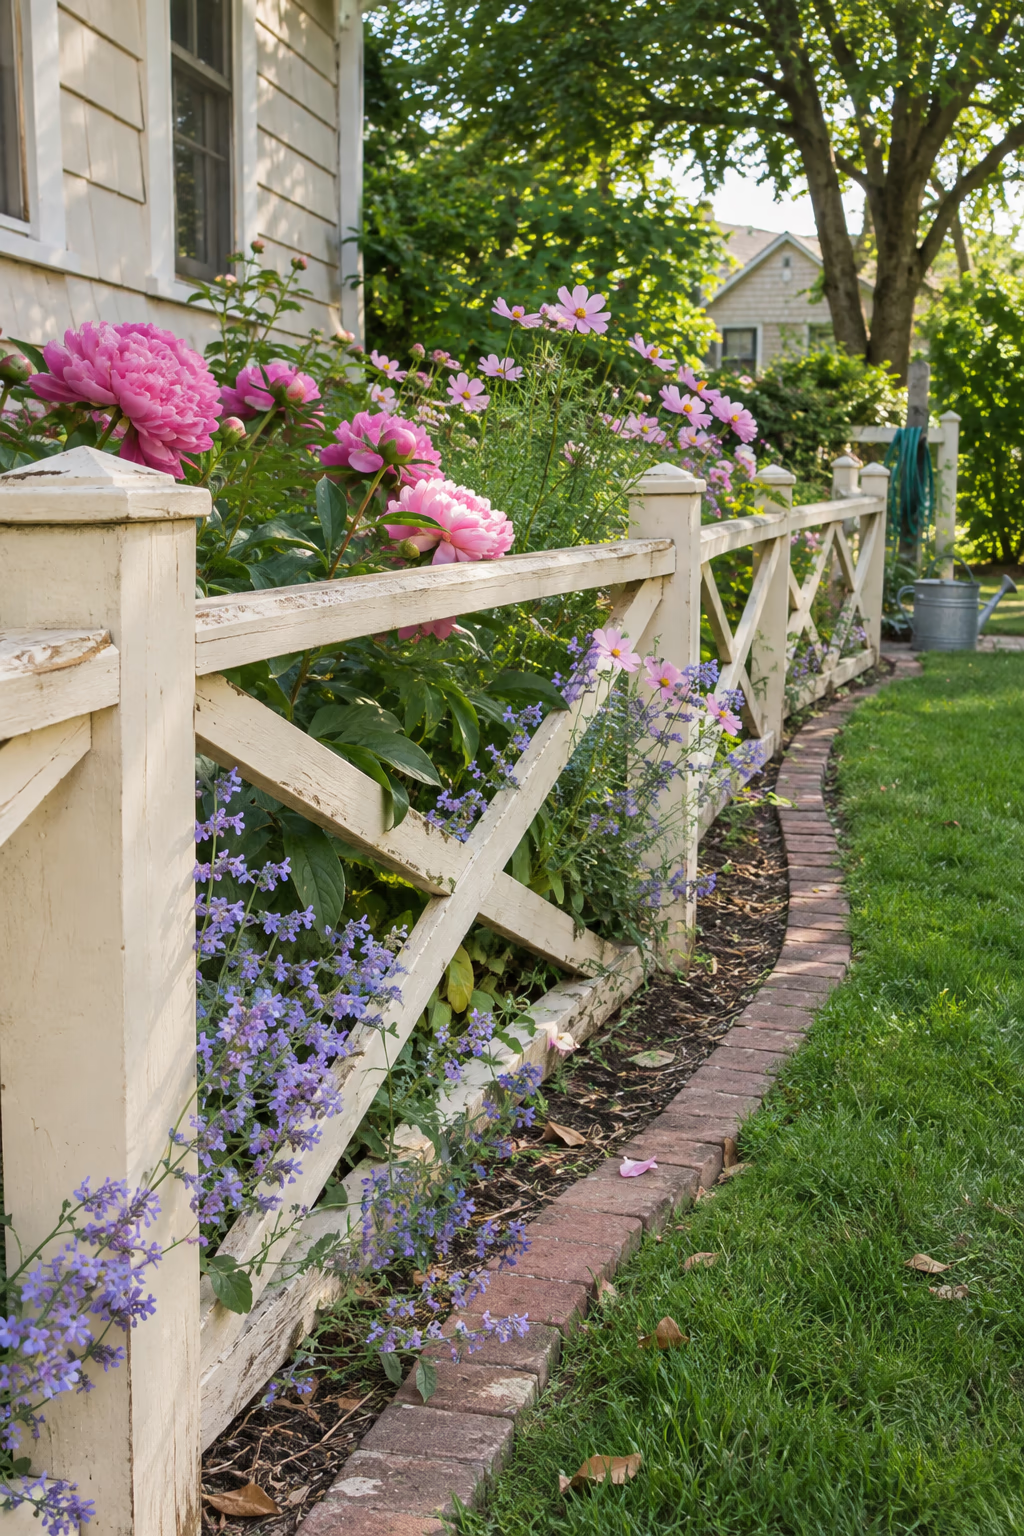
A light frame that lets the blooms shine
A fence just 24 to 36 inches tall, built from 4×4 posts with a top rail and diagonal 2×2 crossbars forming an X in each bay, creates an airy, decorative edge. Leave it natural, stain it honey brown, or paint it a soft cream for a cottage feel.
The low height marks the bed and keeps foot traffic and soccer balls out without hiding a single bloom. Sprawling plants such as peonies, cosmos, and nepeta can lean on the rails instead of flopping onto the lawn.
Set posts at least 18 inches deep, even on a short fence, so it stays straight when wet soil and heavy plants push against it. Leave a mowing strip of mulch or brick along the outside to keep string trimmers off the wood.
16. Shape Cape Cod Pickets Into a Gentle Scallop
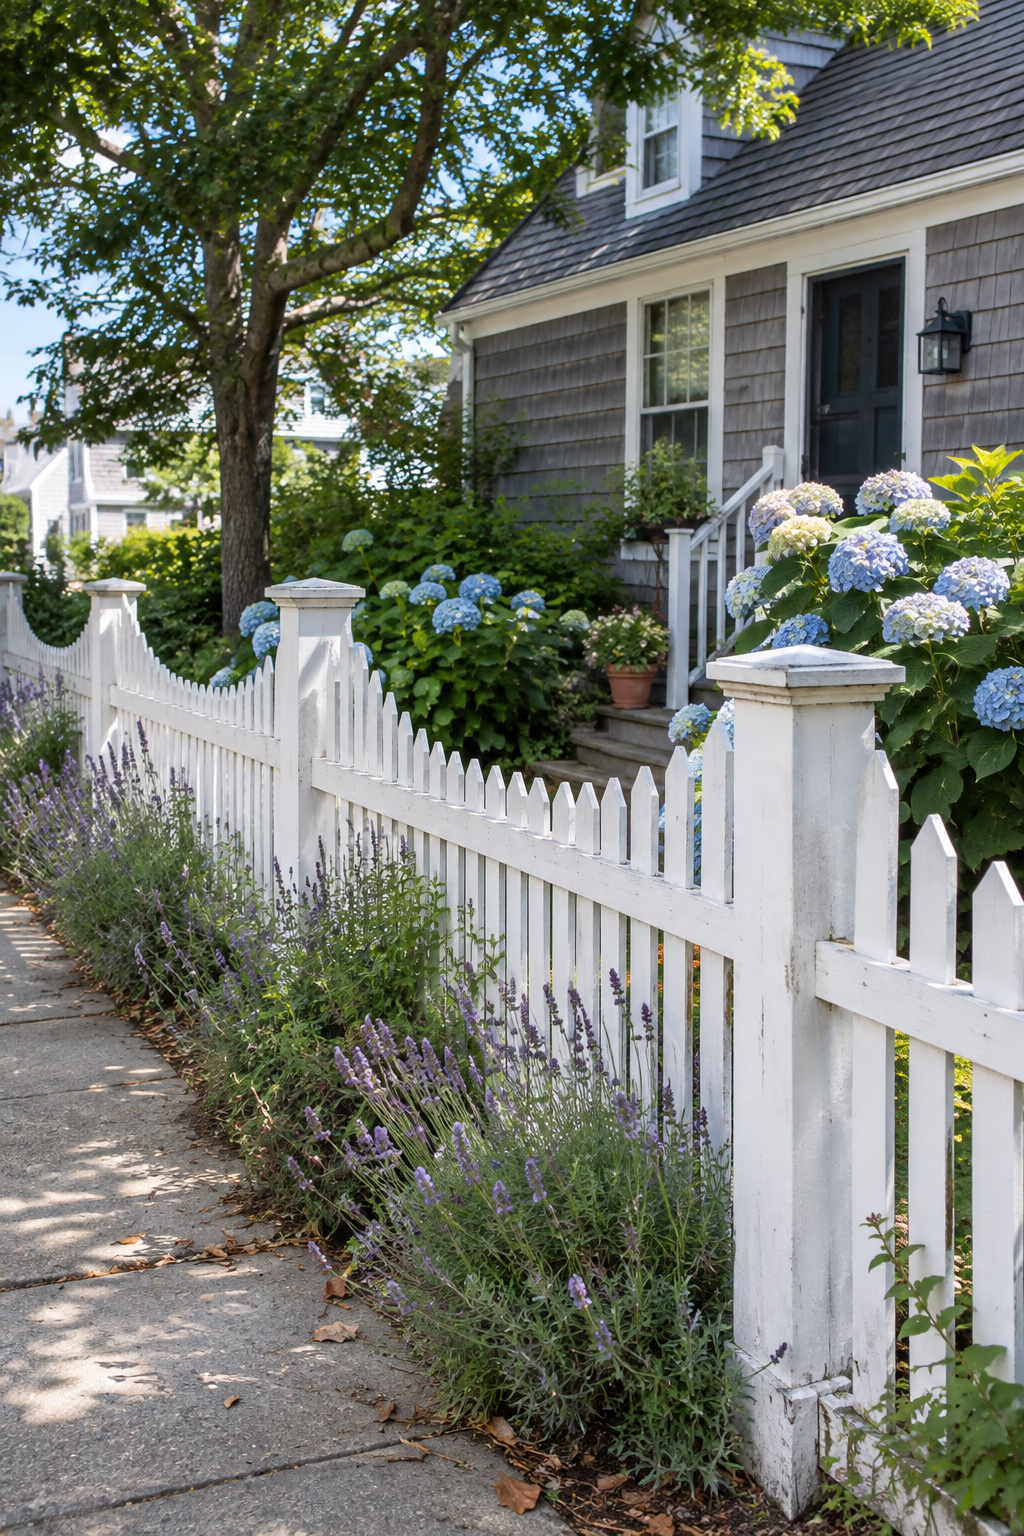
Coastal elegance with a curved top
Cape Cod pickets have shaped tops, often a rounded point or a small ball, and they look especially graceful when each bay dips in a gentle scallop between taller posts. A 3-foot fence that falls to about 30 inches at the center of each section is enough to show the curve.
The rolling line feels softer and more relaxed than a straight top, which suits a small cutting garden, a front walk lined with lavender, or a coastal-style yard with hydrangeas.
To mark the curve, bend a thin strip of wood between nails at the high and low points, trace it across the pickets once they are attached, and trim with a jigsaw. Seal every freshly cut top before painting.
17. Pair Wood Panels With Stone or Brick Pillars
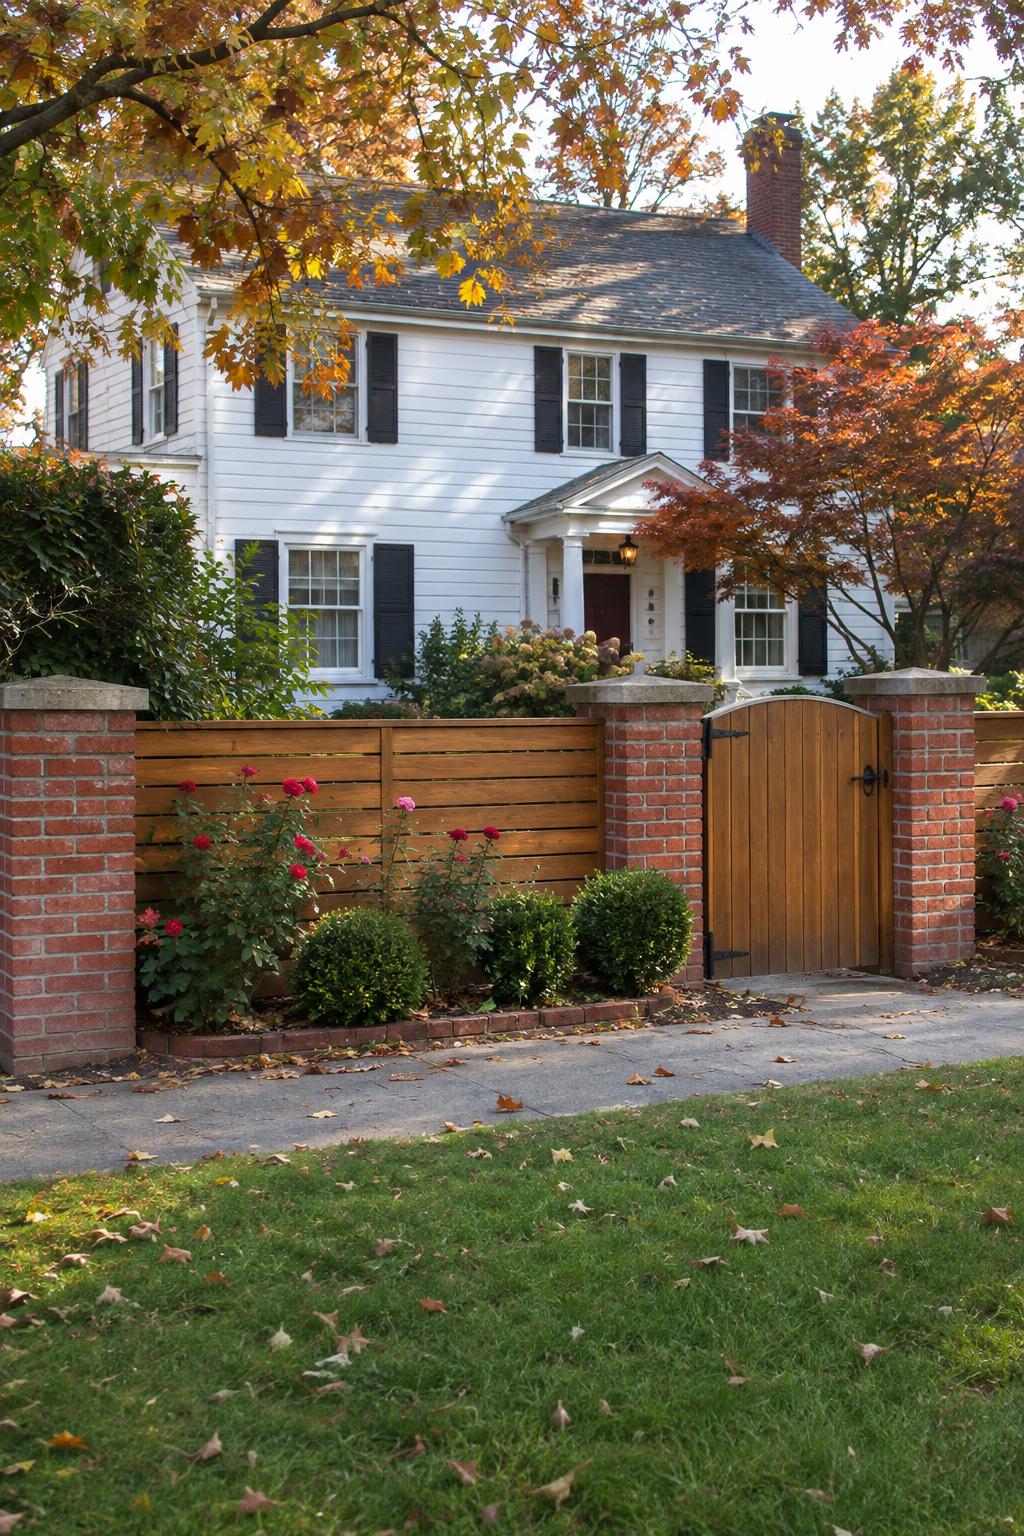
Solid structure with a timeless look
Build stone or brick piers every 8 to 10 feet and fill the bays between them with wood pickets, horizontal boards, or lattice panels. Match the masonry to your house, such as red brick for a colonial or fieldstone for a farmhouse, and finish each pier with a flat cap.
The mix of heavy masonry and lighter wood makes the garden boundary feel established, as if it has always been there. It is a strong choice for a front garden, a formal rose bed, or an entrance where the gate hangs between two piers.
This is the priciest idea on the list. Piers need concrete footings below the frost line in cold climates, and many towns require a permit, so get quotes and check rules before you start. Attach wood to masonry with stainless or galvanized anchors.
18. Step the Fence Down a Sloped Garden
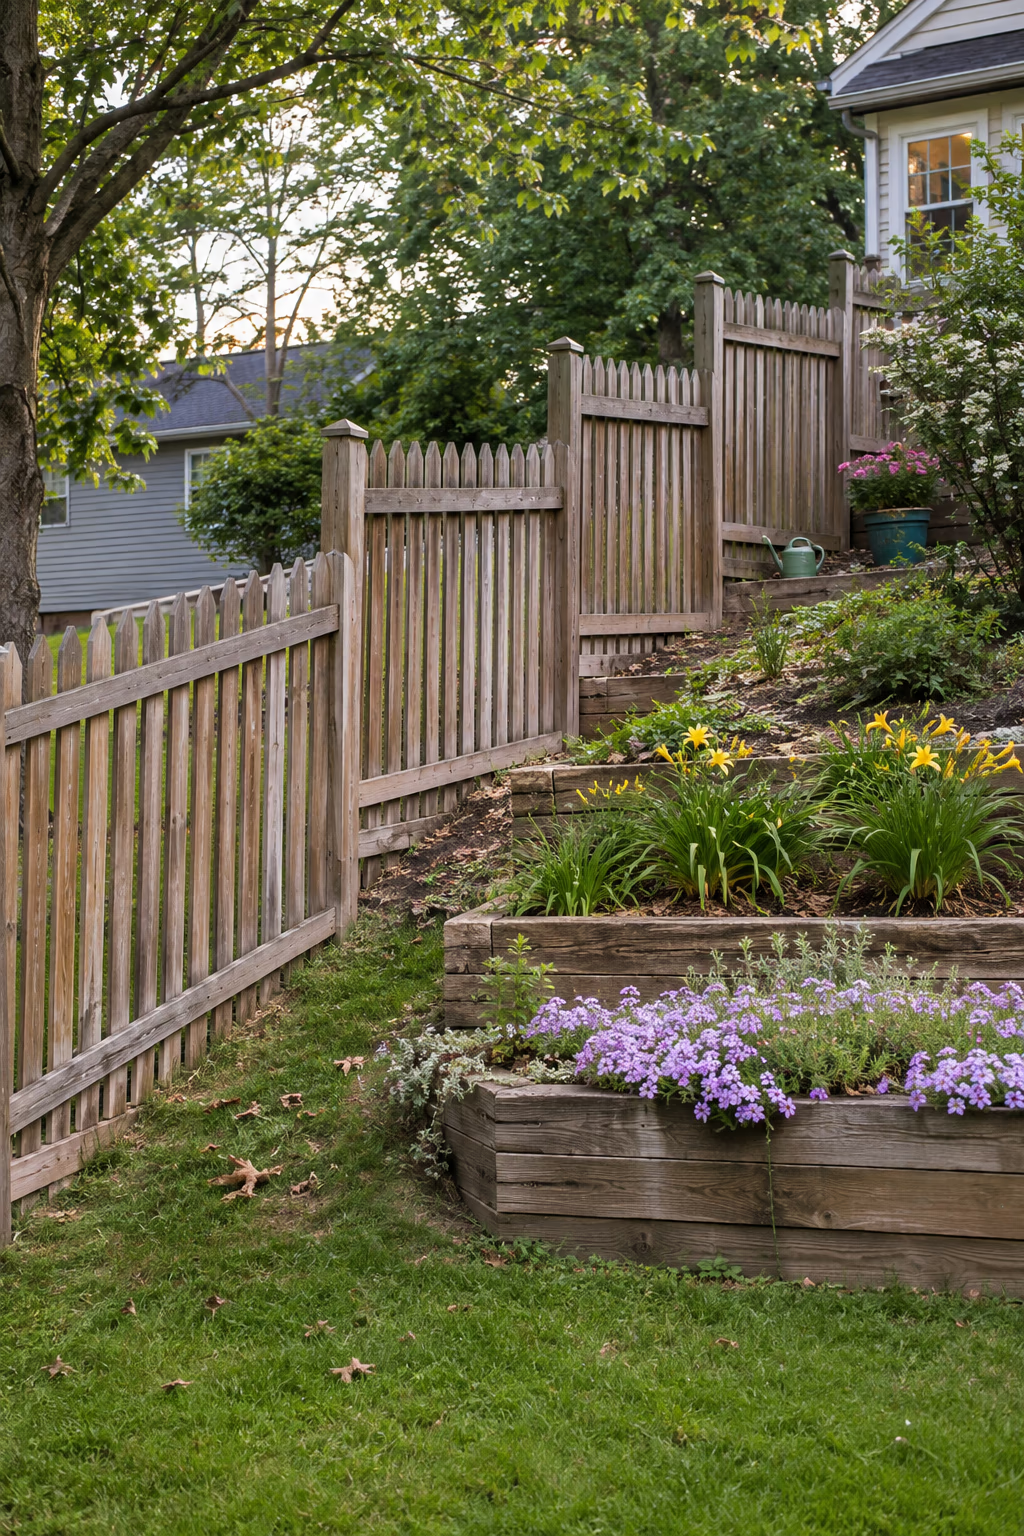
Neat lines on uneven ground
On a hillside garden, you have two choices. A stepped fence keeps each section level and drops it down like a staircase from post to post. A racked fence tilts the rails so the whole fence runs parallel to the slope.
Stepped sections look crisp and suit pickets and solid boards, while racked fences hug the ground and leave fewer openings for animals. Either way, a fence that follows the land makes terraced beds and sloped borders look planned rather than accidental.
Stepped fences leave triangular gaps below each section. Fill them with a cut kickboard, a low stone edge, or a row of sturdy perennials, and shorten the post spacing on steep grades so the steps stay small.
19. Install Louvered Boards for Light and Airflow
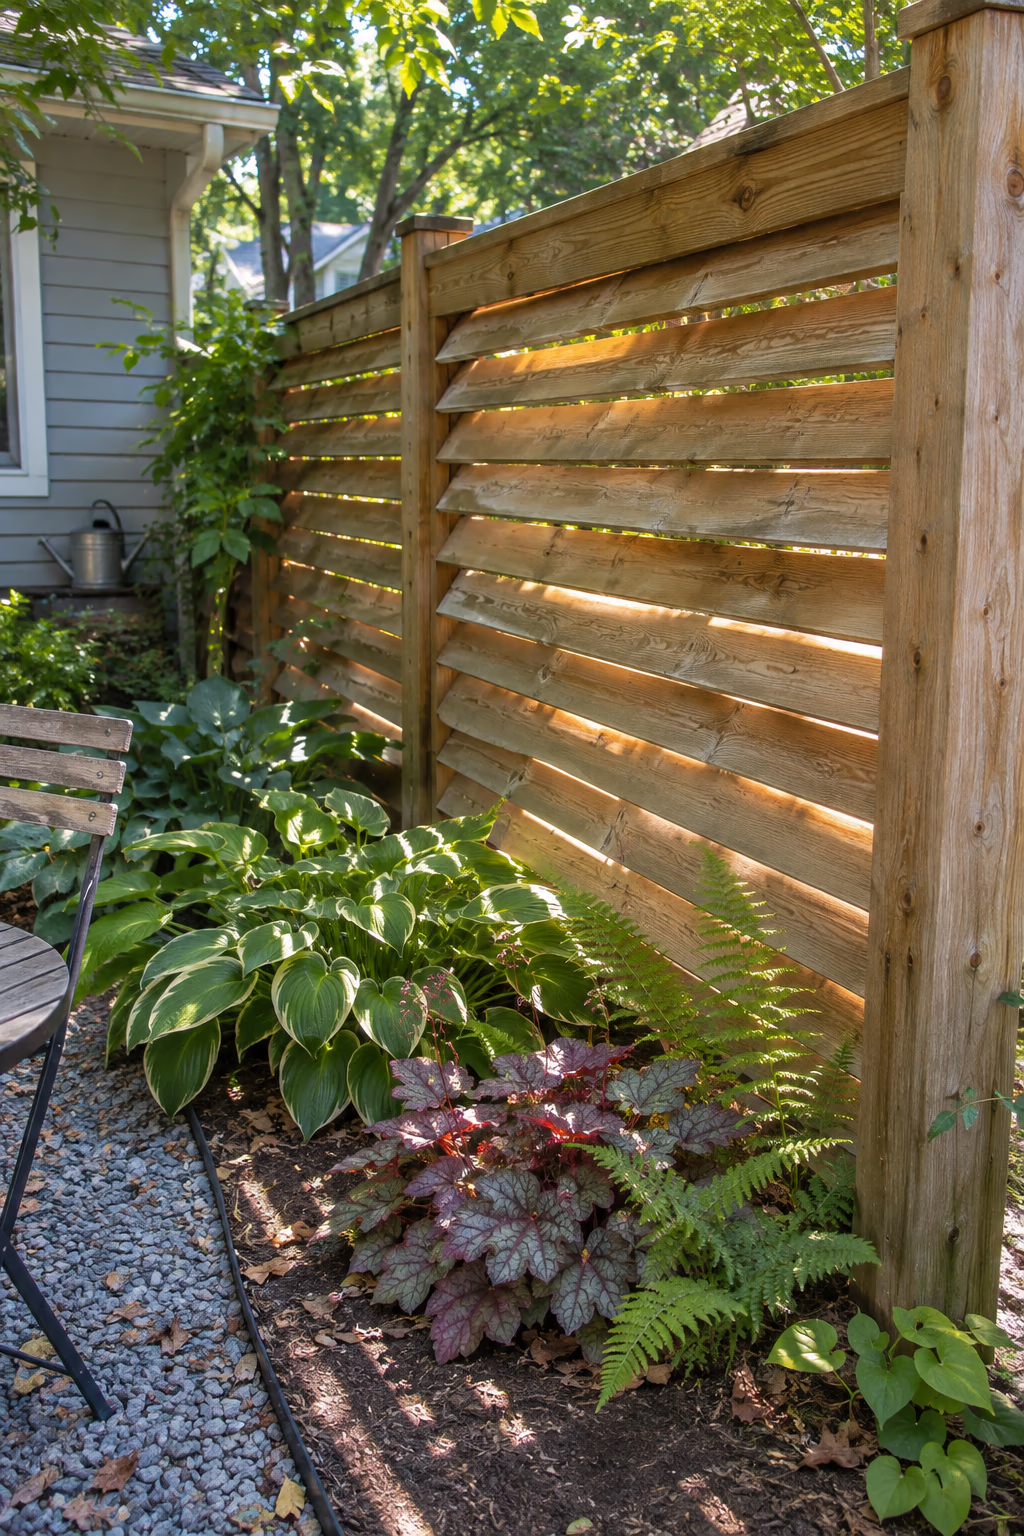
Filtered views with a breezy feel
Louvered fences use boards set at an angle, like oversized window shutters, held in grooved or blocked frames between posts. Run the louvers horizontally for a modern look or vertically for a more traditional screen.
The angle blocks a direct line of sight while letting light and breezes slip through. That makes louvers a smart choice beside a vegetable patch, a shady side yard, or a sitting area where solid boards would feel stuffy and trap humid air that encourages mildew.
Louvered sections use more lumber and labor than plain boards, so many homeowners use them for just one or two feature panels. Choose cedar or redwood with stainless fasteners, since every slat edge is exposed to weather.
20. Build a Tall Deer Fence With a Wood Frame
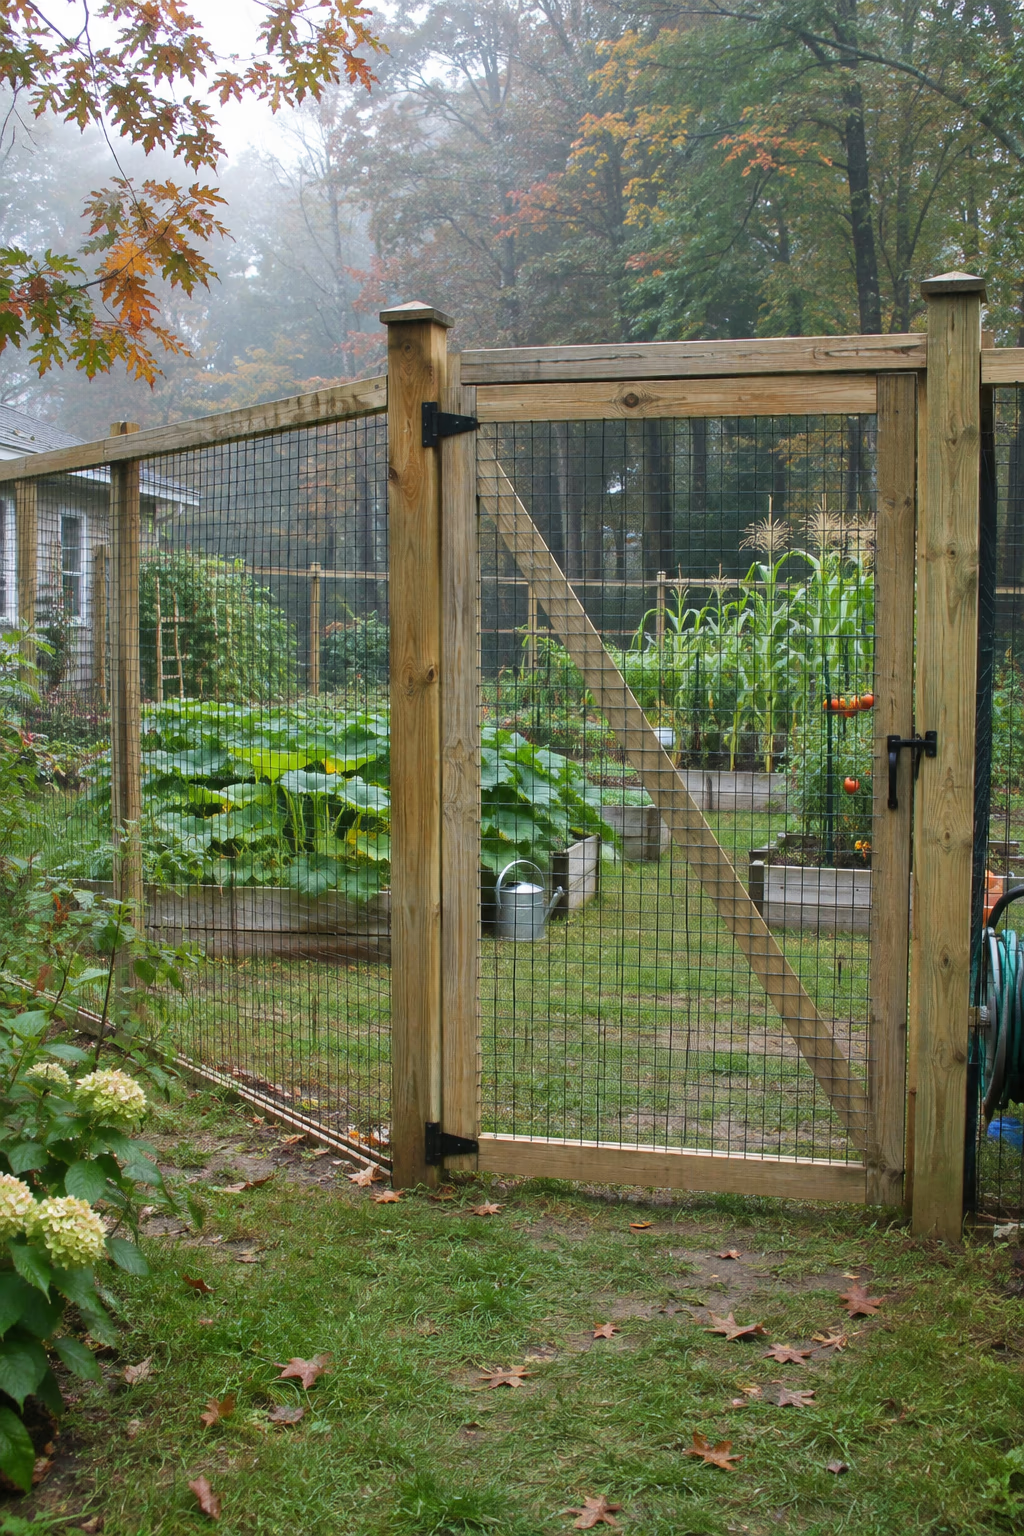
Protect the harvest from hungry visitors
Deer can clear a typical 4- or 5-foot fence with ease, so a garden or small orchard in deer country usually needs a barrier 7 to 8 feet tall. Use 10- to 12-foot pressure-treated 4×4 or 6×6 posts set about 3 feet deep, a wooden top rail, and welded wire or heavy deer mesh stretched between them.
A timber frame looks far more finished than bare metal stakes and gives you a place to hang a matching wooden gate. The open mesh stays almost invisible from a distance, so the garden still feels open.
Check local height limits before building, since many residential codes cap fences at 6 feet unless you apply for an exception. Make the gate just as tall as the fence, because deer will find any low spot.
21. Back a Short Picket Fence With a Clipped Hedge
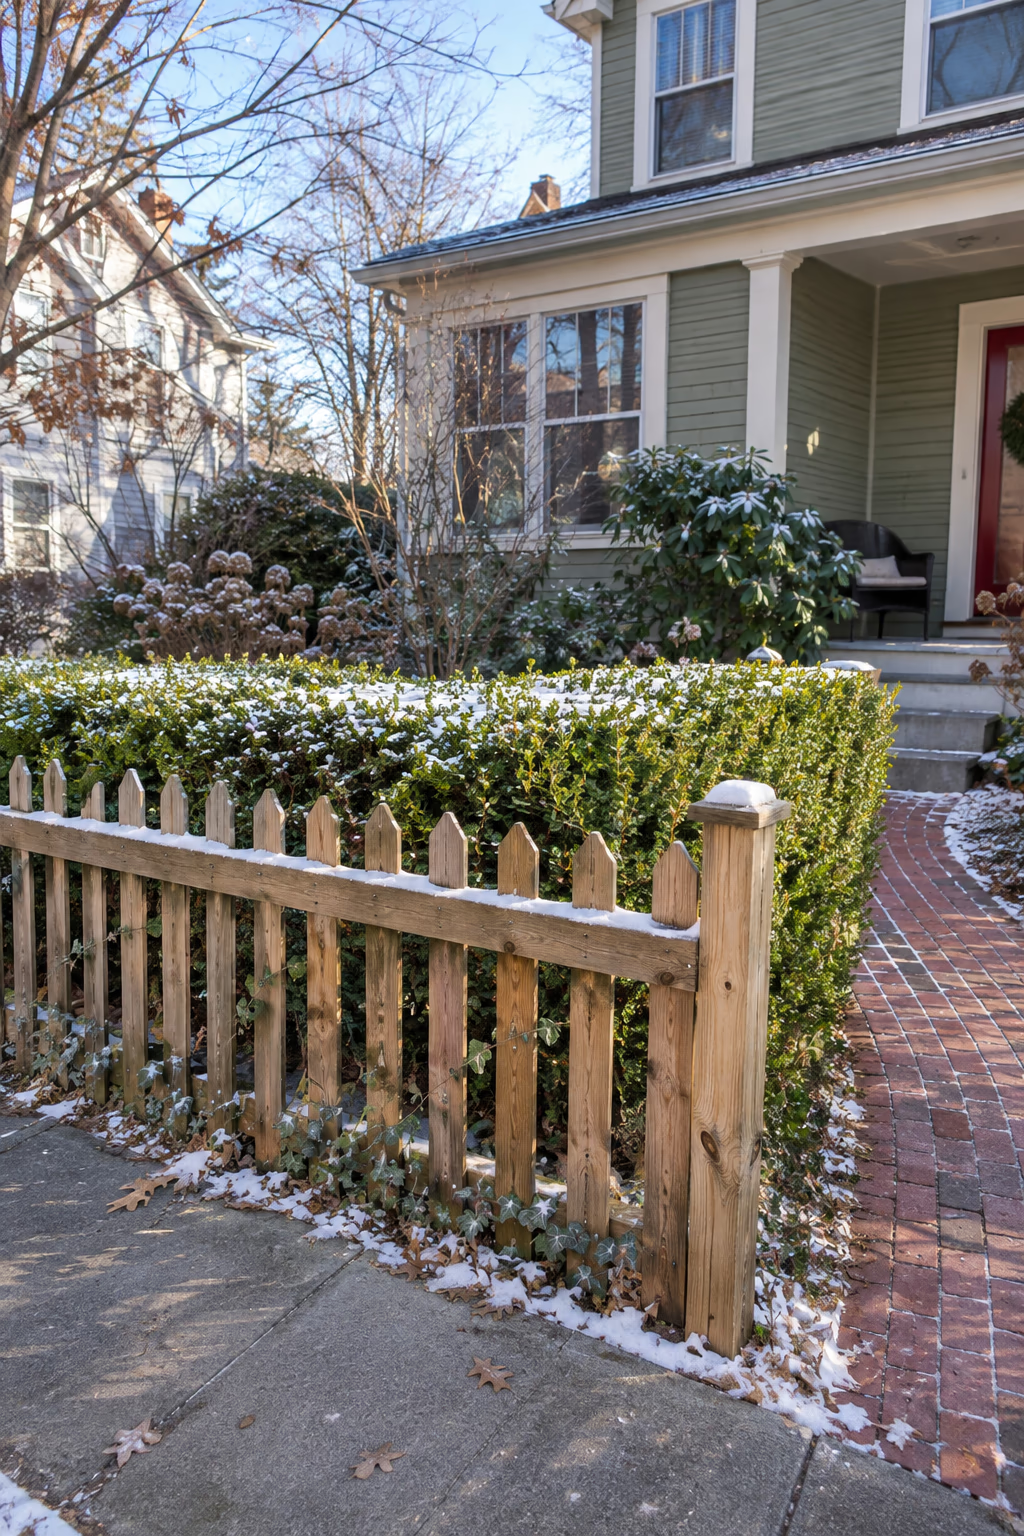
Layered green and wood edge
Plant a row of compact shrubs about 18 to 24 inches behind a 3-foot picket fence and clip them to a few inches above the pickets. Boxwood, inkberry holly, and dwarf yaupon holly all take shearing well; choose what suits your hardiness zone and light.
The wood gives a crisp line in front, and the green wall behind adds depth, extra privacy, and winter interest after perennials die back. Together they look tidy and established in a front garden.
Leave enough room between fence and hedge to reach in with shears and paint brushes. Shrubs pressed against boards keep the wood damp and shorten its life.
22. Let Untreated Cedar Weather to Silver Gray
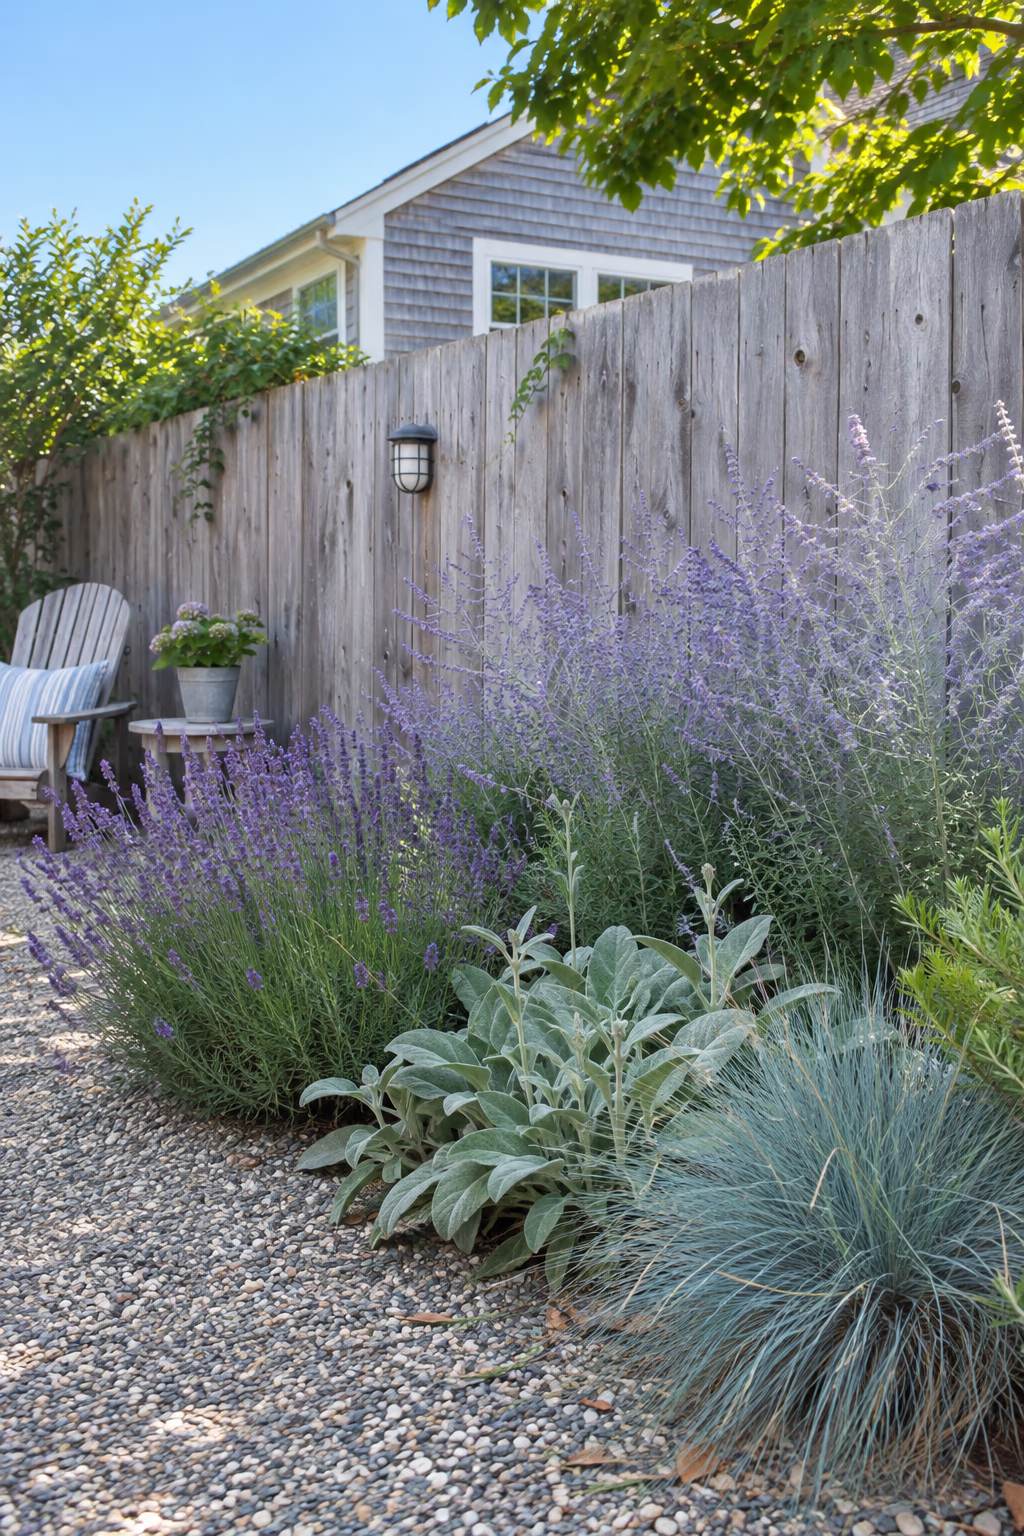
Natural aging with minimal upkeep
Unfinished cedar starts out warm tan or reddish and, after a year or so in sun and rain, mellows to a soft silver gray. The change happens on its own, with no stain or paint required.
That driftwood tone pairs beautifully with lavender, Russian sage, silvery lamb’s ear, and blue-green grasses. It suits coastal yards, meadow plantings, and any garden where the fence should fade into the background.
The color can be uneven while it weathers, and boards may develop small surface checks. Rinse it with a garden hose and a soft brush instead of a high-pressure washer, which can fuzz and gouge the grain.
23. Wash the Fence in Warm Light After Dark
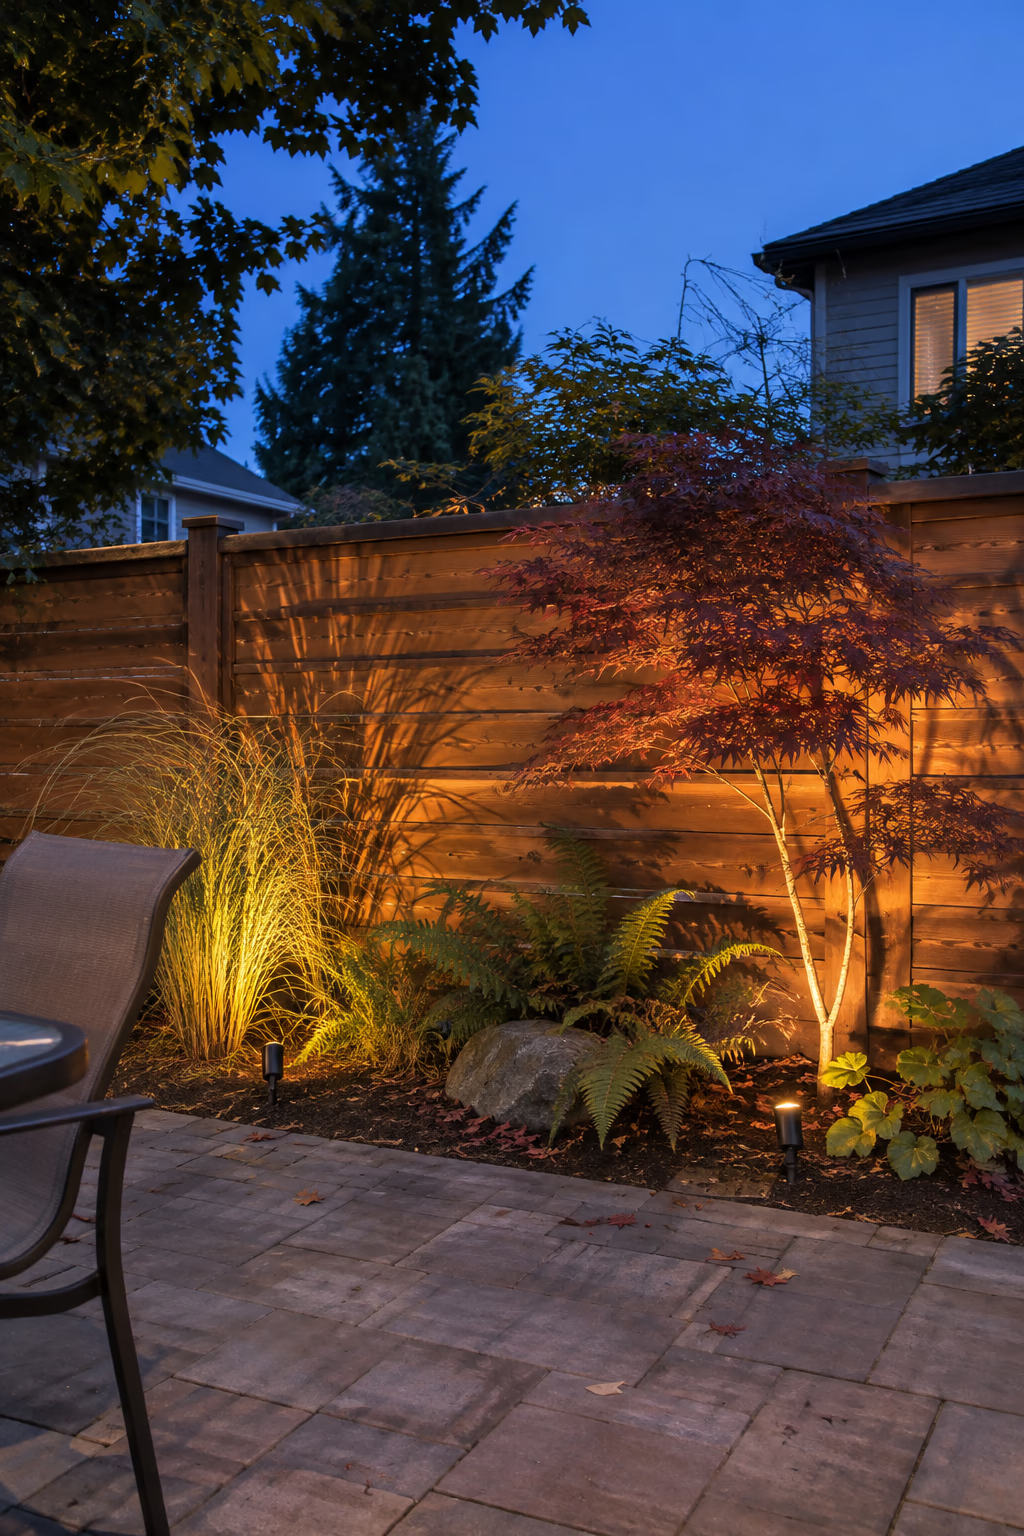
Extend enjoyment into evening
Place low-voltage LED spotlights in the bed a foot or two in front of the fence and aim them up the boards, or mount small downlights under a top rail every 6 to 8 feet. Solar post cap lights are an easy plug-free option.
Light grazing across wood brings out its grain and throws the shadows of grasses, ferns, and small trees onto the fence like a living mural. It makes the garden feel larger at night and turns the fence into a backdrop for evening dinners.
Choose warm white bulbs around 2700K for a soft glow, and angle fixtures so they do not shine into neighbors’ windows. Bury low-voltage cable a few inches deep along the bed so it does not get cut by a spade.
24. Patch a Plain Fence With Colorful Reclaimed Boards
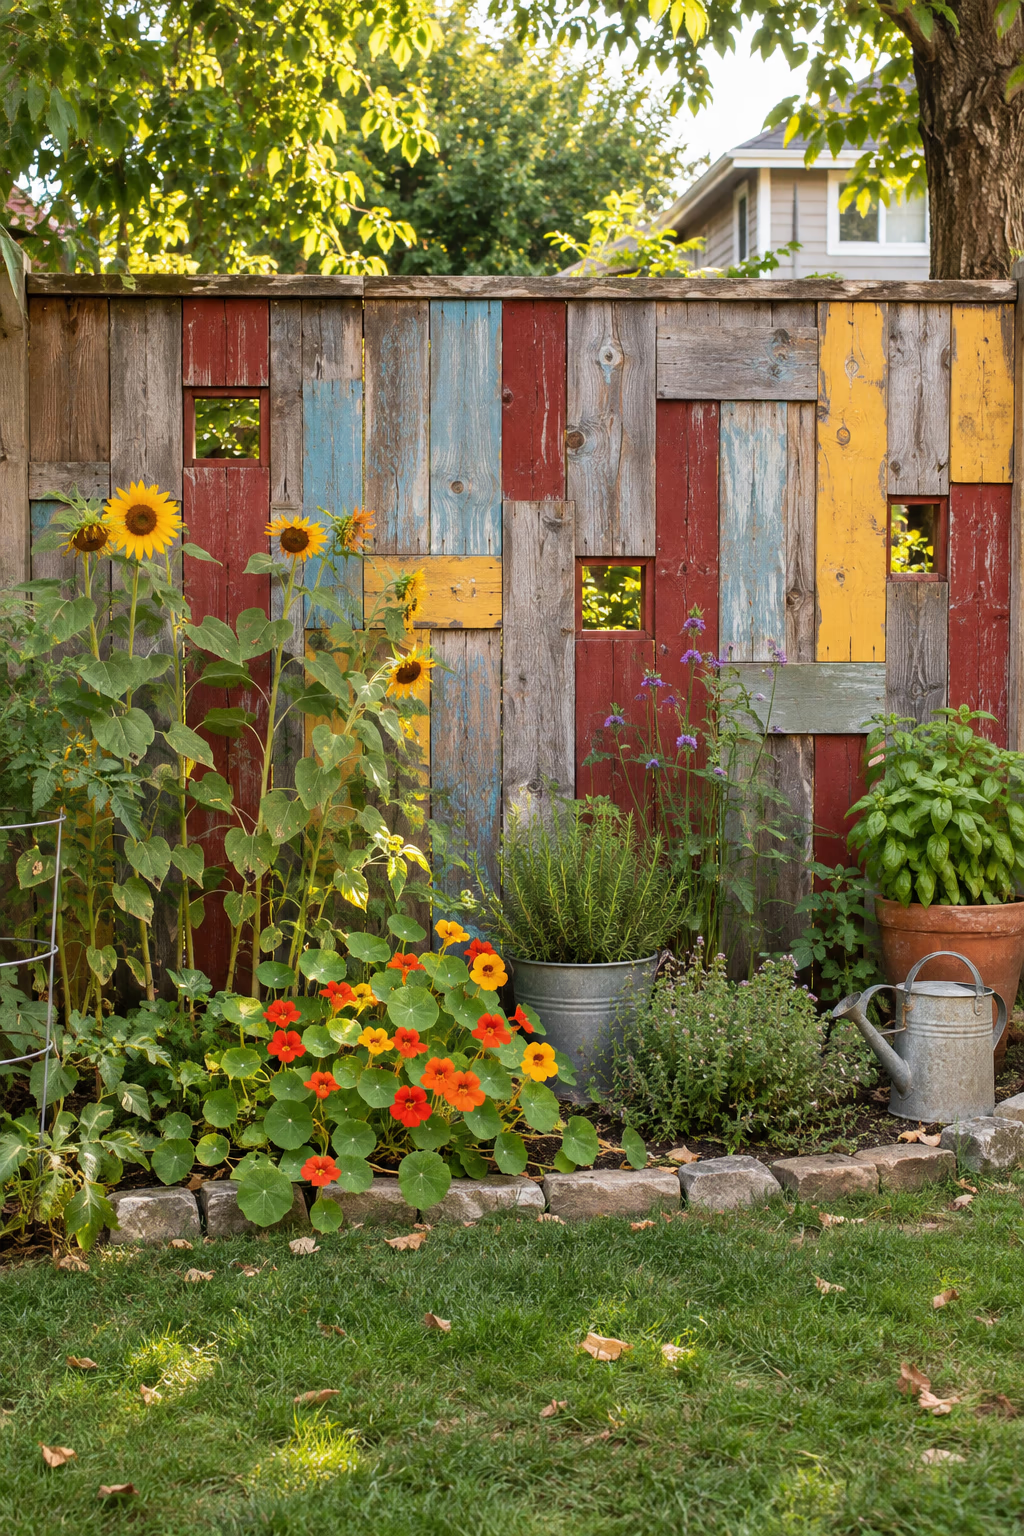
Playful color from salvaged wood
Collect salvaged boards in faded blues, barn reds, mustard yellows, and plain weathered gray, then fasten them in a loose patchwork over a section of a plain fence. Vary lengths and leave a few small gaps or square openings to keep it playful.
A patchwork panel gives a kitchen garden or kids’ garden a cheerful, personal look, and it reuses lumber that might otherwise be thrown away. It also hides a tired or mismatched stretch of fence without a full rebuild.
Old painted wood may contain lead, especially boards from homes built before 1978. Test questionable paint, avoid sanding it, and keep it away from edible beds. Seal bare spots with clear exterior finish.
25. Bury a Wire Skirt Along the Fence to Stop Rabbits
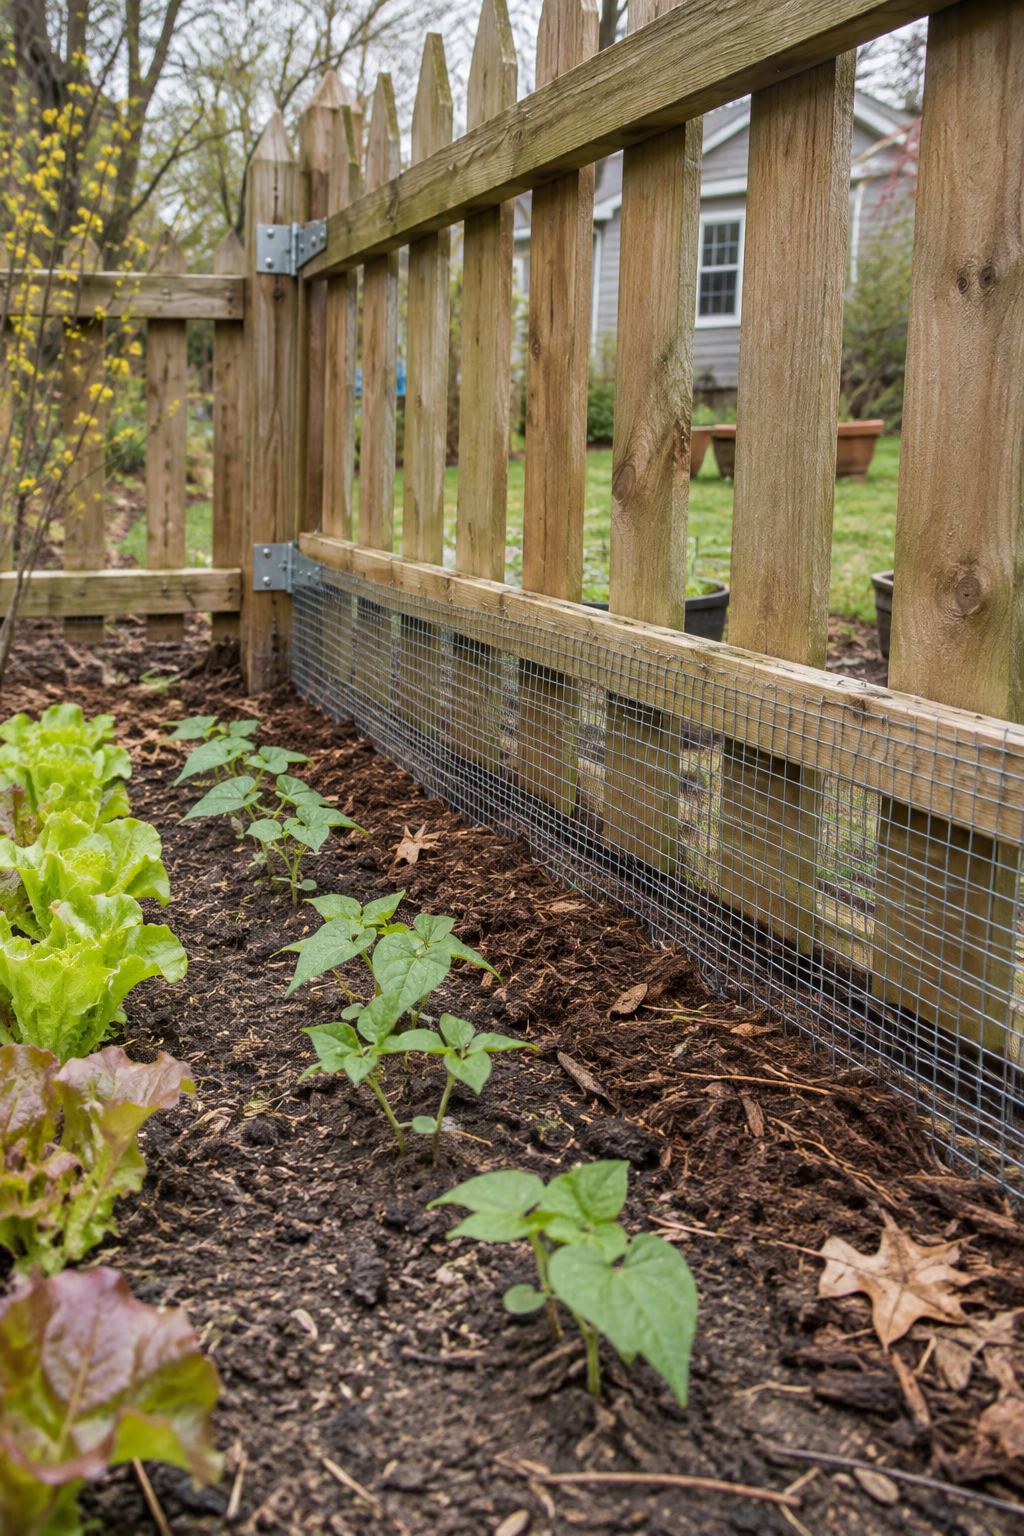
Keep diggers out of the beds
Staple a strip of galvanized hardware cloth or 1-inch chicken wire to the lower 2 feet of a wooden fence, then bury the bottom edge 6 to 12 inches deep and bend it outward in an L shape. Cover the buried flap with soil or mulch.
Rabbits, groundhogs, and other diggers tend to burrow straight down at the fence line. When they hit the wire apron, they give up, and your lettuce and young beans survive. The wire hides behind plants and barely changes the look of the fence.
Hardware cloth with 1/2-inch openings also stops voles and chipmunks but costs more than chicken wire. Inspect the base each spring for rusted spots, and call 811 before trenching along the fence.
How to Plan Your Wooden Garden Fence
A little planning before you buy lumber saves money and gives you a fence that suits both your garden and your neighborhood.
- Define the job first. Decide whether the fence needs to keep out deer, rabbits, or pets, give privacy, or simply frame a bed. Function sets the height and style.
- Check codes and HOA rules. Many towns limit backyard fences to about 6 feet and front-yard fences to 3 or 4 feet, and HOAs may control style and color.
- Find the property line. Use a survey or official plat before building near a boundary, and talk with neighbors about shared fences.
- Choose rot-resistant wood. Use ground-contact rated pressure-treated posts or naturally durable species such as cedar, redwood, or black locust.
- Set posts properly. Bury posts about a third of their length, at least 2 feet deep, with gravel at the bottom for drainage.
- Call 811 before digging. This free service marks buried utility lines so you can dig post holes safely.
Frequently Asked Questions
What is the best wood for a garden fence?
Cedar and redwood resist rot and insects naturally and look attractive, while pressure-treated pine is cheaper and very durable for posts. Many homeowners use pressure-treated posts with cedar boards for a good balance of cost and looks.
How tall should a garden fence be?
A decorative border can be 2 to 3 feet tall, while a fence for dogs or rabbits works at 3 to 4 feet. Deer usually require 7 to 8 feet. Always check local height limits.
How long does a wooden garden fence last?
A well-built cedar or pressure-treated fence often lasts 15 to 20 years or more, depending on climate and maintenance. Posts usually fail first, so good drainage and proper setting matter.
Do I need to stain or seal a wooden fence?
It is optional. Sealing or staining slows weathering and keeps color, while untreated cedar will turn gray naturally. If you finish it, plan to reapply every few years.
Is it safe to grow vegetables near a pressure-treated fence?
Modern pressure-treated lumber uses copper-based preservatives considered safer than older types. To be extra cautious, use cedar for beds or add a barrier between soil and treated wood.
Final Thoughts
The right wooden garden fence does more than mark a boundary. It protects your plants, frames your favorite views, and adds warmth and character to the yard.
Choose a style that fits your home and garden, build with durable materials, and let plants grow around it over time. With a little care, your fence will become one of the most loved parts of your outdoor space.