Picture a bare stretch of sunny wall turning into a strip of crisp lettuce, a tower of strawberries growing beside the back steps, and cucumbers hanging at eye level where you can pick them without bending down. A garden that grows up instead of out can fit where a regular vegetable bed never could.
Vertical growing makes a small yard, patio, or balcony more productive. Climbing crops get better airflow and stay off the soil, so the harvest stays cleaner and is easier to spot. Walls and towers also put greens and herbs right where you can reach them, which makes it easier to keep up with watering and picking.
These 23 vertical vegetable garden ideas cover gutter gardens, salad towers, hydroponic setups, potato cages, string-trained tomatoes, bean teepees, and indoor shelves for microgreens. Each one includes suggested materials and crops, plus honest notes on cost, watering, and weight, so you can choose the projects that fit your space.
1. Hang a Rain Gutter Garden for Salad Greens
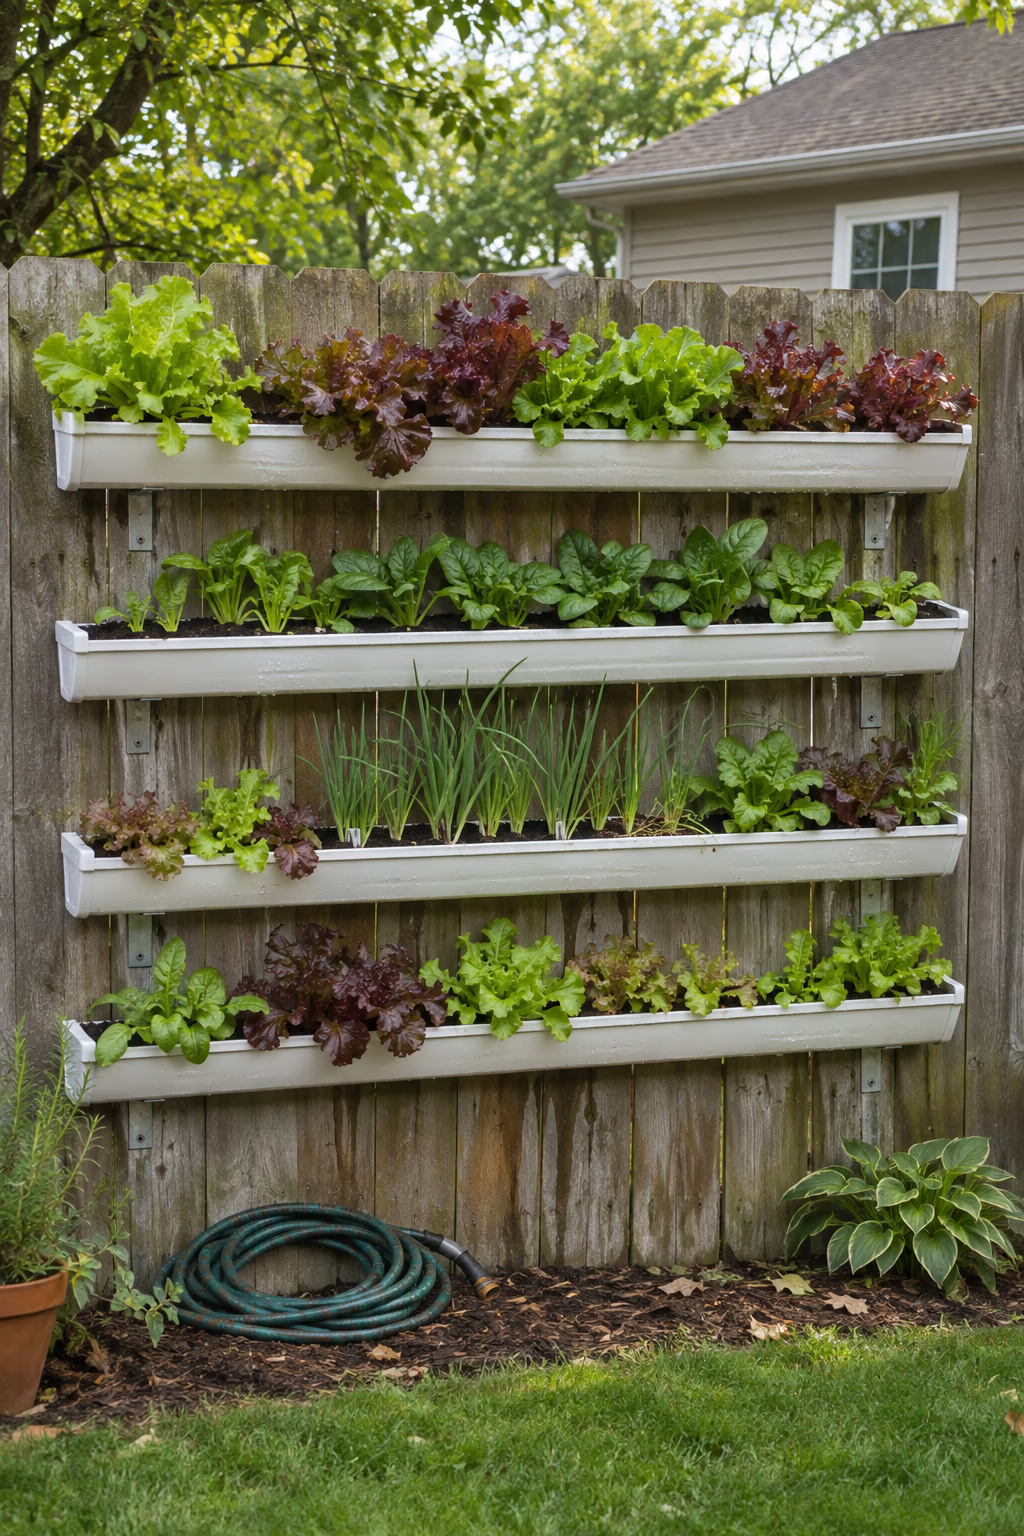
Rows of lettuce in a strip of wall
Mount three or four lengths of vinyl or aluminum rain gutter, each 4 to 6 feet long, across a sunny fence or wall, spaced about 12 inches apart. Fit end caps on each gutter, drill 1/4-inch drainage holes every 6 inches, fill with a light potting mix, and plant loose-leaf lettuce, spinach, arugula, green onions, or radishes.
Gutters are cheap, easy to find at any home center, and look tidy in neat parallel rows. Shallow-rooted greens grow well in them, and harvesting from a standing position feels effortless.
The trade-off is soil volume. Gutters hold only about 4 inches of mix, so they dry out quickly in summer heat. Plan on daily watering in July, or run a drip line along the top row, and give midsummer greens afternoon shade.
2. Build a Wire Salad Tower for Endless Lettuce
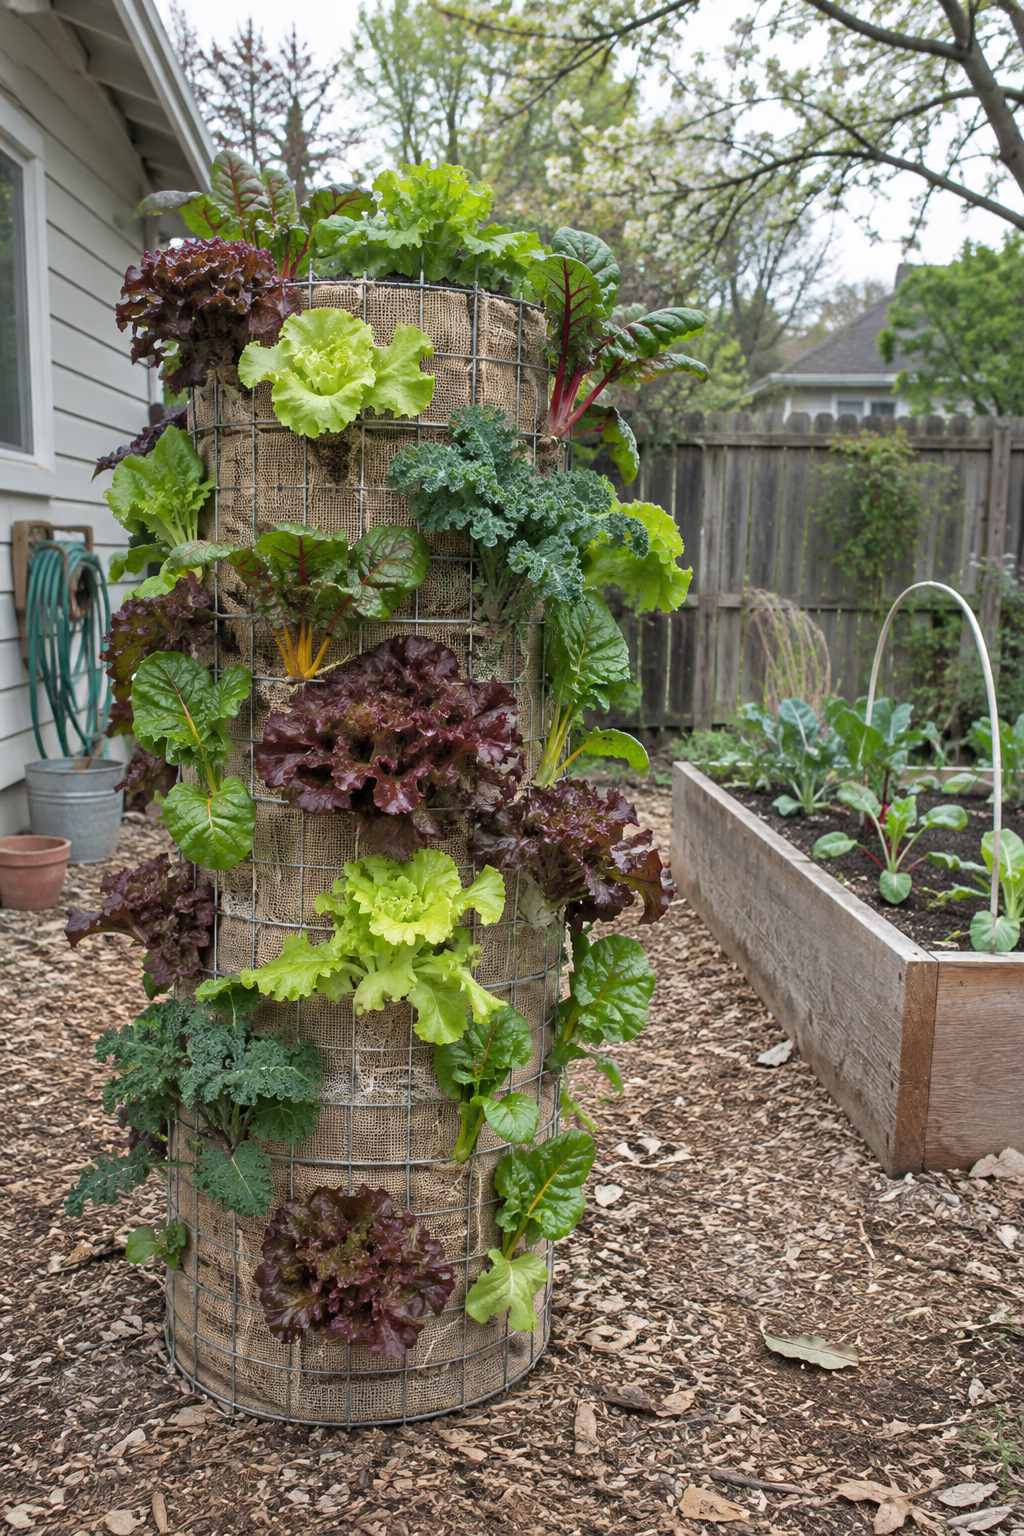
A column of greens you can pick from every side
Roll a 5-foot length of welded wire fencing or concrete reinforcing mesh into a cylinder about 18 to 24 inches across, and secure it to a stake. Line the inside with landscape fabric or burlap, fill it with potting mix, then cut small slits through the liner and tuck in lettuce, chard, kale, or mustard seedlings every 6 to 8 inches.
Plants cover the outside of the tower within a few weeks, creating a living column of leaves. Because the tower is round, every plant gets some light, and you can take outer leaves from any side for cut-and-come-again salads.
Push a length of perforated pipe or a tall cylinder of hardware cloth down the center before filling. Pouring water into it sends moisture into the middle of the tower, where it otherwise stays dry.
3. Grow a Hydroponic Tower on a Sunny Patio
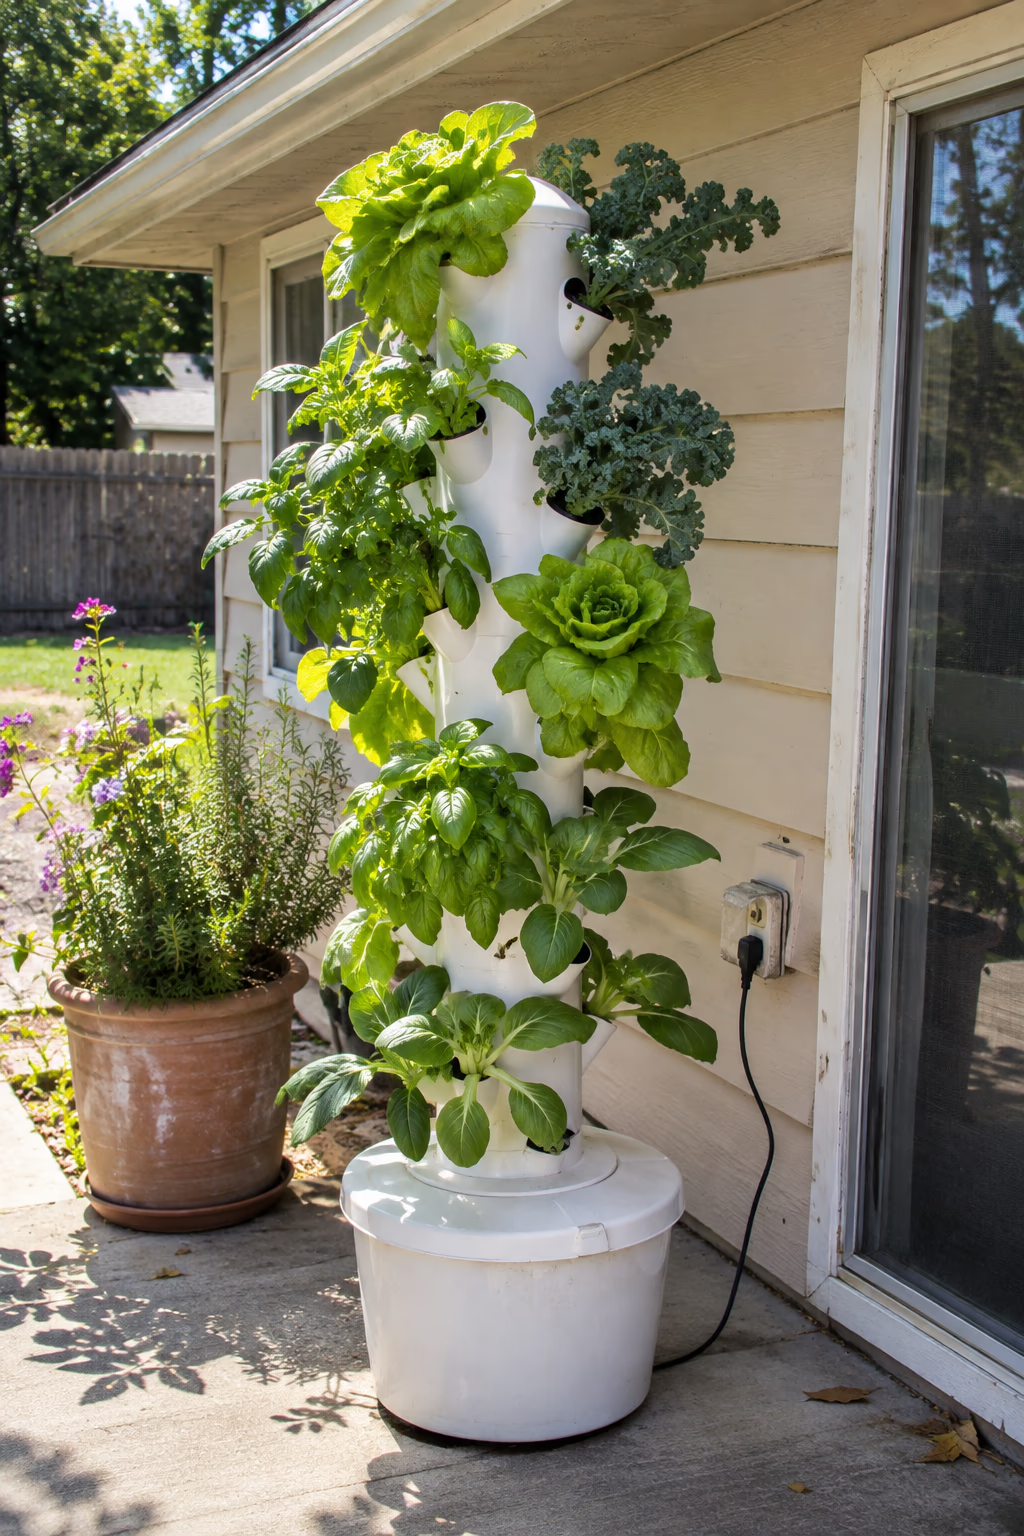
Soil-free greens with a small footprint
A vertical hydroponic tower stacks planting ports around a central column, and a small pump lifts nutrient water from a reservoir at the base to trickle back down past the roots. A 5-foot tower can hold 20 to 40 plants, such as lettuce, basil, bok choy, kale, and compact strawberries, in about 3 square feet.
These towers appeal to people who want fast, clean harvests without hauling bags of soil. Leafy greens often grow quickly in them, and the lack of soil means fewer weeds and soil-borne pests.
Be realistic about cost and upkeep. Ready-made towers can run several hundred dollars, and DIY versions still need a pump, an outdoor-rated outlet, nutrients, and weekly checks of the water level and pH, ideally around 5.5 to 6.5. Large tomatoes and squash are not a good fit.
4. Stack a Potato Tower in a Wire Cage
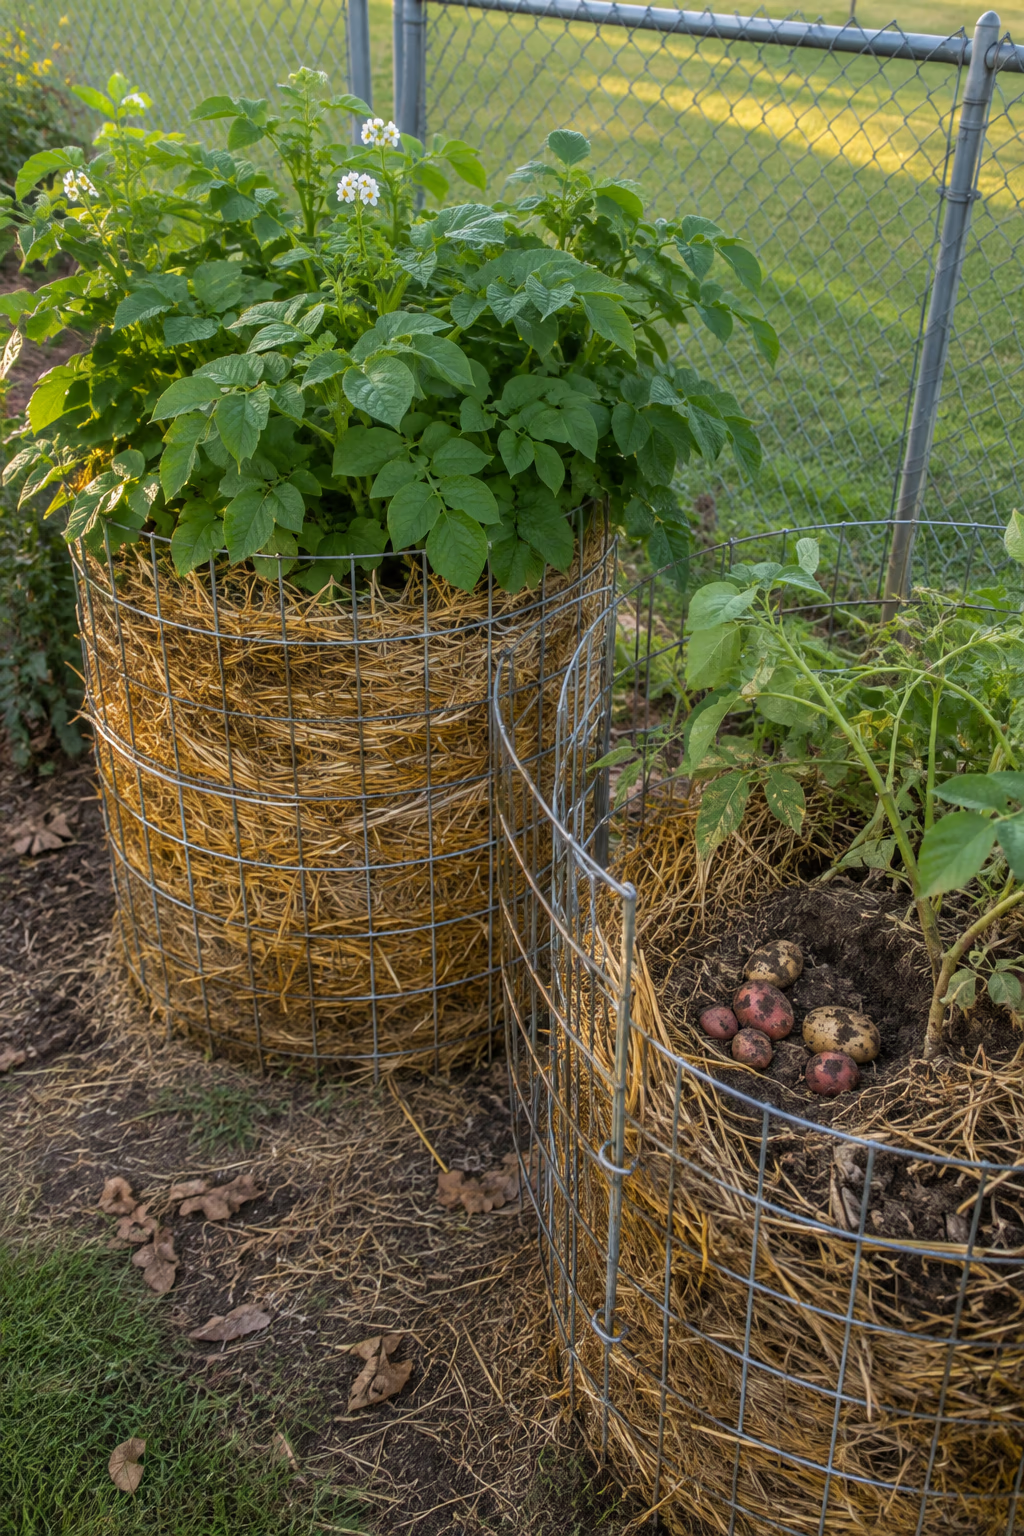
Spuds grown up instead of across a bed
Form a cylinder about 2 to 3 feet across from welded wire, line it with straw, and add 6 inches of compost-rich soil with a few seed potato pieces. As the stems grow, keep adding soil or a straw-and-compost mix around them, leaving the top few inches of leaves exposed, until the cage is roughly 3 feet tall.
At the end of the season, unclip the cage and let the contents tumble out. It feels like a treasure hunt, and it saves digging through a whole bed.
Results vary. Many varieties set most of their tubers in a fairly narrow band, so a tall tower does not always mean a bigger crop. Later-maturing, long-season varieties tend to respond best to hilling, and consistent watering matters more than height.
5. Stack Planter Boxes Into a Tiered Vegetable Pyramid
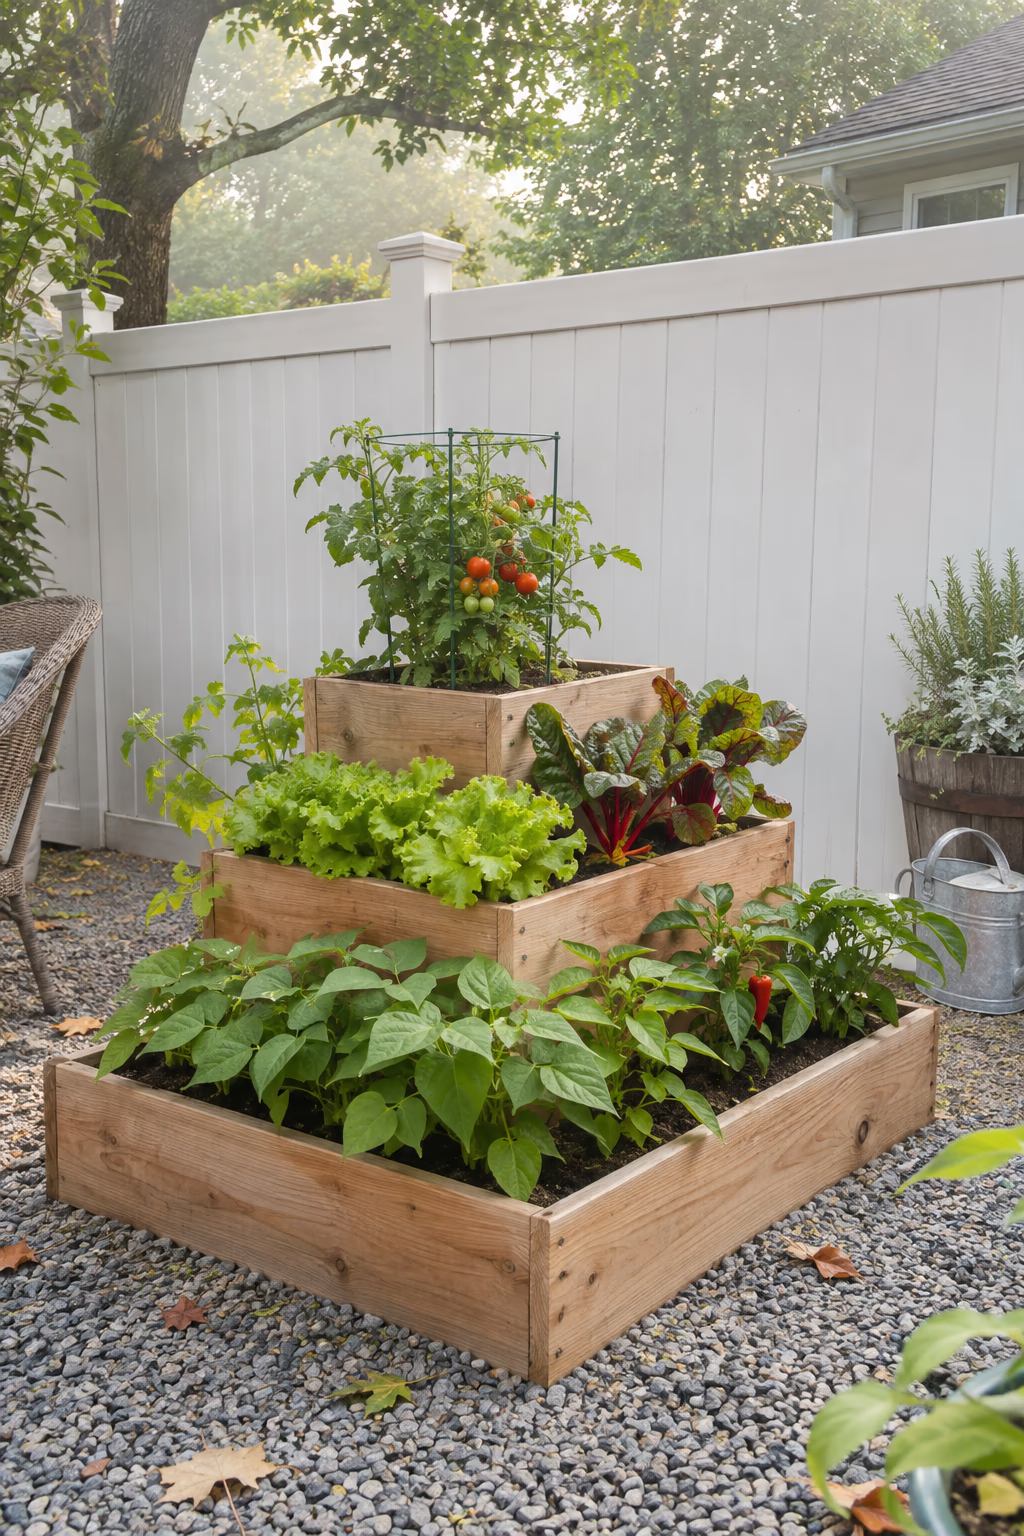
Three levels of crops in one square
Build three square cedar frames, about 4 feet, 3 feet, and 2 feet wide and 8 to 10 inches tall, then stack and center them on top of each other. Fill all three with soil to create a stepped pyramid. Plant bush beans or peppers on the wide bottom ring, lettuce and chard in the middle, and a compact tomato or herbs at the top.
The pyramid looks great as a centerpiece in a small yard, and the stepped layout puts plants at three heights without adding much shade to the lower tiers. It also gives the top tier deeper soil than a single shallow box would.
The tiers drain from top to bottom, so the peak dries out first while the base stays wetter. Group thirsty crops at the bottom and plants that like drier soil, such as thyme or oregano, near the top.
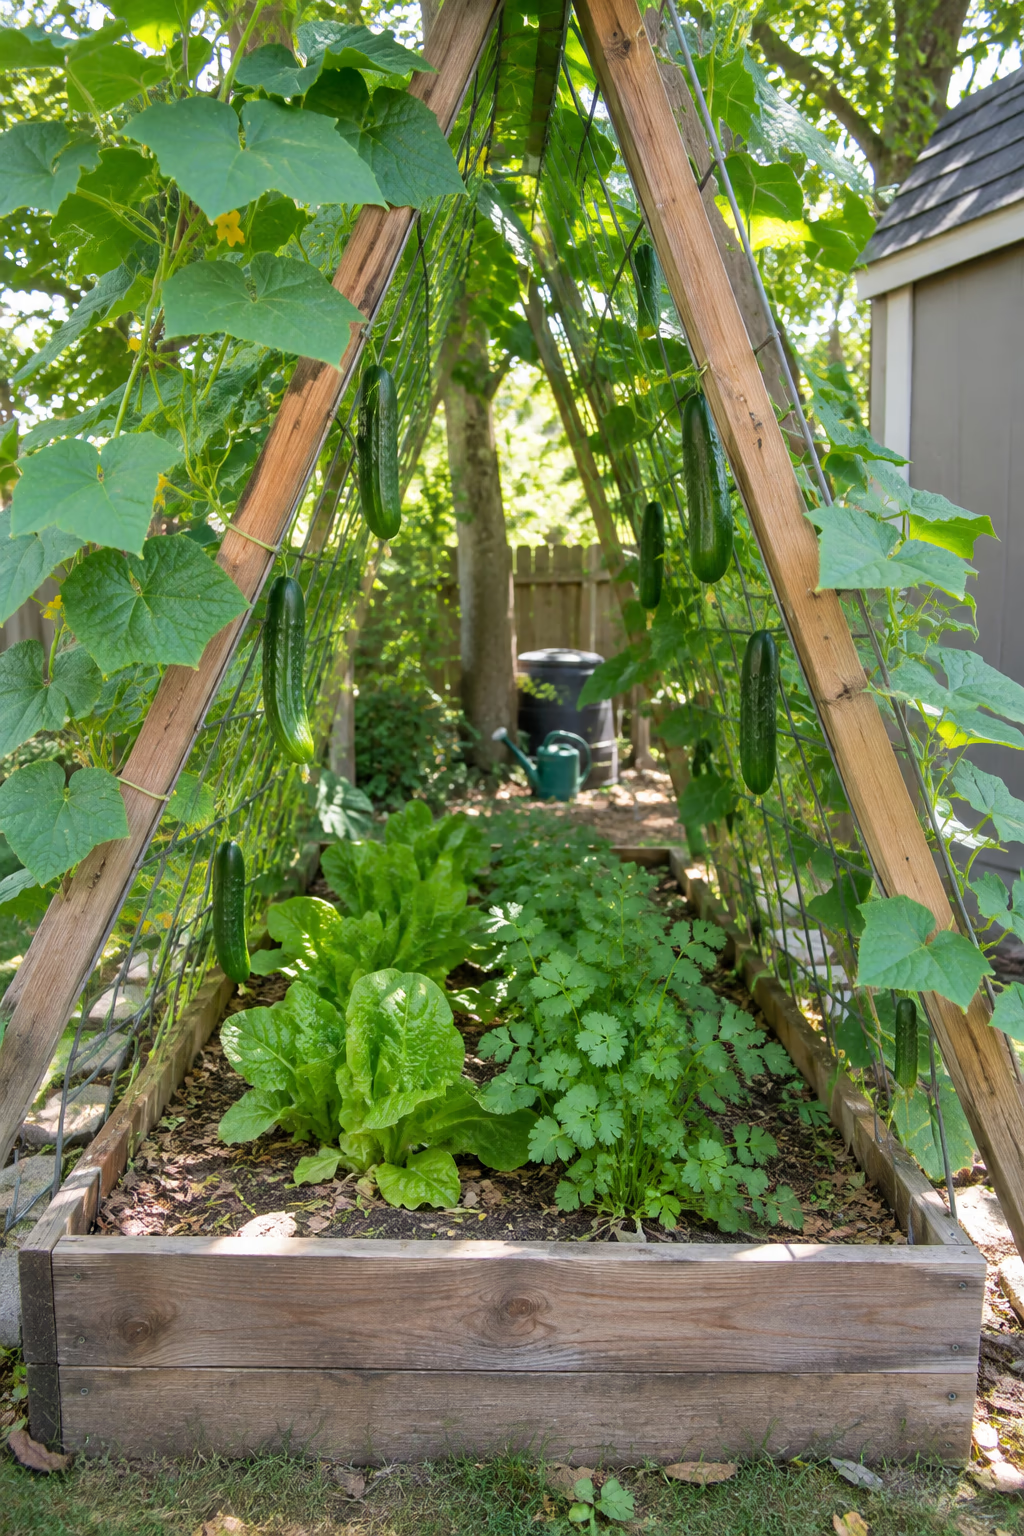
6. Lean an A-Frame Cucumber Trellis Over Shade-Loving Greens
Two crops from the same patch of soil
Hinge two 4-by-5-foot panels made from wood framing and livestock or cattle panel fencing at the top, then set them over a raised bed like a tent. Plant cucumbers along both outside edges and let them climb. In the shaded space underneath, sow lettuce, spinach, or cilantro.
The vines cool the space beneath, which helps heat-sensitive greens last longer into summer before they bolt. Cucumbers grown on a slope also hang down through the mesh, so they come out straight, clean, and easy to find.
Choose vining cucumbers rather than bush types, and gently guide the tendrils onto the mesh for the first week or two. Make sure you can still reach the greens underneath from the open ends.
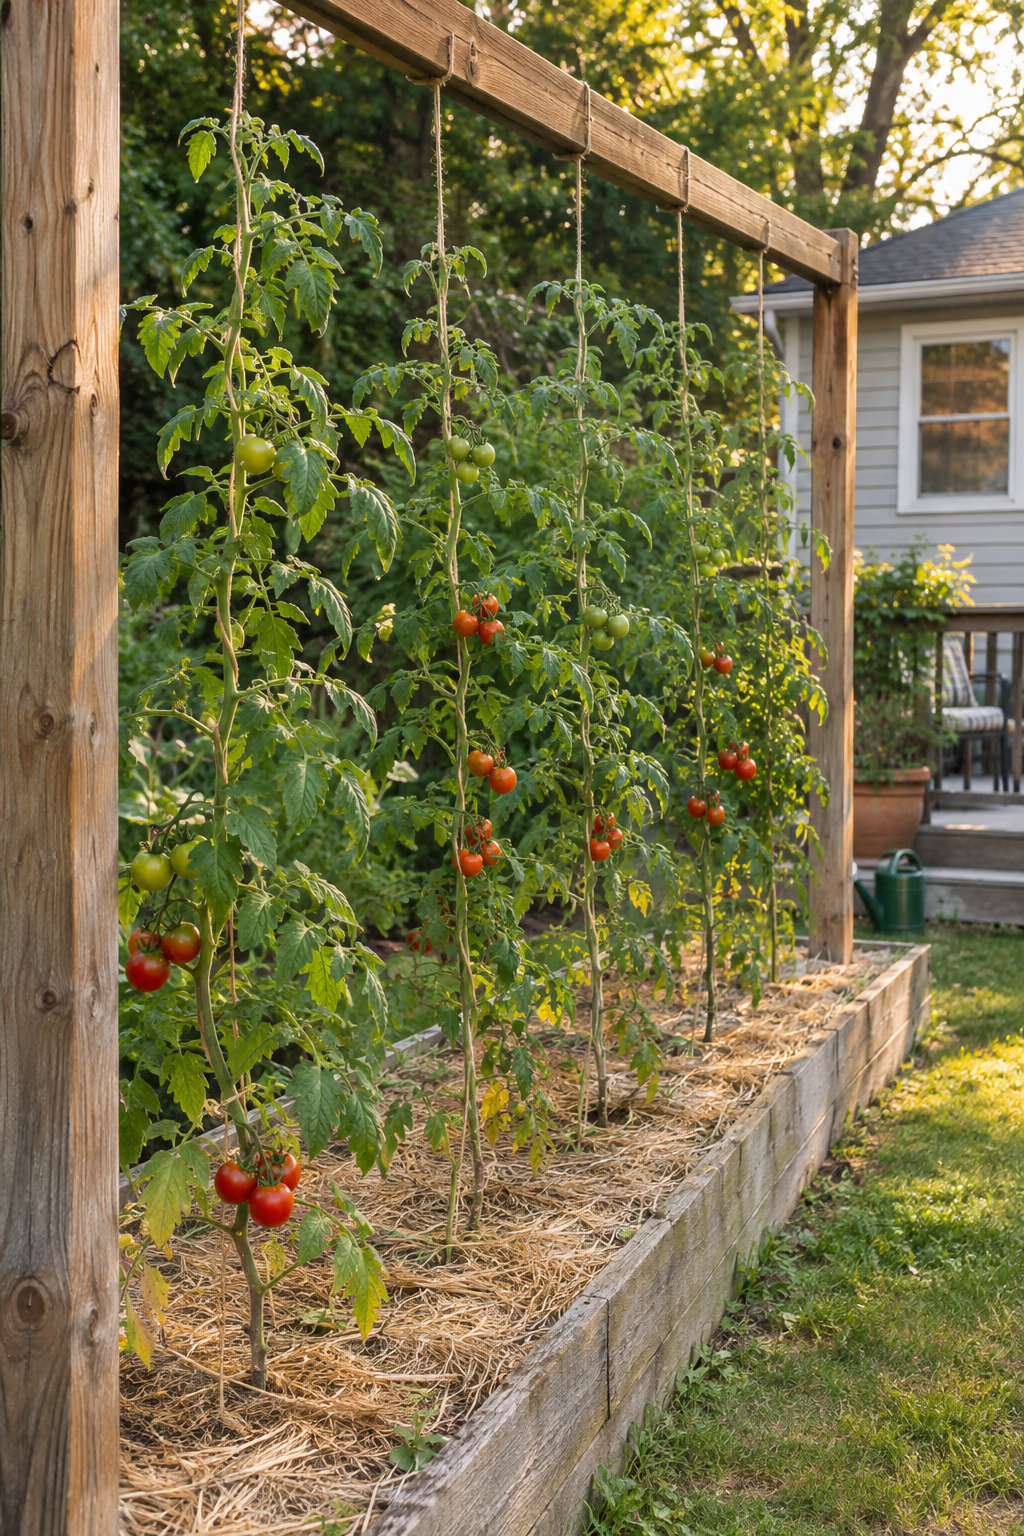
7. Tie Tomatoes to Strings Hung From an Overhead Beam
Tall tomatoes without bulky cages
Run a sturdy horizontal support 7 to 8 feet above a bed, such as a 2×4 between two posts or a pipe on a pergola. Drop a length of strong garden twine from it to the base of each indeterminate tomato, anchored loosely around the stem or to a ground stake. As the plant grows, twist the main stem around the string or attach it with tomato clips.
This greenhouse-style method keeps each plant to one or two main stems, so rows can be spaced just 18 to 24 inches apart. Air moves freely around the leaves, which can help reduce disease.
The method only works if you prune regularly. Remove most side shoots, or suckers, every week. Make sure the overhead support can hold several heavy, fruit-laden plants in a strong wind.
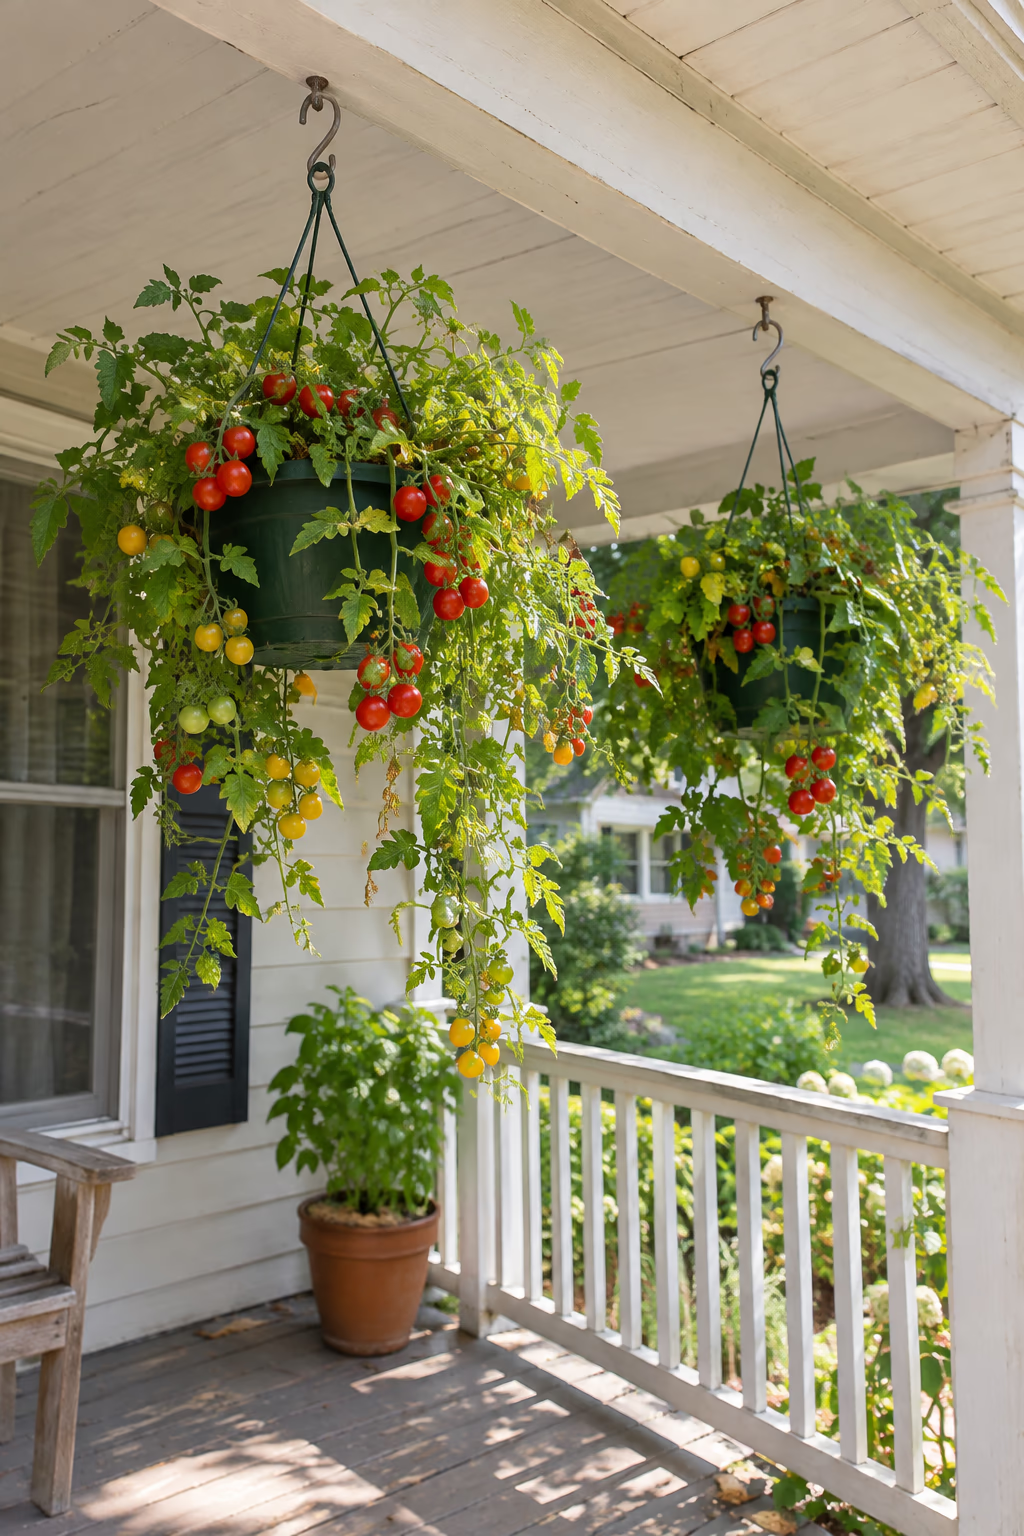
8. Grow Cherry Tomatoes in Hanging Baskets
Snack tomatoes dangling at arm’s reach
Choose a trailing or compact cherry tomato variety bred for containers and plant one per 12- to 16-inch hanging basket filled with quality potting mix. Hang the baskets from a sturdy porch beam, pergola, or bracket that gets at least 6 to 8 hours of sun.
Small red or yellow tomatoes spilling over the edge look decorative, and the fruit stays off the ground and away from many crawling pests. Baskets also make good use of open air that would otherwise go unused.
Baskets dry out fast and get heavy when wet. Use heavy-duty hooks screwed into solid wood, water daily in summer, and feed every couple of weeks, because frequent watering washes nutrients out of the mix.
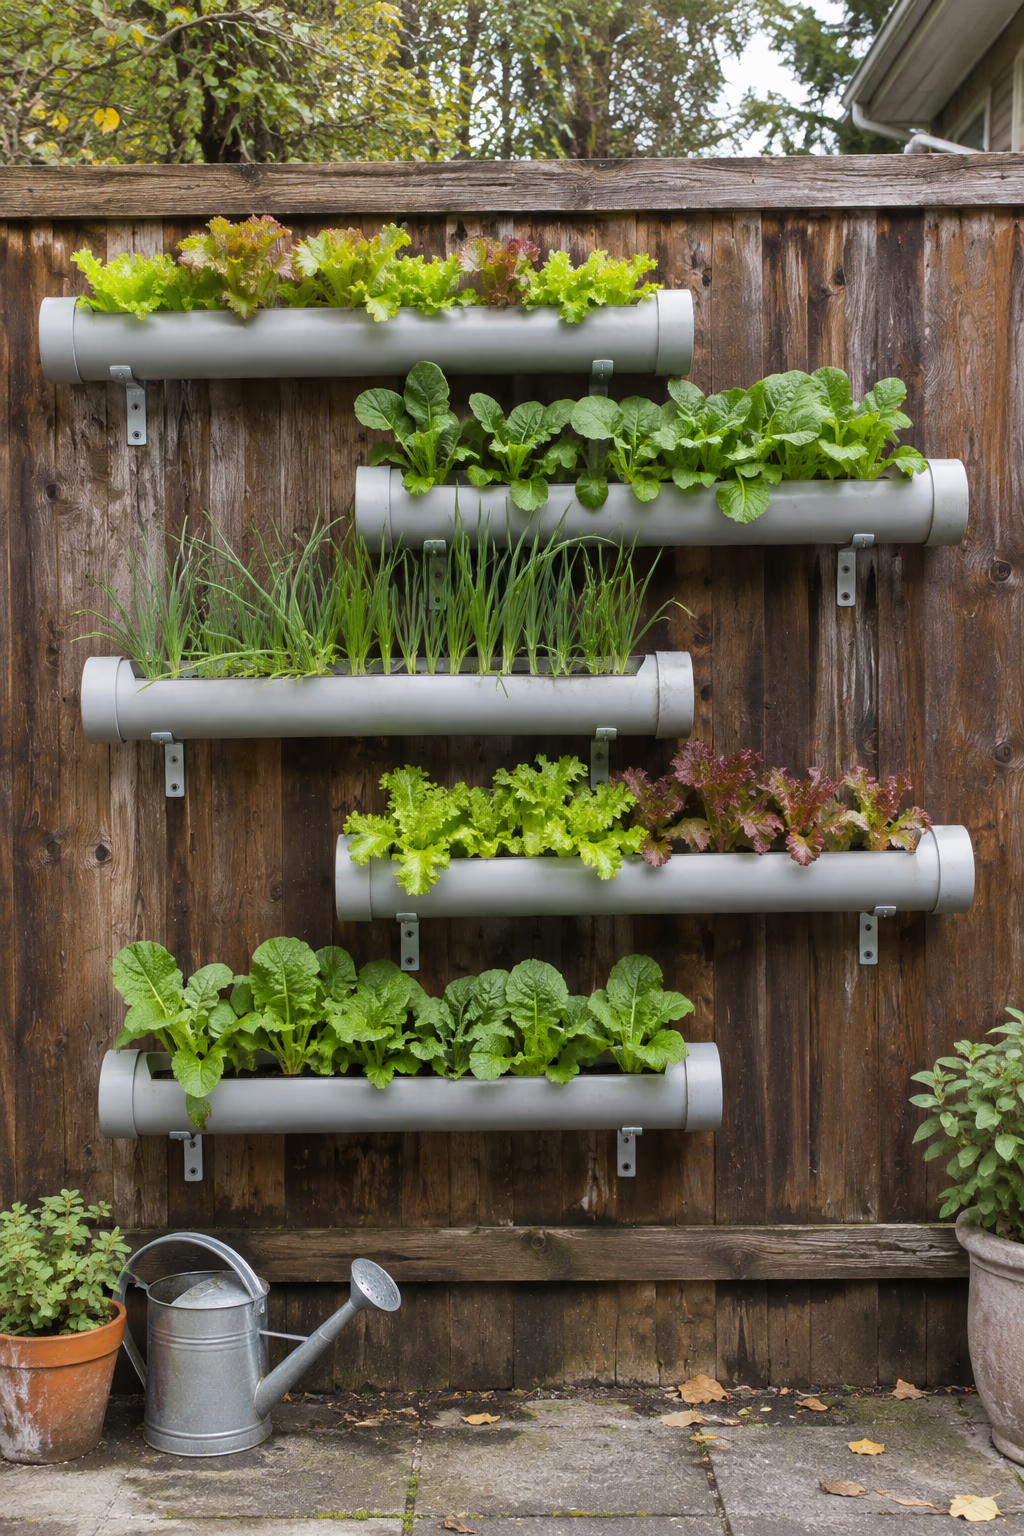
9. Mount PVC Pipe Planters on a Sunny Wall
A sleek, modern take on a wall garden
Cut 4- or 6-inch-diameter pipe into 3- to 4-foot lengths, cap the ends, and cut a long opening along the top of each one. Drill drainage holes in the bottom and mount the pipes horizontally on brackets, staggered up a wall or fence. Fill them with potting mix and plant leaf lettuce, green onions, mustard greens, or strawberries.
The smooth, uniform pipes give the wall a clean, contemporary look, especially if painted a soft gray or deep green with exterior paint made for plastic. The pipes are also easy to reposition later.
If you are concerned about growing food in plastic, choose pipe rated for drinking water or use a food-safe liner. As with gutters, the soil volume is small, so plan on frequent watering.
10. Clip Rail Planters Onto a Balcony for Greens and Peppers
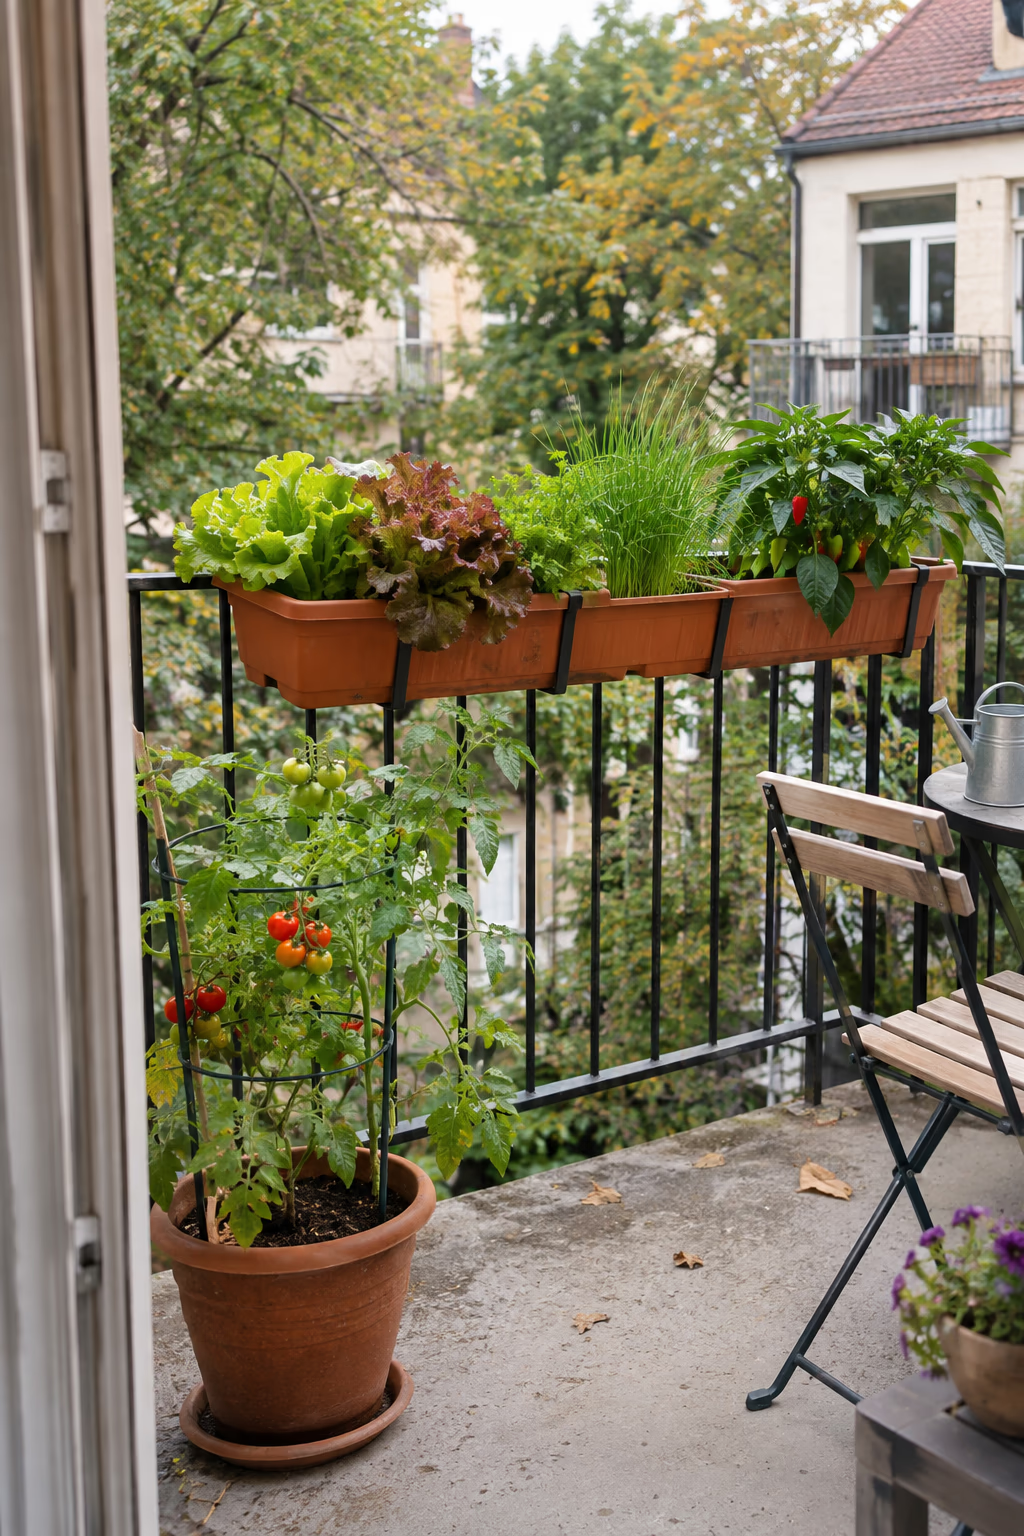
A kitchen garden for apartment dwellers
Hang adjustable railing planters, about 24 to 30 inches long, on the inside of a balcony or deck railing. Stagger them at two heights if the rail allows. Plant compact peppers, bush beans, leaf lettuce, chives, or dwarf kale, and set a deep pot on the floor below for a patio tomato.
Rail planters take up almost no floor space, so the balcony can still hold a chair or bistro set. They also get the best light on the balcony, since they sit right at the edge.
Check building rules and HOA guidelines first, since many prohibit planters on the outer side of railings. Use saucers or trays so runoff does not drip onto a neighbor below, and remember that wind dries balcony containers quickly.
11. Turn a Shoe Organizer Into a Lettuce Wall
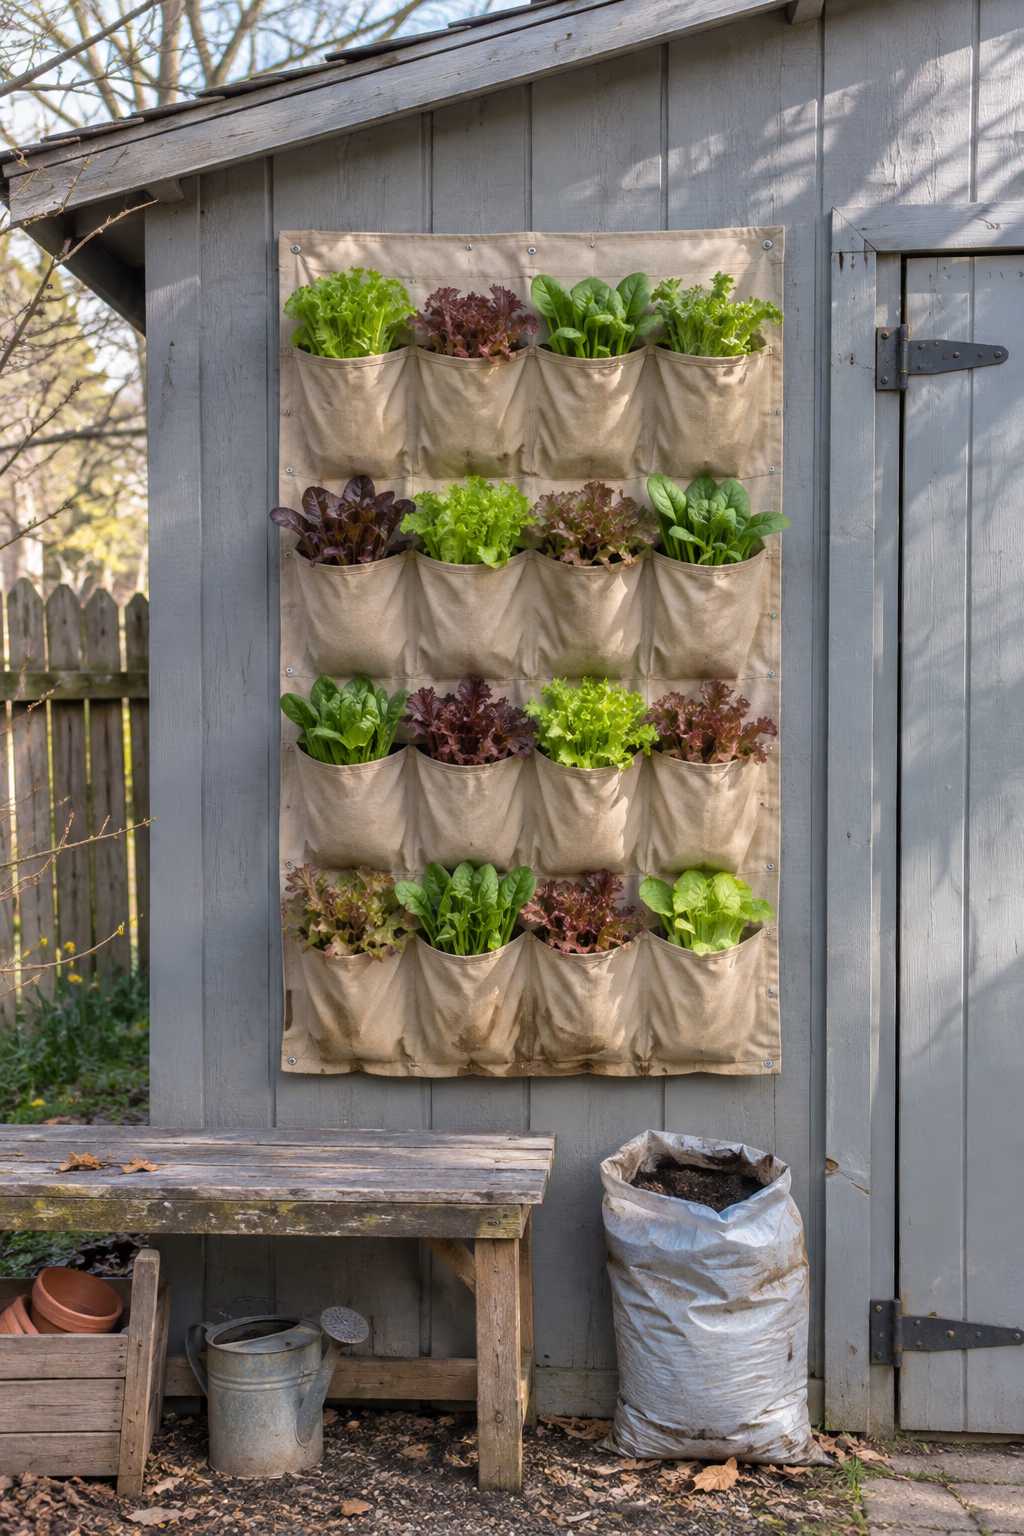
The cheapest vertical garden you can make
Hang a canvas or heavy fabric over-the-door shoe organizer with 12 to 24 pockets on a sunny fence or shed wall using screws and washers. Poke a small drainage hole in each pocket if it does not drain, fill with potting mix, and plant one lettuce, spinach, or green onion plant per pocket.
For very little money, you get a full wall of greens that is easy to set up in an afternoon. It is a great beginner project and an easy way to see whether vertical growing suits your routine.
Avoid clear plastic organizers, which can overheat roots in the sun. Water slowly from the top so it filters down through the rows, and expect the fabric to last a season or two before it needs replacing.
12. Train Zucchini Up a Single Sturdy Stake
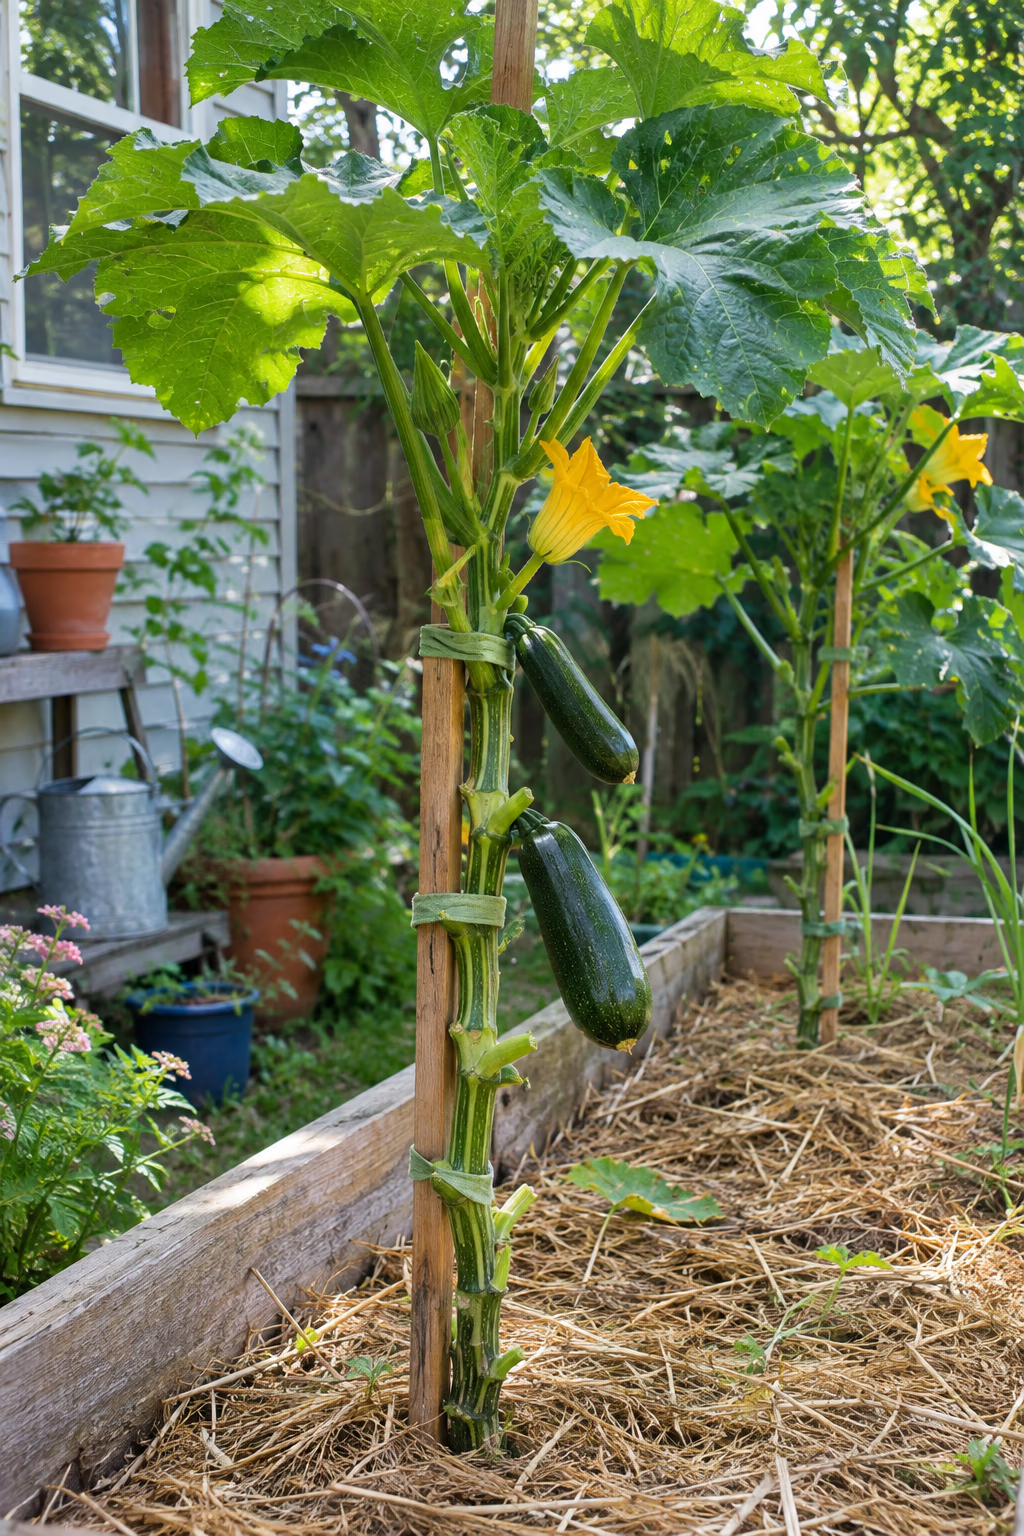
A sprawling plant tamed into a column
Drive a 6-foot wooden stake or metal T-post next to each young zucchini plant. As the main stem lengthens, tie it loosely to the stake every 8 to 12 inches with soft garden ties, and remove the oldest lower leaves once they yellow or get in the way.
A staked zucchini takes up a fraction of the space of one left to sprawl, and better airflow can slow powdery mildew. The fruits are also easier to see, so fewer turn into baseball bats.
Use a stake that is truly sturdy, because a mature plant is heavy and top-heavy. Wear gloves when handling it, since the stems and leaves have prickly hairs, and avoid removing too many leaves at once.
13. Cradle Melons in Mesh Slings on a Strong Frame
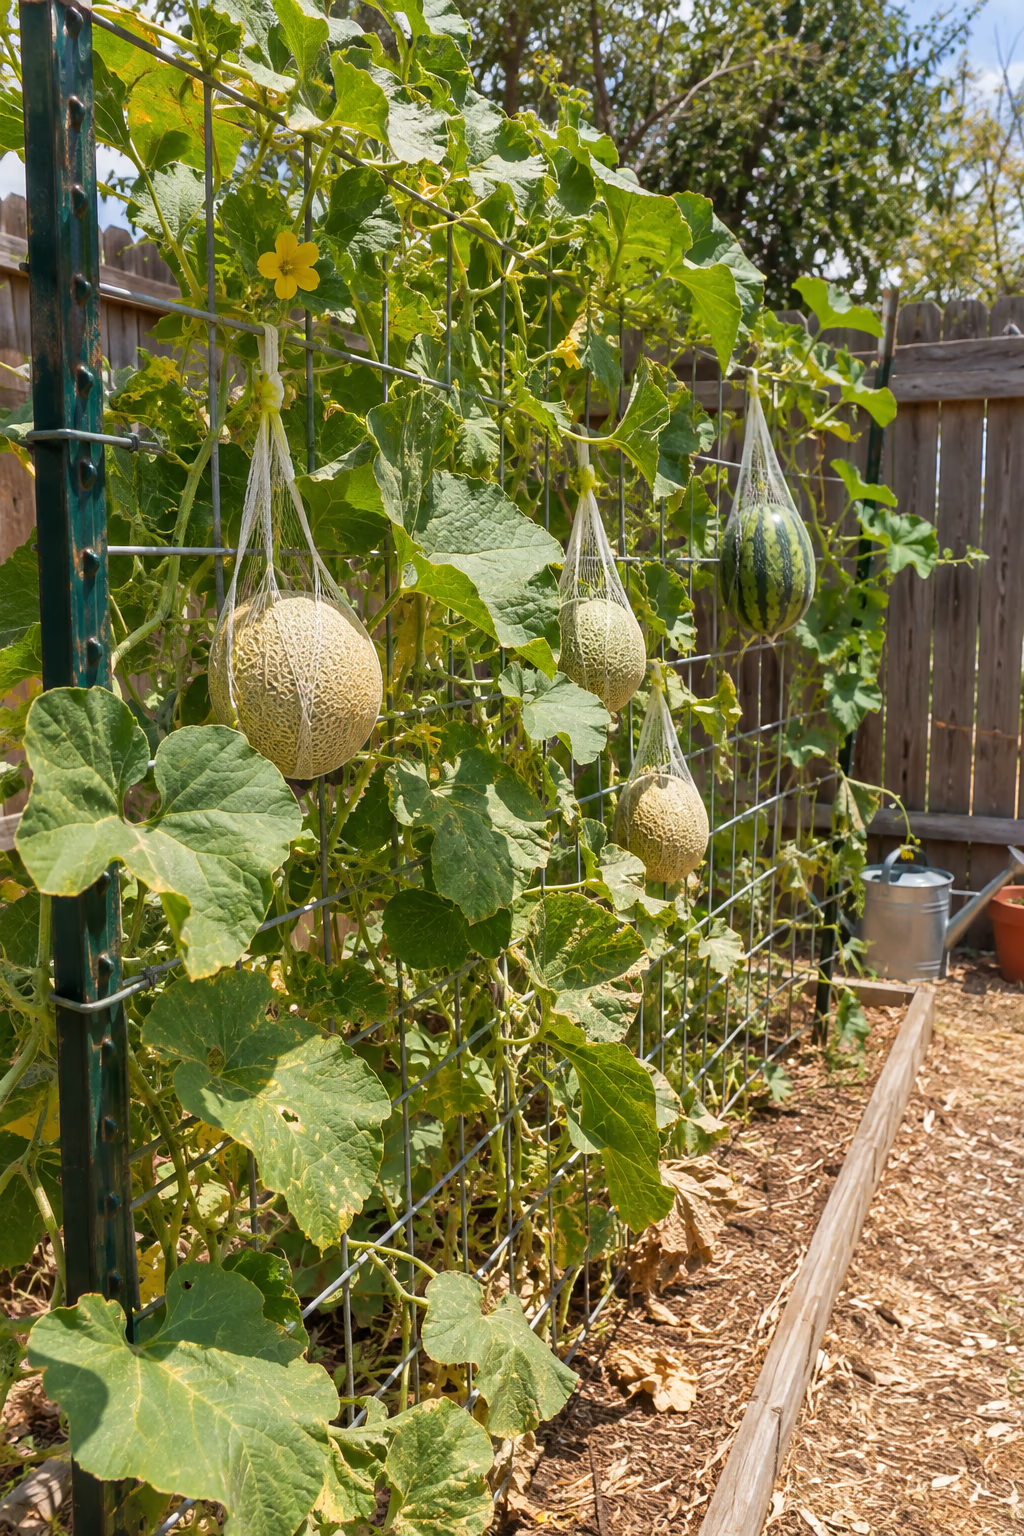
Full-size flavor from a small footprint
Grow small-fruited melons such as personal-size watermelon, cantaloupe, or honeydew up a heavy-duty frame of wire panel attached to strong wooden or metal posts. Once a fruit reaches the size of a tennis ball, cradle it in a sling made from mesh produce bags, old T-shirts, or nylon stockings tied to the frame.
Slings support the weight of each fruit so it does not tear off the vine, and fruit held off the ground avoids rot and soil-dwelling pests. A wall of climbing melons is also a real conversation piece.
Stick to varieties that stay under about 5 pounds, and expect only a few fruit per vine. Melons need heat, full sun, and steady water until the fruit is nearly ripe.
14. Build a Bamboo Teepee for Pole Beans
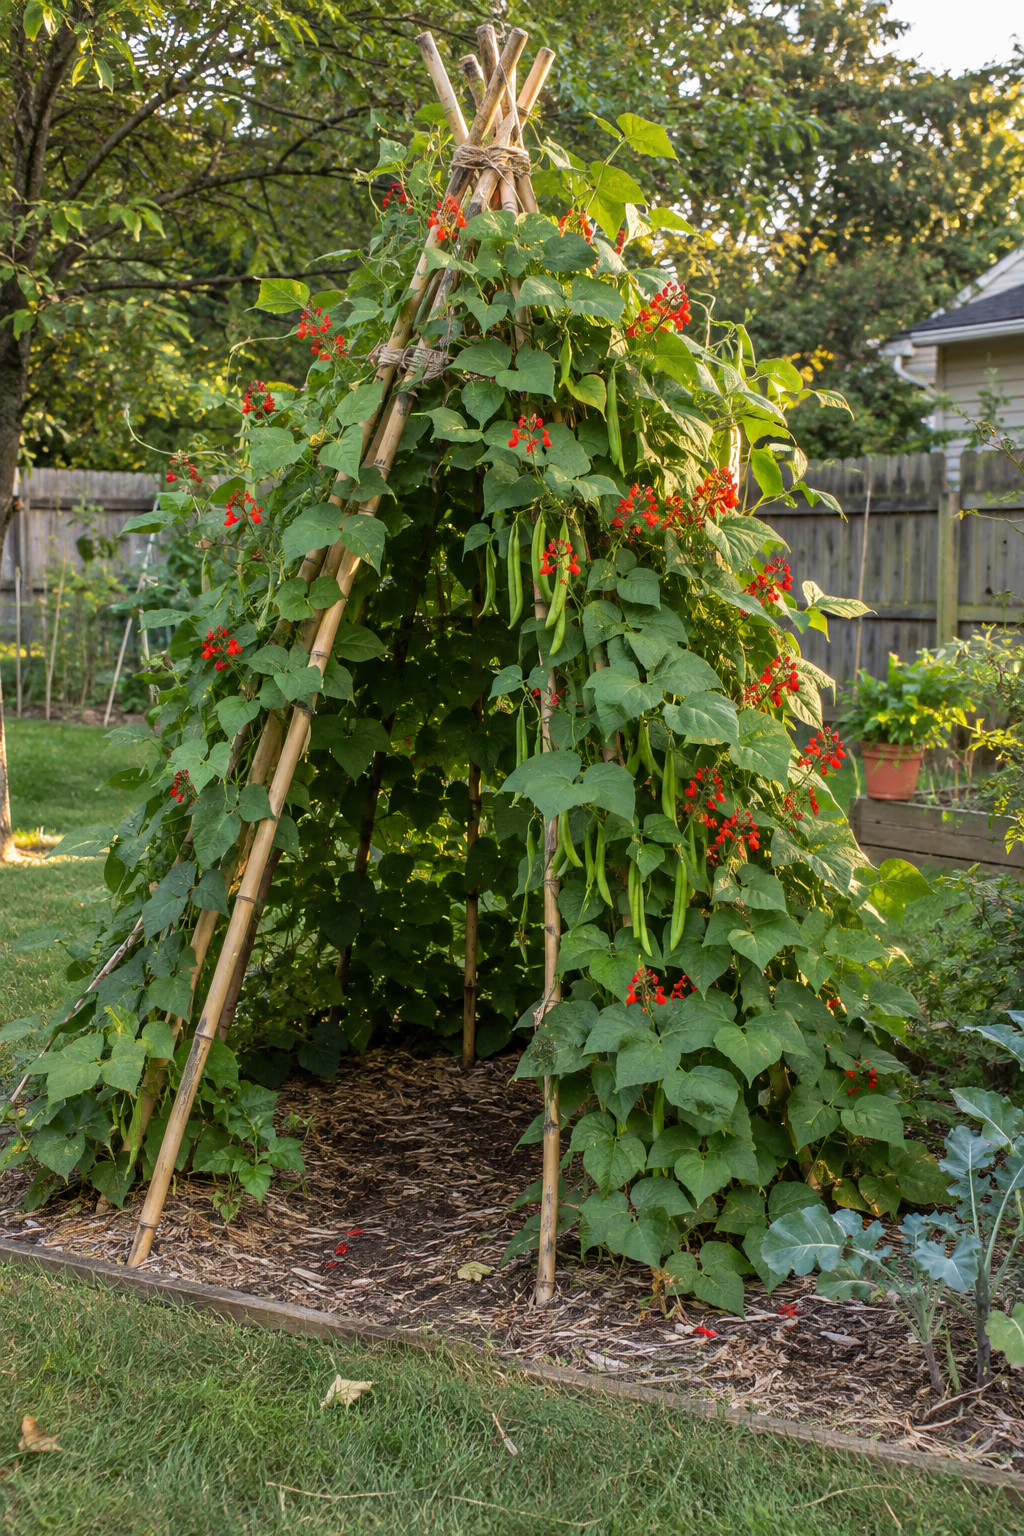
A classic climber with a playful shape
Push six to eight 7- or 8-foot bamboo poles into the soil in a 3- to 4-foot circle and tie them together at the top with twine. Sow two or three pole bean seeds at the base of each pole once the soil has warmed, and the vines will twine their way up without much help.
Pole beans keep producing for weeks when picked often, and a teepee packs a lot of plants into a small circle. Scarlet runner beans add red flowers that attract hummingbirds and pollinators.
Leave one side open if you want a shady hideout for kids. Push the poles in at least 12 inches deep, because a fully loaded teepee catches a lot of wind.
15. Plant Strawberries in a Stacking Tower Pot
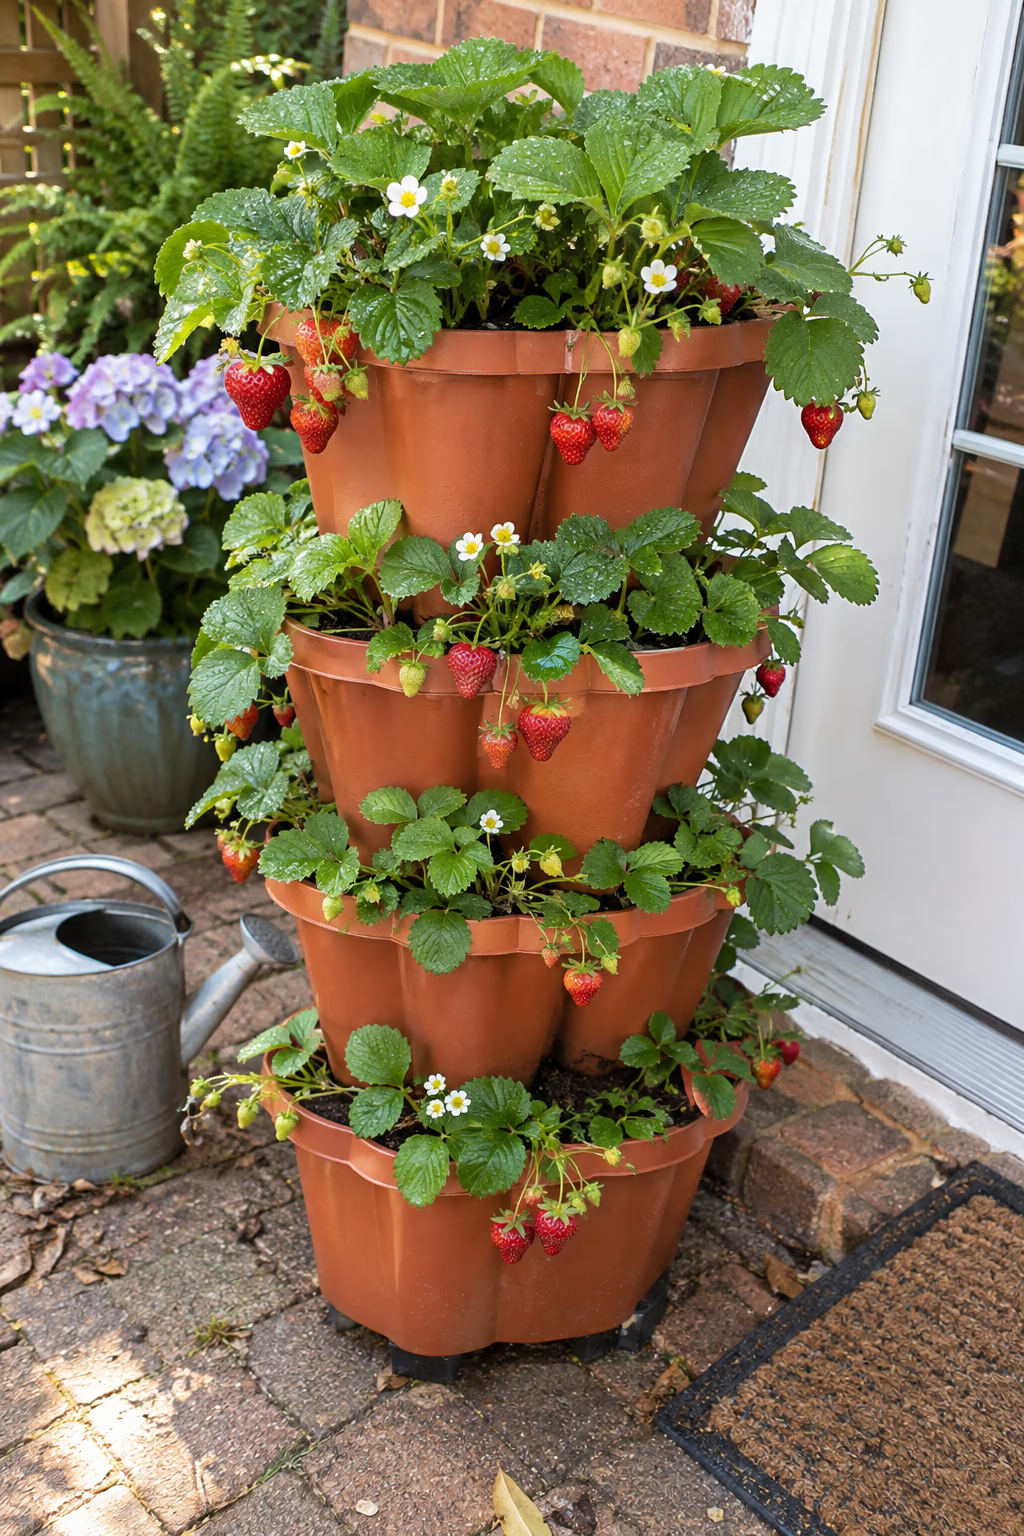
Sweet berries without a sprawling patch
Stack three to five interlocking planters into a tower, or use a tall terracotta or plastic strawberry jar with side pockets. Plant day-neutral or everbearing strawberries in each opening, and set the tower in full sun on a patio or beside the kitchen door.
The berries hang over the edges, where they stay clean and ripen evenly, and the tower takes up only about 2 square feet. It is easy to keep an eye on the harvest and pick before birds or slugs find the fruit.
Towers dry out from the top down. Water slowly until moisture reaches the bottom tier, and rotate the tower each week so every side gets light. Replace the plants every two or three years, when production drops.
16. Run Snap Peas Up Netting Between Two Posts
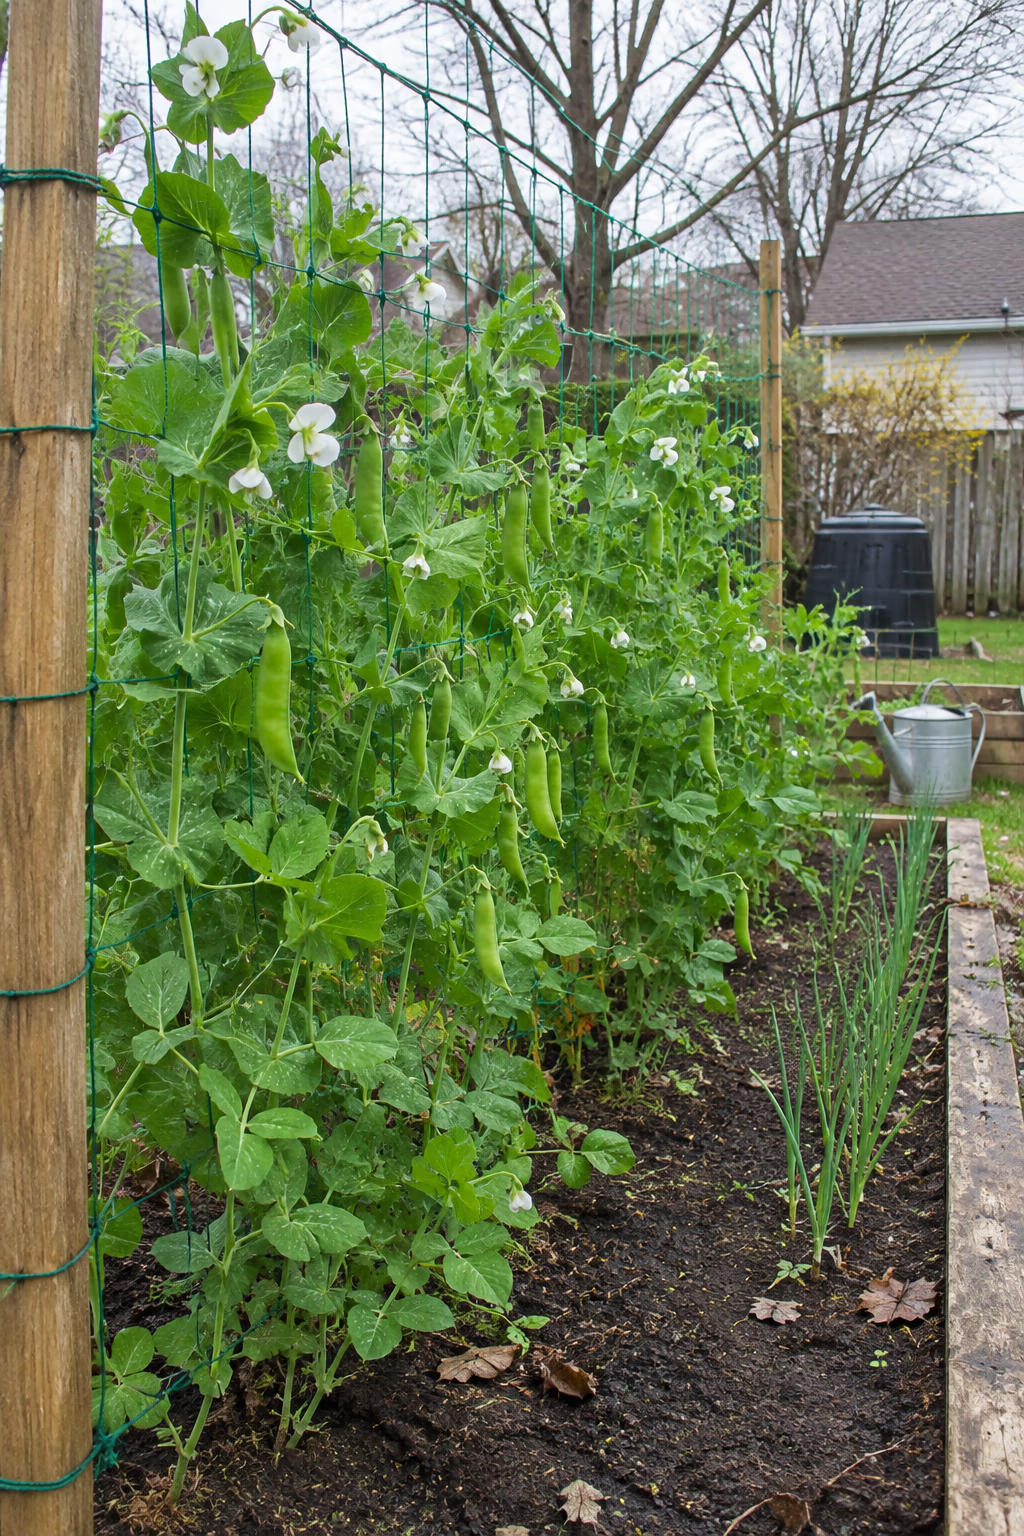
An easy early crop in cool spring weather
Set two sturdy posts or bamboo poles 6 to 8 feet apart along the edge of a bed and stretch plastic or jute trellis netting, 5 to 6 feet tall, between them. Sow sugar snap or snow peas along both sides of the netting in early spring, as soon as the soil can be worked.
Peas cling to netting with their tendrils, so there is no tying required. A single row gives you a green screen covered in white or purple blossoms and sweet pods that are easy to pick from both sides.
Peas fade in hot weather, so get them in early. Once they finish, use the same netting for cucumbers or pole beans in summer, or sow another round of peas in late summer for a fall crop.
17. Hang Recycled Soda Bottles for Baby Greens
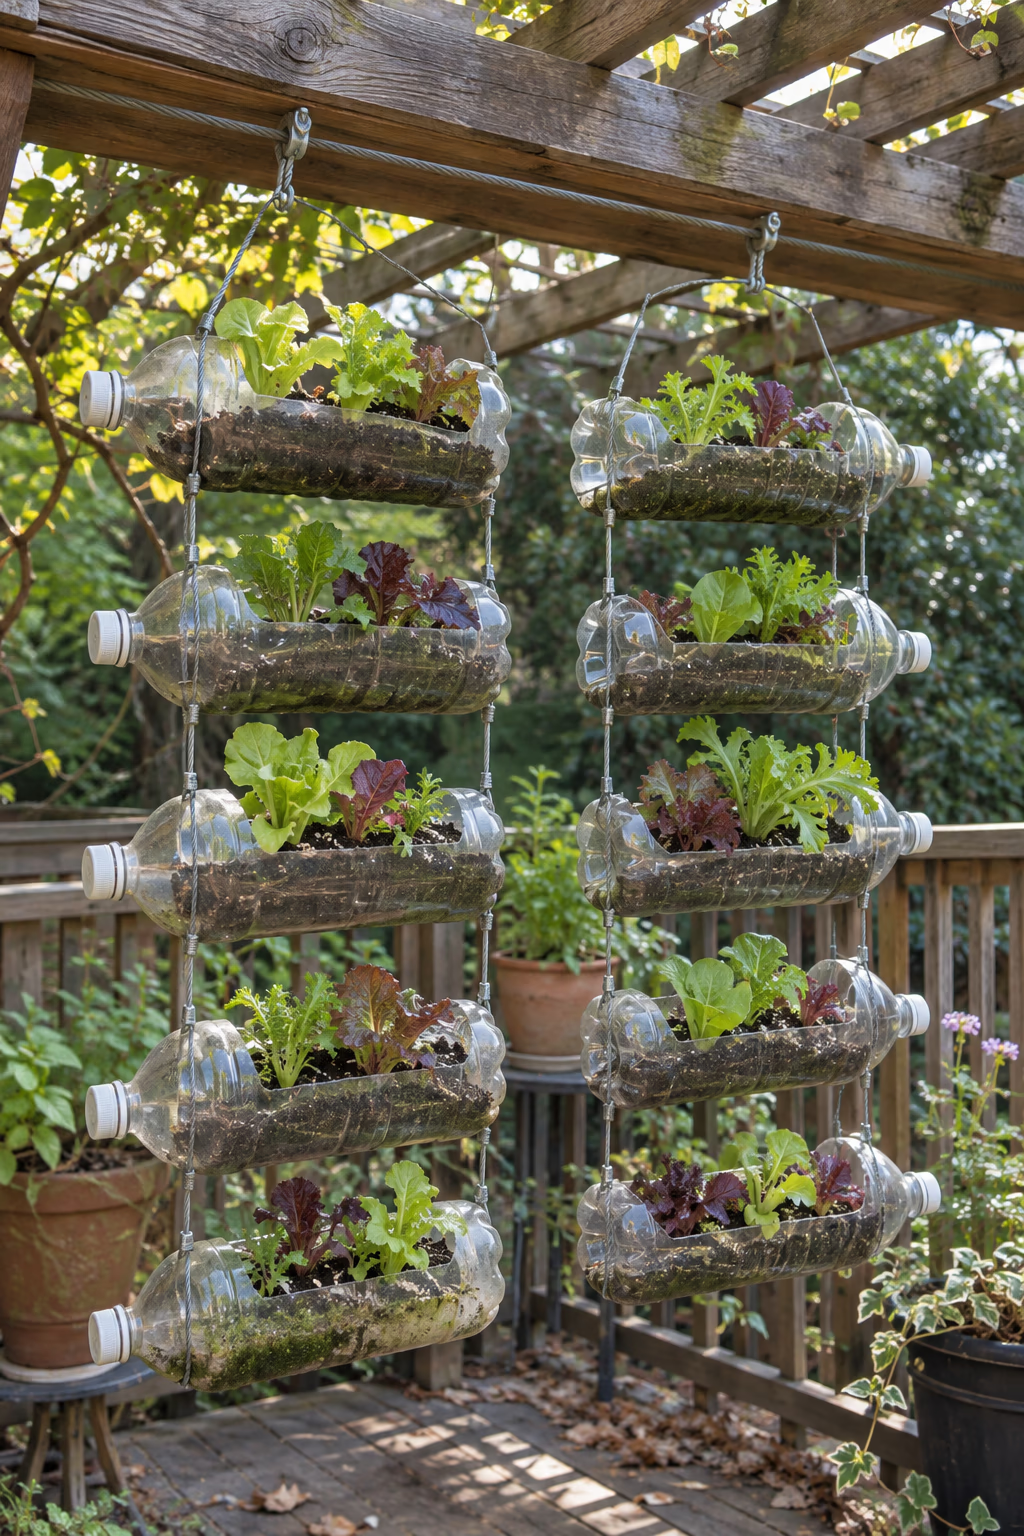
Upcycled planters that water themselves in sequence
Cut a rectangular opening in the side of clean 2-liter bottles, poke small drainage holes on the bottom side, and thread them horizontally onto two lengths of wire rope or strong cord. Hang the strings from a pergola or porch beam so the bottles stack about 8 inches apart, and plant them with loose-leaf lettuce, mesclun, or spinach.
The project costs almost nothing and is a fun way to reuse plastic. Water drips from each bottle into the one below, so a single watering at the top moistens the whole stack.
Clear bottles can heat up and grow algae, so hang them where they get morning sun and some afternoon shade, or paint the outside with exterior spray paint. Expect to replace them after a season or two as the plastic breaks down.
18. Start Seedlings on a Covered Mini Greenhouse Shelf
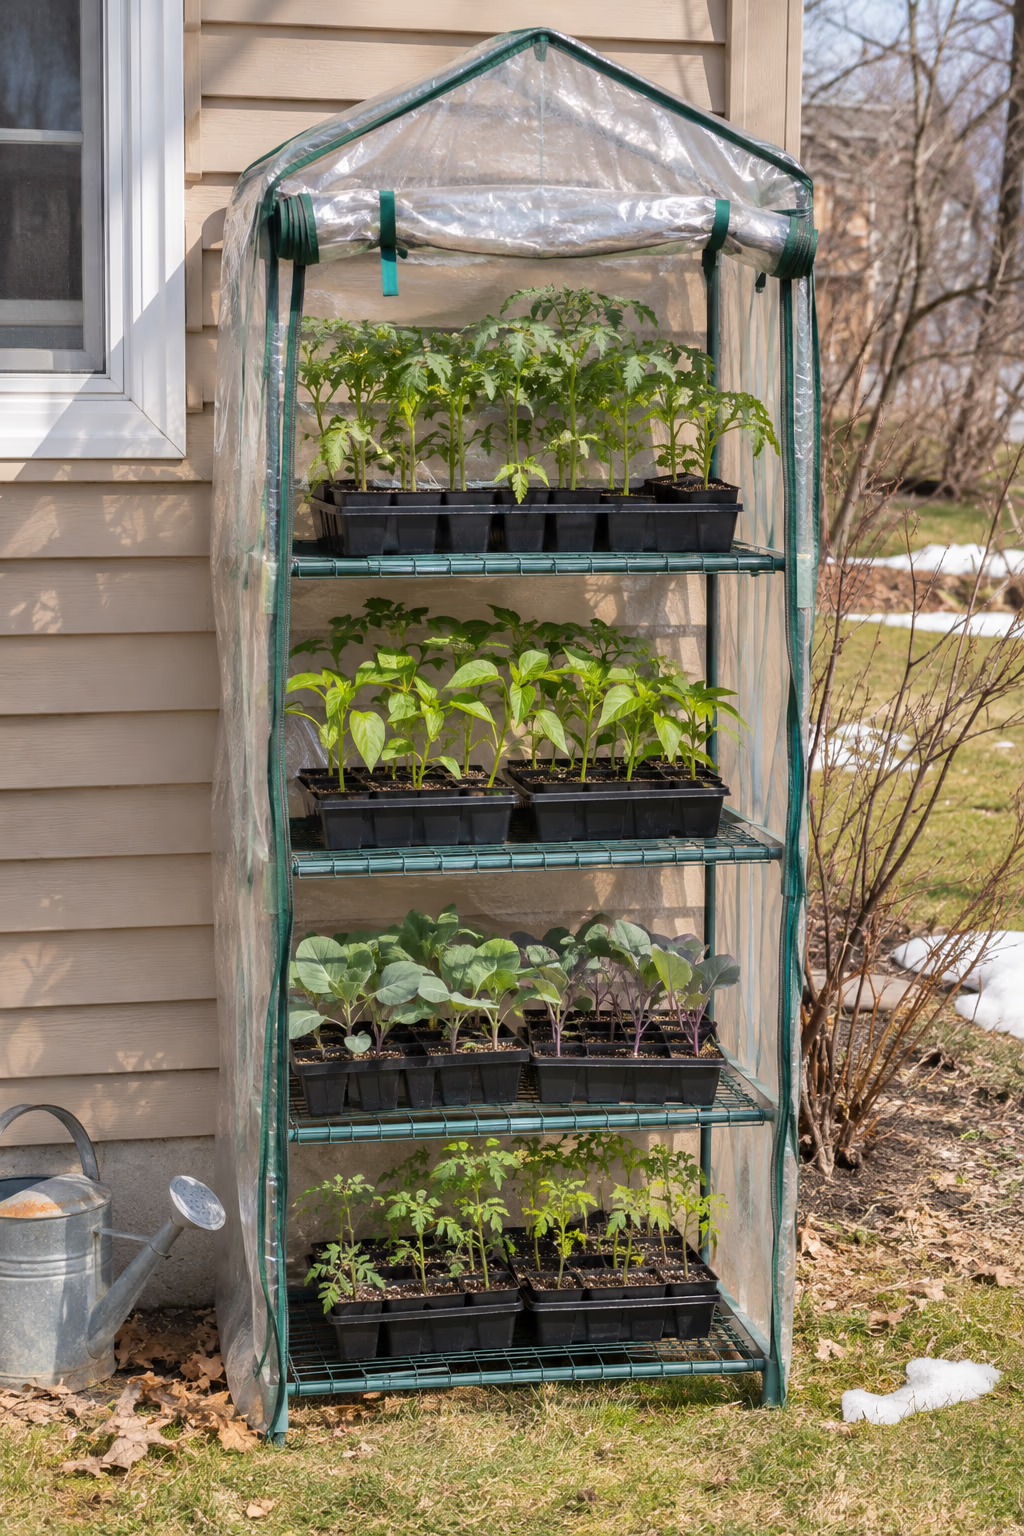
A head start on the season in a narrow spot
A four-tier steel shelf with a zippered clear cover fits against a sunny south-facing wall and needs only about 2 by 2 feet of space. Use it in spring to start tomatoes, peppers, squash, and brassicas in trays, then use it again in fall for lettuce and spinach transplants.
The cover traps daytime warmth and protects young plants from wind and light frost, giving you a few extra weeks at each end of the season. The tall, narrow frame holds dozens of trays in very little space.
Open the zipper on sunny days, because temperatures inside can climb fast and cook seedlings. Anchor the frame to the wall or weigh down the bottom shelf, since these lightweight shelves can blow over in a storm.
19. Grow Microgreens on an Indoor Shelf Under Grow Lights
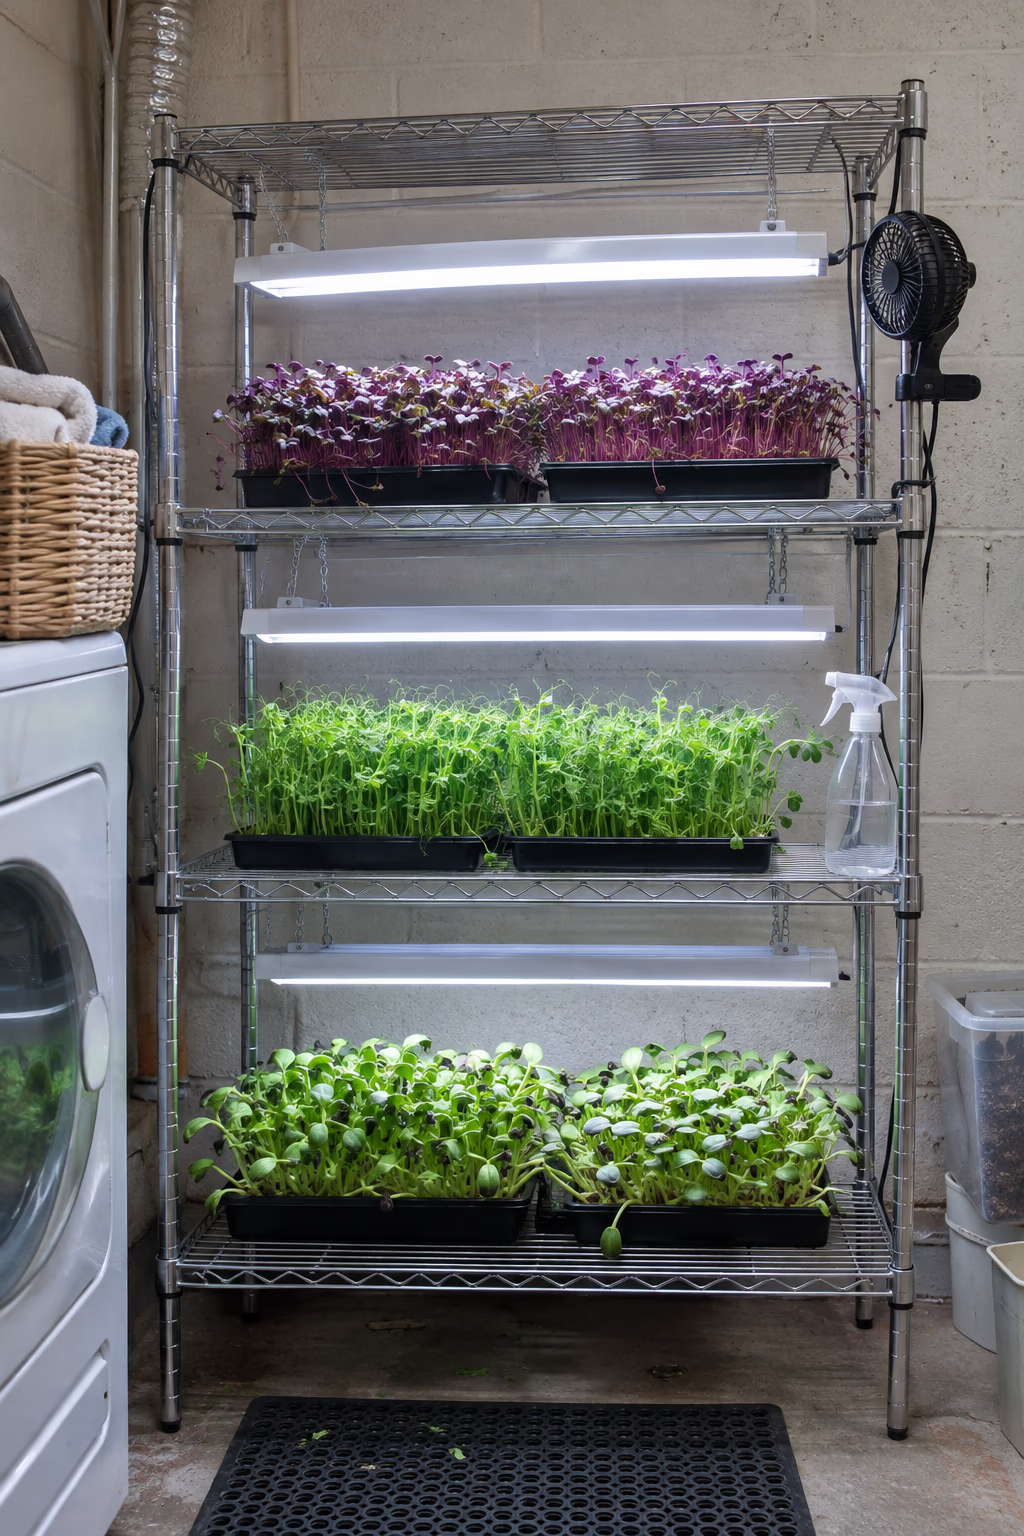
Fresh harvests in the middle of winter
Set up a wire shelving unit in a spare corner, basement, or laundry room and hang an LED grow light or shop light over each shelf, about 2 to 4 inches above the trays. Sow shallow trays densely with radish, broccoli, pea shoots, sunflower, or mustard seeds.
Most microgreens are ready to cut in 7 to 21 days, so you get a steady supply of nutritious greens year-round. Stacking trays on three or four levels turns a few square feet into a small indoor farm.
Put the lights on a timer for 12 to 16 hours a day, and keep a small fan running to help prevent mold on densely sown trays. Use a waterproof tray or mat under the shelf to protect the floor.
20. Bolt Cedar Planter Boxes to a Sunny Garage Wall
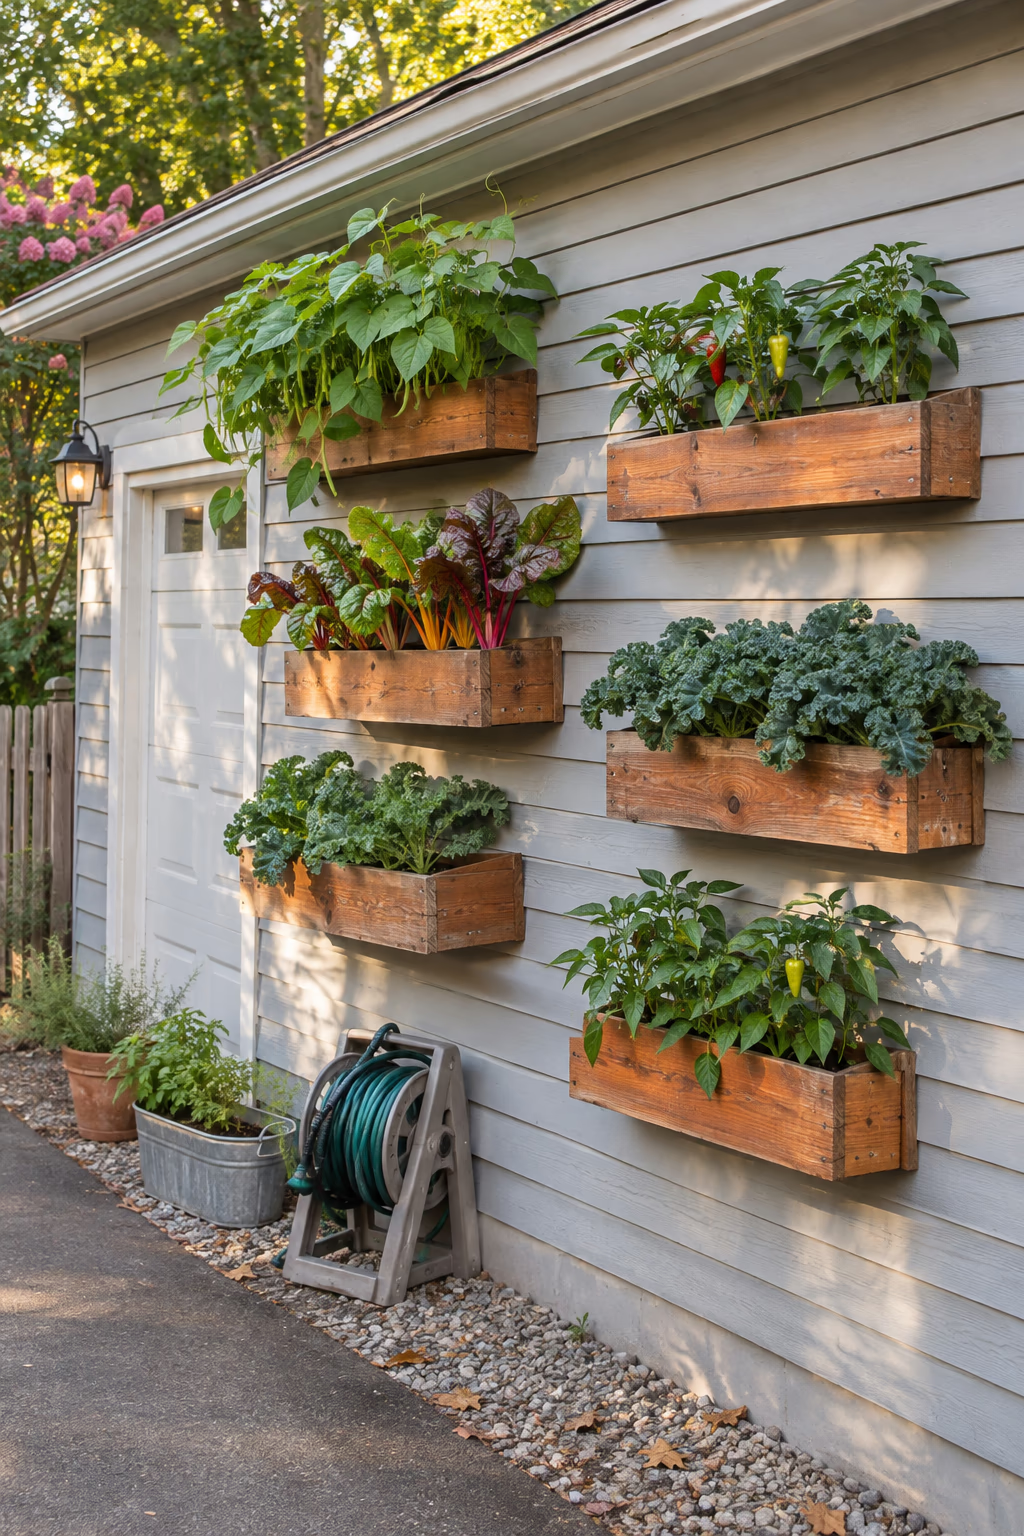
Turn blank siding into a productive wall
Build or buy cedar planter boxes about 30 inches long, 8 inches wide, and 8 inches deep, and mount them in a staggered pattern on a south- or west-facing garage wall. Screw them into wall studs or a mounting board, using spacers to leave an air gap. Plant bush beans, compact peppers, chard, or kale.
The warm wood softens a plain wall, and the deeper boxes hold more soil than gutters or pipes, so they can support bigger crops and need watering less often. The wall also reflects heat, which warm-season vegetables appreciate.
A wet box filled with soil is heavy, so use exterior structural screws into solid framing, never just siding. Line the back of each box or keep the gap so moisture does not stain or rot the wall.
21. Let Malabar Spinach Climb a Porch Post
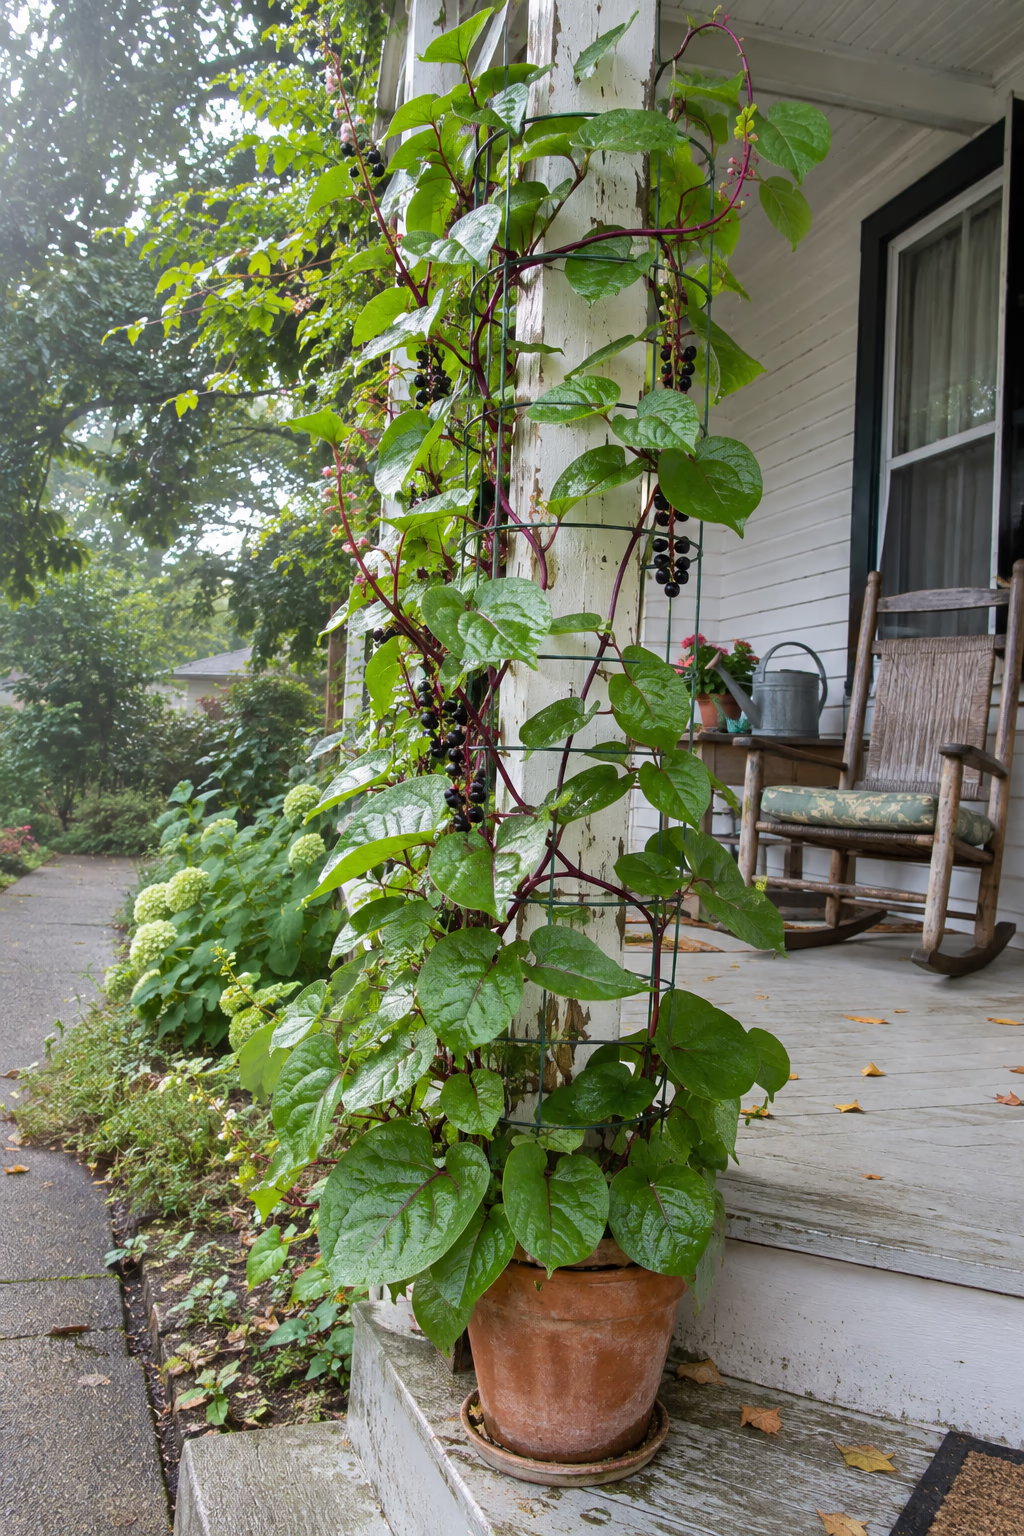
A heat-loving green that grows when lettuce quits
Malabar spinach is a fast-climbing vine with glossy, thick leaves and red stems in some varieties. Plant it at the base of a porch post, railing, or simple wire trellis after the weather warms, and it can climb 6 feet or more by late summer.
Unlike true spinach, it loves heat and humidity, so it fills the gap in midsummer when cool-season greens bolt. The leaves can be eaten raw or cooked, and the shiny vines look attractive enough for a front porch.
It is frost-tender and grows slowly in cool weather, so wait until nights stay above about 50 degrees. In mild climates it can reseed itself readily, so pick off the dark berries if you do not want volunteers next year.
22. Plant a Three Sisters Patch With Corn as Bean Poles
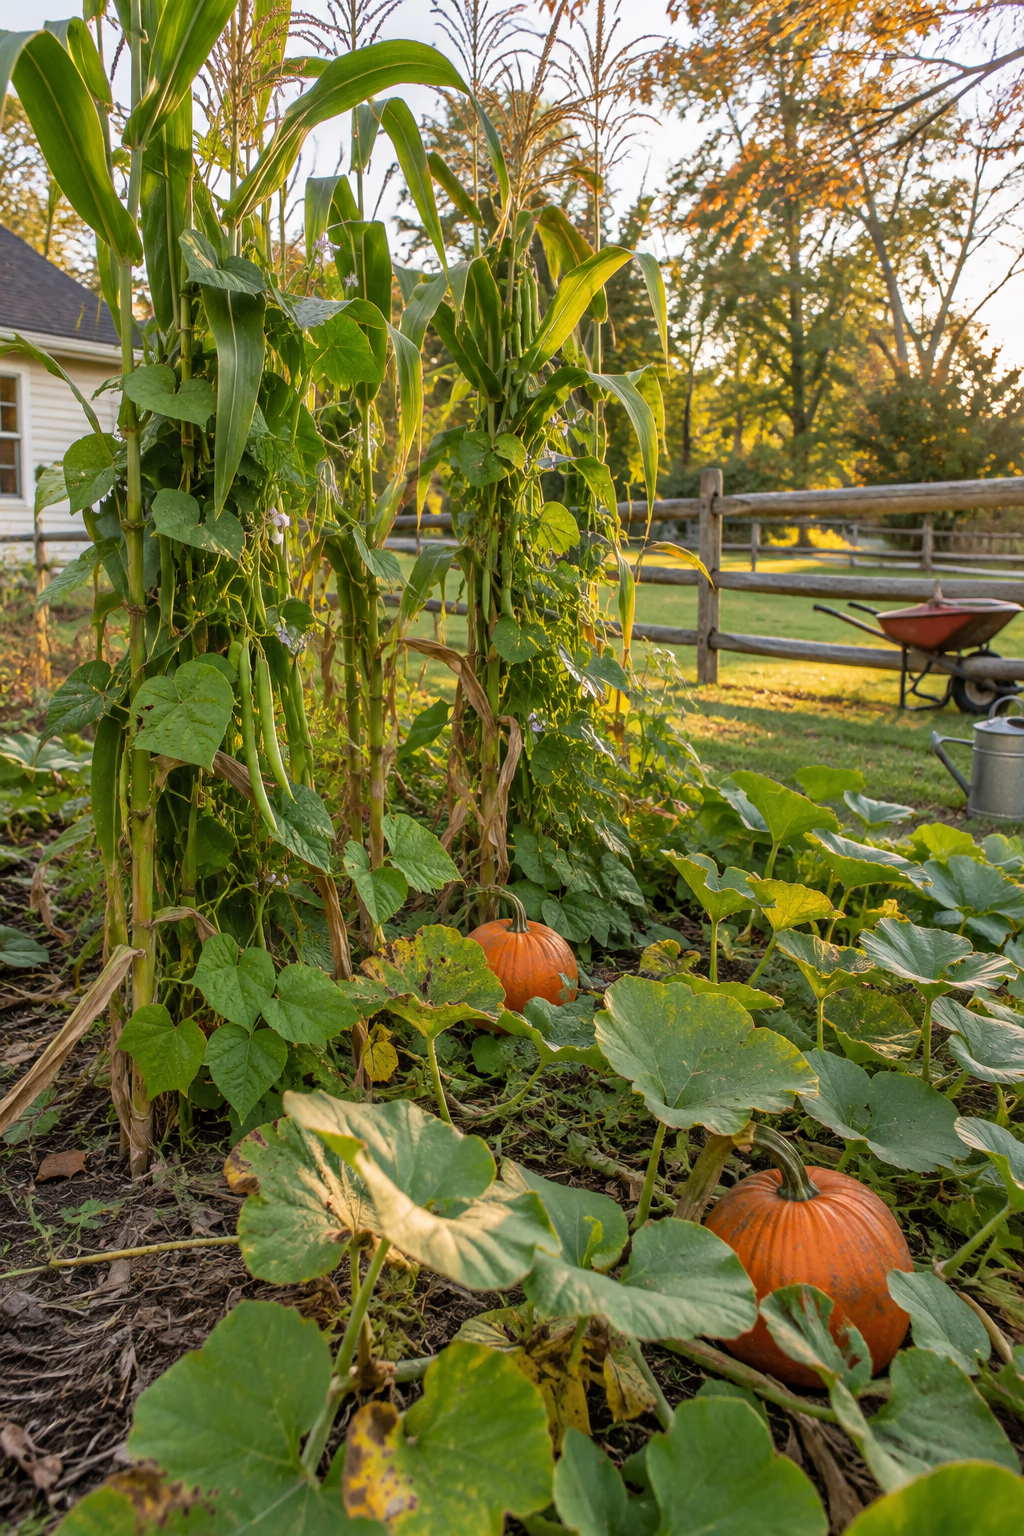
A traditional living trellis
The three sisters method, practiced by Indigenous farmers for centuries, plants corn, pole beans, and squash together. Sow corn in small mounds or blocks first, add pole beans around each stalk once the corn is about 6 inches tall, and plant squash or pumpkins between the mounds to shade the soil.
The corn becomes a natural support for the beans, the beans add nitrogen to the soil, and the squash leaves help hold in moisture and suppress weeds. It is a vertical garden with no structure to build.
Plant corn in a block of at least four short rows rather than a single line, since it is wind-pollinated. Choose sturdy field or flour corn, or tall sweet corn, and keep beans in check so they do not pull stalks over.
23. Turn a Metal Baker’s Rack Into a Patio Veggie Stand
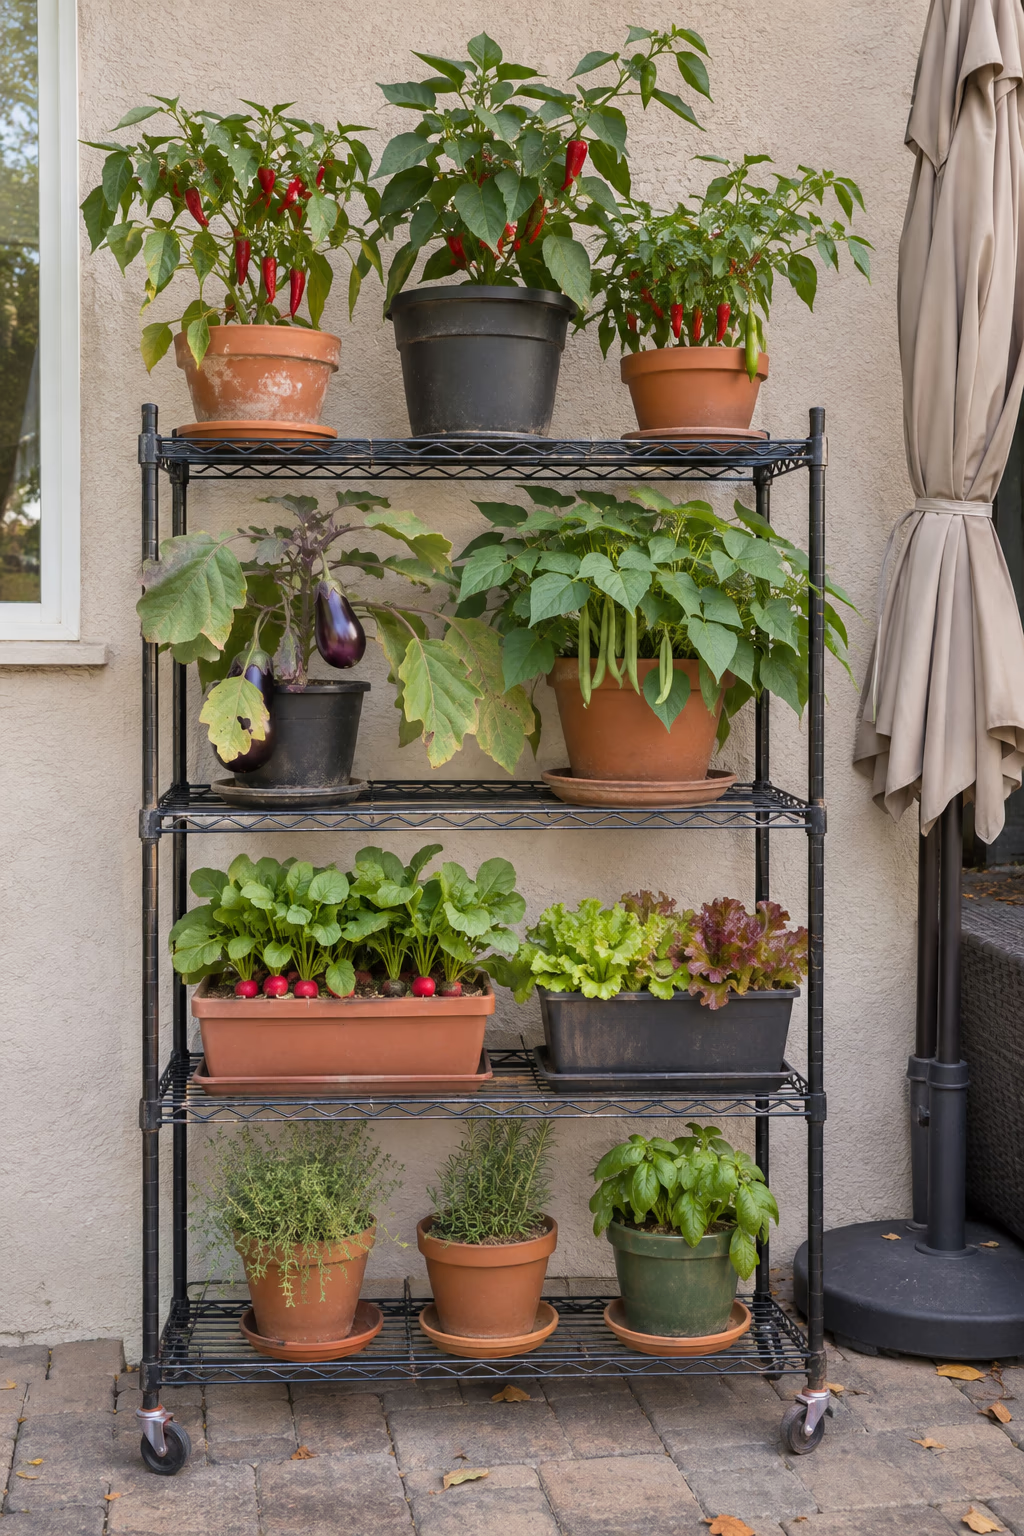
Movable shelves that follow the sun
Use a sturdy metal baker’s rack or wire shelving unit with three or four shelves and caster wheels. Line it with pots of compact crops such as patio peppers, dwarf eggplant, bush beans, radishes, and leaf lettuce, putting sun lovers on the top shelf and greens lower down.
A rack turns a corner of the patio into a neat display of edible plants, and the wheels let you roll it into sun, shade, or shelter as the weather changes. It is also a good fit for renters who cannot attach anything to walls.
Lower shelves get less light, so keep the rack in a spot with full sun and swap the pots around occasionally. Set saucers under every pot so water does not drip onto the plants below.
How to Plan Your Vertical Vegetable Garden
Growing up instead of out can multiply what a small space produces, but vertical gardens need a little more planning for weight, sun, and water than ground-level beds. Keep these tips in mind before you build.
- Follow the sun. Most fruiting vegetables need 6 to 8 hours of direct sun. Put tall structures on the north side of a bed so they do not shade shorter crops.
- Match crops to soil depth. Shallow gutters, pipes, and pockets suit greens, radishes, and strawberries. Save deeper boxes, towers, and ground beds for tomatoes, peppers, and squash.
- Plan for weight and wind. Wet soil and loaded vines are heavy. Anchor structures to studs, posts, or deep stakes, and check that balconies and railings can handle the load.
- Make watering easy. Small vertical containers dry out quickly. Group them near a hose, add a simple drip line with a timer, or choose systems that drain from top to bottom.
- Feed regularly. Frequent watering flushes nutrients from potting mix. Use a slow-release fertilizer at planting and a liquid feed every two to three weeks in summer.
- Check the rules. Renters, condo owners, and homeowners with an HOA should confirm what can be attached to walls, fences, and railings before drilling.
Frequently Asked Questions
Which vegetables grow best vertically?
Vining crops such as pole beans, peas, cucumbers, indeterminate tomatoes, small melons, and Malabar spinach are natural climbers. Leafy greens, green onions, radishes, and strawberries work well in shallow wall planters, gutters, and towers.
Can I grow a vertical vegetable garden in partial shade?
Yes, but stick to leafy crops. Lettuce, spinach, chard, kale, and many herbs tolerate 3 to 5 hours of sun. Tomatoes, peppers, cucumbers, and melons need full sun to produce well.
How often should I water vertical planters?
Small containers like gutters, pockets, and bottles may need water every day in hot weather, while deeper boxes and towers might go two or three days. Check the soil with your finger, and consider drip irrigation on a timer for larger setups.
Are vertical vegetable gardens expensive to set up?
They can cost almost nothing when made from recycled bottles, shoe organizers, or leftover fencing. Cedar boxes, metal frames, and hydroponic towers cost more, with complete hydroponic systems often running several hundred dollars.
Will a vertical garden damage my house or fence?
It can if moisture is trapped against the surface or the load is too heavy. Leave an air gap behind wall planters, fasten into solid framing, and keep watering runoff away from siding and foundations.
Final Thoughts
A vertical vegetable garden can turn a fence, wall, railing, or corner of the patio into a steady source of fresh food. Whether you start with a simple gutter of lettuce or a tall teepee of beans, growing upward makes the most of every square foot.
Begin with one or two projects that suit your light and schedule, learn how much watering they need, and then add more as you go. By next season, you may find that your best garden space was above ground level all along.