Imagine stepping out the back door on a summer morning to find tidy boxes full of lettuce, tomatoes, and marigolds. The soil is loose and dark, the paths are dry, and you can pick dinner without kneeling in the mud.
That’s why raised beds have become so popular. They warm up earlier in spring, drain better than heavy ground, and keep weeds and foot traffic in check. They also give a yard a neat, intentional structure, whether you build them from metal, wood, stone, or salvaged materials.
These 27 raised garden bed ideas cover trending materials, back-friendly heights, clever layouts for awkward spaces, season-extending covers, and budget builds that use what you already have. Pick one bed to start, or mix several to create a garden that fits your yard and the way you like to grow.
1. Build Corrugated Metal Beds With Cedar Trim
A farmhouse-modern look that lasts for years
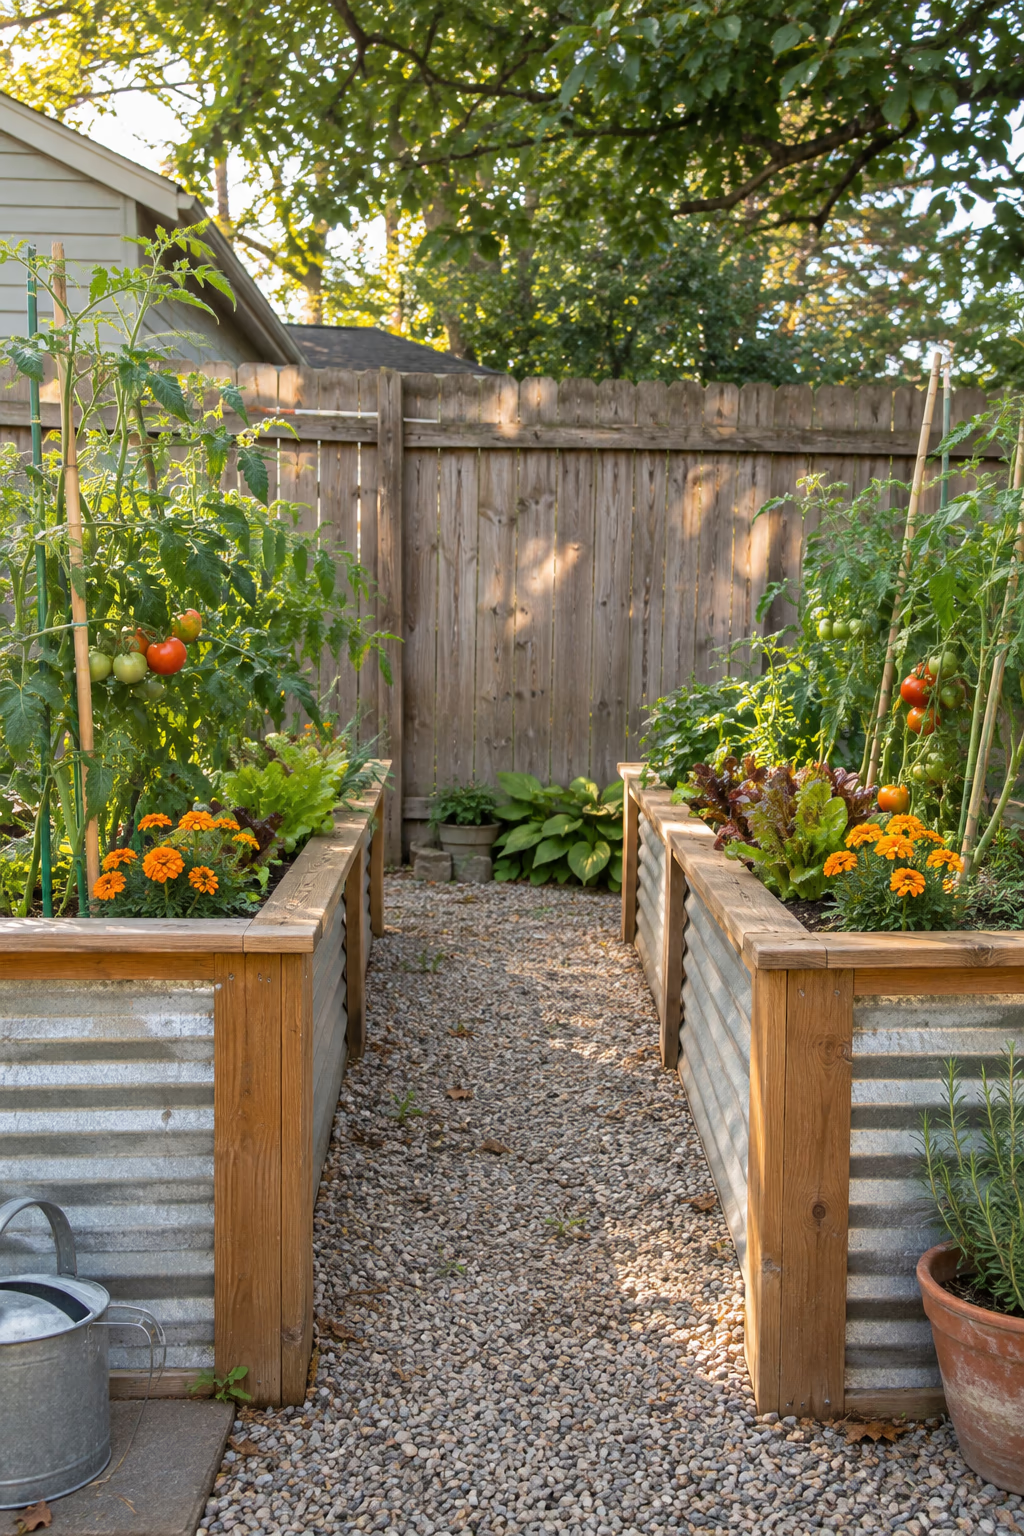
Corrugated galvanized steel panels set into a cedar frame make one of the most popular raised beds around. A common size is 4 by 8 feet and 18 to 24 inches tall, with 4×4 cedar corner posts, a few mid-span posts, and a flat 2×6 cedar cap screwed along the top edge.
The metal resists rot, holds its shape, and keeps the bed walls thin, so you get more growing room inside. The cedar cap hides sharp panel edges and gives you a place to rest tools or a coffee mug.
Metal sides heat up in full sun in hot climates, so keep the soil mulched and watered. Wear gloves when cutting panels, and file or cover every cut edge.
2. Cap Tall Cedar Beds With a Wide Sitting Ledge
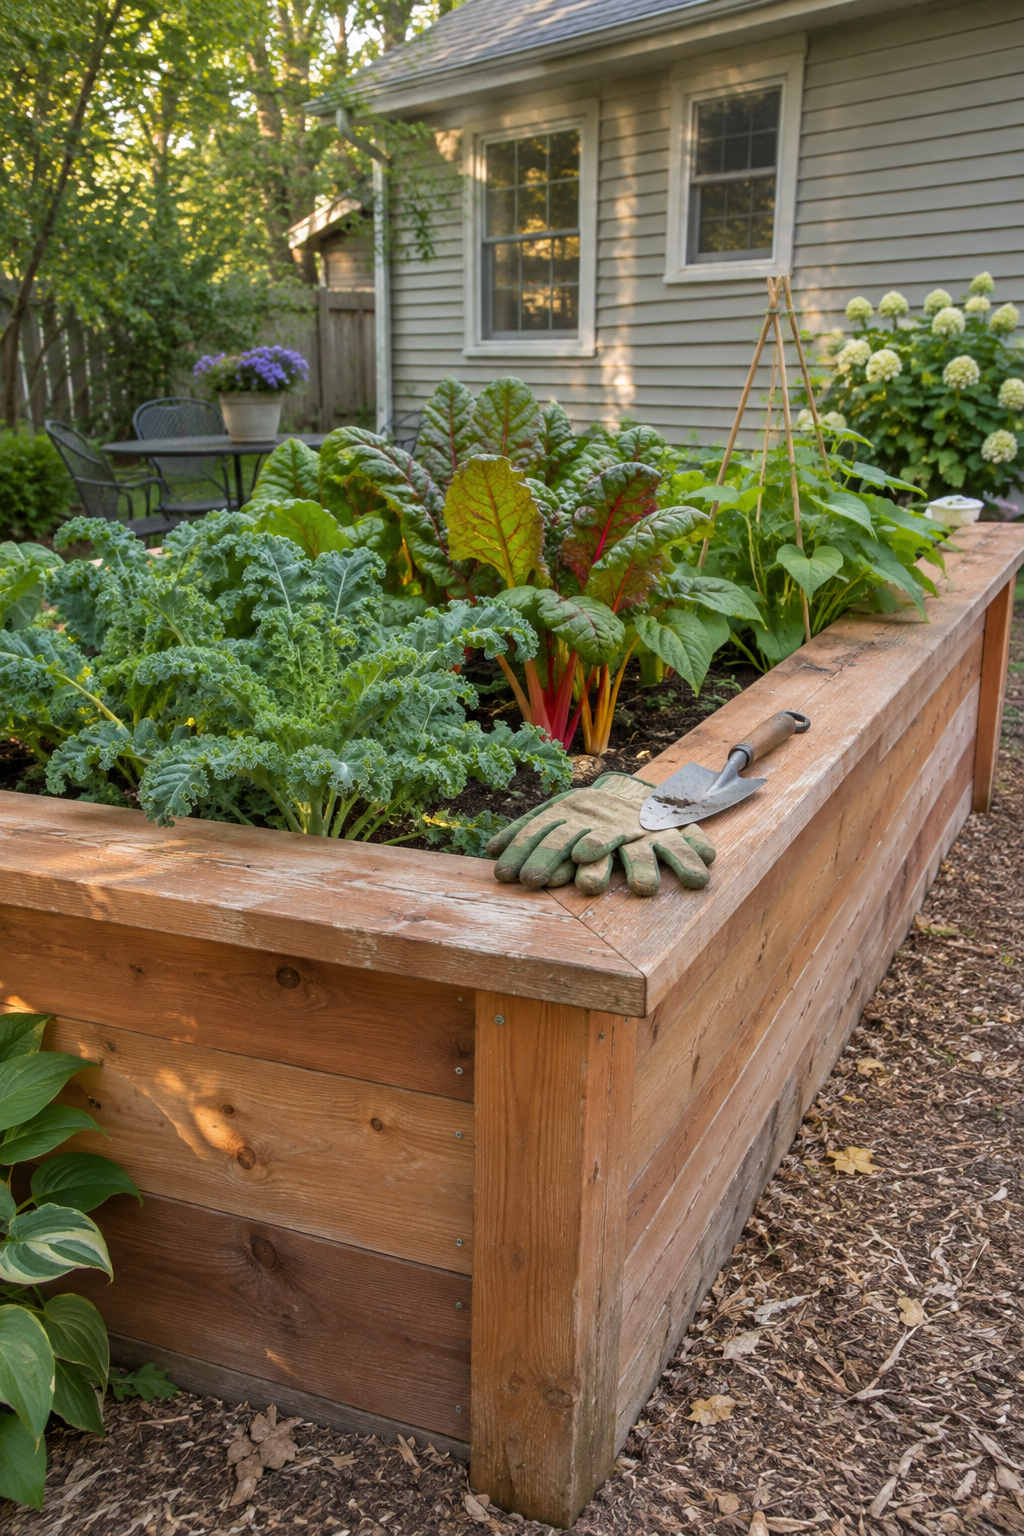
Garden comfortably from a built-in perch
Cedar is the classic raised bed wood because it naturally resists rot and insects. Build the walls 18 to 24 inches high from 2×6 or 2×8 boards, then add a 2×8 or 2×10 cap all around the top so it overhangs slightly on the outside.
That wide ledge turns the bed into seating. You can sit sideways to weed, plant seedlings, or harvest beans without bending, and the cap protects the end grain of the boards from water, which helps the bed last longer.
Use exterior screws and brace long sides with a cross tie at mid-span, since wet soil pushes outward hard. Expect untreated cedar to weather to silver-gray within a season or two.
3. Raise a Waist-High Planter on Sturdy Legs
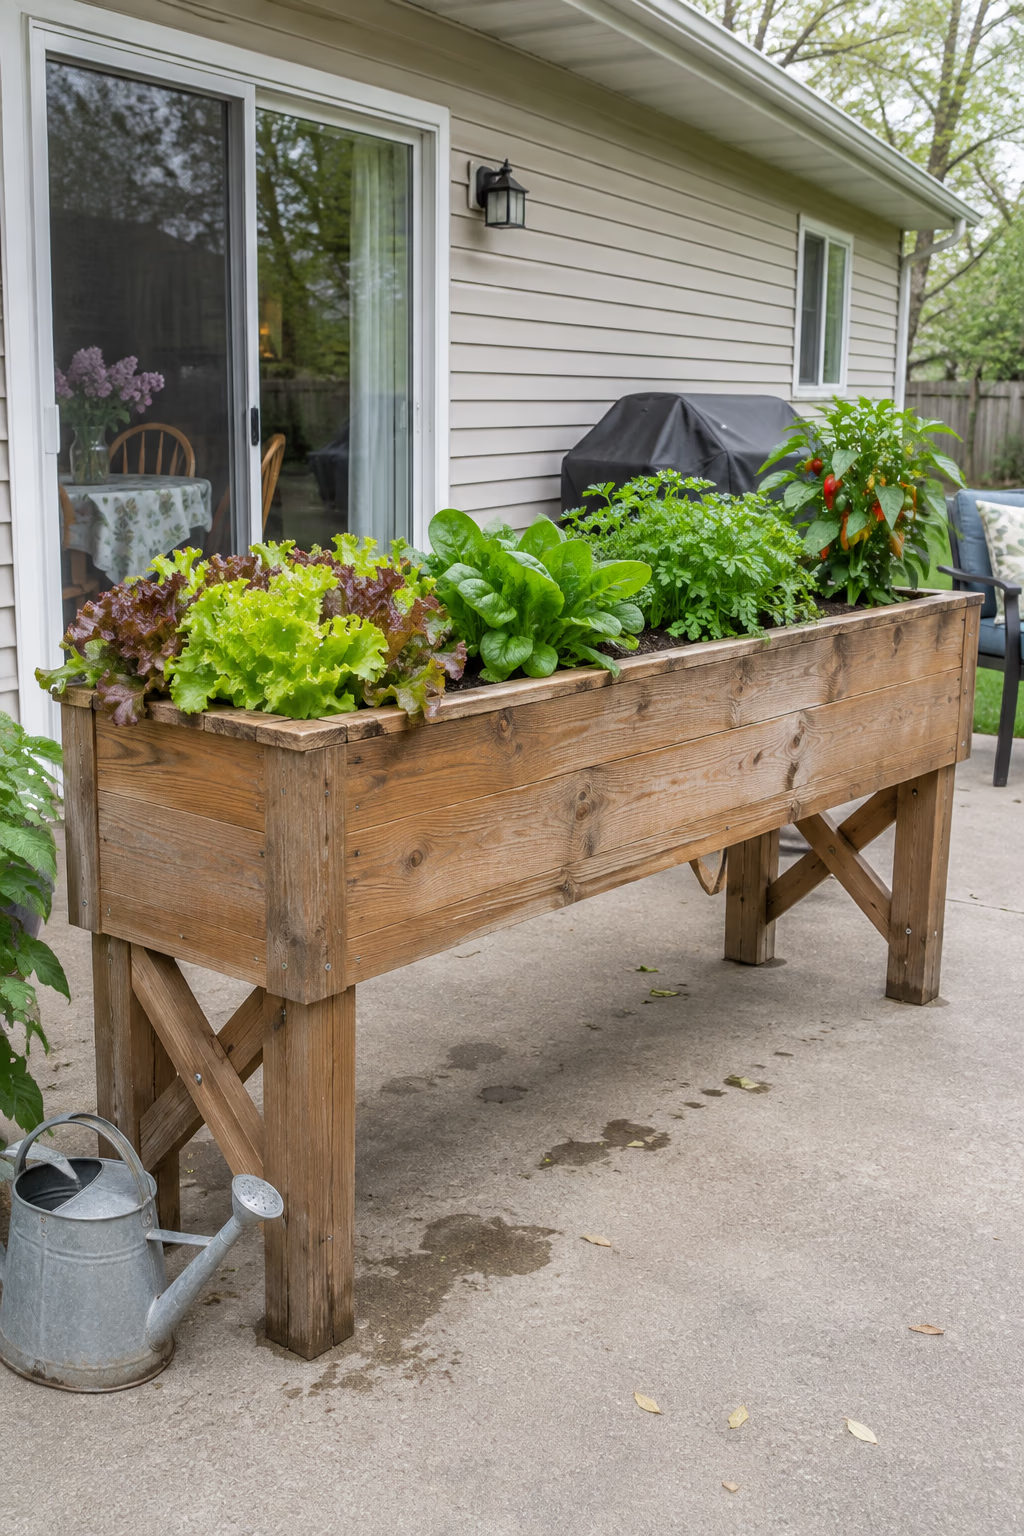
No bending, no kneeling, no back strain
An elevated planter on legs puts the soil surface around 30 to 36 inches high, close to kitchen counter height. A trough 2 by 6 feet with a soil depth of 8 to 12 inches is plenty for lettuce, spinach, radishes, herbs, and compact peppers.
It’s ideal for anyone with knee or back trouble, and it works on patios, decks, and concrete pads where in-ground beds aren’t possible. Pests like rabbits and slugs also have a harder time reaching the plants.
Wet soil is heavy, so use thick legs, cross bracing, and a slatted or mesh bottom lined with landscape fabric for drainage. Shallow soil dries quickly, so check moisture daily in summer.
4. Paint Wooden Beds a Bold, Cheerful Color
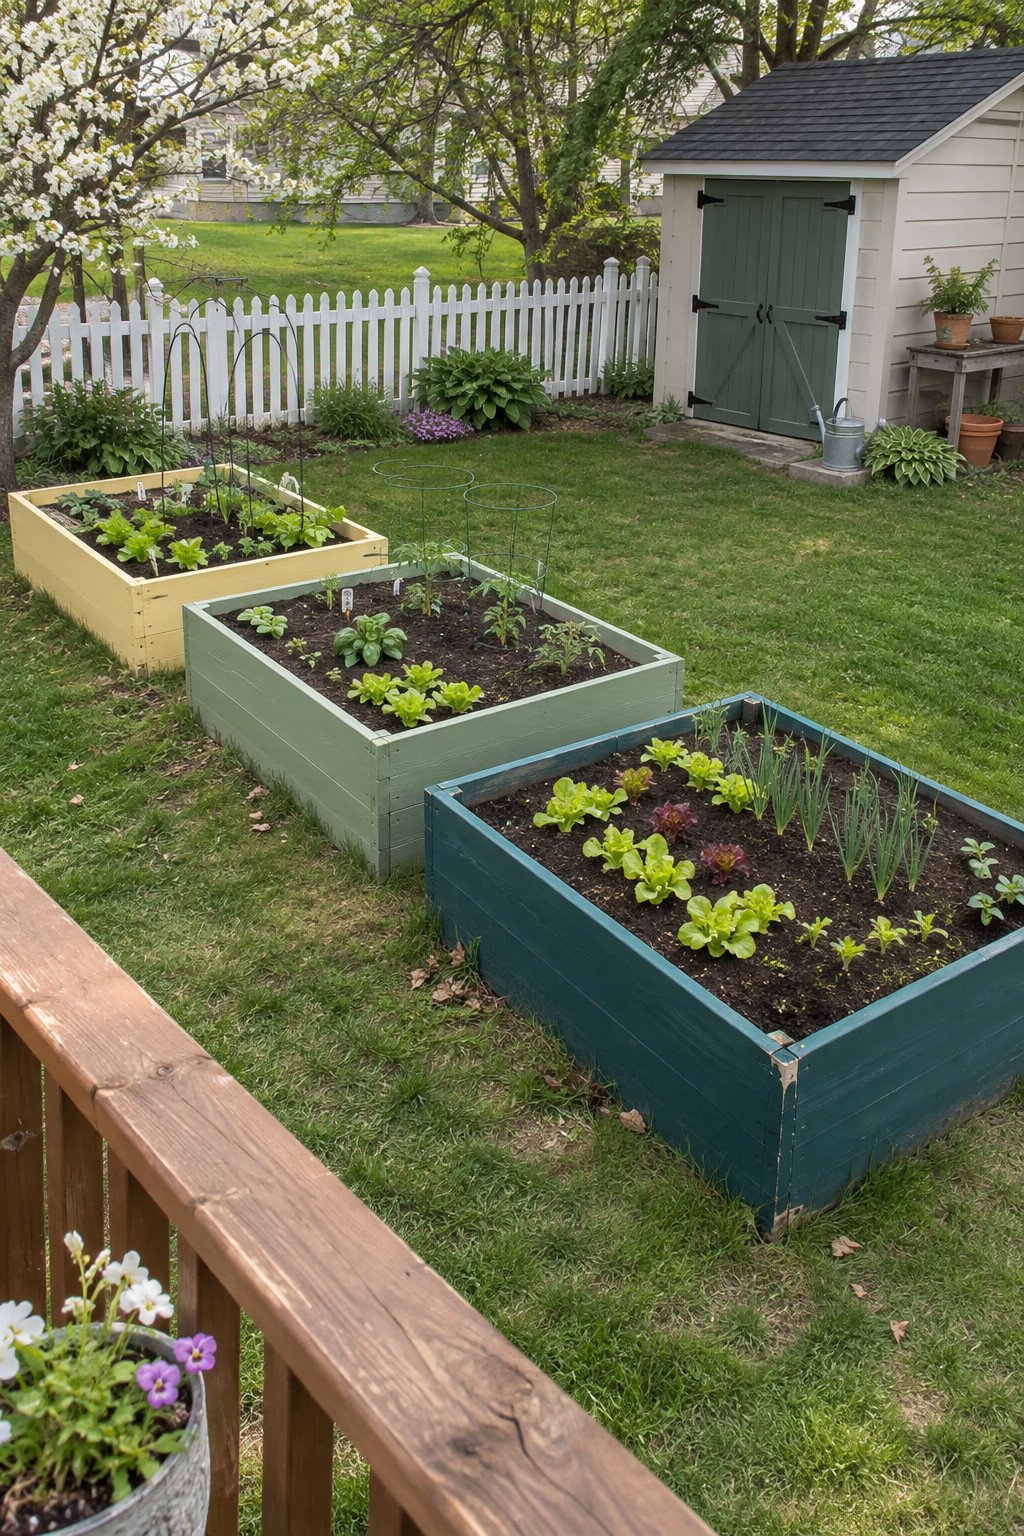
Add color even before anything blooms
A coat of exterior paint or solid stain can turn plain lumber into a design feature. Deep teal, sage green, charcoal, barn red, or soft butter yellow all look great against green foliage, and painting several beds in a coordinated palette adds a playful color-block effect.
Color makes the garden look finished in early spring and late fall, when beds are mostly bare soil. It also helps tie the beds to your house trim, shed, or outdoor furniture.
Paint only the outside faces and top cap, and let it cure fully before filling with soil. Plan on touching up the finish every few years where sprinklers and sun wear it down.
5. Turn Galvanized Stock Tanks Into Round Beds
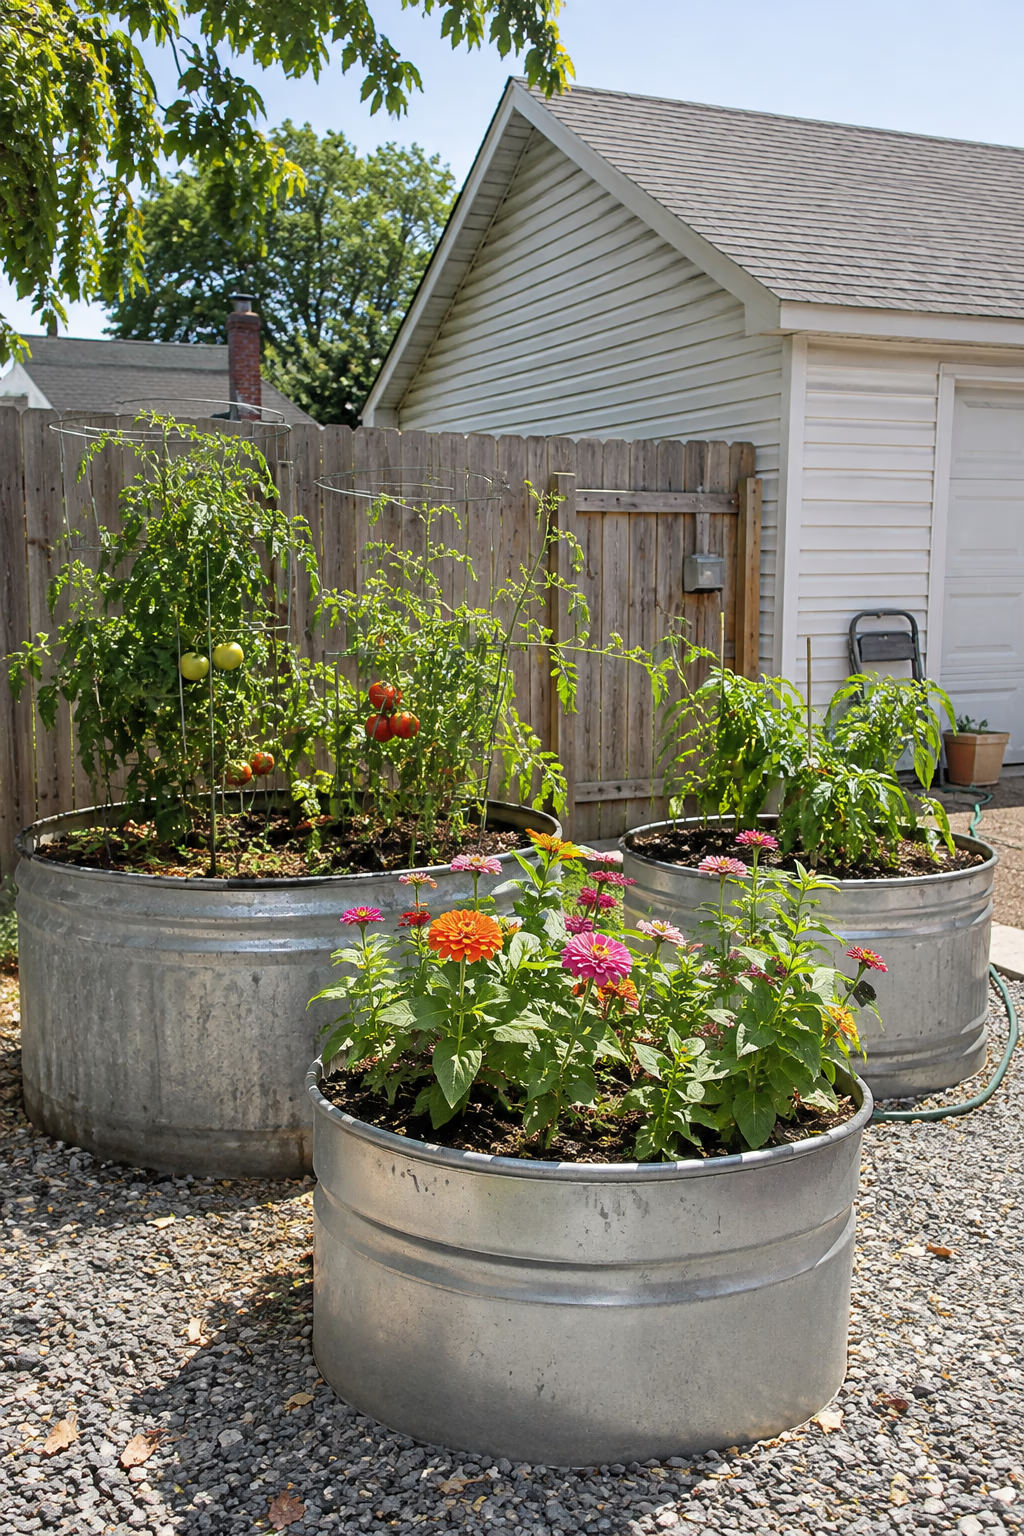
Instant, no-build beds with a ranch feel
Round or oval galvanized livestock tanks, available at farm supply stores, make ready-made raised beds. Tanks around 2 feet tall and 4 to 6 feet across are a good size for tomatoes, peppers, flowers, or a mixed salad garden.
They need no assembly, last for many years, and look clean and modern in a gravel yard. Grouping two or three of different sizes creates an easy, attractive layout.
Drill several half-inch drainage holes in the bottom, or remove the drain plug, and set the tank on level ground. To save on soil, fill the bottom third with chunky wood, leaves, or upside-down pots before adding soil mix.
6. Stack Concrete Blocks for a Budget-Friendly Bed
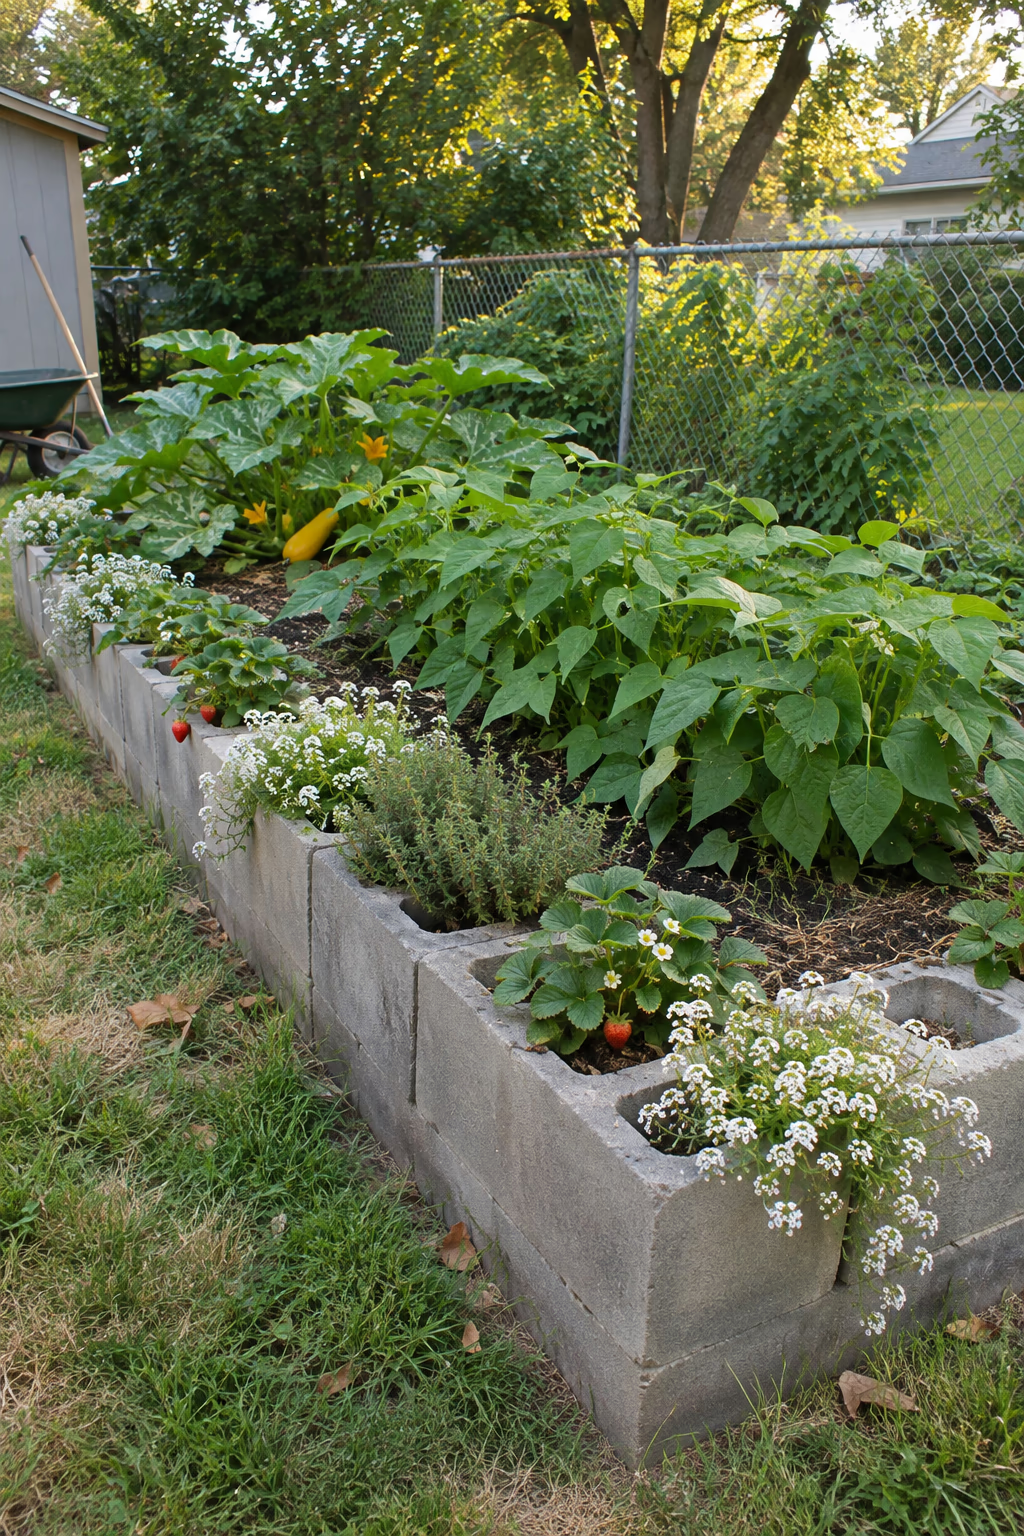
Cheap, sturdy, and done in an afternoon
Standard 8x8x16-inch concrete blocks stacked one or two courses high make a long-lasting bed with no tools beyond a level and a shovel. Lay them with the hollow cores facing up, and you get bonus pockets for herbs, strawberries, or trailing flowers.
Blocks don’t rot, can be rearranged anytime, and cost less than most lumber for the same length of wall. They also absorb heat, which can help warm-season crops in cooler regions.
Level the first course carefully on compacted soil or gravel. Some older blocks contain fly ash, so many gardeners choose new concrete blocks for edible beds and grow ornamentals in the core pockets.
7. Bend Weathering Steel Into Curved Modern Beds
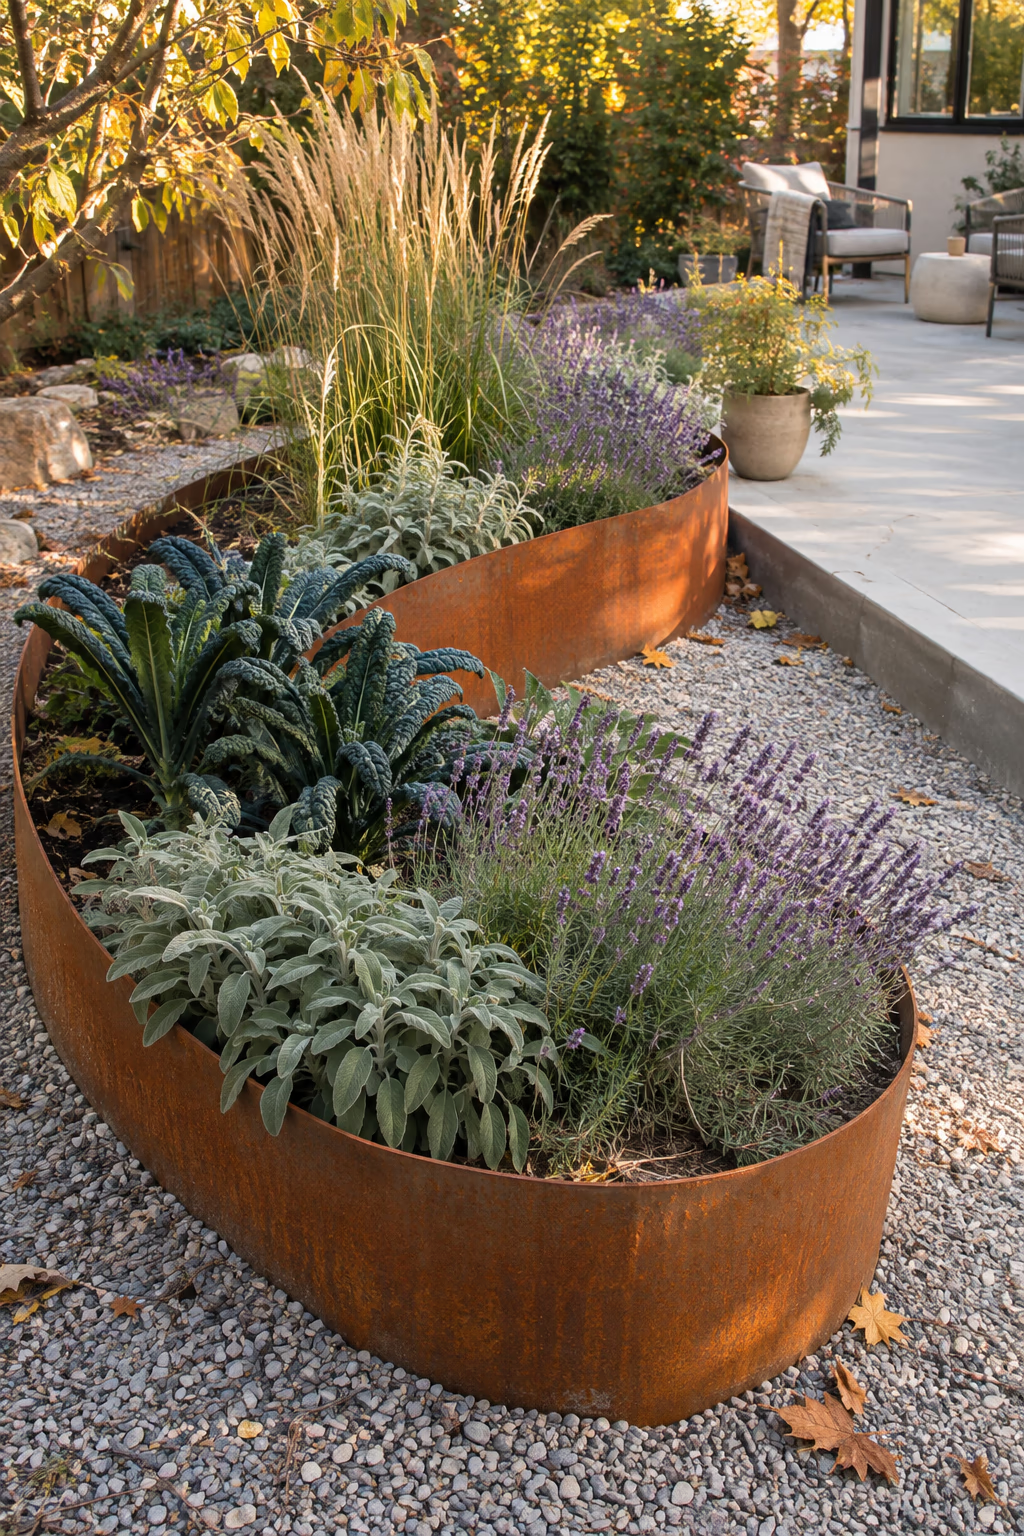
Sleek rust-colored curves for a contemporary yard
Weathering steel develops a stable, rust-colored surface that protects the metal underneath. Thin steel bed kits or edging panels can be curved into rounds, ovals, or sweeping S-shapes 12 to 18 inches tall, softening the hard lines of a modern patio.
The warm orange-brown color pairs beautifully with ornamental grasses, lavender, silvery herbs, and dark-leaved kale. Because the walls are thin, curved beds look crisp without bulky edges.
New steel releases rusty runoff for the first several months, which can stain concrete, pavers, and siding. Set beds on gravel or soil, and expect a higher upfront cost than wood or blocks.
8. Weave Willow Sides for a Rustic Cottage Bed
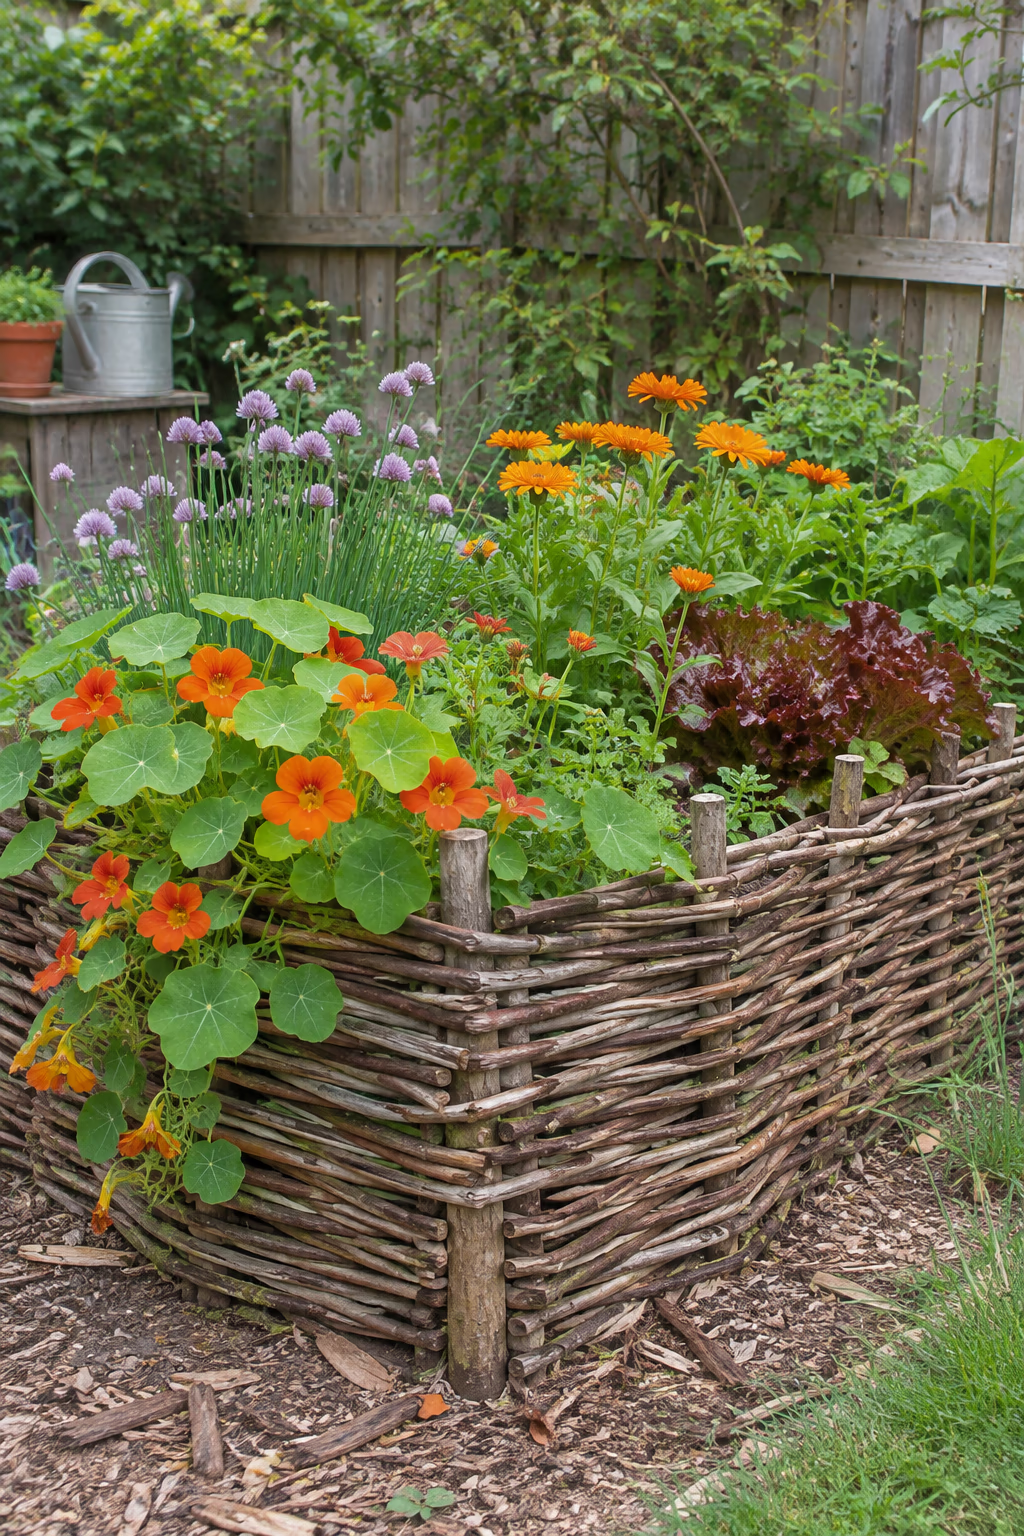
A handmade look that blends into the garden
Woven willow or hazel panels give a raised bed a soft, old-world feel. Pound sturdy stakes into the ground every 12 to 18 inches, then weave flexible branches in and out to a height of about 12 to 18 inches, or buy ready-made woven panels and fasten them to a simple wooden frame.
The texture looks lovely around flowers, herbs, and leafy greens, and it suits cottage, woodland, and informal gardens especially well.
Woven sides let soil sift through, so line the inside with burlap or landscape fabric. Natural branches break down over time, typically lasting a few seasons, so treat this as a charming but temporary bed.
9. Fill Wire Gabions With River Rock
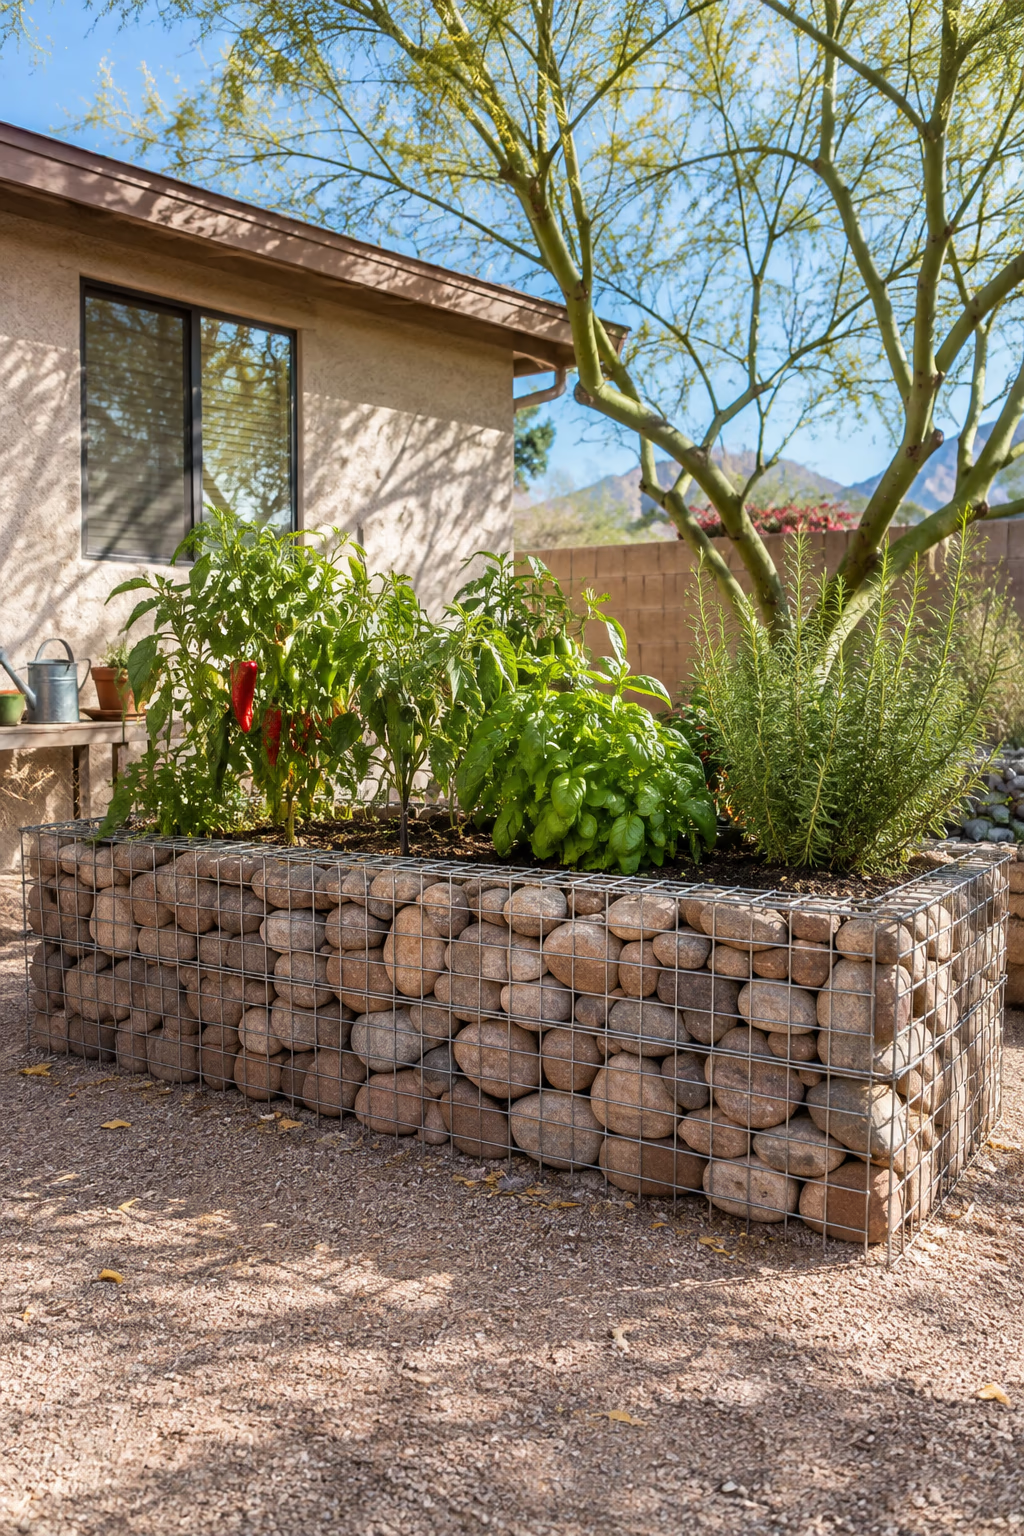
Stone walls without masonry skills
Gabions are welded wire baskets filled with stone. Set rectangular cages about 12 inches wide and 18 to 24 inches tall around the bed perimeter, fill them with rounded river rock or crushed stone, and plant inside the frame.
The result looks substantial and modern, never rots, and drains well. It’s a smart choice in hot, dry regions or rocky yards where stone is easy to source.
Line the inner face with landscape fabric so soil doesn’t wash into the rocks. Filled gabions are very heavy, so place them exactly where you want them before adding stone.
10. Line Up Smooth Concrete Beds for a Clean Modern Look
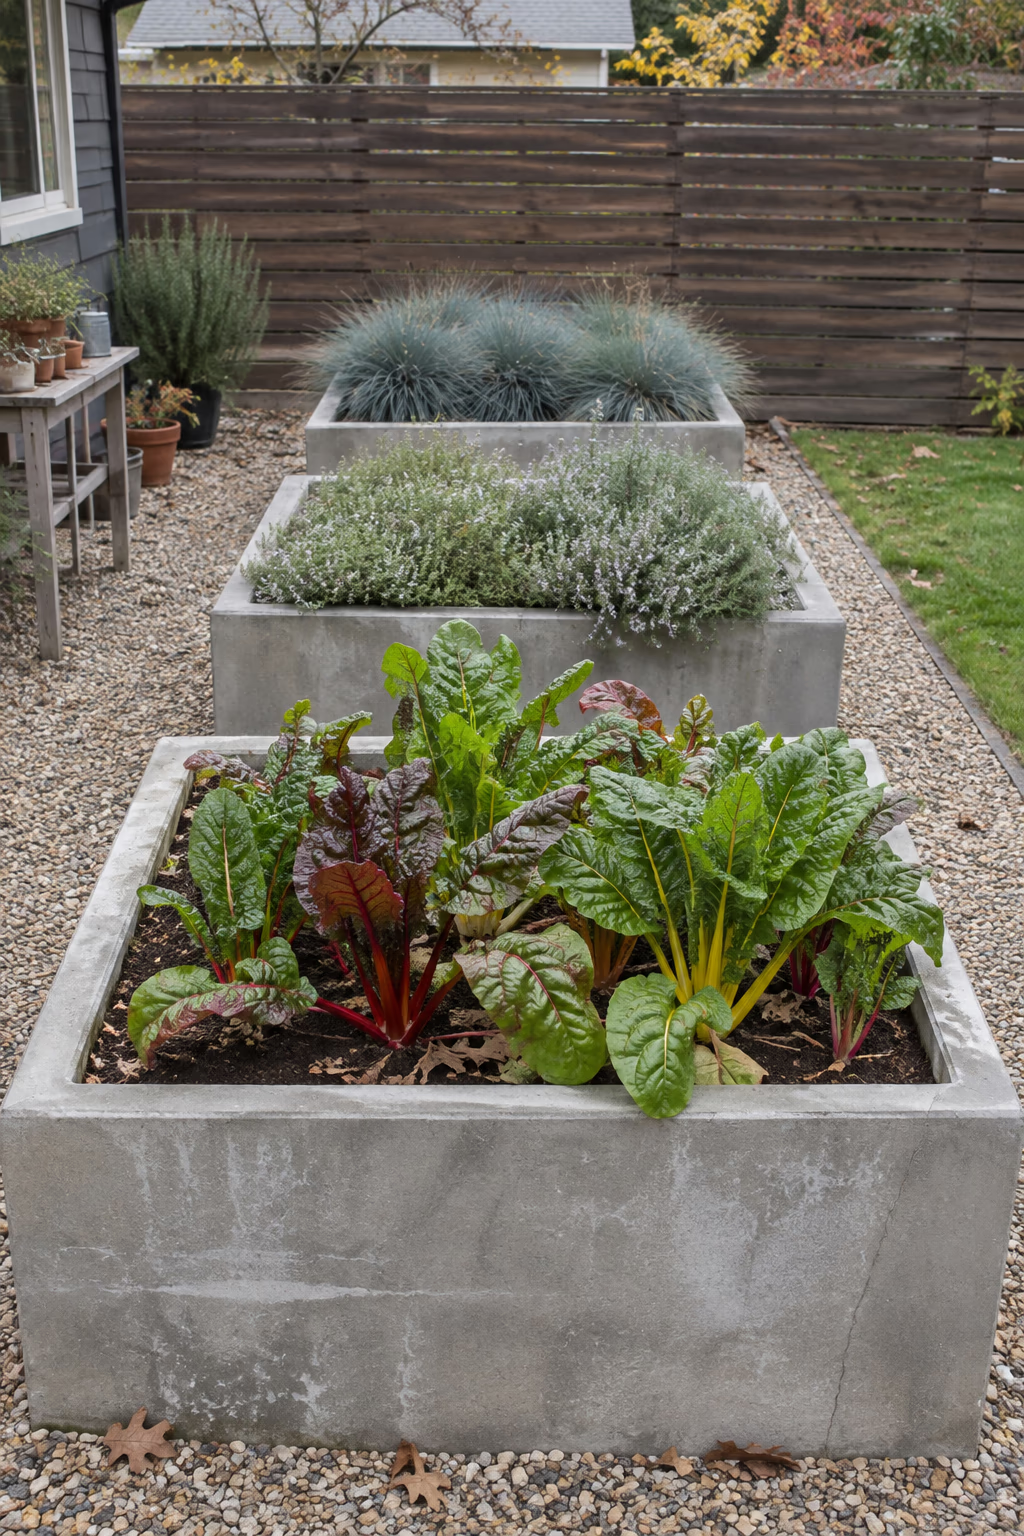
Minimal, architectural, and built to last
Precast concrete planters or poured concrete walls create crisp, gray raised beds that suit modern homes. Line up two to four matching rectangles in a row or grid with pea gravel or decomposed granite between them for a calm, orderly look.
Concrete won’t rot or warp, and its neutral tone lets plant color take center stage. Try silver-leaved herbs, grasses, chard with bright stems, or a simple mass of one plant.
Poured walls require forms, reinforcement, and footings, so many homeowners hire a contractor. For a lighter DIY option, look for concrete-look fiberglass or resin planters.
11. Build a Tiered Pyramid Bed for Strawberries
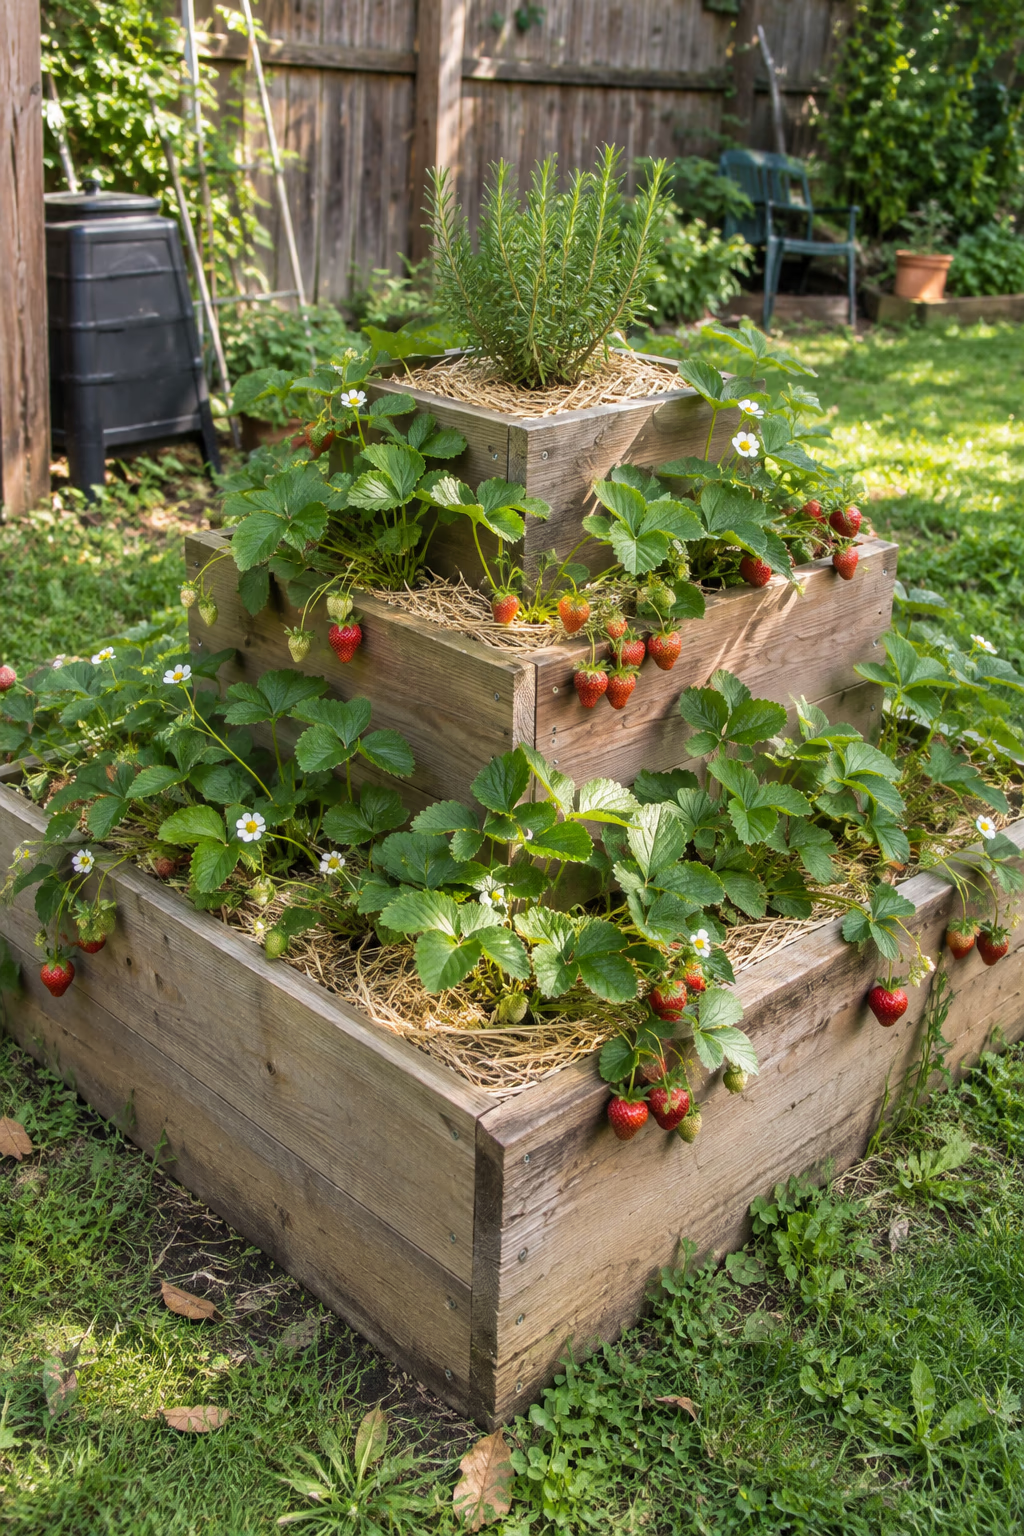
More harvest from the same footprint
Stack three square or round frames of decreasing size, such as 6 feet, 4 feet, and 2 feet across, each about 6 to 8 inches tall. Strawberries planted around each step cascade over the edges, while the top tier can hold herbs or a single compact plant.
Tiers increase planting space, improve drainage, and make berries easier to spot and pick before slugs find them. It’s also a fun focal point in a small yard.
Upper tiers dry out faster than the bottom, so water slowly from the top or run a soaker hose around each level. Replace strawberry plants every three to four years for best yields.
12. Mortar a Low Brick Bed Along the Patio
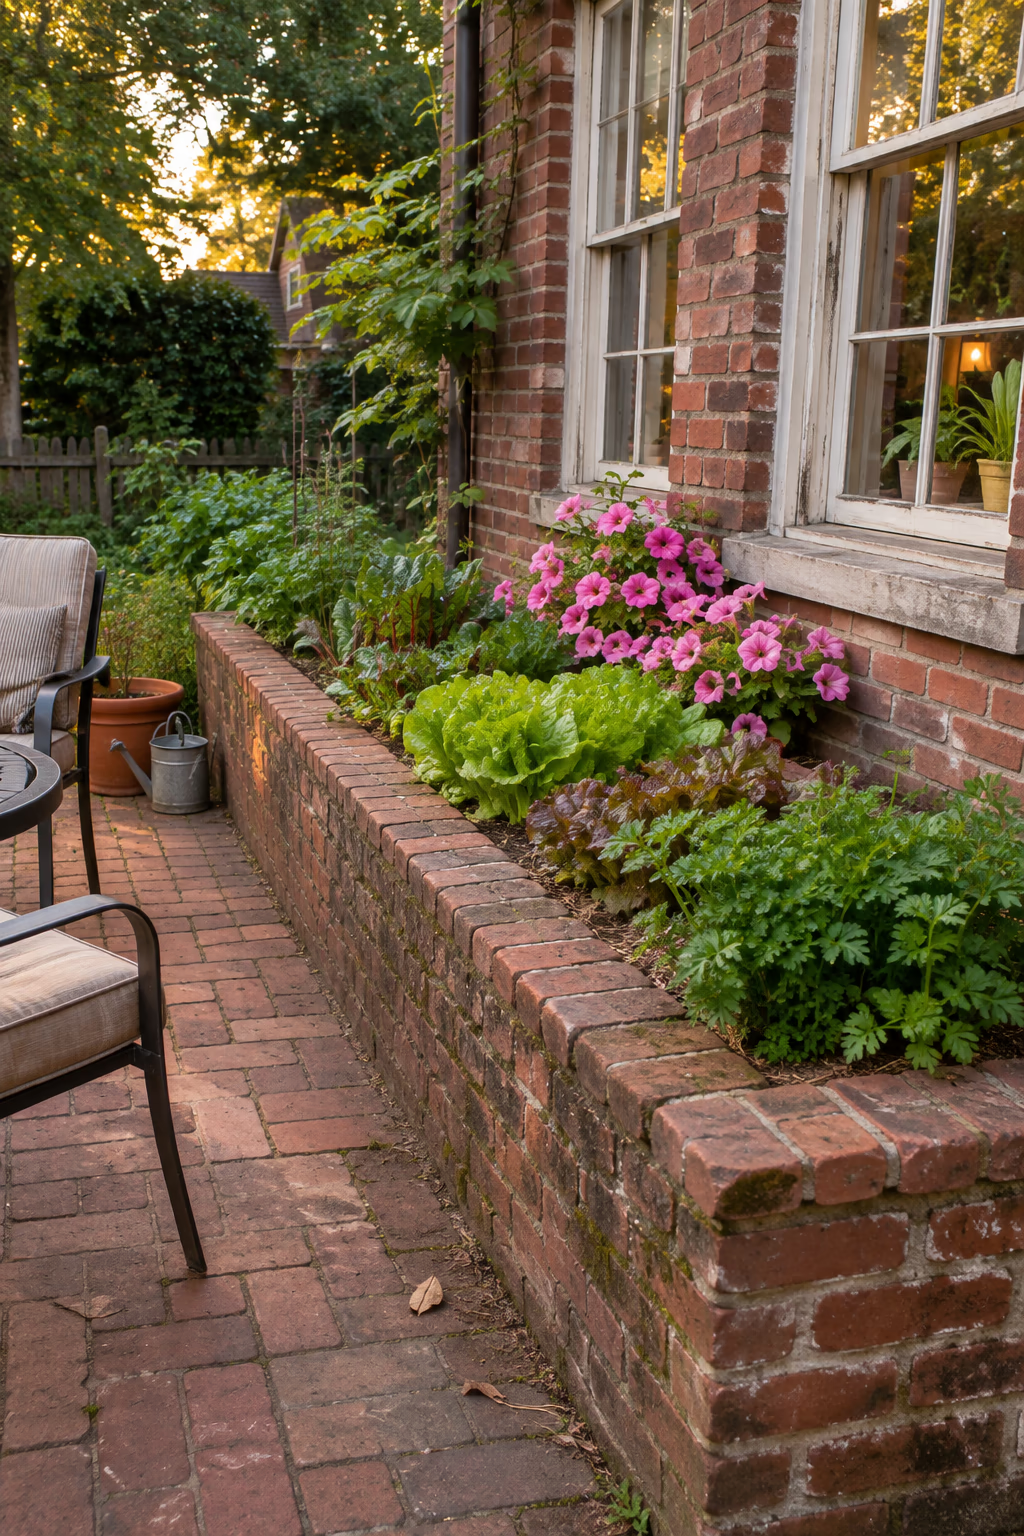
A permanent bed that matches your hardscape
A low brick bed 12 to 18 inches tall can run along the edge of a patio or terrace, linking the garden to the house. Use exterior-grade brick on a concrete footing, and finish the top with a row of bricks laid flat or a stone cap.
Brick feels timeless, especially beside red-brick homes or older patios, and it can hold flowers, herbs, or a row of salad greens within arm’s reach of your seating area.
Leave weep holes near the base so water can drain. Brick walls are a permanent project and may need a mason, so plan the size and location carefully before you build.
13. Build a Bench Into the Side of the Bed
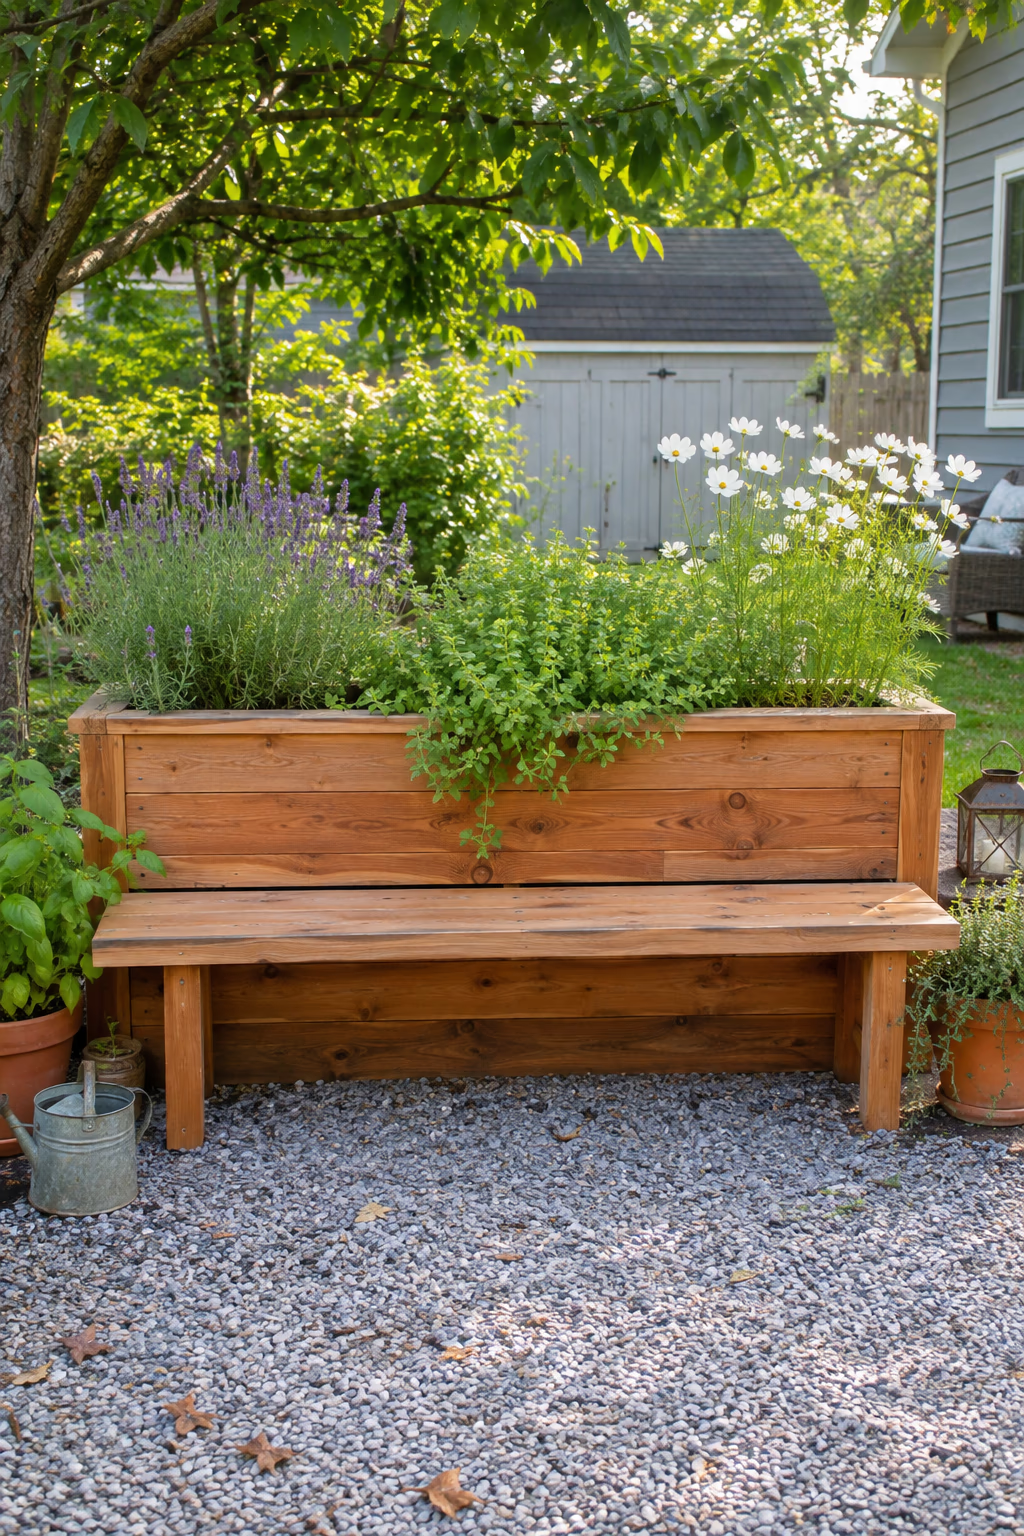
Seating and growing space in one structure
Attach a wooden bench to the long side of a raised bed, or build a lower box that runs alongside a taller bed so the seat sits about 18 inches high. The planted bed acts as a backrest filled with fragrant herbs or flowers.
It’s a space-saving way to add seating in a small yard, and you can sit among the plants while you sip coffee or watch pollinators work.
Use rot-resistant wood and leave a small gap between the seat and the soil wall so the bench dries out after rain. Plant thornless, non-prickly plants beside the seat.
14. Shape a Hexagon Bed as a Garden Centerpiece
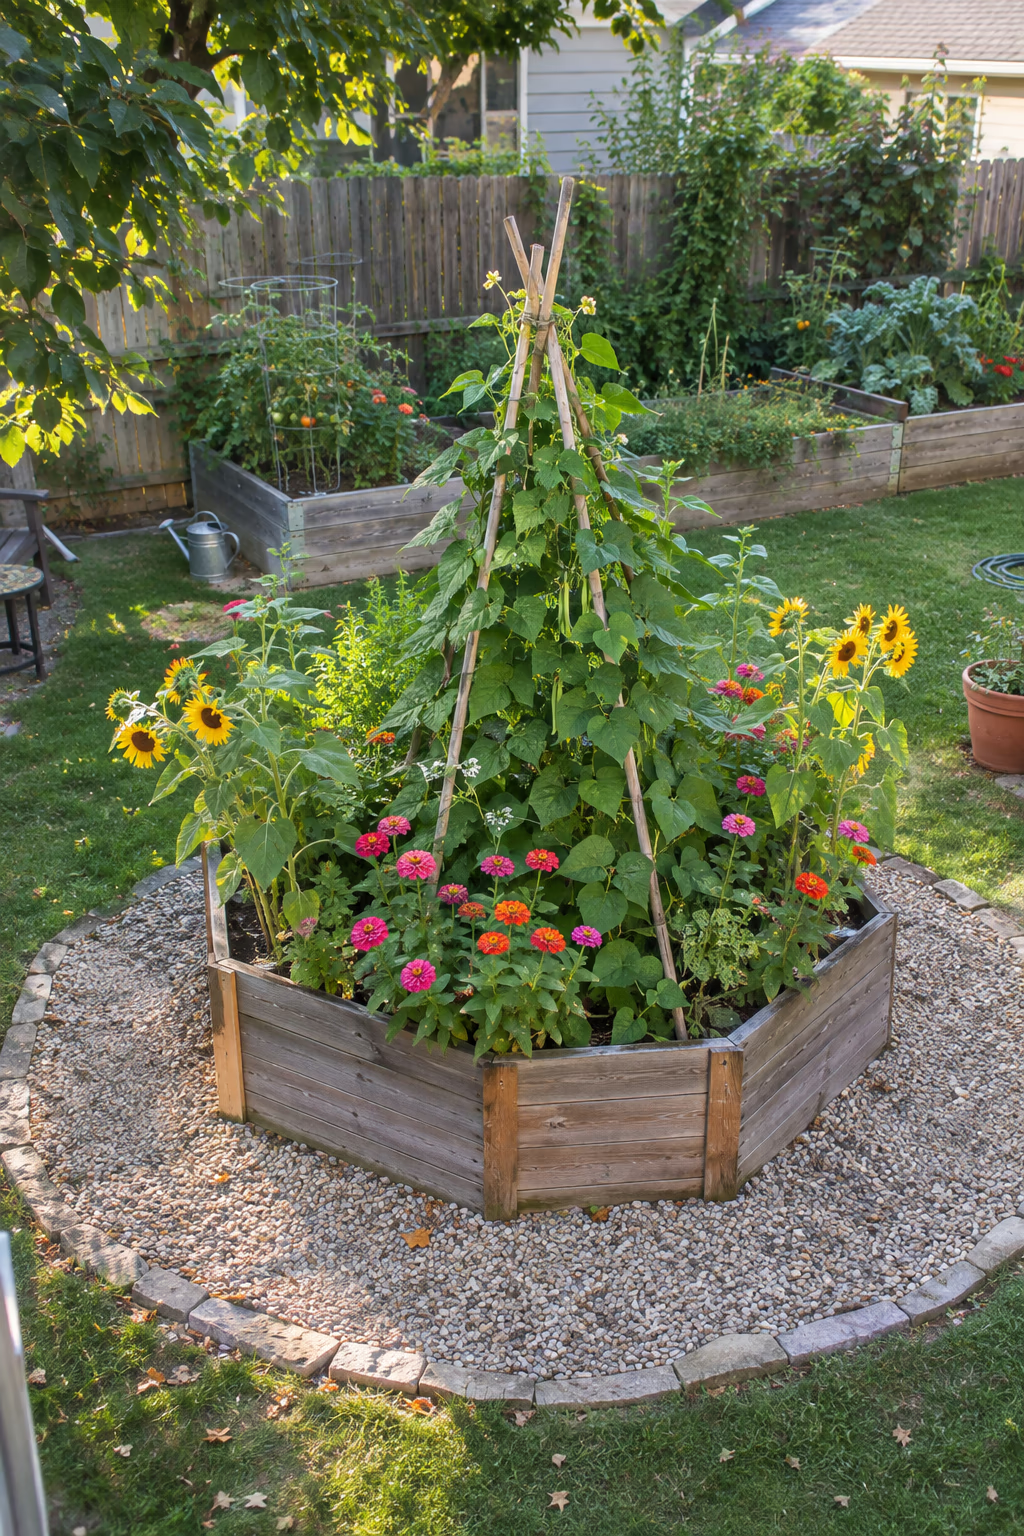
A geometric bed that breaks up the rectangles
A hexagon makes a striking centerpiece in a garden full of rectangles. Six boards cut at 30-degree angles on each end form the frame. Keep each side about 2 to 3 feet long so you can reach the middle from any angle.
Fill it with a single tall feature like a dwarf fruit tree, a teepee of pole beans, or a bold mix of sunflowers and zinnias. Surround it with gravel or brick to frame the shape.
Angled cuts take patience, so use a miter saw and test-fit the frame before adding soil. Many retailers also sell pre-cut hexagon and octagon kits.
15. Tuck a Slim Bed Along a Side-Yard Fence
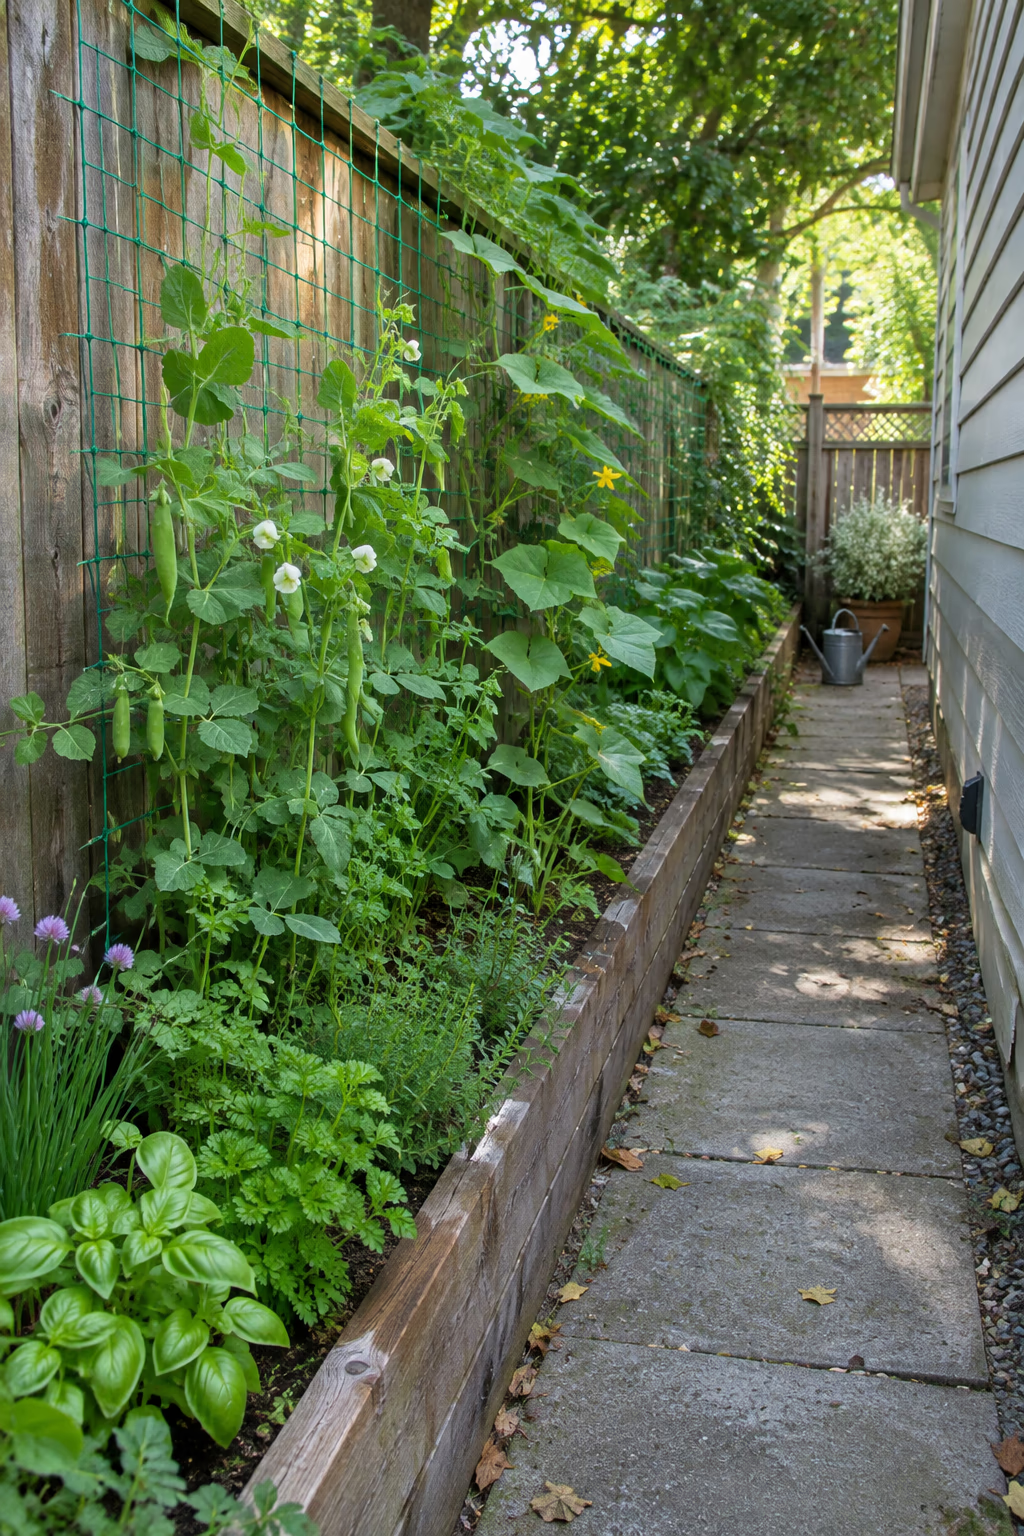
Turn a forgotten strip into a growing space
A narrow bed 18 to 24 inches wide fits neatly along a side-yard fence, a garage wall, or a driveway edge. Run it as long as the space allows and fill it with peas, cucumbers on netting, herbs, or cut flowers.
Slim beds make use of space that usually holds trash cans or weeds, and their narrow width means you can reach everything from one side without stepping into the soil.
Check sun before building, since side yards are often shaded part of the day. Leave a few inches between the bed and the fence so wood doesn’t stay damp, and check HOA or property-line rules.
16. Wrap an L-Shaped Bed Around a Fence Corner
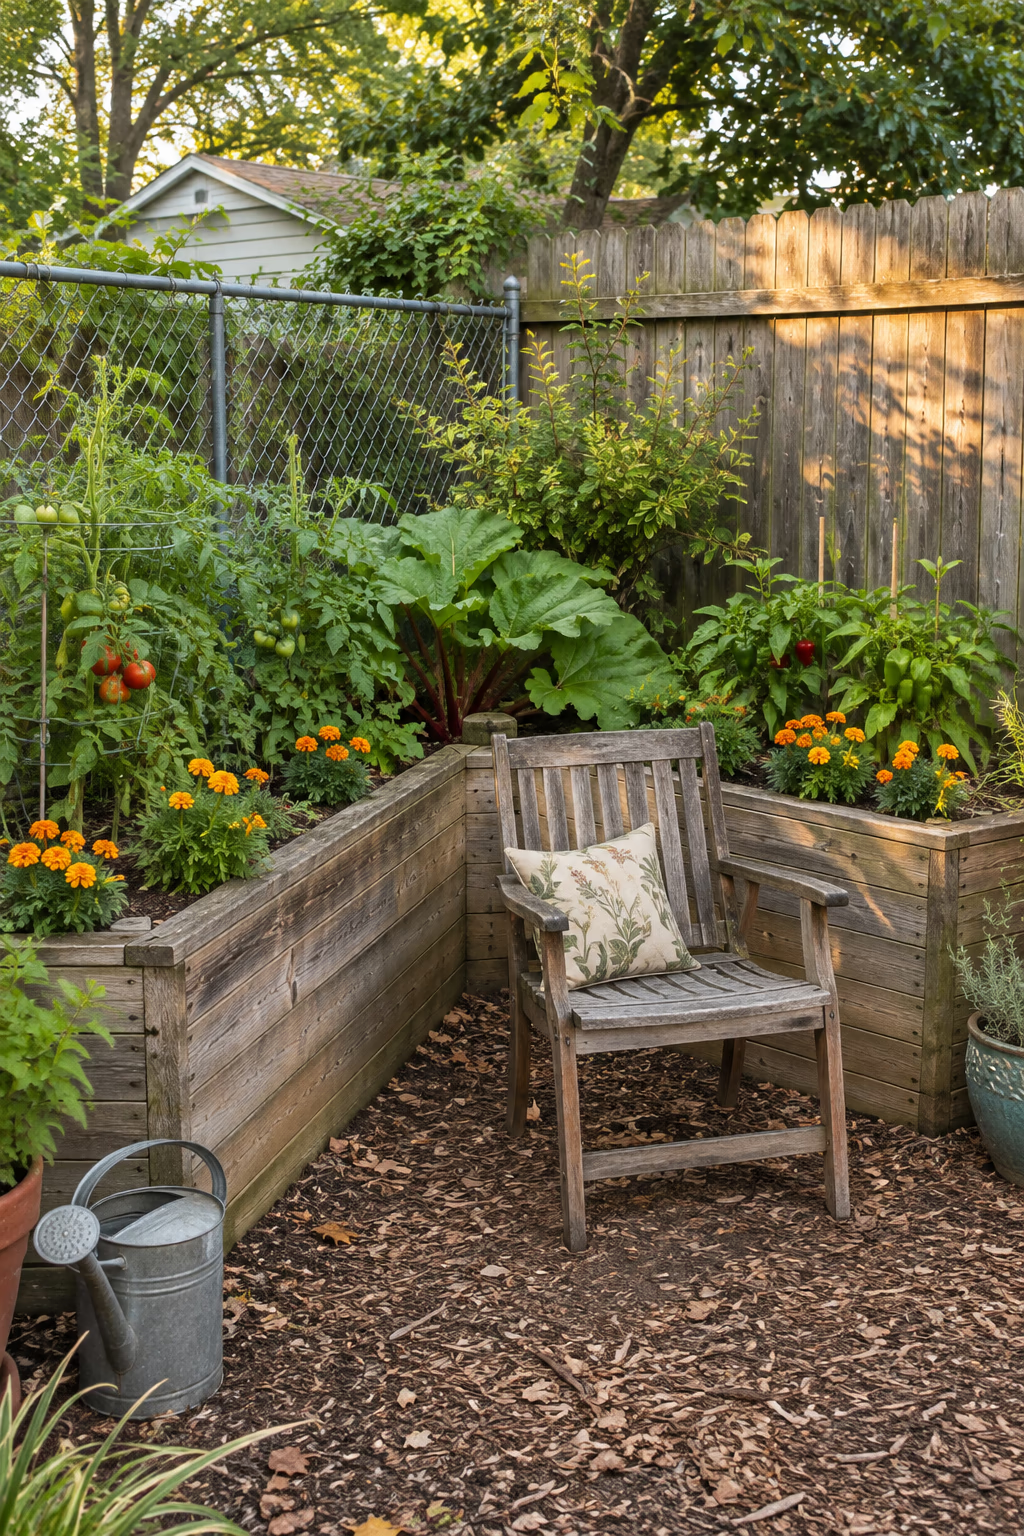
Make the most of an empty corner
Two beds joined at a right angle create an L that hugs a back corner of the yard. Keep each arm 2 to 3 feet deep and 6 to 8 feet long so you can reach everything from the front.
An L-shaped bed frames the corner, makes the yard look more finished, and creates a cozy pocket in front where you could place a chair or small table.
The inside corner can be hard to reach, so plant low-maintenance perennials, rhubarb, or a dwarf shrub there. Keep vegetables and annuals along the easy-to-reach edges.
17. Step Raised Beds Down a Sloped Yard
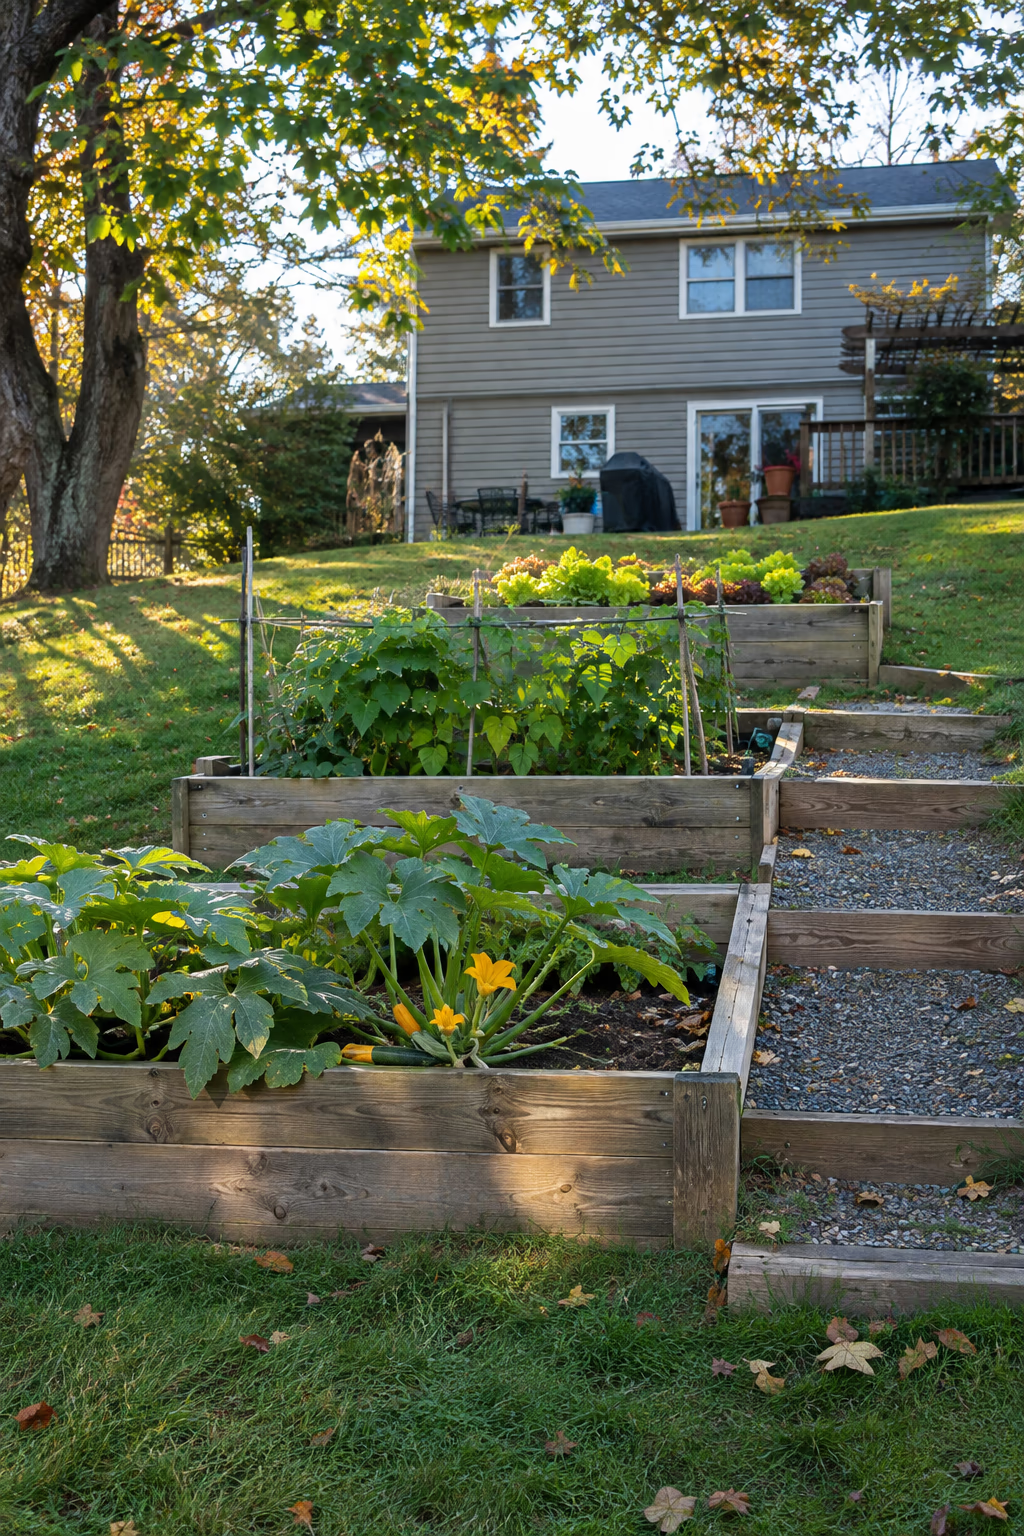
Turn a hillside into flat, usable growing space
On a gentle slope, set a series of rectangular boxes at different heights, stepping down the hill like stairs. Dig the uphill side into the slope and build up the downhill side so each bed sits level.
Level beds hold water instead of letting it run off, and they turn a hard-to-mow slope into a productive, attractive feature. Gravel or timber steps between the beds make access easy.
Retaining walls over about 3 to 4 feet tall often require engineering or permits, so keep each bed low. Call 811 before digging into any slope.
18. Stack Rough Timber Sleepers Two High
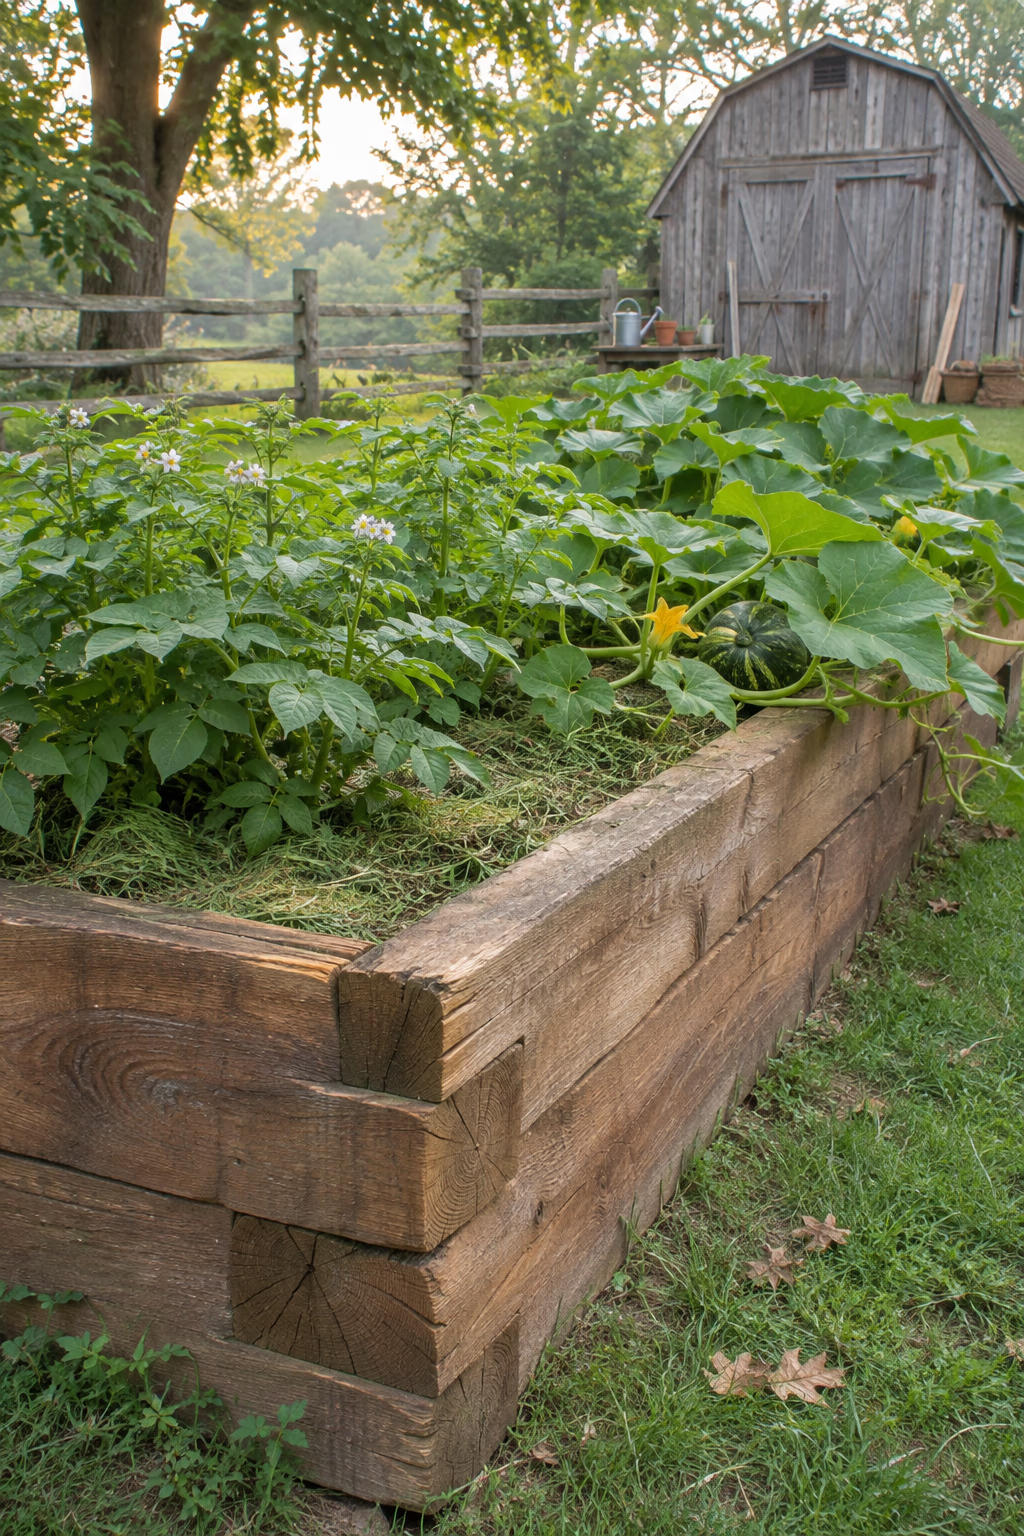
Chunky, rugged beds with lots of character
Large rough-sawn timbers, often 6 by 8 inches thick, stacked two high create a bed about 12 to 16 inches tall that looks sturdy and rustic. Overlap the corners like a log cabin and pin them together with long timber screws or rebar.
The heavy wood stays put, resists bowing, and looks especially good in larger country yards or beside rustic fences and outbuildings.
Choose new, untreated hardwood or naturally rot-resistant timbers for edible beds. Avoid old railroad ties, which are often treated with creosote that you don’t want near food crops.
19. Snap Hoops Over a Bed for Frost Protection
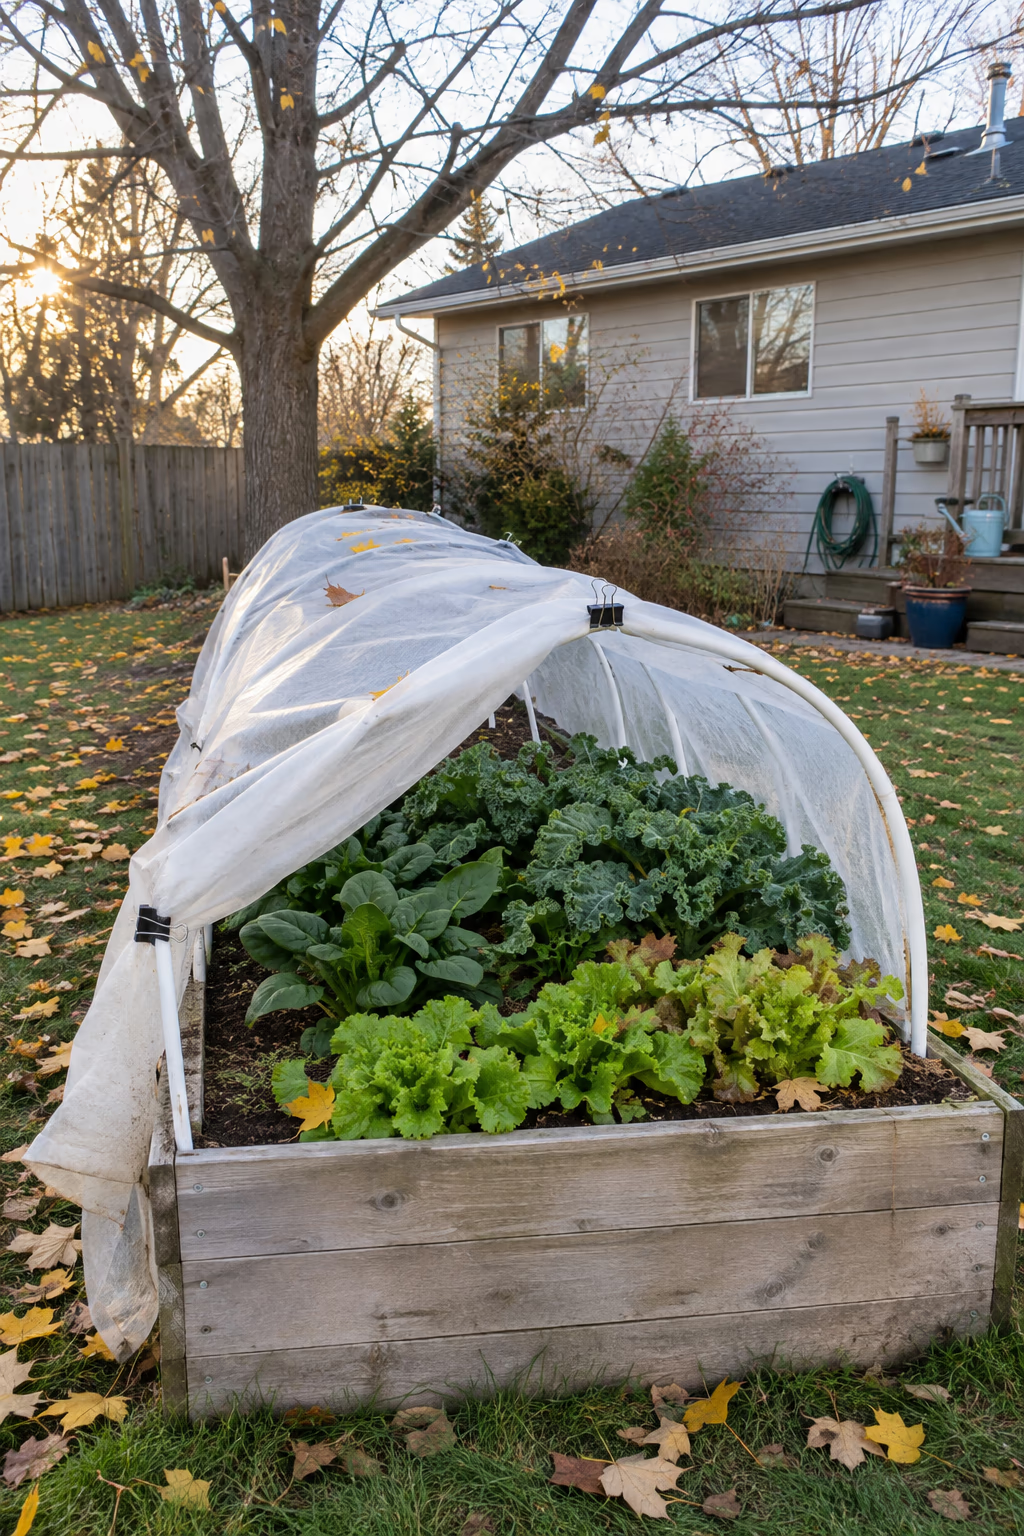
Extend your growing season by weeks
Attach short pipe brackets to the inside of each long wall, then bend half-inch PVC or metal conduit hoops into them every 2 to 3 feet. Drape frost cloth, greenhouse plastic, or bird netting over the hoops and clip it in place.
Hoops let you plant earlier in spring and keep harvesting greens later into fall. In summer, you can swap the cover for shade cloth or insect netting to protect seedlings.
Open or vent plastic covers on sunny days, since temperatures inside can climb quickly. Weigh down the edges so wind can’t lift the fabric.
20. Enclose a Bed With a Hinged Critter-Proof Cage
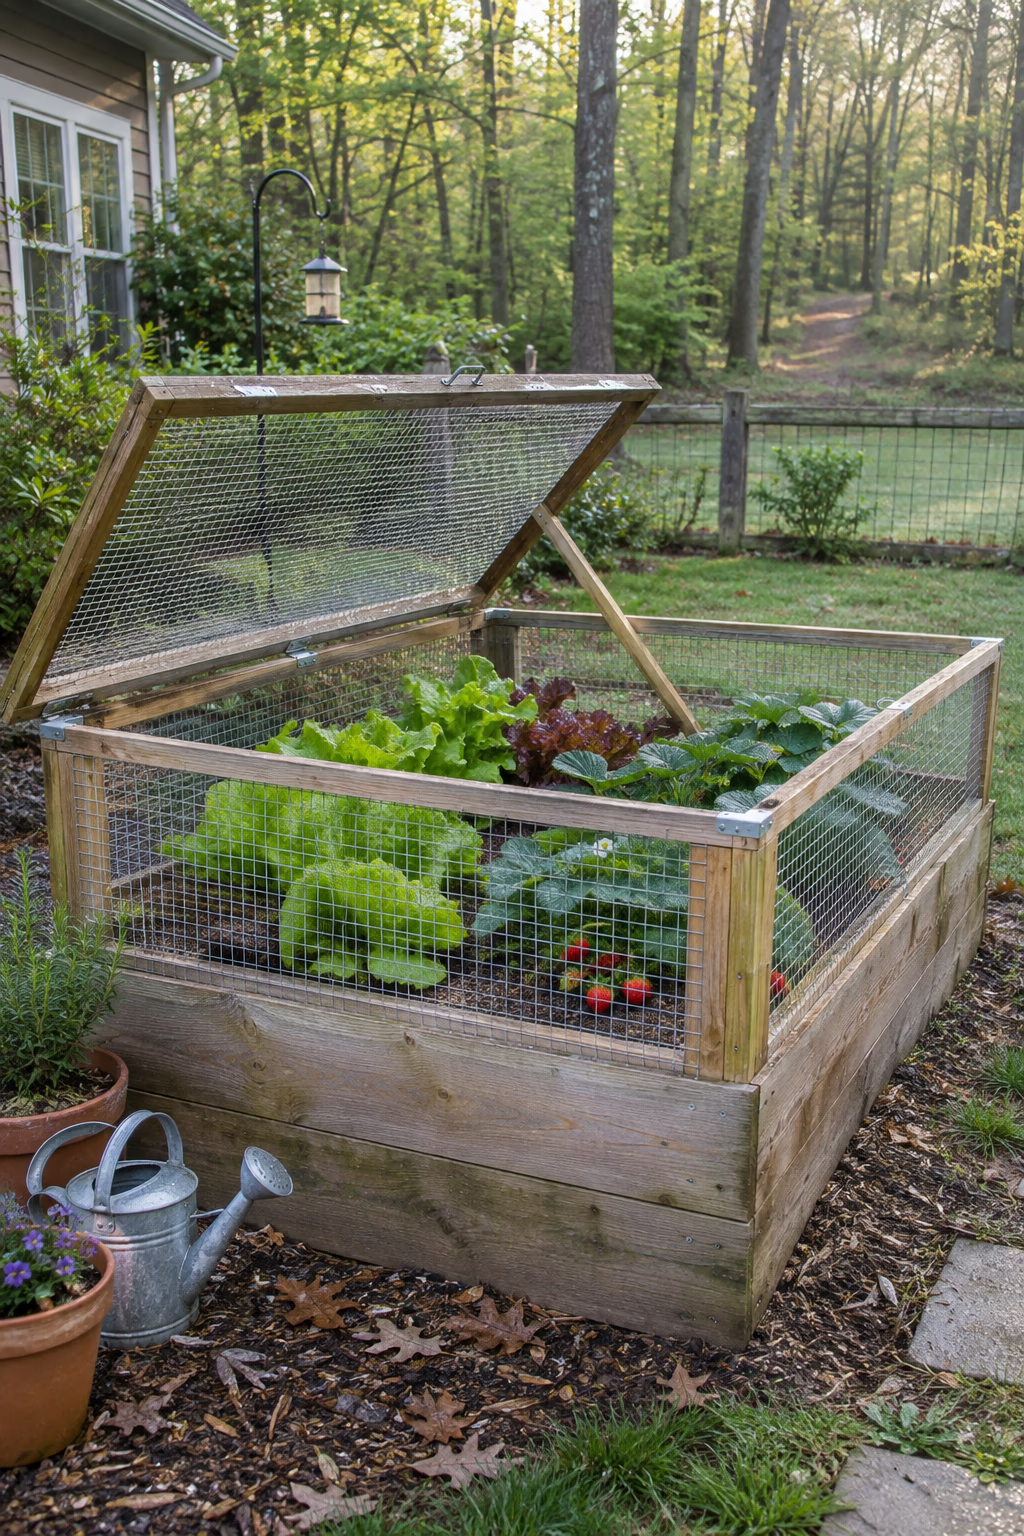
Keep deer, rabbits, squirrels, and birds out
Build a simple wooden frame 2 to 3 feet tall on top of the bed, wrap it in galvanized hardware cloth or welded wire, and add a hinged lid on one or both sides. Screwing hardware cloth to the bottom before filling also stops gophers and voles.
A cage makes it possible to grow lettuce, strawberries, and other favorites in places where wildlife would otherwise eat everything overnight.
Make the lid easy to prop open, and size the mesh for your pests: about half-inch openings for rodents. The cage adds shade, so leave enough height for tall crops.
21. Lay Out a Keyhole Bed With a Compost Basket
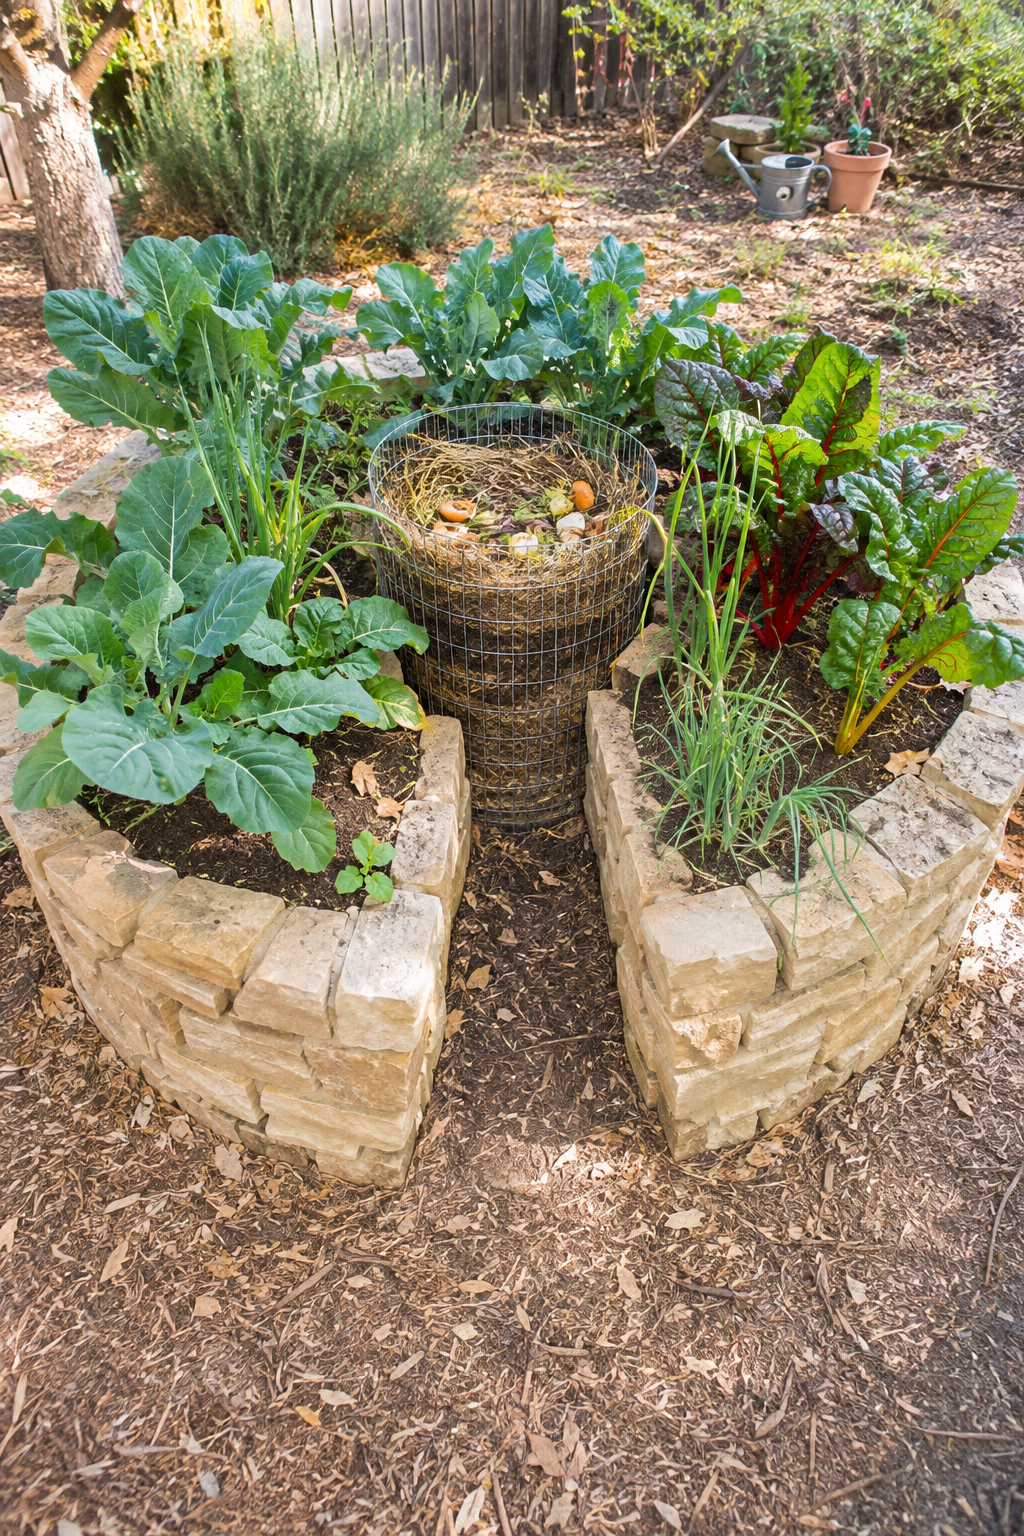
A self-feeding bed with easy access
A keyhole bed is round, roughly 6 feet across, with a narrow notch cut into one side so you can reach the center. In the middle sits a wire or wicker basket where you add kitchen scraps and water.
As the scraps break down, nutrients and moisture spread into the surrounding soil. The design works especially well in hot, dry climates where it helps conserve water.
Build the walls from stone, brick, or blocks about 2 to 3 feet tall. Keep meat, dairy, and oily scraps out of the basket to avoid odors and pests.
22. Place a Bed Right Outside the Kitchen Door
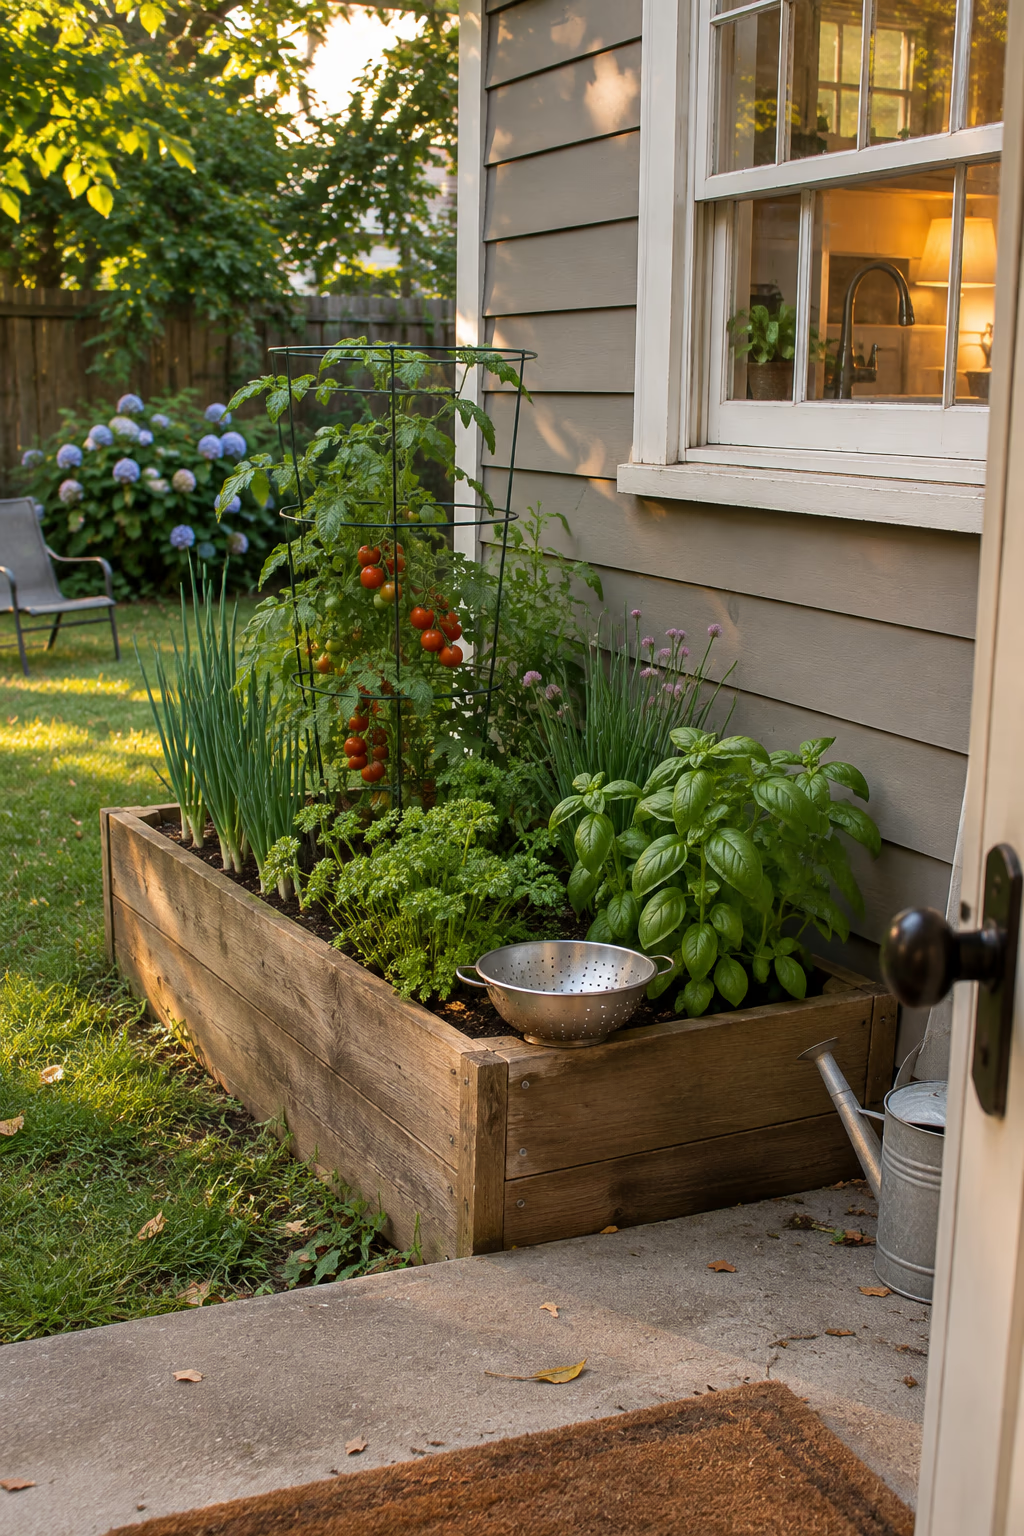
Herbs and salad greens within a few steps
Put a small bed, around 3 by 6 feet, as close to the kitchen door as sun allows. Fill it with plants you pick often, such as basil, parsley, chives, scallions, cherry tomatoes, and cut-and-come-again lettuce.
When the garden is visible from the house, you notice dry soil, ripe tomatoes, and pests much sooner. You’ll also use more of what you grow because it’s right there while you cook.
Keep beds at least a foot or two from the house foundation, and make sure soil and water drain away from the walls.
23. Fill a Deep Bed Hugelkultur-Style With Old Logs
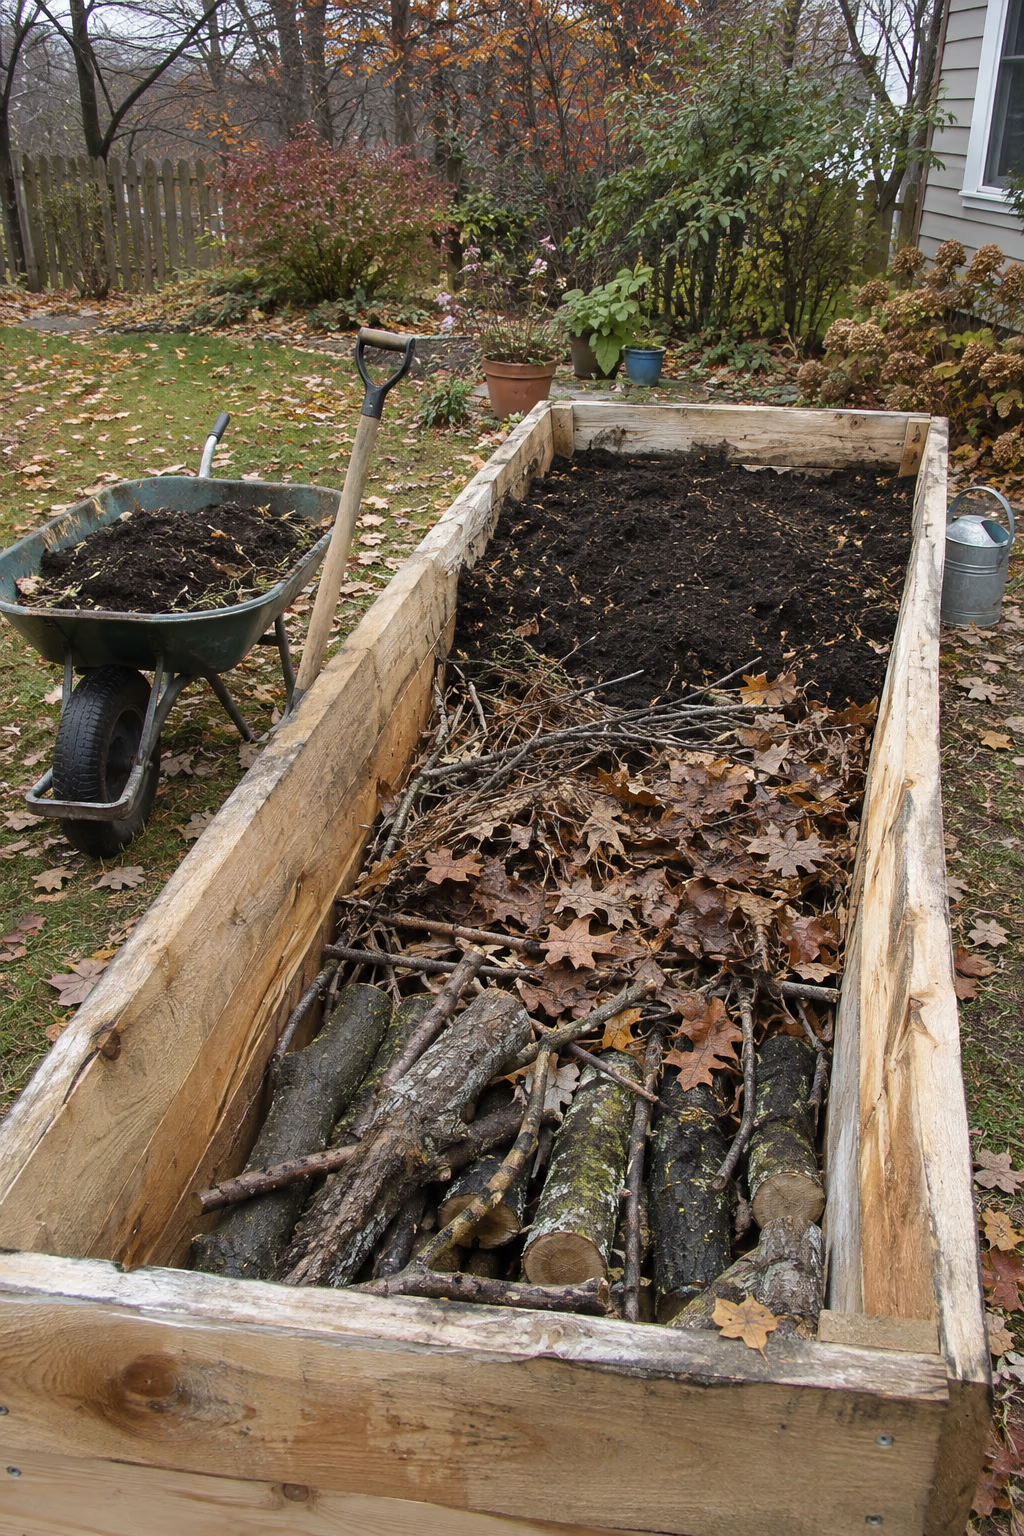
Save money on soil and build fertility
Hugelkultur means burying wood in the base of a bed. Lay old logs and thick branches in the bottom of a tall bed, cover them with smaller twigs, leaves, grass clippings, and compost, then top with at least 8 to 12 inches of good soil.
The wood acts like a sponge, holding moisture, and slowly breaks down into rich organic matter. It also cuts down on how much purchased soil you need to fill a deep bed.
Avoid black walnut, treated wood, and naturally rot-resistant woods like cedar in the core. Expect the soil level to settle over time and top it up each spring.
24. Grow a Raised Bed in Conditioned Straw Bales
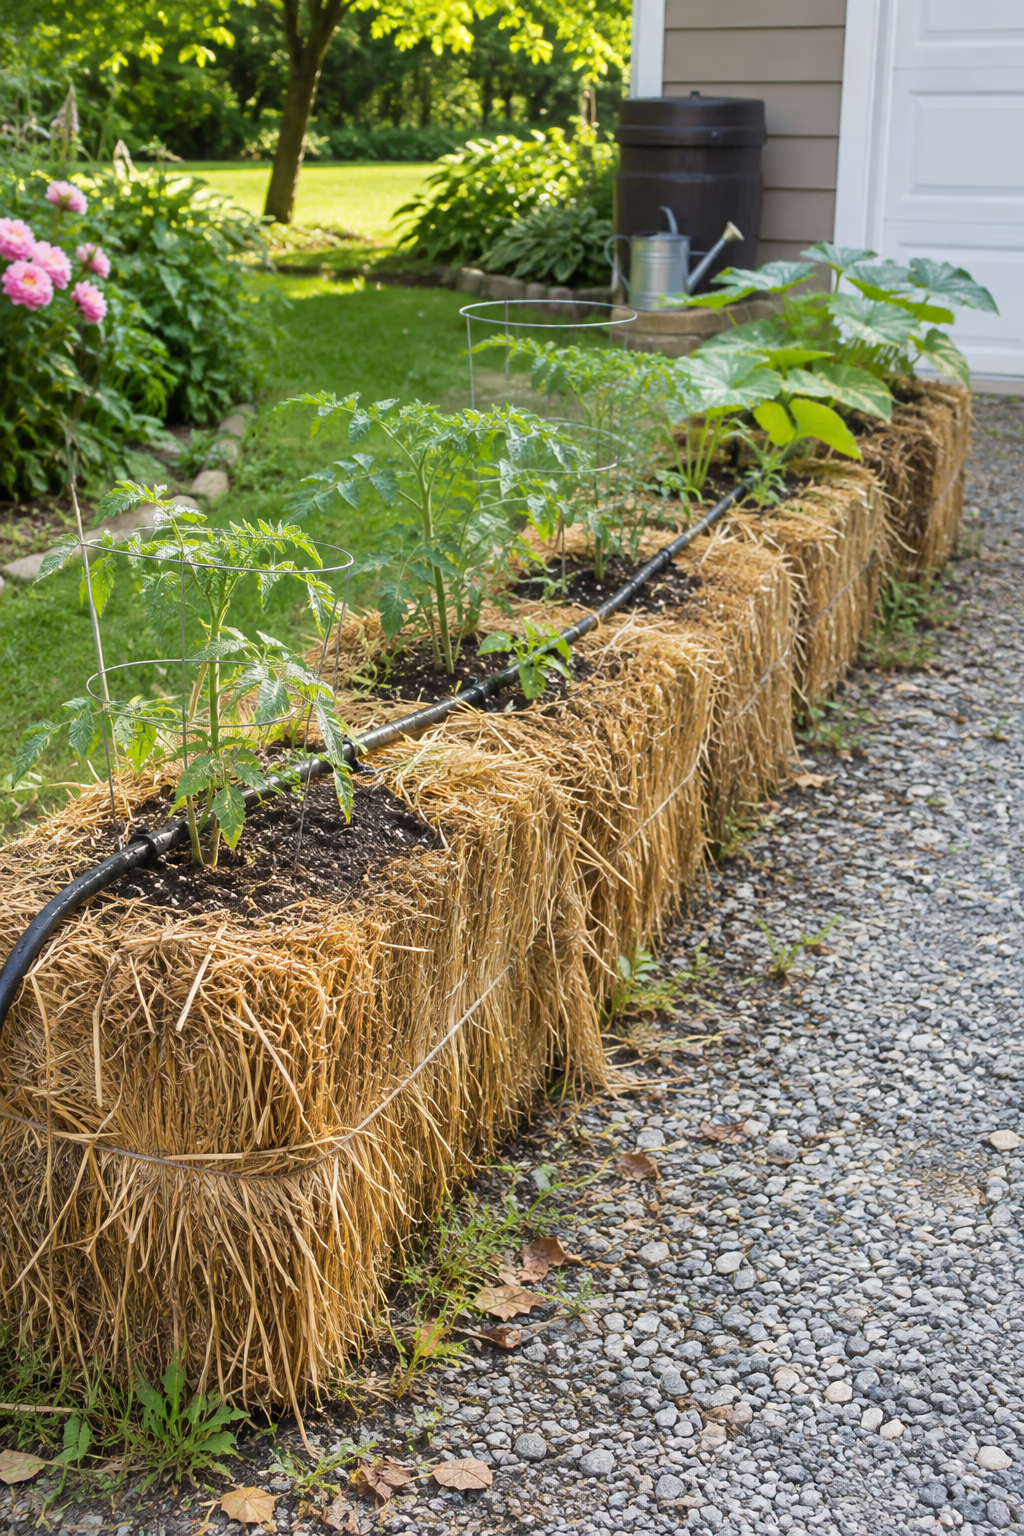
A temporary bed you can start anywhere
Straw bales can become raised beds on poor soil or even on gravel. Set them with the twine running around the sides, then spend about 10 to 14 days conditioning them with water and a nitrogen fertilizer until the inside starts breaking down.
Plant tomatoes, squash, peppers, or flowers directly into pockets of potting mix. The bales stay warm and loose, and by the end of the season they become great mulch or compost.
Use straw, not hay, which is full of seeds. Bales dry out fast, so a soaker hose or drip line is worth adding.
25. Hide Drip Irrigation Under the Mulch
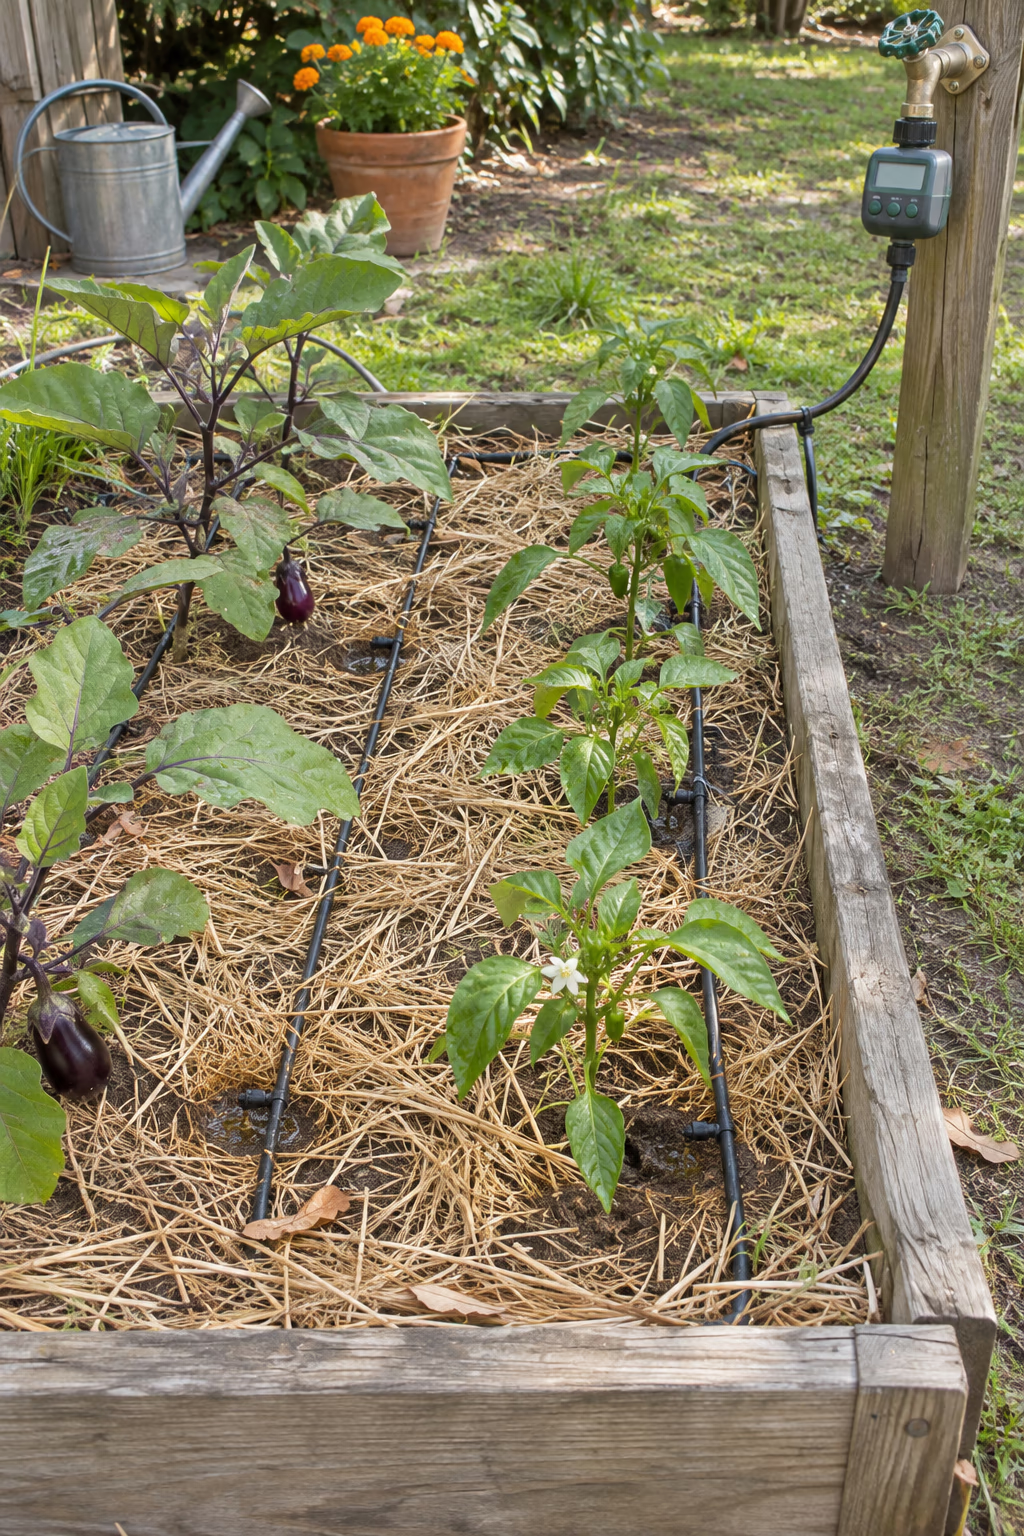
Water every bed evenly with almost no effort
Run a supply line to each bed, then lay drip tubing with built-in emitters every 12 inches in parallel rows about a foot apart. Cover the tubing with 2 to 3 inches of straw or shredded leaves and connect it to a simple battery timer at the faucet.
Drip irrigation delivers water directly to roots, keeps leaves dry to reduce disease, and saves time on hot summer evenings.
Install a pressure regulator and filter, as most drip systems require them. Check emitters a few times a season for clogs, and drain the lines before freezing weather.
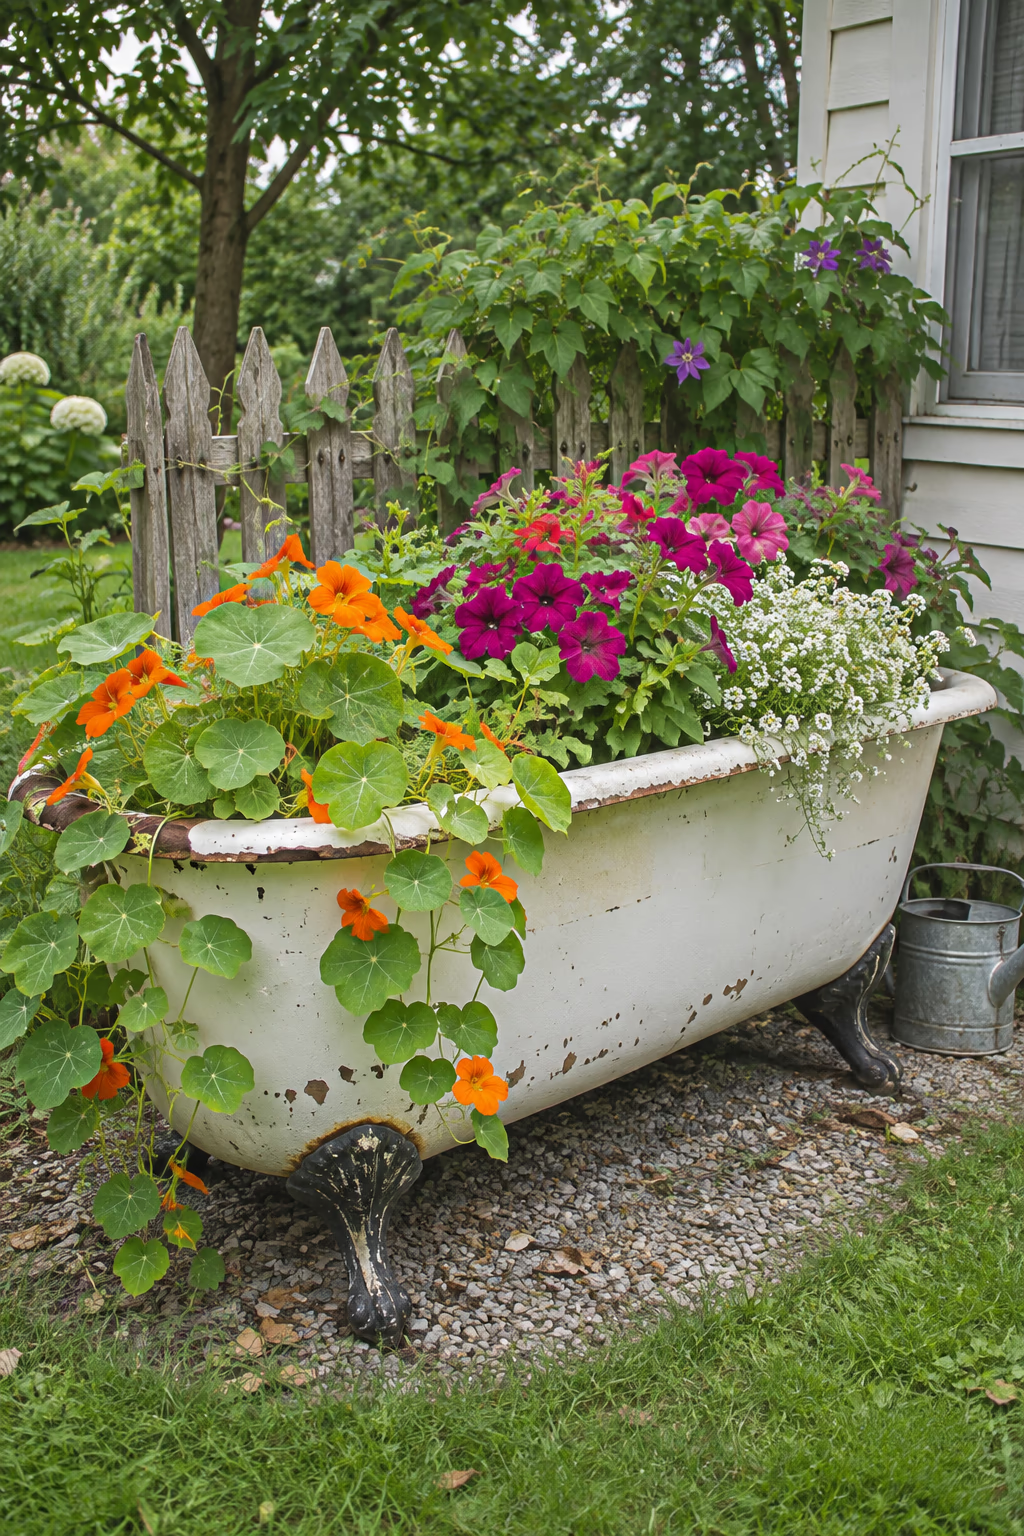
26. Upcycle an Old Bathtub Into a Raised Bed
A quirky, conversation-starting planter
A discarded clawfoot or steel tub makes a charming raised bed. The drain gives you built-in drainage. Add a few inches of gravel, then fill it with potting mix and plant flowers, herbs, or trailing nasturtiums.
A tub is deep enough for most plants and already the right height for comfortable gardening. Painted feet or a fresh coat of exterior paint on the outside adds extra character.
Older tubs may have lead in their glaze, so many gardeners use them for ornamental plants only. Tubs are extremely heavy, so place them before filling.
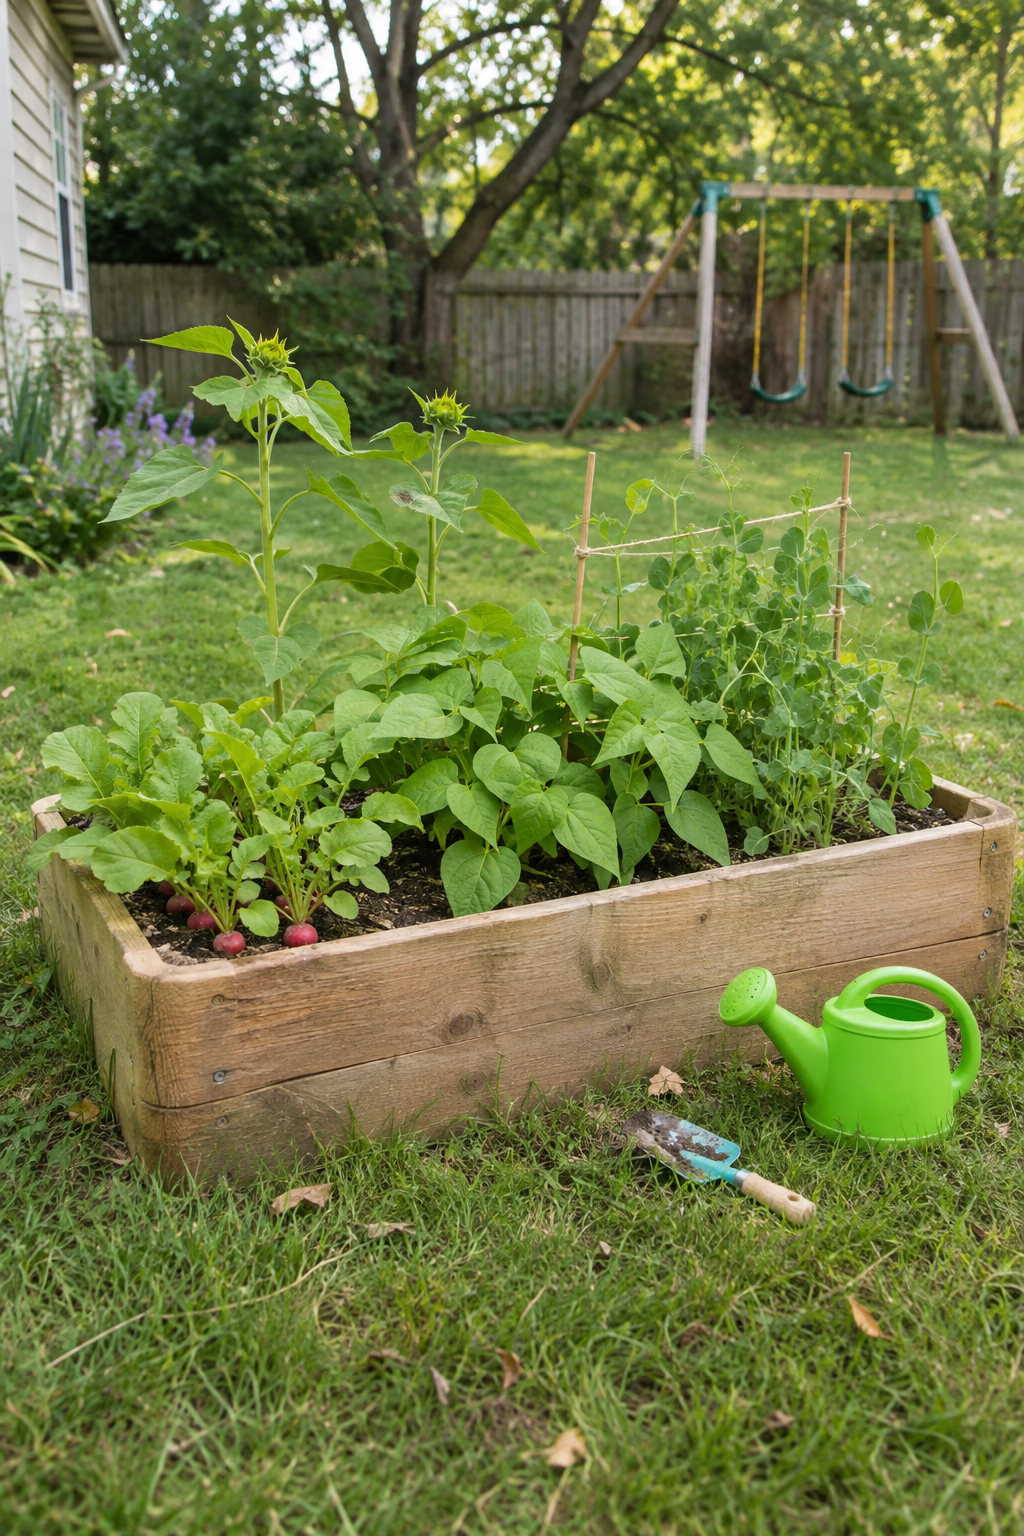
27. Build a Kid-Size Bed for Little Gardeners
Give children their own patch to grow
A small bed, about 2 by 4 feet and 8 to 12 inches tall, is just right for kids to reach across. Let them pick easy crops like radishes, sugar snap peas, sunflowers, bush beans, and cherry tomatoes.
Having their own bed helps children feel responsible and excited about growing food. Quick crops like radishes give them results in about a month.
Choose untreated wood, smooth any rough edges, and skip prickly or toxic plants. Keep a child-size watering can nearby to make daily care fun.
How to Plan Your Raised Garden Beds
A little planning before you buy lumber or soil saves money and makes your beds easier to care for for years to come.
- Follow the sun. Most vegetables need at least 6 to 8 hours of direct sun. Watch your yard for a day before choosing a spot.
- Keep beds reachable. Limit width to about 4 feet if you can reach from both sides and 2 to 3 feet if the bed sits against a fence or wall.
- Leave room for paths. Plan paths at least 2 feet wide, and 3 feet or more if you’ll use a wheelbarrow or need wheelchair access.
- Calculate soil before you shop. Multiply length by width by depth in feet to get cubic feet, then divide by 27 for cubic yards. A 4 by 8 foot bed 1 foot deep needs about 1.2 cubic yards.
- Choose food-safe materials. Use naturally rot-resistant wood, galvanized steel, stone, or concrete, and avoid old railroad ties and wood treated with outdated chemicals.
- Check rules and utilities. Review HOA guidelines for front or side yards, and call 811 before digging, driving stakes, or installing posts.
Frequently Asked Questions
How deep should a raised garden bed be?
For most vegetables and flowers, 10 to 12 inches of soil depth works well, especially if the ground beneath is loosened. Carrots, potatoes, and tomatoes appreciate 18 to 24 inches, while lettuce and herbs grow fine in 6 to 8 inches.
What should I put in the bottom of a raised bed?
On soil, you can simply loosen the ground or lay cardboard to smother grass. Add hardware cloth if gophers or voles are a problem. Avoid thick layers of gravel, which can actually slow drainage.
What is the best soil mix for raised beds?
A blend of quality topsoil and compost, often around 60 percent topsoil to 40 percent compost, works for most crops. Many garden centers sell bulk raised bed mixes. Top up with an inch or two of compost each year.
Do raised beds need more water than in-ground gardens?
They often dry out faster because they drain well and warm quickly. Mulching, drip irrigation, and deeper beds all help hold moisture through hot weather.
How much does it cost to build a raised garden bed?
Costs vary with material and size. A concrete block or basic wood bed can cost under a couple hundred dollars including soil, while cedar, metal, stone, or brick beds cost more. Soil is often a big part of the total, so plan for it.
Final Thoughts
The right raised bed makes gardening easier, neater, and more enjoyable. Whether you choose metal and cedar, a waist-high planter, a round stock tank, or a simple block bed, the right design can transform how you use your yard.
Start with one or two beds in your sunniest spot, fill them with good soil, and add more as your confidence grows. With a little planning, your raised garden beds will give you fresh harvests and beautiful color for years.