Imagine coming in from an afternoon of weeding, mowing, or splashing at the beach and stepping straight under warm water in the open air. Sunlight filters through the leaves, a breeze moves past the slats, and the sand and grass clippings wash away before you ever reach the back door.
An outdoor shower is one of those rare upgrades that is both practical and a little indulgent. It keeps dirt and chlorine out of the house, saves wear on your indoor bathroom, and turns a forgotten corner of the yard into a spot you’ll actually look forward to using. It also doesn’t have to be a big construction project. Many great setups start with a single hose bib or a short run of pipe.
These 19 outdoor shower ideas cover enclosures, plumbing styles, floors, walls, planting, lighting, and budget builds, from a simple fence-mounted rinse to a spa-like corner with a soaking tub. Mix and match the ones that suit your climate, yard size, and how often you plan to use it.
1. Build a Cedar Slat Shower Enclosure
Warm wood privacy that breathes
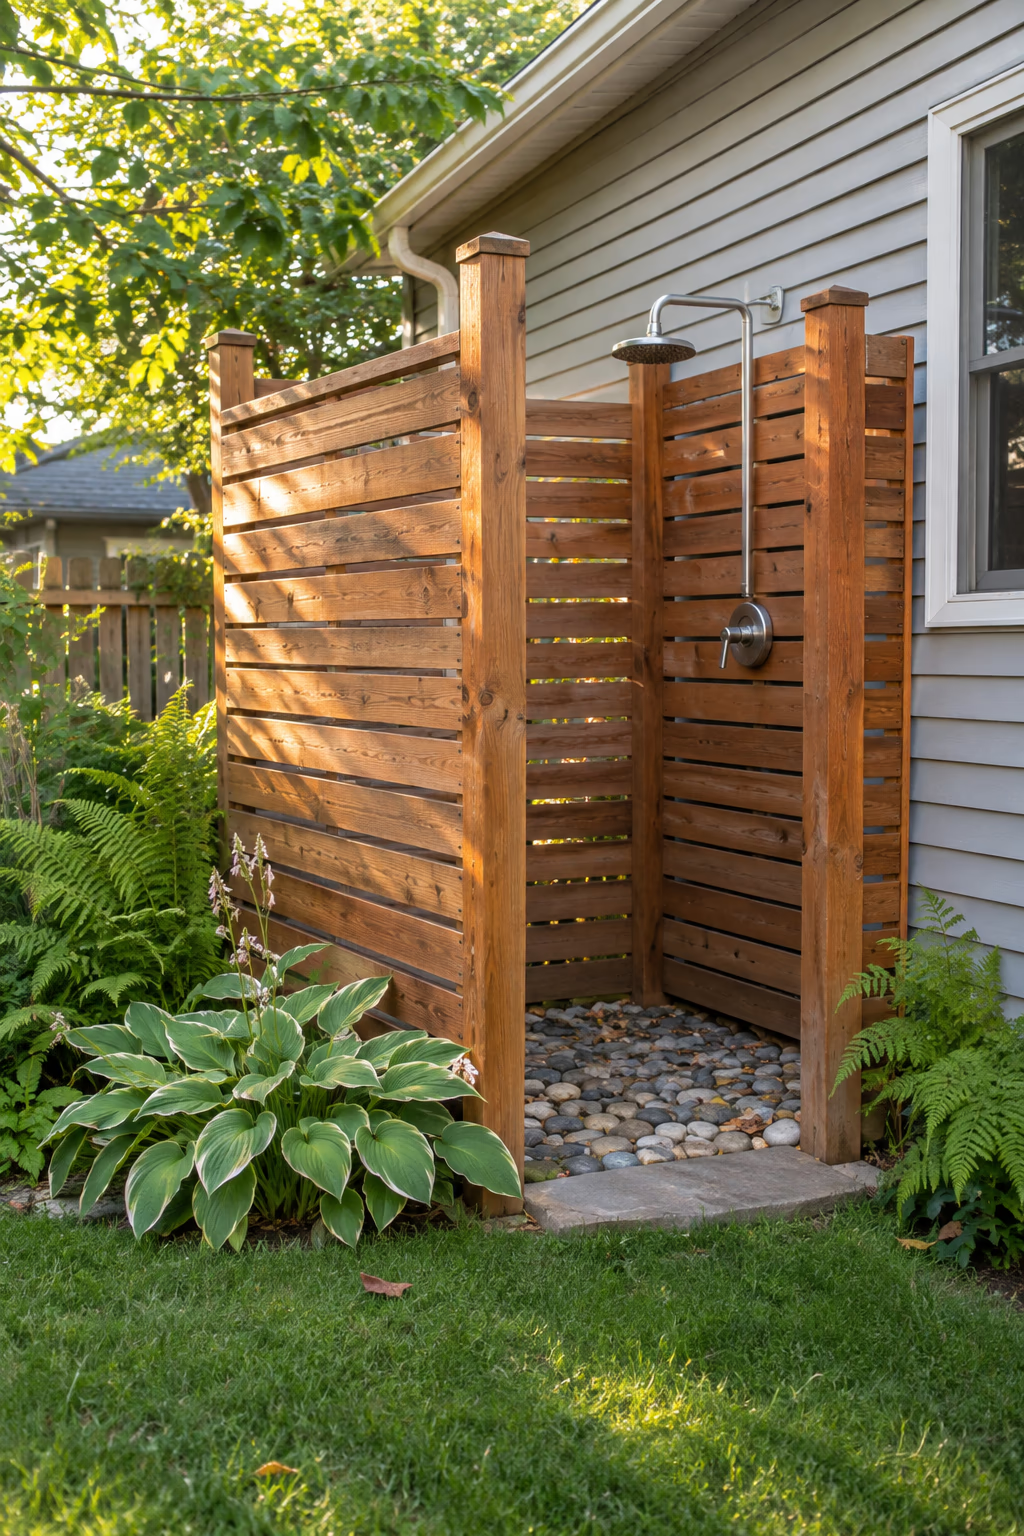
A three-sided enclosure made from cedar slats is the classic outdoor shower look for good reason. Set 4×4 posts in concrete or on post bases, then attach 1×4 or 1×6 boards horizontally with gaps of about 1/2 inch. A footprint of roughly 4 by 4 feet gives enough elbow room for one person, and walls about 6 feet tall cover most adults while leaving the top open to the sky.
Cedar resists rot and insects naturally, smells wonderful when wet, and weathers to a soft silver gray if you leave it unfinished. The gaps let air move through so the wood dries quickly between uses, which is the real secret to making it last.
Use stainless steel screws rather than standard galvanized fasteners, which can cause dark streaks in cedar. If you prefer the warm honey color, plan to reapply a penetrating exterior oil once a year.
2. Run Exposed Copper Pipe Up a Fence or Post
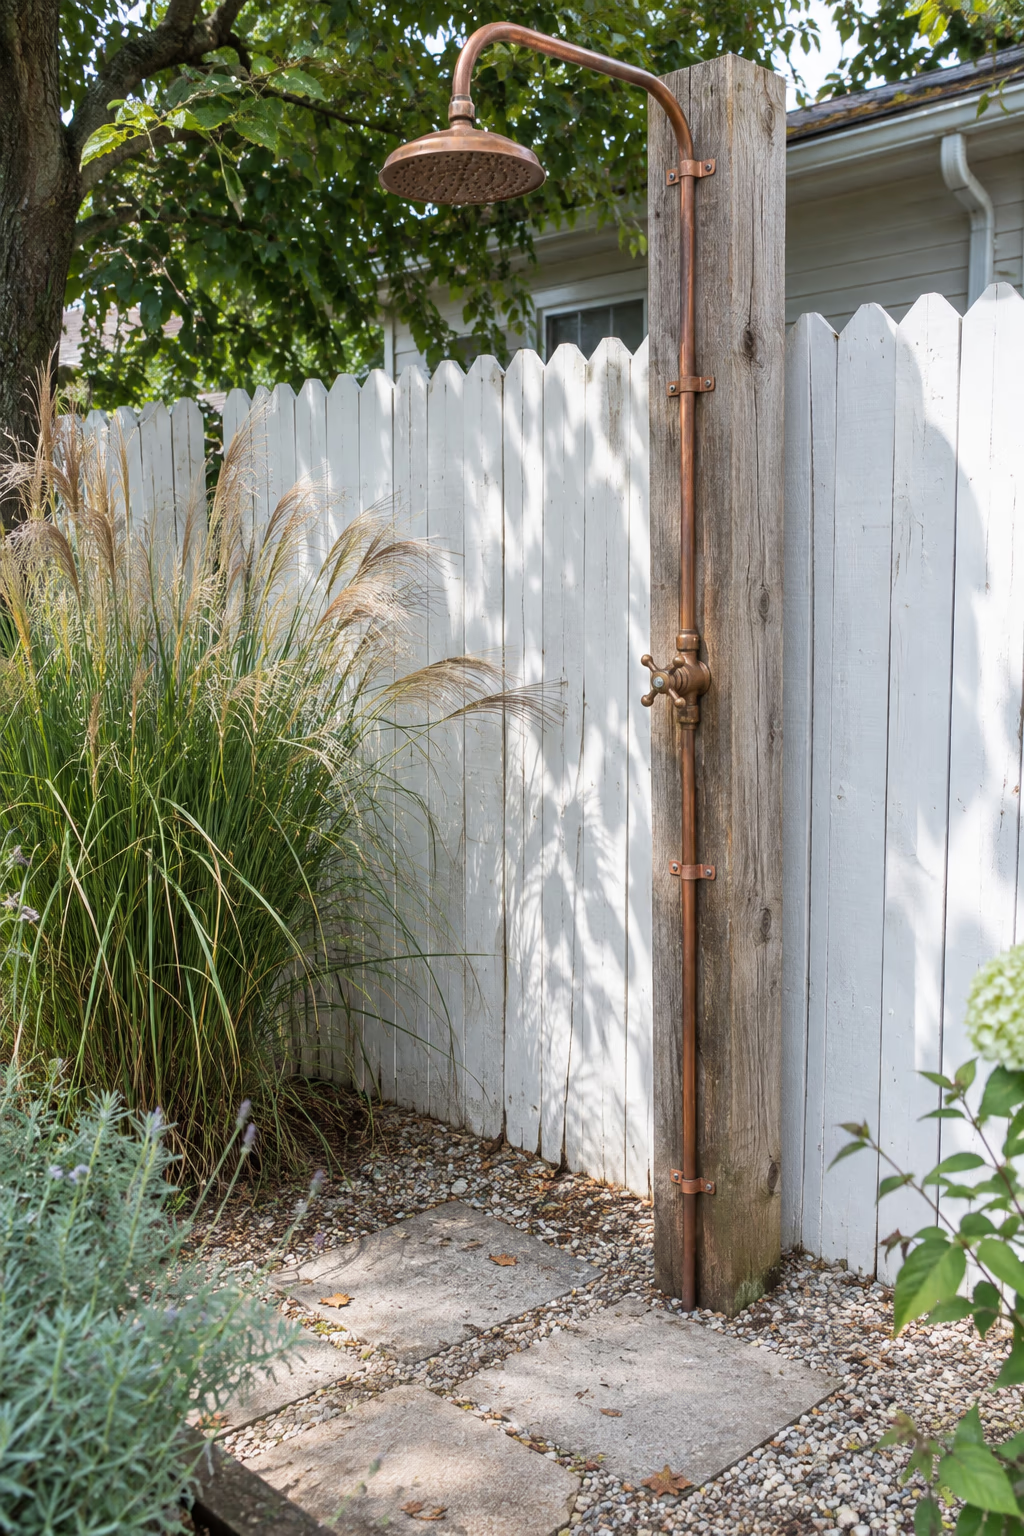
Plumbing that doubles as decor
Instead of hiding the pipes, make them the main feature. A run of 1/2-inch copper pipe climbing a fence post or a single sturdy 6×6 timber, topped with a round showerhead and a simple valve at shoulder height, looks handcrafted and intentional. Secure the pipe with copper or stainless straps every 2 to 3 feet so it can’t wobble.
Copper develops a warm brown patina over time and eventually picks up hints of green, which looks lovely against weathered wood or a white fence. It’s also one of the most affordable ways to get a custom look, since the pipe and fittings cost far less than a premade shower panel.
Soldering copper takes some practice. Push-to-connect fittings are an easier option for DIYers, but in cold climates any exposed pipe must be drained before the first freeze or it can split.
3. Tuck the Shower Into Lush Garden Planting
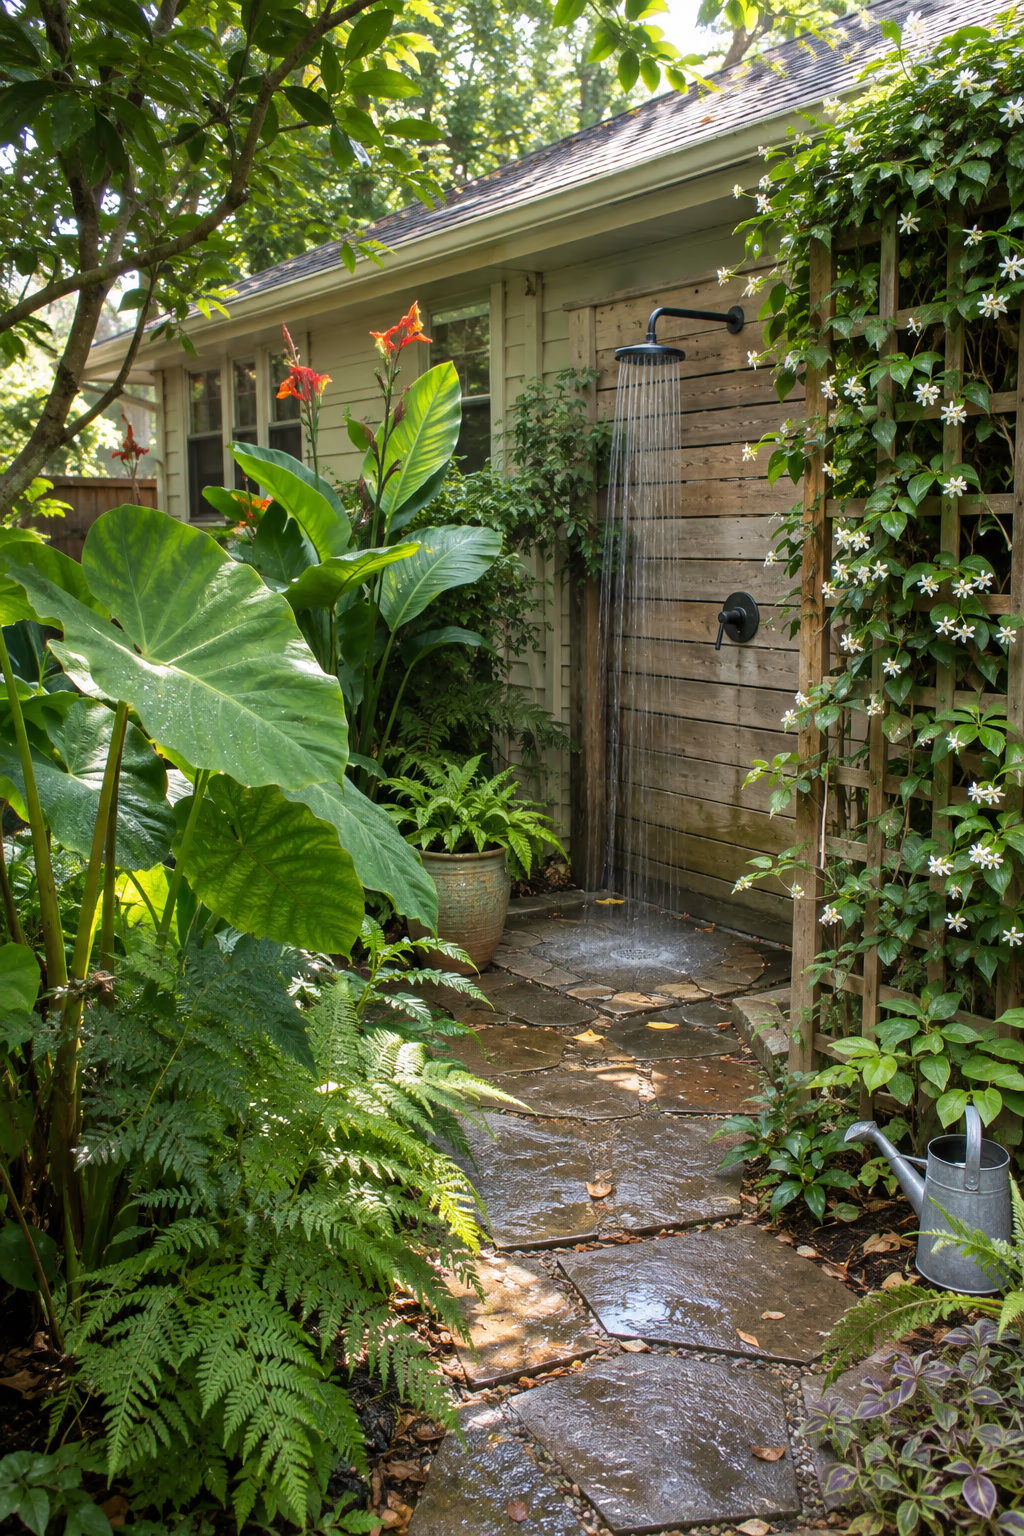
Feel like you’re showering in the garden
Surround the shower with layers of foliage so it feels hidden in green. Big-leaf plants such as elephant ears, cannas, and hardy banana work well in warm summers, while ferns, hostas, and hydrangeas suit shadier spots. A climbing vine like clematis or star jasmine trained up a trellis panel can soften a plain wall in a single season.
The runoff from the shower gives nearby plants a steady drink, so choose species that enjoy moist soil. Leafy screening also blocks views from neighbors more naturally than a tall solid fence.
Keep plants with thorns or sticky sap away from the shower area. If you use soap, pick a biodegradable, plant-friendly one and keep the heaviest runoff away from edible beds.
4. Hang a Rainfall Showerhead From a Pergola
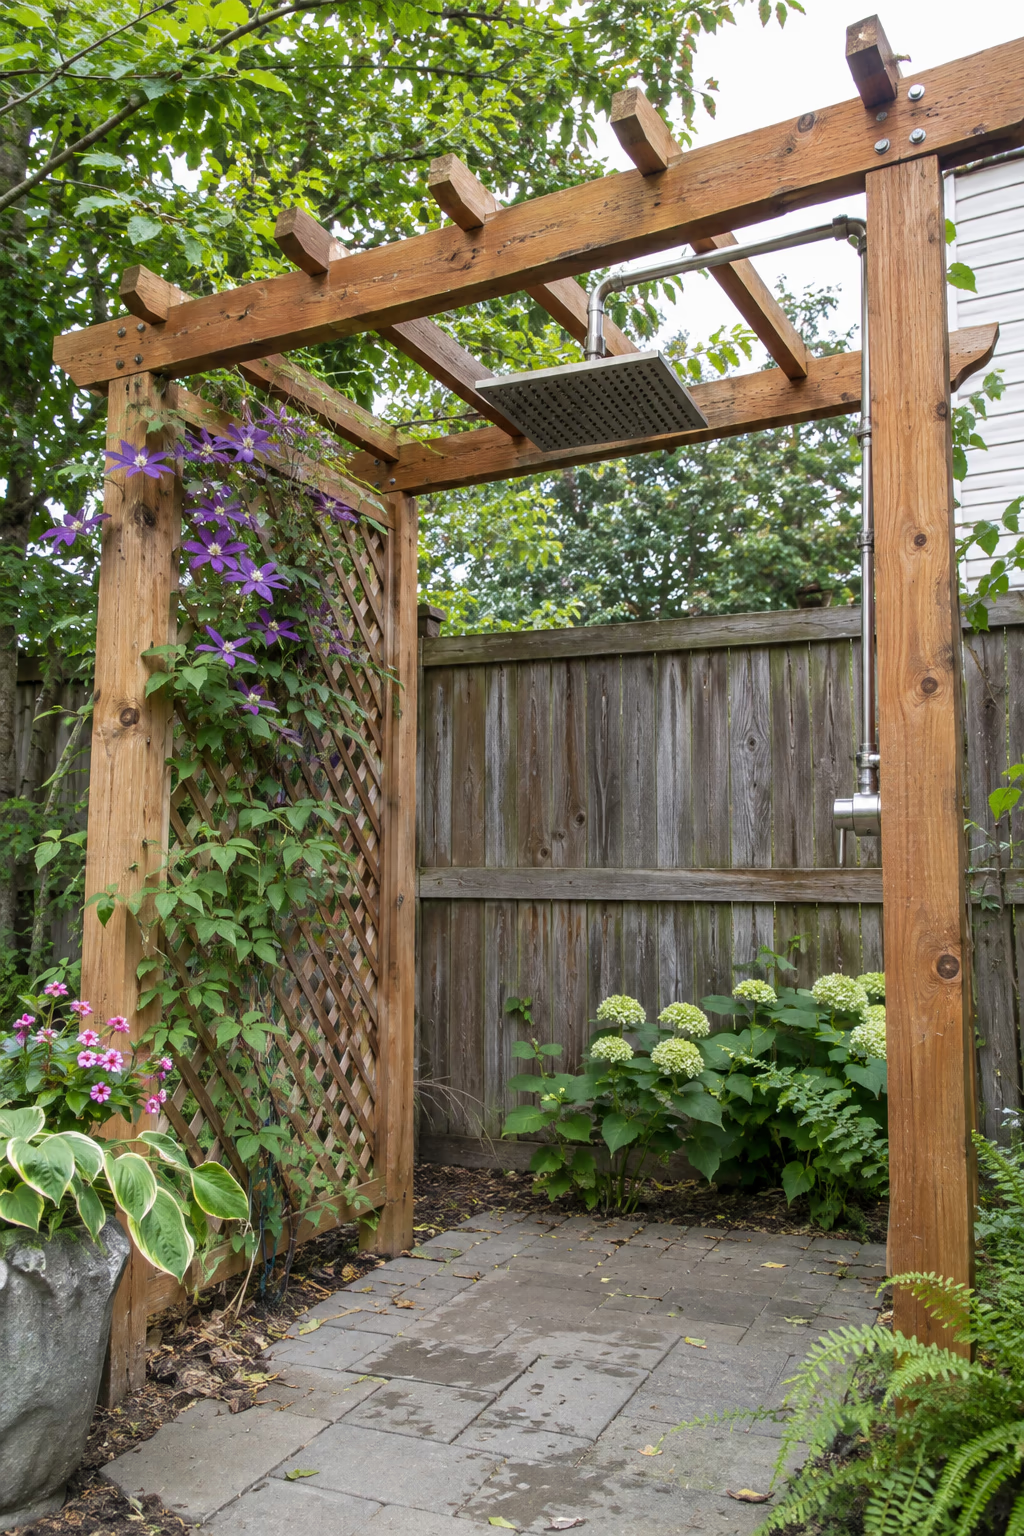
A spa-style soak under an open roof
A small pergola, about 4 by 6 feet, gives you a place to mount a wide rainfall head directly overhead. Run the supply pipe up one post and across a top beam, then hang a 10- or 12-inch square or round head about 7 feet above the floor. Add lattice or slats on one or two sides for privacy.
Overhead water feels relaxing and soaks you evenly, which is why rainfall heads are so popular in spa-inspired designs. The pergola also frames the shower as a real destination in the yard rather than a quick rinse spot.
Large rainfall heads use more water and need decent pressure to work well. If your outdoor tap runs weak, choose a smaller 8-inch head or test the pressure before committing to the design.
5. Lay a River Rock Floor That Drains Naturally
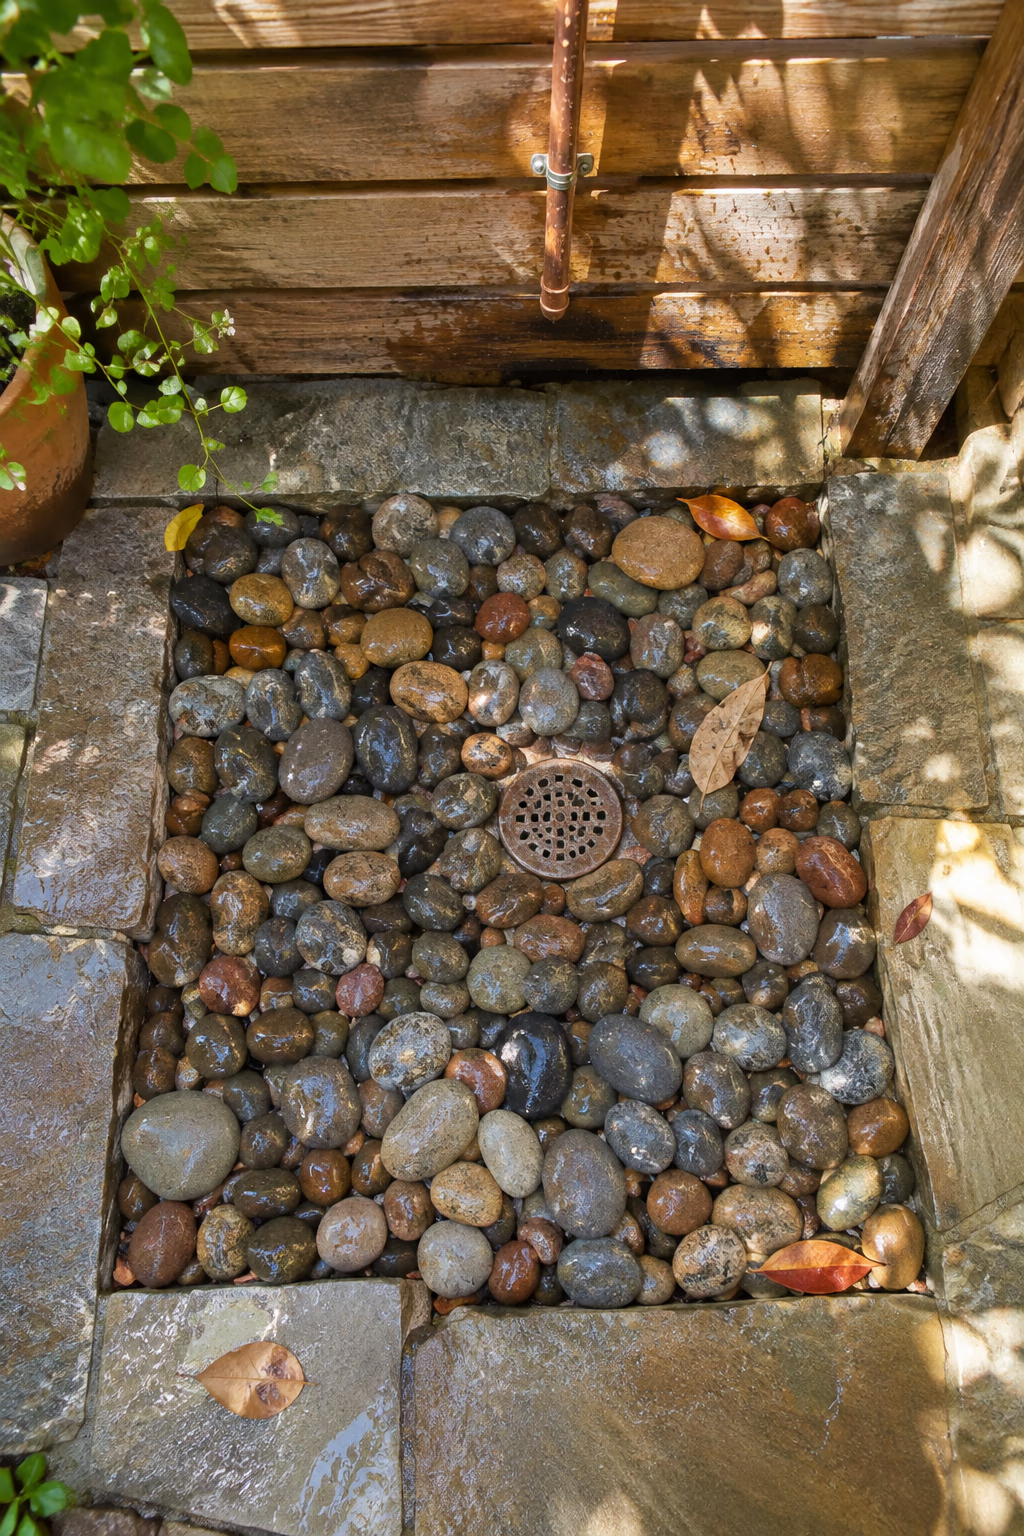
Simple drainage with a natural feel underfoot
Dig out the shower footprint 12 to 18 inches deep, fill the bottom with coarse gravel, and finish with a 2- to 3-inch layer of smooth river rock in the 1- to 2-inch range. This creates a basic dry well that lets water soak into the ground instead of puddling.
Rounded stones feel pleasant on bare feet, look natural in almost any style of yard, and cost very little. They also hide splashes and dirt better than a solid surface.
This approach works best in sandy or loamy soil. In heavy clay, water may sit for hours, so add a perforated drain pipe that leads runoff to a lower part of the yard, and keep the drainage area at least 10 feet from your foundation.
6. Create a Natural Stone Wall Backdrop
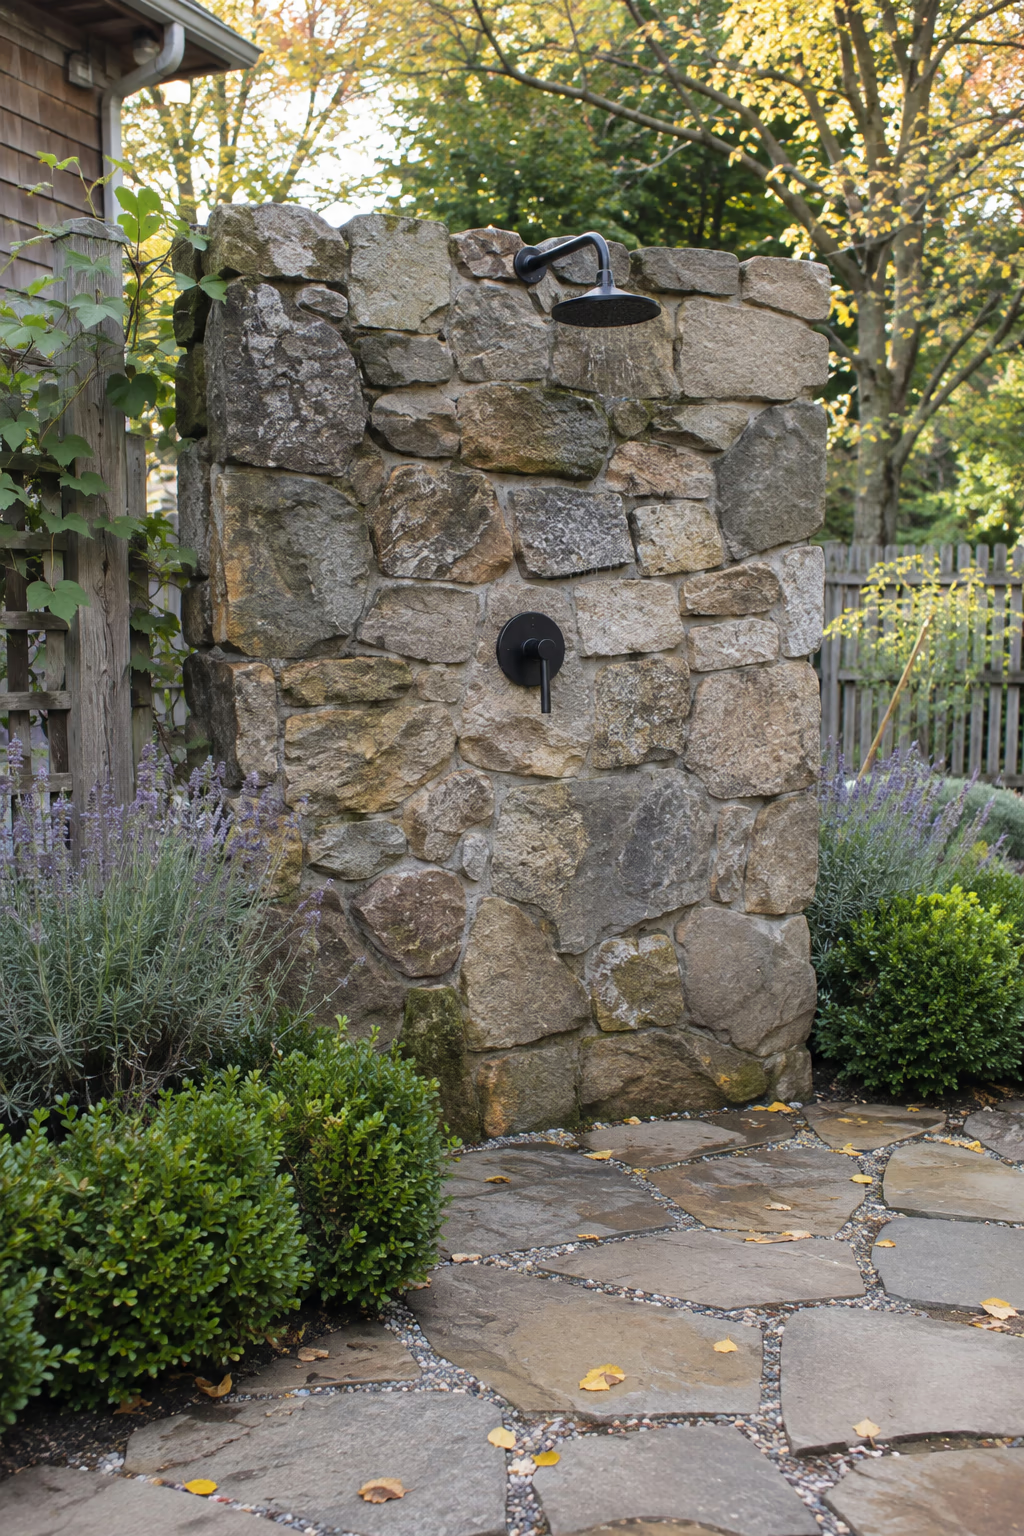
A permanent feature built to last
A short stone wall, either dry-stacked fieldstone or stone veneer over a concrete block core, makes a solid backdrop for a wall-mounted shower. The plumbing can run inside the block wall so only the showerhead and valve show.
Stone handles constant moisture without rotting, adds a rugged texture, and blends easily with existing patios and garden walls. In sunny spots, it also holds warmth late into the afternoon.
Stone walls are heavy and usually need a proper concrete footing. A mason may be worth hiring for anything taller than about 3 feet. Choose stone with some texture rather than polished slabs, which can become slick around the floor.
7. Build In a Bench, Shelves, and Towel Hooks
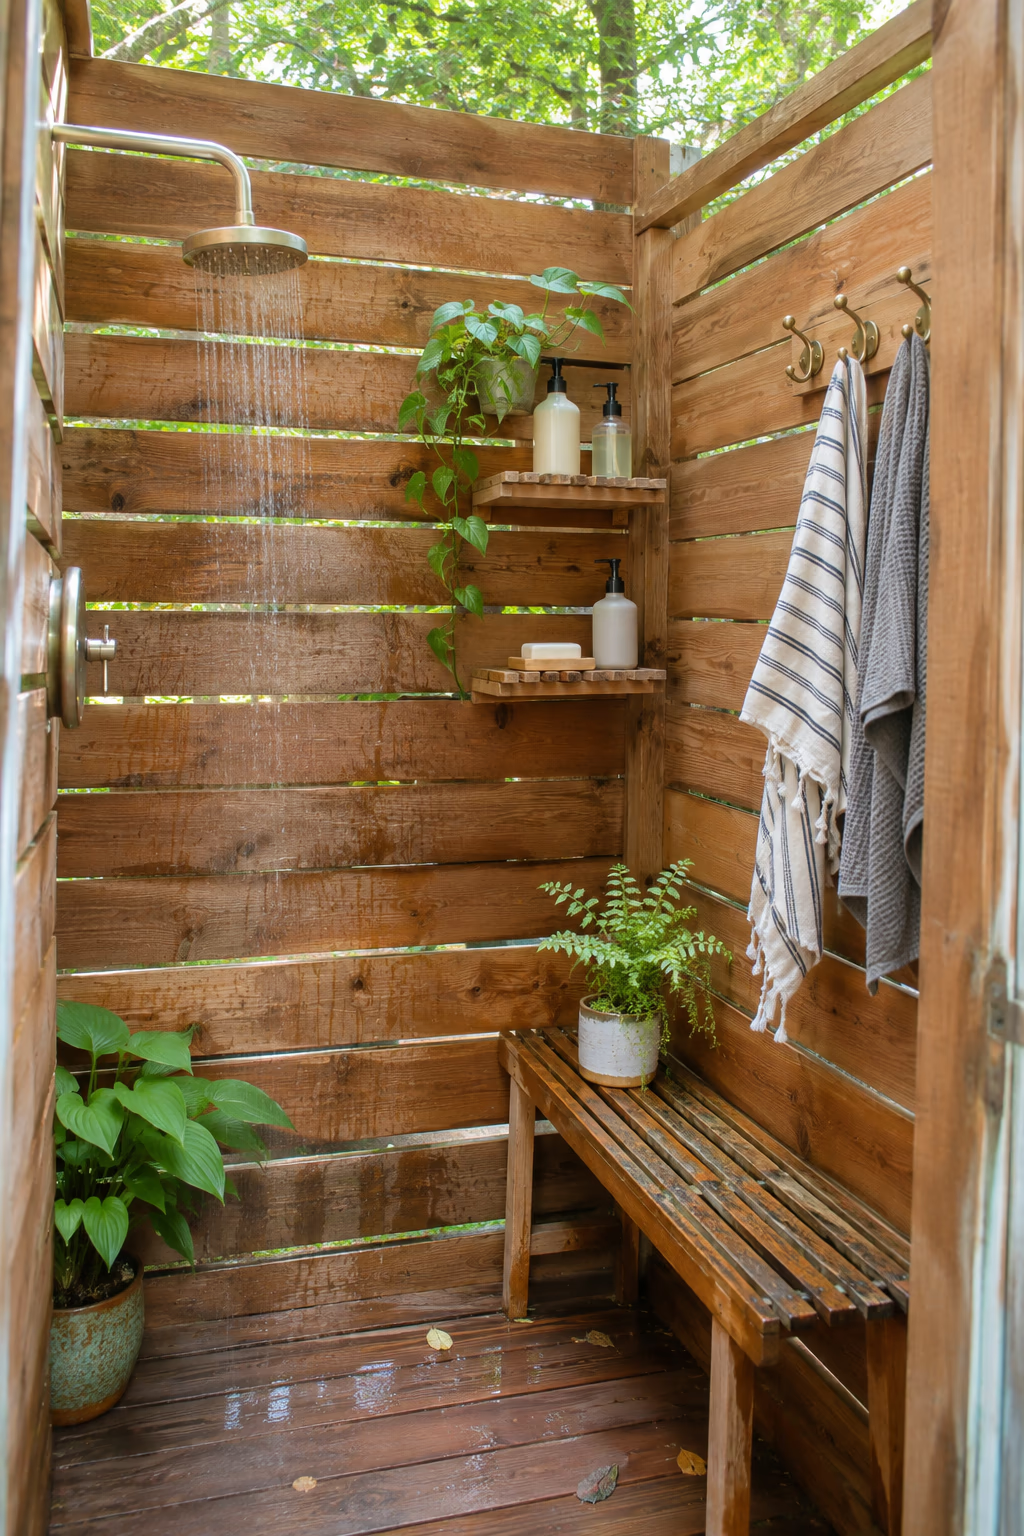
Small comforts that make it usable every day
Add a narrow cedar or teak bench, about 12 inches deep, along one wall of the enclosure or just outside it. Mount two or three slatted shelves for soap and shampoo and a row of stainless or brass hooks for towels and clothes, placed where spray won’t reach.
A seat makes it easier to rinse sandy feet or take off muddy boots, and storage means you aren’t balancing bottles on the ground. These details turn a basic rinse into a space that feels finished.
Slatted shelves drain better than solid ones and prevent standing water and grime. Bring towels inside after use so they don’t stay damp and mildew.
8. Set Up a Coastal Rinse Station by the Gate
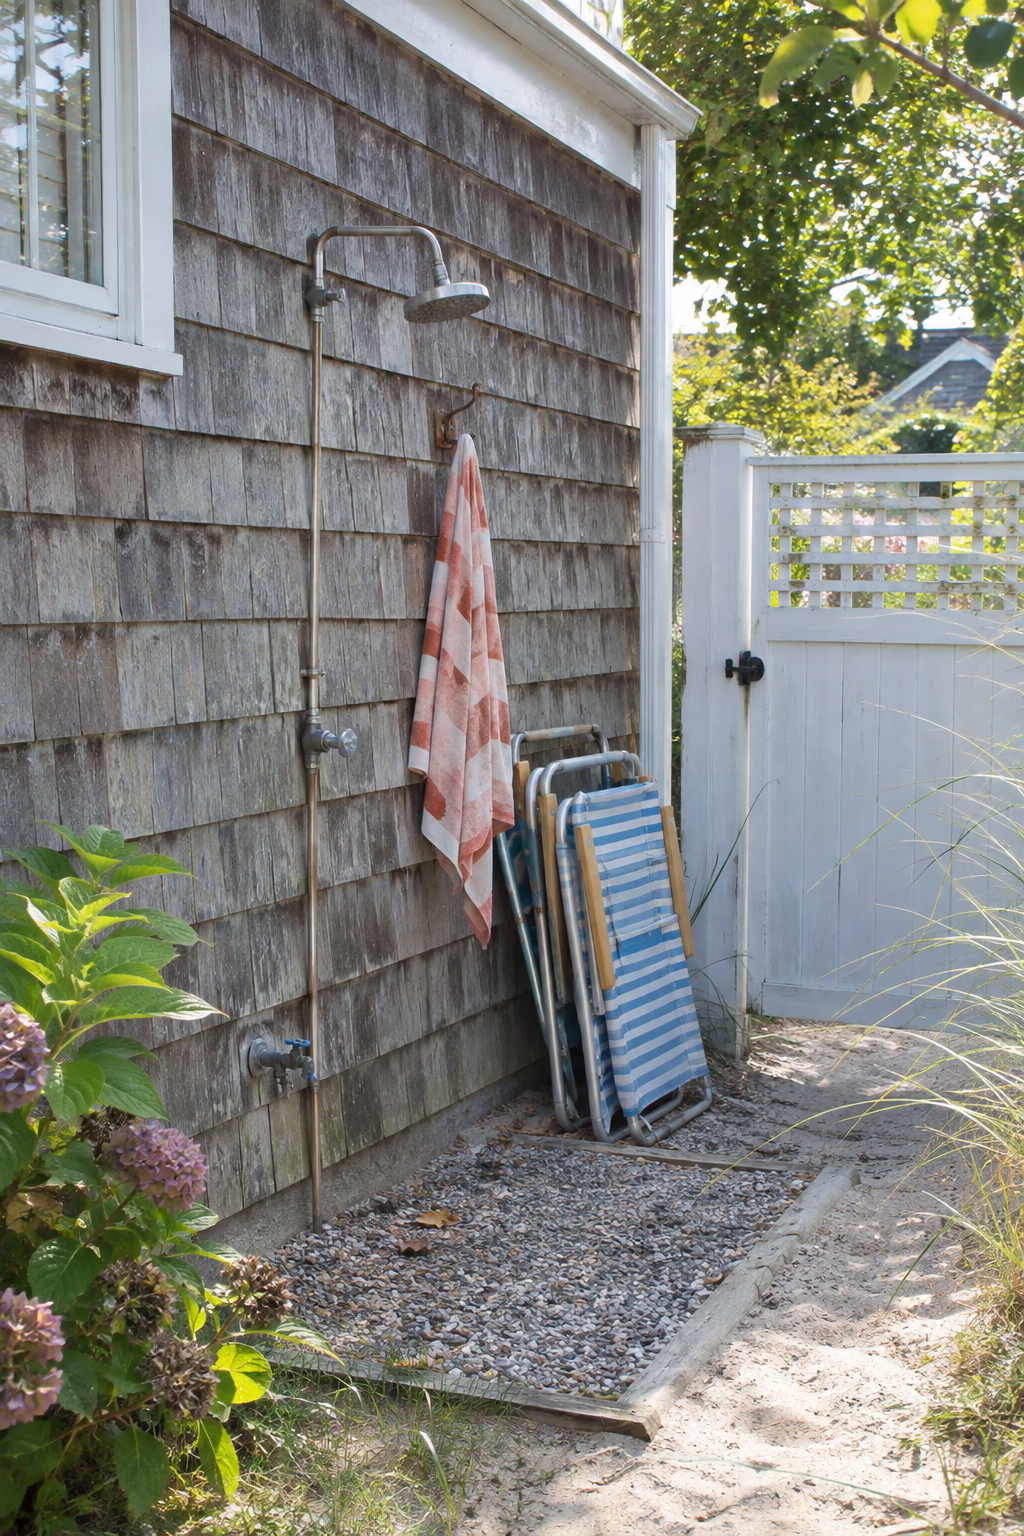
Leave the sand outside where it belongs
If you live near the beach or a lake, put a simple open shower right where everyone comes back into the yard. A wall-mounted head plus a low foot-rinse spigot over a gravel pad, near the side gate, catches sand before it reaches the deck or the house. Add a hook for wet towels and a spot for beach chairs and boogie boards.
This kind of station is all about convenience, so it doesn’t need much privacy. Weathered shingles, white paint, and a striped towel or two give it an easy beach-cottage feel.
Salt air is hard on metal. Choose marine-grade stainless steel or solid brass fixtures, and rinse them with fresh water now and then to slow corrosion.
9. Smooth a Stucco Wall for a Mediterranean Look
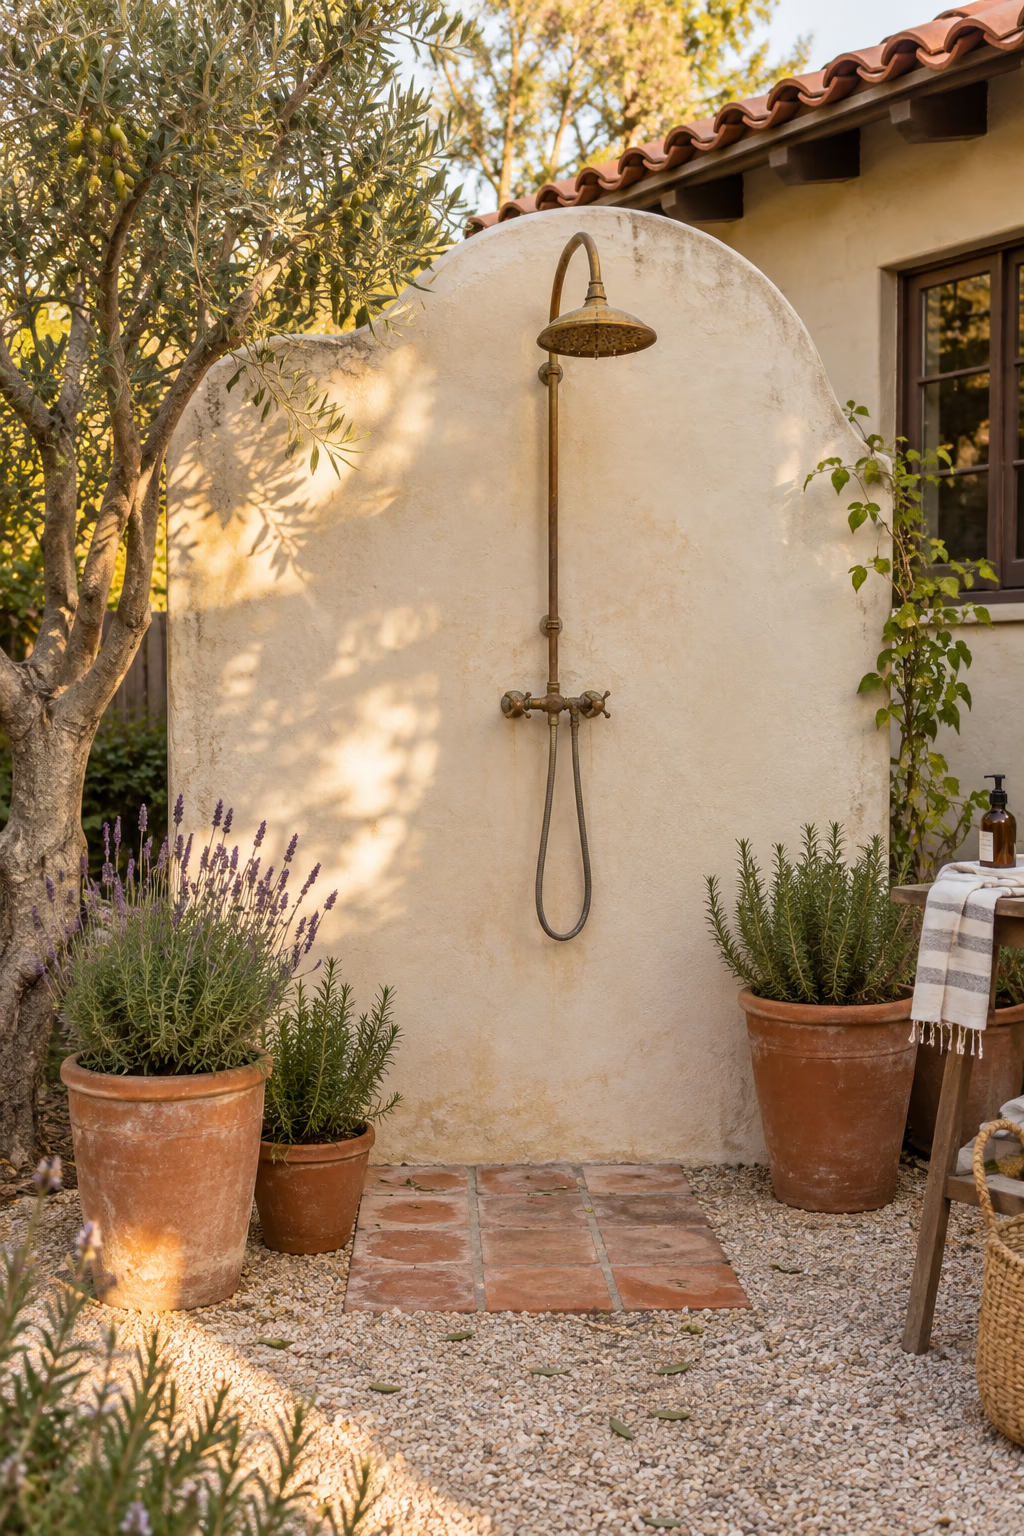
Sun-washed warmth with soft curves
A freestanding wall finished in stucco or exterior plaster, painted a warm white, sand, or terracotta, gives a shower the feel of a villa courtyard. A gentle curve or rounded top edge adds softness. Pair it with an aged bronze or brass fixture, terracotta pots of rosemary or lavender, and a gravel or tile floor.
The smooth surface makes greenery and metal finishes stand out, and light colors stay cool in hot climates. This style suits Southwest, Spanish revival, and Southern California homes especially well.
Stucco needs a waterproof base and proper flashing, or water can get behind it and cause cracks. In freezing regions, check with a local contractor about the best mix and sealer for your climate.
10. Step Onto a Removable Wood Duckboard
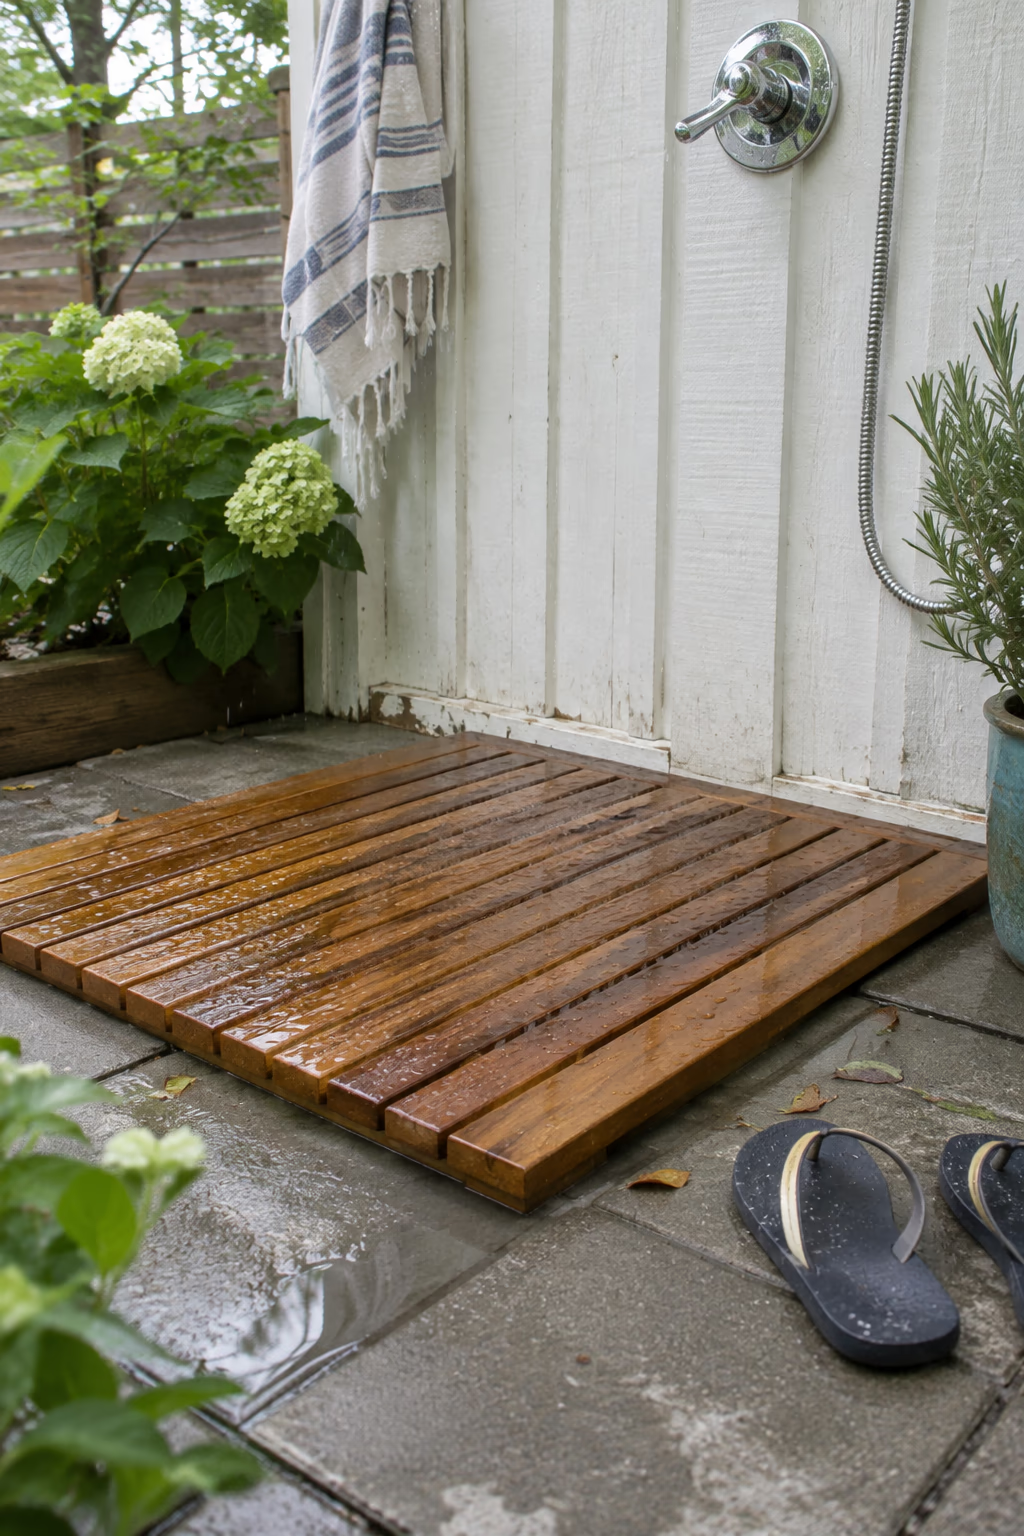
A comfortable floor that lifts out for cleaning
A slatted duckboard is a raised wood platform that sits over gravel, pavers, or a concrete pad. Build one from cedar, teak, or ipe using 1×3 or 1×4 boards set about 3/8 inch apart on runners, sized to fit your shower floor, often around 3 by 3 feet.
It keeps your feet off cold or rough ground, lets water drop straight through, and looks warm and finished. Because it simply sits in place, you can lift it to rinse out leaves and debris underneath.
Wood stays slippery if it never dries out. Prop the duckboard up on its side occasionally in damp weather, and store it in a shed over winter to make it last longer.
11. Tile a Bold Accent Wall
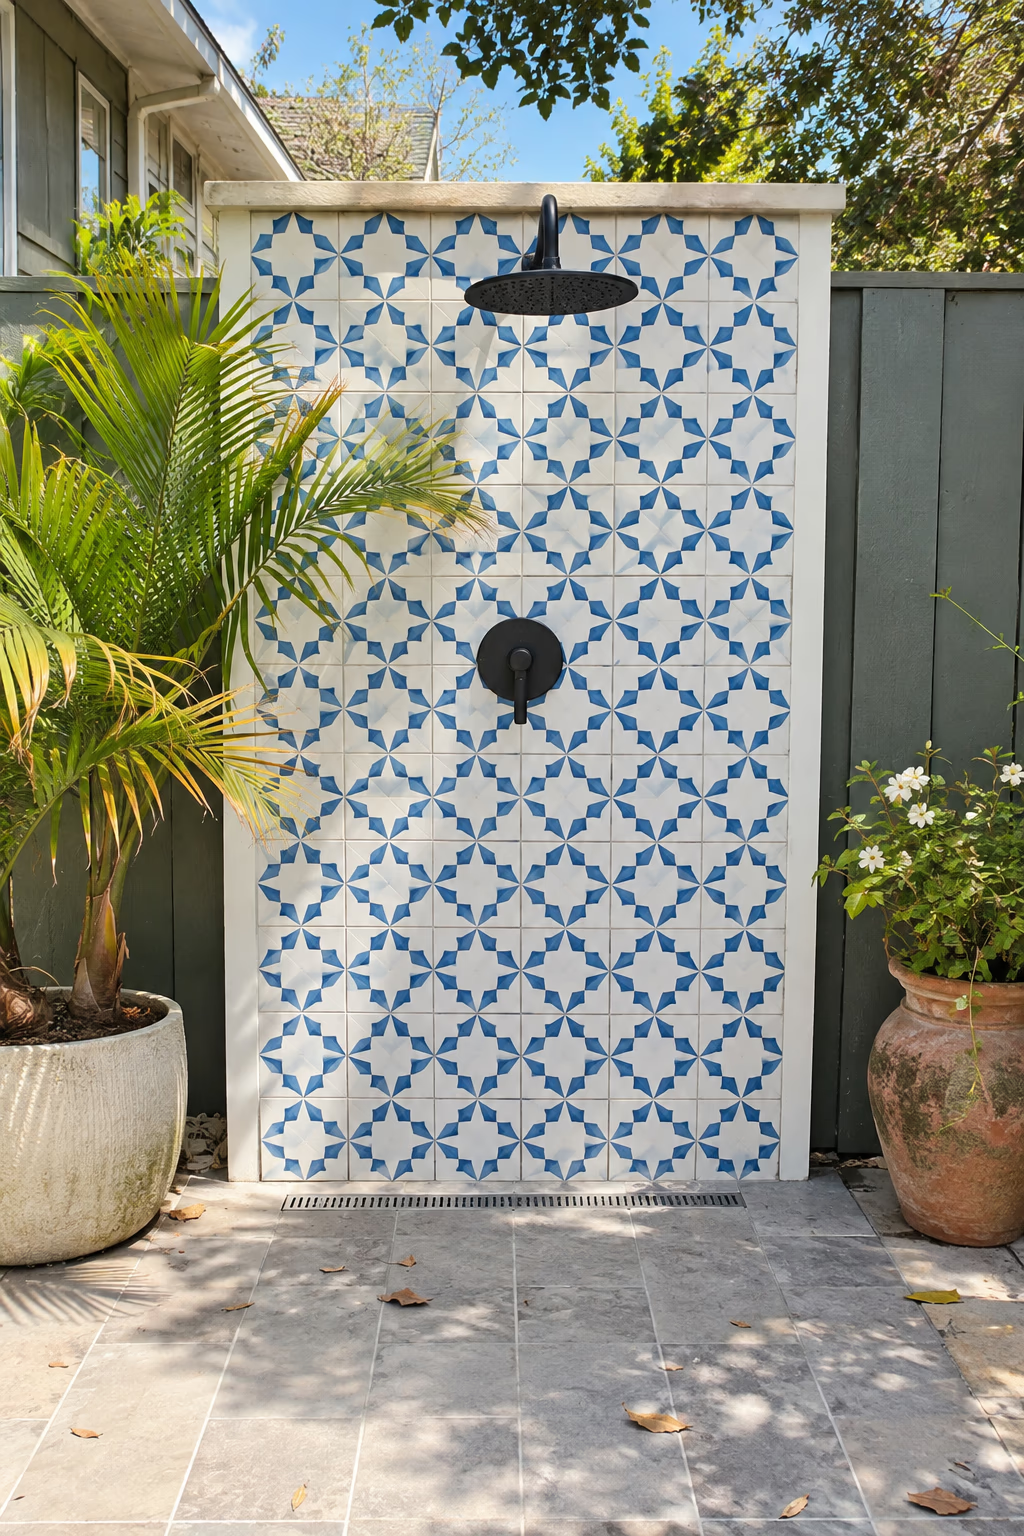
Pattern and color that stand out in the yard
Turn the shower wall into a focal point with tile. Patterned cement-look porcelain, glossy blue and white ceramic, green zellige-style tile, or a pebble mosaic can all brighten a plain corner. Install it over cement backer board with a waterproof membrane on a block or framed wall.
Tile is easy to clean, completely water resistant, and brings personality that wood and stone alone can’t. A small panel of about 4 by 7 feet is enough to make an impact without a large budget.
In climates with freeze and thaw cycles, use porcelain or tile rated frost-resistant, since many decorative ceramic and terracotta tiles absorb water and crack. Choose a slip-resistant tile for any floor area.
12. Fit a Compact Stall Into a Narrow Side Yard
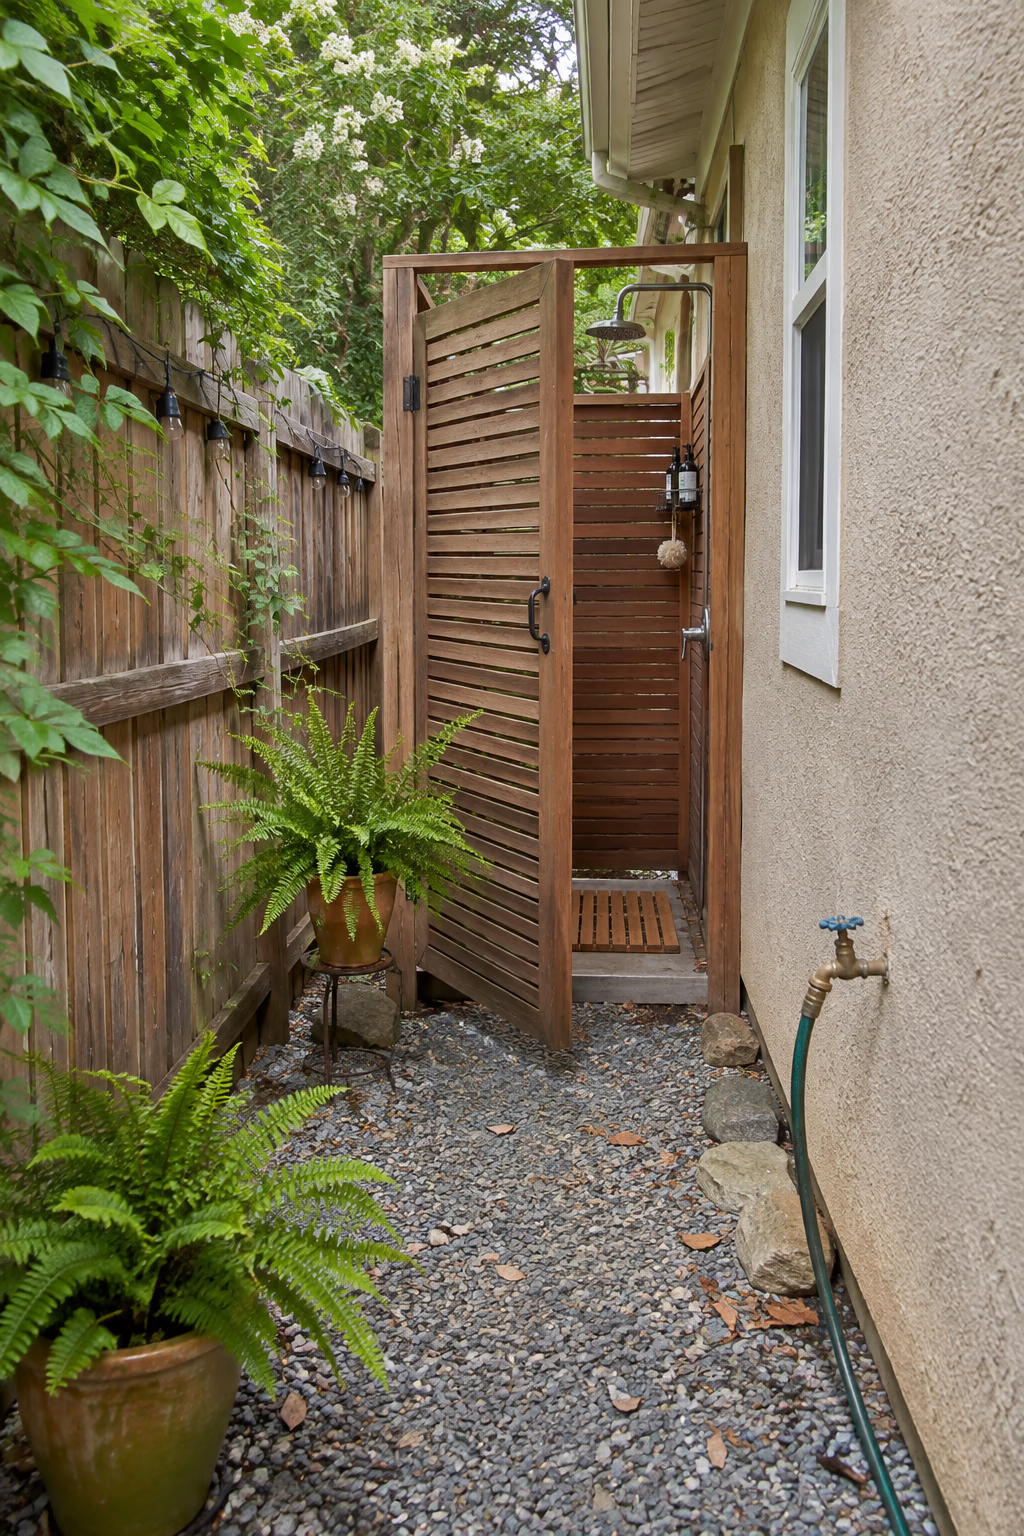
Put that awkward strip of space to work
Side yards are often too narrow for anything except trash cans, but a 3-by-3-foot stall fits nicely against the house or fence. Build a simple frame with a hinged slat door, and run the supply from a nearby hose bib or interior plumbing wall.
Side yards usually offer built-in privacy and are close to existing plumbing, which keeps installation costs down. They also keep the shower out of your main patio views.
Make sure water drains away from the house, not toward it, and that the stall doesn’t block a required path, utility meter, or gate. Check setback rules if you plan to build close to a property line.
13. Mount a Simple Shower on an Exterior House Wall
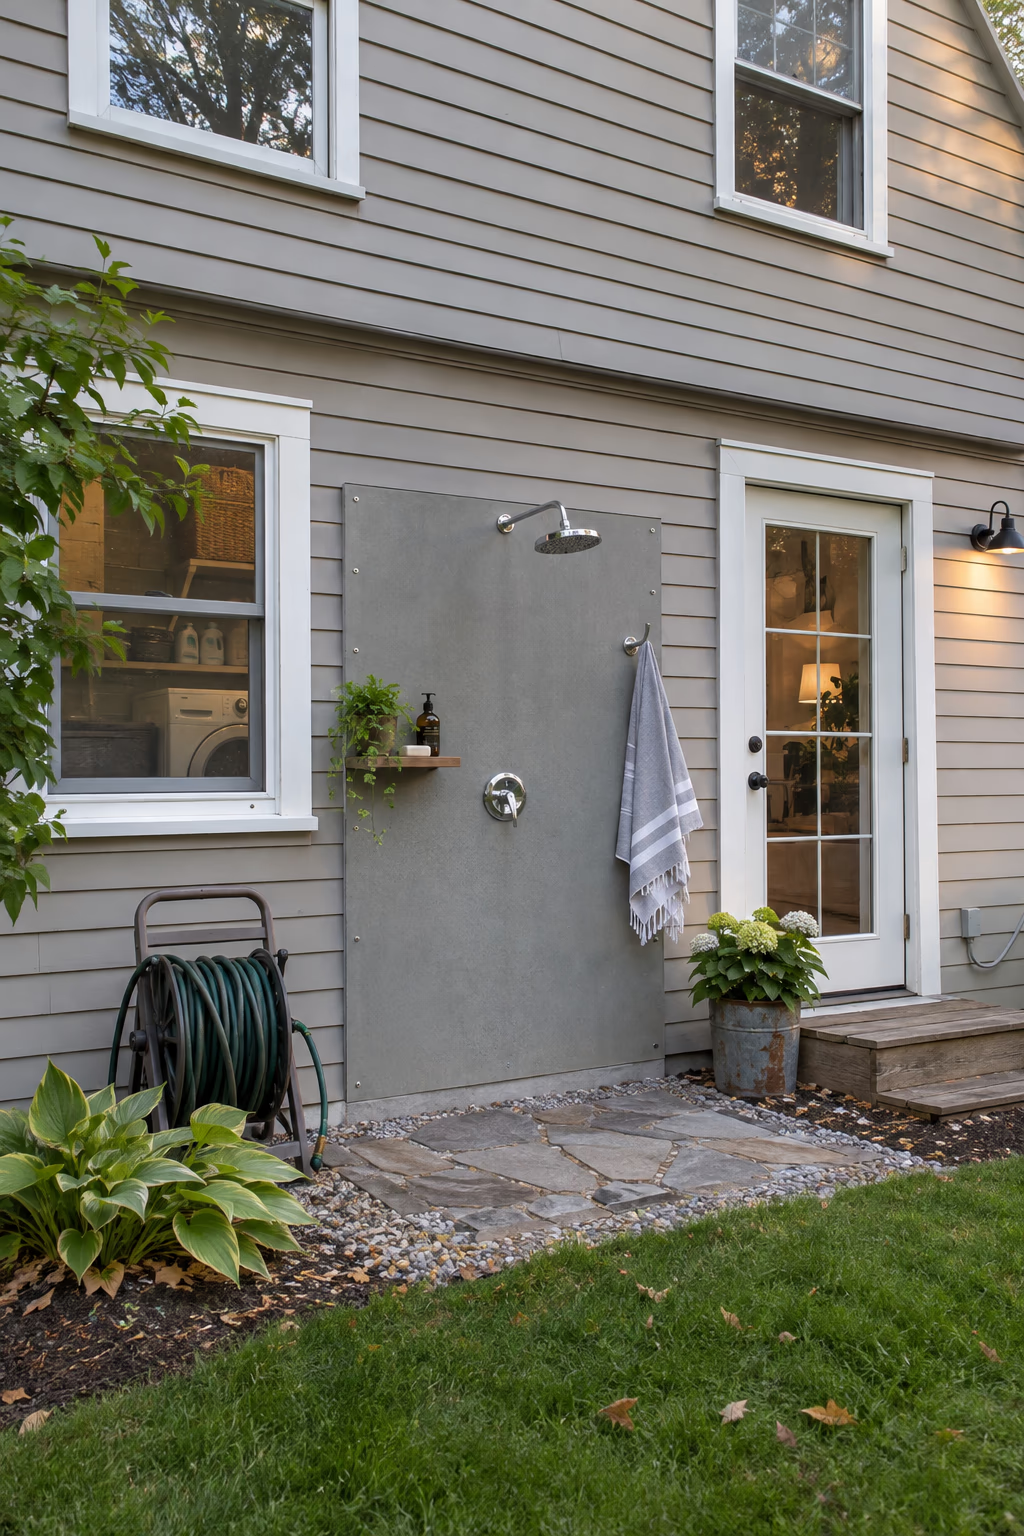
The easiest way to add hot and cold water
A wall-mounted shower attached to the back of the house can tap into existing indoor plumbing for both hot and cold water. A plumber runs the lines through the wall to an outdoor mixing valve and showerhead, often next to a back door or laundry room.
It’s one of the most dependable setups because the water heater is already nearby and the pipes are short. A simple stone or gravel pad below, plus a hook and a small shelf, is all it needs.
Protect the siding with a tiled or composite panel behind the fixture, and make sure the ground slopes away from the foundation. Use an anti-scald valve and frost-free or easily drained lines in cold areas.
14. Place a Freestanding Shower Column Beside the Pool
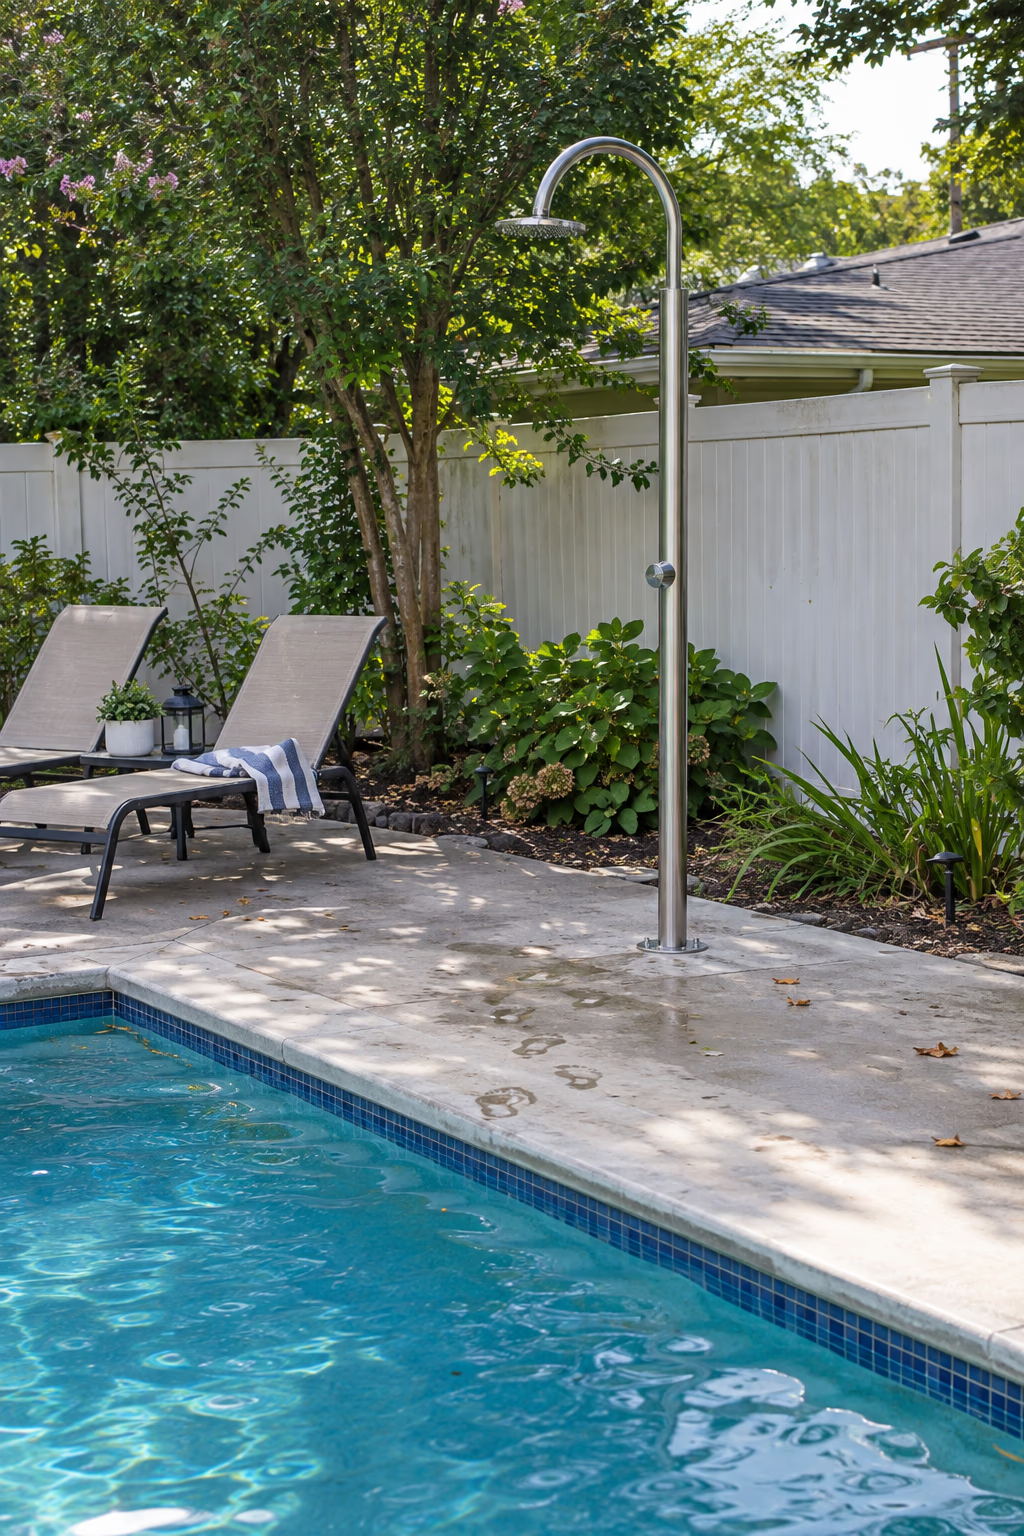
A quick rinse right where you need it
A freestanding shower column, made of stainless steel, aluminum, or powder-coated metal, can be bolted to a concrete pad or pool deck. Many connect to a standard garden hose, so you can add one without any trenching.
Rinsing off before and after a swim helps keep the pool cleaner and washes chlorine off skin and hair. A column’s slim profile looks clean and modern and takes up only a couple of square feet.
Place it far enough from the pool edge that rinse water and soap don’t flow back into the pool, and anchor it firmly so it can’t tip. Hose-fed columns provide only cold water unless you add a heater.
15. Warm the Water With a Solar Setup
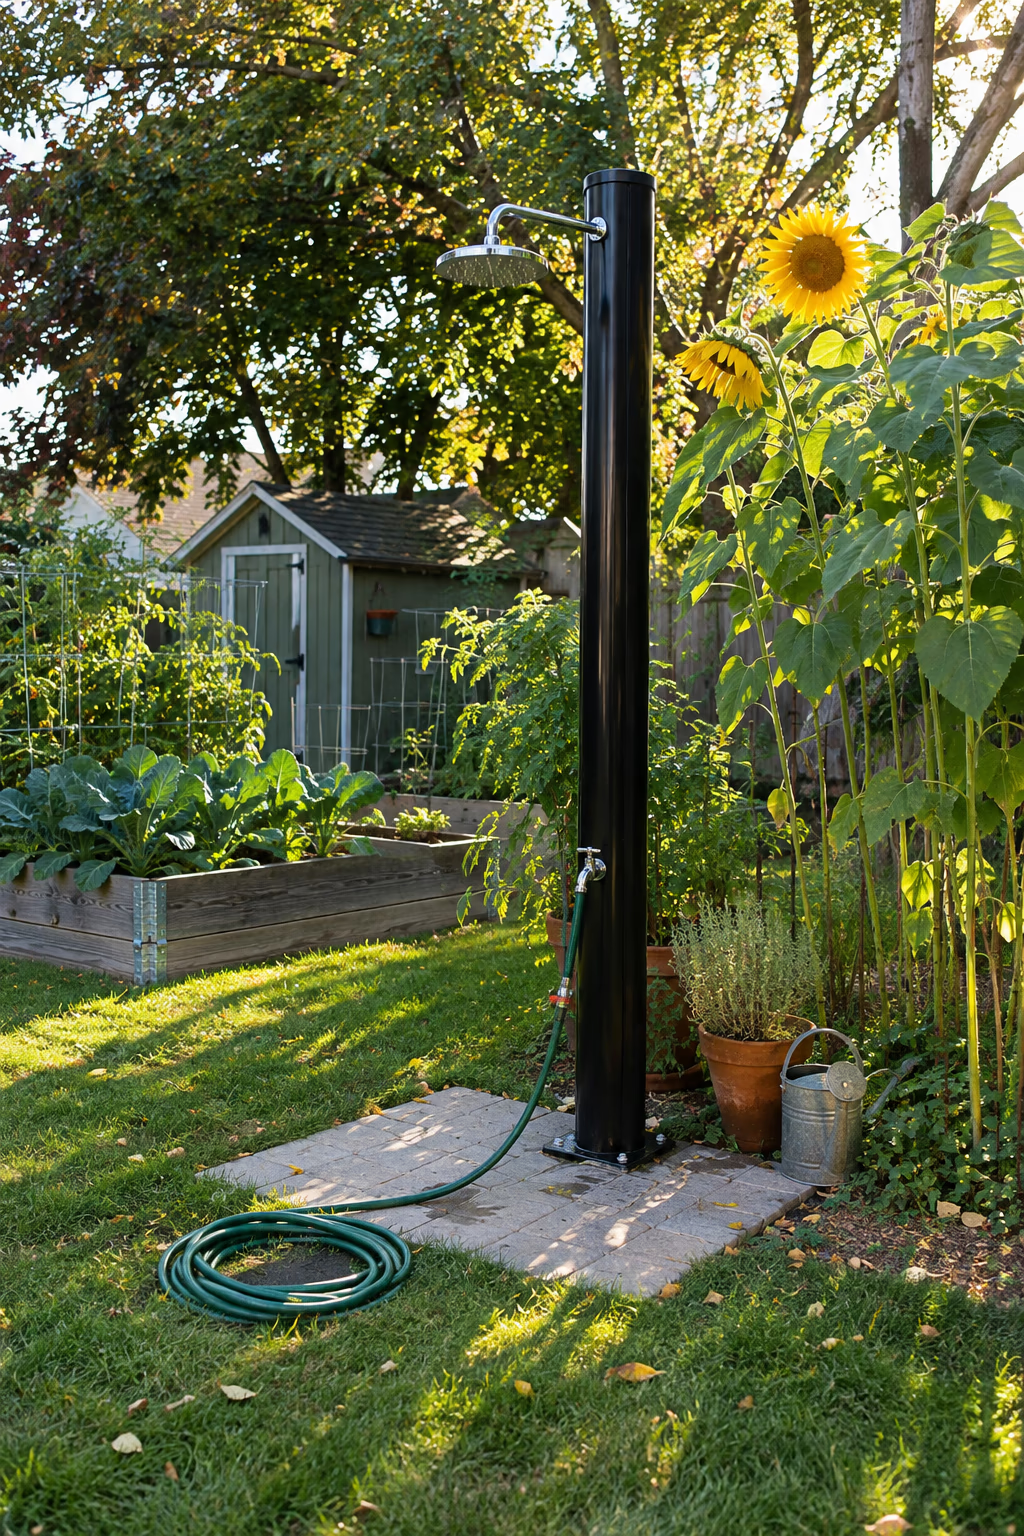
Free heat on sunny days
Solar outdoor showers use a dark-colored tank or tall column that absorbs sunlight and warms the water inside. Hook one up to a garden hose, set it in full sun for a few hours, and you’ll have warm water by late afternoon. A long coil of dark hose lying in the sun works as a very basic version.
This is an easy way to add warm water without running gas or electric lines, and it suits cottages, garden sheds, and rentals where permanent plumbing isn’t practical.
Solar-heated water can get surprisingly hot on a summer afternoon, so always test it before stepping under. On cloudy or cool days, expect lukewarm water at best.
16. Build a Budget Shower From Reclaimed Wood
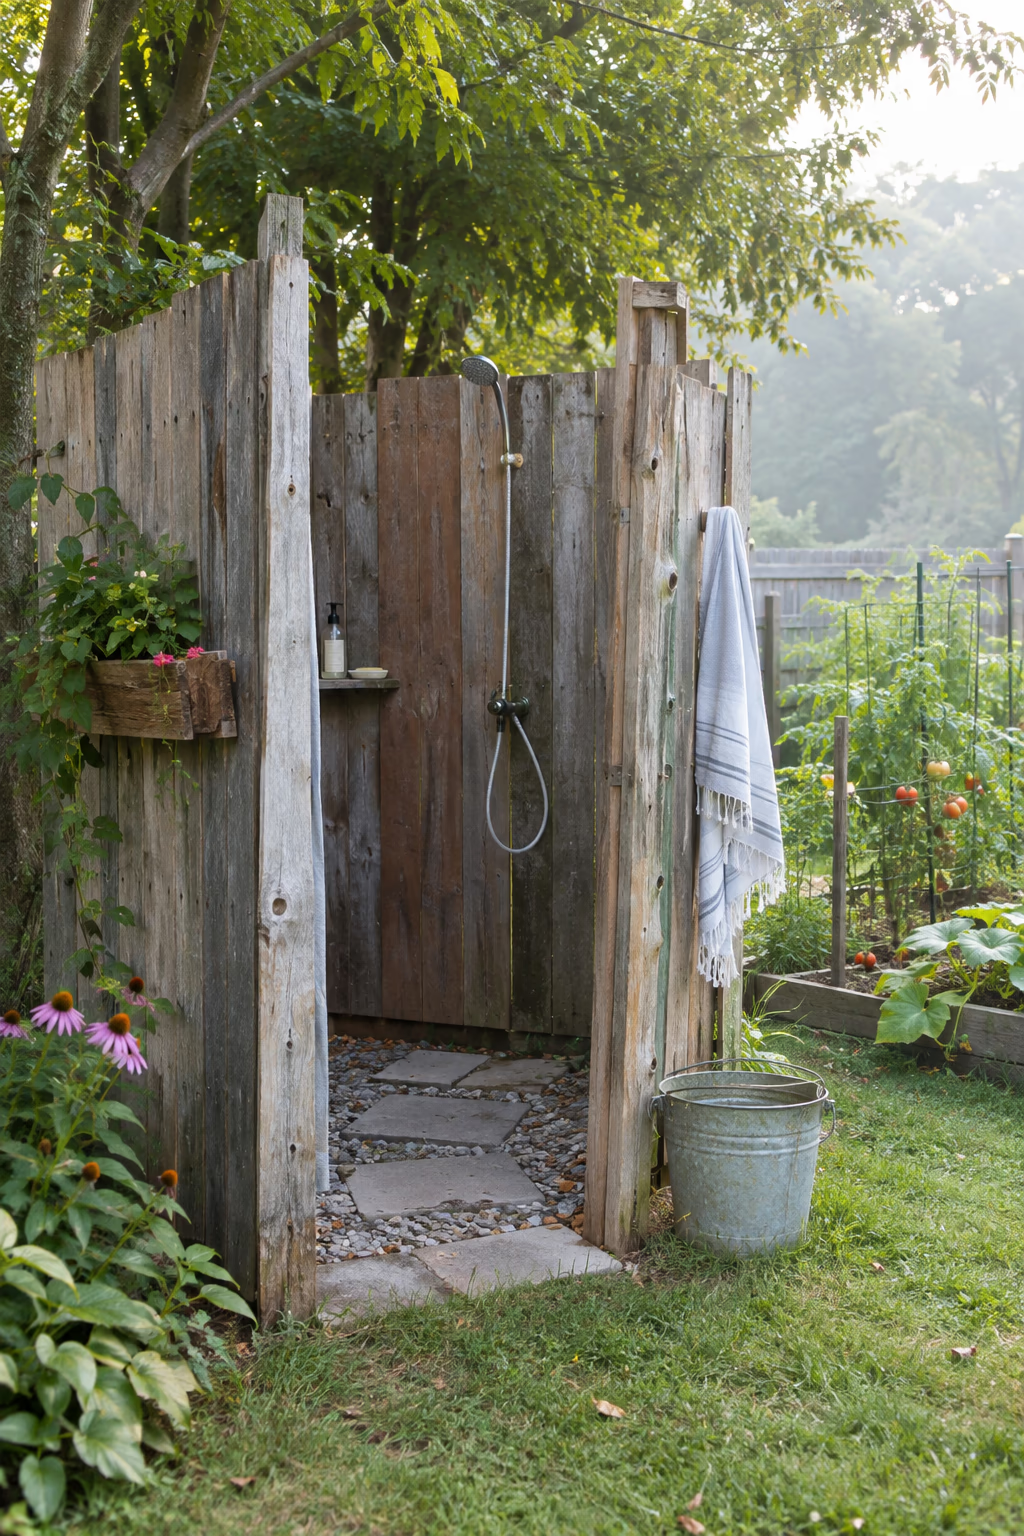
Rustic charm for very little money
Old fence boards, salvaged decking, or heat-treated pallets can be turned into a simple enclosure. Frame it with pressure-treated posts, attach the salvaged boards, and add a hose-fed showerhead mounted to the back wall. Pavers or a gravel pad make an inexpensive floor.
Reclaimed wood brings character from the start, with nail holes, weathering, and color variation. It’s also a good way to test whether you’ll use an outdoor shower often before investing in a permanent one.
Only use pallets stamped HT (heat-treated), never MB, which means they were treated with chemicals. Sand down rough spots and check for protruding nails or splinters before use.
17. Add Soft Low-Voltage Lighting for Evening Rinses
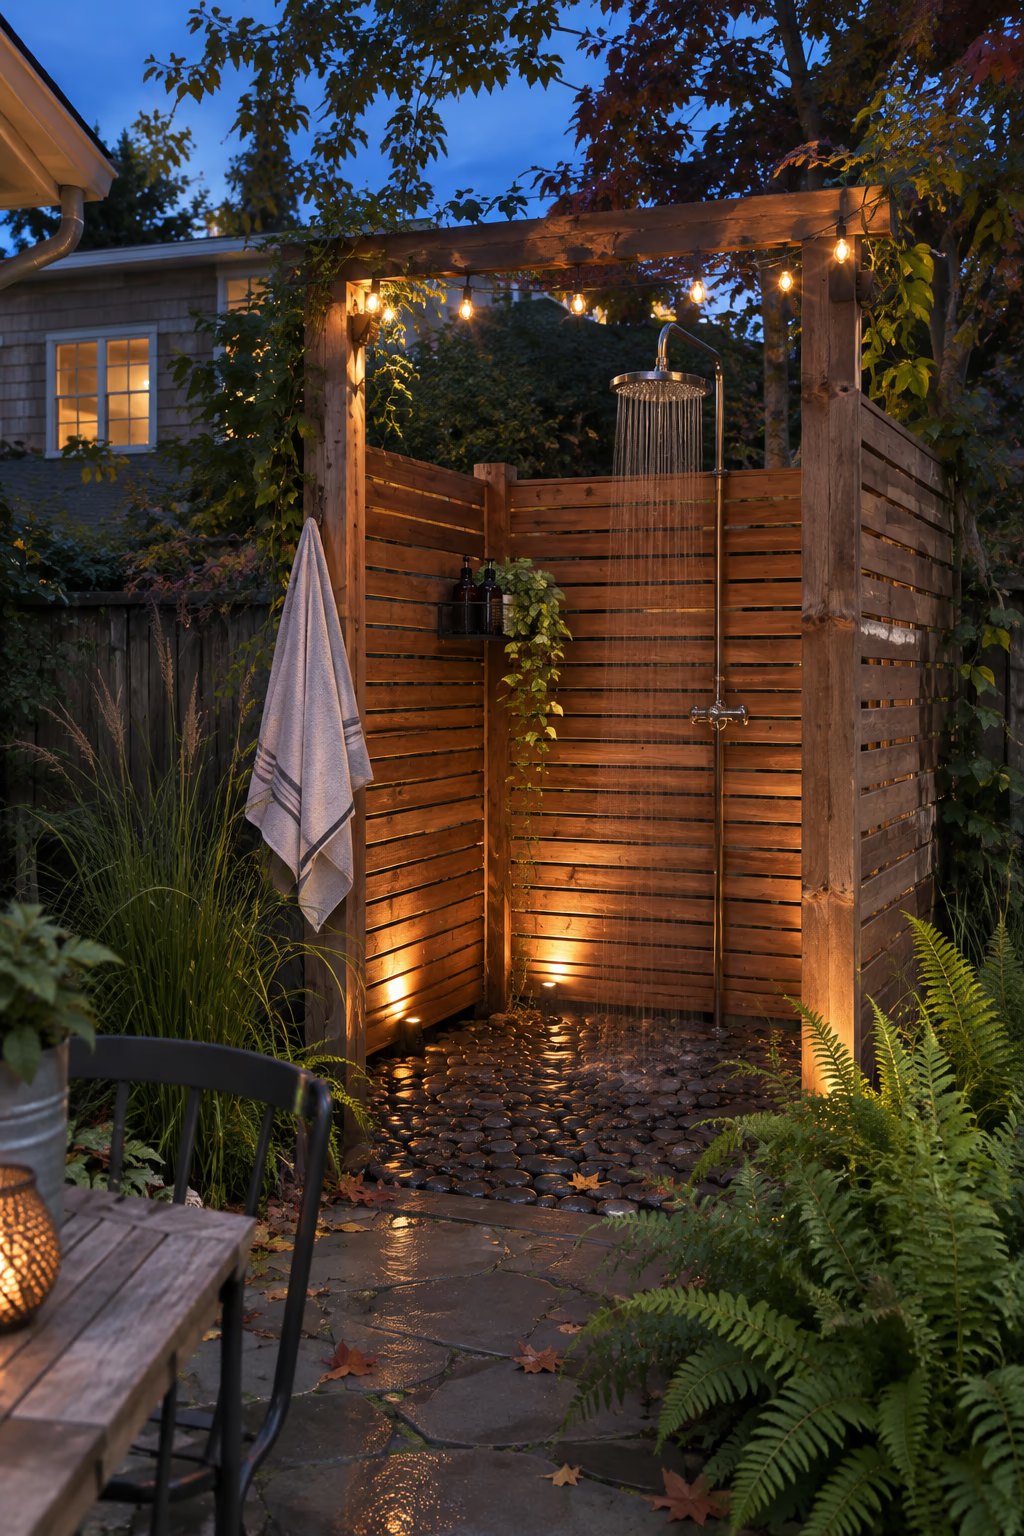
Make the shower glow after dark
Low-voltage landscape lights let you use the shower in the evening. Uplights at the base of a slat wall, a small wall sconce rated for wet locations, or a string of outdoor lights across a pergola beam can all set a cozy mood. Warm white bulbs around 2700K feel more inviting than cool white.
Nighttime rinses after a hot day or a long evening in the garden are one of the best parts of having an outdoor shower. Gentle lighting also helps you see your footing on wet stone or wood.
Only use fixtures rated for wet locations near the spray, and keep transformers and outlets well away from the water. Any outdoor outlet should be GFCI protected, and line-voltage wiring calls for a licensed electrician.
18. Hang Outdoor Curtains for Flexible Privacy
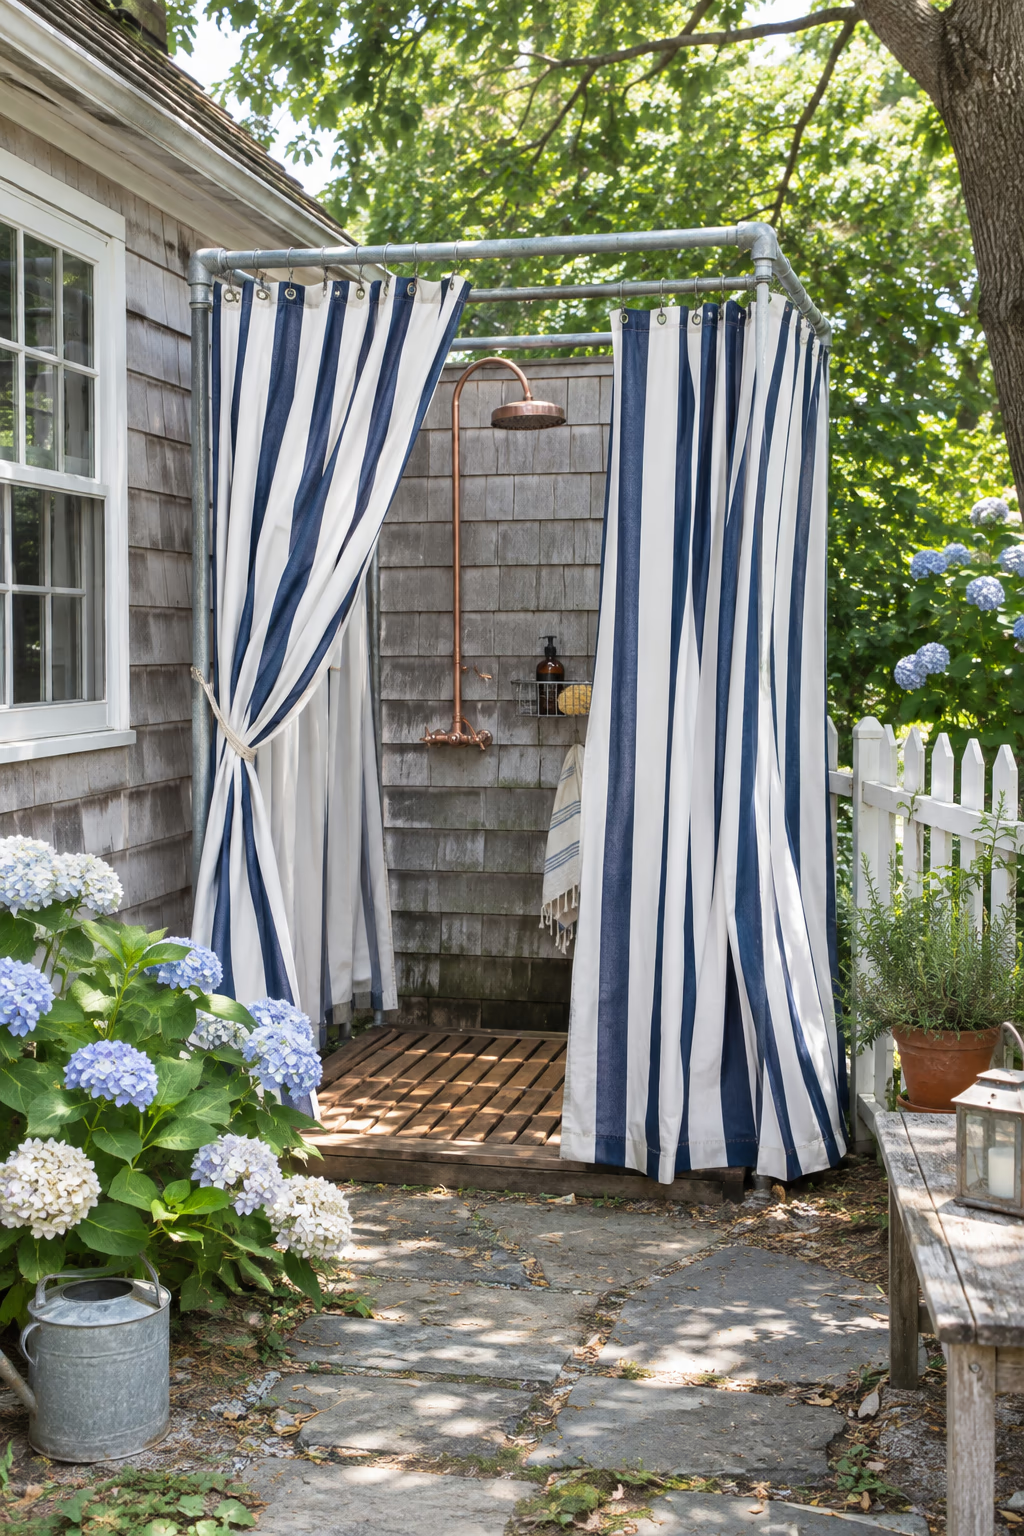
Easy coverage you can open or close
A simple frame of wood posts or galvanized pipe with an outdoor curtain rod lets you hang quick-drying fabric panels around the shower. Choose solution-dyed acrylic, polyester, or canvas meant for outdoor use, and attach them with stainless rings so they slide easily.
Curtains are lightweight, inexpensive, and easy to change, and they can be pulled back to let air and sun dry the space. Stripes or crisp white panels look fresh and fit casual cottage and coastal yards.
Even outdoor fabric can mildew if it stays wet and bunched up. Leave panels spread open to dry after each use, and take them down to wash and store over the winter.
19. Pair the Shower With an Outdoor Soaking Tub
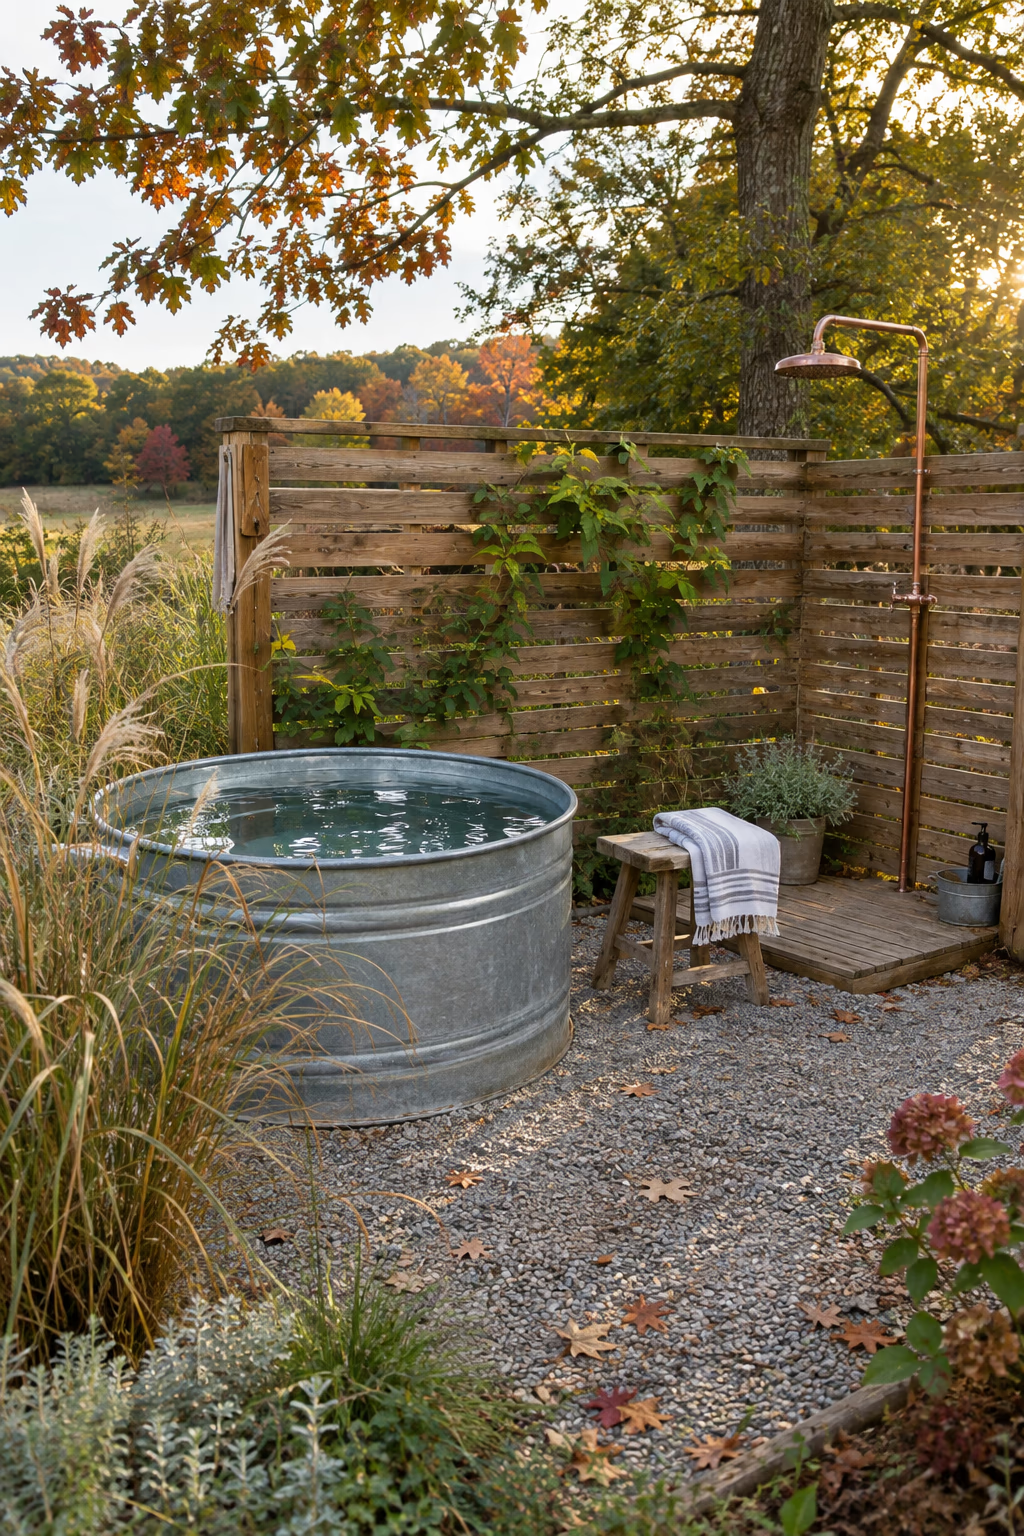
Create a complete backyard bathing corner
Set a freestanding soaking tub, such as a galvanized stock tank or a cast-iron clawfoot tub, next to the shower on a gravel or stone pad. Rinse off under the shower first, then soak in the tub surrounded by plants and a privacy screen.
The combination turns your yard into a wellness retreat at home, a style that fits the current interest in backyard spa features. A stock tank is a relatively affordable option and has a rustic farmhouse look.
A full tub is extremely heavy, so set it on a level, solid base. Plan where the drain water will go, and cover or empty the tub when not in use to prevent mosquitoes and keep children safe.
How to Plan Your Outdoor Shower
A little planning before you dig or build helps your outdoor shower work well for years. Think about water, drainage, privacy, and climate before choosing materials.
- Decide on hot water or cold only. A hose-fed cold shower is simple and cheap, while hot water usually means running lines from the house, adding a solar setup, or installing a dedicated heater.
- Plan the drainage first. Choose a river rock dry well, a drain line to a lower area, or a connection to your home’s plumbing, and keep runoff well away from your foundation.
- Check local codes and HOA rules. Some areas regulate gray water, require permits for new plumbing, or limit structures near property lines, so confirm before building.
- Pick a location with privacy and sun. Morning or afternoon sun helps surfaces dry quickly and prevents mildew, while existing walls or fences reduce what you need to build.
- Prepare for freezing weather. In cold climates, use frost-free valves or include shutoff and drain valves so you can empty the lines before winter.
- Use materials made for constant moisture. Cedar, teak, stone, porcelain tile, and stainless or brass hardware last much longer outdoors than untreated pine and ordinary steel.
Frequently Asked Questions
How much does it cost to add an outdoor shower?
Costs depend on materials and plumbing. A hose-fed fixture on a fence or a basic solar shower can cost under a few hundred dollars, while a custom enclosure with hot water lines from the house, stone or tile work, and professional installation can run into the thousands.
Do I need a permit for an outdoor shower?
It depends on where you live. Simple hose-fed showers often don’t require permits, but adding new water supply lines, connecting to a sewer, or building a permanent structure might. Check with your local building department and HOA before you start.
Where should the water from an outdoor shower go?
Many homeowners use a gravel dry well or let runoff water a nearby planting area, while others connect to a drain line. Some areas have rules about gray water, so use biodegradable soap and confirm what’s allowed locally.
Can I use an outdoor shower in winter?
In mild climates, an outdoor shower with hot water can be used year-round. In regions with freezing temperatures, most people shut it down in late fall, draining the lines to prevent pipes and valves from cracking.
What is the best wood for an outdoor shower enclosure?
Western red cedar, teak, ipe, and redwood are popular choices because they naturally resist rot and moisture. Pressure-treated lumber works well for posts in the ground, while the boards you touch are usually more pleasant in cedar or teak.
Final Thoughts
The best outdoor shower ideas balance practical needs with a sense of retreat. Whether it’s a copper pipe on a fence, a cedar slat enclosure surrounded by ferns, or a stucco wall with a rainfall head, a well-placed shower can quickly become one of the most-used features in your yard.
Start with good drainage and the right materials, then add comforts such as a bench, warm lighting, or plants as you go. With a little planning, you’ll have a refreshing spot that makes every summer day feel more like a vacation.