The burgers are sizzling, someone is slicing tomatoes on a stone counter, and a cold drink is within arm’s reach. Nobody has to run back and forth through the screen door with a tray of raw chicken. That’s the simple magic of cooking outside where everyone already is.
An outdoor kitchen turns a grill into a real gathering spot. It keeps heat and smoke out of the house in summer, makes weeknight dinners feel like a small vacation, and gives guests a natural place to hang out while you cook. It doesn’t have to be a huge build, either. A well-planned corner of the patio can do most of what a big custom setup does.
These 23 outdoor kitchen ideas cover shade structures, pizza ovens, stone islands, griddles, storage, lighting, layouts for small patios, and budget-friendly builds. Use one as a starting point or combine several into a backyard cooking space that fits how your household actually eats and entertains.
1. Shade the Cooking Zone With a Cedar Pergola
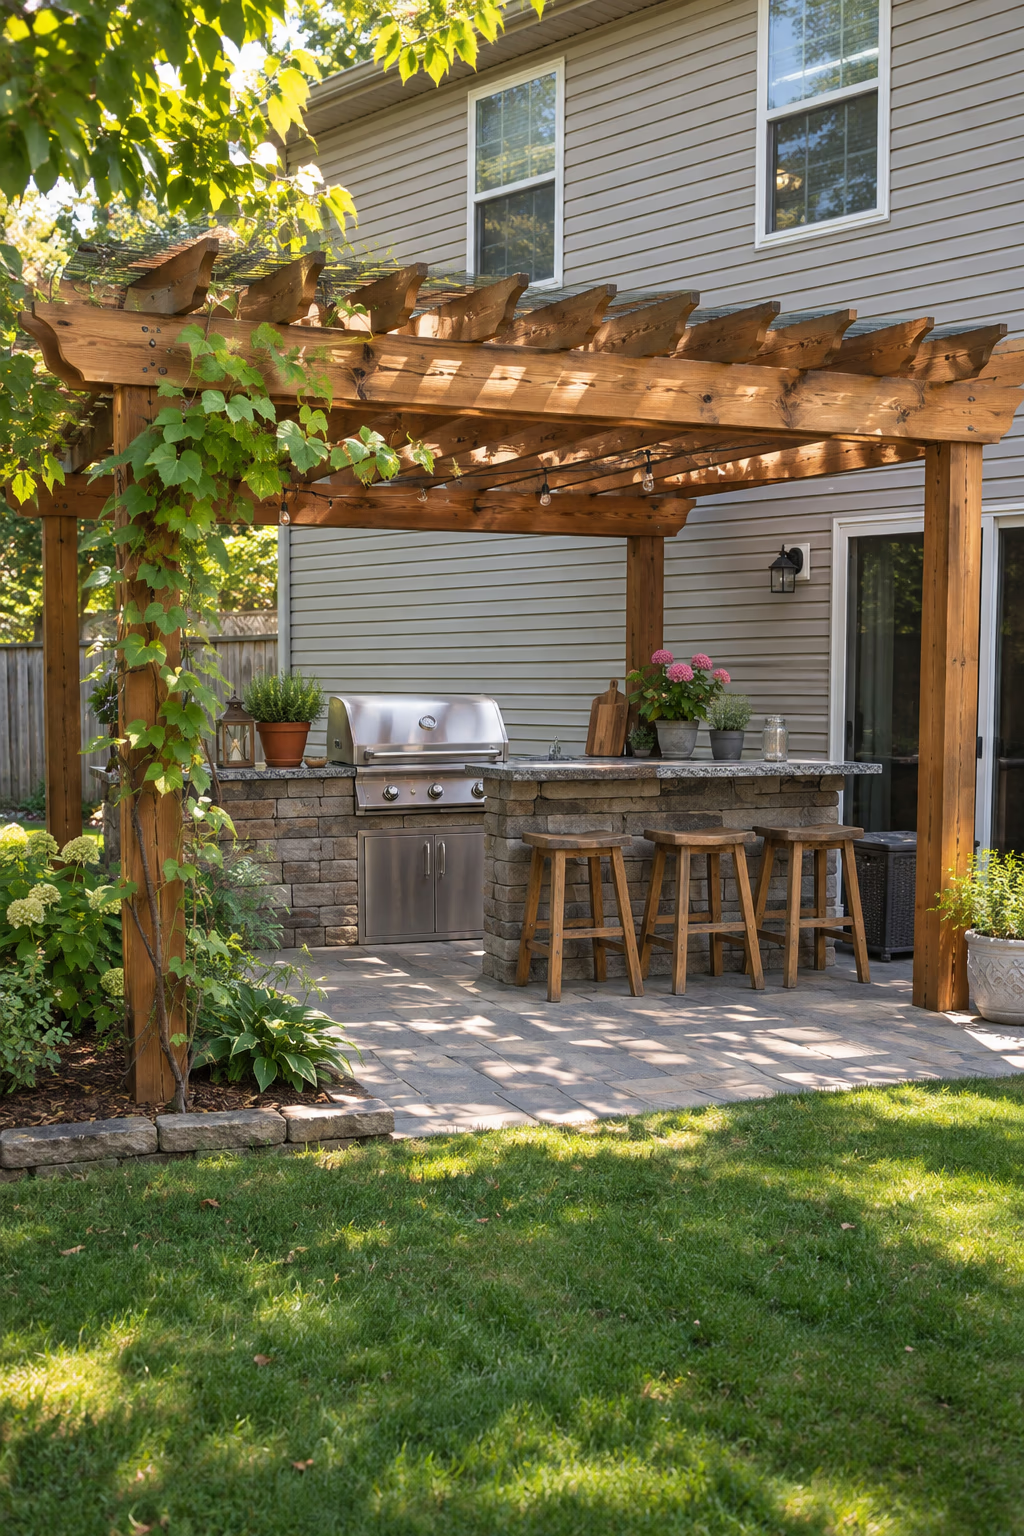
Comfortable cooking on bright afternoons
A pergola gives an outdoor kitchen a sense of structure, like walls and a ceiling without blocking the breeze. A 10 by 12 foot cedar frame comfortably covers a straight run of counters plus a few stools, and the open rafters let smoke escape while still breaking up hot sun.
For more shade, add a retractable canopy, louvered panels, or a climbing vine such as wisteria or grape on the side away from the grill. Stain or seal cedar every couple of years to keep it from graying unevenly.
Keep the grill out from directly under low rafters and canopies, and follow the manufacturer’s clearance to combustibles. Many towns require a permit for permanent structures, so check with your building department or HOA before setting posts.
2. Build In a Wood-Fired Pizza Oven
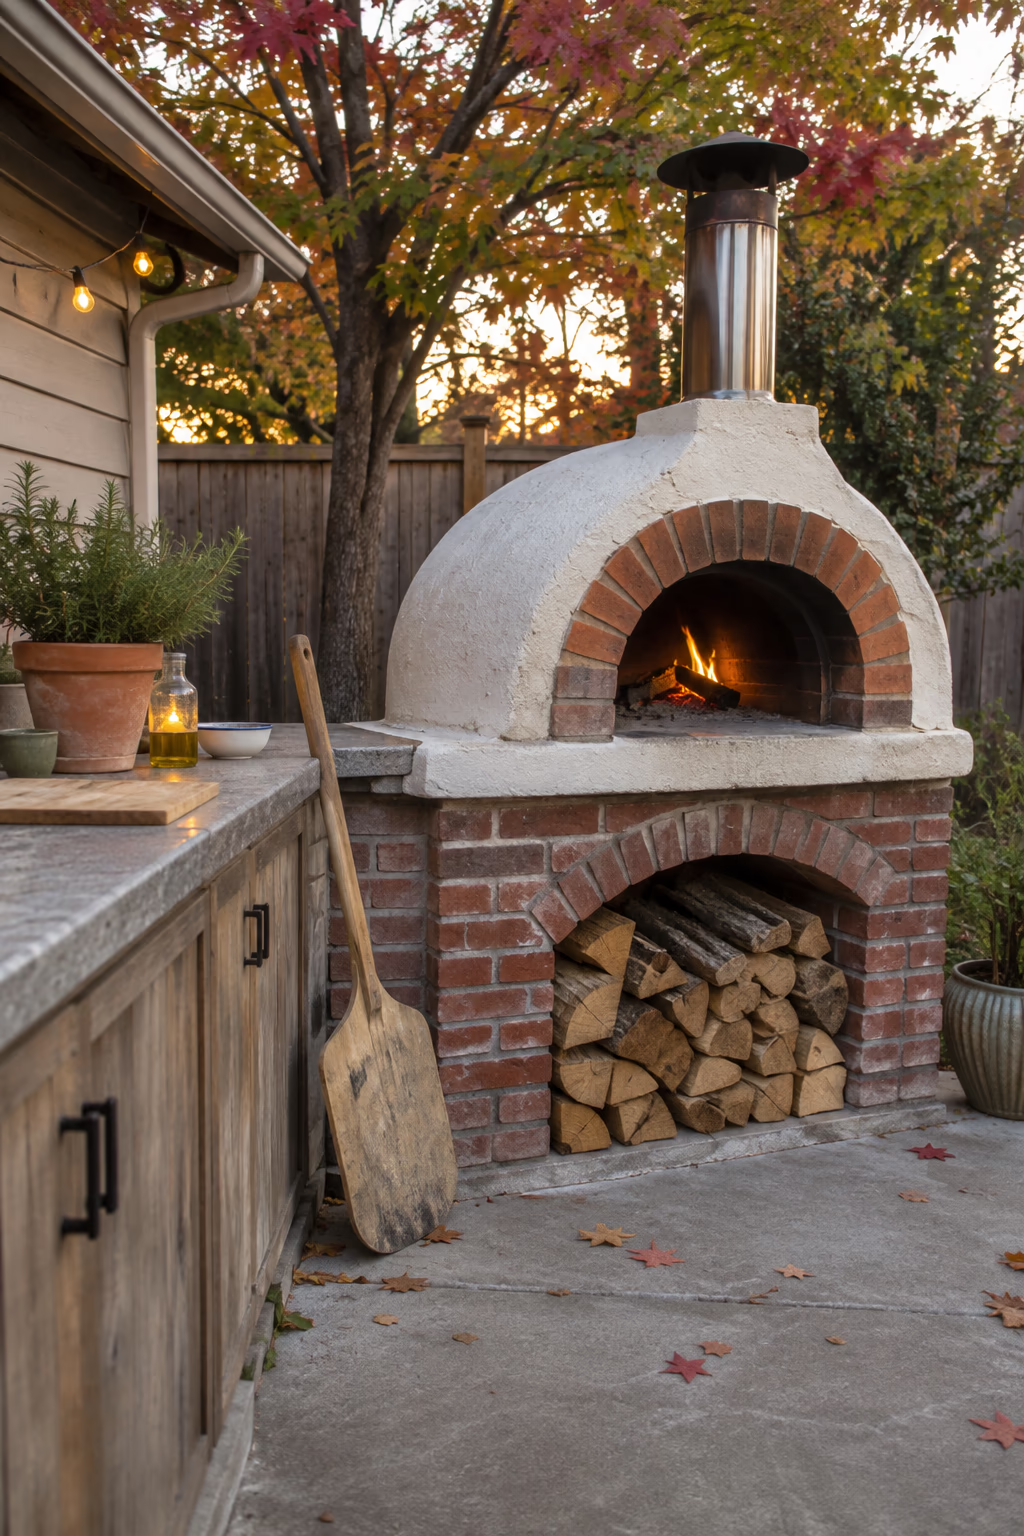
A crowd-pleasing showpiece that cooks fast
A dome or barrel-style oven reaches the high temperatures needed to bake a thin-crust pizza in a couple of minutes, and it handles roasted vegetables, bread, and skillet dishes too. You can build one from a refractory kit on a concrete block stand, or set a ready-made oven on a reinforced end of the counter.
Ovens are a natural focal point. Finish the base in brick, stucco, or stone and leave a nook underneath for stacking split hardwood, which keeps fuel dry and adds a rustic look.
A wood-fired oven usually needs 45 minutes or more to heat fully, so plan to light it well before guests arrive. Ovens are heavy, and the base needs a solid footing. Gas-fired models heat faster and are easier for weeknight use.
3. Wrap an L-Shaped Island in Natural Stone
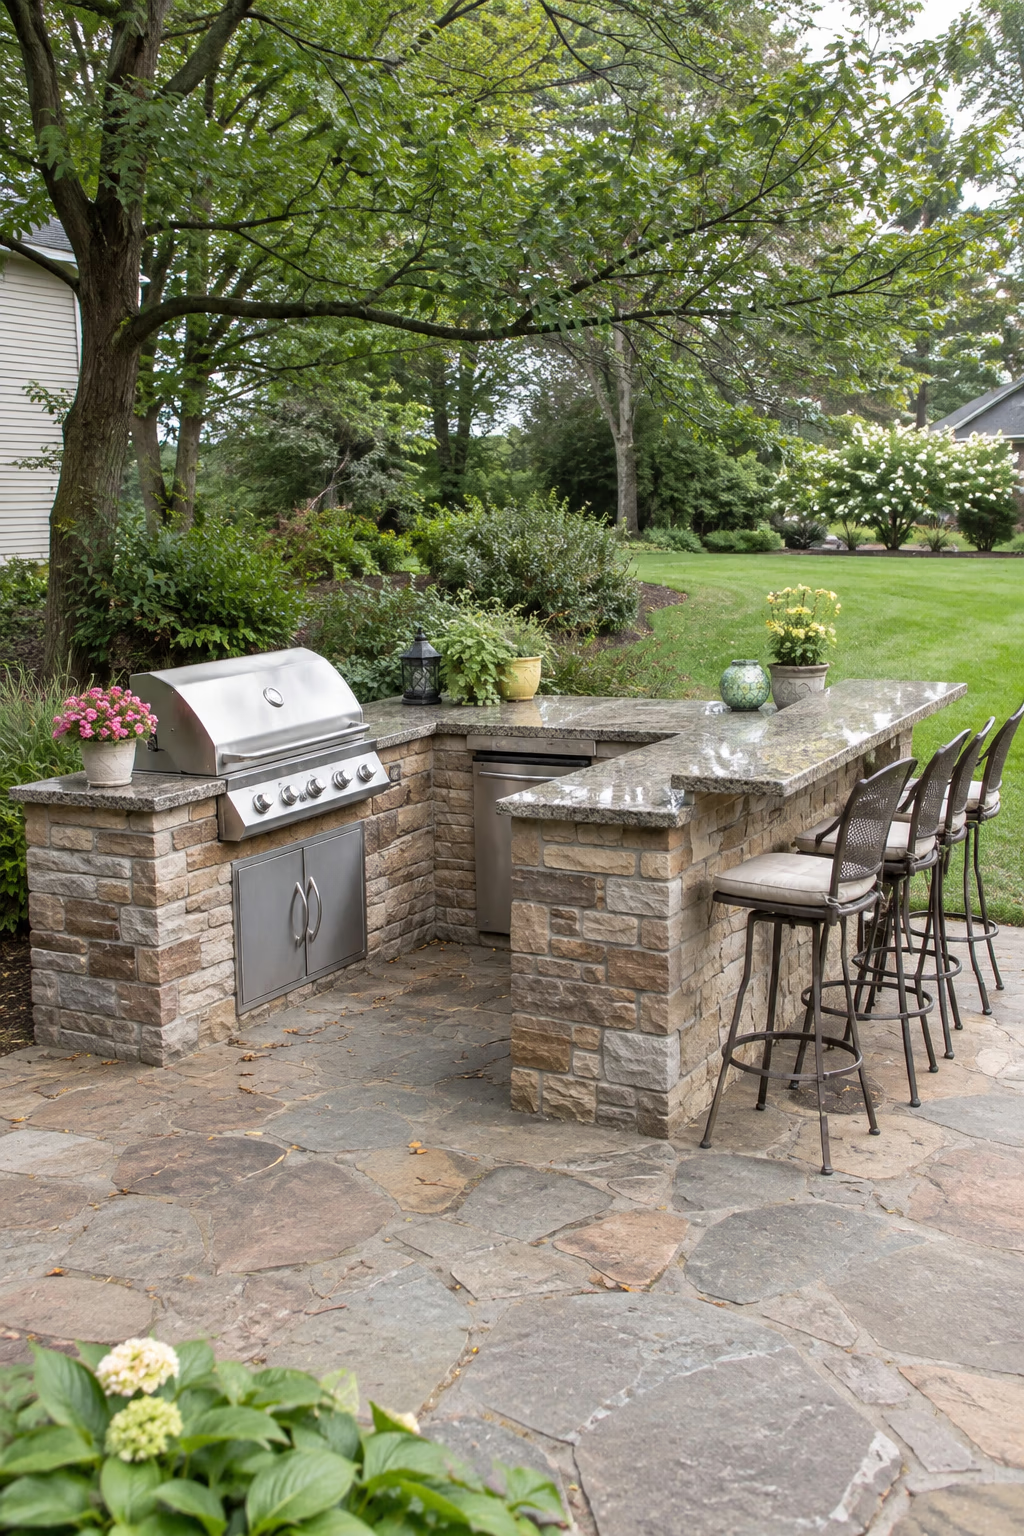
The classic layout with room to cook and chat
An L-shaped island puts the grill on one leg and prep space or a raised bar on the other, so the cook can face guests instead of turning their back to the party. A common setup is an 8-foot grill run with a 6-foot return holding a bar ledge about 42 inches high.
Fieldstone, ledgestone veneer, or tumbled limestone gives the island an earthy look that blends with garden beds and patios. Pair it with a granite or quartzite top, which stands up to sun and heat better than many indoor materials.
Allow at least 12 inches of overhang for knee space at the bar, and leave 36 to 48 inches of clear walkway behind the cook. Stone veneer is heavy, so the island frame should be built on a proper concrete pad.
4. Add a Flat-Top Griddle Station
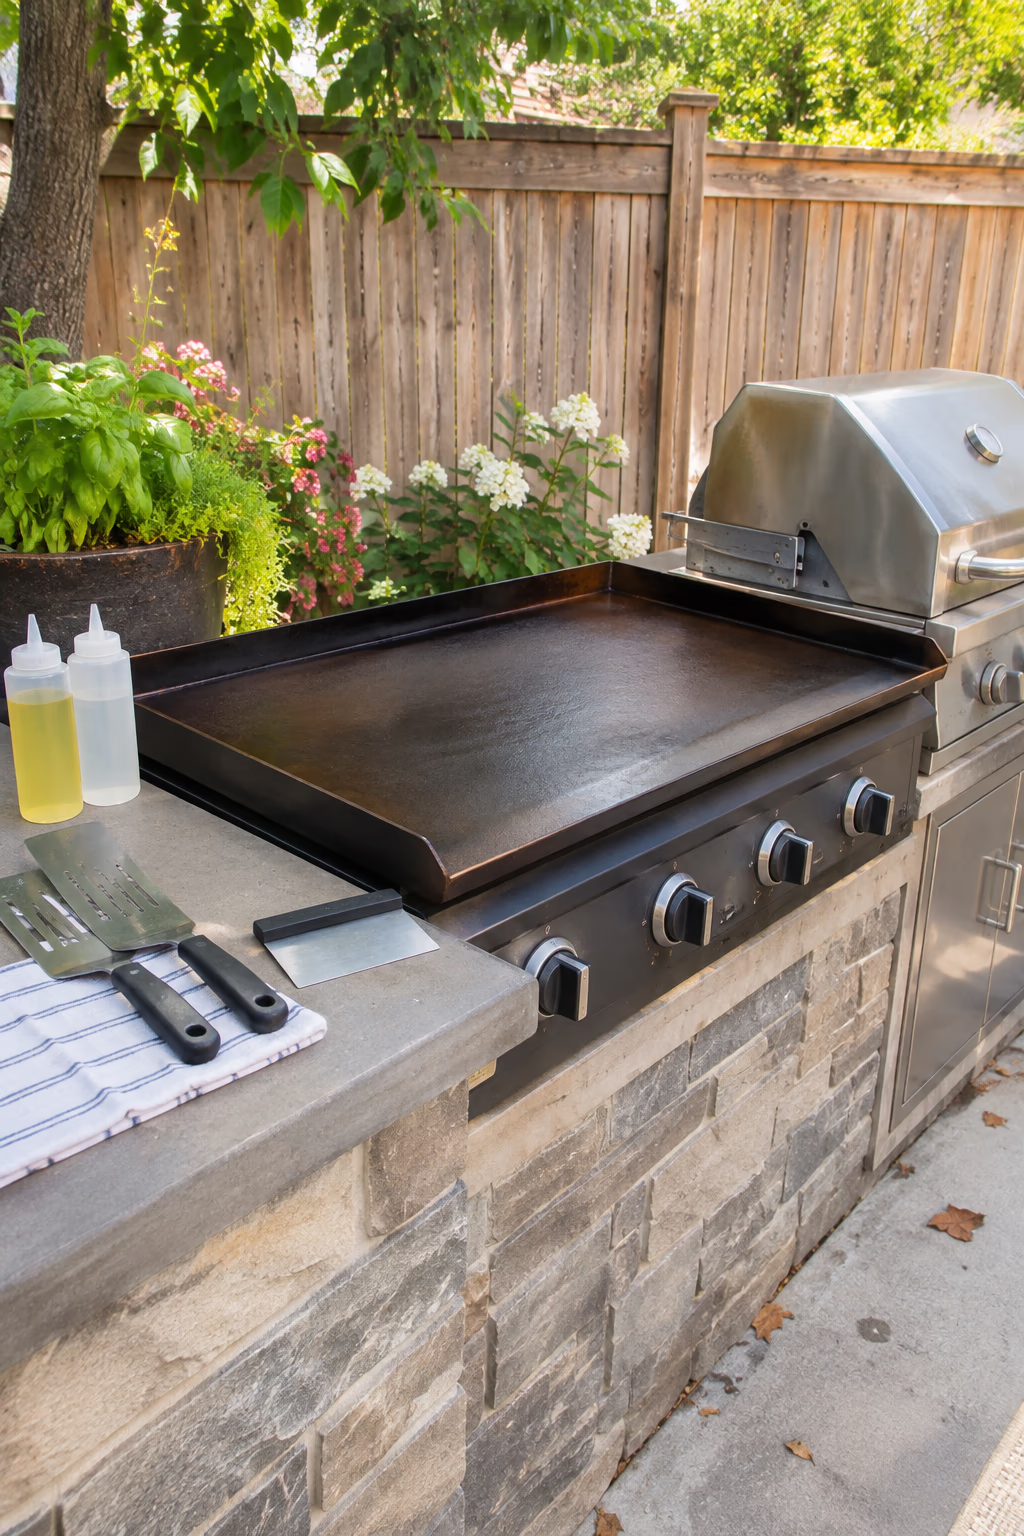
Breakfast, smash burgers, and stir-fry outdoors
A flat-top griddle has become one of the most popular outdoor cooking tools because it handles foods that fall through grill grates: pancakes, eggs, fried rice, fajitas, and crispy smash burgers. A built-in drop-in griddle fits beside the grill, or a freestanding 36-inch model can roll up to the end of the counter.
Having both a grill and a griddle lets you cook a whole meal outside at once, with steak on the grates and vegetables on the flat top.
Griddles need seasoning like cast iron. Scrape and oil the surface after each use and keep a hard cover on it so rain doesn’t cause rust.
5. Open a Pass-Through Window to the Indoor Kitchen
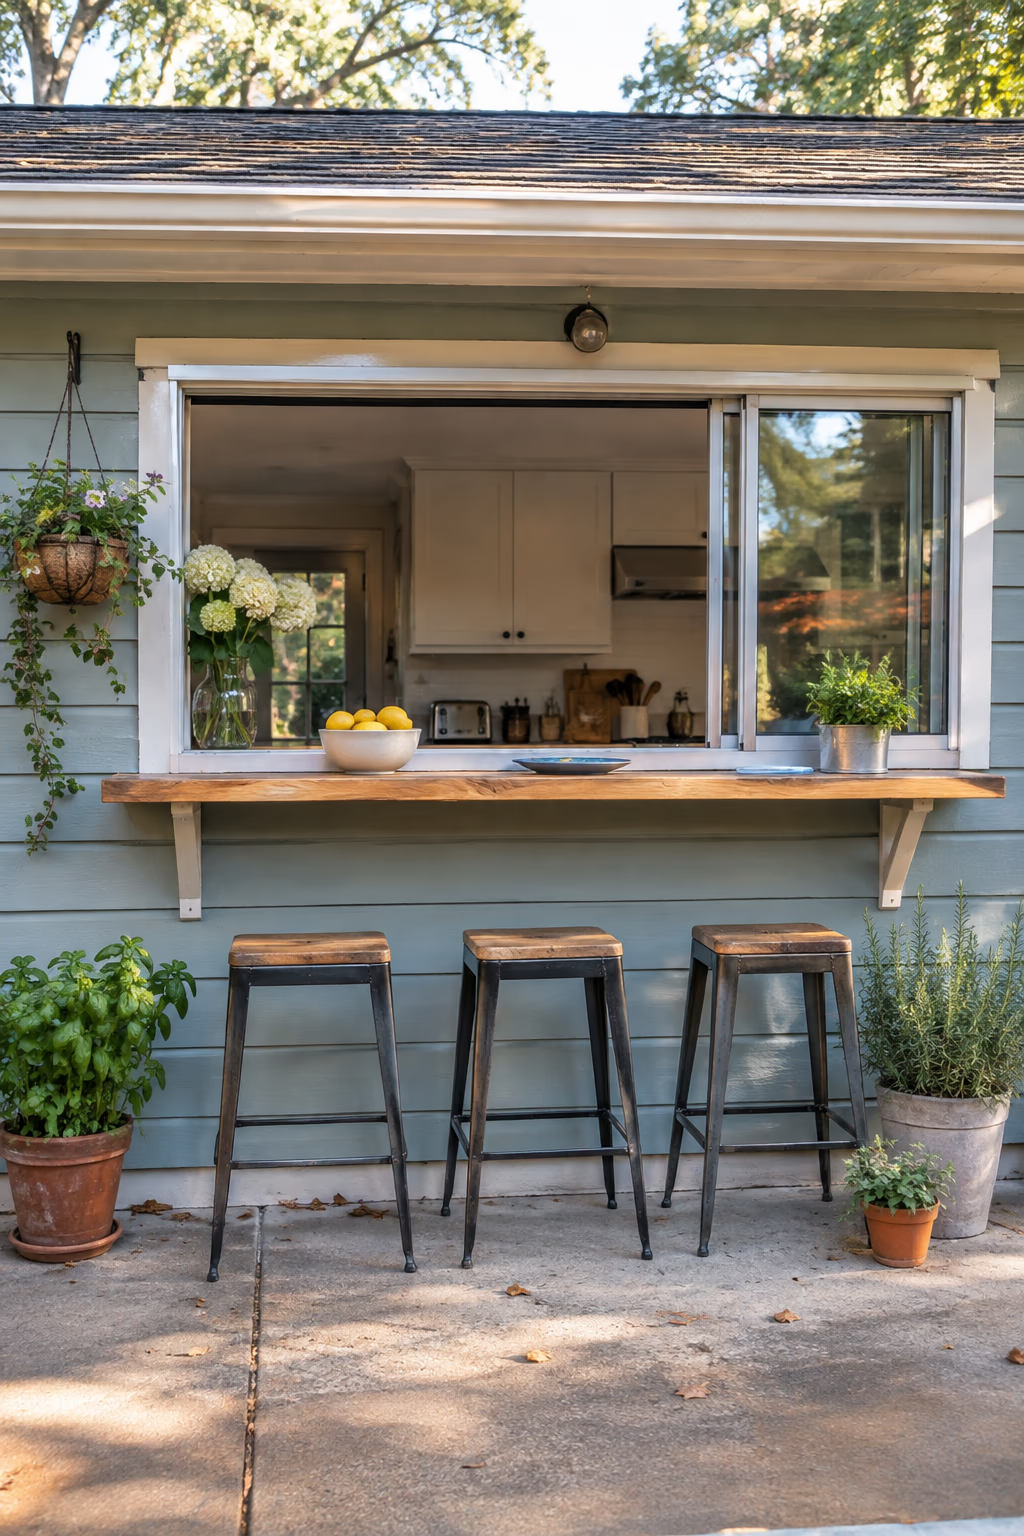
Seamless serving between inside and out
If your indoor kitchen sits along a back wall, a pass-through window can connect it directly to an outdoor counter or bar. Awning windows, sliding windows, and folding glass units all work, and a wide stone or wood sill on both sides makes handing plates through easy.
This setup lets you keep the fridge, sink, and pantry indoors while still serving outside, which can save thousands compared with plumbing a full outdoor kitchen.
Cutting a new opening in an exterior wall usually requires a header and a permit, and it’s a job for a contractor if the wall is load-bearing. Choose weather-sealed hardware so the window stays tight in winter.
6. Choose Weatherproof Stainless Steel Cabinets
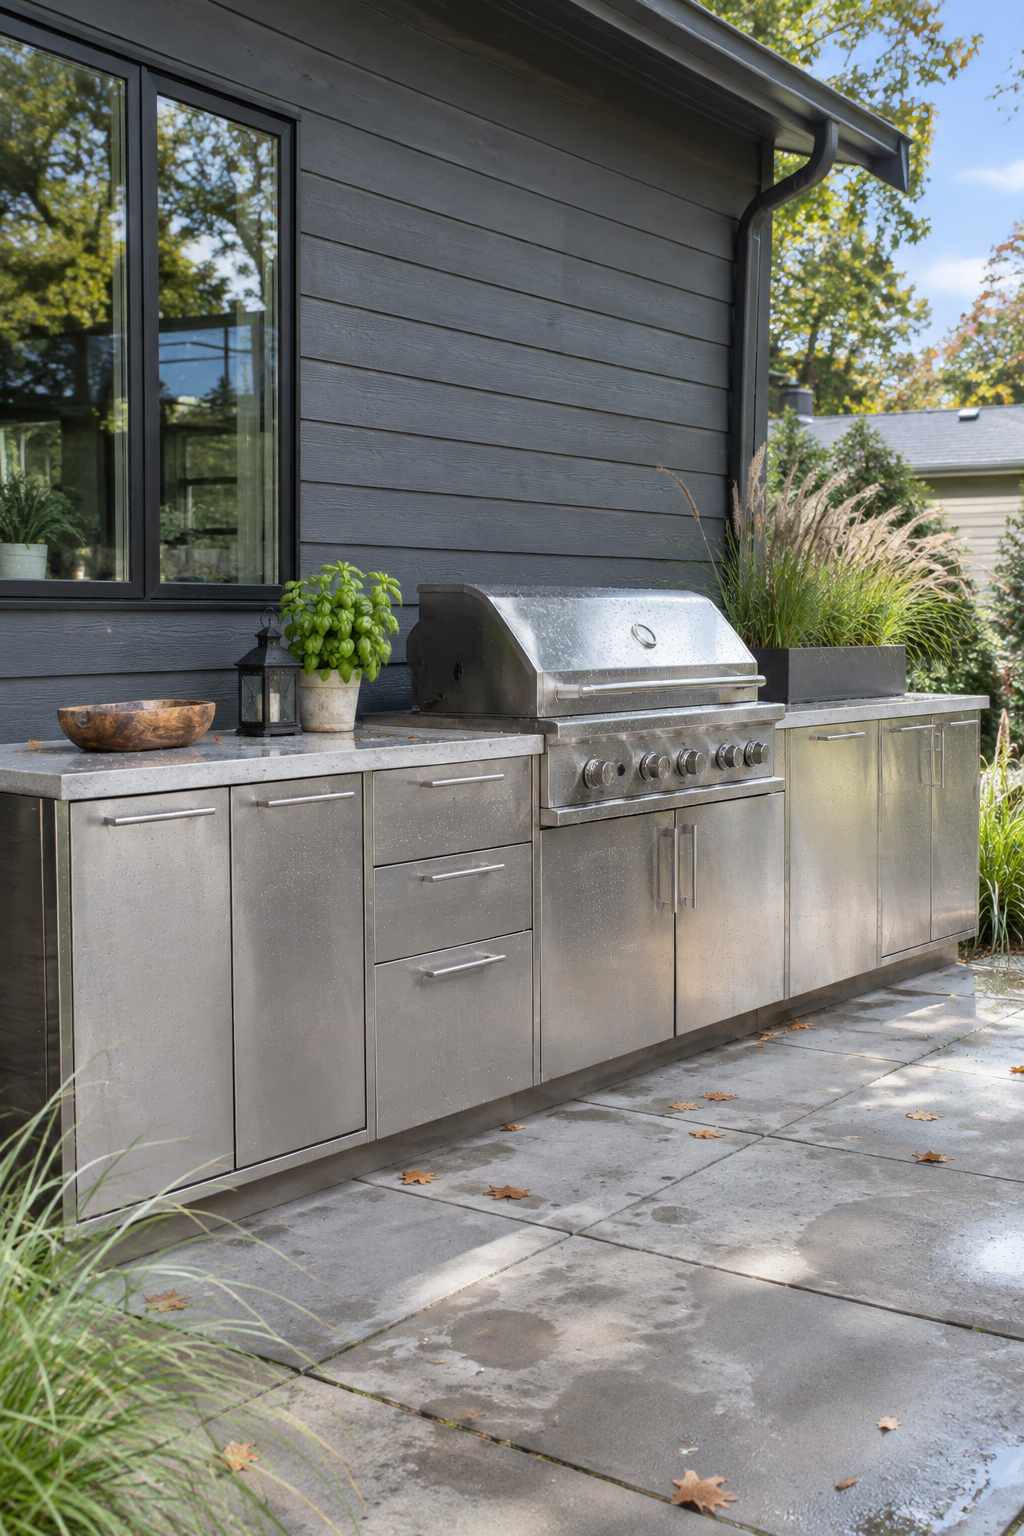
Sleek storage that shrugs off rain
Stainless cabinets and access doors keep tongs, platters, charcoal, and cleaning supplies right where you need them. They look crisp in modern and transitional yards, and they won’t rot, swell, or attract termites the way untreated wood can.
Look for 304-grade stainless for most yards, and consider marine-grade 316 near the coast or around saltwater pools, where lower grades can develop rust spots.
Stainless gets very hot in full sun, so pair it with shade or lighter-colored counters. Wipe it down periodically to remove pollen, grease, and fingerprints.
7. Fit an Undercounter Fridge and Beverage Center
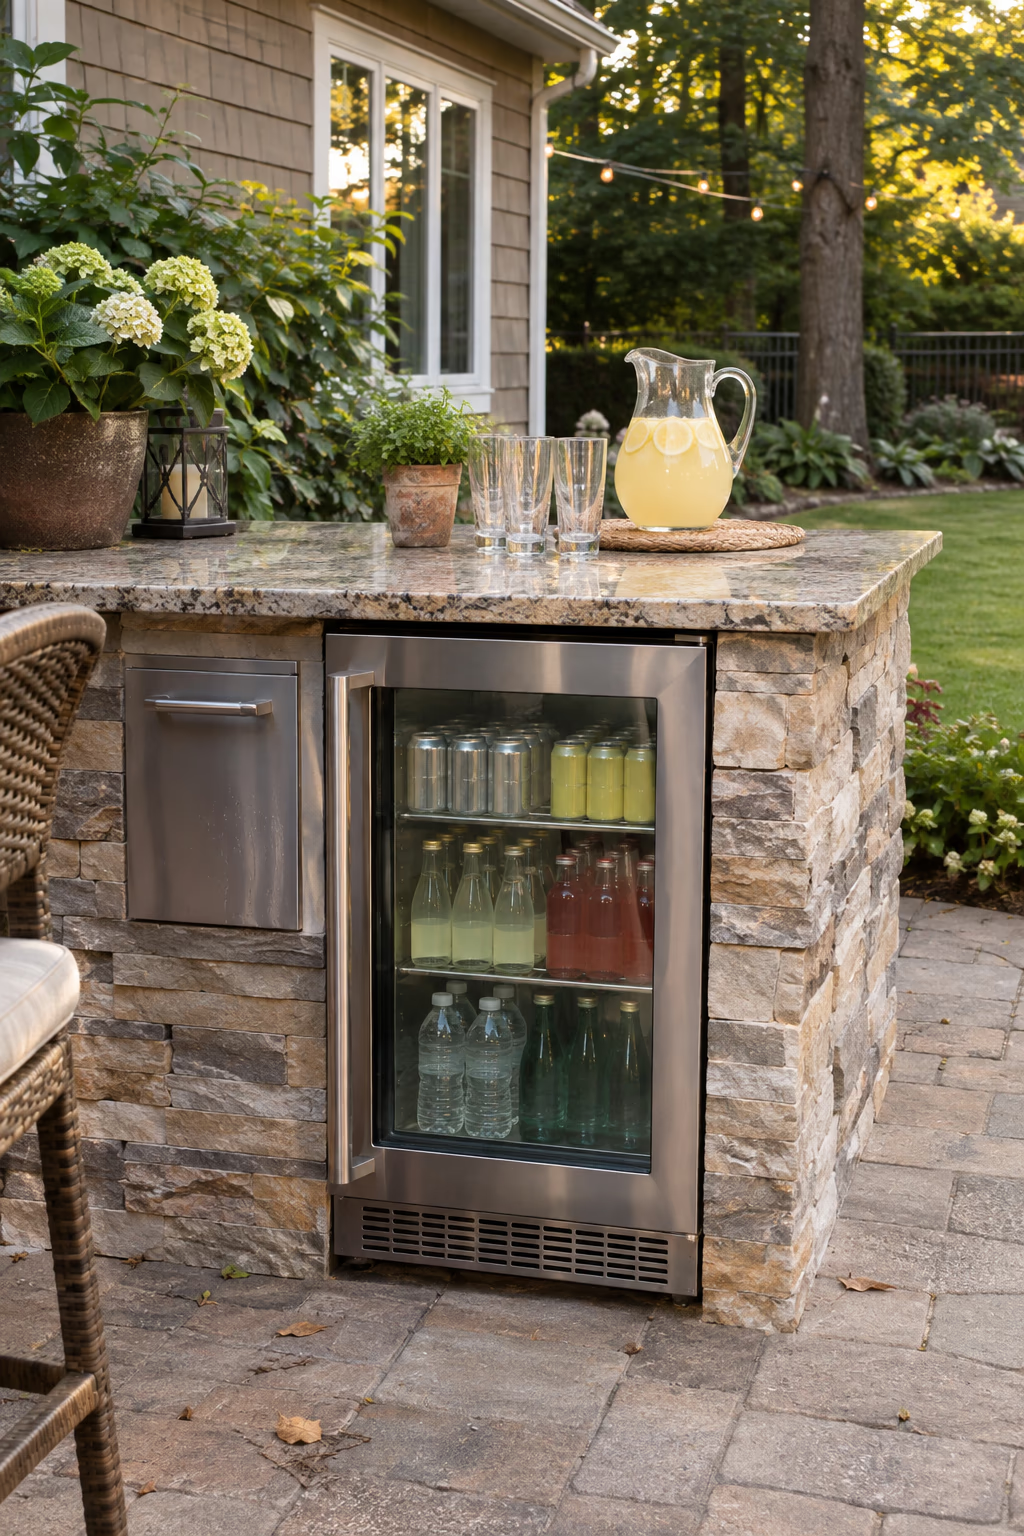
Cold drinks without trips inside
An undercounter refrigerator keeps marinated meat, condiments, and drinks close to the grill. A two-drawer unit or a fridge paired with a small ice bin fits into a standard 24-inch-wide cabinet opening.
Place the beverage zone at the end of the island away from the cooking line. Guests can grab drinks without walking through the cook’s space.
Buy a unit rated for outdoor use, since indoor fridges struggle in summer heat and can fail in freezing weather. It needs a dedicated GFCI-protected outlet, installed by a licensed electrician.
8. Install a Vented Hood Over a Covered Grill
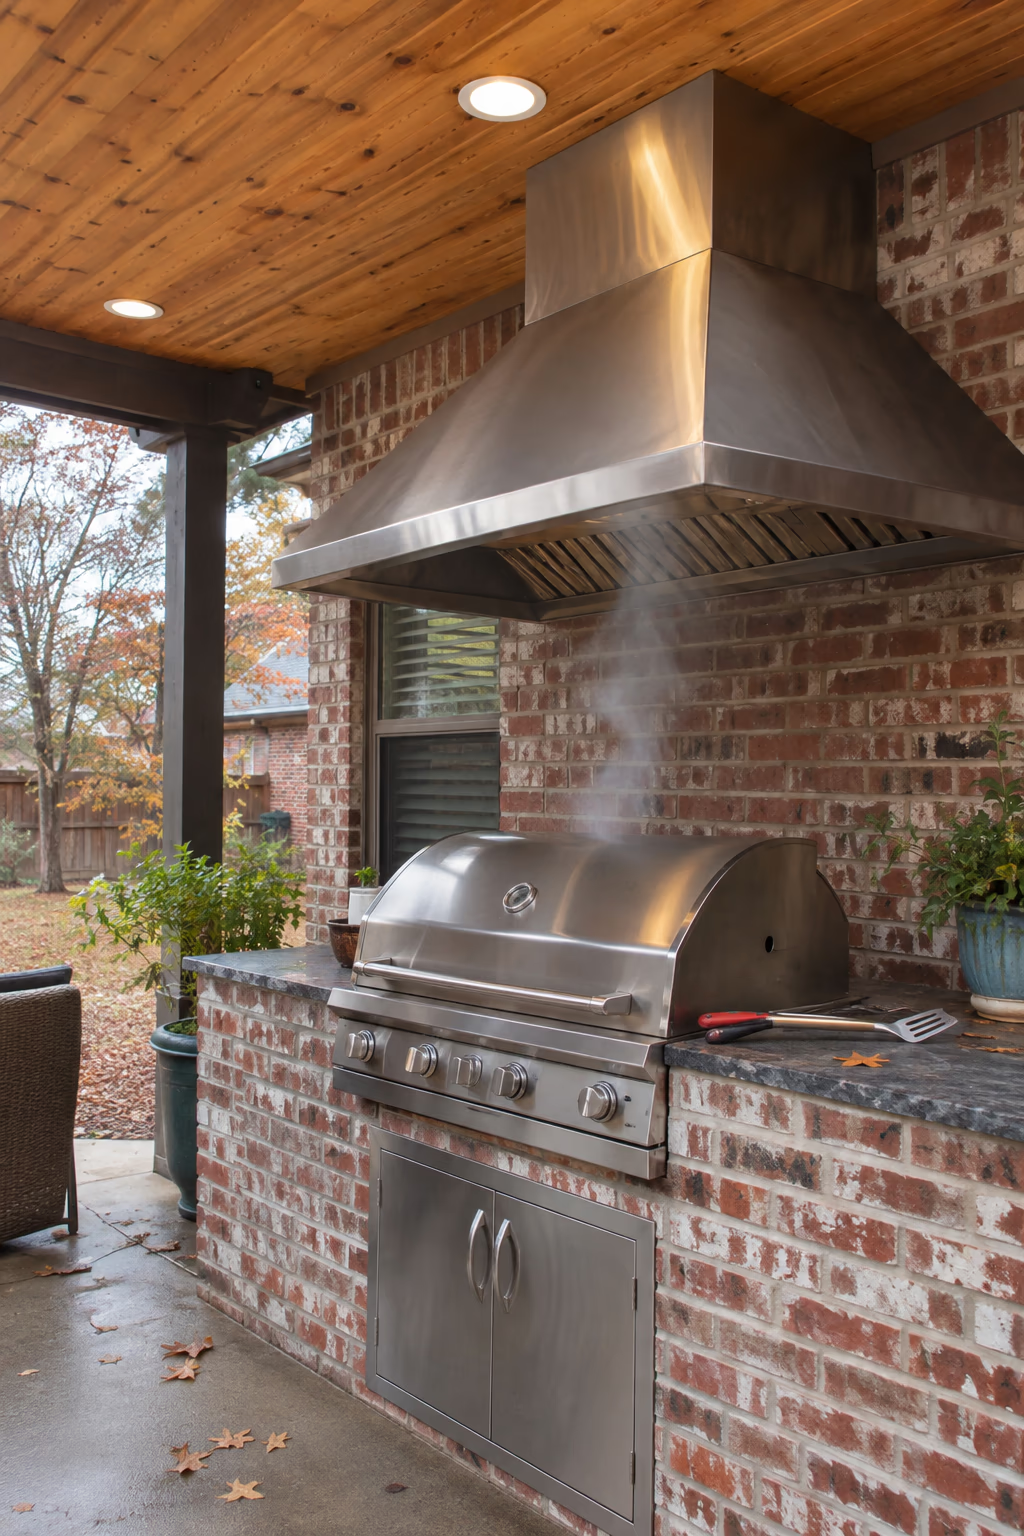
Clear the smoke from under a solid roof
If your kitchen sits under a solid patio roof or porch ceiling, smoke and grease can build up quickly. An outdoor-rated vent hood captures that smoke and keeps the ceiling from staining.
Outdoor hoods are larger and more powerful than indoor models because breezes push smoke sideways. Choose one that is wider than the grill by several inches on each side, and have it ducted out through the roof.
Hood installation involves electrical work and roof penetration, so hire a pro. Clean the baffle filters regularly; grease buildup is a fire risk.
9. Pour Concrete Countertops for a Modern Edge
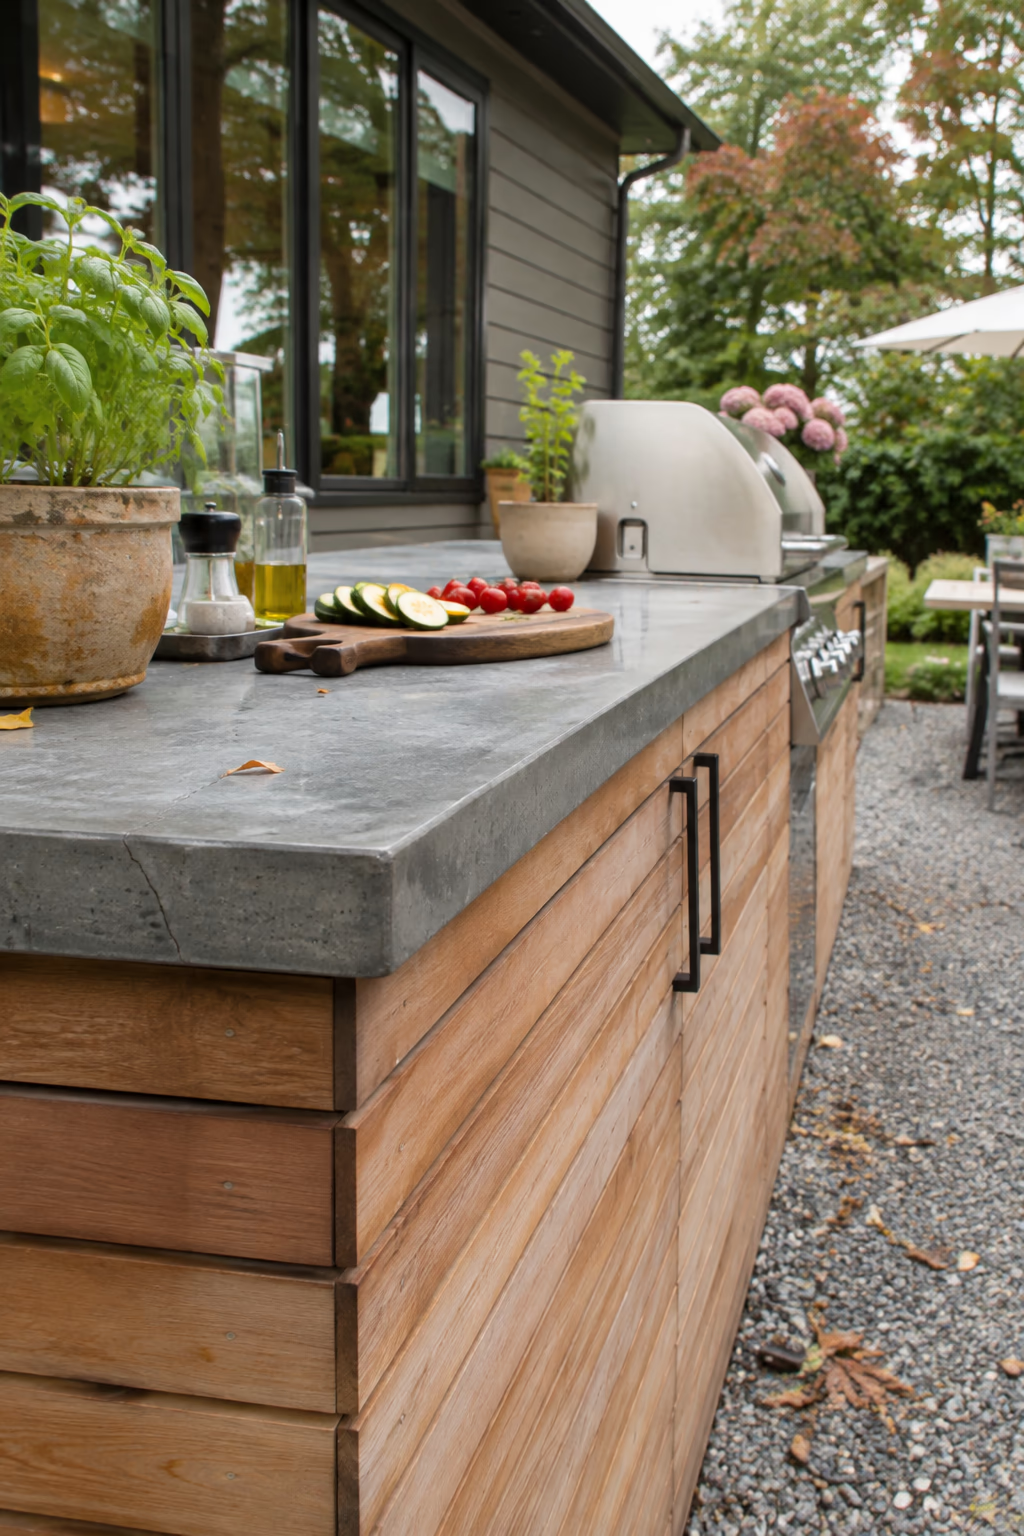
A custom look with a handmade feel
Concrete counters can be cast in place or formed in a garage and set on the island. They’re easy to shape with a sink cutout, a thick waterfall edge, or a built-in drainboard, and they can be tinted charcoal, warm gray, or sandy beige.
The material suits modern and industrial yards and pairs well with steel, cedar, and black hardware.
Concrete is porous, so seal it before use and reseal it about once a year to resist stains from oil, wine, and sauce. Hairline cracks are normal, especially in freeze-thaw climates, and add character rather than causing problems.
10. Plant a Kitchen Herb Garden Beside the Prep Counter
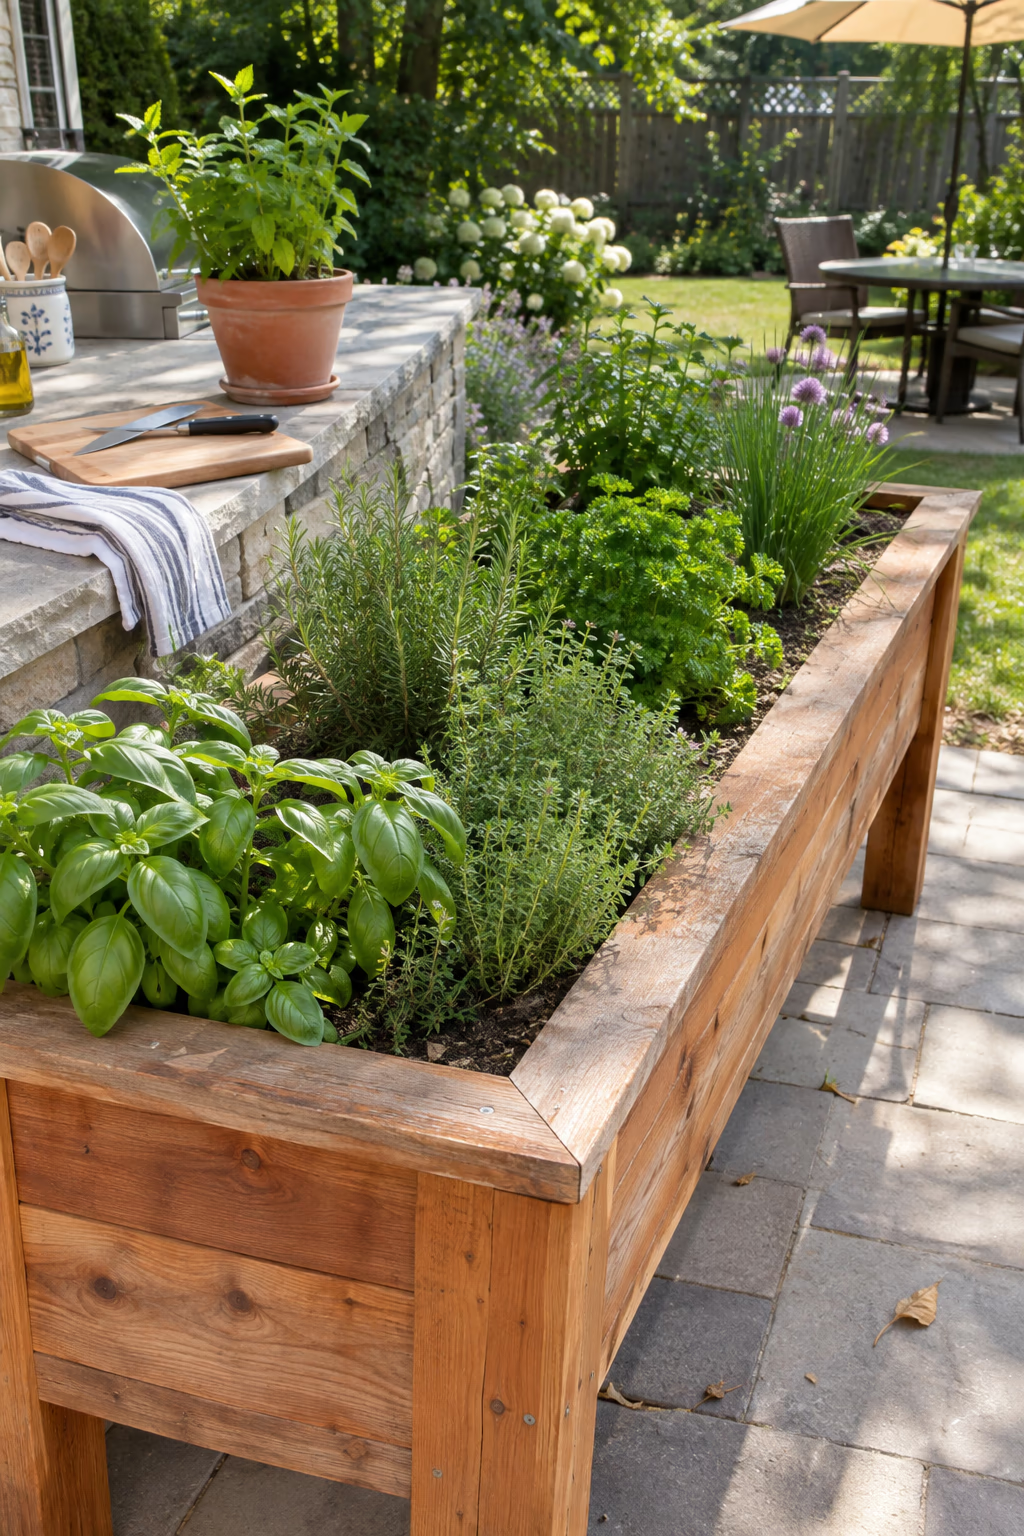
Fresh flavors within arm’s reach
Raised beds or long planters next to the counter put basil, rosemary, thyme, oregano, parsley, and chives right where you chop. A 2 by 6 foot cedar bed at counter height also softens the hard edges of the island.
Herbs like at least six hours of sun, and rosemary, thyme, and oregano prefer lean, well-drained soil. Basil needs regular watering and warmth.
Keep planters a few feet from the grill so heat doesn’t scorch the leaves. Mint spreads aggressively in beds, so grow it in its own pot.
11. Pair the Kitchen With a Fire Pit Lounge
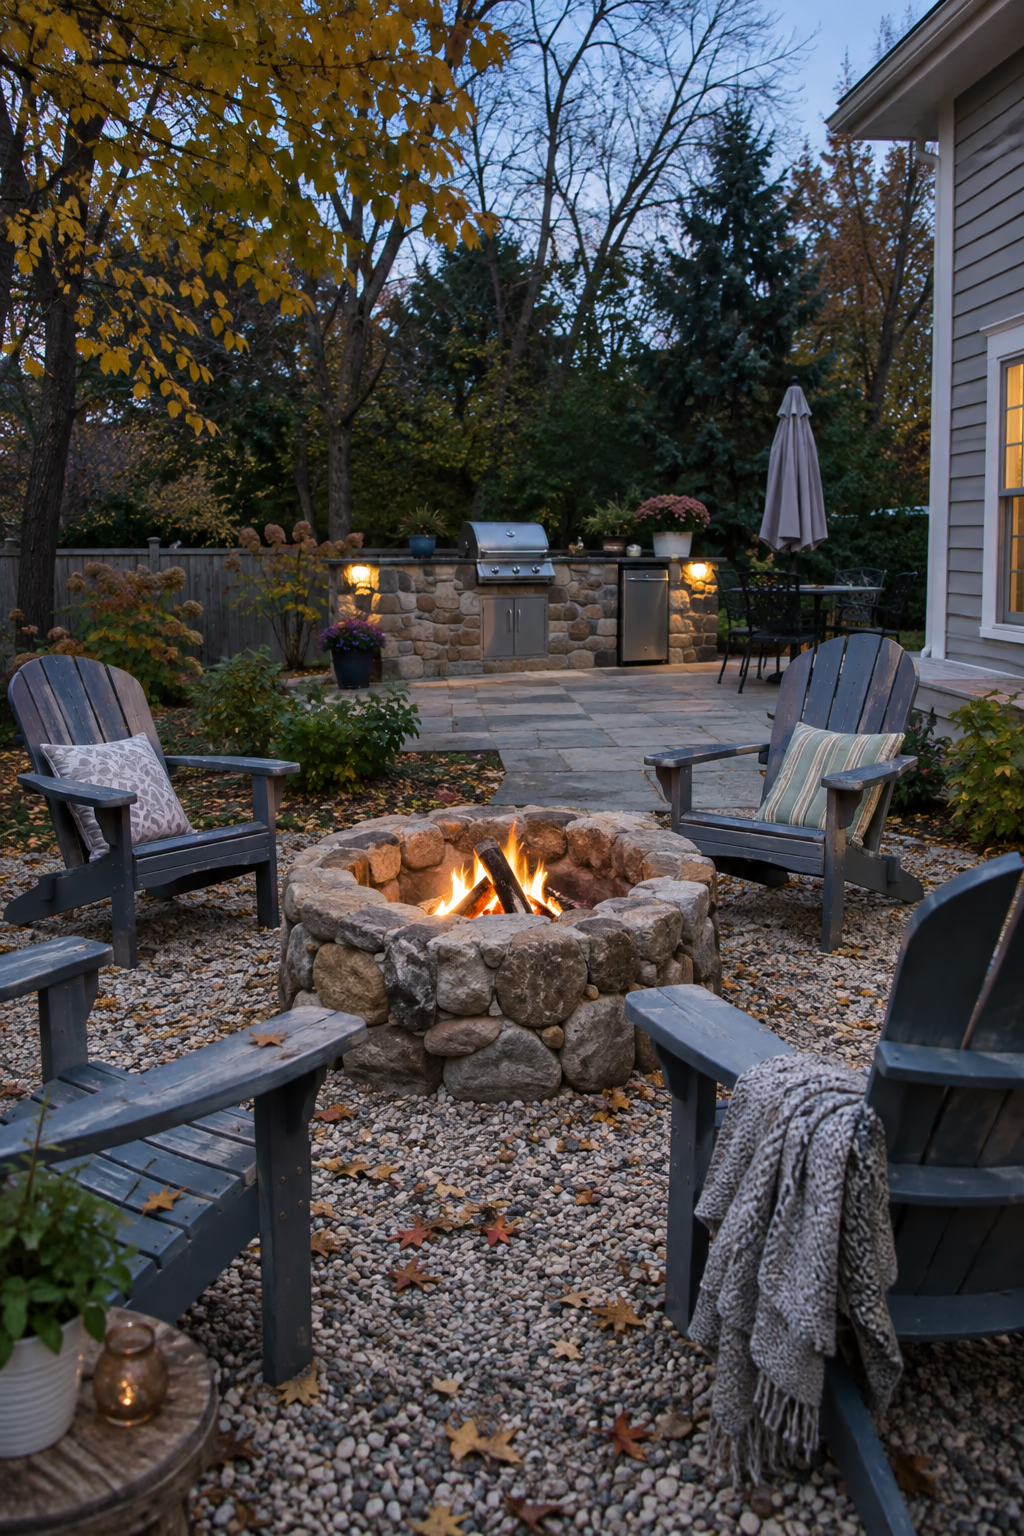
Keep the party going after dinner
Once the food is served, a fire pit gives everyone a place to settle in. Set a round gravel or paver area a short walk from the kitchen with low chairs around a gas or wood-burning pit.
Placing it nearby links the two zones, so the cook isn’t isolated and dessert like s’mores can move from counter to fire easily.
Most local codes require fire pits to be at least 10 feet from the house and other structures, and some areas restrict wood burning on dry or bad-air days. Check the rules before you build.
12. Set Up a Compact Grill Cart Kitchen on a Small Patio
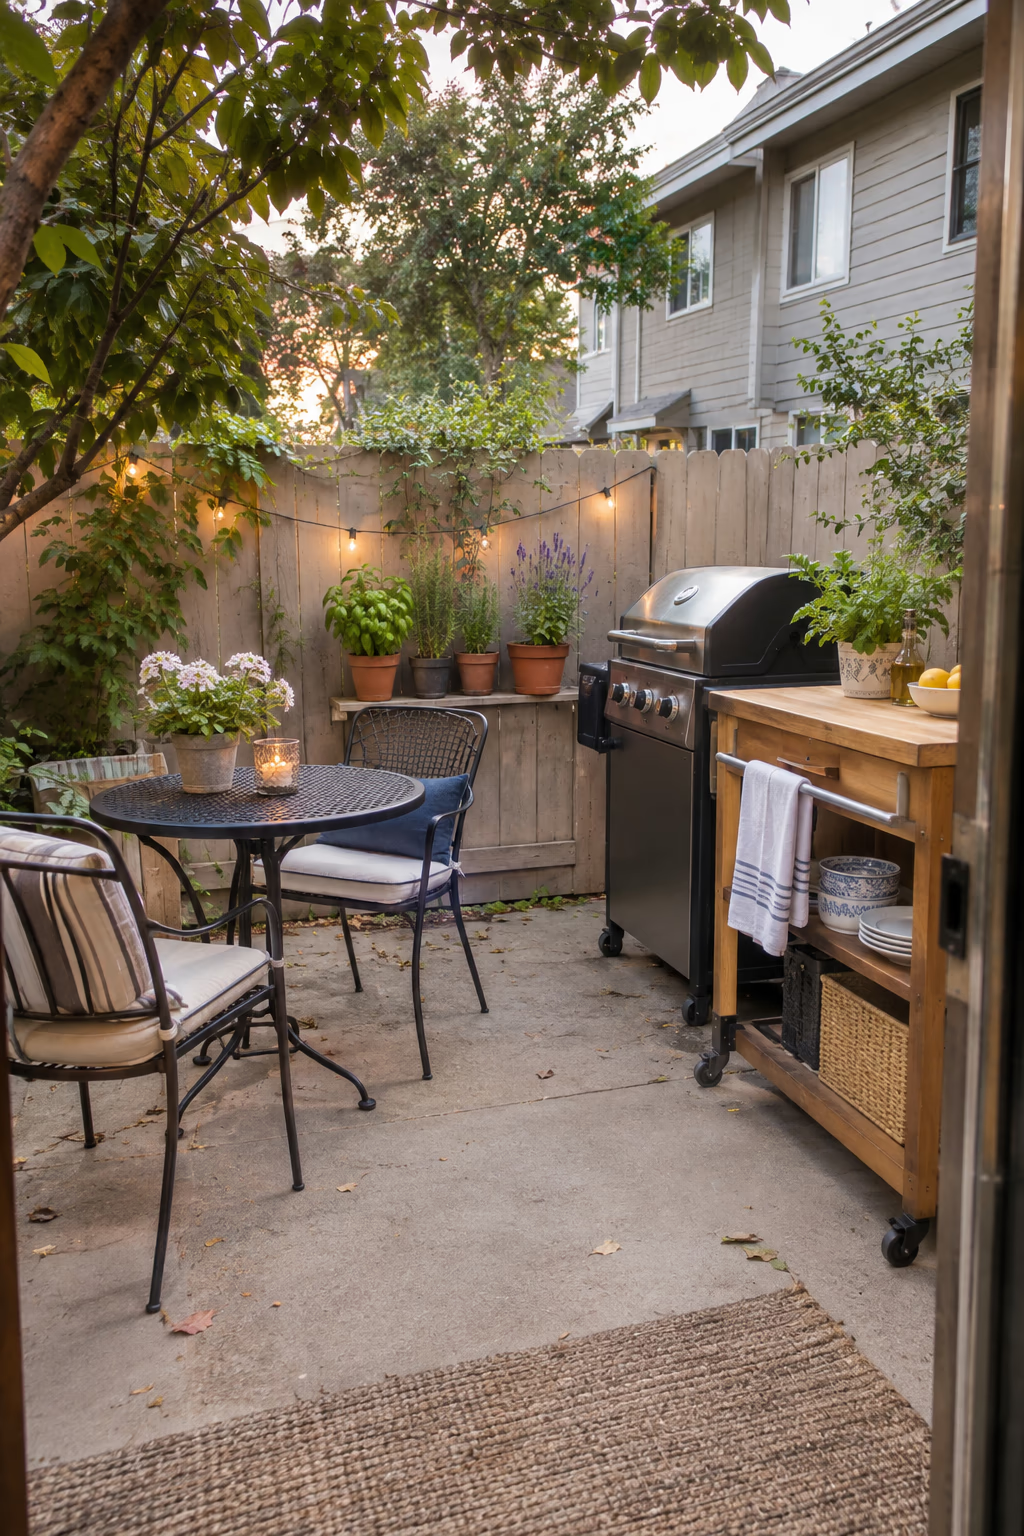
Big function in a small footprint
Townhome patios and small decks can still have an outdoor kitchen. Pair a compact grill with a rolling stainless or teak-look prep cart that has a cutting board top, towel bar, and shelf storage.
Everything can be moved aside for more space or stored in a garage during winter, and renters can take it with them.
Check your lease, HOA, or local fire code first. Many apartments and condo buildings prohibit charcoal or gas grills on balconies, though electric grills are often allowed.
13. Build a Rustic Island From Reclaimed Timber
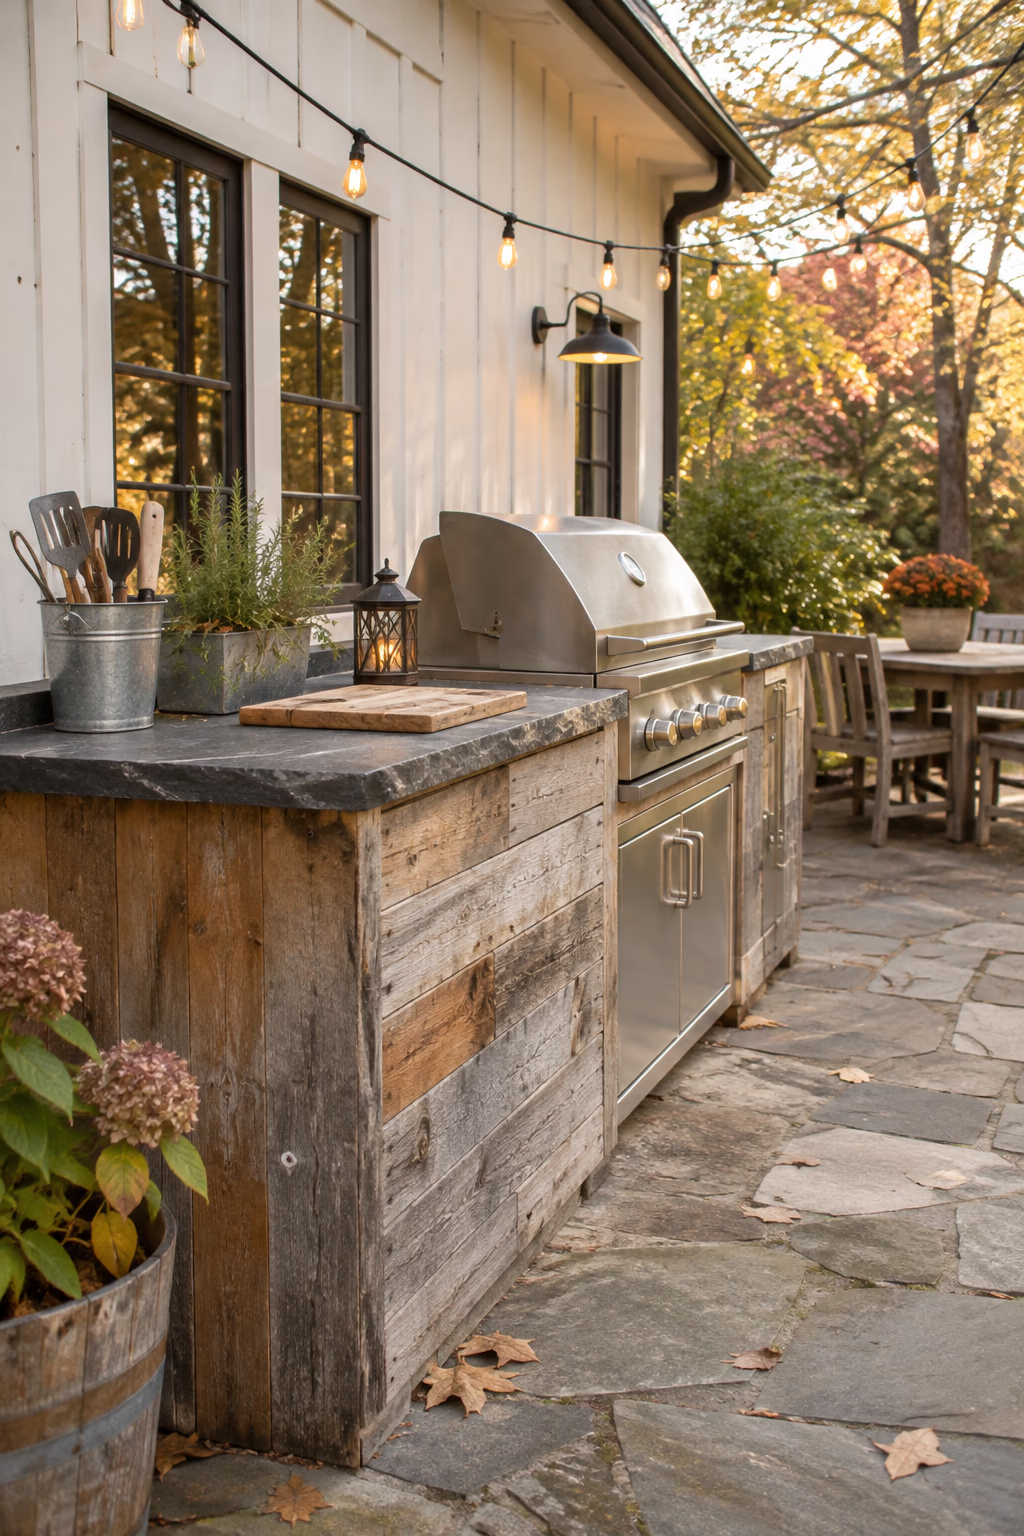
Warm farmhouse character outdoors
Weathered barn wood, rough-sawn cedar, or reclaimed oak gives an outdoor kitchen a cozy, lived-in feel. Clad a steel or masonry frame with timber, then top it with a slab of stone or concrete.
The look fits well in cottage, farmhouse, and mountain-style yards, especially with galvanized buckets, string lights, and potted herbs.
Wood should never be close to the grill’s heat source. Use a stainless insulated jacket around a built-in grill, keep wood away from burners, and seal the timber to resist moisture and rot.
14. Tile the Backsplash With Bold Patterned Porcelain
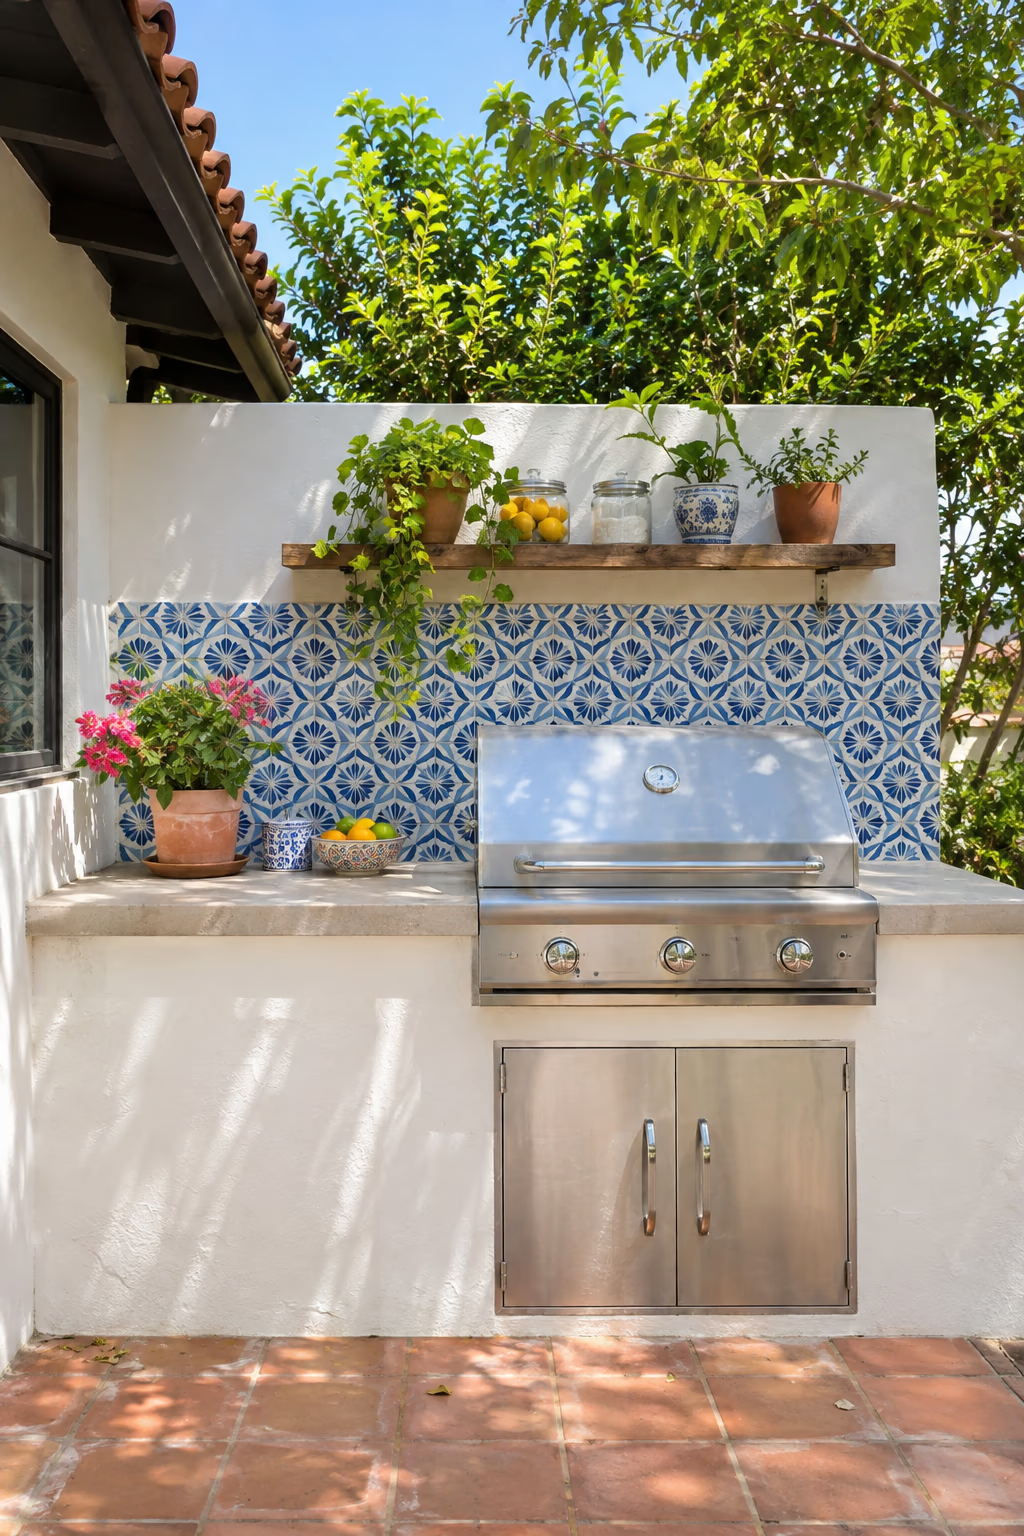
A splash of color behind the grill
A backsplash wall behind the grill protects a fence or siding from grease and adds personality. Encaustic-look porcelain in blue and white, terracotta and cream, or green geometric patterns makes a strong focal point.
A tiled wall also gives you a place to mount shelves, task lights, or hooks.
In cold climates, use frost-resistant porcelain tile instead of ceramic or natural terracotta, which can crack after freezing and thawing. Set it with exterior-grade thinset and grout.
15. Light the Work Zones With Task and String Lights
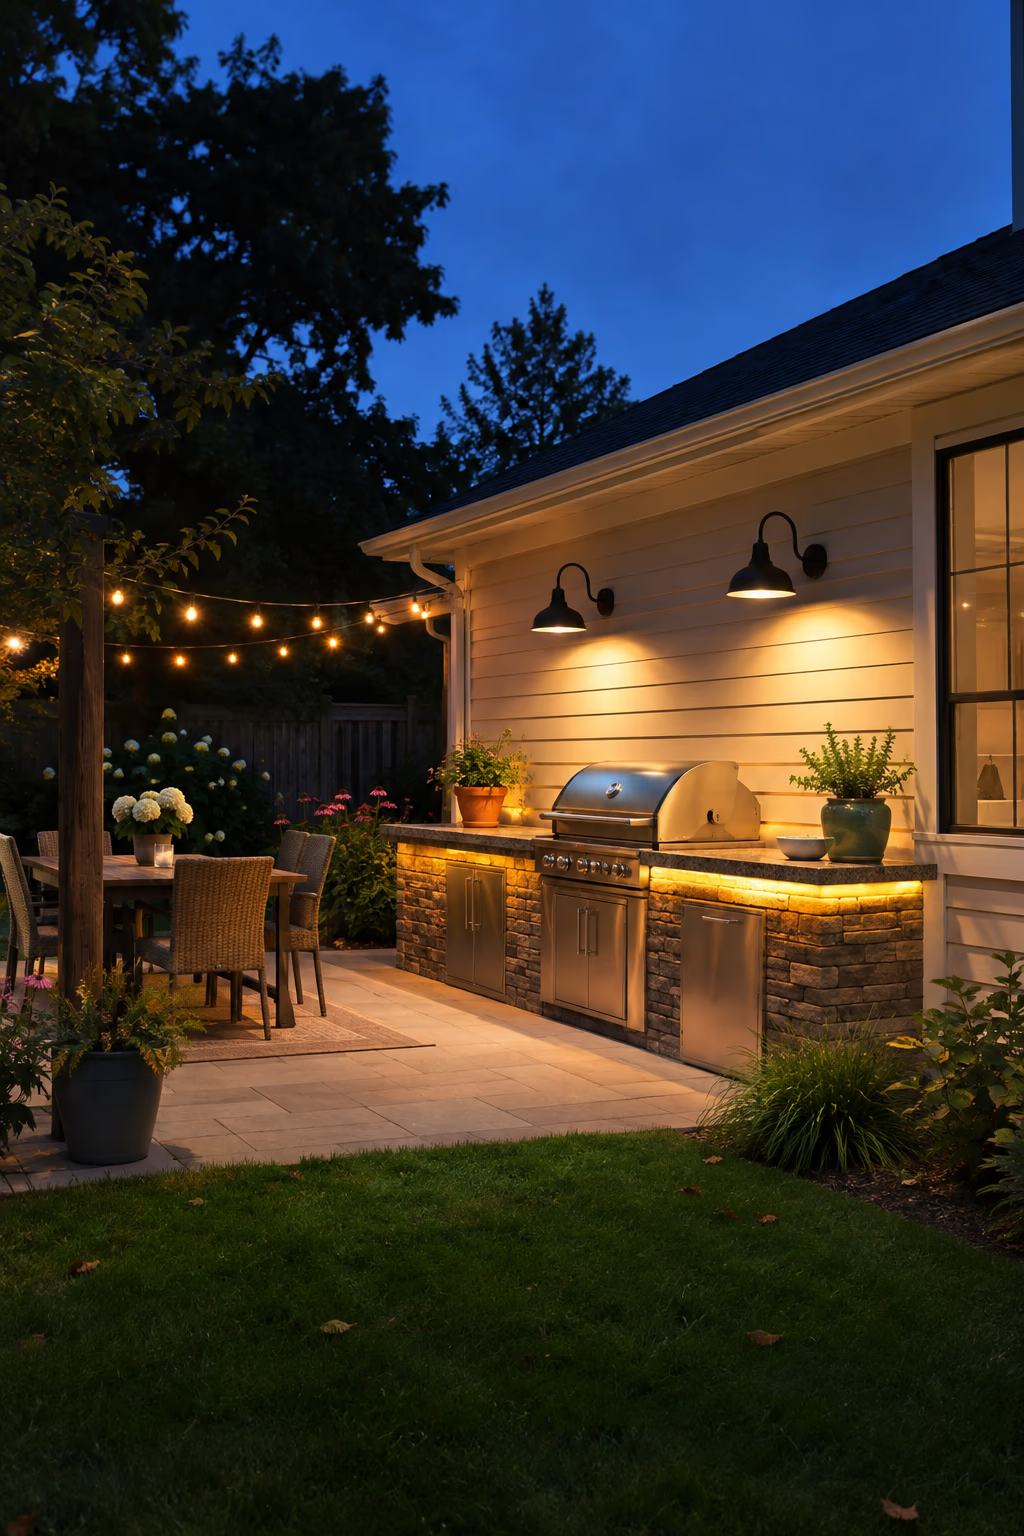
Cook safely after the sun goes down
Good lighting keeps the grill usable after dark. Use bright task lights over the prep and cooking areas, such as wall sconces, under-counter LED strips, or downlights in a pergola beam.
Then add softer string lights or lanterns over the dining zone for a warm, relaxed glow.
All fixtures should be wet-rated for exposed areas. Low-voltage LED systems are easy for DIYers, but hardwired circuits need a licensed electrician.
16. Carve Out a Smoker Corner for Low-and-Slow Barbecue
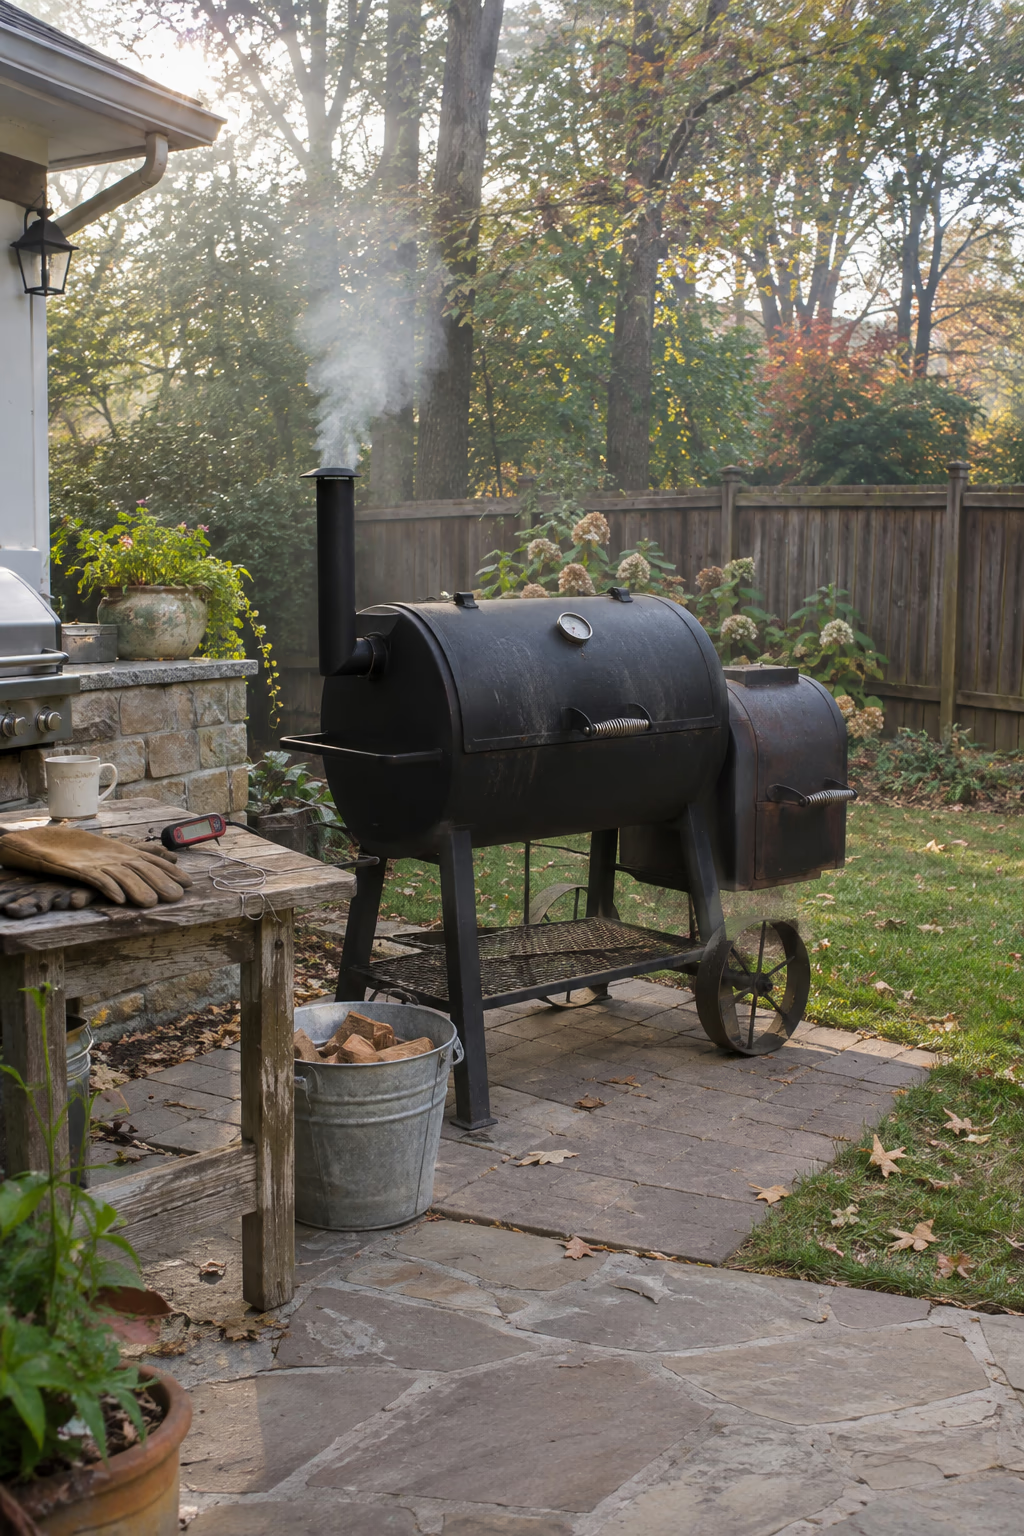
A dedicated spot for serious pitmasters
If brisket and ribs are your thing, give the smoker its own spot at the end of the counter. A paver pad with a small side table, a bin for wood chunks, and a hook for a thermometer and gloves creates a tidy barbecue station.
Pellet, offset, and kamado smokers all work, and placing the smoker slightly away from the dining area keeps smoke from drifting onto guests.
Consider the prevailing wind and your neighbors’ windows before choosing the location. Long cooks can produce smoke for many hours.
17. Install an Outdoor Sink With a Prep Station
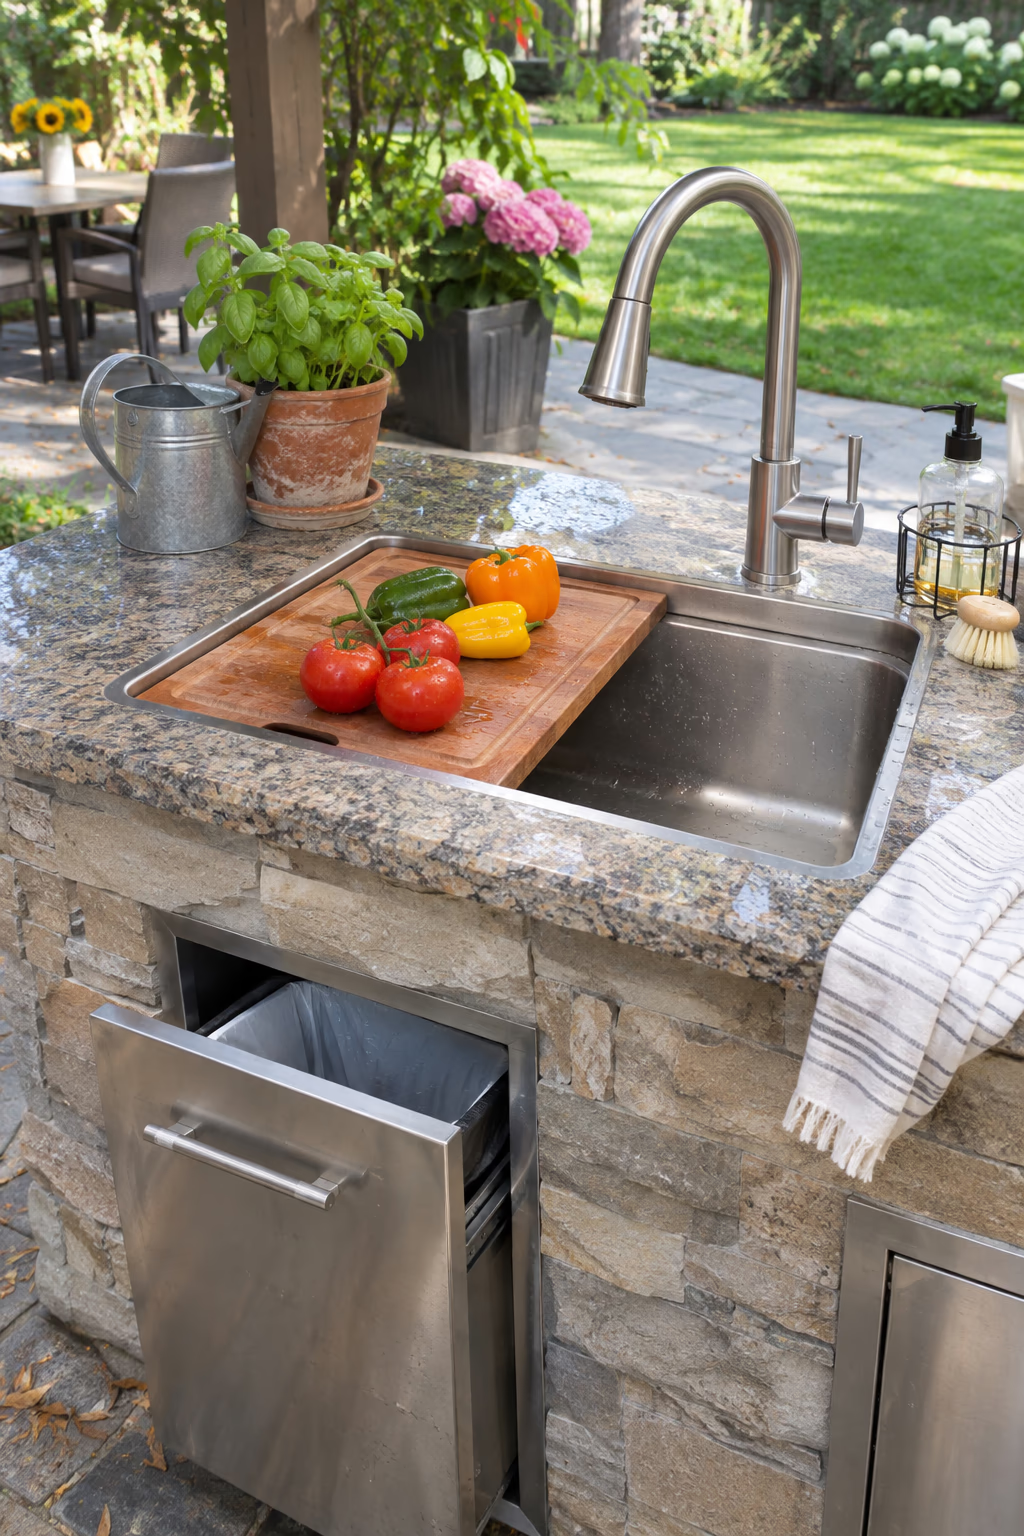
Rinse, chop, and clean without going inside
A stainless bar sink makes it easy to wash vegetables, rinse tools, and clean hands while cooking. Combine it with a cutting board insert and a pull-out trash bin to create a complete prep zone.
A sink is one of the most useful upgrades because it cuts down on trips to the house.
Plumbing an outdoor sink usually requires a proper drain connection, and freezing climates need shut-off valves and drain-down lines for winter. Local codes may restrict draining gray water into the yard.
18. Create a Poolside Grill and Bar
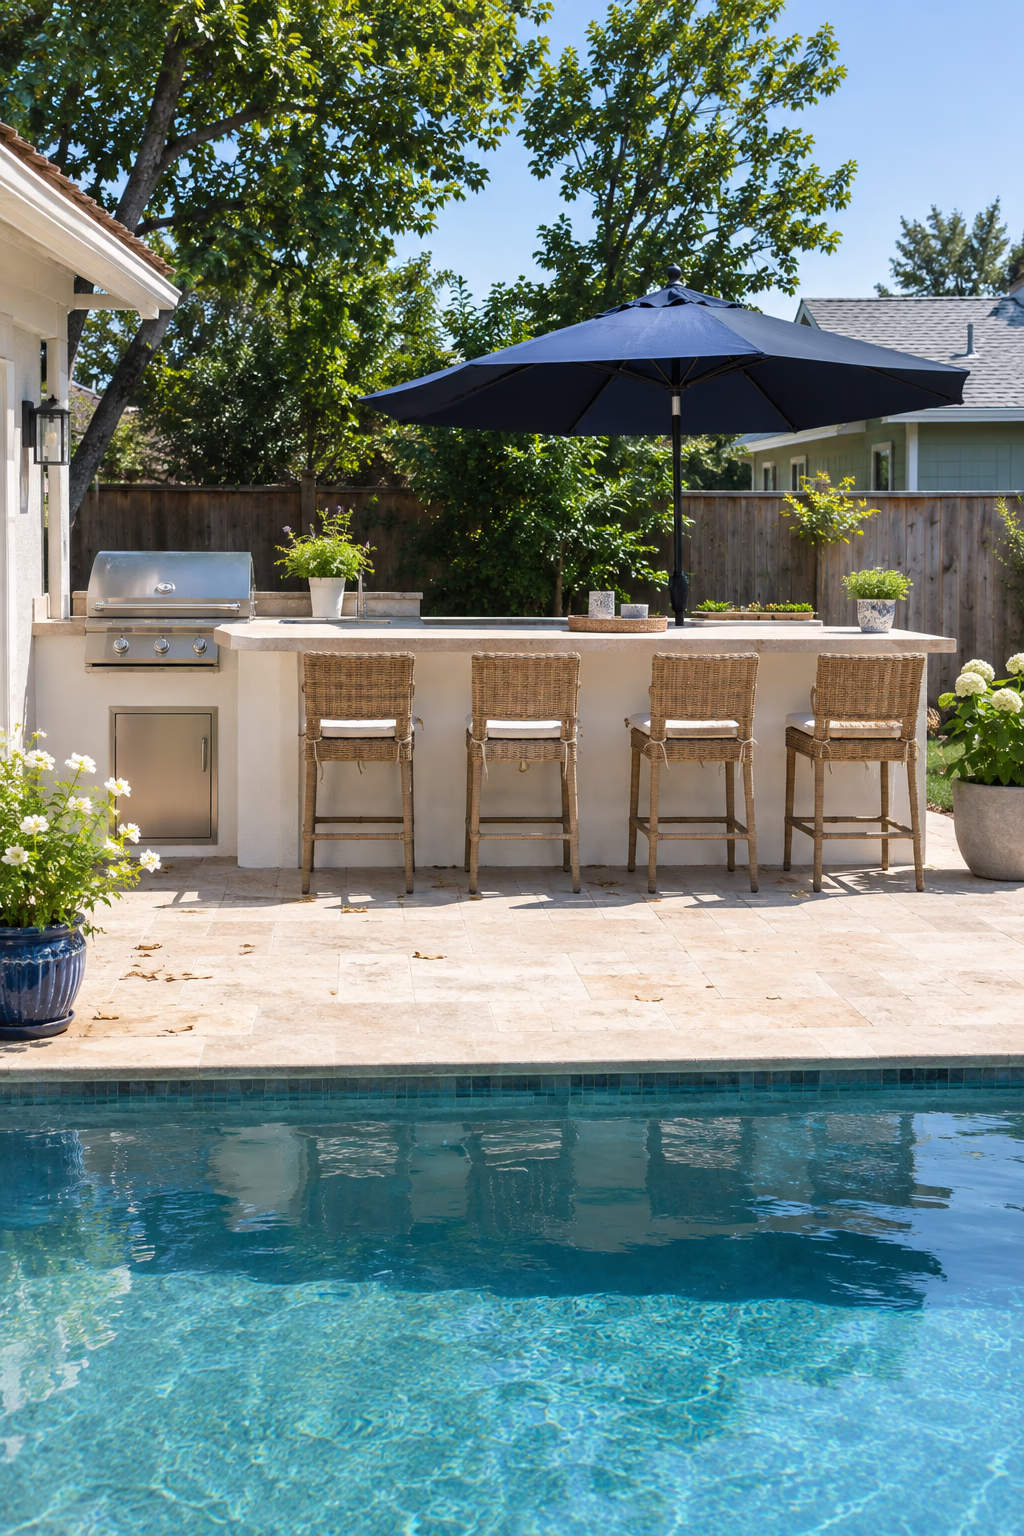
Snacks and drinks without leaving the water
A grill and bar near the pool keep swimmers fed and hydrated. Use a simple straight counter with bar stools facing the water, plus a small fridge and a shade umbrella.
Light-colored pavers and counters stay cooler underfoot and look fresh against blue water.
Keep the grill at a safe distance from the pool edge and follow local barrier codes. Choose slip-resistant paving, and remember that chlorine and salt can affect some metals over time.
19. Build a Budget Island From Concrete Block and Stucco
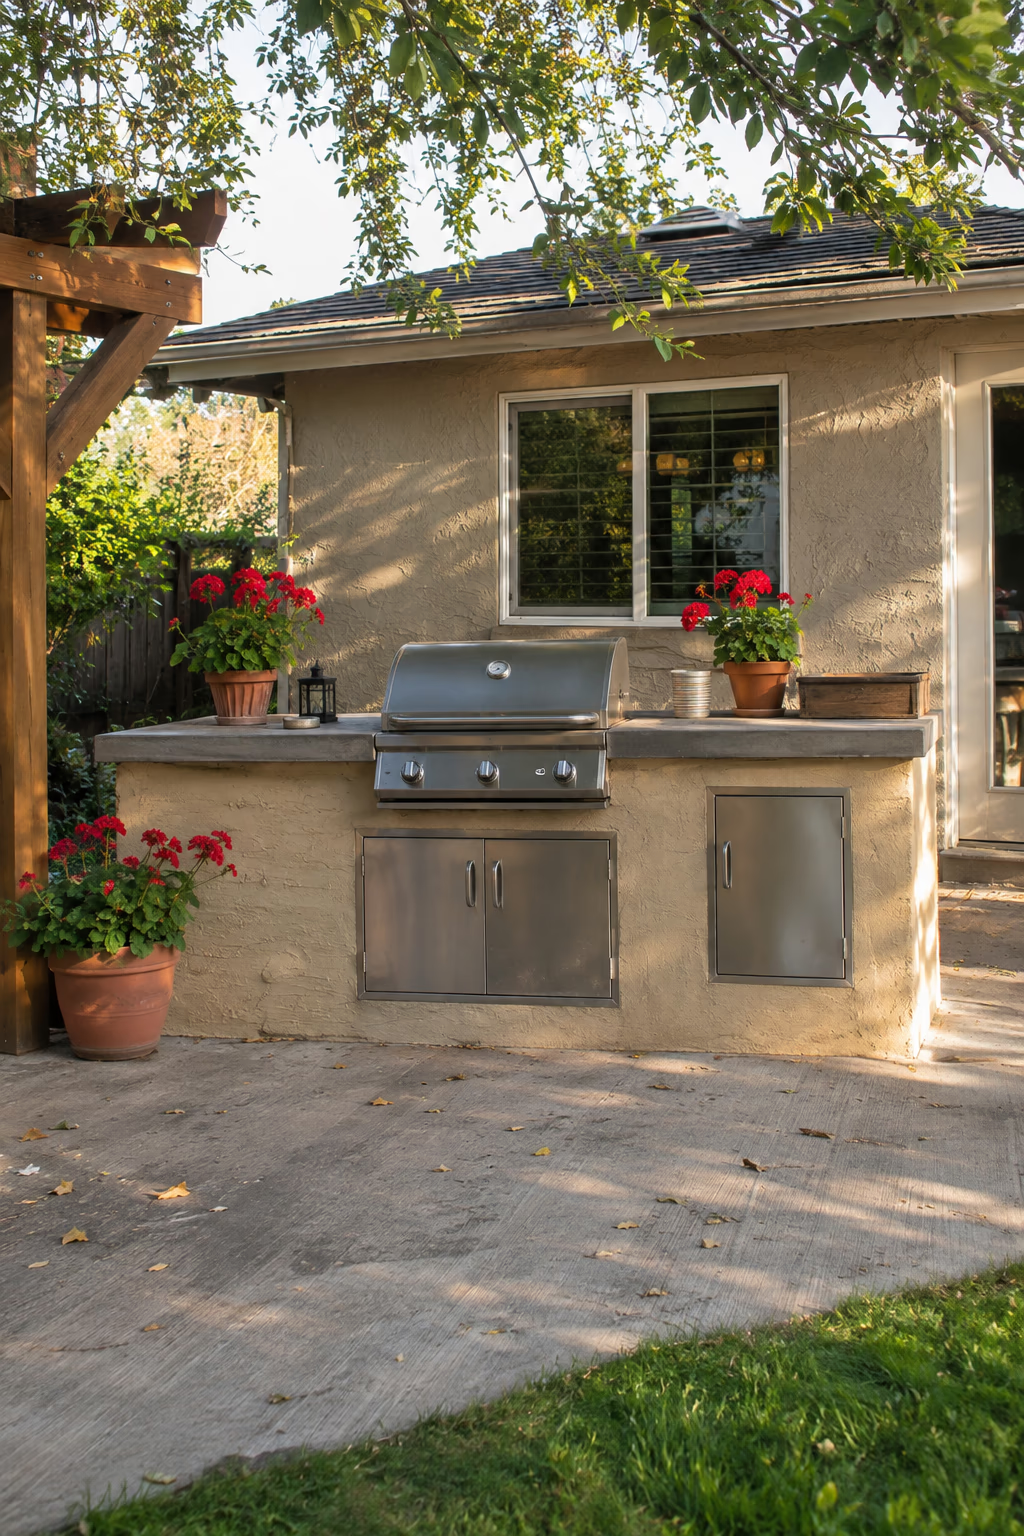
A sturdy custom island for less
Concrete block is affordable, fireproof, and DIY-friendly. Stack and mortar blocks into a simple U or straight island, then cover them with stucco in white, sand, or soft terracotta.
This method gives you a permanent island for much less than stone veneer or premium cabinets.
The island still needs a solid concrete base, and block walls may need rebar and filled cores. Check local building rules and use a grill insert designed for built-in installation.
20. Set a Long Farmhouse Table Next to the Grill
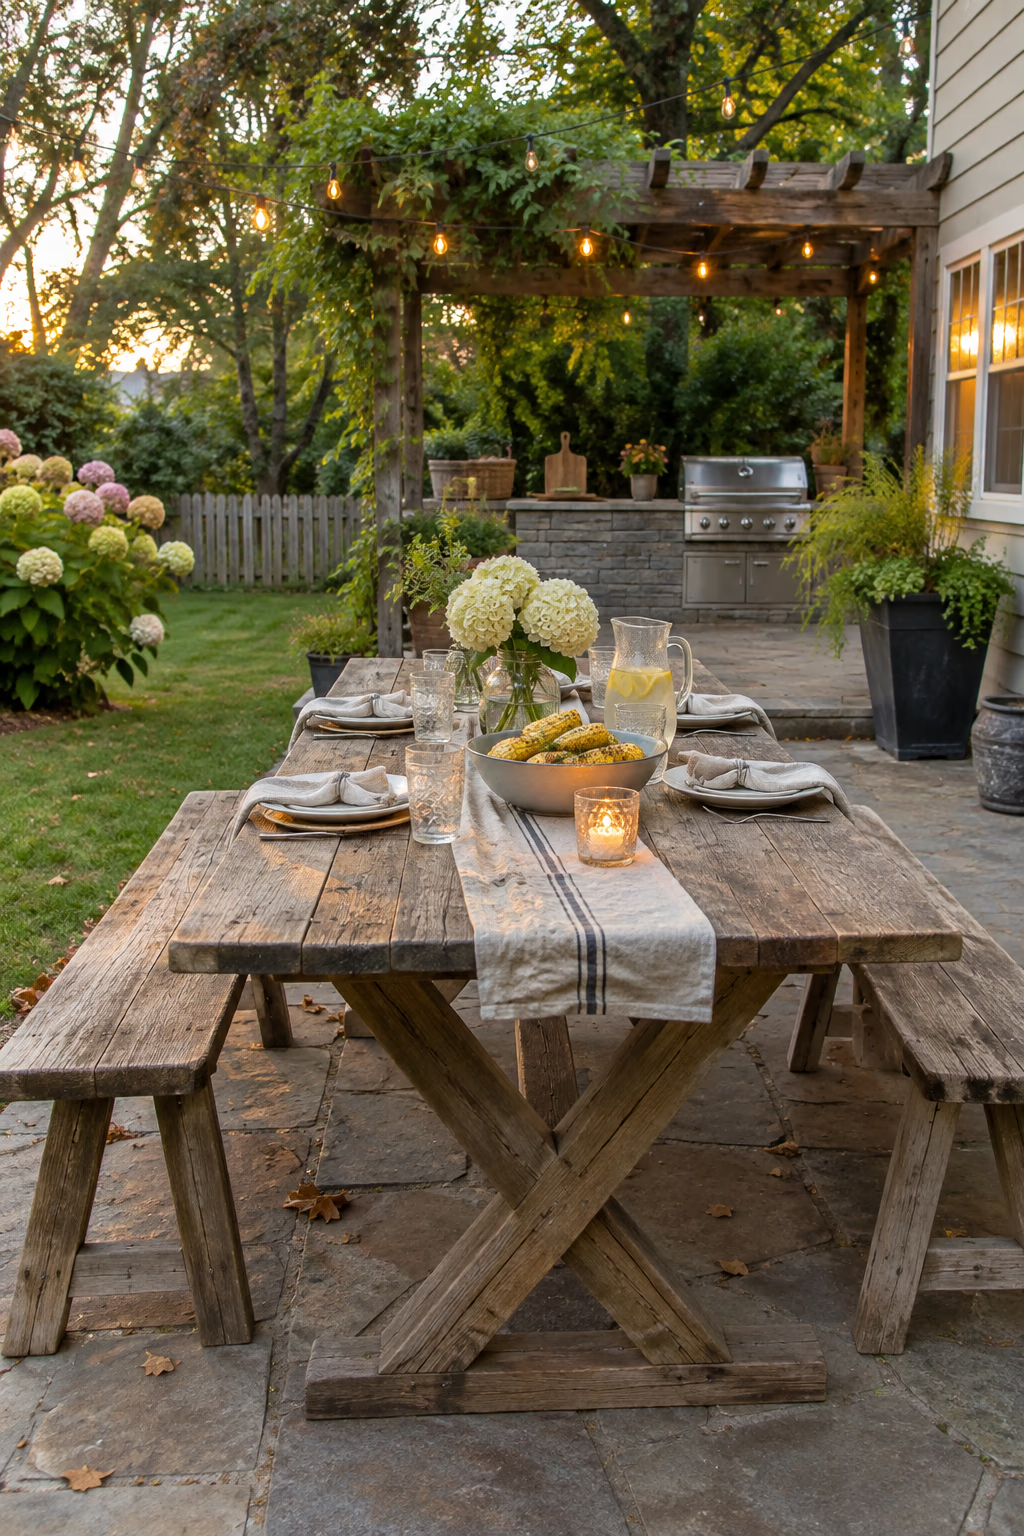
Dinner served steps from the cooking
A long table close to the kitchen turns any meal into an outdoor dinner party. A trestle table made from teak, cedar, or powder-coated aluminum with bench seating can easily fit eight people.
Keeping the dining zone just a few steps away means food goes from grill to plate while it’s still hot.
Leave enough space for chairs to slide out without crowding the cook, and choose furniture that can handle sun and rain or store cushions when not in use.
21. Hang Rails and Hooks for Grill Tool Storage
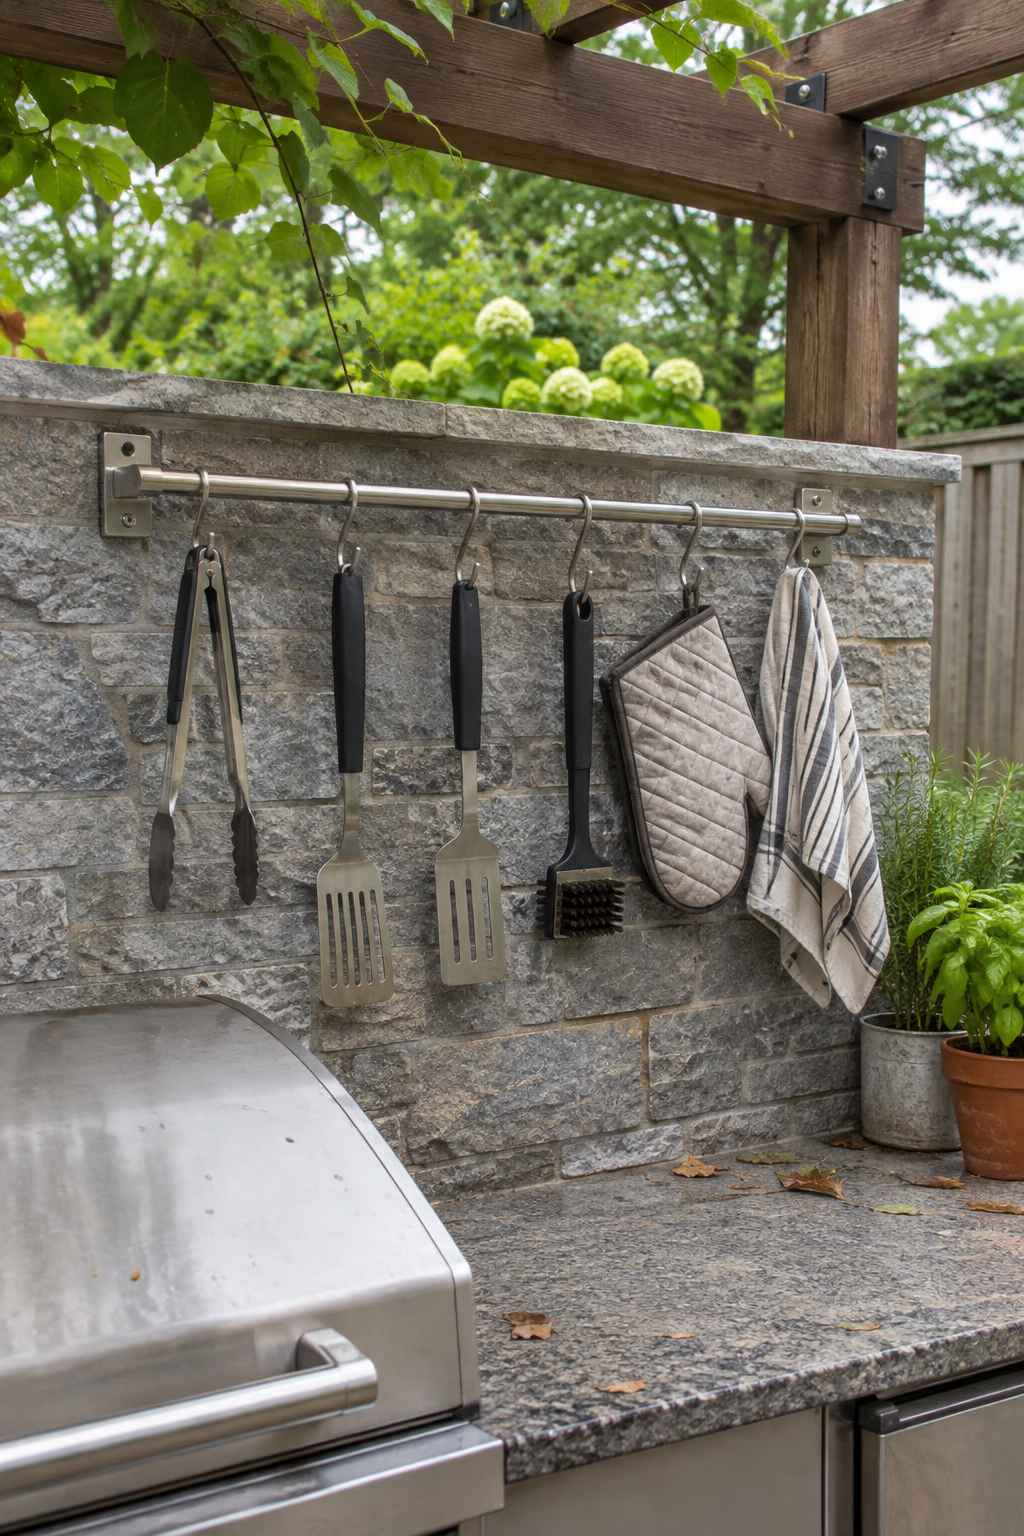
Keep tools handy and counters clear
A steel rail mounted on the backsplash or under a pergola beam keeps spatulas, tongs, brushes, mitts, and towels at hand. S-hooks let you rearrange everything as needed.
This simple upgrade frees counter space and gives the kitchen a working, chef-like look.
Choose stainless or powder-coated hardware to prevent rust, and keep fabric items away from the grill flame.
22. Add Ceiling Fans and Heaters for Year-Round Cooking
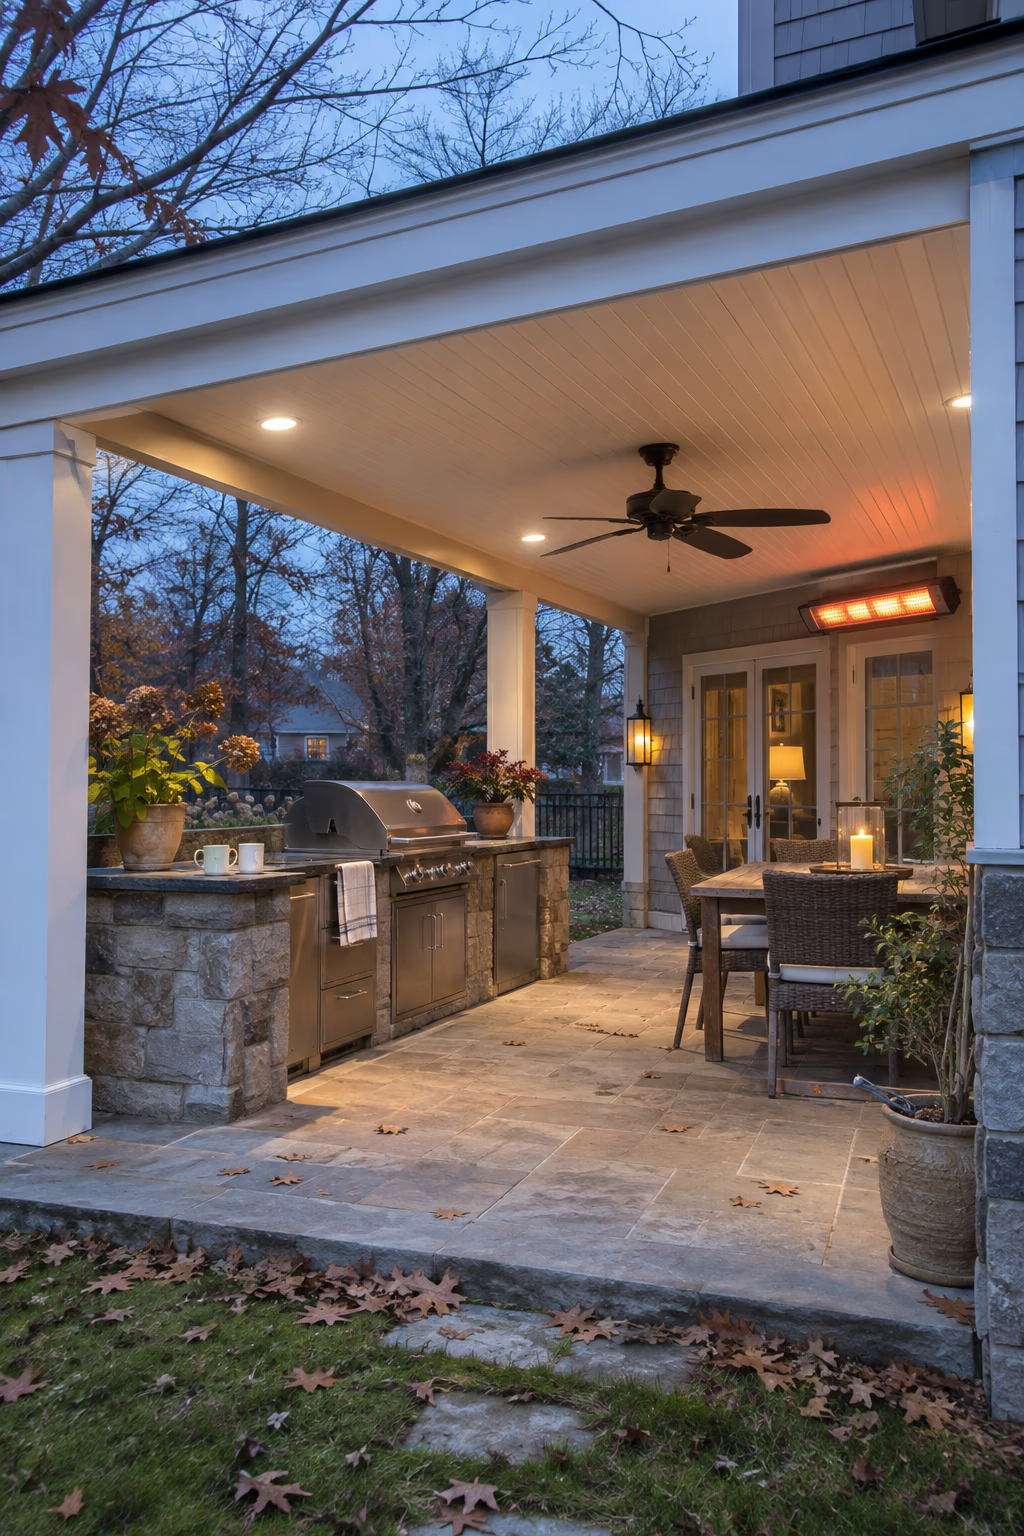
Stretch your outdoor season
A wet-rated ceiling fan keeps bugs and heat away during summer, while an infrared or patio heater makes chilly fall evenings comfortable. Both work best under a covered pergola or roof.
Together they can extend outdoor cooking by several weeks or months in many climates.
Follow clearance guidelines for heaters and choose models rated for outdoor use. Electric heaters need proper wiring, and gas heaters need ventilation and safe placement.
23. Go Modular With a Prefab Island Kit
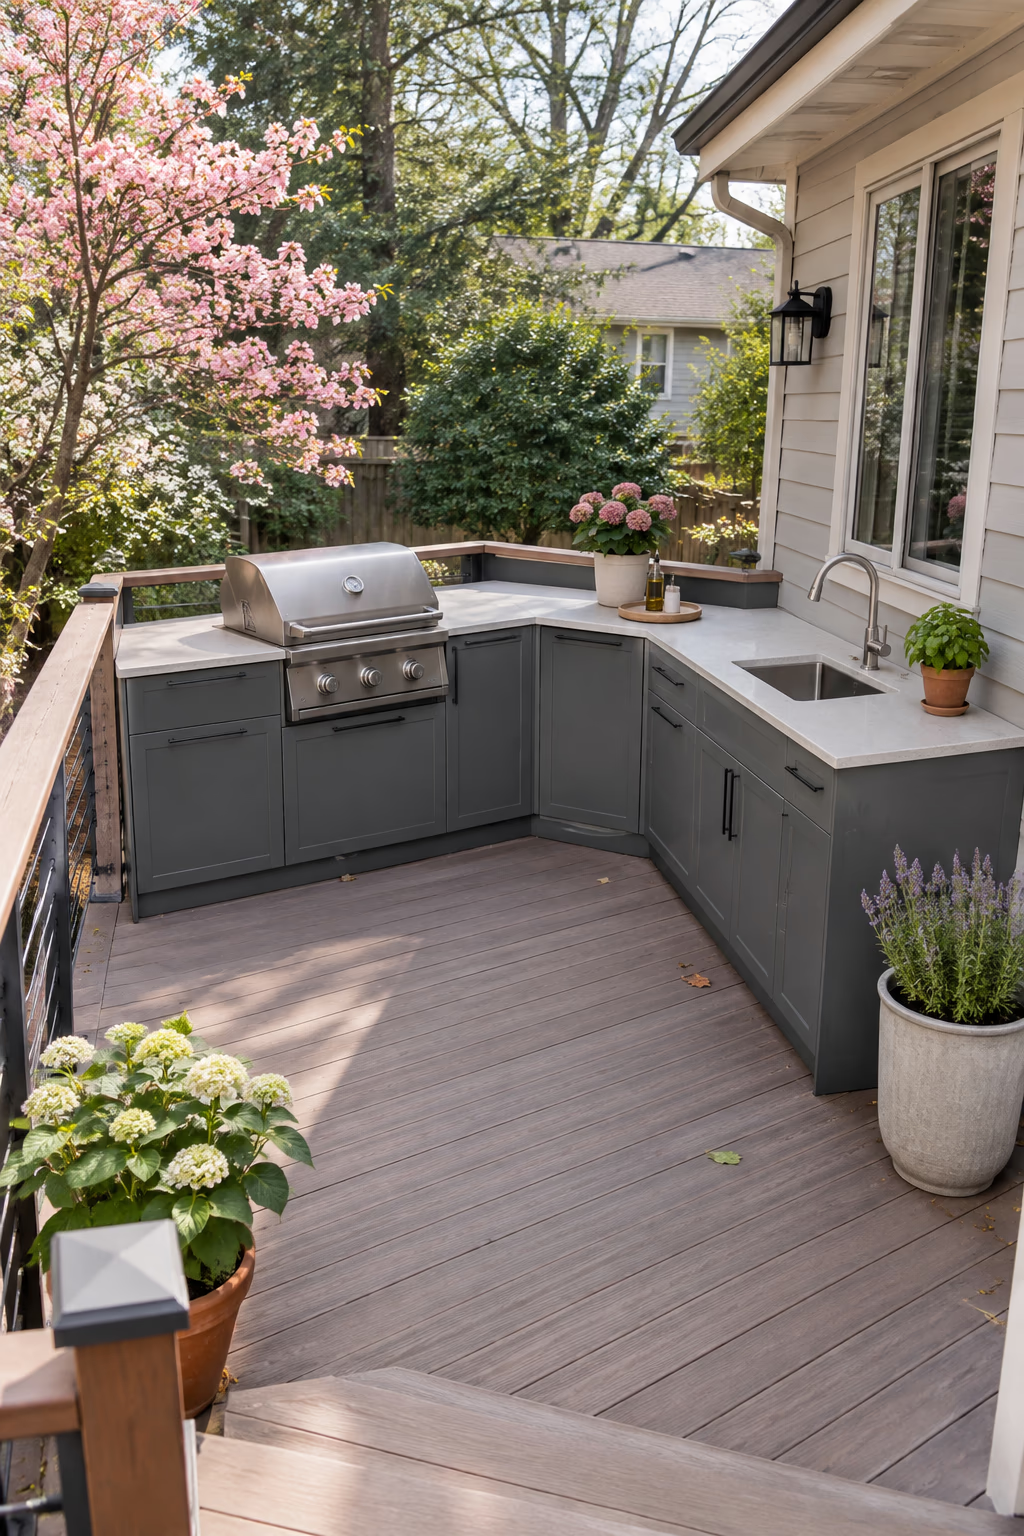
Fast installation and room to grow
Prefab modular kitchens arrive in ready-made sections such as grill cabinets, sink bases, corner units, and bar modules. You can begin with a grill and one cabinet, then add more units later.
They install faster than custom masonry and work well for homeowners who want a polished look without months of construction.
Make sure the patio surface is level and strong enough for the weight. Some modules still need gas, water, or electrical work, which should be handled by licensed pros.
How to Plan Your Outdoor Kitchen
The best outdoor kitchens are designed around how you cook, how many people you host, and what your climate allows. Spend time on these basics before you buy appliances or pour concrete.
- Start with your cooking style. Decide whether you mostly grill, smoke, bake pizza, or cook full meals, and choose the main appliance first.
- Place it close to the house. A kitchen near the back door is easier to stock and more likely to be used, but keep the grill a safe distance from siding and windows.
- Map out work zones. Plan areas for prep, cooking, serving, and cleanup, with at least 18 to 24 inches of counter space on each side of the grill.
- Plan utilities early. Gas lines, outlets, water, and drains are easiest to install before patios and counters are built. Call 811 before digging.
- Choose weather-ready materials. Use outdoor-rated appliances, sealed counters, frost-resistant tile, and corrosion-resistant hardware suited to your climate.
- Check permits and HOA rules. Structures, gas lines, electrical work, and plumbing often require permits, and some neighborhoods restrict design and placement.
Frequently Asked Questions
How much does an outdoor kitchen cost?
Costs vary widely. A grill cart and prep table can cost a few hundred dollars, a DIY block island with a built-in grill can run a few thousand, and a custom stone kitchen with utilities, appliances, and a roof can reach tens of thousands. Get several local quotes before committing.
What is the best countertop for an outdoor kitchen?
Granite, quartzite, sealed concrete, porcelain slab, and tile are common choices. Granite and quartzite handle heat and sun well. Many indoor quartz products can fade or discolor in direct sunlight, so check whether a product is rated for outdoor use.
Do I need a permit to build an outdoor kitchen?
Often, yes, especially if you are adding a gas line, electrical circuits, plumbing, or a permanent roof or pergola. Rules vary by town and HOA, so check with your local building department before starting.
How do I protect an outdoor kitchen in winter?
Cover the grill and appliances, drain and shut off water lines, clean out grease, and store cushions and loose tools. In very cold climates, unplug fridges unless they are rated for freezing temperatures.
Can I build an outdoor kitchen on a wood deck?
Yes, but weight and fire safety are important. Masonry islands are heavy, so a deck may need extra framing. Lightweight modular cabinets are often a better fit, and you should use heat shields, fire-resistant mats, and the grill manufacturer’s clearance guidelines.
Final Thoughts
A great outdoor kitchen does not need to include every feature on this list. A shaded grill station, a reliable prep counter, and somewhere nearby to sit can completely change how often you cook and eat outside.
Start with the elements that matter most to your household, choose materials that suit your climate, and build in stages if needed. Over time, your backyard can become the place where everyday dinners and summer celebrations naturally happen.