Think about the last time you walked through a yard that felt good underfoot. The gravel crunched, a little lavender brushed your ankles, and the route pulled you along toward a bench or a gate you hadn’t noticed at first. That gentle pull is what a well-made path does.
A garden path is one of the hardest-working features in any yard. It keeps shoes out of the mud, protects lawn and beds from shortcuts, and gives the whole landscape a sense of order. It also sets the mood, whether that’s relaxed and natural, crisp and modern, or a little bit romantic.
These 27 garden path ideas cover gravel walks, oversized pavers, boardwalks, lighting, edging, planting partners, and thrifty DIY surfaces. Some can be finished in a weekend, while others are bigger projects worth planning around. Mix and match until you find the right path for the way you use your yard.
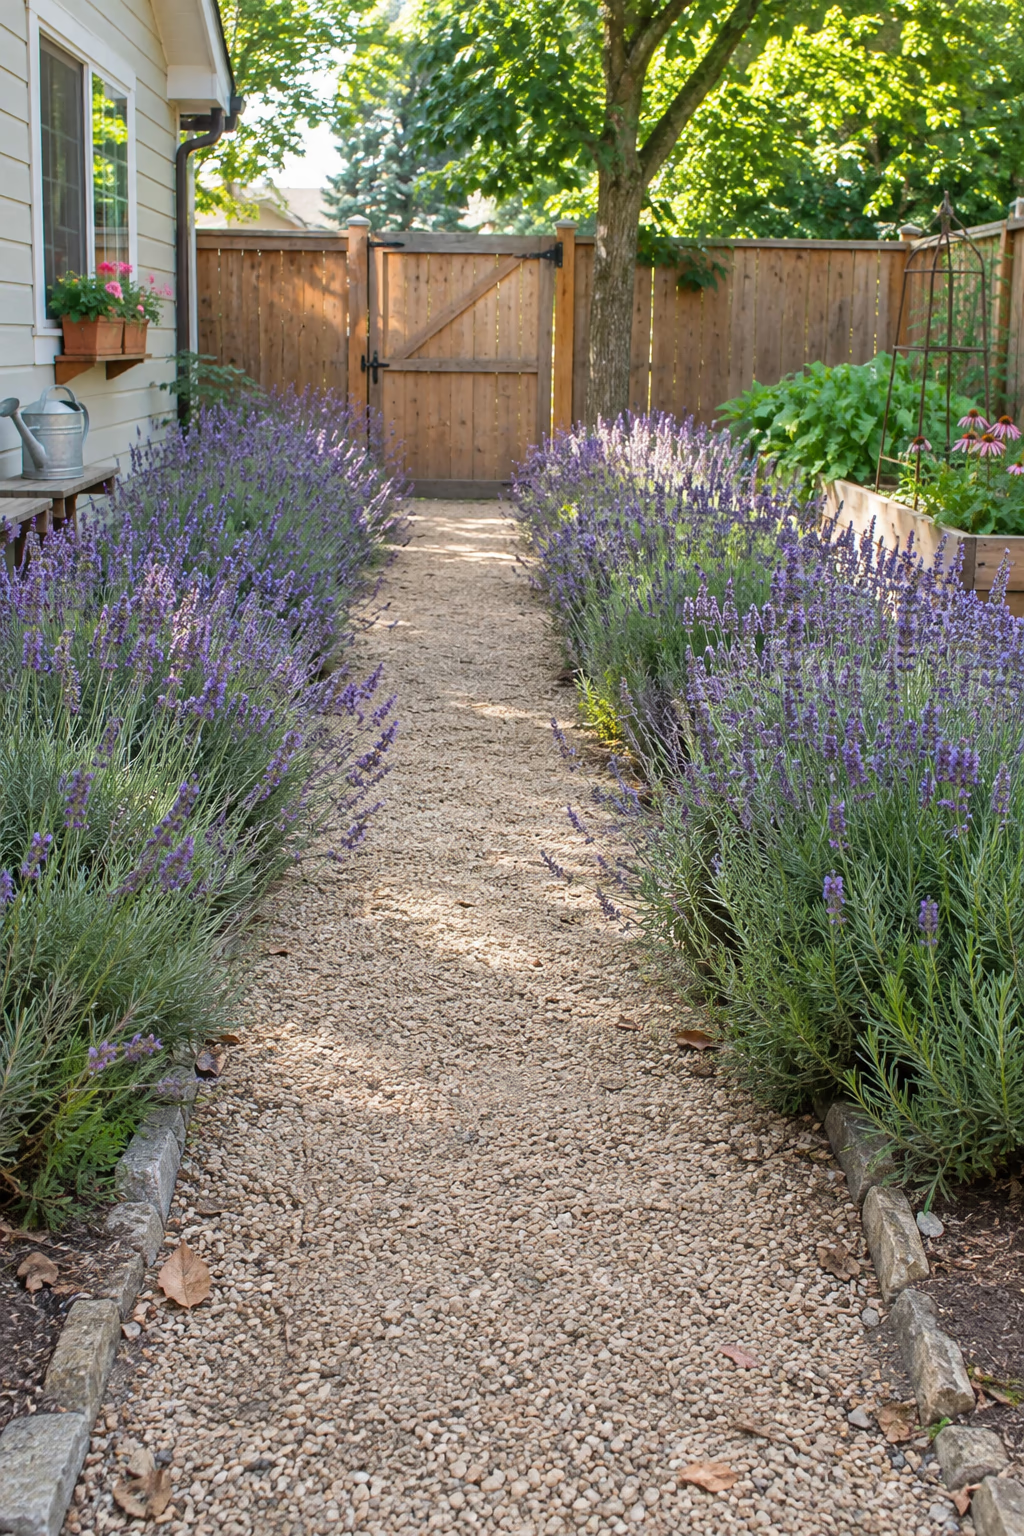
1. Line a Gravel Walk With Lavender
Fragrance and color with every step
Spread 2 to 3 inches of warm tan pea gravel or 3/8-inch crushed stone over a compacted base, then plant a row of lavender along each side, about 18 to 24 inches apart. As the plants fill in, they form soft silver-green mounds topped with purple spikes in early summer.
Lavender and gravel are natural partners. Both love sun and sharp drainage, and the stones reflect warmth back onto the plants. Brushing past the foliage releases its scent, which makes even a short walk to the mailbox feel special.
Lavender rots in wet clay, so it needs full sun and loose, well-drained soil. In colder regions, choose hardy English lavender varieties, and set the plants back far enough from the edge that they won’t swallow the path by midsummer.
2. Set Oversized Concrete Pavers Into the Lawn
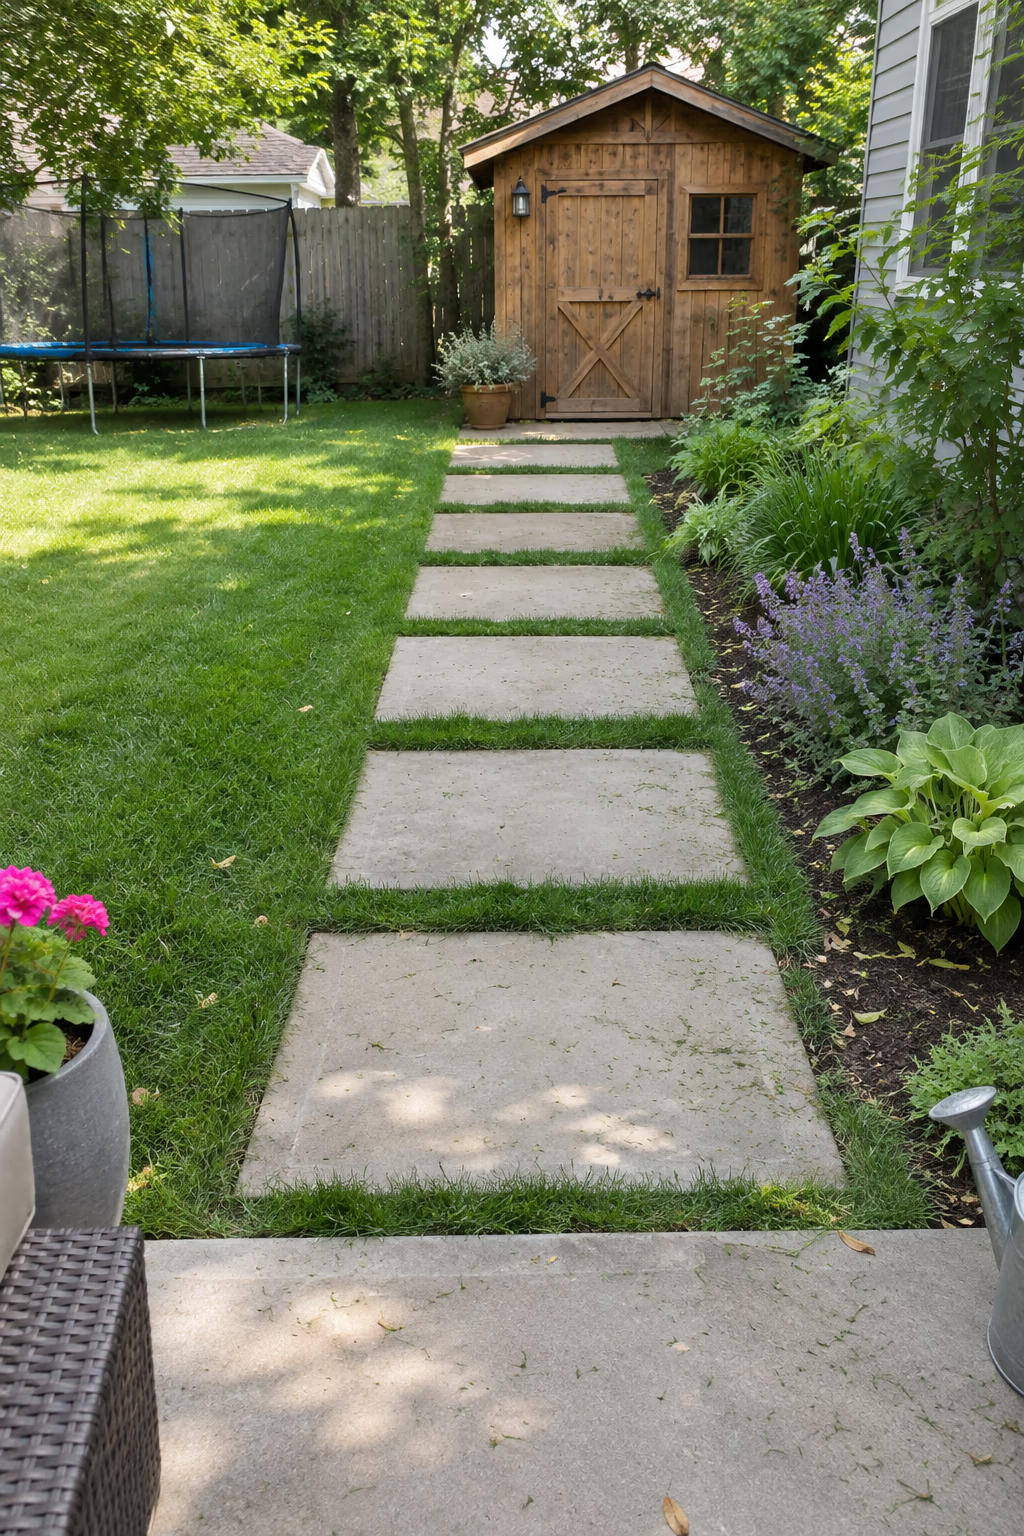
A clean, modern line across the grass
Large concrete slabs, around 24 by 36 inches, laid across a lawn create a striking path that still lets the grass do most of the work. Space them so the gaps are 4 to 6 inches, leaving a ribbon of green between each slab.
The look is simple and graphic, and it works with almost any house style. It also costs less than paving the whole route because the lawn fills the spaces in between.
Dig each slab in on a few inches of compacted gravel and sand so it sits just at or slightly below the turf. That lets the mower roll right over without catching an edge, and it keeps the pavers from rocking as the ground freezes and thaws.
3. Build a Winding Boardwalk Through Lush Plantings
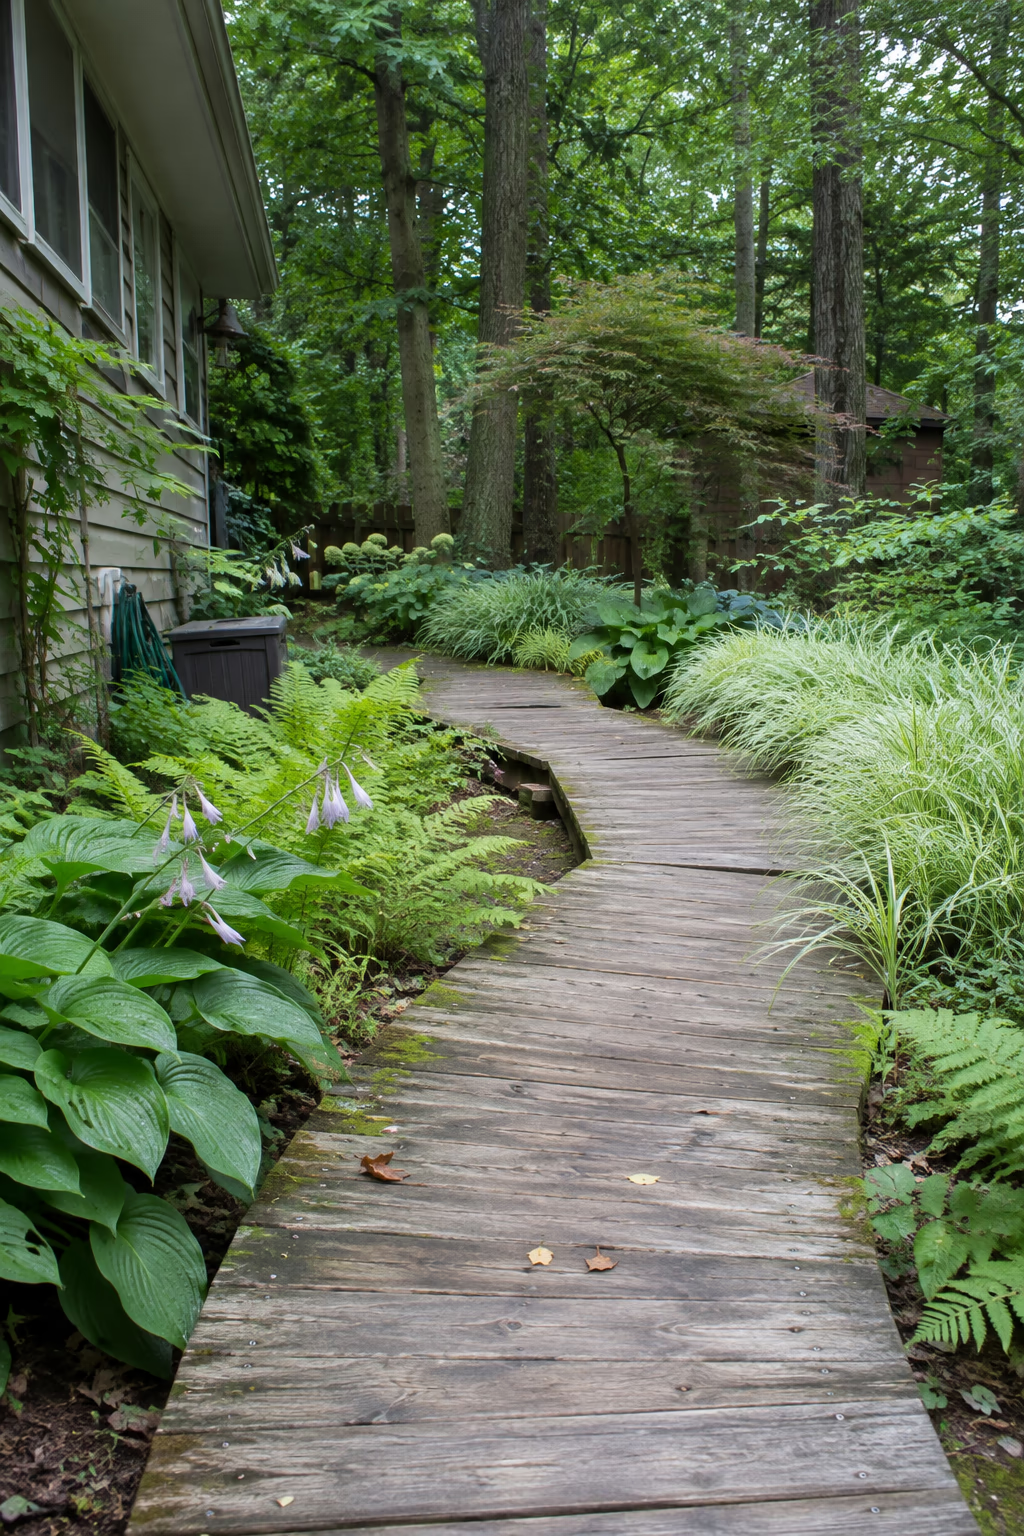
A walkway that feels like a little adventure
A low wooden boardwalk raised a few inches off the ground can snake through dense beds of grasses, hostas, and ferns. Short straight sections angled at each turn create a gentle curve without complicated carpentry.
Boardwalks are ideal where the ground stays soft or uneven, and they let plants grow right up to the edges without being trampled. The warm wood tone also contrasts beautifully with green foliage.
Use ground-contact rated pressure-treated lumber or naturally rot-resistant wood for the framing, and leave about 1/4 inch between deck boards for drainage. Wood can turn slick when wet or mossy, so an occasional scrub helps keep it safe.
4. Zigzag a Dark Paver Ribbon Through Pale Gravel
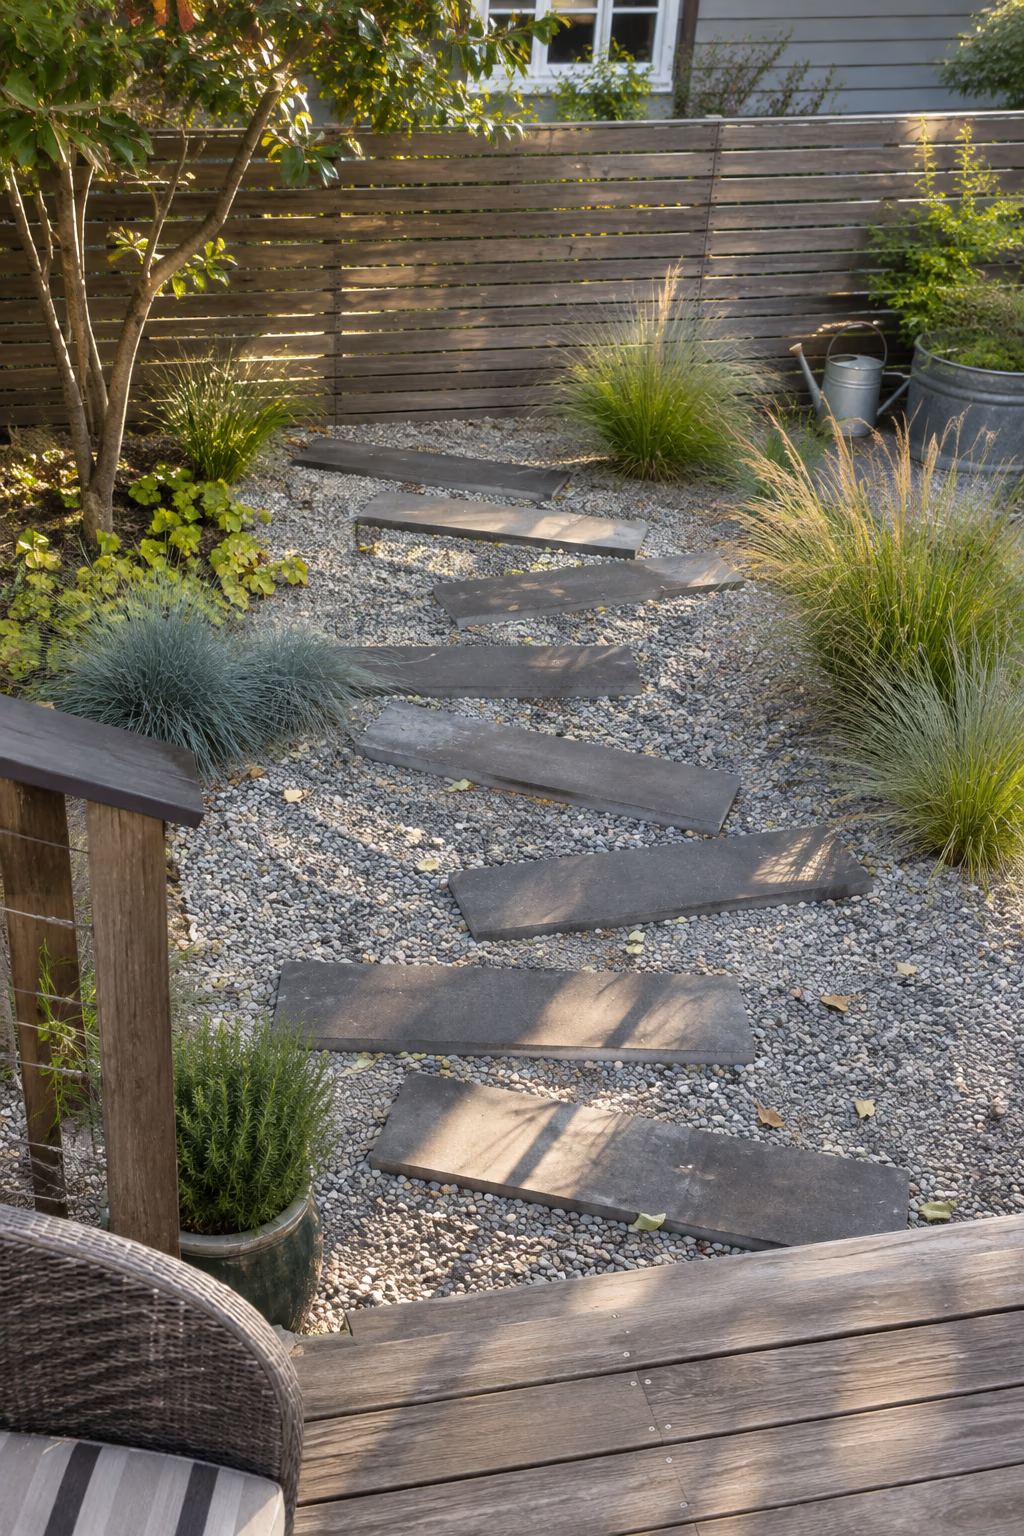
Bold contrast with a sculptural edge
Narrow charcoal concrete or basalt pavers, laid end to end in a series of offset steps, create a zigzag ribbon running through a bed of light gray or cream gravel. Low grasses tucked into the corners soften the sharp angles.
The dark-on-light contrast turns a plain walkway into something that looks designed. It’s especially good in small yards because the switchbacks make the route feel longer than it is.
Set the pavers on a compacted base and keep the gravel slightly lower than their surface so stones don’t scatter onto them. Choose a textured finish, because smooth dark pavers can become slippery and very hot in direct sun.
5. Walk Beneath a Vine-Covered Pergola
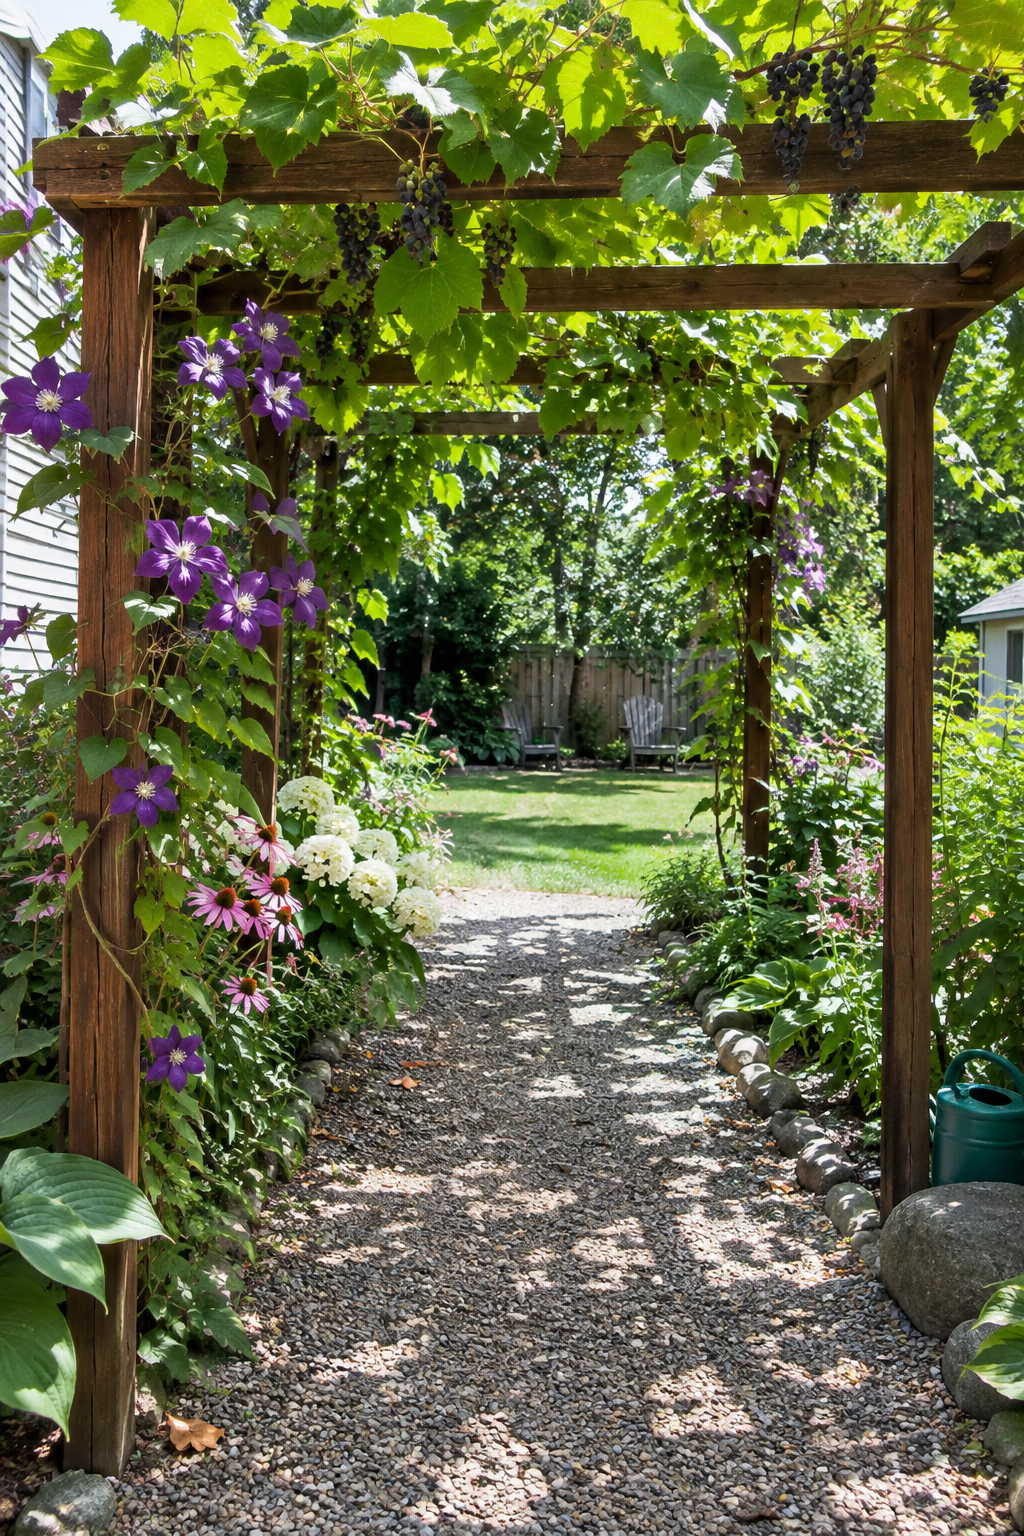
Dappled shade and a sense of arrival
A simple wooden pergola built over a section of path creates a green ceiling once vines climb over the top. Clematis, climbing hydrangea, trumpet honeysuckle, or grapes are reliable choices for ordinary yards.
Walking from bright sun into soft shade is one of the most pleasant experiences a garden can offer. The pergola also frames the view and turns a basic path into a destination.
Build the posts sturdy enough for mature vines, which get heavy. Avoid Chinese and Japanese wisteria, which are invasive in many states; native American wisteria is a better-behaved option. Check local setbacks or HOA rules before building a large structure.
6. Light the Route With Low Path Lights
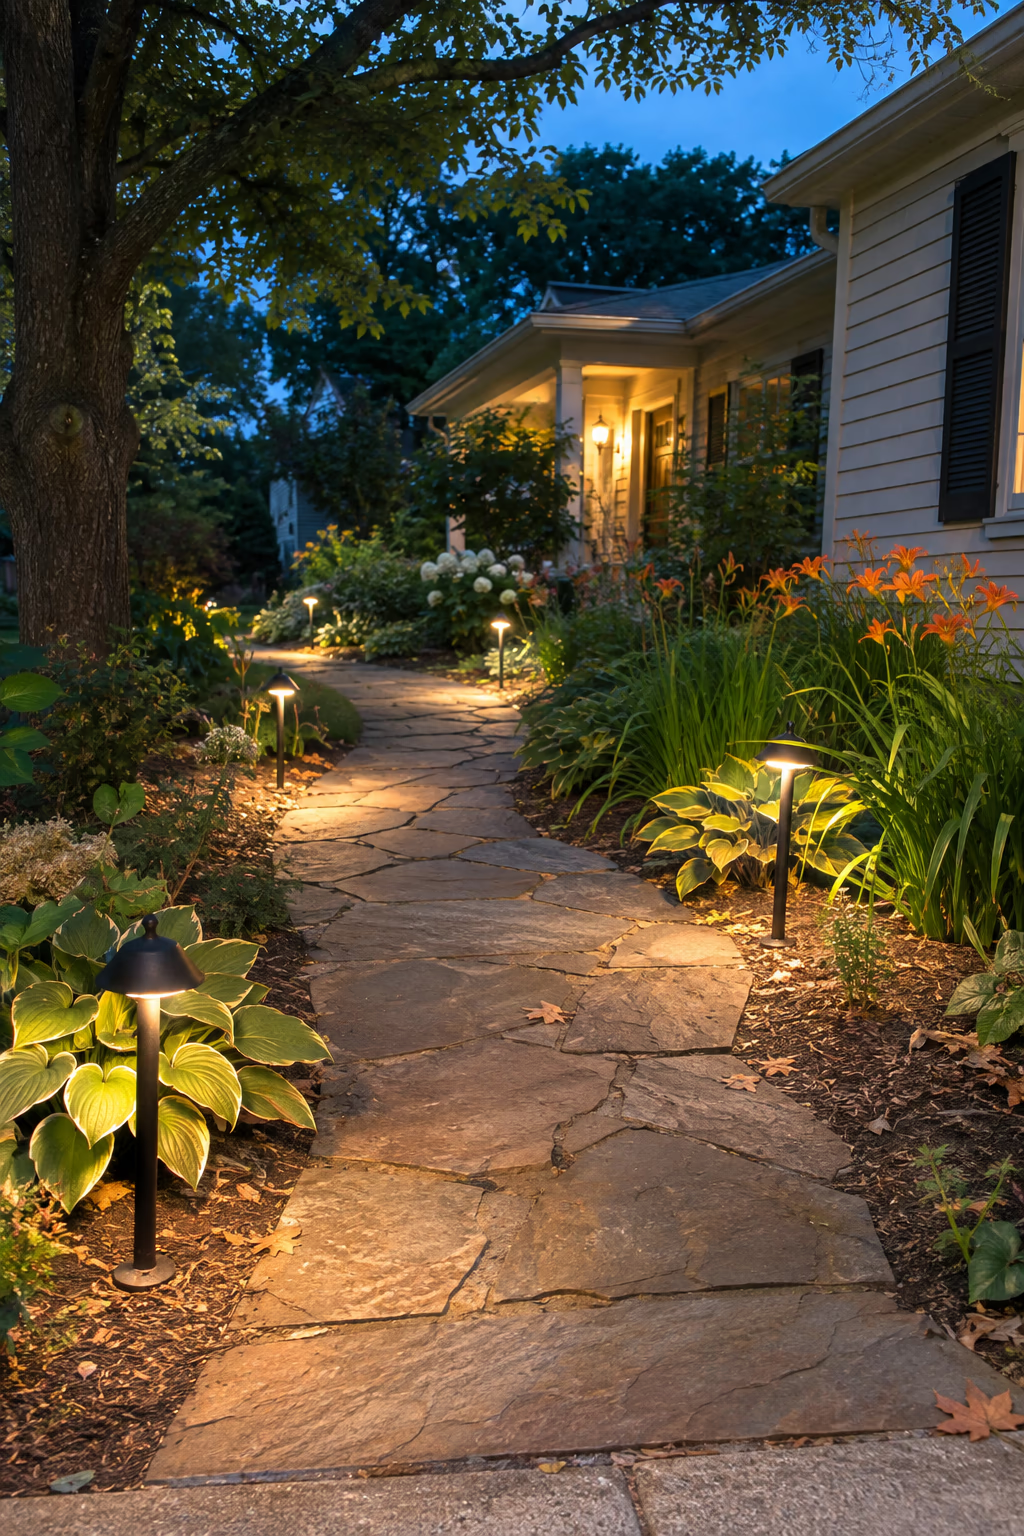
Safe footing and an evening glow
Low-voltage or solar path lights placed every 6 to 8 feet guide feet after dark and show off nearby plants. Staggering them from side to side looks more natural than lining them up like a runway.
Good lighting means you’ll actually use the path in the evening, whether you’re taking out the trash or heading to a fire pit. Warm white bulbs make plants and stone look their best.
Solar lights are easy to install but can be dim in shady spots or short winter days. A low-voltage system with a plug-in transformer costs more upfront but gives steadier, brighter light.
7. Mow a Meandering Trail Through Tall Wildflowers
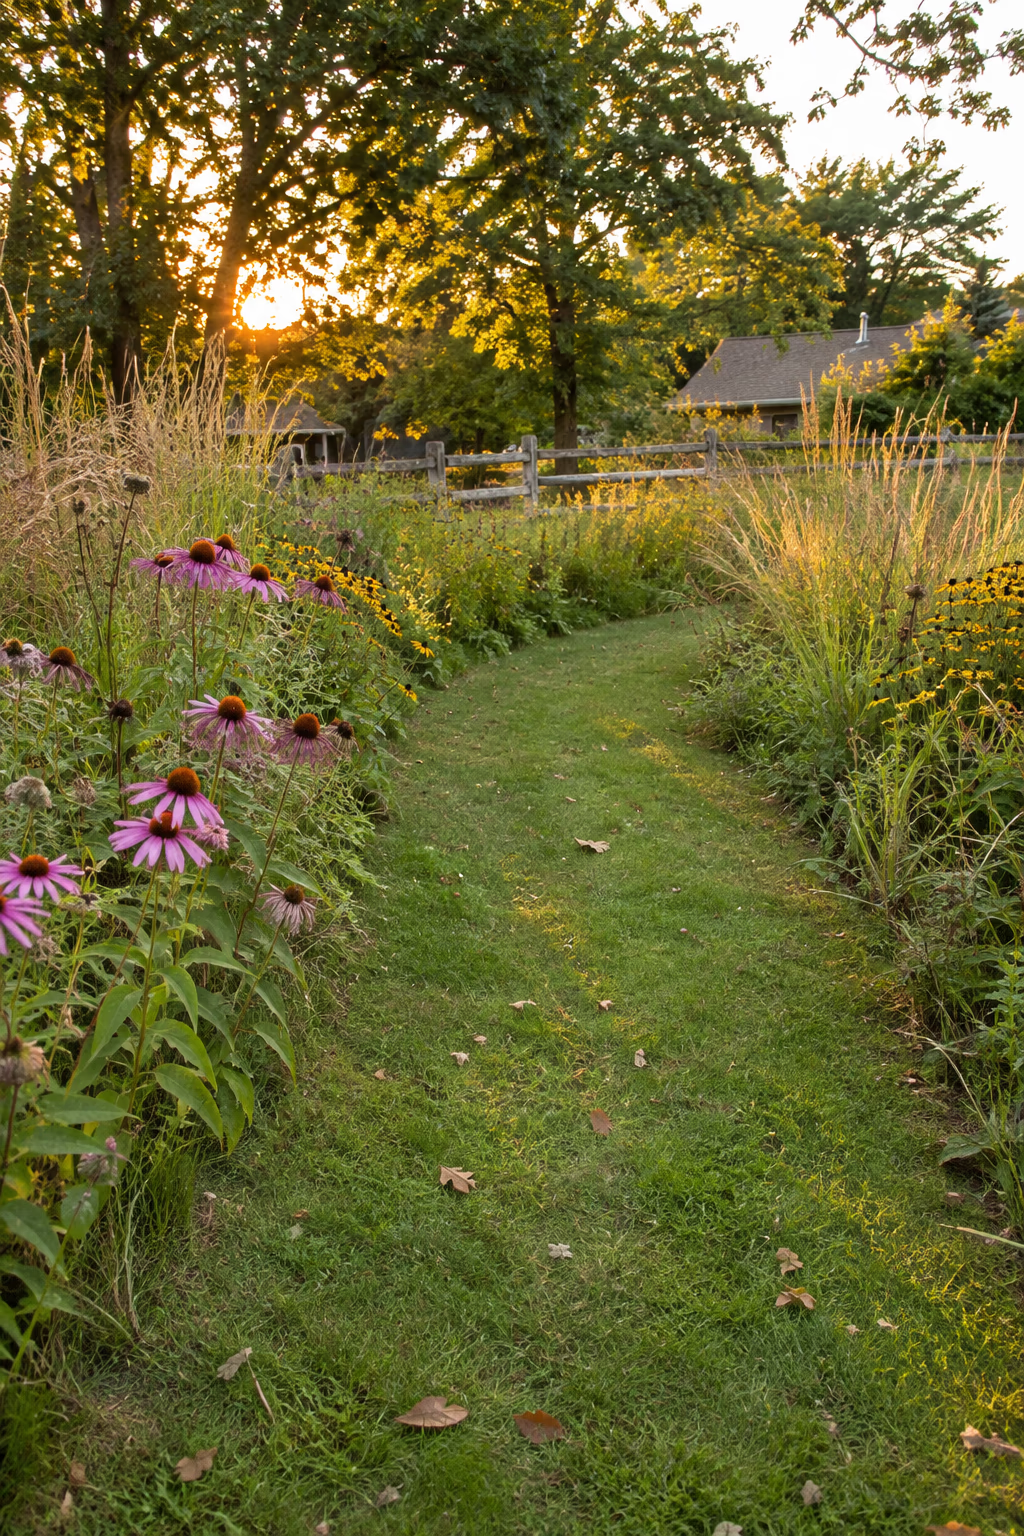
The easiest path you’ll ever make
If part of your yard is a meadow or a no-mow area, simply mow a winding strip about 3 feet wide through it. Keep the strip short and let coneflowers, black-eyed Susans, asters, and native grasses grow tall on either side.
A mown trail costs nothing and makes a wild area look intentional rather than neglected. It’s also a lovely way to walk among pollinators without trampling their flowers.
Some towns and HOAs have rules about grass height, so a crisp mown edge and a clear path help show neighbors that the meadow is on purpose. Check for ticks after walking through tall plantings.
8. Edge a Formal Walk With Low Clipped Hedges
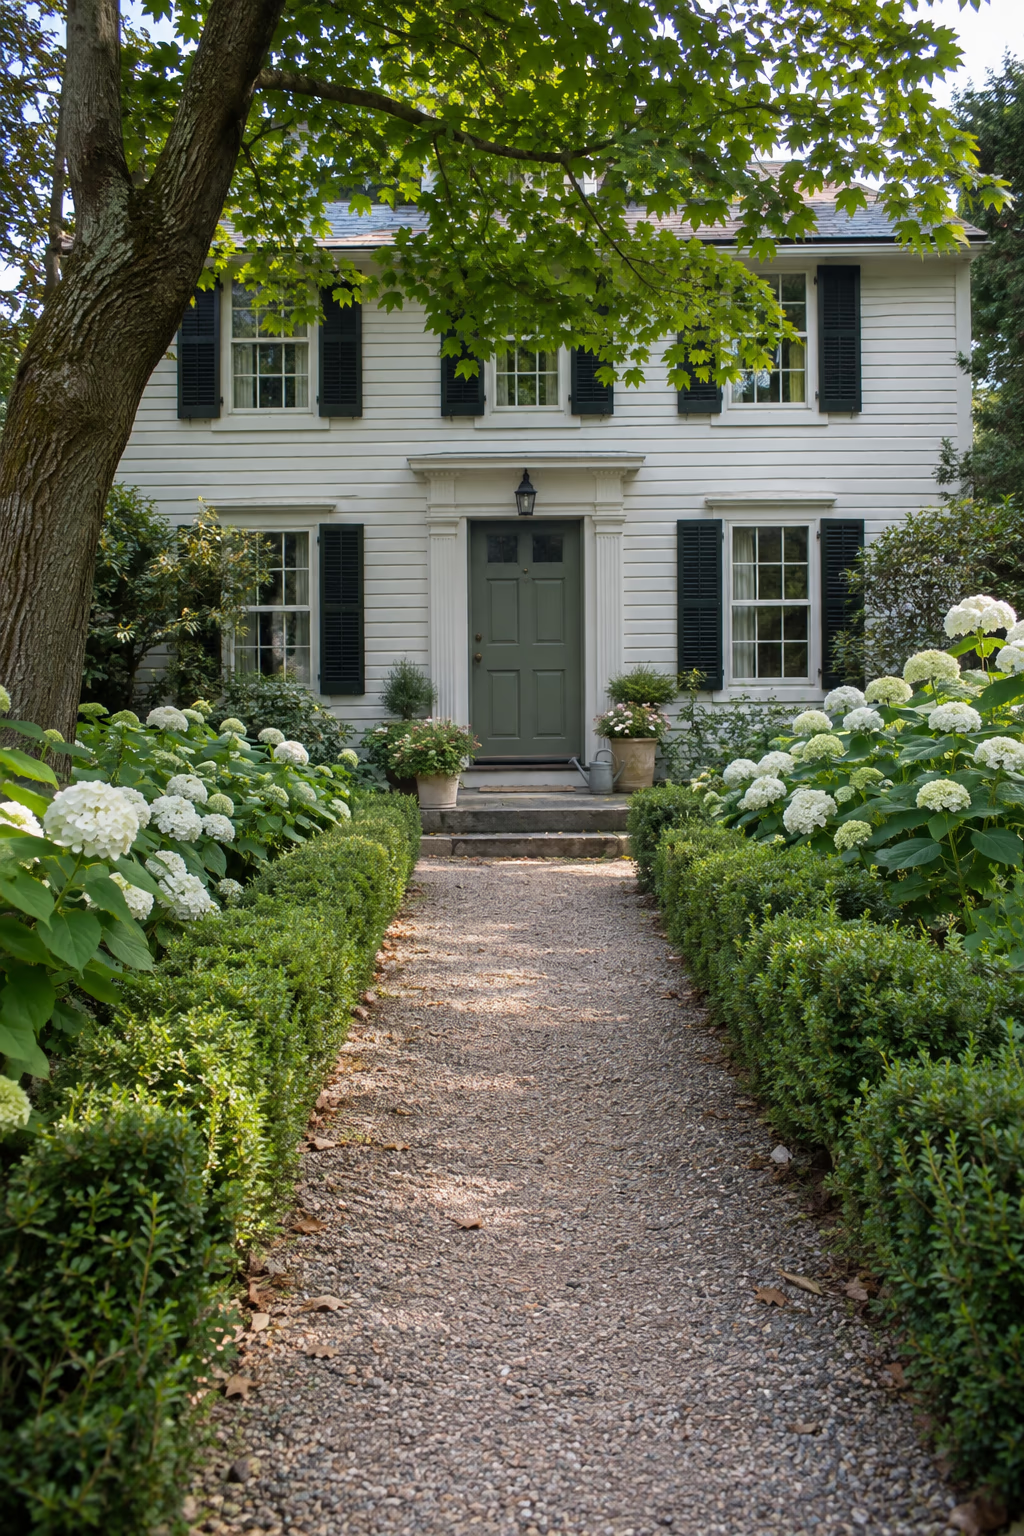
Structure that looks good all year
A straight brick or gravel walk lined with low hedges about 12 to 18 inches tall instantly feels tailored. Boxwood is the classic choice, but inkberry holly and dwarf yaupon holly give a similar look.
Evergreen edging keeps its shape in winter, when most borders are bare. It also corrals looser flowers planted behind it, so the path always looks neat.
Boxwood can suffer from boxwood blight and box tree moth in some regions, so ask a local nursery which shrubs perform well near you. Plan on trimming once or twice a year to keep the hedge crisp.
9. End the Path at a Birdbath or Fountain
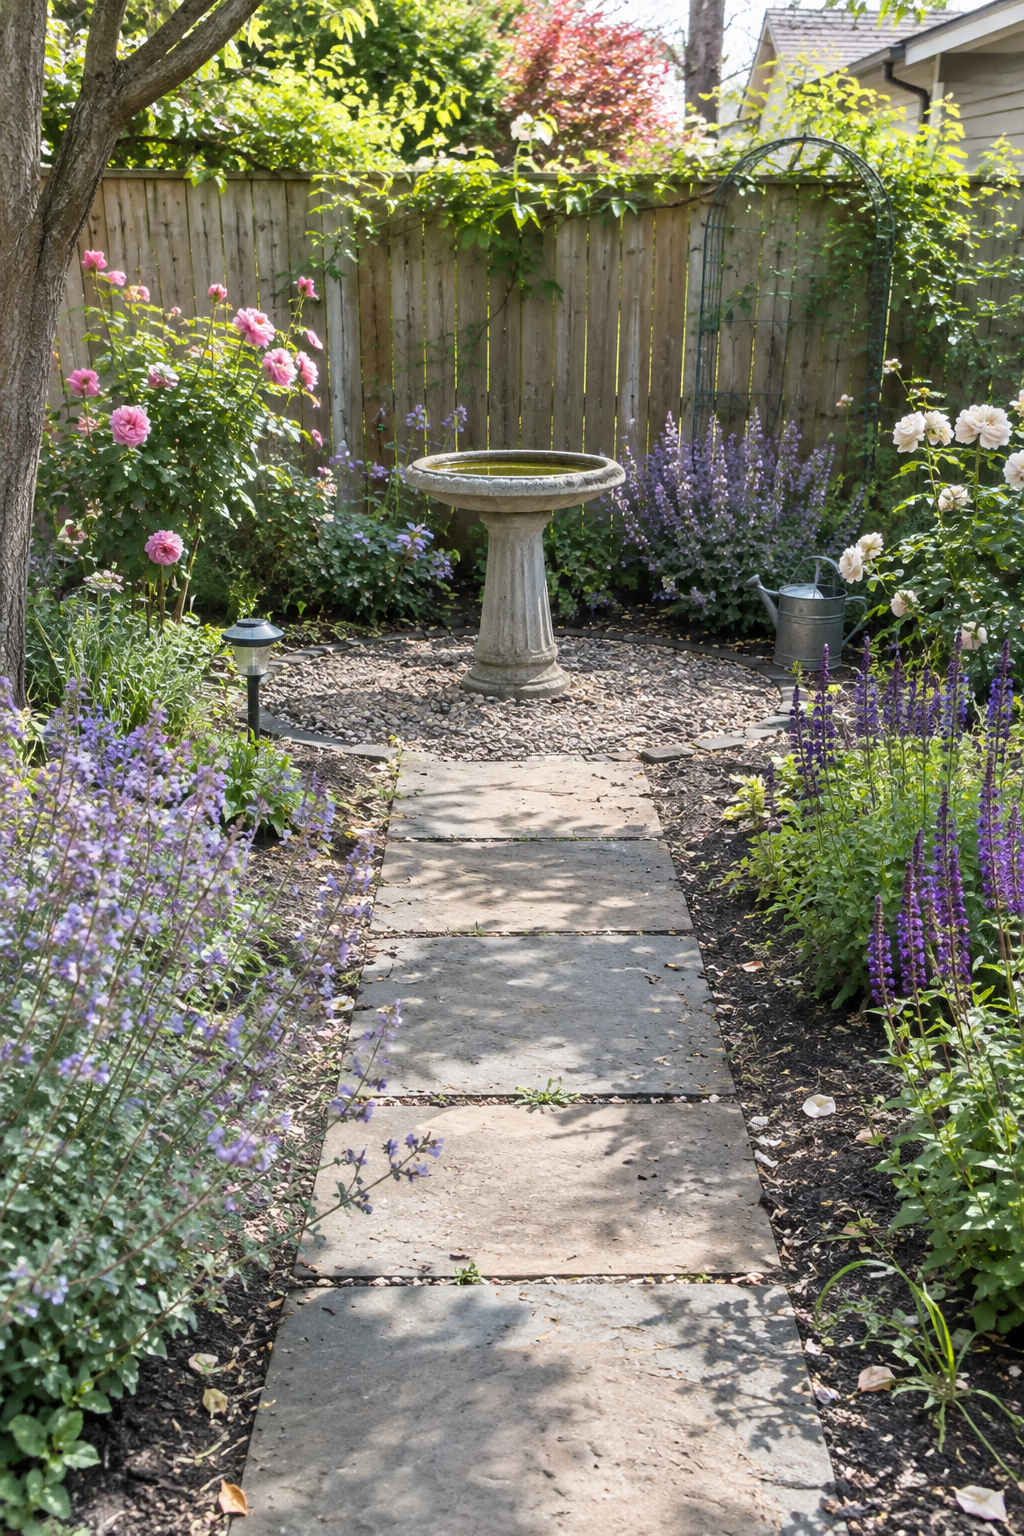
Give the walk a reason to exist
A path feels most satisfying when it leads somewhere. Place a stone birdbath, a small bubbling fountain, or a sculptural urn at the far end, centered on the path so it catches the eye from the house.
A focal point draws people forward and makes even a short path feel purposeful. It also gives you a natural spot to add a small circle of gravel or pavers as a pause point.
Fountains need a power source, so plan for an outdoor-rated outlet installed by a qualified electrician. Birdbaths need fresh water every few days in warm weather to discourage mosquitoes.
10. Line the Walk With Drifts of Spring Bulbs
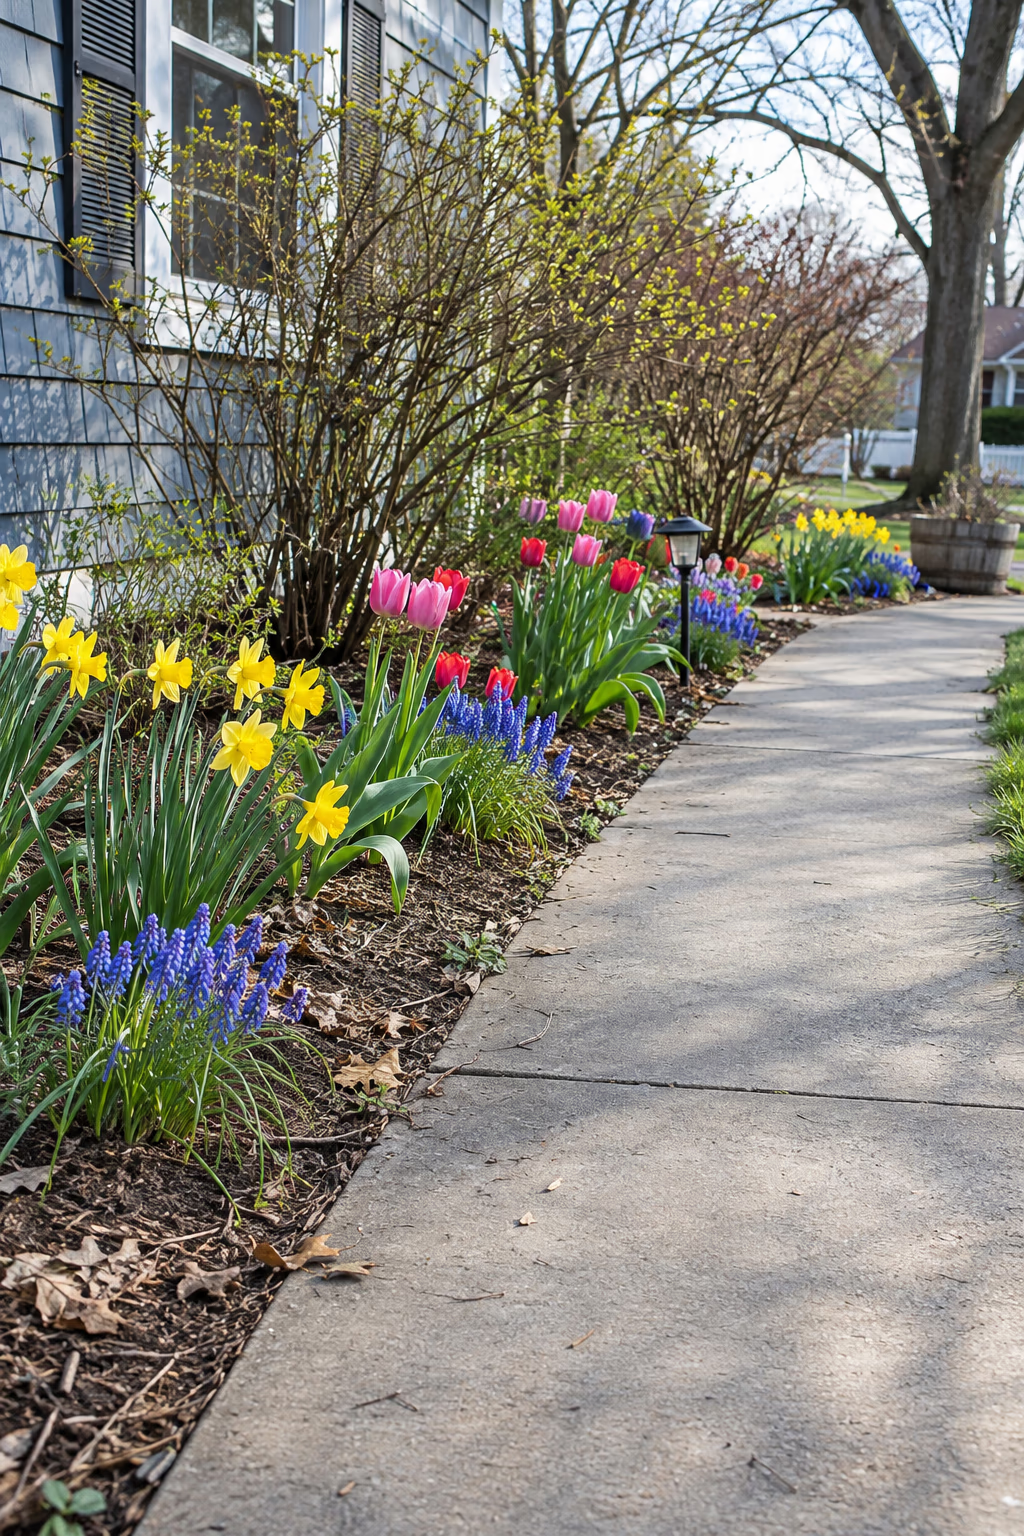
A colorful welcome after a long winter
Plant generous clusters of tulips, daffodils, and grape hyacinths along both sides of a path in fall. Groups of 10 to 15 bulbs of one variety look more natural than single rows of mixed colors.
Few things lift spirits like a walkway framed in fresh color in March and April. Bulbs are also inexpensive and take up little space, so they can be tucked in front of shrubs or perennials.
Plant most bulbs at a depth of about three times their height. Daffodils are ignored by deer and rodents, while tulips often get eaten, so protect them or choose daffodils if wildlife is a problem.
11. Soften the Edges With Swaying Ornamental Grasses
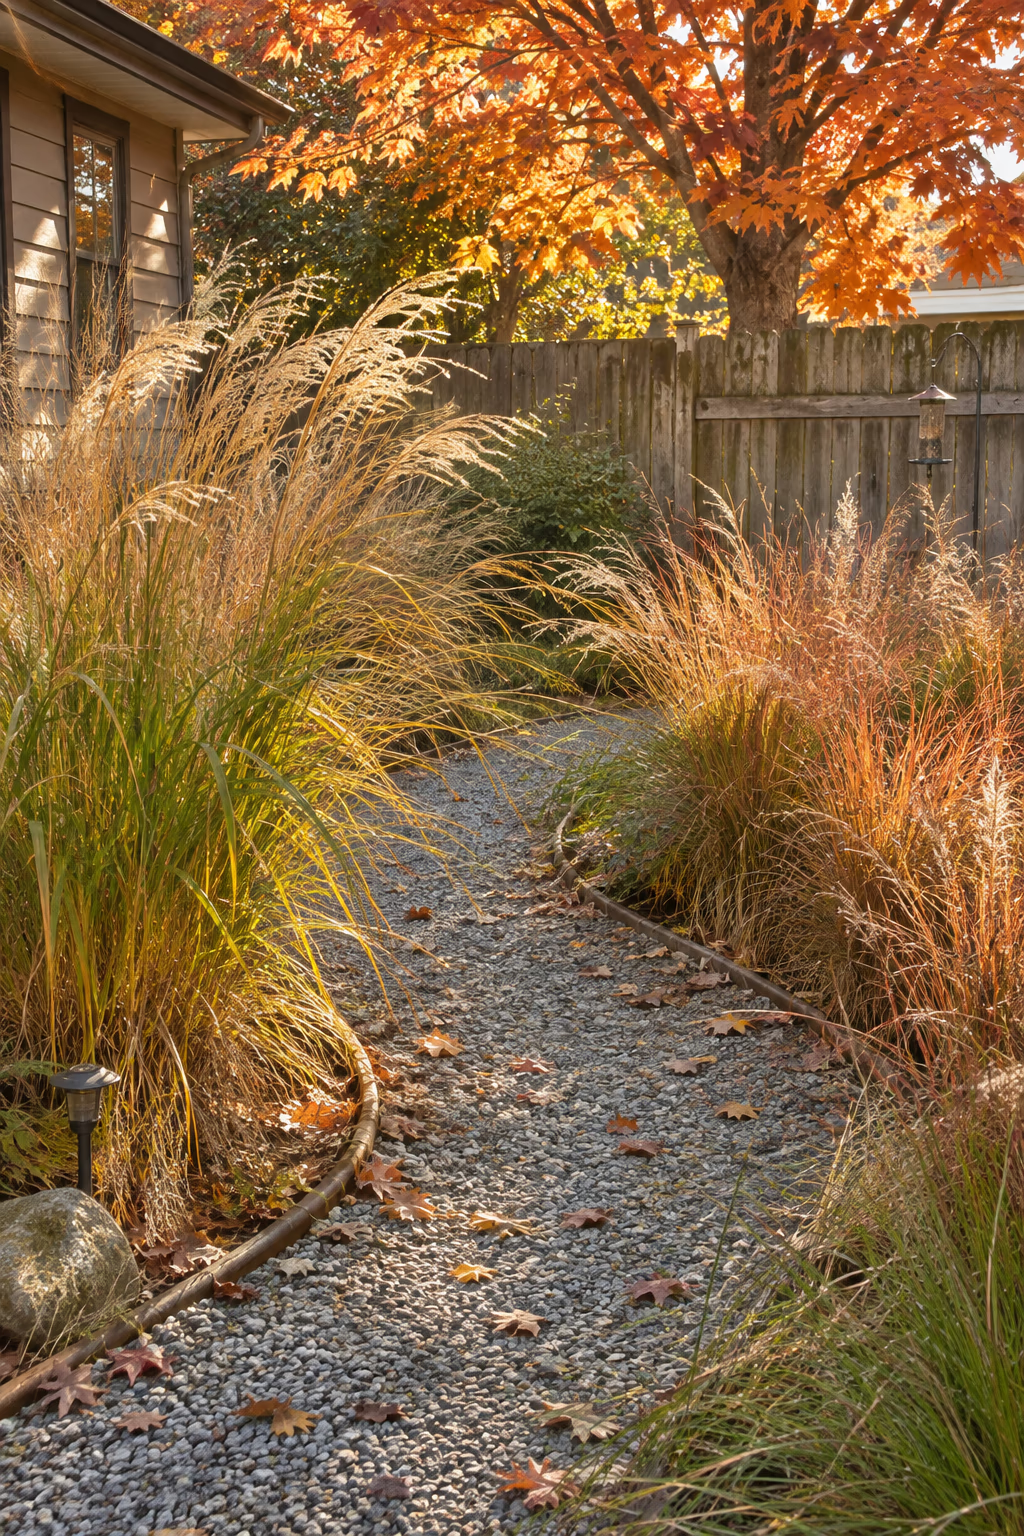
Movement and texture in every season
Ornamental grasses such as little bluestem, prairie dropseed, and switchgrass make a relaxed, airy border along a gravel or paver path. Their seed heads catch the light in late summer and stand through winter.
Grasses move with the slightest breeze, which gives a path a calm, natural feel. Most are drought tolerant once established and need little more than an annual cutback.
Cut them back to a few inches in late winter before new growth starts. Choose clumping types suited to your region and avoid grasses listed as invasive in your state, such as some fountain grass species in warm climates.
12. Lay Bluestone in a Running Bond Pattern
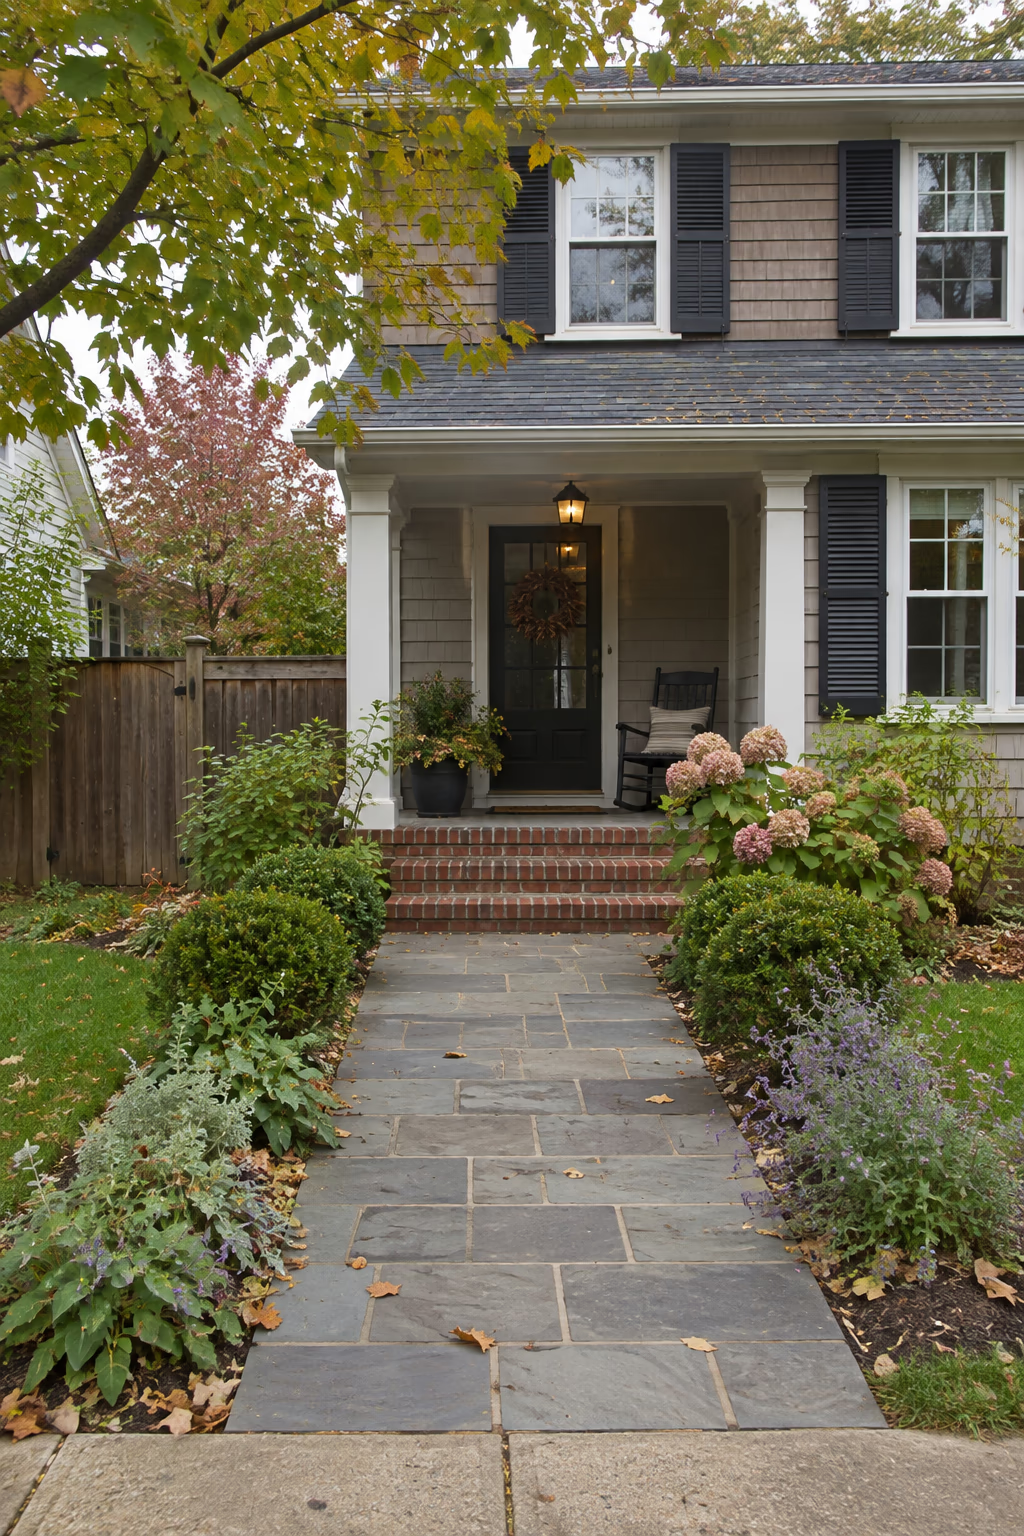
A timeless front walk with tidy lines
Rectangular bluestone pieces laid in a running bond, where each row’s joints are offset like a brick wall, create a refined, traditional walkway. Pieces around 12 by 24 inches suit most front walks.
The cool blue-gray tone works with almost any house color, and the staggered joints hide minor variations in stone size. The look is classic enough that it won’t feel dated in a few years.
Bluestone is pricier than concrete pavers and needs a well-compacted gravel base. Thermal-finished stone offers better grip than smooth stone, and it can get hot in full sun, so keep that in mind for barefoot areas.
13. Climb a Slope With Timber and Gravel Steps
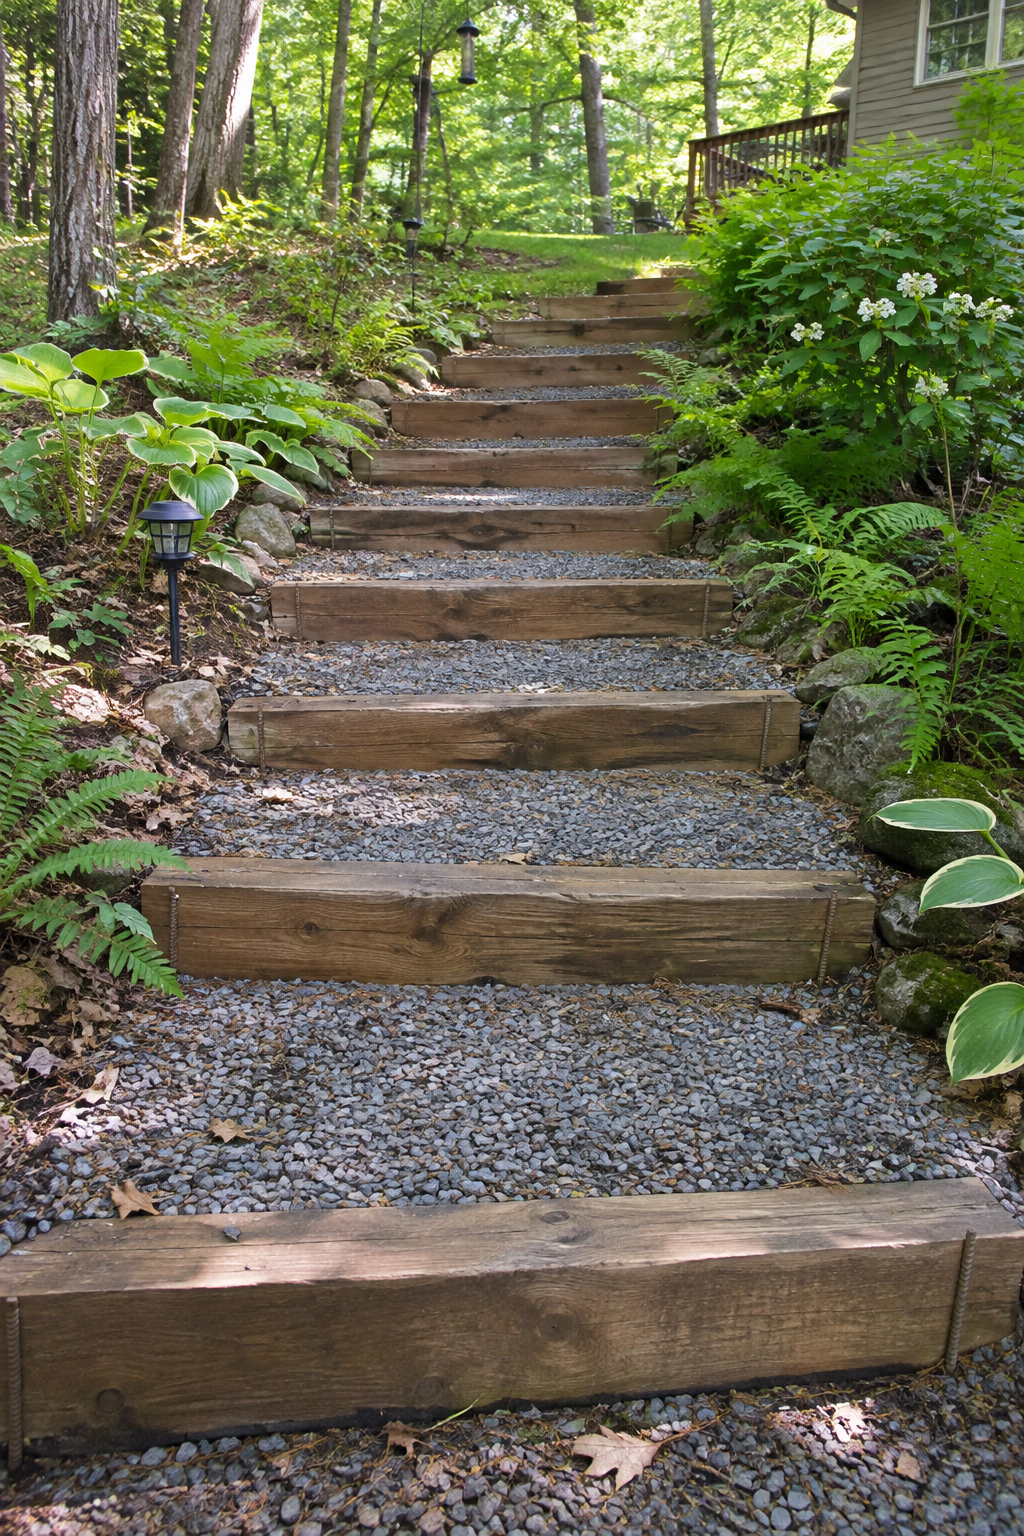
Turn a tricky hill into an easy walk
On sloped yards, use pressure-treated timbers or railroad-tie-style landscape timbers as step risers, then fill each tread with compacted gravel. Treads 12 to 16 inches deep and risers 5 to 7 inches tall feel comfortable underfoot.
Steps prevent erosion and make a slope safer to walk, especially when the grass is wet. The rustic look blends into natural or wooded settings.
Secure each timber with long steel stakes or rebar driven into the soil. Avoid old creosote-treated railroad ties near edible plants, and consider a handrail if the slope is steep.
14. Combine Wood Decking and Pale Pavers in One Path
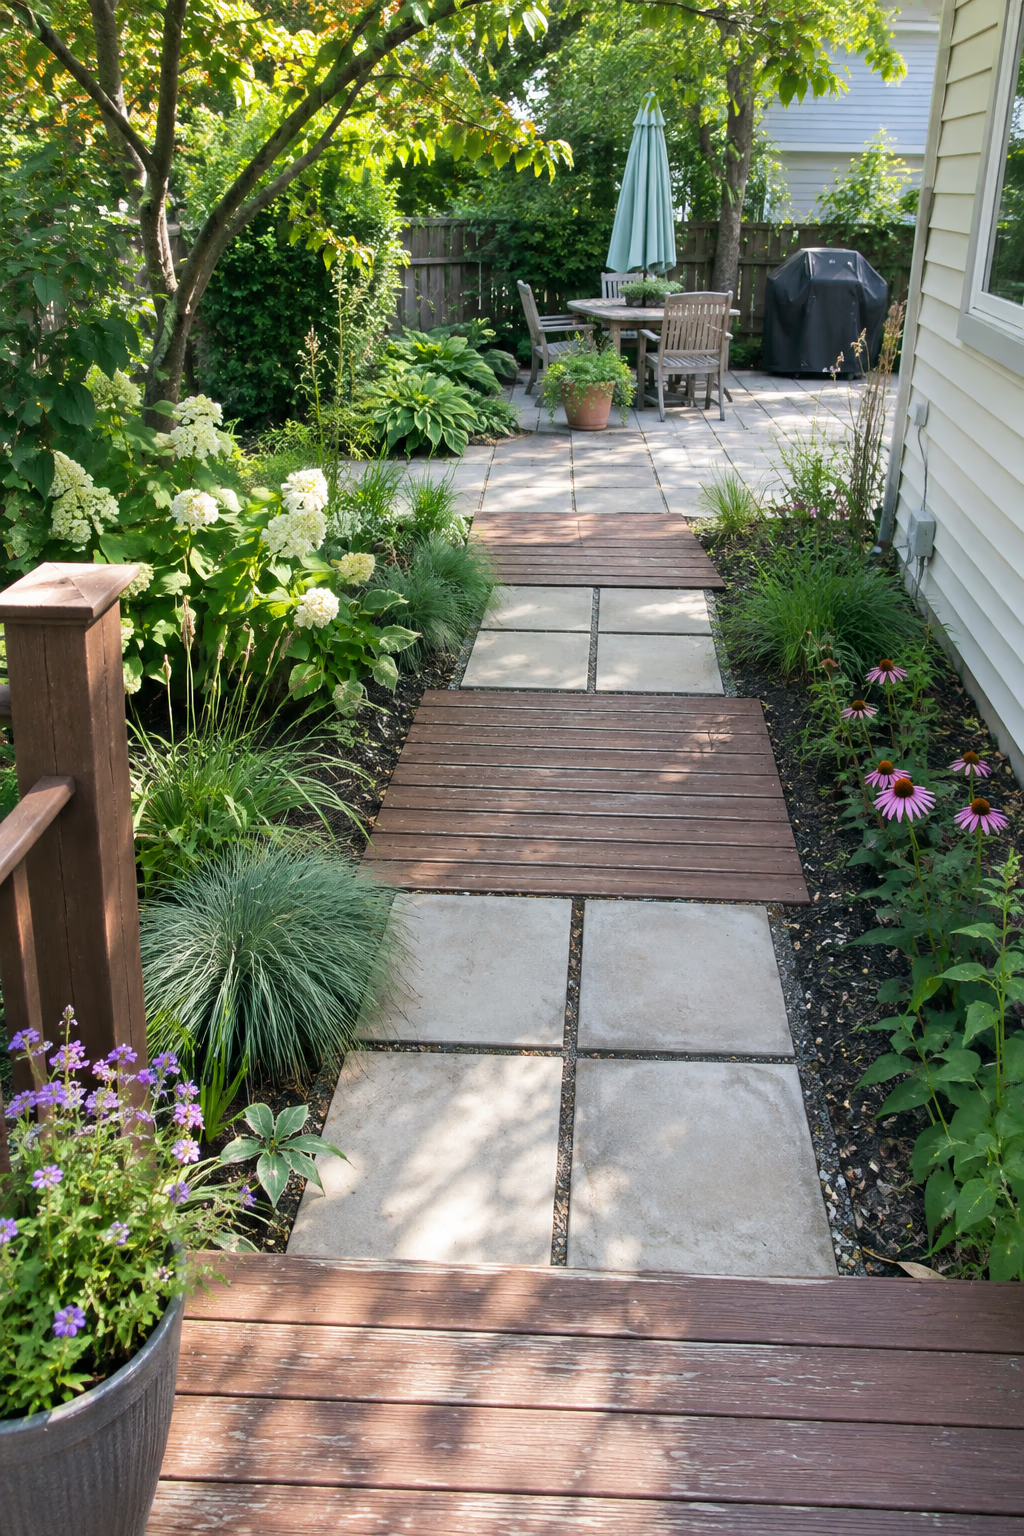
Warm and cool materials working together
Alternate sections of wood or composite decking with light-colored concrete or limestone-look pavers along the same route. A deck section might cross a low area, while pavers take over near the patio.
Mixing two materials adds rhythm and helps tie together a deck and a patio that might otherwise feel separate. It’s also a smart way to use leftovers from other projects.
Keep the surfaces level where they meet to avoid tripping. Composite boards last longer than wood in damp areas but can get warm in strong sun.
15. Plant Hostas and Ferns Along a Shady Side Path
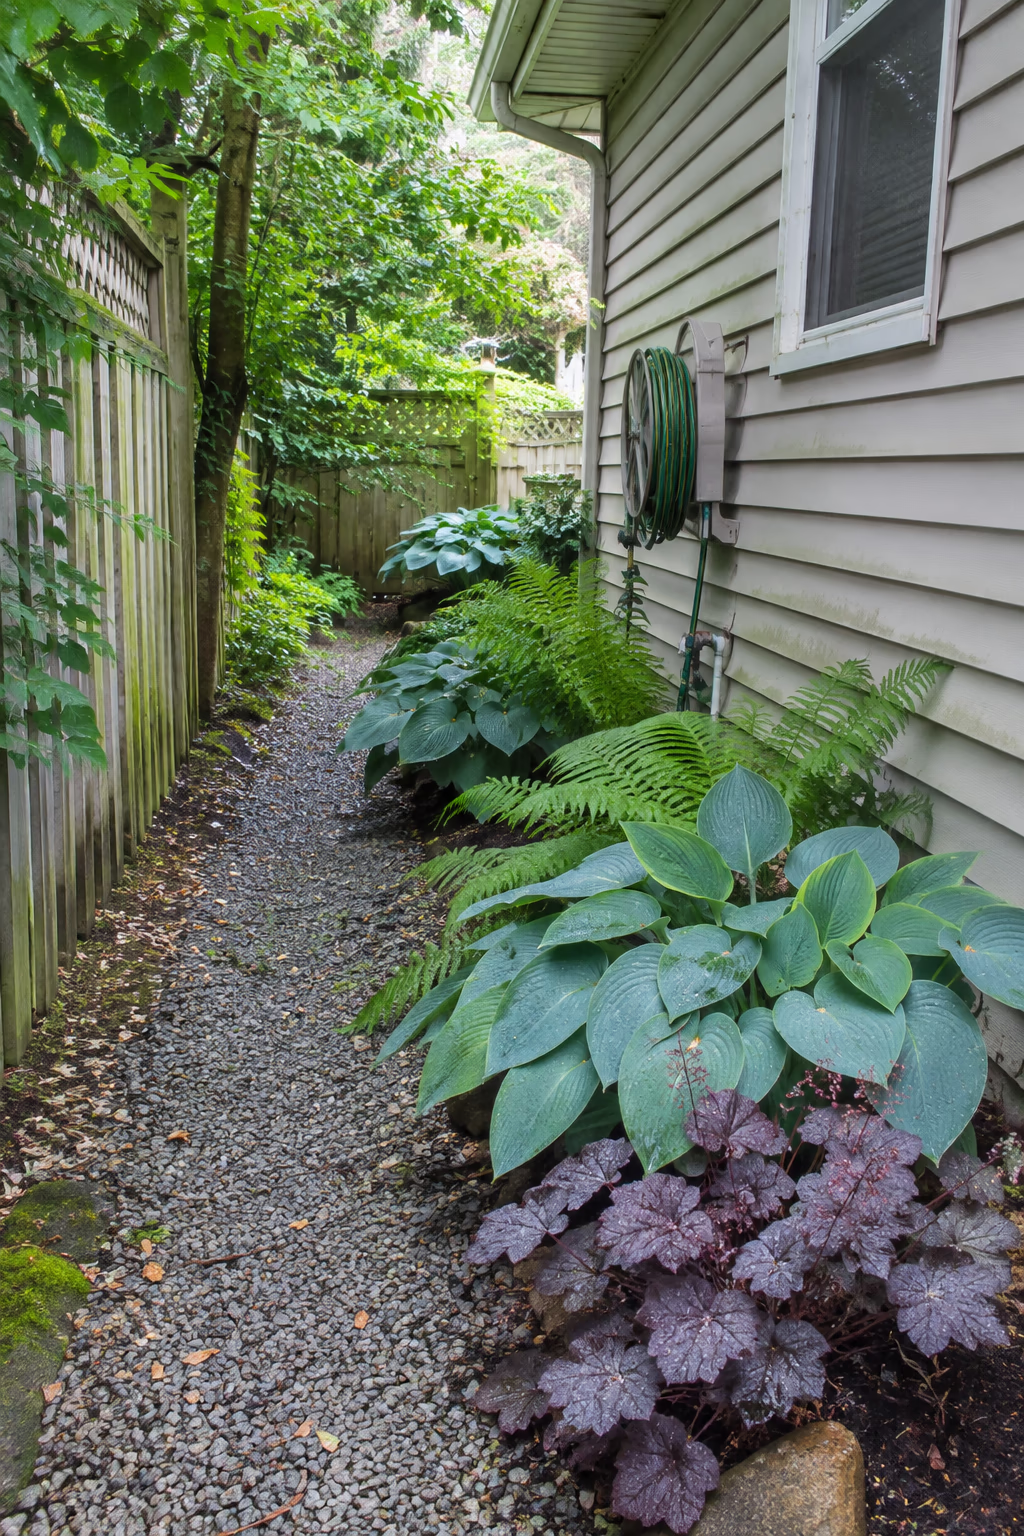
A cool, green passage where grass won’t grow
Narrow side yards and spots under trees often struggle to grow lawn. Lay a simple gravel or flagstone path and line it with hostas, ferns, coral bells, and hellebores that thrive in shade.
The layered foliage creates a lush, woodland feel, and a defined path keeps you from compacting the roots of nearby trees. It turns a forgotten strip into a pleasant shortcut.
Deer and slugs love hostas, so in areas with heavy browsing, lean more on ferns and hellebores. Make side paths at least 3 feet wide so you can roll trash bins or a wheelbarrow through.
16. Line the Walk With Columnar Trees
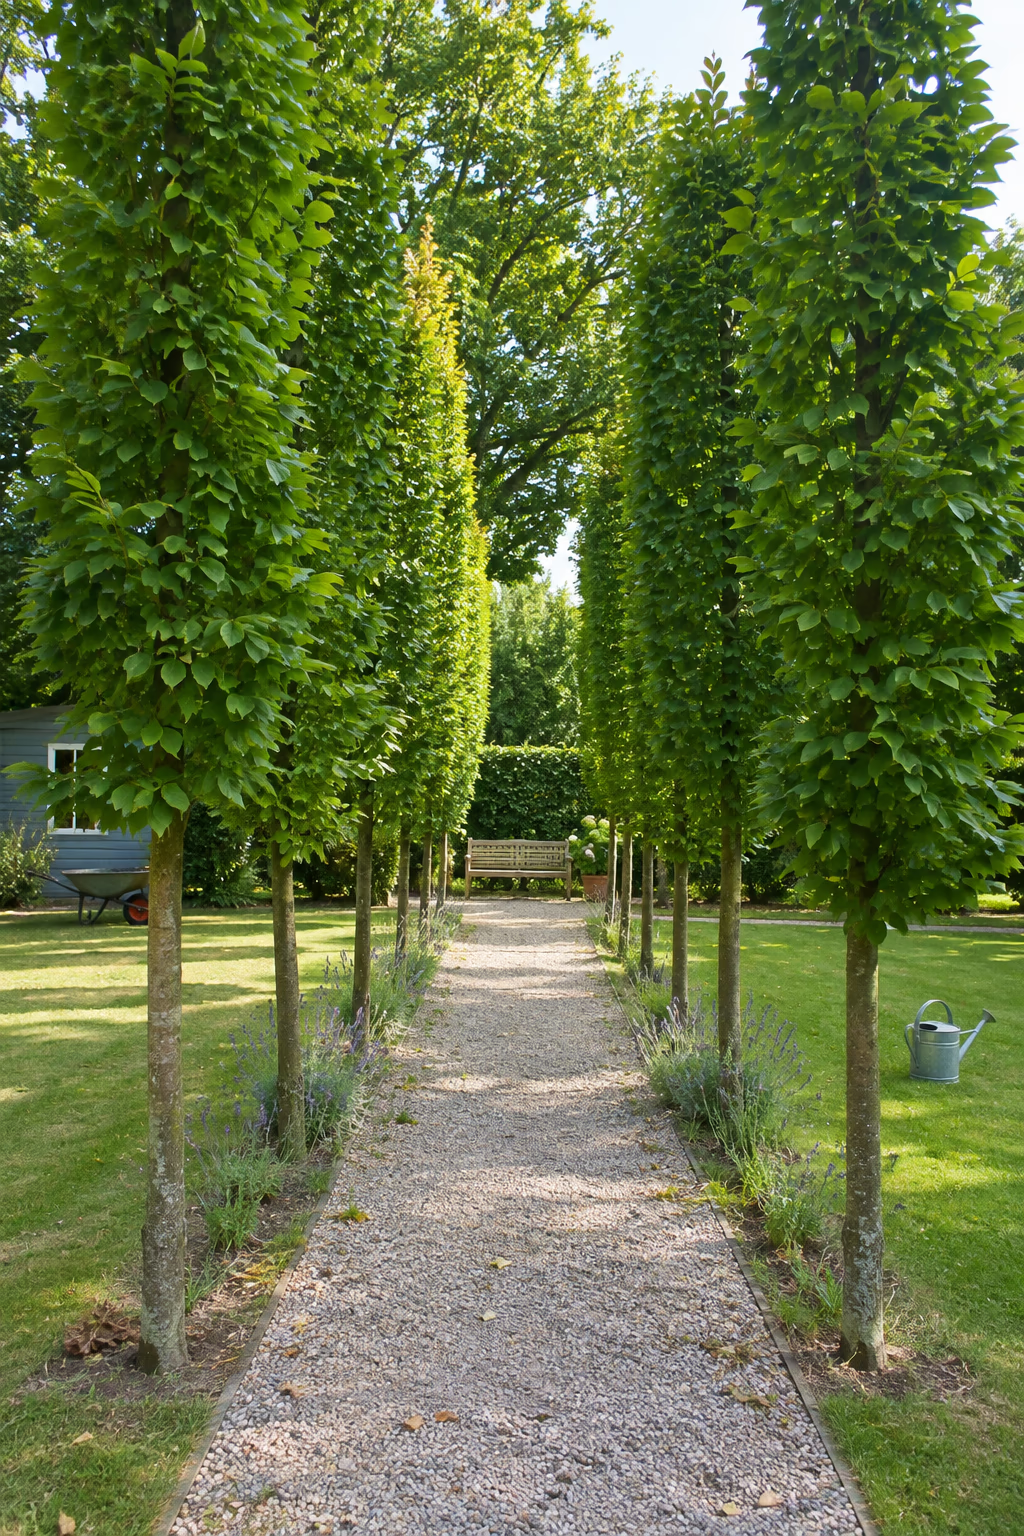
A living colonnade that adds height
Narrow upright trees such as columnar European hornbeam or upright crabapple varieties planted in a row along each side of a path create a dramatic allée. In smaller spaces, slim evergreens like Sky Pencil holly offer a similar effect.
The vertical lines draw the eye down the path and make it feel grand, even in an ordinary backyard. They also add privacy and screening without taking much ground space.
Check each tree’s mature width and keep them far enough from the path that roots won’t lift the paving. Space them evenly, usually 6 to 10 feet apart, depending on the variety.
17. Lay Reclaimed Cobblestones in a Freeform Pattern
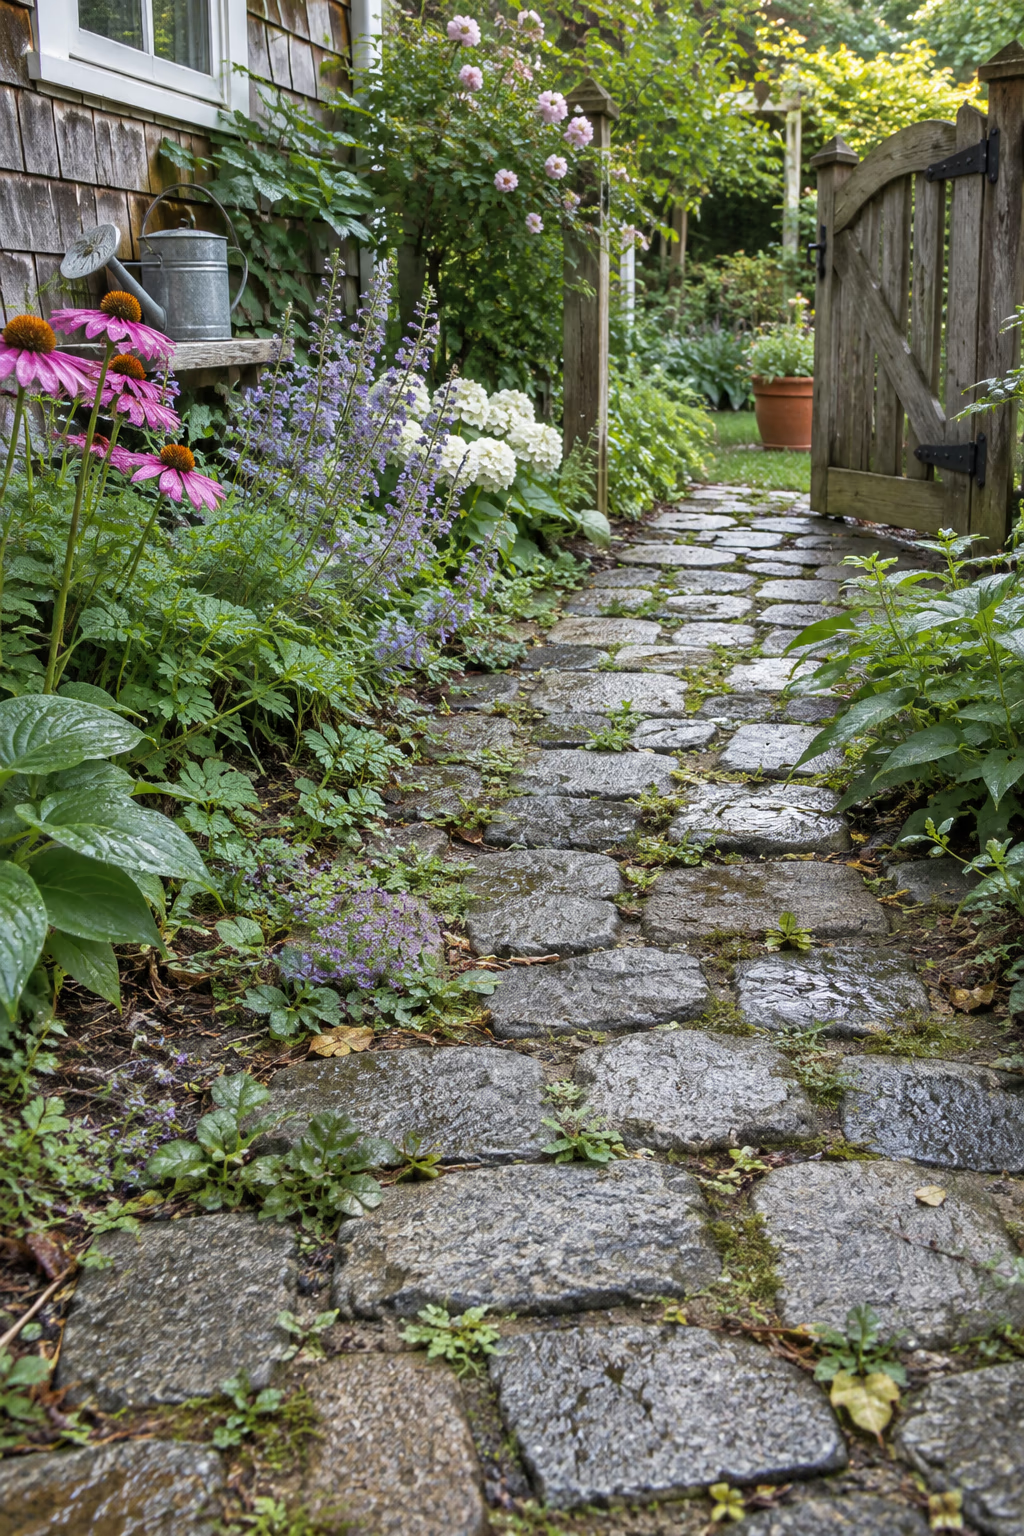
Old-world character with a sustainable twist
Salvaged granite cobbles set in a loose, irregular pattern create a path that looks like it’s been there for a century. Sand or fine gravel in the joints lets moss and tiny plants creep in over time.
Reclaimed cobbles are extremely durable and keep heavy stone out of the waste stream. Their rounded tops and varied sizes give lovely texture to a cottage or rustic garden.
Cobbles can be uneven underfoot, so they’re best for slower garden walks rather than the main route to the front door. Look for them at salvage yards, stone suppliers, or local online marketplaces.
18. Spread Wood Chips for a Woodland Trail
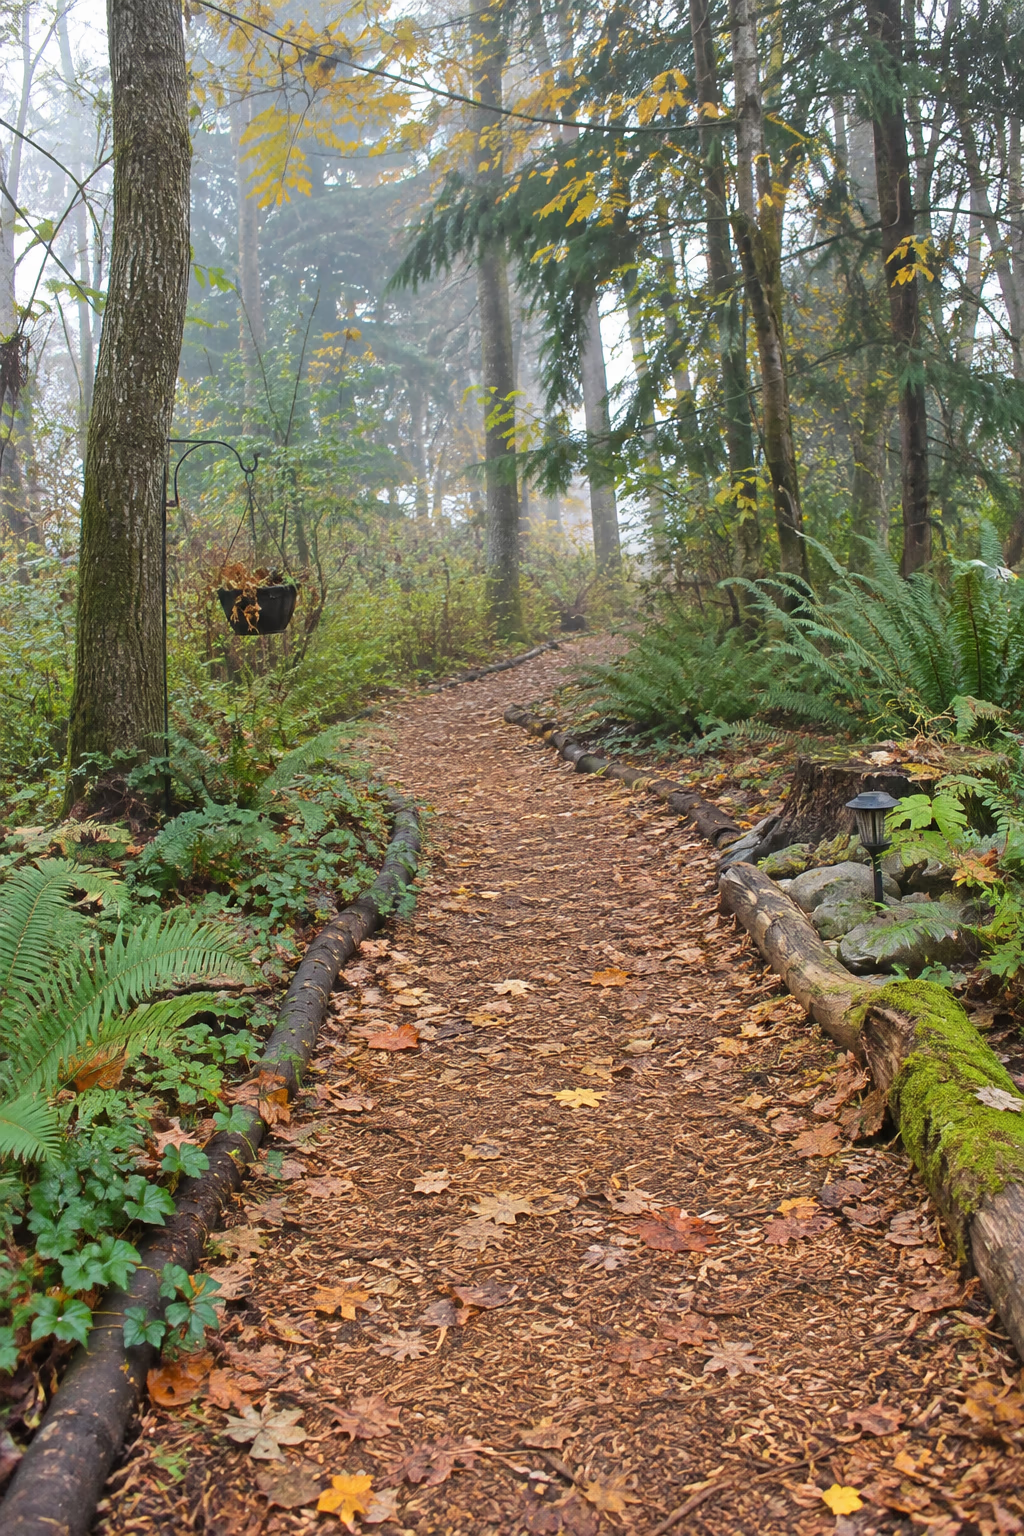
Soft, natural, and nearly free
A layer of wood chips 3 to 4 inches deep makes a springy, natural path through wooded areas or along the back of a property. Edge it with logs or fallen branches for a casual trail look.
Wood chips are inexpensive and often free from local tree services. They suppress weeds, absorb rain, and slowly break down into rich soil.
The chips decompose, so plan to top them up every year or two. Keep chip paths away from the house foundation, since mulch can attract termites in some regions.
19. Sharpen a Gravel Path With Steel Edging
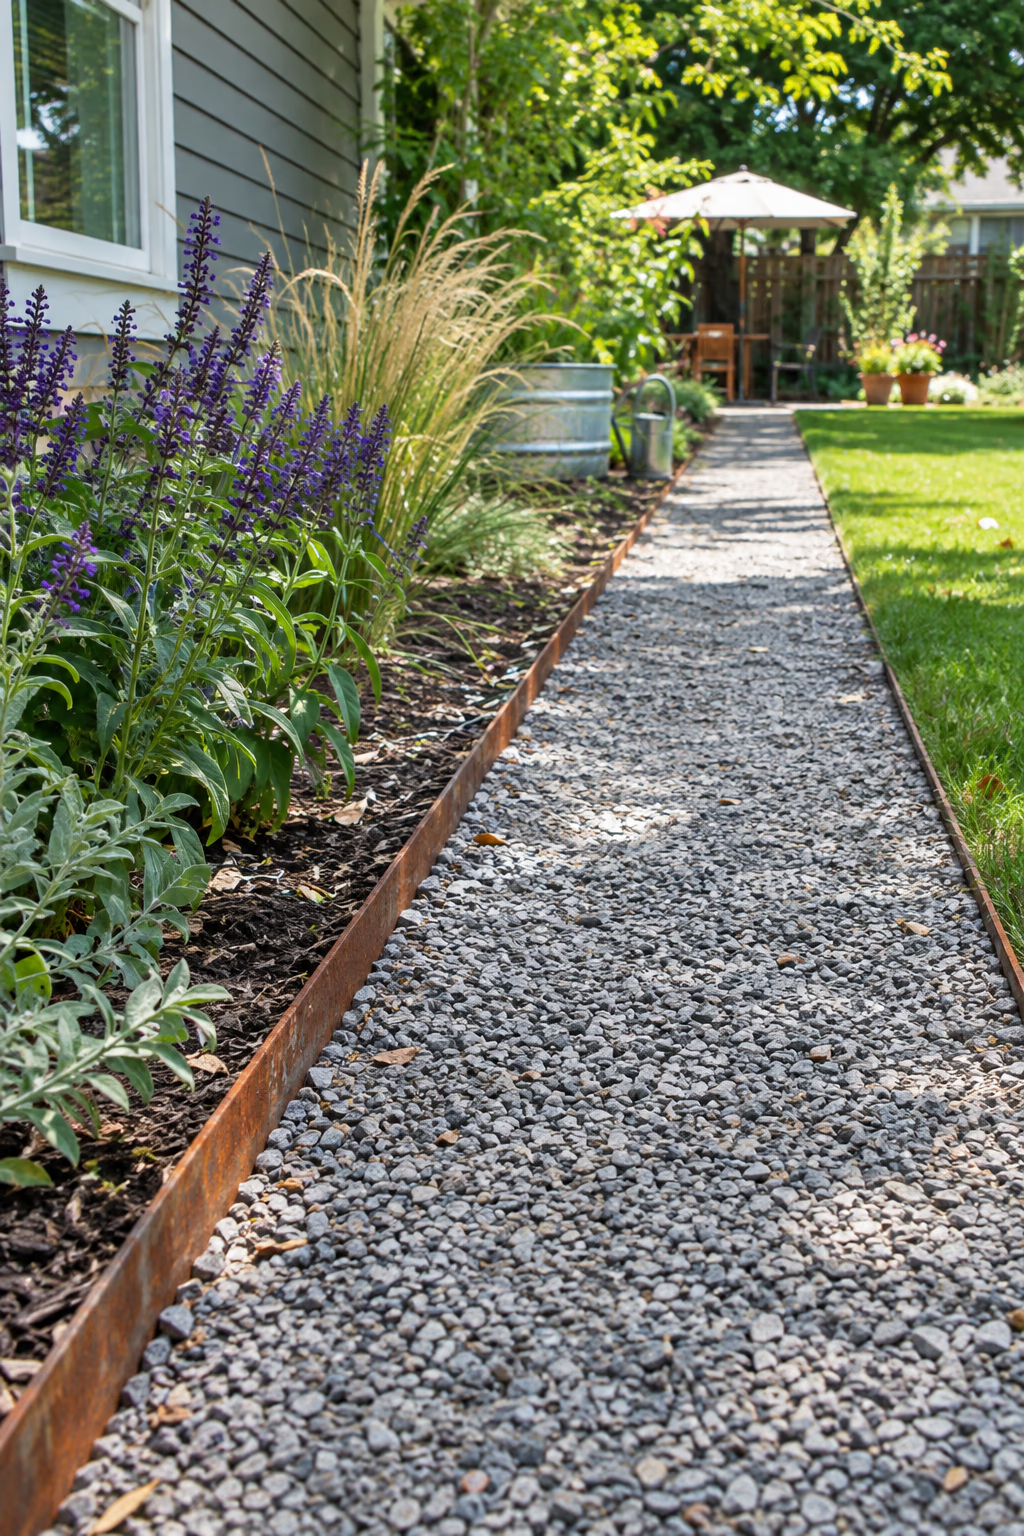
Crisp lines that keep gravel in place
Thin steel landscape edging set along both sides of a gravel path gives a clean, modern outline and stops stones from wandering into the lawn. Weathering steel develops a rich rust color, while black-coated steel looks sleek.
Edging makes even a simple gravel path look finished. It also holds the base material in place so the path stays tidy longer.
Leave the top of the edging about 1/2 inch above the gravel so it holds stones without becoming a trip hazard. Weathering steel can stain light concrete nearby during its first few months.
20. Pour Decomposed Granite for a Firm Natural Surface
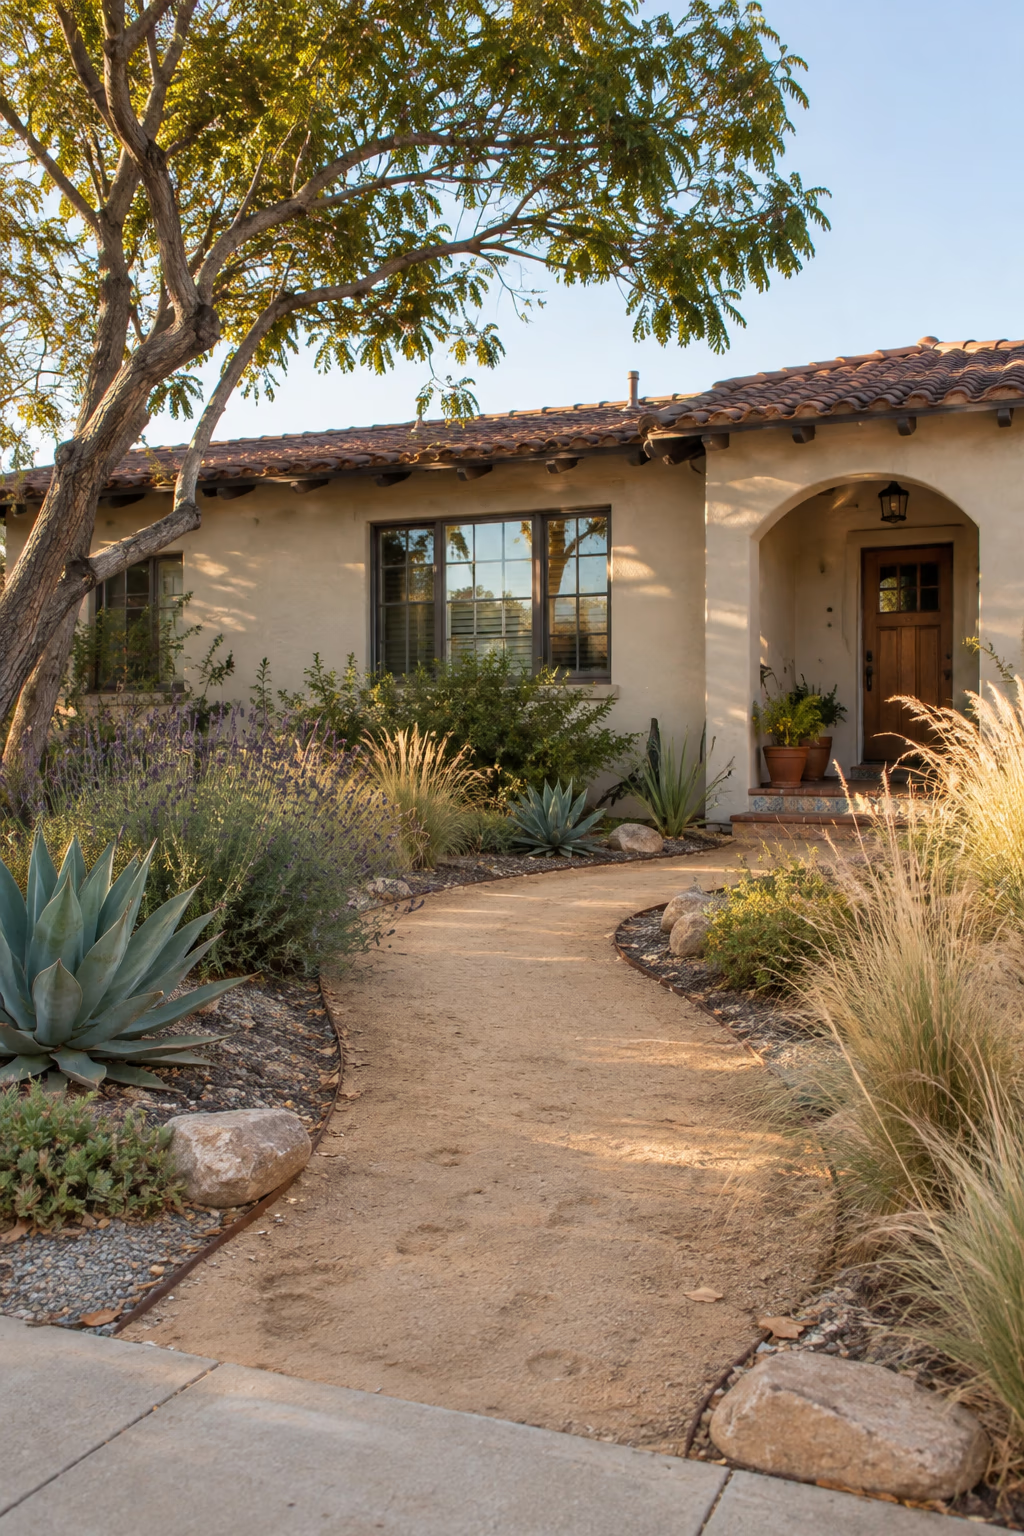
The look of gravel with a smoother walk
Decomposed granite, a fine, sandy crushed stone, compacts into a firm surface that feels almost like packed earth. Lay 3 to 4 inches over a compacted base and tamp it in layers.
It’s popular in dry climates because it drains well, looks natural, and is easier to walk on than loose gravel. Stabilized versions bind together even more firmly.
Decomposed granite can track into the house on shoes and may wash out on slopes during heavy rain. Edging and a doormat near the door help a lot.
21. Set a Pebble Mosaic Into the Path
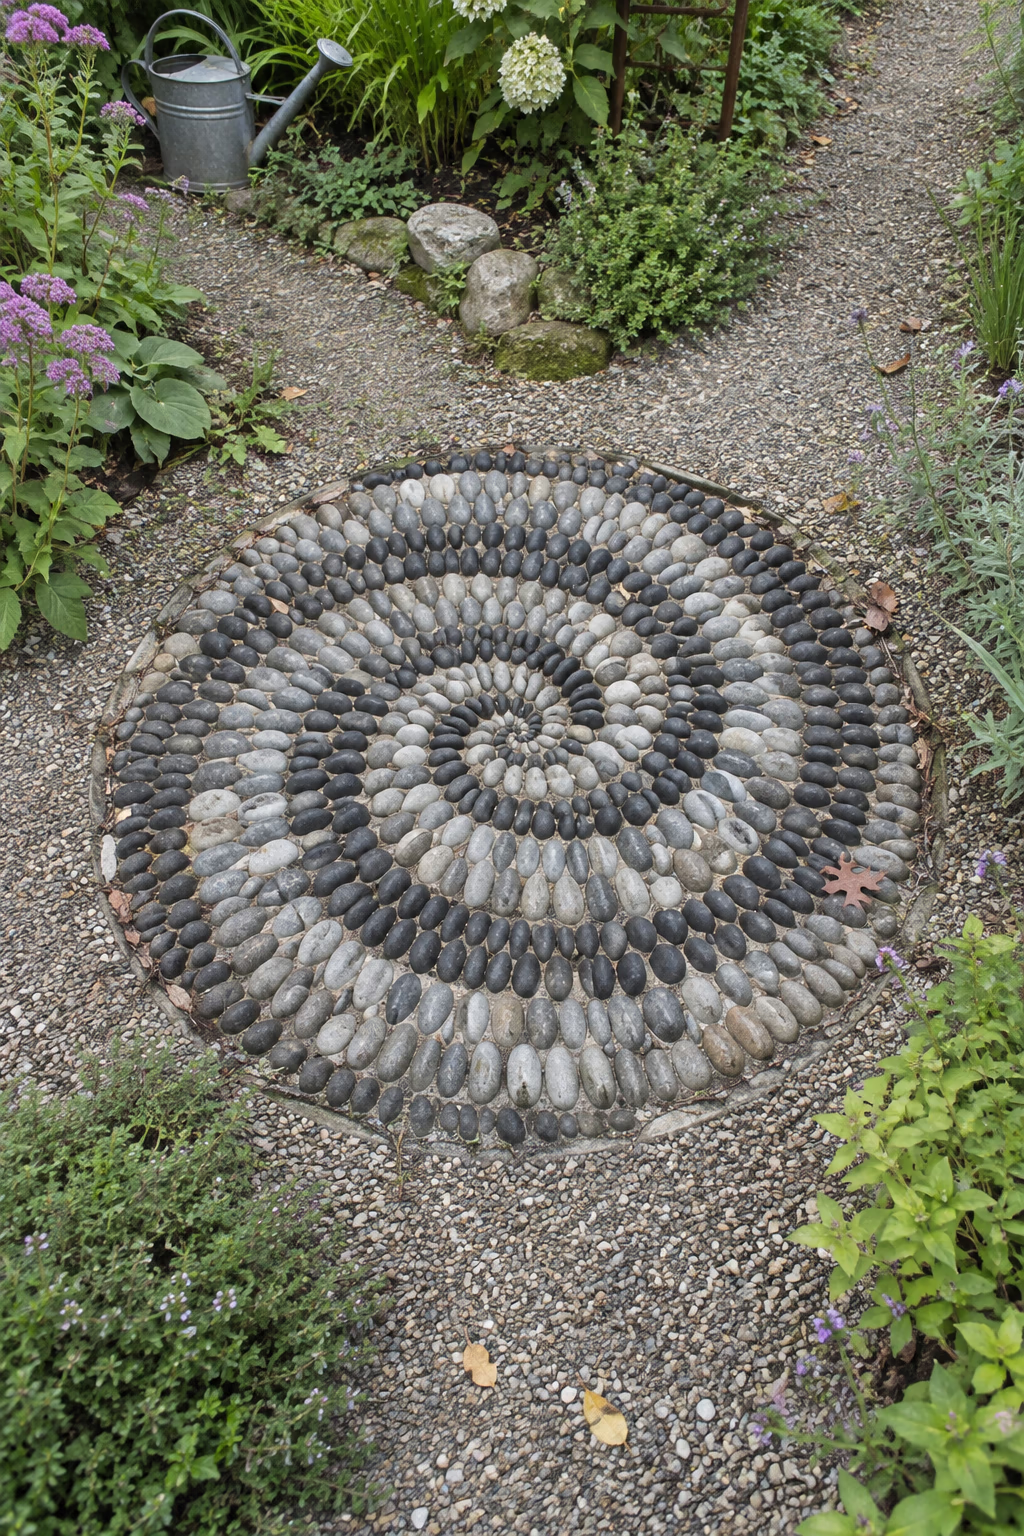
A handmade detail that becomes a conversation piece
Create a circular or square pebble mosaic using smooth river stones set on edge in mortar. A simple spiral, sunburst, or compass pattern makes a charming centerpiece at a path junction.
A mosaic adds a personal, artistic touch without changing the entire path. It’s a rewarding DIY project and a great way to use stones collected over time.
Setting stones on edge takes time, so start with a small section about 2 to 3 feet across. Pack stones tightly and keep them level to avoid tripping.
22. Lay Cedar Log Rounds Through the Vegetable Patch
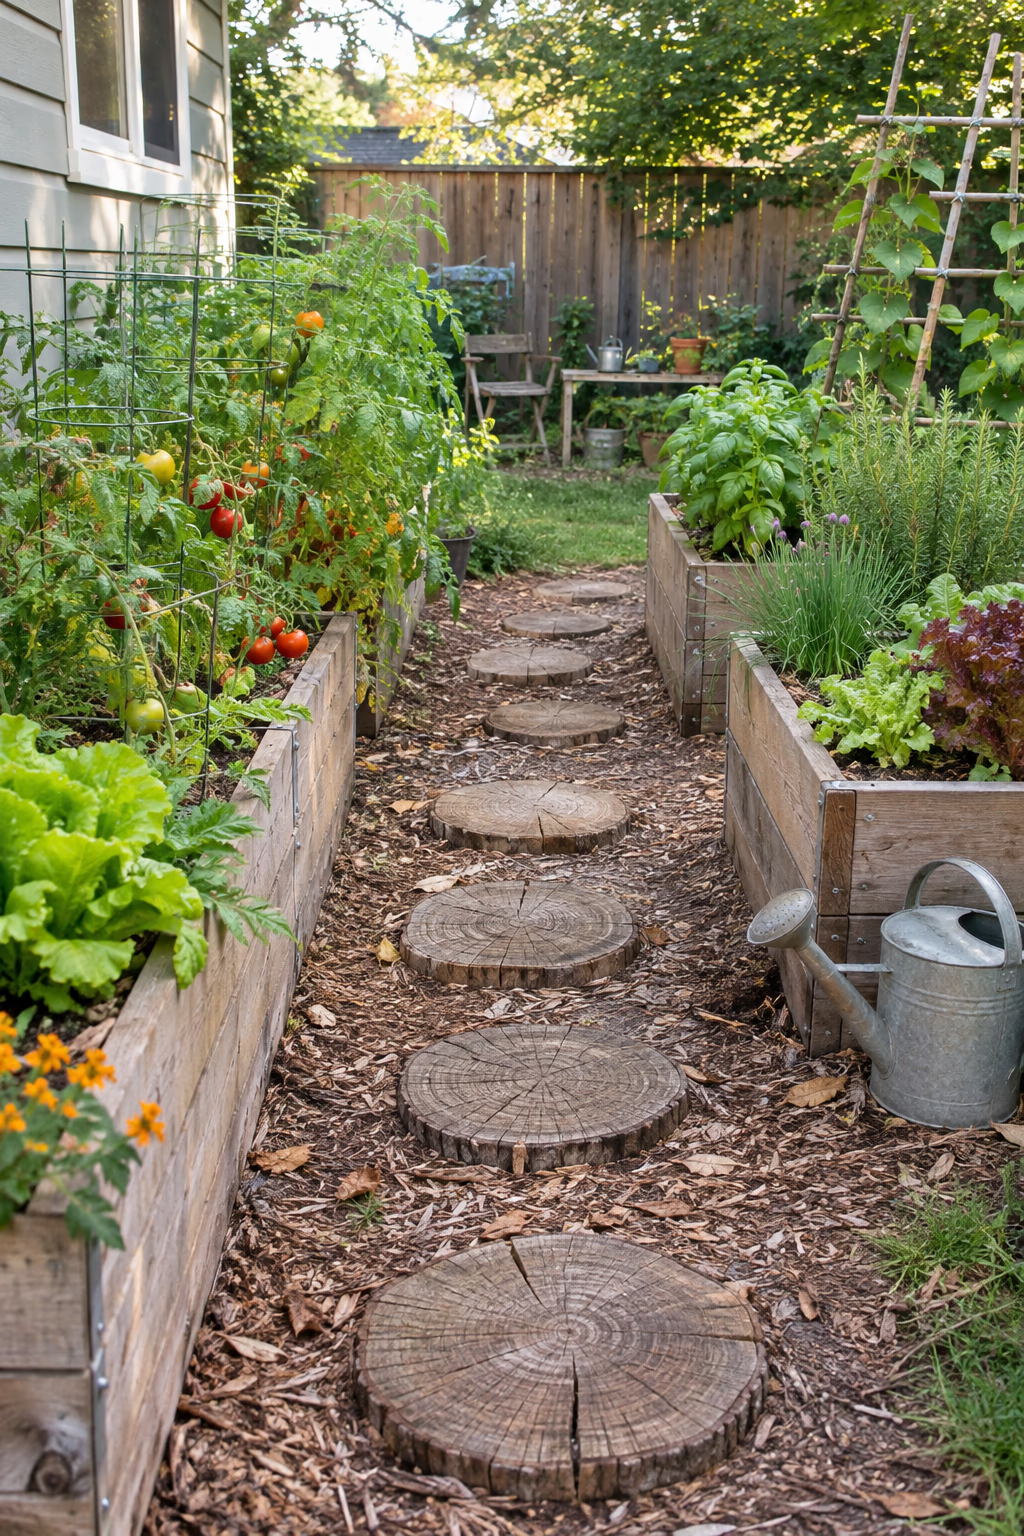
A rustic route between rows
Slices of logs, about 3 to 4 inches thick, set into soil or wood chips create a rustic stepping path between raised beds or vegetable rows. Cedar and black locust last longer than most other woods.
Log rounds are often free from tree work and give a warm, storybook look to edible gardens. They also keep your boots out of the mud on rainy harvest days.
Expect wood rounds to break down within a few years, especially in damp soil. They can get slippery when wet, so lightly scoring the tops or adding a bed of gravel underneath improves drainage and grip.
23. Cross a Soggy Spot With a Small Footbridge
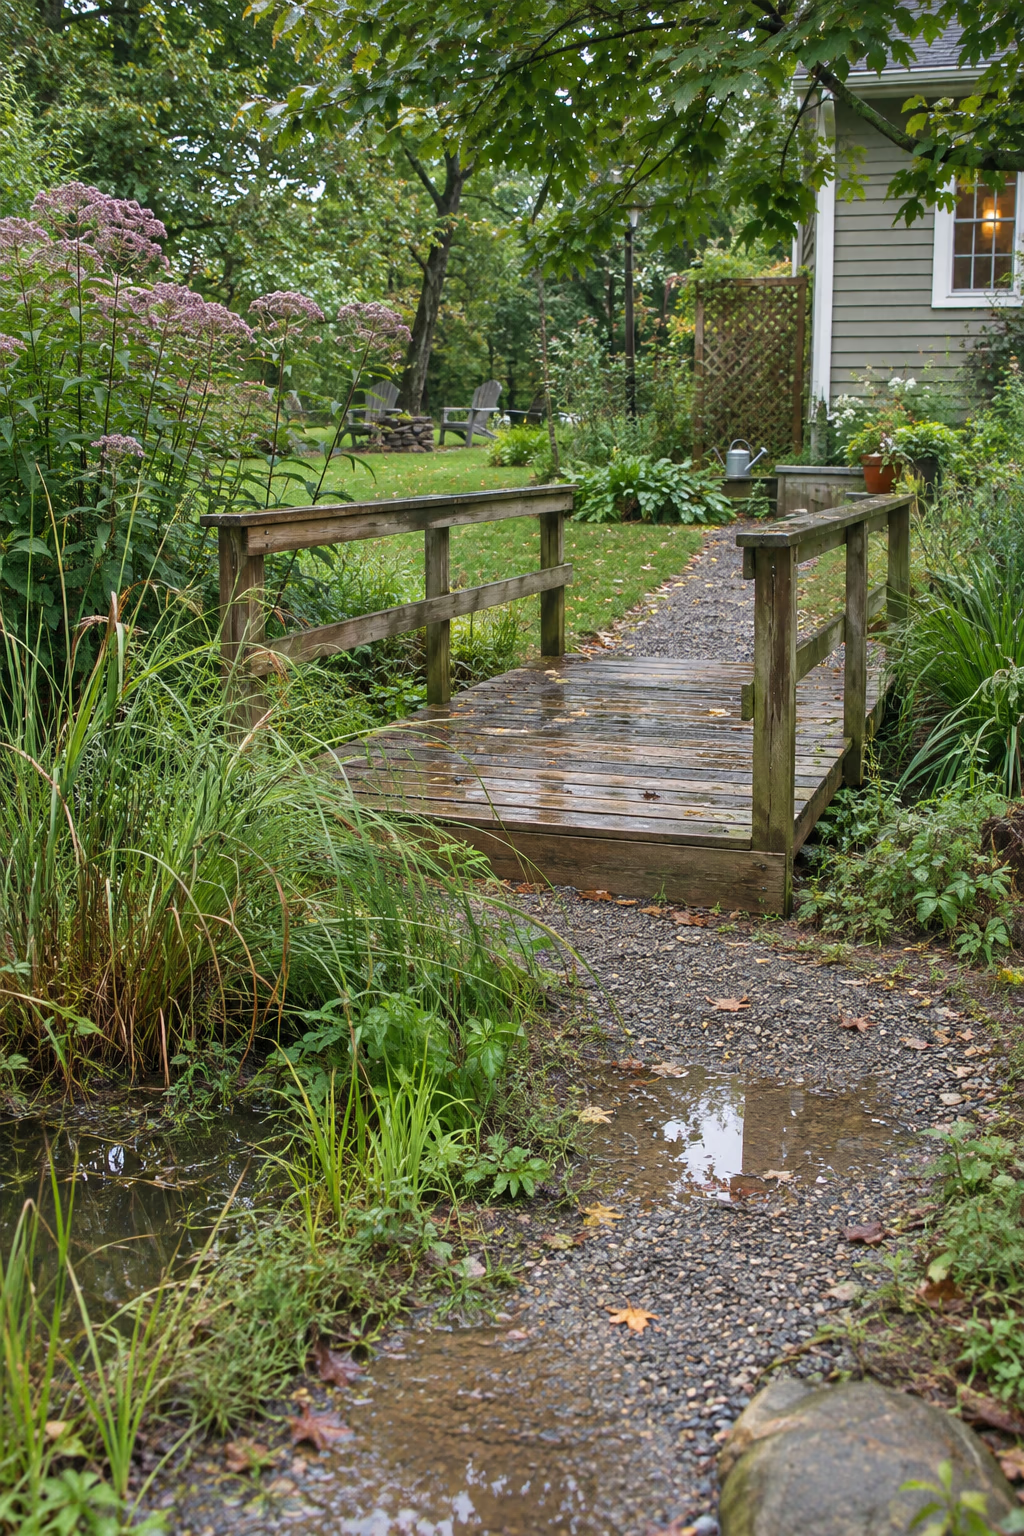
Turn a drainage problem into a feature
If a path crosses a low area that puddles after rain, a simple wooden footbridge 3 to 4 feet wide can carry walkers over it. Surround it with moisture-loving plants such as Joe Pye weed or sedges.
A bridge solves a practical problem while adding charm. Even a modest arch or flat plank bridge makes the walk feel more like an adventure.
Anchor bridge ends on concrete blocks or gravel pads so they don’t sink. If water pools near the house, address the drainage itself rather than just bridging it.
24. Install Permeable Grid Pavers Filled With Gravel
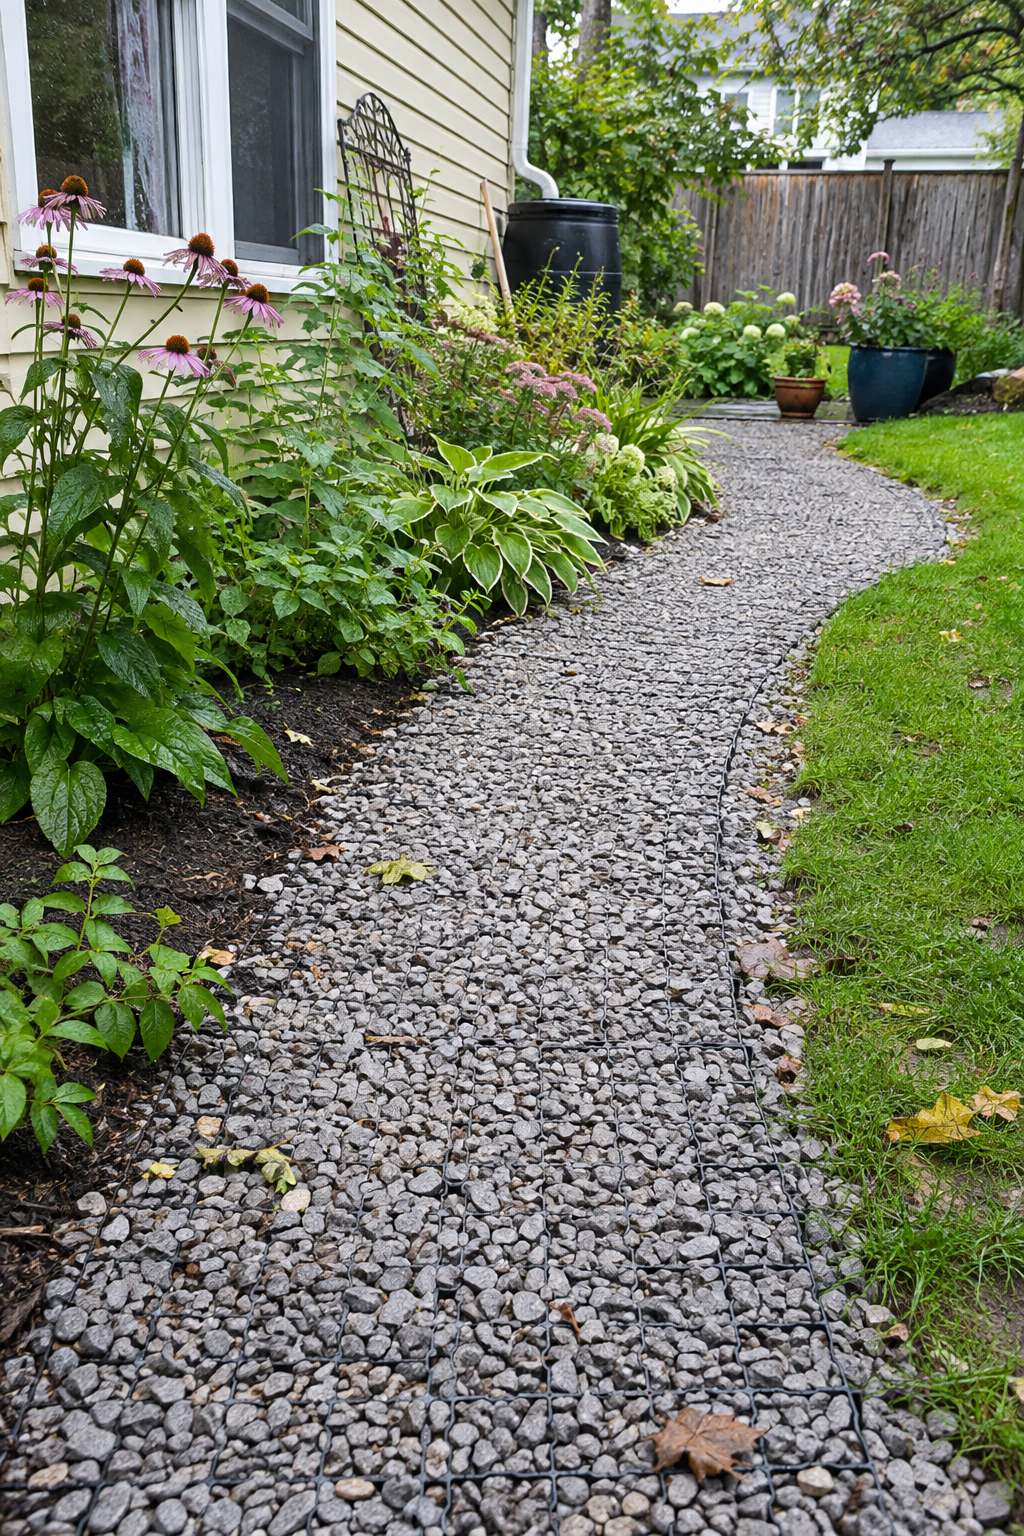
A stable surface that lets rain soak in
Plastic or concrete grid panels laid over a compacted base and filled with gravel create a sturdy path that still drains. They keep gravel from shifting and work well on gentle slopes.
Permeable surfaces reduce runoff and help rainwater soak into the soil instead of rushing into storm drains. Some towns even encourage or require them for new hardscape.
The grids need a level base to work well. Fill cells completely so the grid edges don’t show, and top up gravel as it settles.
25. Press Leaf Prints Into a DIY Concrete Path
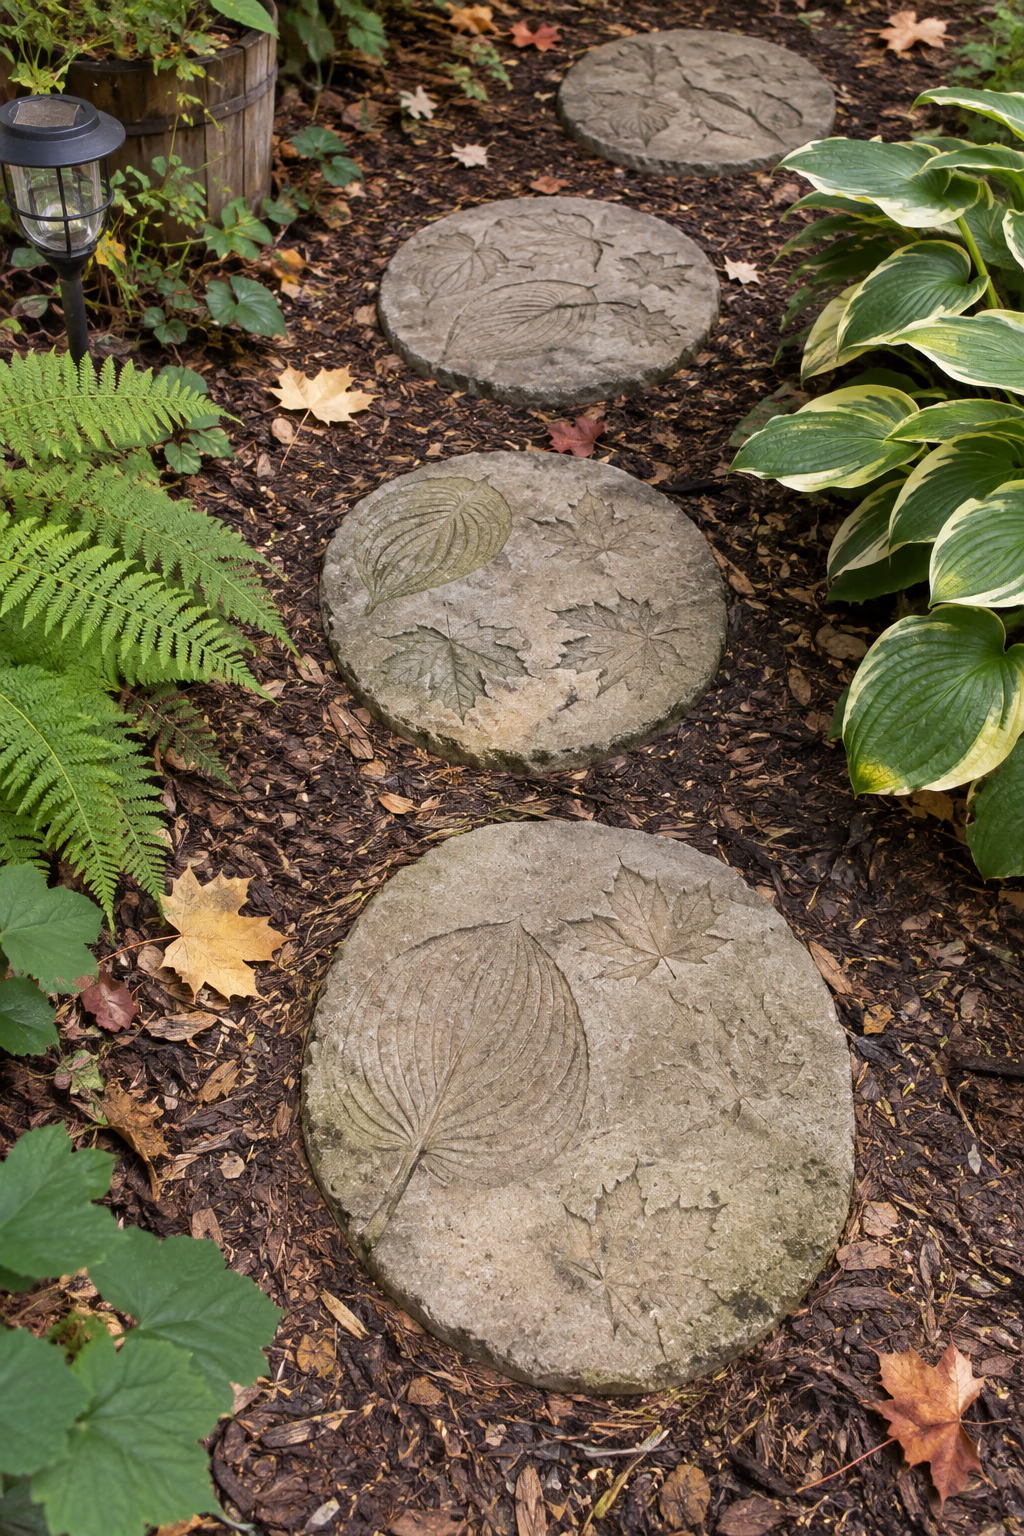
A personal touch on a budget
Pour concrete into simple forms to create stepping pads or a continuous path, then press large leaves such as hosta, maple, or fig into the surface while the concrete is still wet. Remove them after it sets to reveal detailed impressions.
Leaf prints add an organic, handmade feel to plain concrete. Kids often enjoy helping, and every print is a little different.
Concrete work is physical and time sensitive, so prepare forms and leaves before mixing. Seal the surface after it cures to protect the prints from weather.
26. Mark the Entrance With a Pair of Matching Planters
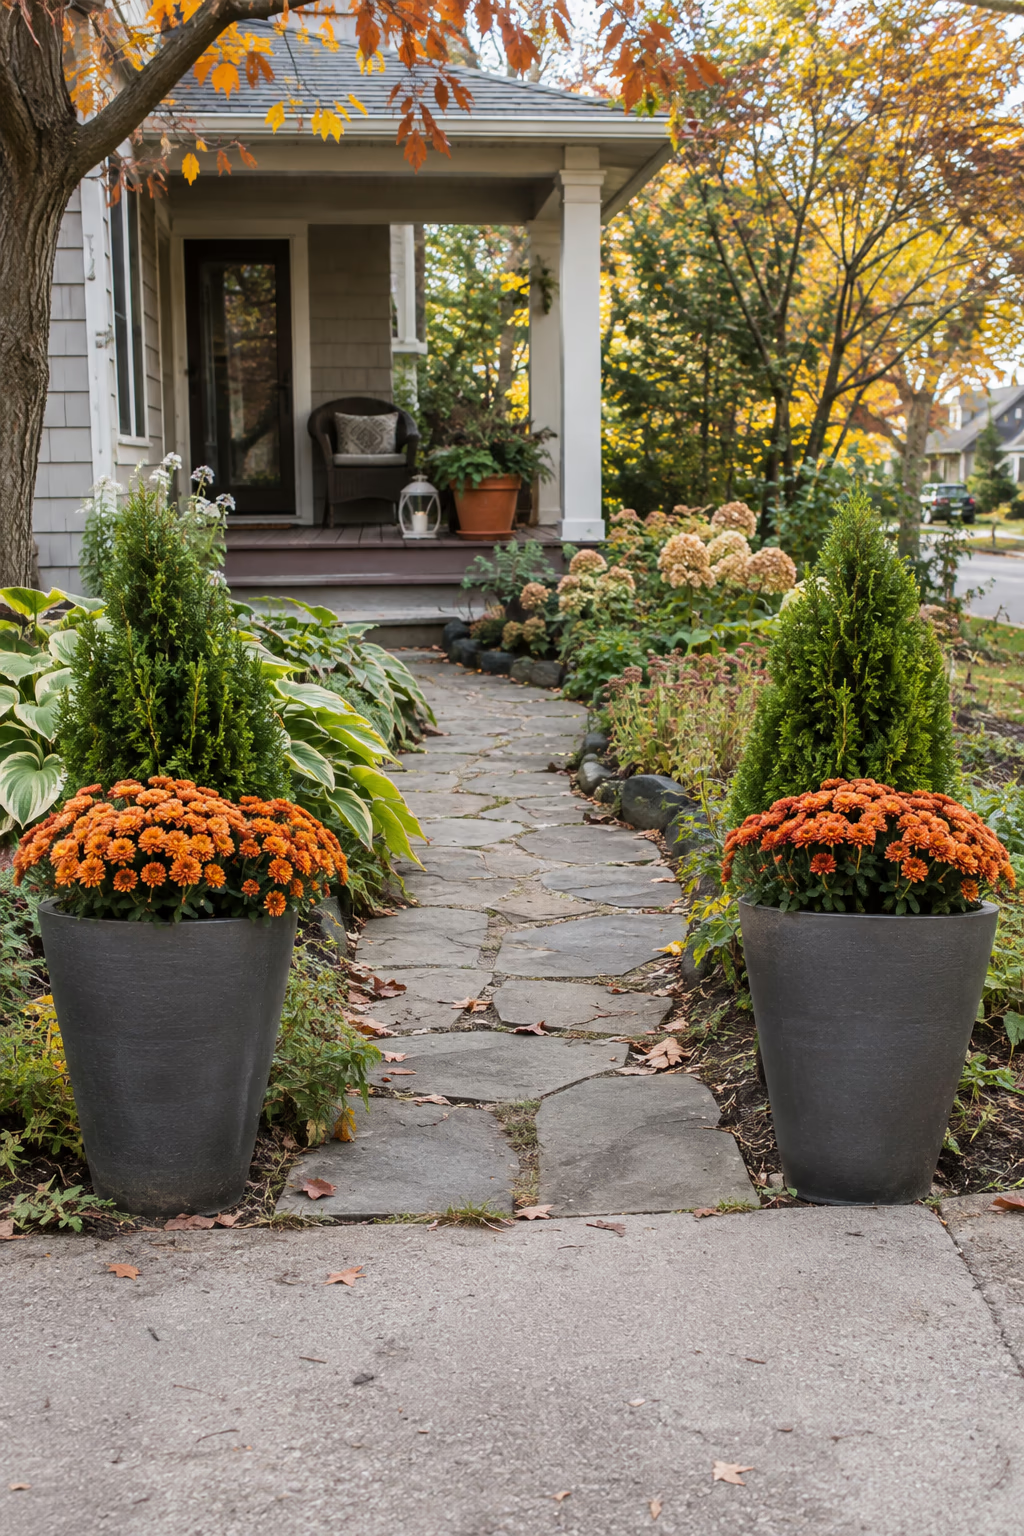
A simple threshold that says welcome
Place two large matching pots at the start of a path, filled with dwarf evergreens, ornamental grasses, or seasonal flowers. The pair creates a gateway effect without building anything.
Planters signal where a path begins and make the entry look polished. They’re easy to update with the seasons, from spring pansies to fall mums.
Choose frost-resistant containers in cold climates and make sure they have drainage holes. Large pots are heavy, so place them before filling with soil.
27. Refresh an Old Concrete Walk With Exterior Stain
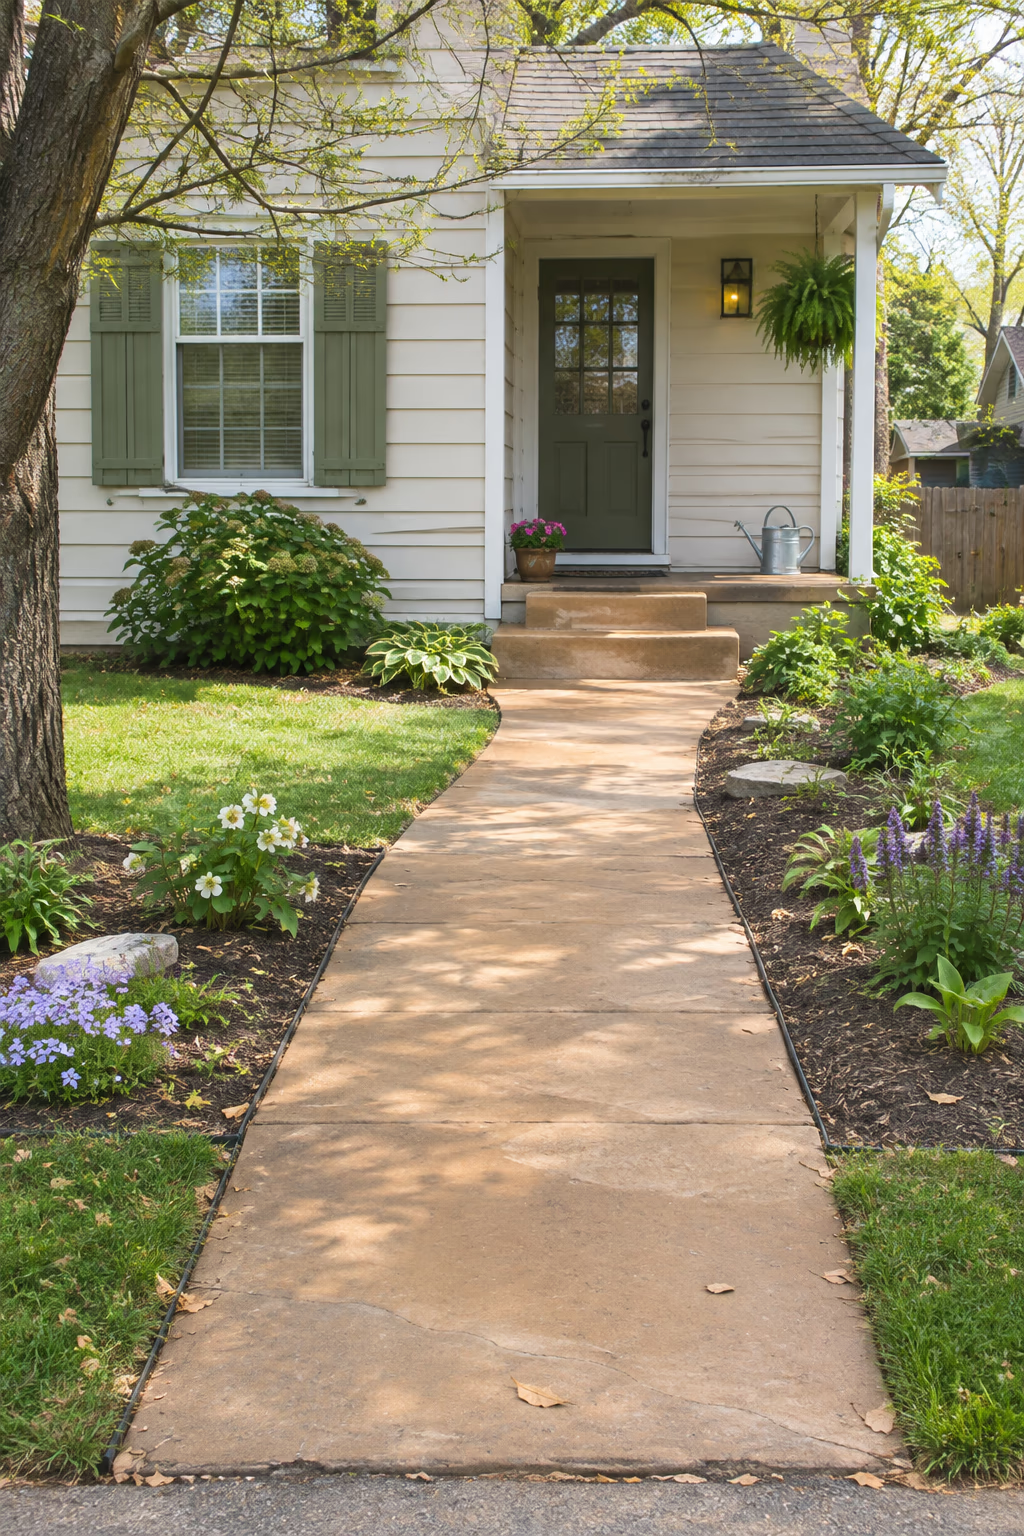
A quick update without tearing anything out
If an old concrete walk is structurally sound but dull, clean it thoroughly and apply a penetrating exterior concrete stain in a warm tan, gray, or terra-cotta tone. Some homeowners also score a simple grid pattern for added detail.
Staining costs far less than replacement and can make a tired walkway look intentional. It pairs well with new edging plants to complete the update.
Repair cracks first and test the stain in a hidden area, because results vary with the concrete. Sealed or painted surfaces may need stripping before stain will absorb.
How to Plan Your Garden Path
A great path balances how you move through the yard with how you want it to look. A little planning before you dig saves time, money, and frustration.
- Follow the natural routes. Notice where people and pets already walk, and place paths along those lines so they actually get used.
- Size it for its job. Main paths should be about 4 to 5 feet wide so two people can walk side by side, while secondary garden paths can be 2 to 3 feet.
- Build a solid base. Most paths need 3 to 6 inches of compacted gravel beneath the surface material to prevent sinking and heaving.
- Plan for drainage. Slope paths slightly so water runs off into beds or lawn, never toward the house foundation.
- Choose materials for your climate. Freeze-thaw cycles, hot sun, and heavy rain all affect how materials perform, so ask local suppliers what lasts in your area.
- Check rules and utilities. Review HOA guidelines and local codes for front-yard changes, and call 811 before digging to locate buried lines.
Frequently Asked Questions
What is the cheapest material for a garden path?
Wood chips, mown grass, and pea gravel are the least expensive options. Wood chips are often free from local tree services, and gravel costs relatively little per square foot. Expect to refresh both every few years.
How do I keep weeds out of a gravel path?
Start with a well-compacted base and a layer of landscape fabric, then keep gravel at least 2 to 3 inches deep. Pull small weeds promptly and rake the surface occasionally to disturb seedlings.
Which garden path surface is best for wheelchairs or strollers?
Firm, smooth surfaces such as concrete, tight-jointed pavers, or stabilized decomposed granite work best. Loose gravel and widely spaced stepping pads are hard to roll across.
Can I build a garden path myself?
Yes. Gravel, mulch, and simple paver paths are manageable DIY projects with basic tools. Larger stone, concrete, or sloped paths may benefit from professional help, especially for grading and drainage.
How long does a garden path last?
It depends on the material. Concrete and stone can last decades, gravel needs occasional topping up, and wood or mulch paths may need replacing every few years. A good base extends the life of any path.
Final Thoughts
The best garden path ideas make your yard easier to use and more enjoyable to explore. A lavender-lined gravel walk, a row of oversized pavers, or a simple mown trail can completely change how you move through your outdoor space.
Start with the route you use most, pick materials that suit your budget and climate, and let the plantings grow in around it. Over time, your path will settle into the landscape and become one of your favorite parts of the garden.