Step off the patio, follow a ribbon of gravel past a clump of swaying grasses, and suddenly the path bends out of sight. You can’t quite see where it goes, so you keep walking. That small moment of curiosity is exactly what a curved path is built to create.
Straight walks are efficient, but curves feel relaxed and natural. They slow you down, show off the plants along the way, and can make even a modest suburban lot seem deeper and more interesting than it really is. A gentle bend also softens the hard lines of fences, houses, and property boundaries.
These 23 curved garden path ideas cover hidden bends, gravel and paver curves, stepping stones, edging options, lighting, slopes, shady side yards, and planting tricks that make a curve look intentional. Each one works for an ordinary yard and budget, and many can be built over a weekend or two.
1. Hide the Destination Behind a Planted Bend
Add a little mystery to any yard
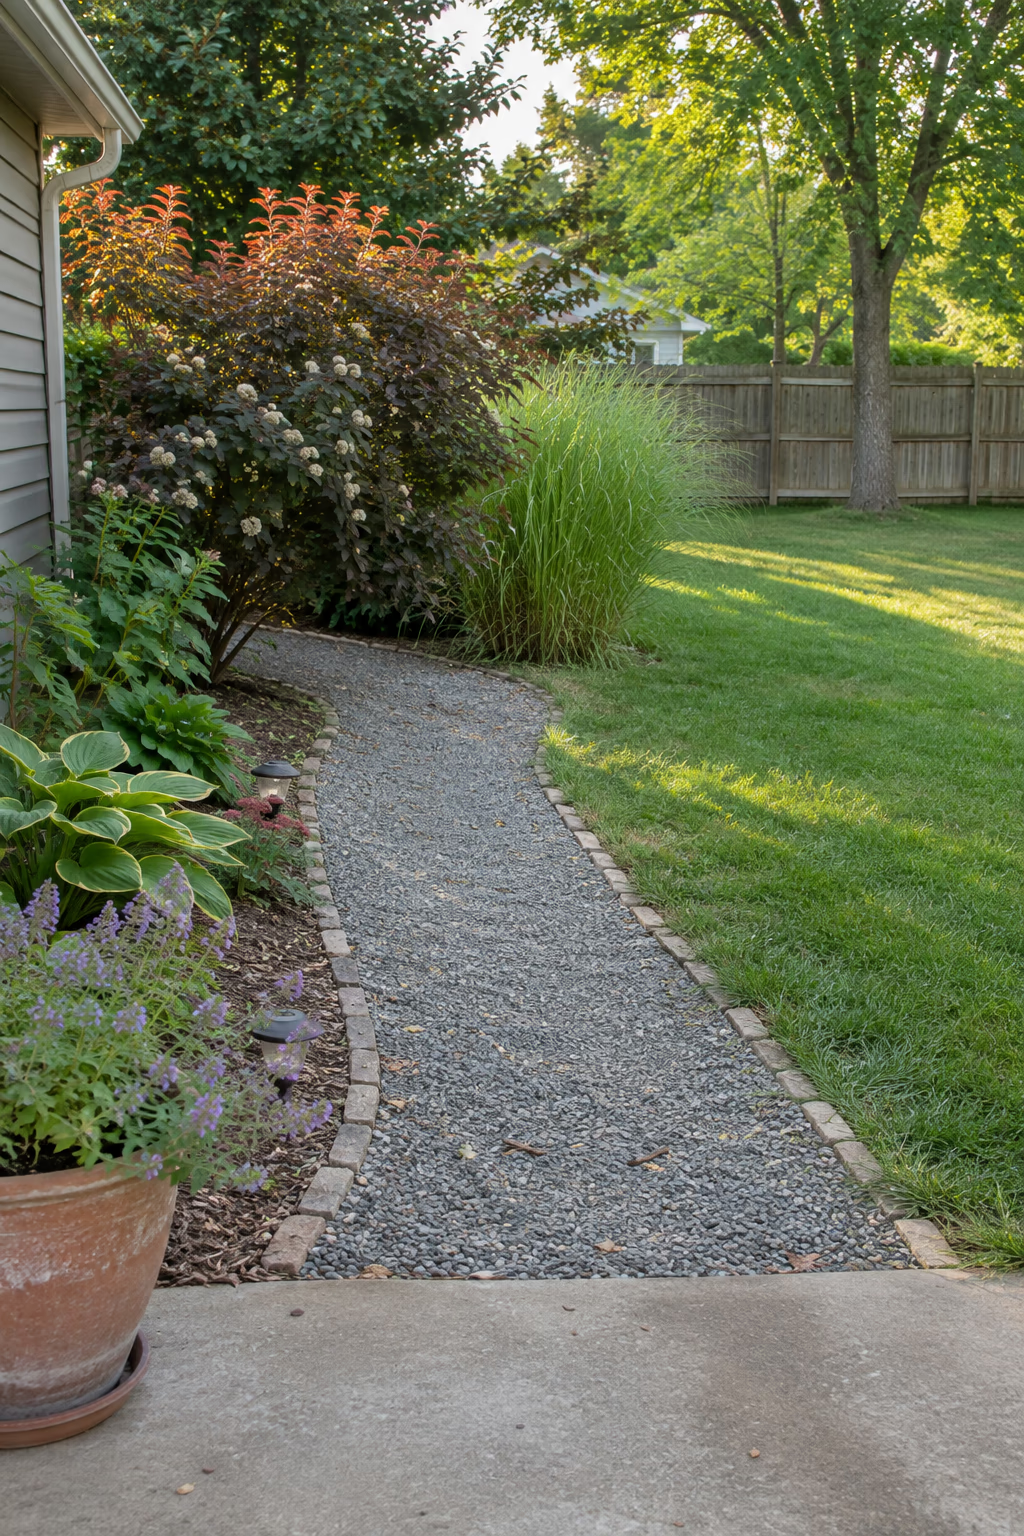
The classic reason to curve a path is to hide what comes next. Swing the walk to one side, then plant a screen of shrubs or tall perennials right at the turn so the far end disappears from view. Ninebark, viburnum, panicle hydrangea, or a big clump of switchgrass all make good living screens.
Because visitors can’t see the end, the brain fills in more space than actually exists. A path that ends at a shed or a compost bin 40 feet away can feel like it leads somewhere much larger.
Give the bend a believable reason. If the path curves around a planting, a boulder, or a small tree, it feels natural. If it wiggles across open ground for no reason, people tend to cut straight across instead.
2. Curve a Gravel Path Through Billowing Ornamental Grasses
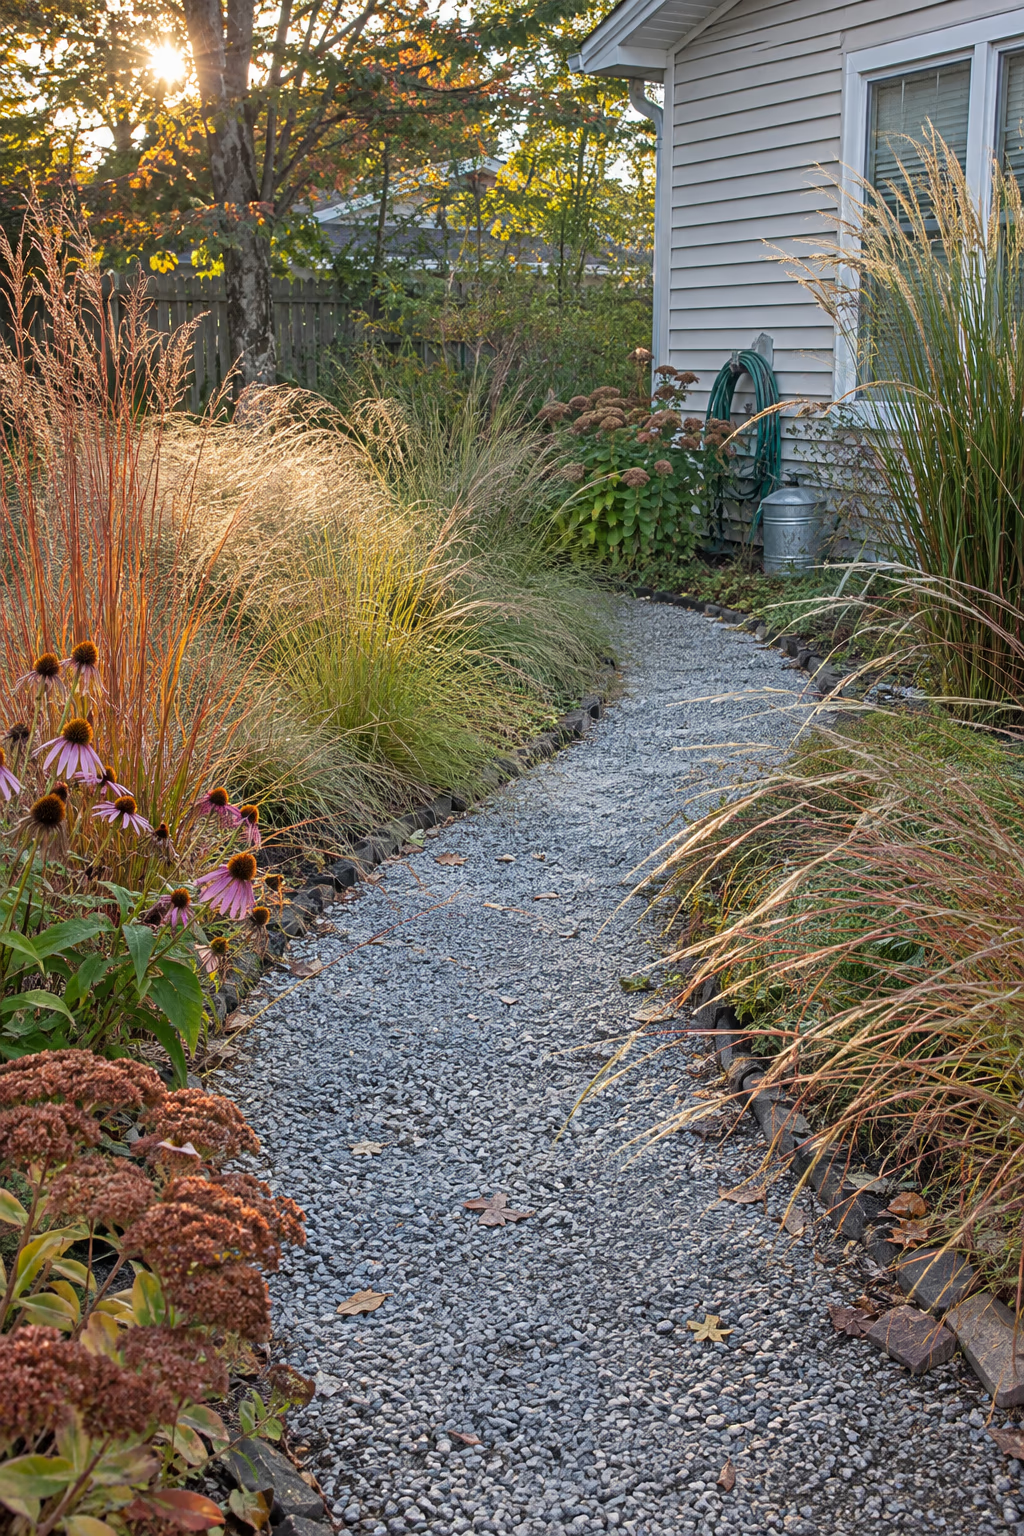
Soft movement on both sides of the walk
Ornamental grasses and a flowing gravel path are made for each other. Lay a 3- to 4-foot-wide path of 3/8-inch crushed gravel and plant drifts of little bluestem, prairie dropseed, switchgrass, or feather reed grass along both edges. Tuck in coneflowers, salvia, or sedum for summer color.
The arching blades blur the edges of the path and sway in the breeze, which makes the curve feel even softer. In fall and winter, the tan and copper seed heads keep the walk attractive long after flowers fade.
Set grasses at least 18 inches back from the gravel, since many grow 3 to 4 feet wide. Cut them back in late winter before new growth starts, and check that any grass you choose is not invasive in your region.
3. Edge a Sweeping Curve With Corten Steel
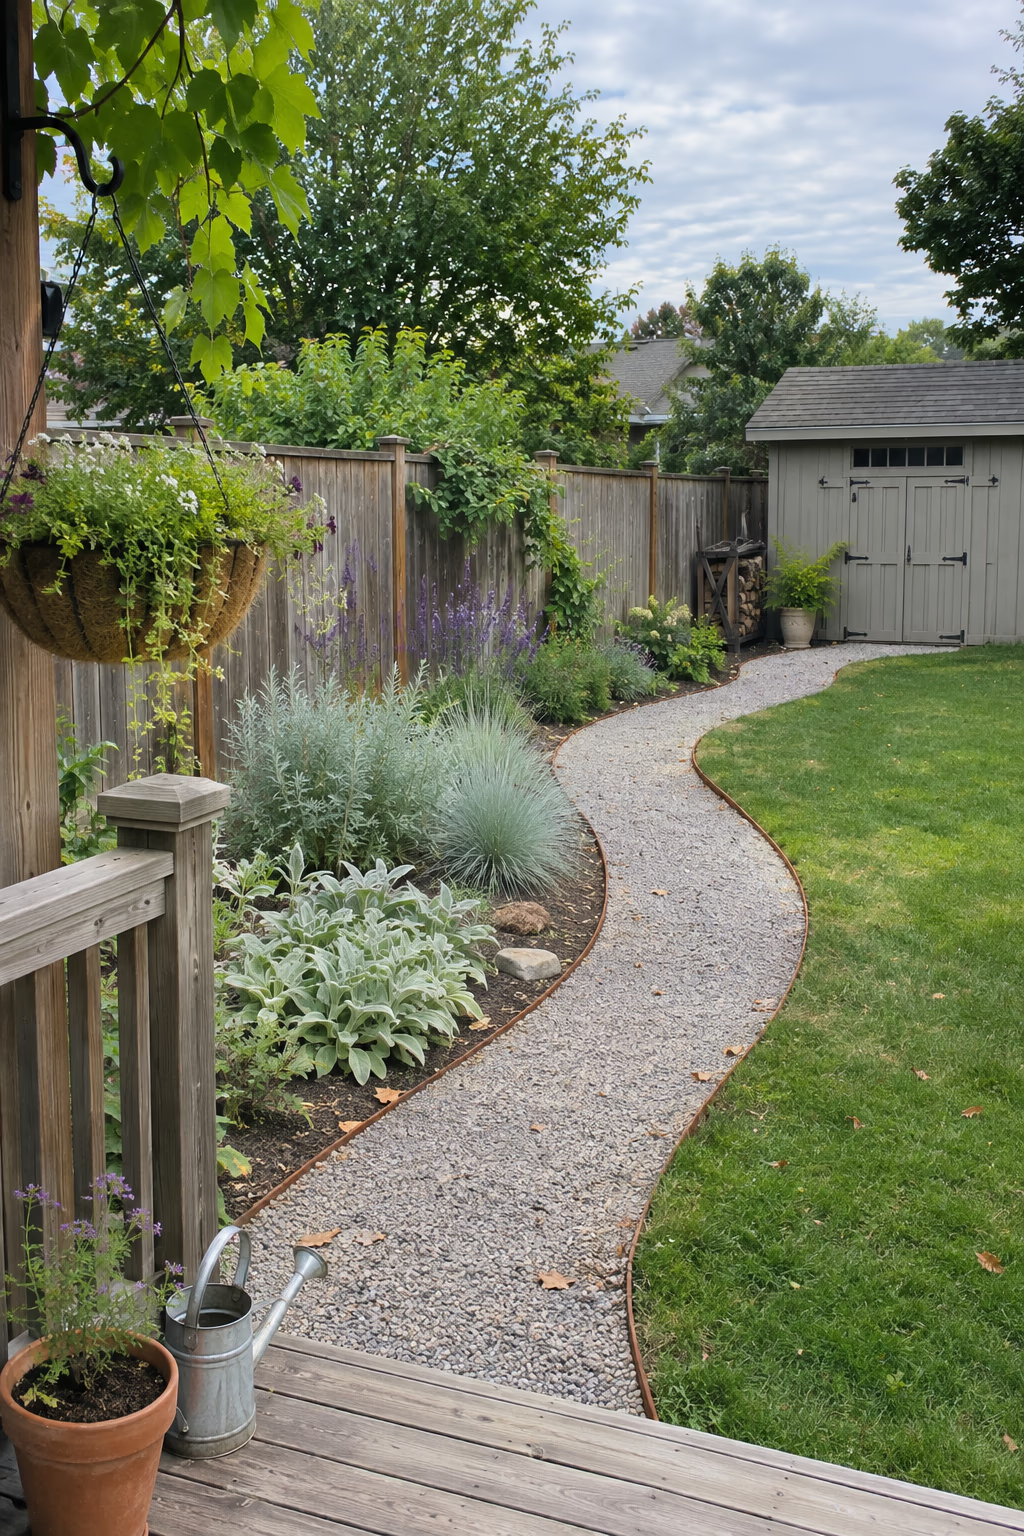
A crisp, modern line that holds its shape
Weathering steel edging, often called corten, bends smoothly into long arcs and develops a warm, rusty brown patina. Run a strip along both sides of a gravel or decomposed granite path, and the curve stays razor sharp for years without shifting or heaving.
The rich orange-brown tone looks striking next to gray gravel, silvery plants like lamb’s ears and artemisia, and green lawn. It gives an informal curve a clean, contemporary finish.
Expect the steel to shed rusty runoff while the patina forms, which can stain nearby concrete or light-colored pavers. Choose edging with a rolled or folded top so the edge isn’t sharp, and plan on a higher cost than plastic or aluminum.
4. Stagger Round Stepping Stones Along an S-Curve
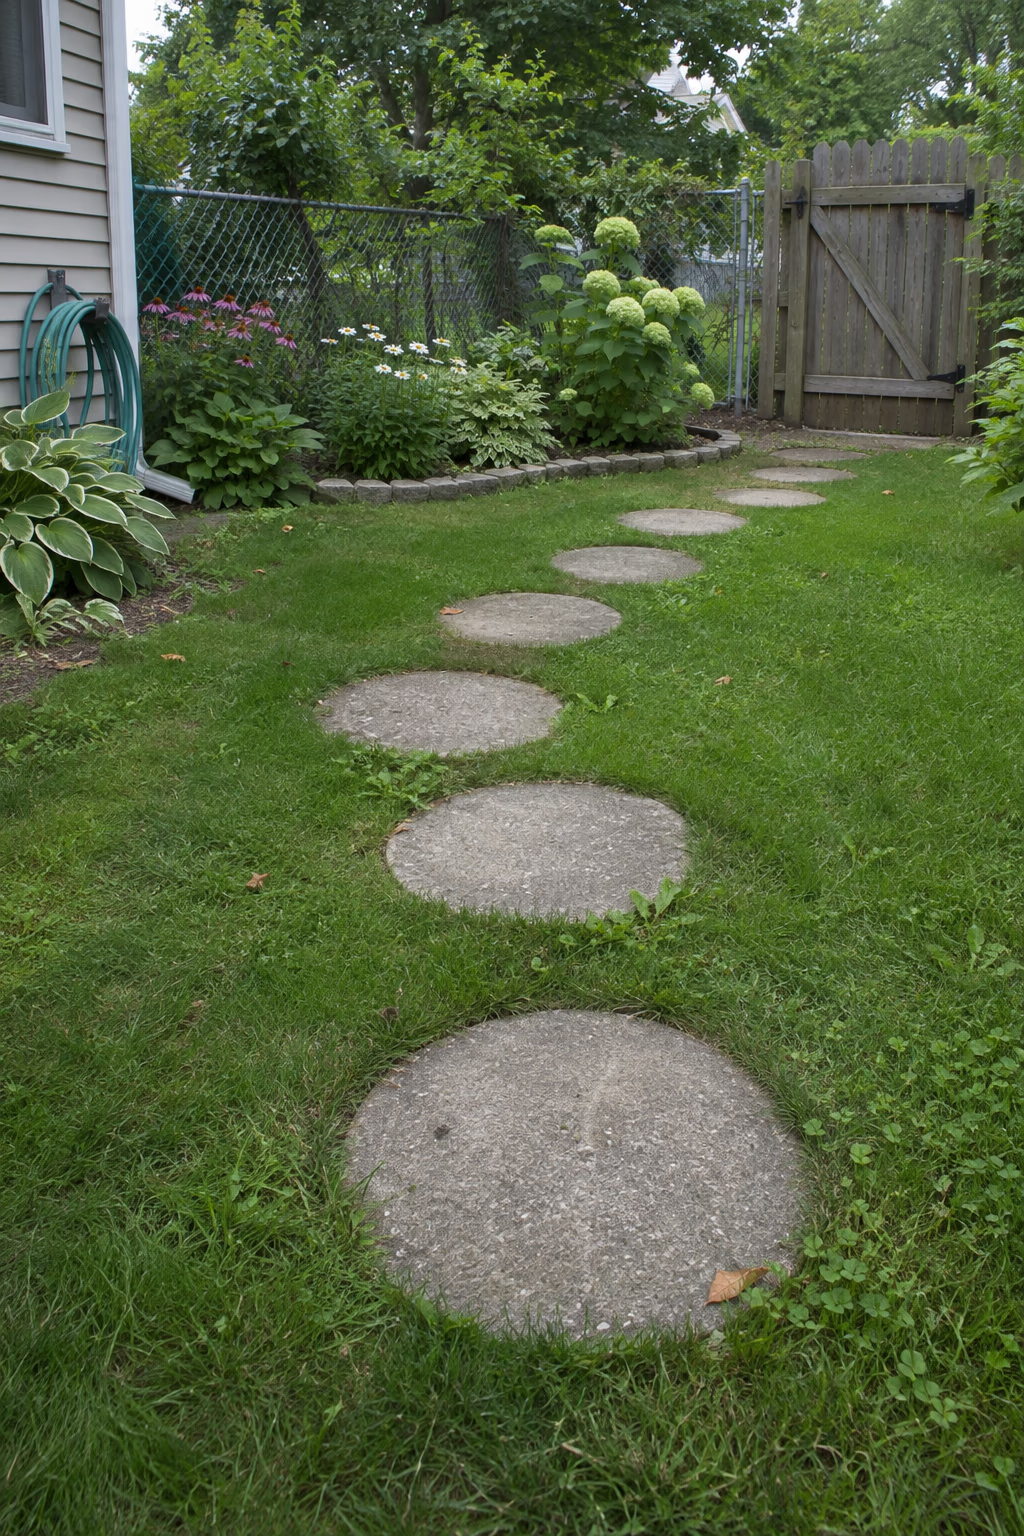
A playful path that keeps the lawn green
Round stepping stones, 18 to 24 inches across, are an easy way to draw a loose S-curve across grass or mulch. Lay them out first and walk the route a few times, adjusting the spacing until each step feels natural. Roughly 24 inches from center to center suits most adults.
Circles naturally suggest movement, so even a short run of six or eight stones reads as a flowing line. Gray concrete rounds are affordable, while natural sandstone or slate rounds add more texture.
Set each stone so its top sits level with the soil or turf. That way the mower rolls right over it, and nobody trips on a raised edge. Rest them on an inch or two of sand so they don’t rock.
5. Line a Winding Path With Low Stacked Stone Walls
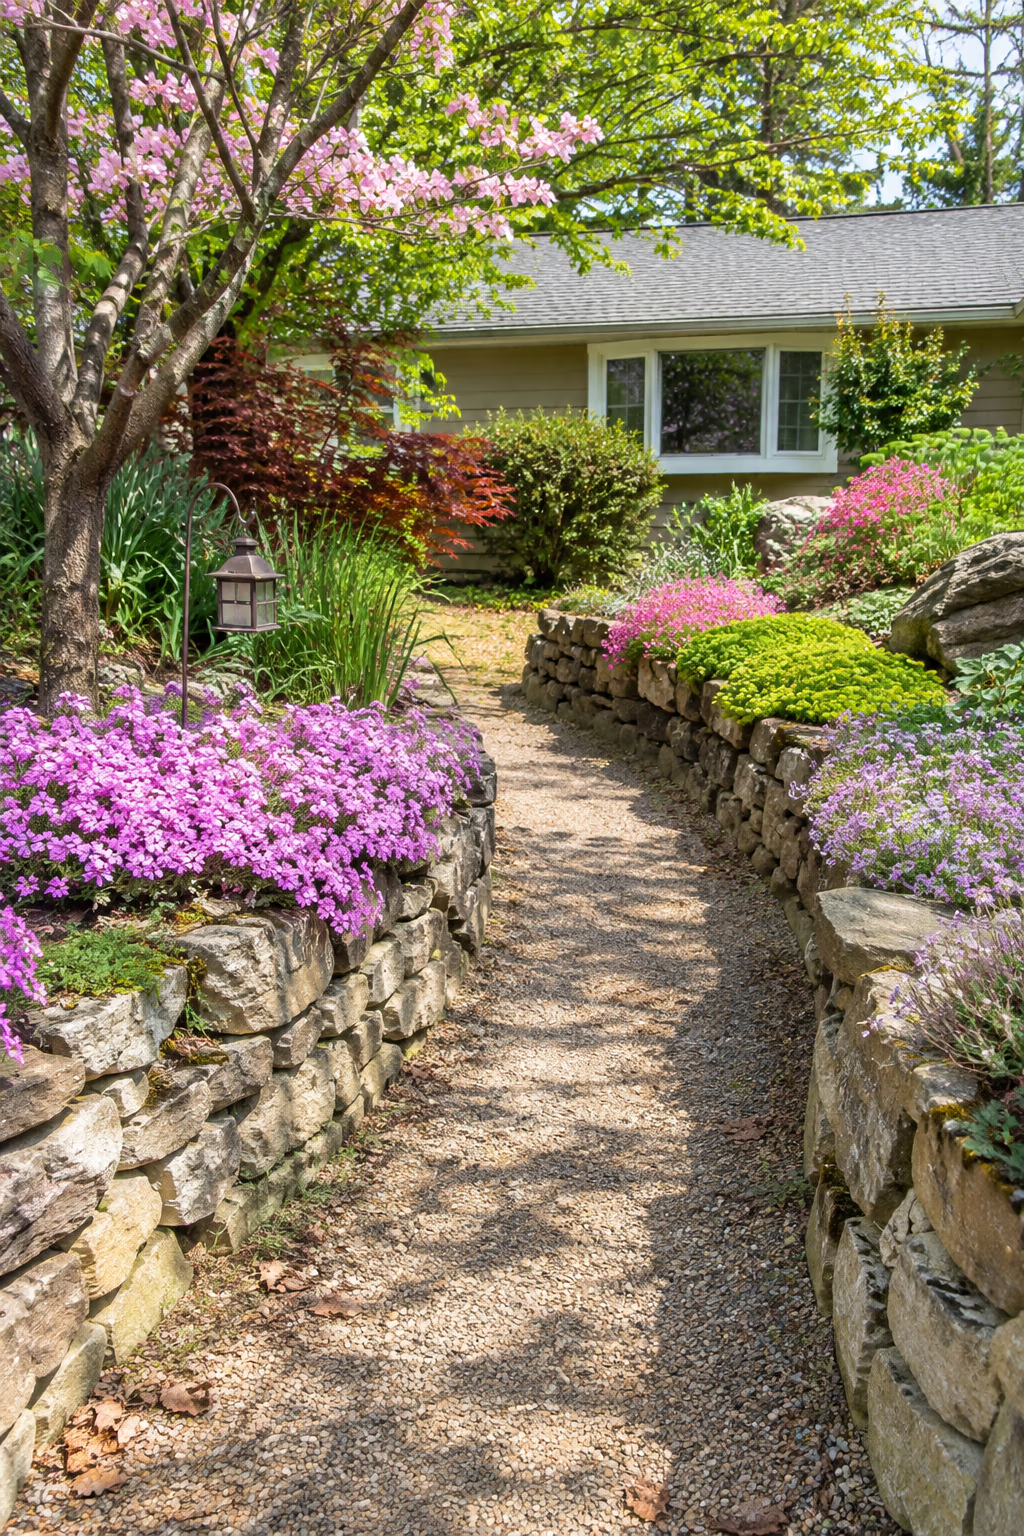
Raised beds and a defined route in one project
Dry-stack fieldstone or flat sandstone into low walls, about 12 to 18 inches tall, along each side of a gently winding gravel path. Backfill behind them with good soil, and you’ve created two raised planting strips that follow the curve.
The walls give the path a strong, settled look and let trailing plants like creeping phlox, sedum, and thyme tumble over the stone without crowding the walking surface. They also make a handy spot to perch while weeding.
Keep the walls low and wide at the base, tilting each course slightly back into the soil. Walls that hold back significant soil, usually anything over about 3 feet, may need engineering or a permit, so check local rules first.
6. Place a Low Light at Every Bend
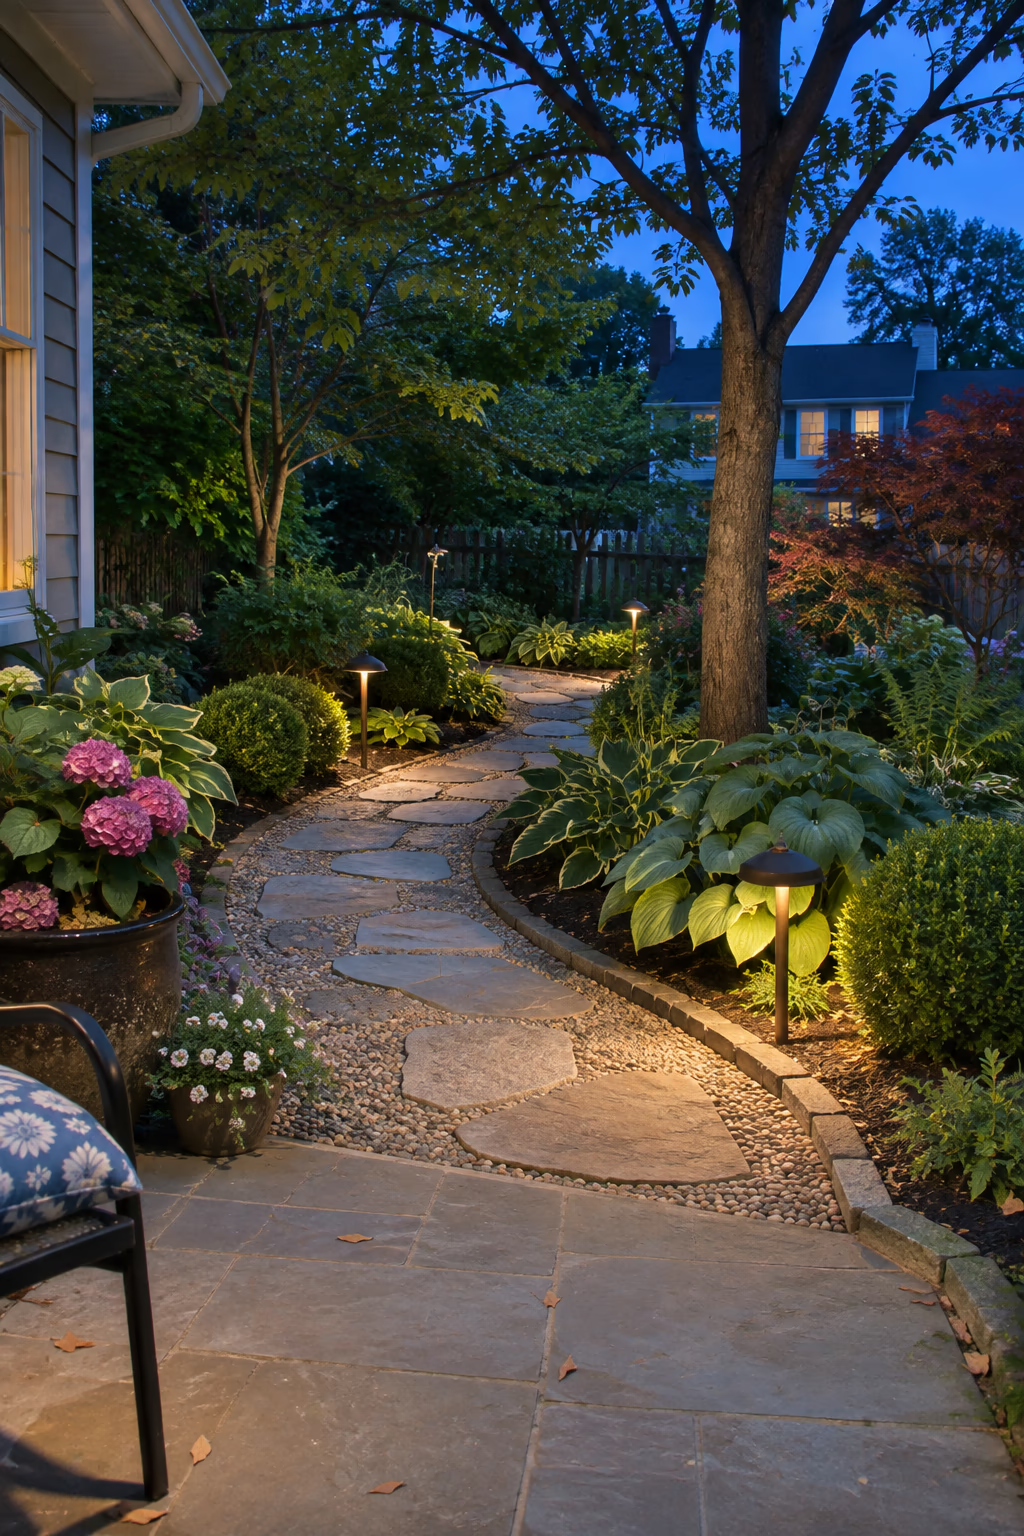
Make the curve safe and beautiful after dark
A curved path is harder to follow at night because you can’t see straight ahead. Set a low path light at each change of direction, plus one at the start and end. Low-voltage fixtures with a warm white glow, around 2700K, look natural and are easy for homeowners to install.
The pools of light trace the shape of the path like a dotted line, which is both practical and quietly dramatic. Shielded, downward-facing fixtures keep glare out of your eyes and your neighbors’ windows.
Solar stakes are the budget option, but they often dim on cloudy days and in shade. If you go hardwired, call 811 before digging trenches for cable.
7. Swap a Straight Front Walk for a Gentle Concrete Curve
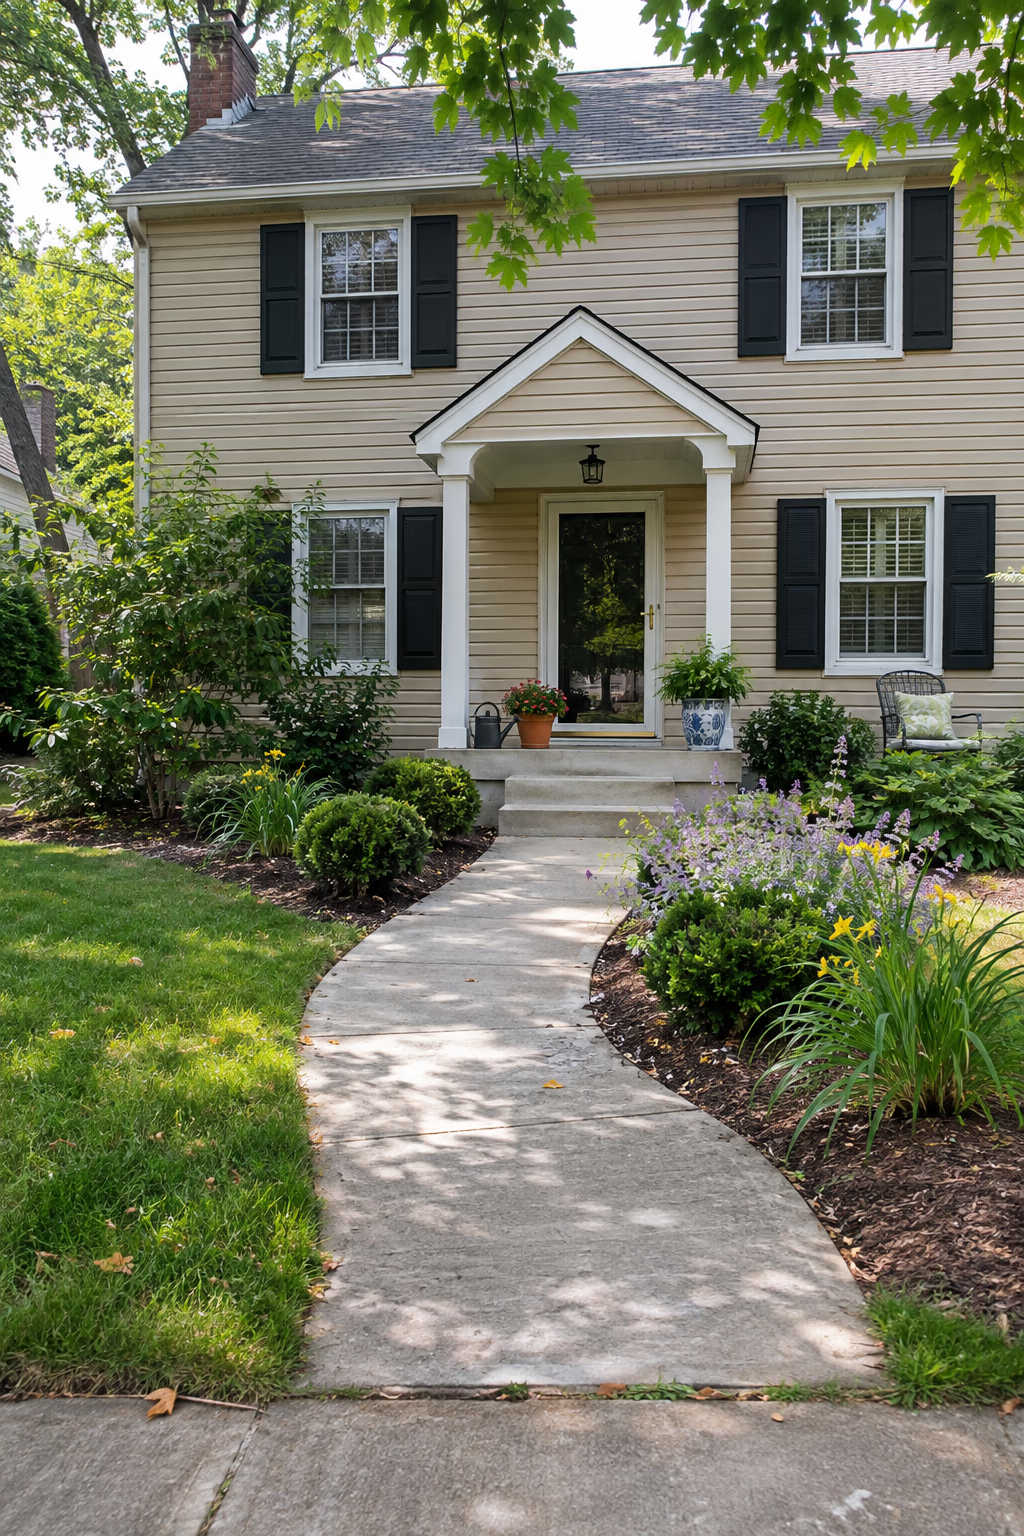
Instant curb appeal with planted edges
A dead-straight concrete strip from the sidewalk to the front door can feel stiff. Replacing it with a walk that sweeps gently across the yard, with low shrubs and perennials planted in the pockets on each side, makes the entry far more welcoming.
Keep the curve shallow so the route stays direct and doesn’t annoy delivery drivers or guests in a hurry. A width of 4 feet lets two people walk side by side, and a light broom finish gives good traction in rain.
Curved concrete forms are trickier than straight ones, so many homeowners hire a flatwork contractor for this job. Ask for control joints at regular intervals to limit cracking, and check whether your city or HOA requires a permit for front walks.
8. Set Pavers in a Sweeping Fan Pattern
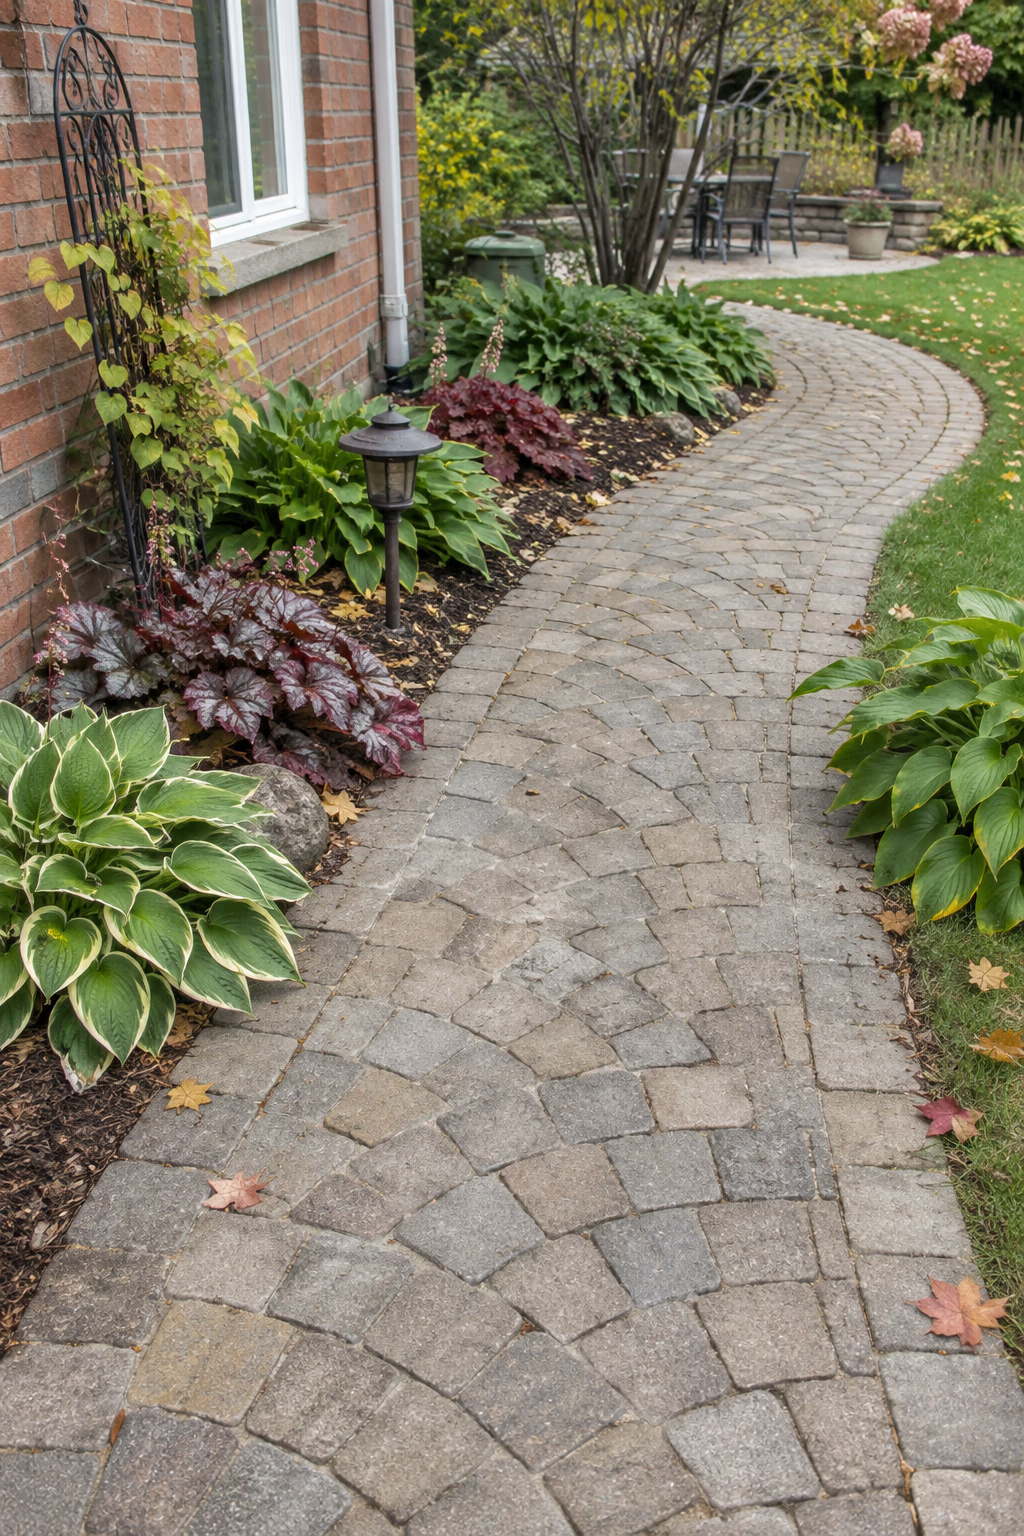
A pattern that follows the curve naturally
Fan patterns use small square pavers laid in overlapping arcs, so the joints themselves curve. On a winding path, this pattern bends with the walk instead of fighting it, and the result looks handcrafted and Old World.
Small units, around 4 to 6 inches square, are what make the fan work. Concrete versions in mixed gray or tan tones are much more affordable than natural granite and come in tumbled finishes that look aged.
This is slow, precise work. Each arc needs to be laid by hand over a compacted gravel base and a screeded sand bed, so a professional installation costs more than a simple running-bond walk. It’s worth it for a short, high-visibility stretch near the house.
9. Mow a Curving Trail Through a Patch of Tall Grass
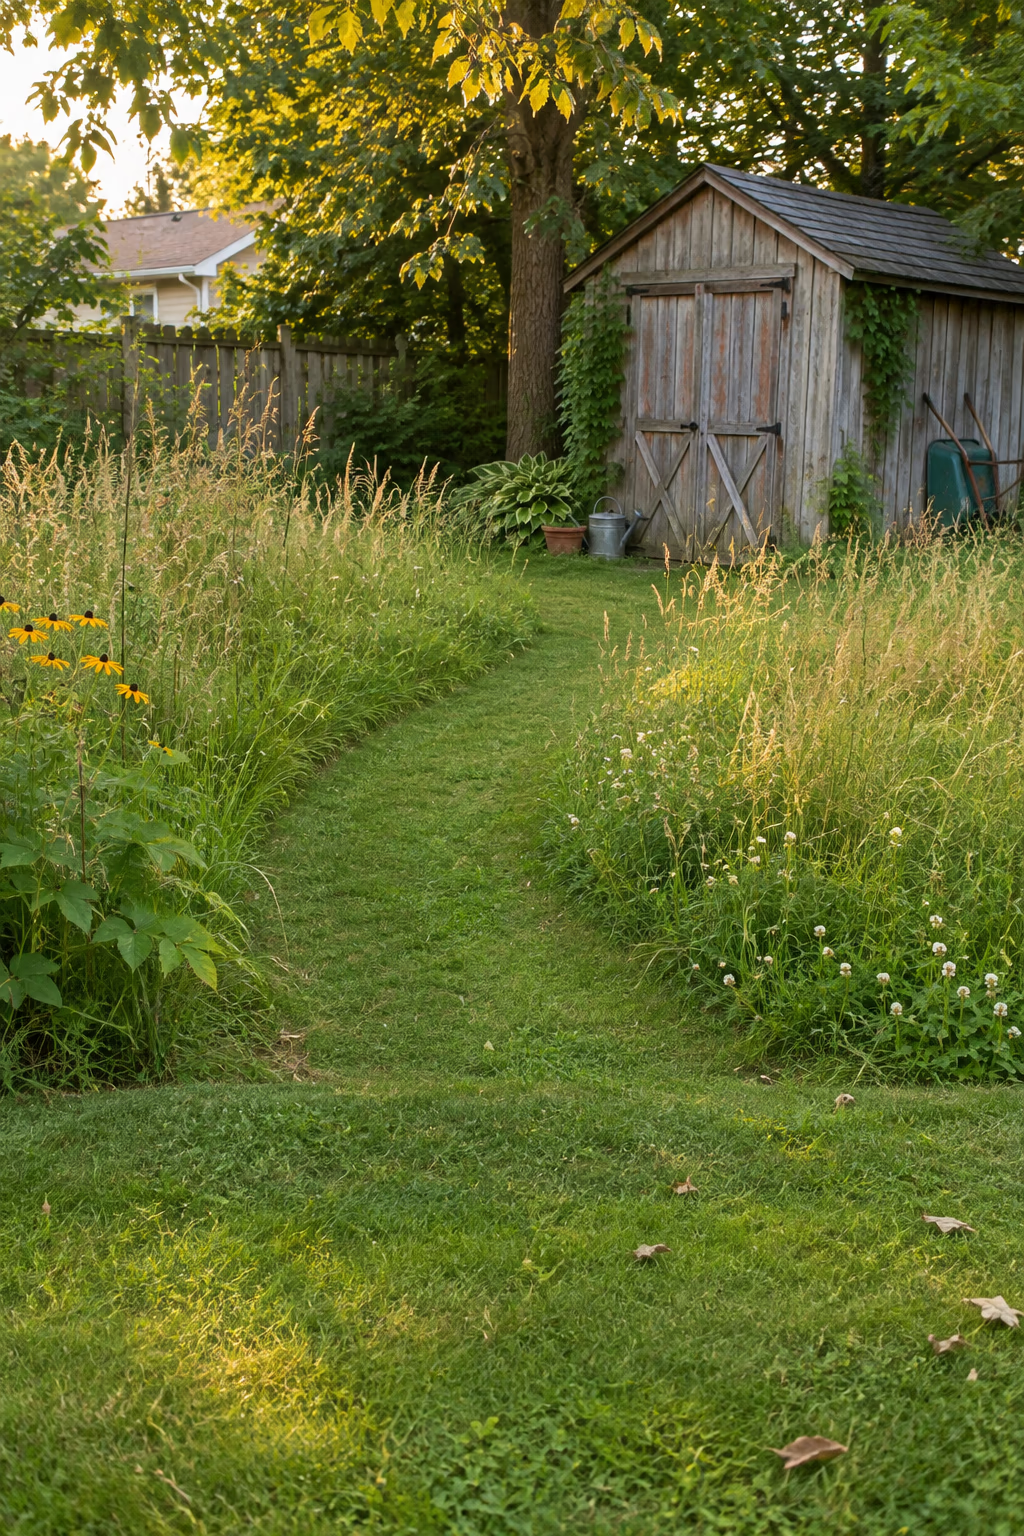
The cheapest curved path you’ll ever make
If you have a back corner of lawn that you’d like to mow less often, let it grow tall and simply mow a winding path through the middle. A trail one or two mower widths wide, about 3 to 4 feet, is enough to walk comfortably.
The contrast between short and long grass makes the curve pop, and the tall area gives butterflies, bees, and birds more cover. You can shift the route next year just by mowing in a different spot.
Mow the trail every week or two during the growing season so ticks have less tall grass to cling to. Some towns and HOAs have rules about grass height, especially in front yards, so this idea usually fits best behind the house.
10. Spread Shredded Bark for a Woodland Trail
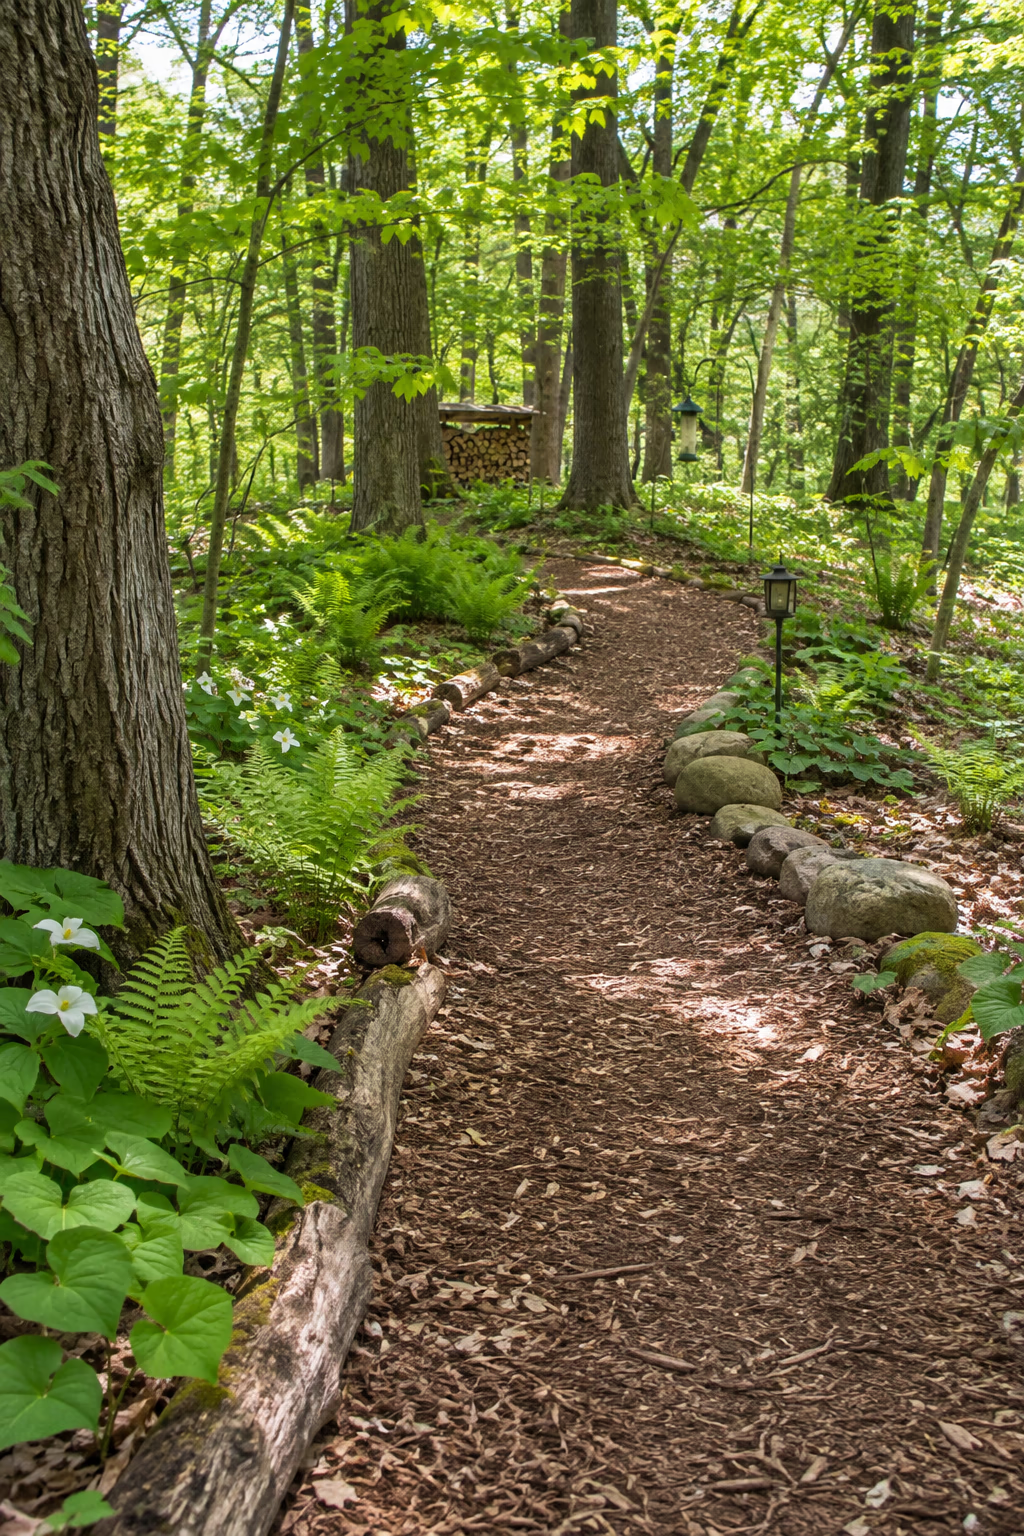
Soft, quiet footing under trees
Under a canopy of trees, a winding path of shredded hardwood bark or arborist wood chips feels right at home. Mark the route, remove the turf, and spread 3 to 4 inches of mulch. Edge it loosely with logs, rounded fieldstones, or simply a slightly raised soil line.
Wood mulch is soft underfoot, inexpensive, and blends seamlessly with ferns, wild ginger, and spring bulbs. It also breaks down slowly into the soil, which woodland plants appreciate.
Plan on topping it up every year or two as it decays. Bark can be slick when wet, so it’s not ideal on steep grades, and it’s best kept a few feet away from the house foundation.
11. Step a Curving Path Up a Slope With Timber Risers
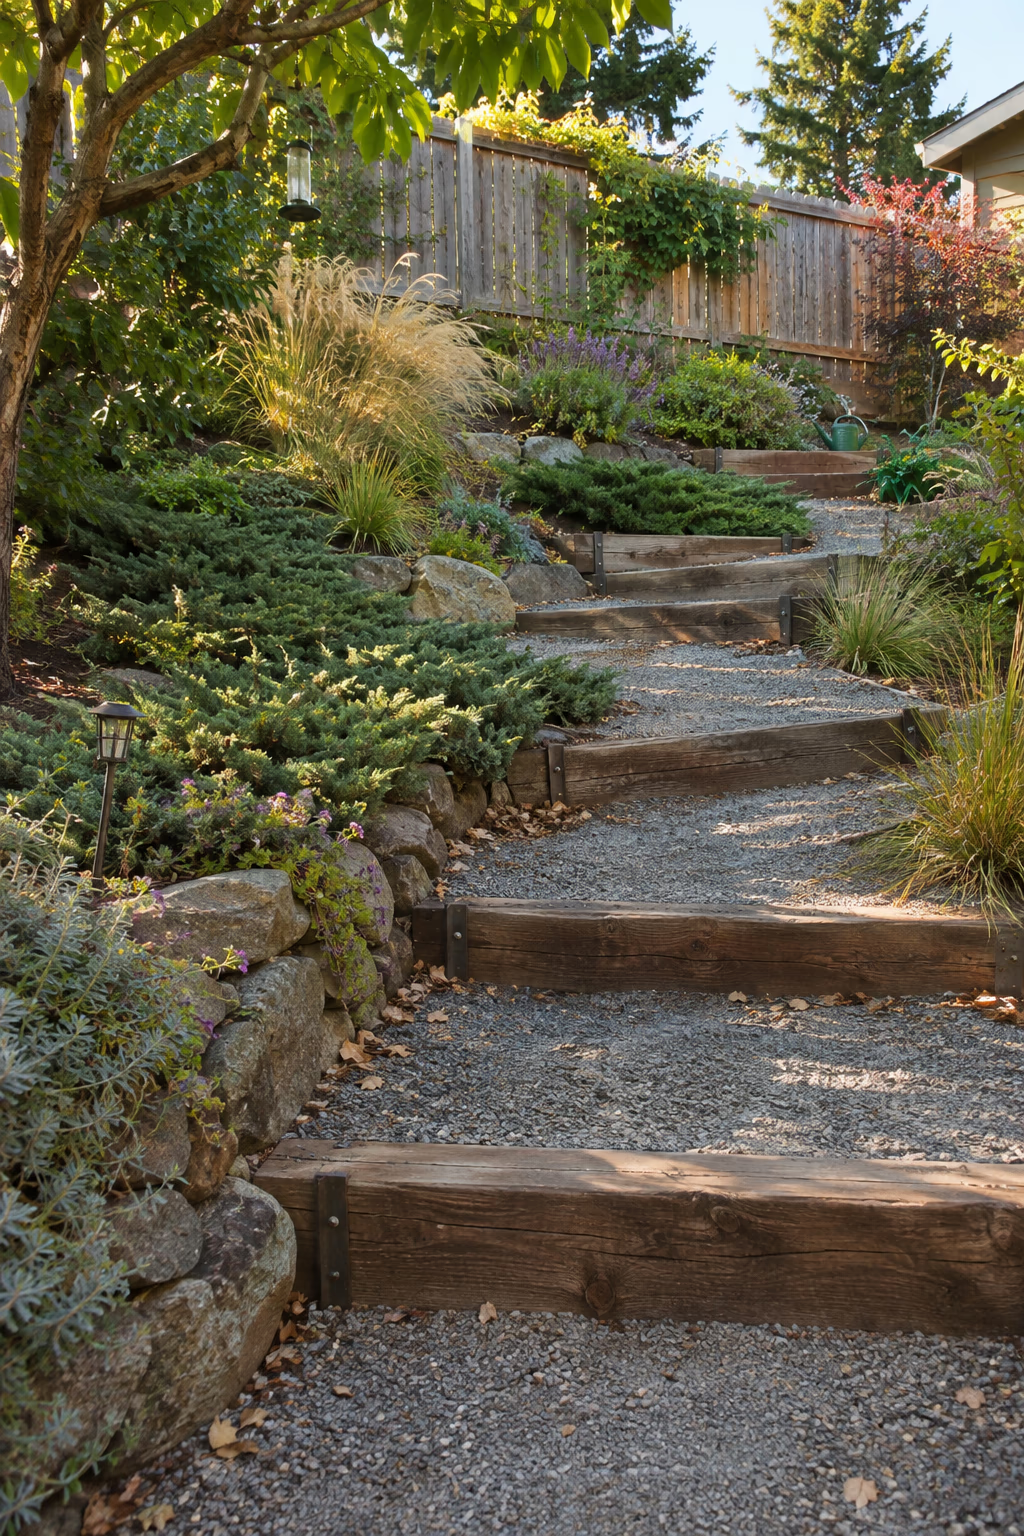
Turn a hill into a comfortable climb
On a slope, a path that curves back and forth across the grade is easier to walk than one that charges straight uphill. Where the path does need to climb, set chunky timber risers across it to create shallow steps, and fill each tread with compacted gravel.
The wood adds warmth and a rustic look, and the curve lets you plant the hillside between switchbacks. Rounded shrubs and groundcovers help hold soil on the bank.
Use lumber rated for ground contact and anchor each timber with long steel stakes or rebar. Comfortable outdoor steps usually have rises of about 4 to 6 inches and treads at least 12 to 16 inches deep, and every riser on a flight should be the same height.
12. End the Curve at a Bench or Birdbath
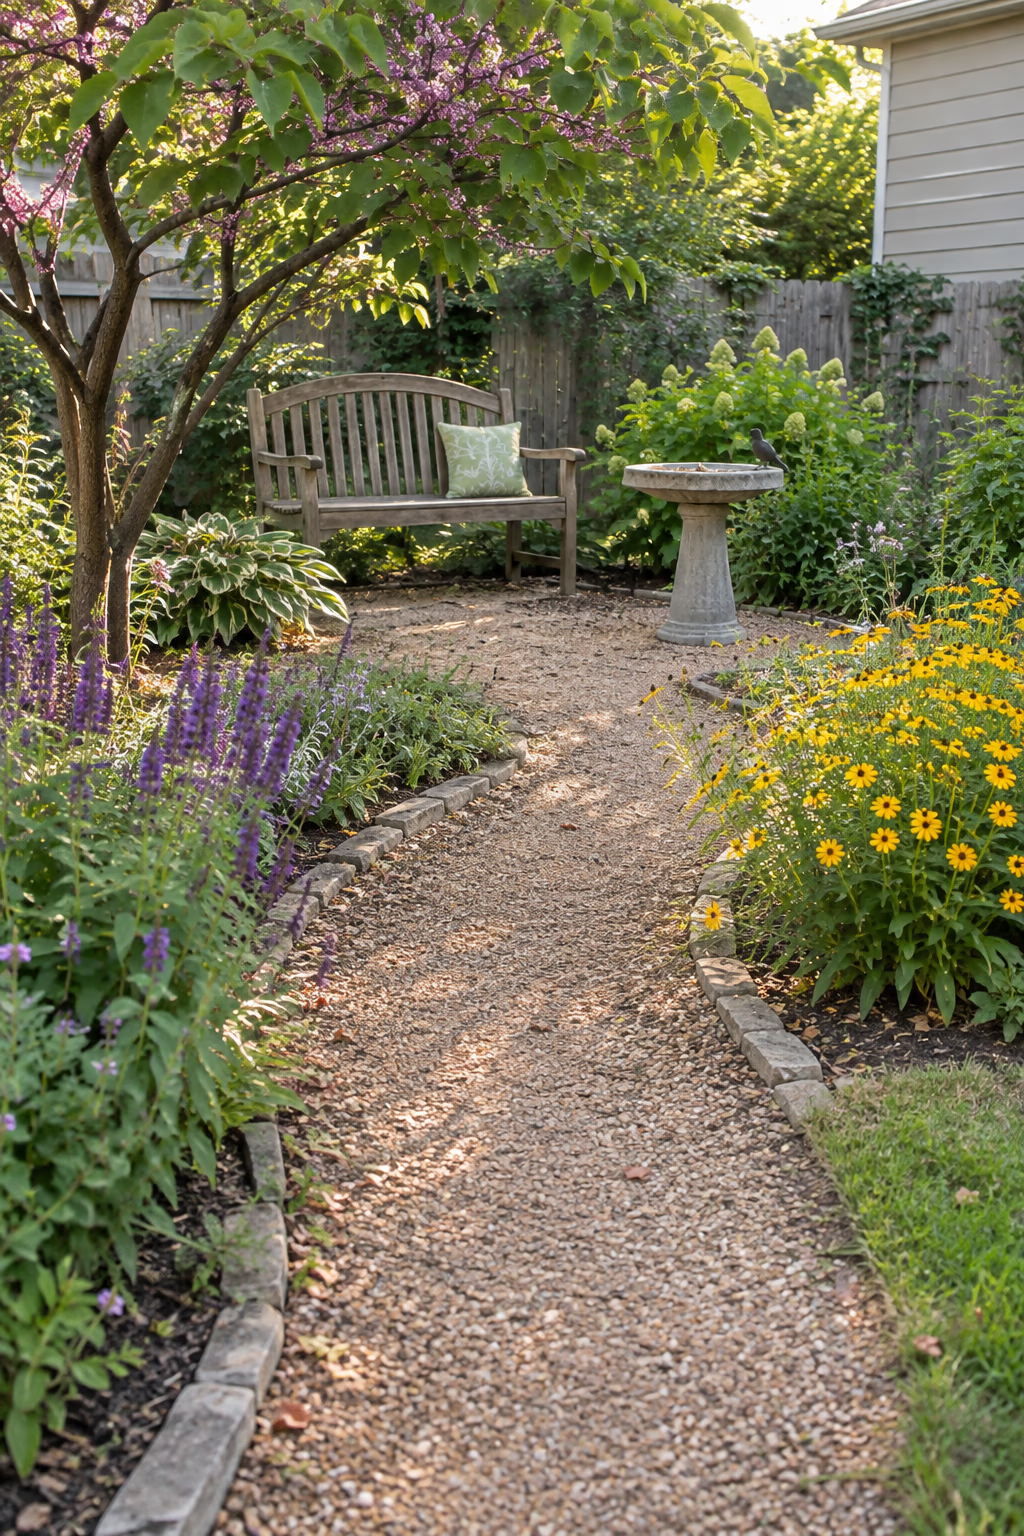
Give the walk a reason to exist
A winding path feels purposeful when it arrives somewhere. Finish it at a small gravel pad, around 4 by 6 feet, with a wooden bench, a pair of chairs, a birdbath, or a large glazed pot.
When the destination comes into view just as you round the final bend, it feels like a reward. The spot also becomes a natural place to sit with morning coffee or watch birds.
Choose the location before you lay the path. A place with afternoon shade, a pleasant view back toward the house, or a bit of privacy from neighbors will get used far more than an exposed corner.
13. Inlay a Ribbon of River Pebbles Along the Curve
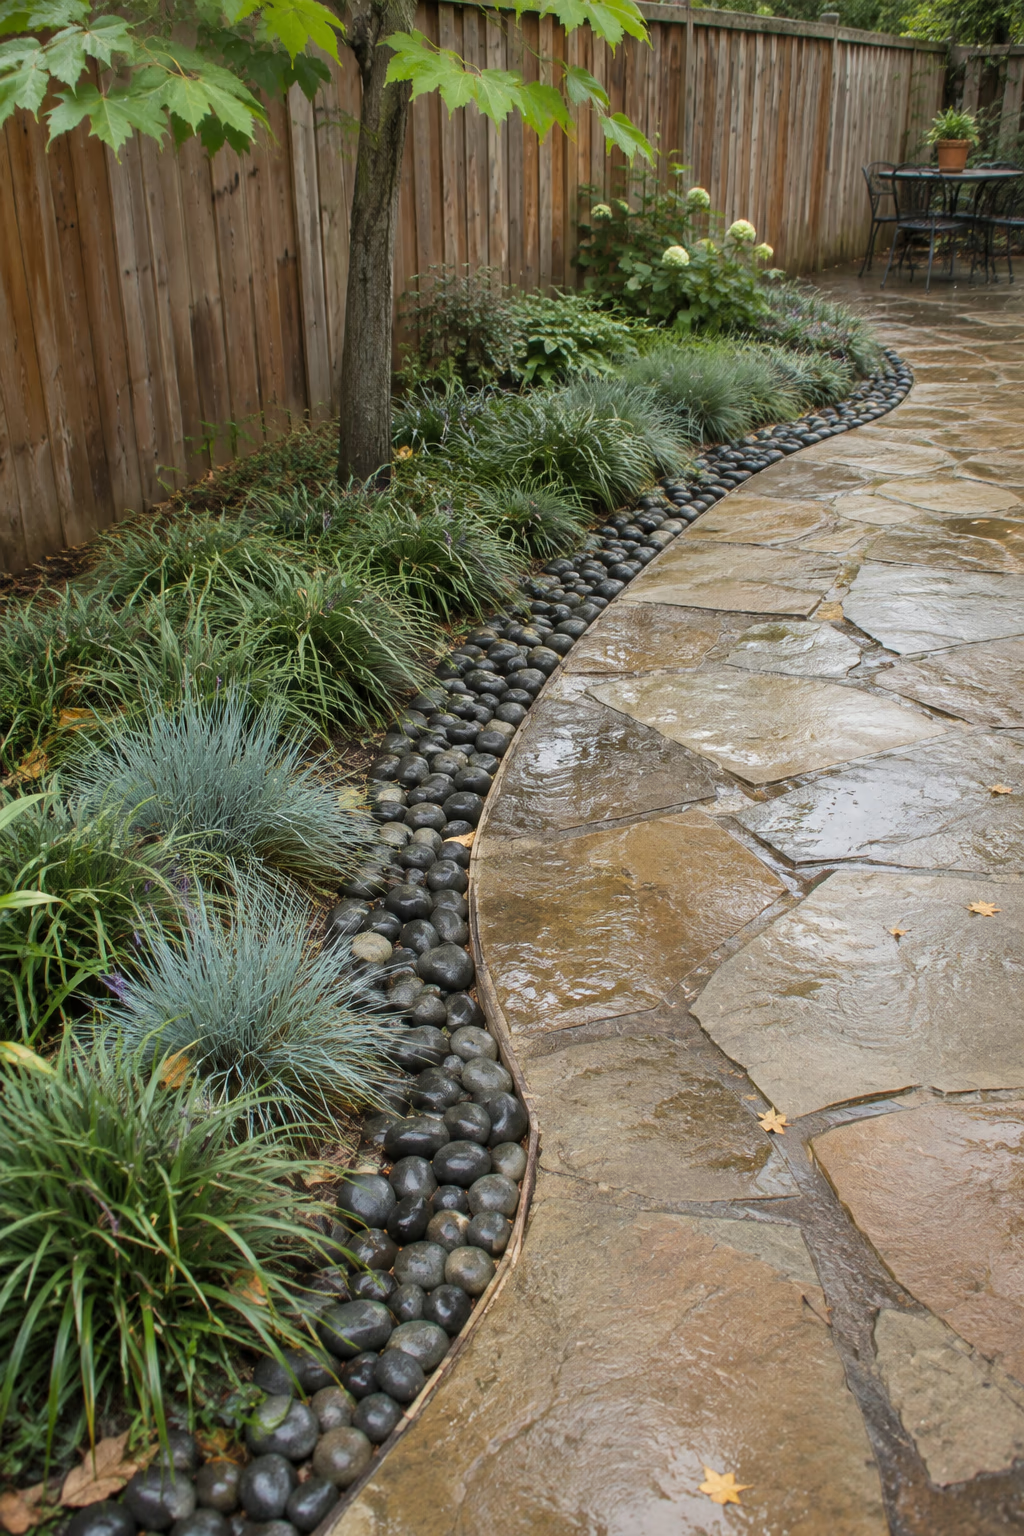
Texture and contrast that trace the line
Combine two materials to emphasize the shape of a curve. Lay a paver or flagstone path, then run a 6- to 10-inch band of smooth, dark river pebbles along the inside edge. The rounded stones highlight the arc like a pencil line.
The contrast between flat paving and lumpy pebbles adds visual interest without adding many plants to maintain. Black, gray, or mixed-color pebbles all work, depending on your paving color.
Loose round pebbles roll underfoot, so keep them outside the main walking line. For a band that people will step on, set the pebbles in mortar instead of leaving them loose.
14. Let Catmint and Hardy Geraniums Spill Over the Edges
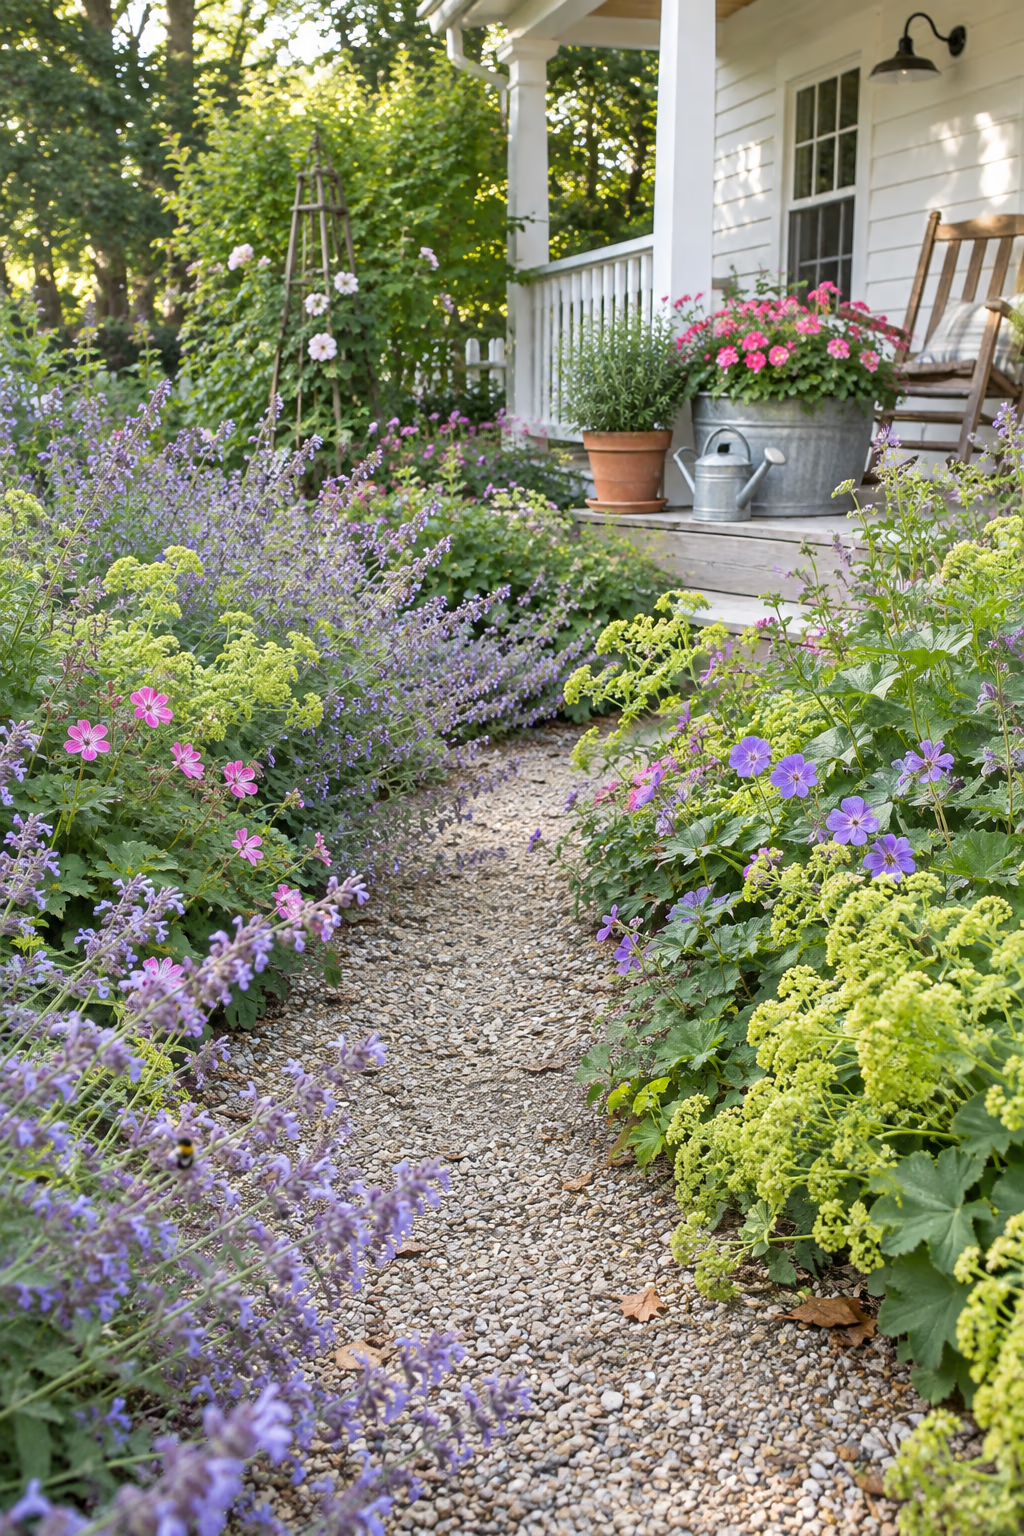
Blur the line for a relaxed, established look
Nothing softens a curved path faster than mounding perennials that flop gently over the edges. Catmint, hardy geranium, lady’s mantle, and dwarf asters form loose cushions that break up the line without blocking the path.
The overlap makes a new path look as though it has been there for years. Many of these plants also bloom for weeks and attract bees.
Start with a path that’s about 6 inches wider than you need, since the plants will claim that space. Shear catmint after its first flush of flowers to keep it tidy and encourage a second round of bloom.
15. Loop a Path All the Way Around an Island Bed
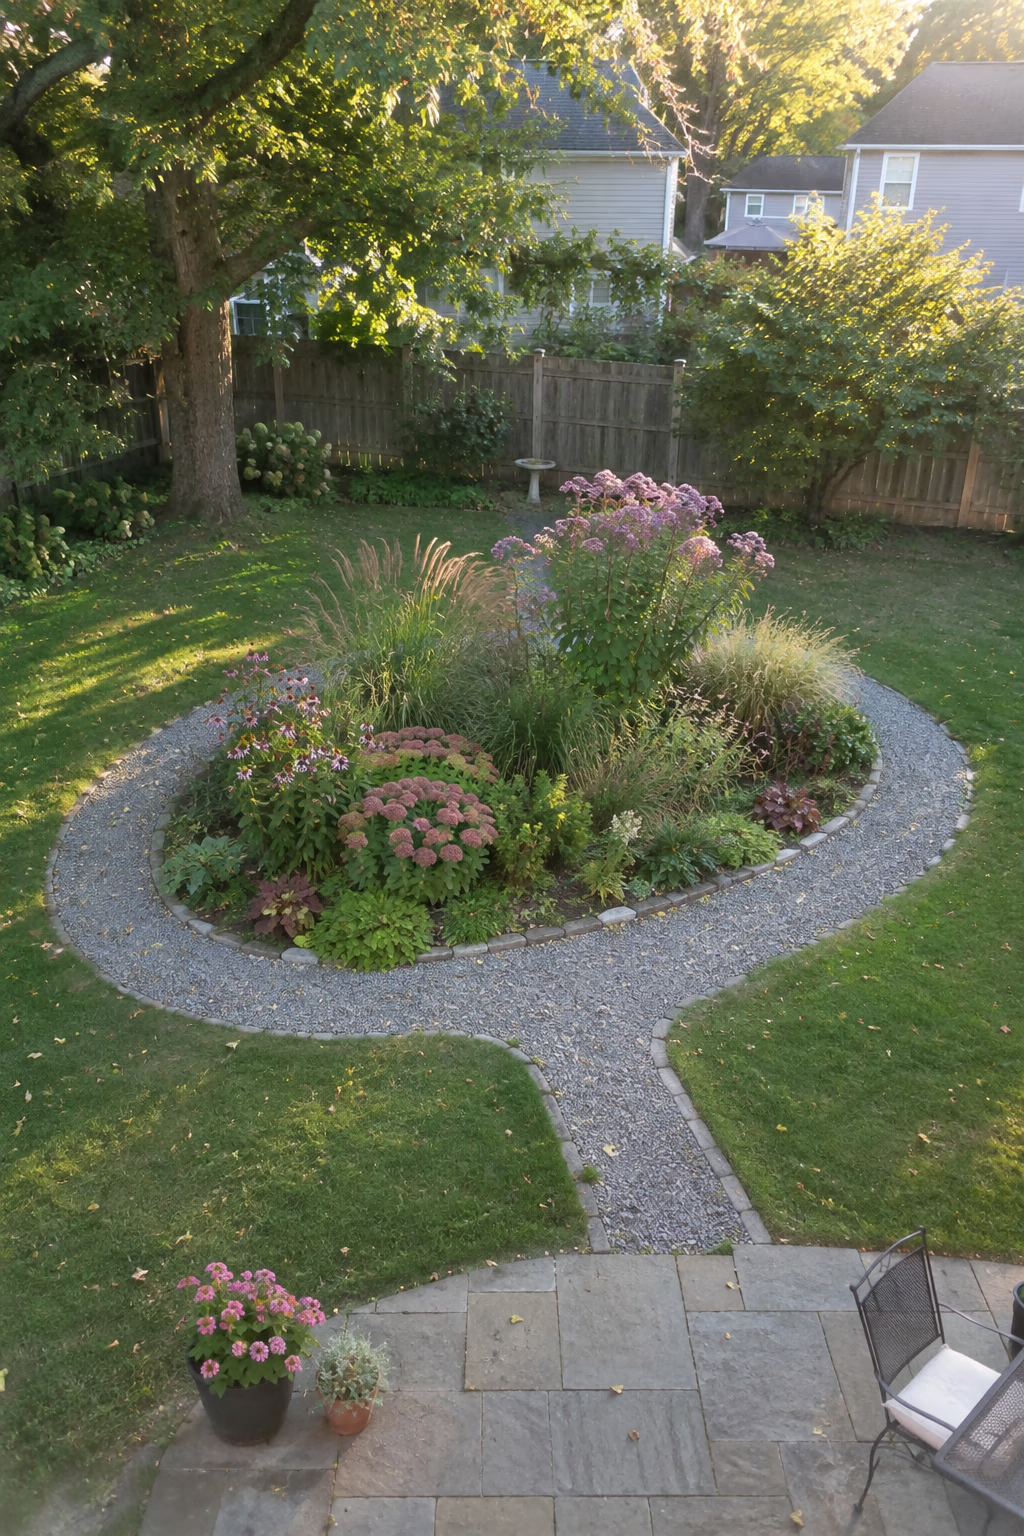
Enjoy the planting from every side
An island bed in the middle of a lawn or gravel area becomes much more useful when a narrow path circles it completely. You can stroll around it, weed from every side, and see plants from new angles.
Make the bed an oval or kidney shape and the path follows naturally. Put the tallest plants near the center and shorter ones toward the edges so nothing is hidden from the loop.
A loop path of about 30 to 36 inches is usually wide enough, since it’s mainly for strolling and maintenance. Connect it to the main path or patio with a short spur so it feels like part of the garden rather than an isolated circle.
16. Link Round Lawns With a Winding Walk
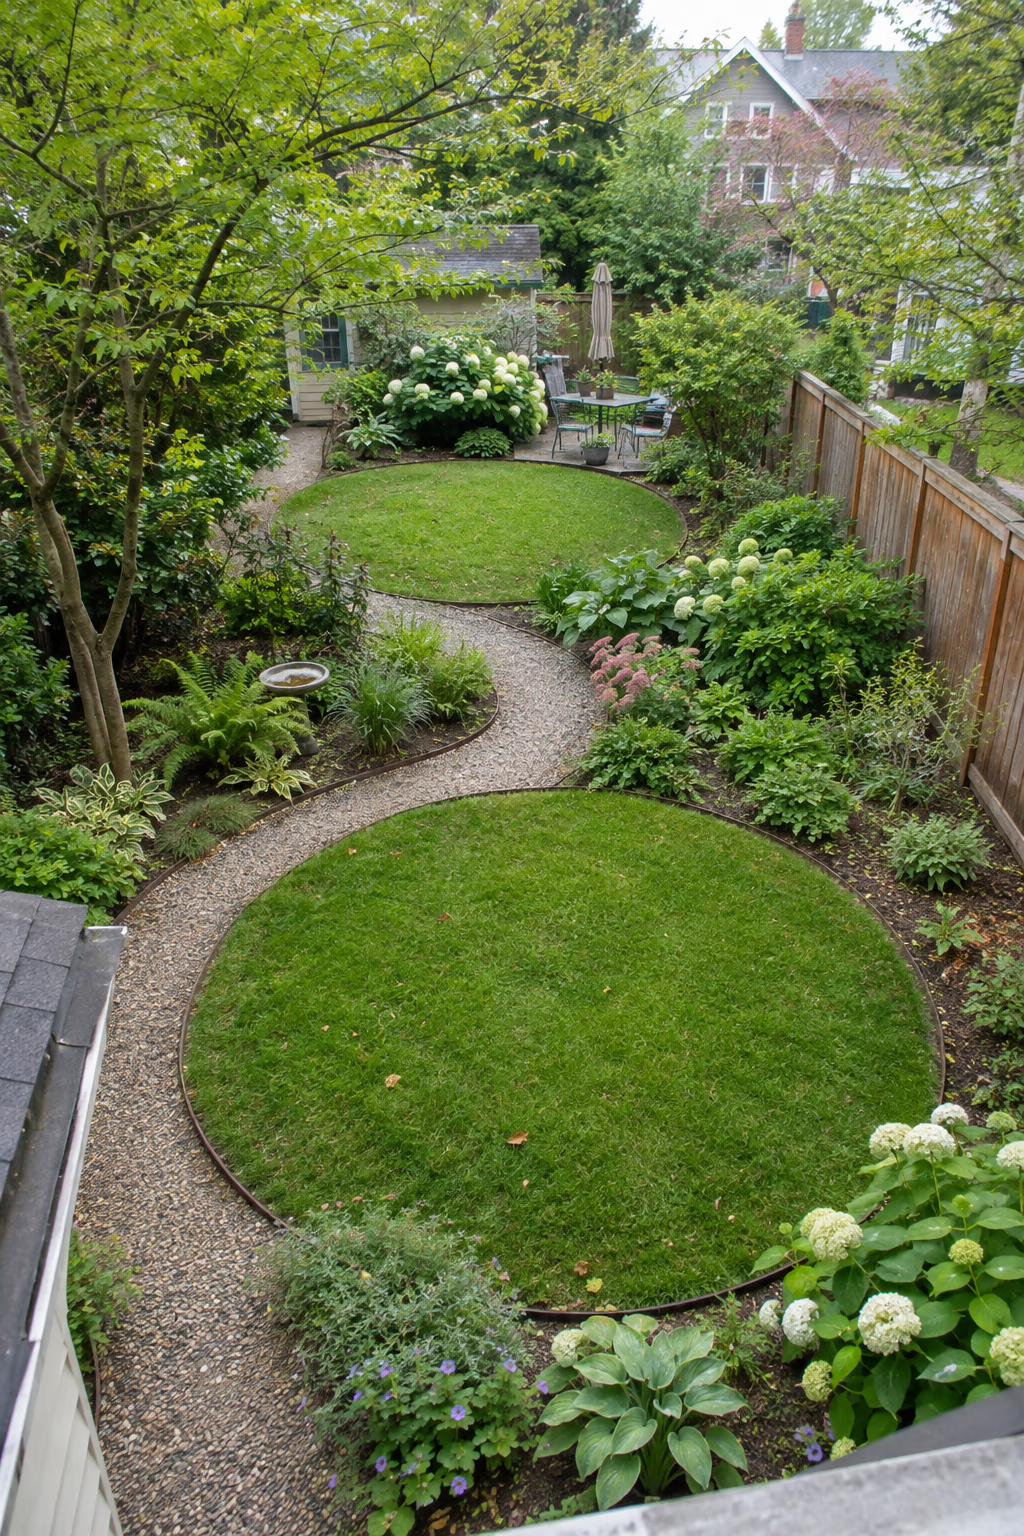
Break a long yard into a series of rooms
Instead of one big rectangle of grass, shape two or three circular lawns, each about 10 to 14 feet across, and connect them with a winding path. Plant shrubs and perennials in the leftover spaces between the circles.
Each round lawn feels like its own small room, and the curving connections make the yard feel larger and more intriguing. Circles are also surprisingly easy to mow.
Use a stake and string to mark perfect circles, and edge them with steel, brick, or a crisp spade-cut edge so they keep their shape. This idea works best in long, narrow backyards.
17. Pack Decomposed Granite Into a Smooth, Firm Curve
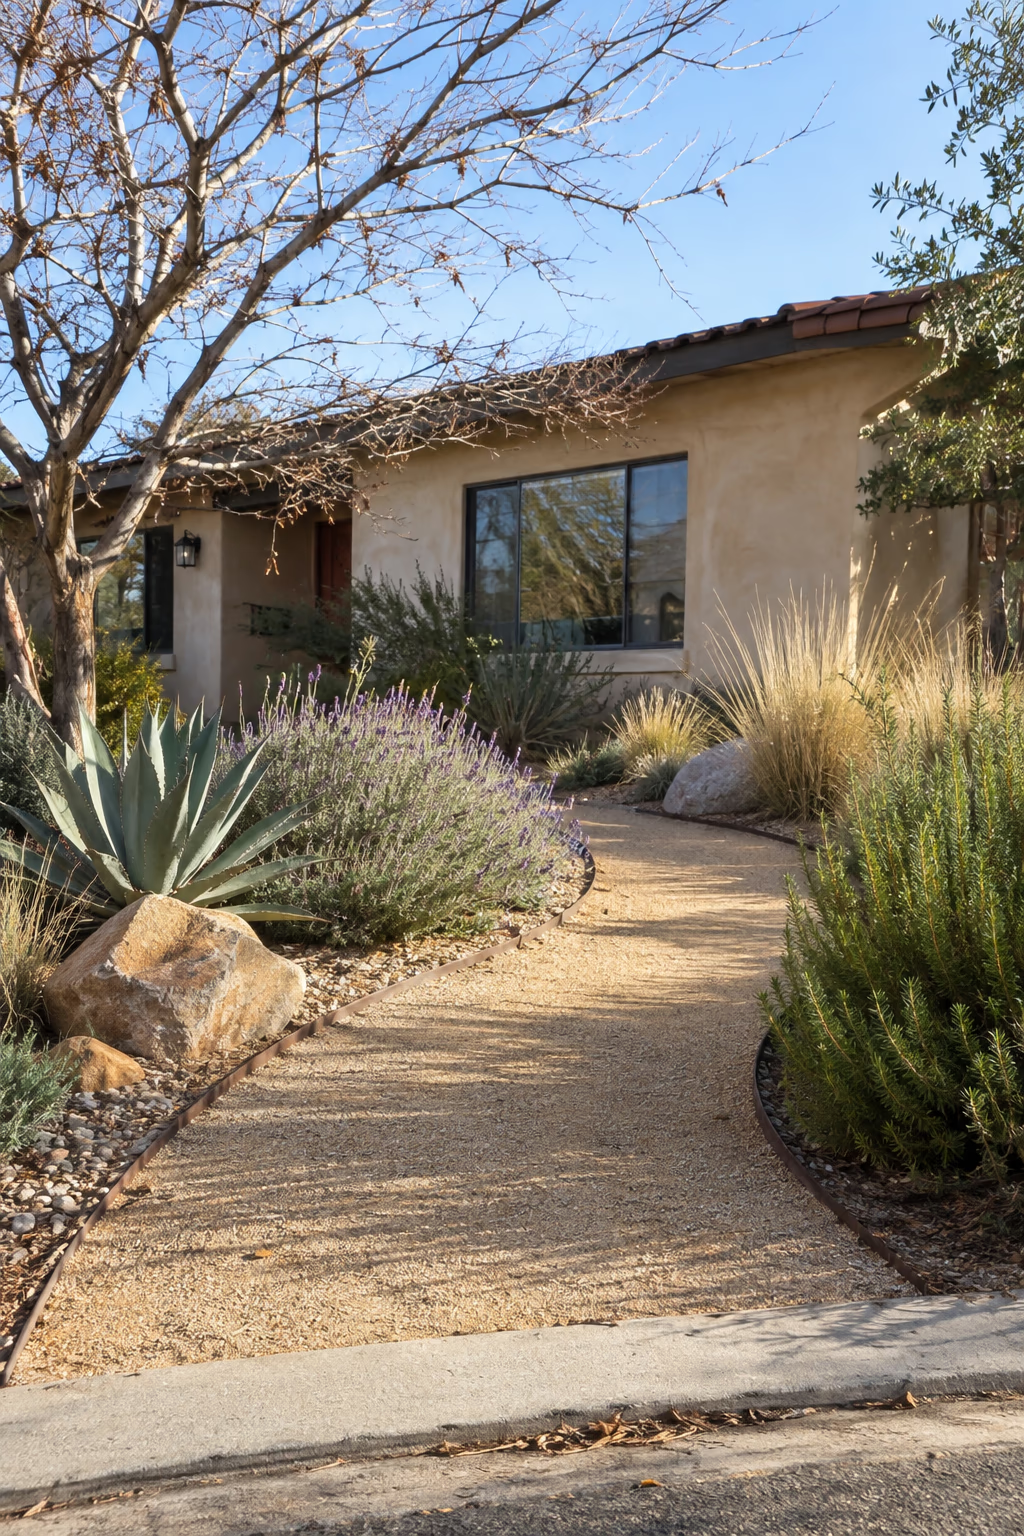
A natural surface that feels almost paved
Decomposed granite is crushed granite with fine particles that compact into a firm, sandy-looking surface. Spread 3 inches over a prepared base, wet it, and compact it in layers. It flows easily into curves of any shape.
The warm tan or gold color suits dry, Western, and Mediterranean-style yards, and it pairs well with agave, lavender, rosemary, and native grasses. It’s also easier on bare feet than sharp gravel.
Stabilized decomposed granite, which includes a binder, resists washing out and holds up better to foot traffic. Plain decomposed granite can track into the house, so put a doormat at the end of the path.
18. Narrow the Path as It Curves Away
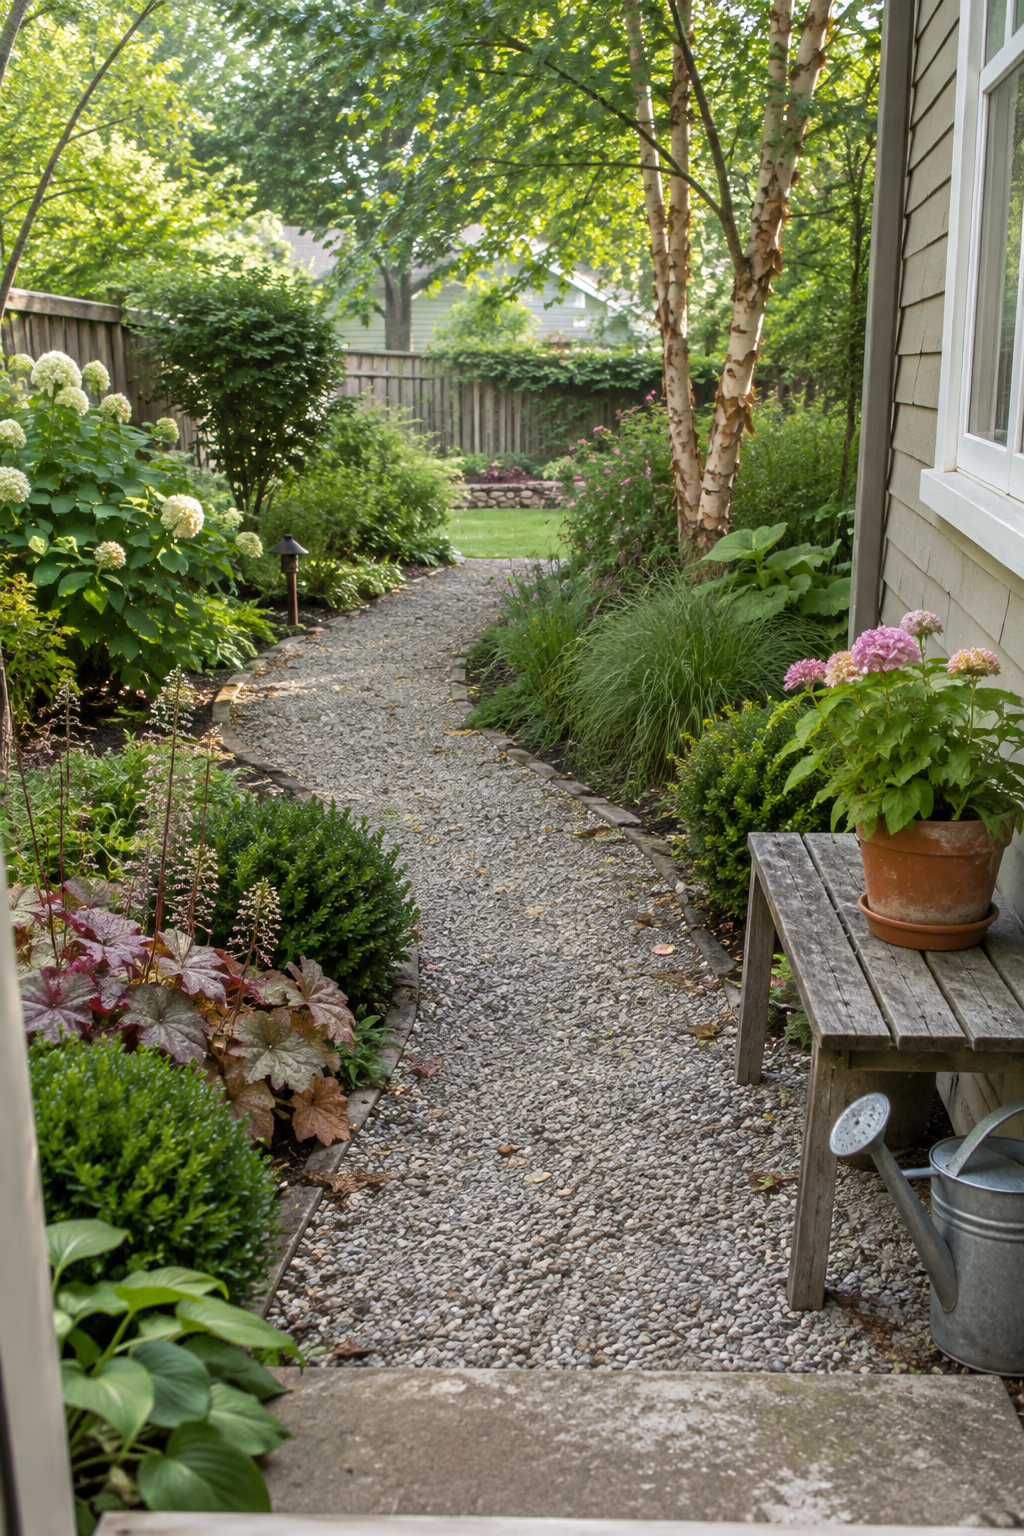
A simple trick that fakes extra depth
Forced perspective makes a short yard look longer. Start the path at about 4 feet wide near the house and taper it gradually to about 3 feet as it curves toward the back. Pair it with smaller plants in front and taller, fuller ones farther away.
Your eye reads the narrowing as distance, so the path seems to travel farther than it does. The effect is strongest when viewed from the back door or a main window.
Don’t go much narrower than about 30 inches at the far end, or the path becomes awkward for walking and for wheelbarrows. Keep the taper gradual so it looks natural rather than wedge-shaped.
19. Border a Gravel Curve With a Brick Soldier Edge
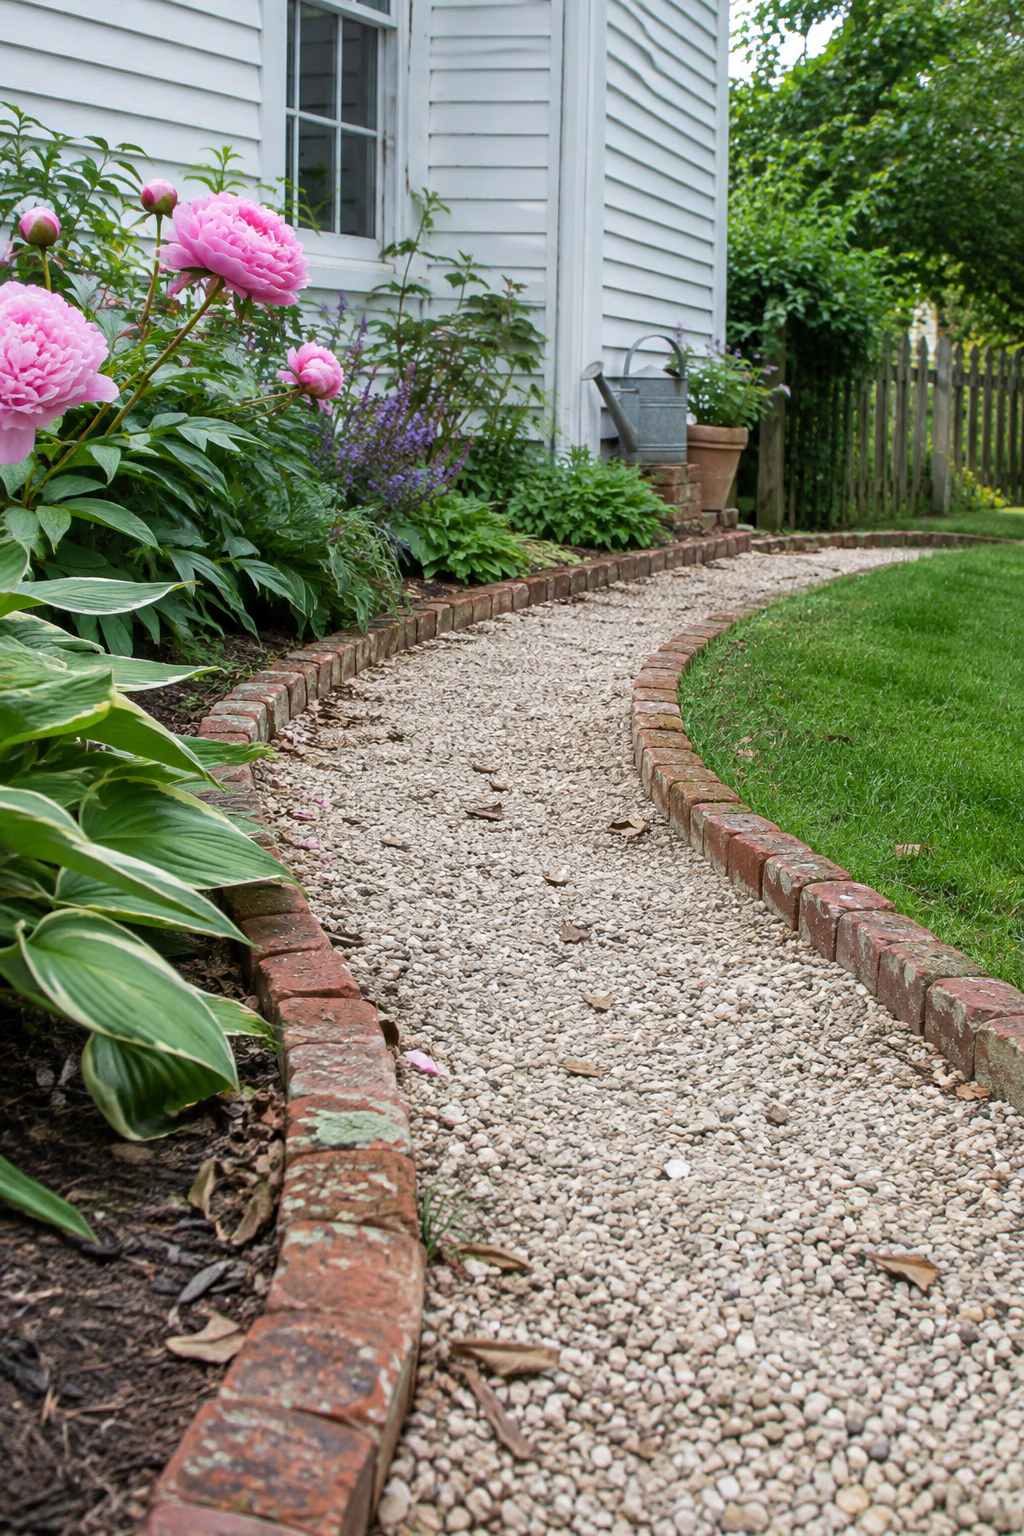
Classic edging that bends with ease
Bricks set on end, side by side, form what’s called a soldier course. Because each brick is narrow, they turn tight or gentle curves easily and keep gravel from drifting into the lawn or planting beds.
The warm red edge frames pale gravel beautifully and suits traditional, colonial, and farmhouse-style homes. It’s an especially good way to reuse salvaged bricks.
Bury each brick at least halfway and set it in a trench with compacted gravel or a bit of mortar so frost doesn’t push it out. In cold regions, choose bricks rated for severe weather.
20. Swing the Path Around a Mature Tree
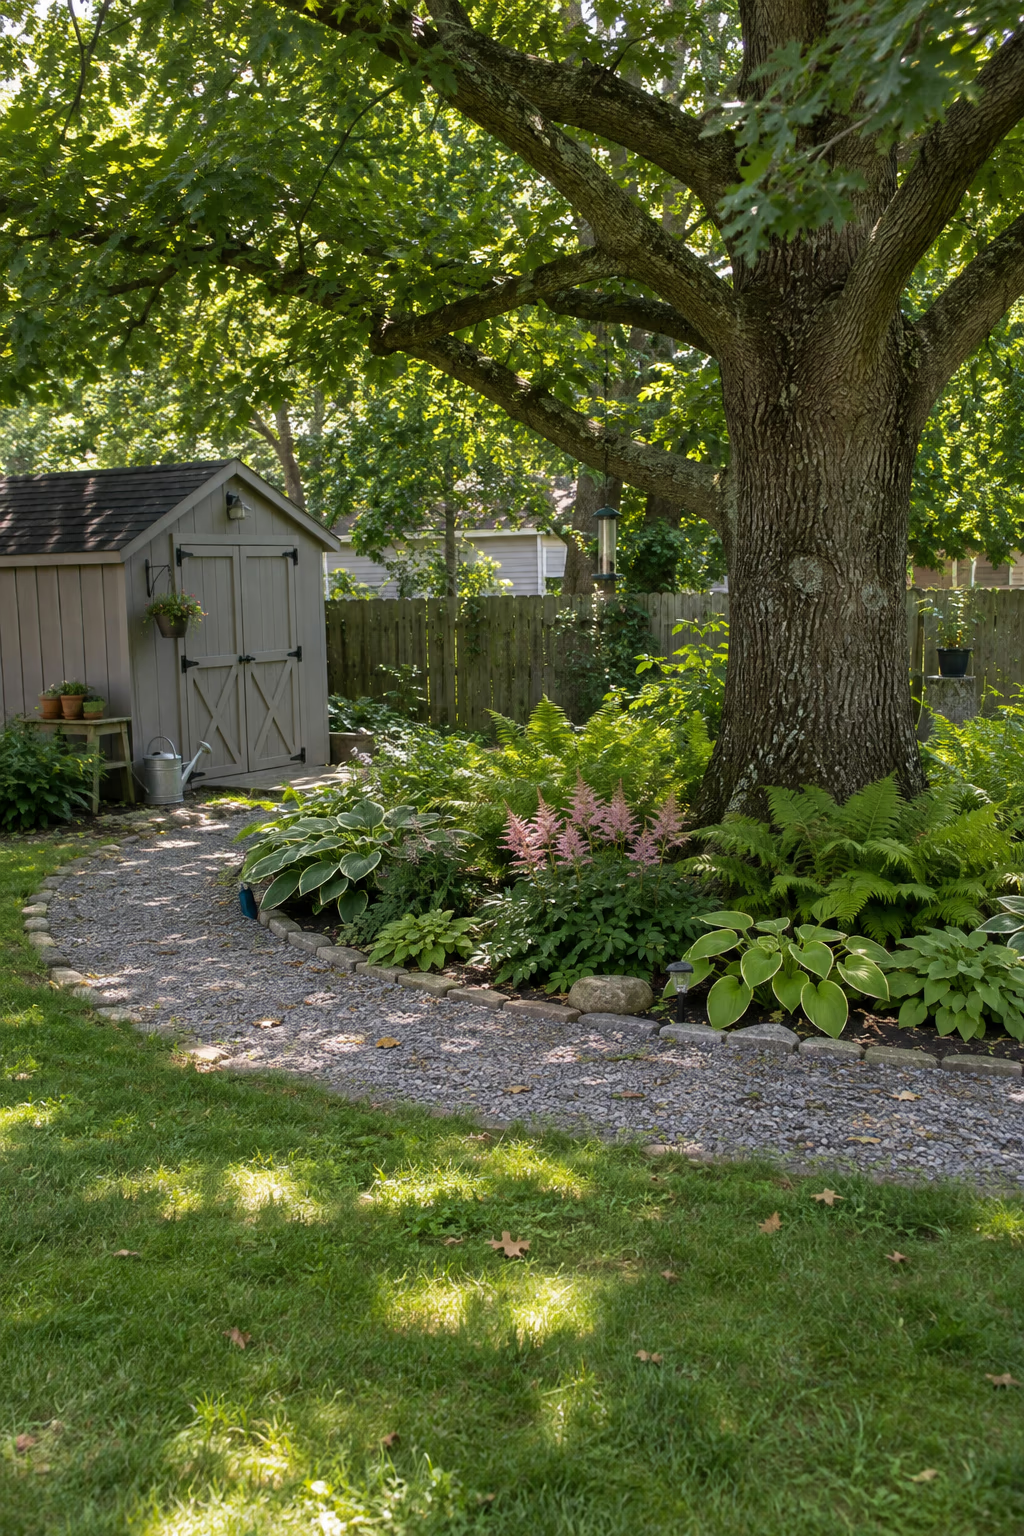
Let an existing tree shape the route
Instead of cutting a straight path past a big oak or maple, bend the path around it. The tree becomes a natural focal point, and the curve looks completely intentional.
Shade from the canopy keeps the path cooler in summer, and you can plant shade-loving hostas, ferns, and astilbe in the space between the tree and the walk.
Tree roots are shallow and easily damaged. Keep the path well outside the trunk area, avoid heavy excavation within the drip line, and use a surface like gravel or mulch that can sit on top of the soil with minimal digging.
21. Snake a Narrow Path Through a Shady Side Yard
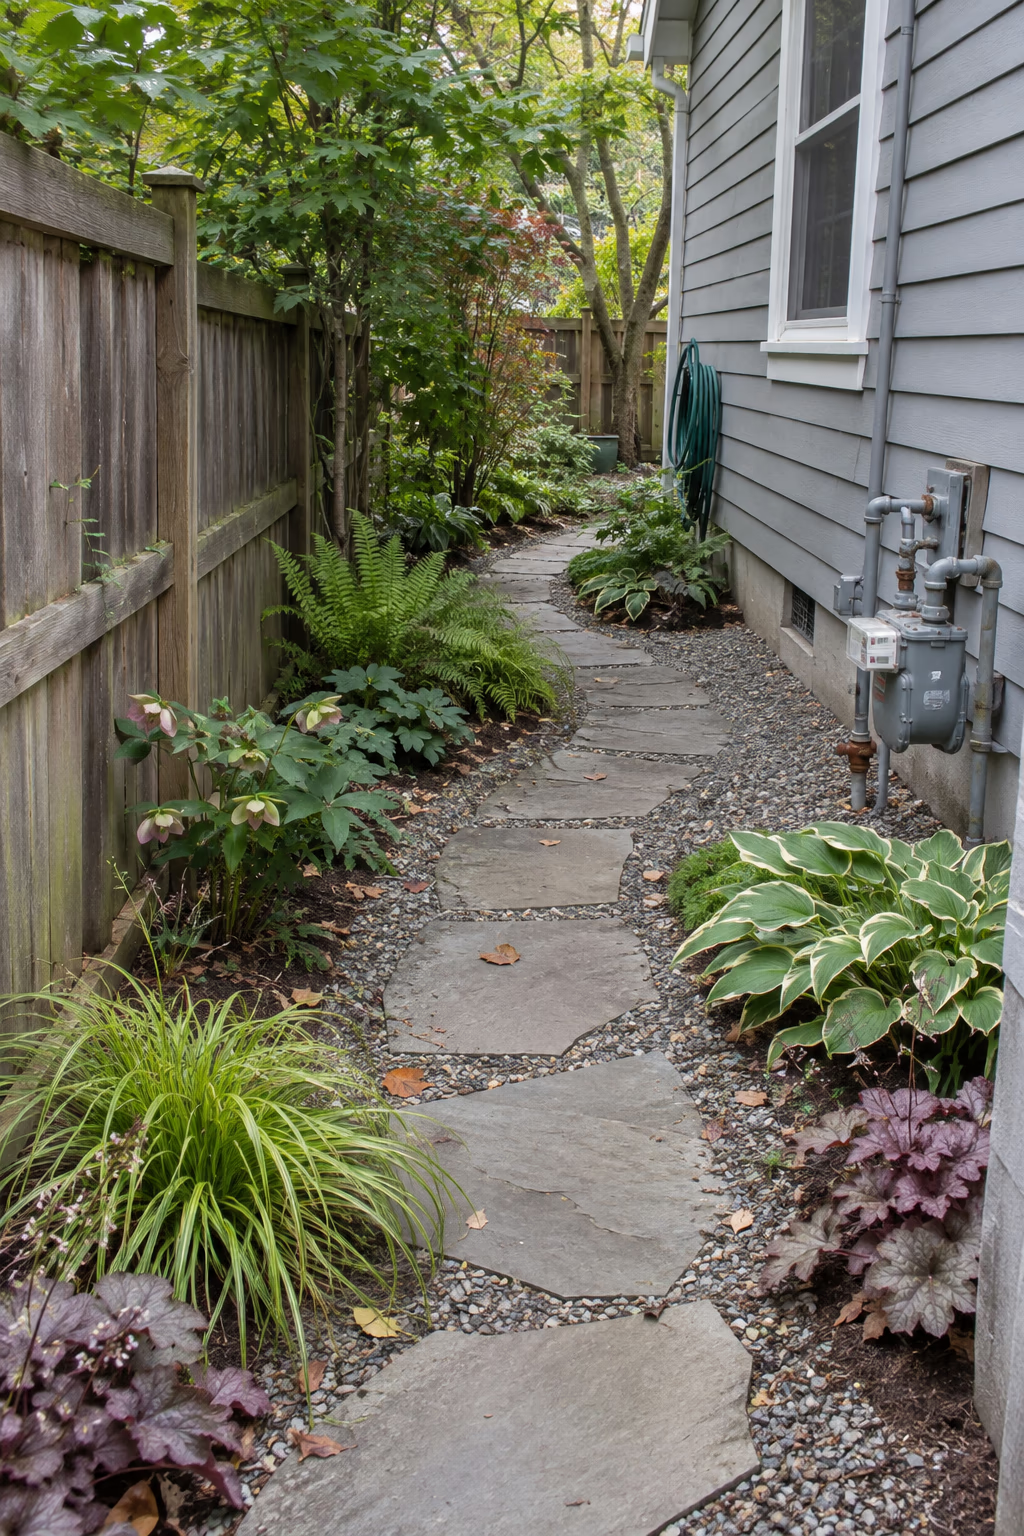
Turn a forgotten strip into a pleasant passage
Side yards are often narrow, shady, and overlooked. A gently snaking gravel or flagstone path, about 30 inches wide, with small planting pockets on alternating sides, turns that strip into a walk you’ll actually enjoy.
Japanese forest grass, hellebores, ferns, coral bells, and hostas thrive in shade and create a lush feel even in a tight space. Alternating the plantings creates the curve without wasting width.
Keep the soil and path sloped so water drains away from the house foundation. Leave clear access to utility meters, hose bibs, and gates, and avoid planting anything large against siding or under eaves.
22. Echo the Path’s Curve in Matching Bed Edges
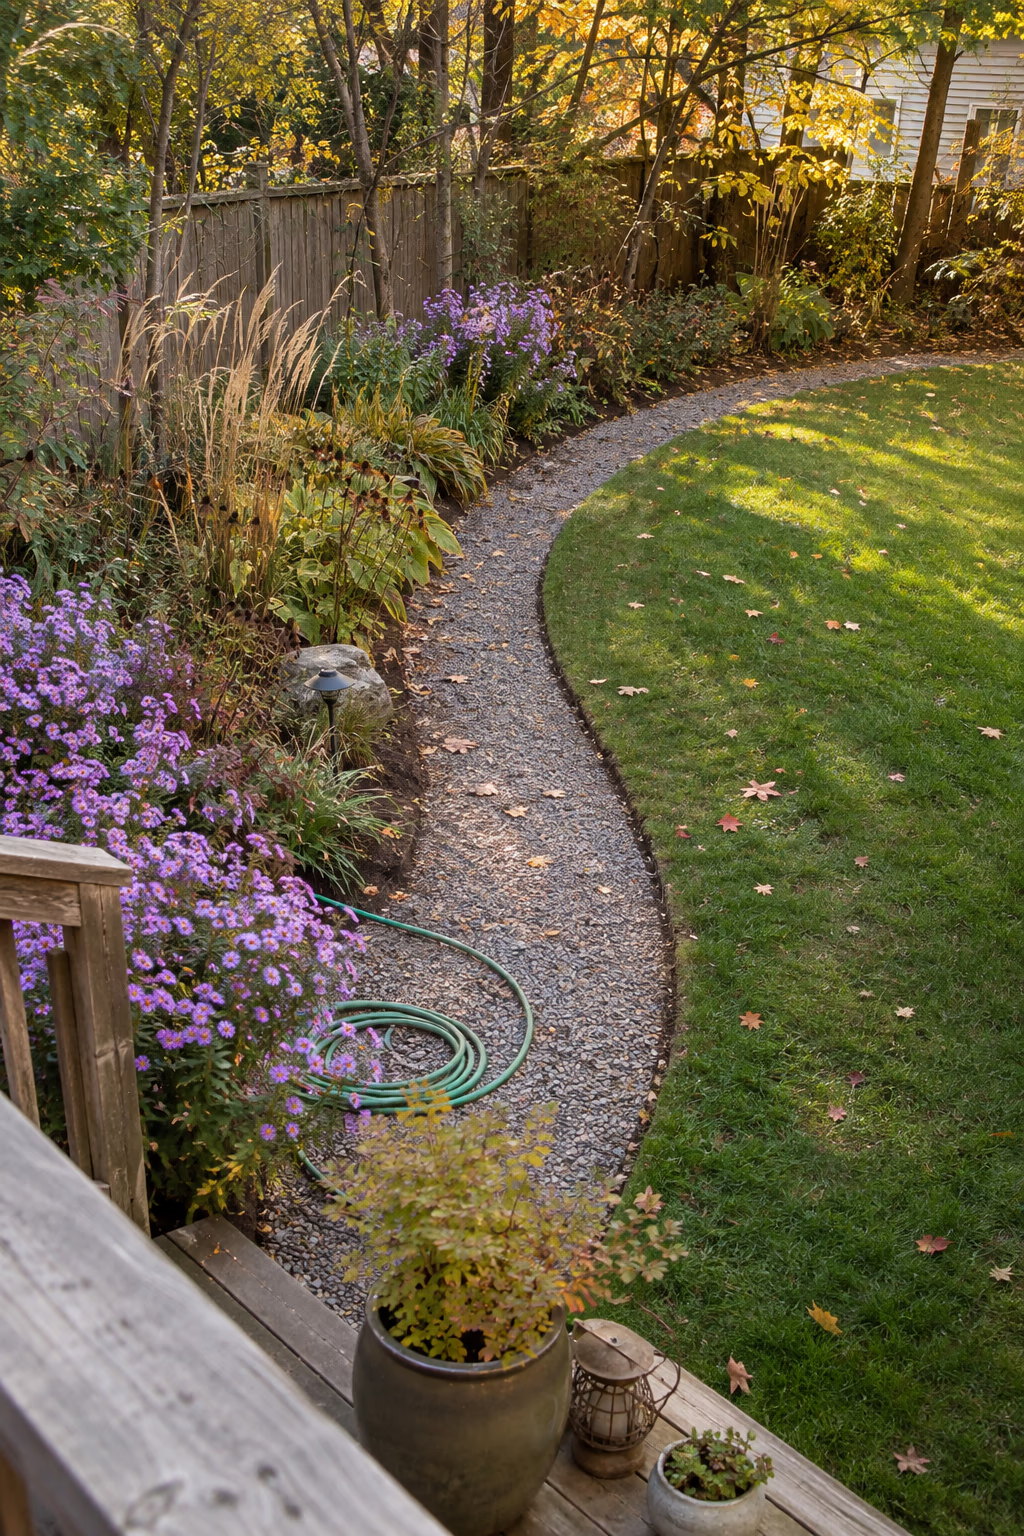
Make the whole yard feel connected
A curved path looks most intentional when the beds and lawn edges around it follow the same rhythm. Repeat the same sweeping radius in the edge of a nearby border, a patio, or the lawn line.
Repeated curves create flow and harmony, so the path looks designed rather than randomly placed. It also makes mowing easier because the edges are smooth and continuous.
Lay a garden hose along the path, then use it as a guide to mark the parallel bed edge with marking paint. Step back and look from the house and from a second-floor window before digging.
23. Stabilize a Gravel Curve With Permeable Grid Pavers
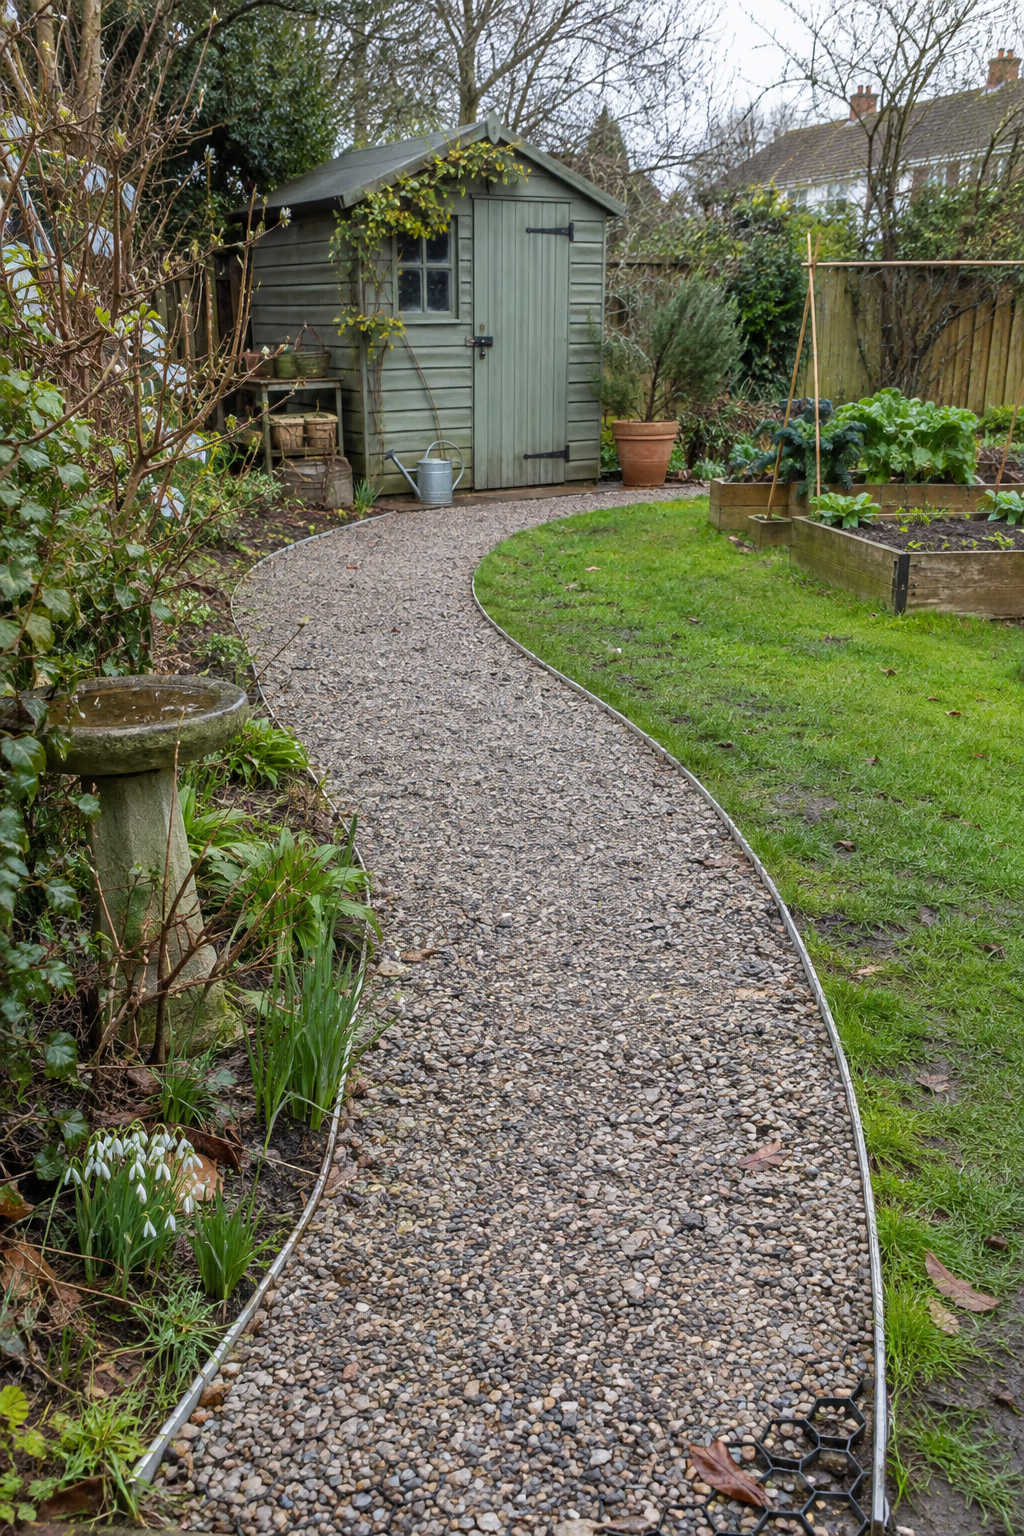
Gravel looks with a firmer walking surface
Loose gravel can shift under wheelbarrows, bikes, and strollers. Plastic honeycomb grid panels, filled with gravel, lock the stones in place while still letting rain soak through. The panels are flexible enough to follow a curve when cut and fitted.
The finished path looks just like ordinary gravel but feels much firmer, with fewer ruts and less scattering into the lawn. It’s a good choice for a curved route to a shed or garden gate that gets heavy use.
Lay the grids over a compacted gravel base and fill them just slightly above the rim so the plastic stays hidden. Pair them with solid edging so the panels don’t creep sideways over time.
How to Plan Your Curved Garden Path
A good curved path looks effortless, but it takes a bit of planning to get the shape, width, and materials right. Keep these tips in mind before you dig.
- Lay out the curve with a hose. Arrange a garden hose or rope on the ground, walk the route, and view it from the house before marking it with paint.
- Keep the bends gentle. Wide, sweeping curves feel natural and comfortable, while tight zigzags tempt people to cut across beds and lawn.
- Size the path for its use. About 3 feet works for strolling, 4 feet for two people side by side, and around 30 inches is the practical minimum for a side yard.
- Prepare a solid base. Most paths need several inches of compacted crushed gravel under the surface material to stay level and drain well.
- Add firm edging. Steel, stone, or brick edging keeps gravel in place and holds the curve’s shape over time.
- Check rules and utilities. Call 811 before digging, and check HOA guidelines or local permits for front walks, lighting, and retaining walls.
Frequently Asked Questions
What is the best material for a curved garden path?
Gravel, decomposed granite, and wood mulch are the easiest because they flow into any shape without cutting. Stepping stones and small pavers also work well. Large rectangular slabs are harder because they need lots of cutting to follow a curve.
How wide should a curved path be?
Plan on 3 to 4 feet for most garden paths and at least 4 feet for a main front walk. Narrow side yard or maintenance paths can be about 30 inches. Add a few extra inches if plants will spill over the edges.
Why do curved paths make a yard look bigger?
When the end of a path is hidden around a bend, your mind assumes the yard continues beyond what you can see. Curves also lengthen the walking route and reveal plants gradually, which makes the space feel larger.
How do I keep gravel from spreading off a curved path?
Install firm edging such as steel, brick, or stone, use angular crushed gravel instead of round pea gravel, and keep the layer about 2 inches deep. Grid pavers can also lock gravel in place on busy routes.
Is a curved path more expensive than a straight one?
With loose materials like gravel or mulch, the cost is about the same. With concrete, pavers, or cut stone, curves usually cost more because they require more labor, cutting, and flexible forms.
Final Thoughts
The best curved garden path ideas use gentle bends, good edging, and the right plants to invite people to wander and explore. Whether you choose a gravel path through grasses, a stepping stone curve across the lawn, or a winding woodland trail, a curve can make your yard feel larger and more relaxing.
Start by laying out the shape with a hose, choose materials that suit your style and budget, and let the planting fill in over time. Before long, your path will be the favorite route through the garden.