Walk down an old brick path on a damp spring morning and you notice the warm red tones first, then the moss tucked into the joints and the slight dip each brick has taken from years of footsteps. Few garden surfaces feel as settled and welcoming.
Brick is a path material that fits almost any American home, from a 1920s bungalow to a new suburban build. It comes in a manageable size, you can lay it in dozens of patterns, it sits well beside both flowers and vegetables, and it looks better as it ages. With a good base, many brick paths outlast the people who lay them.
These 21 brick garden path ideas cover classic patterns like basketweave and herringbone, brick-and-gravel combinations, reclaimed brick, modern charcoal looks, budget projects, and practical details such as steps, edging, lighting, and drainage. Use one as your blueprint or mix a few into a path that suits your yard.
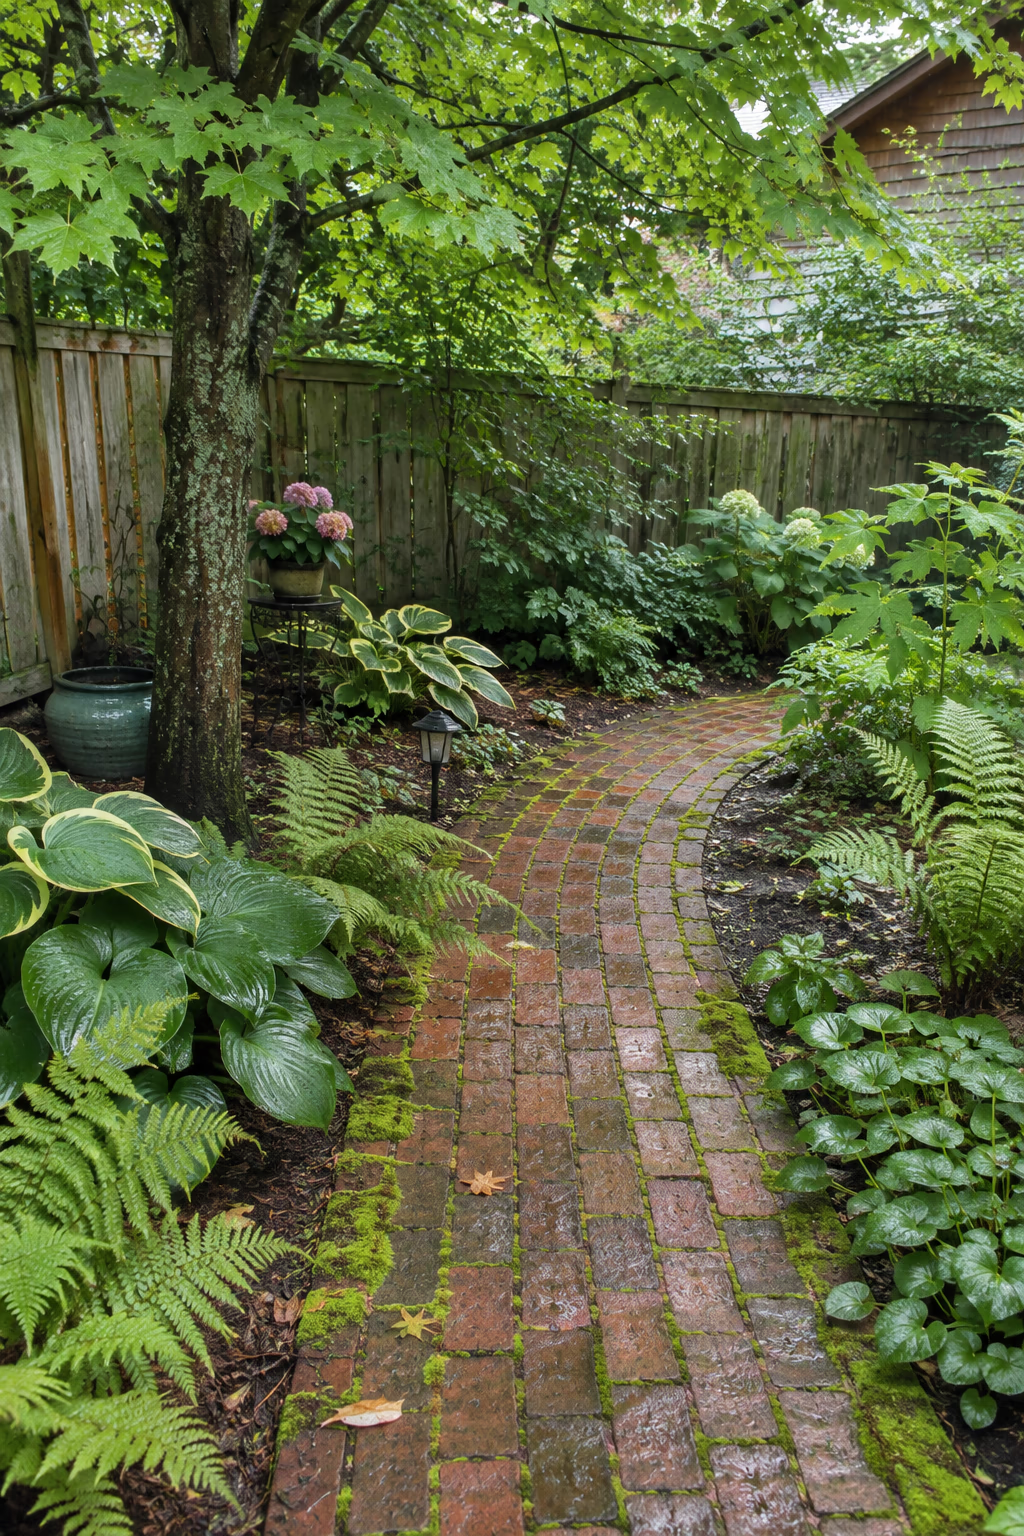
1. Let Moss Soften an Aged Red Brick Path
The timeless, lived-in look everyone wants
A path of worn red brick with green moss creeping along the joints looks as though it has been there for a century. To get the look, lay salvaged or tumbled clay pavers in a simple running bond on a compacted gravel base, then fill the joints with plain sand rather than polymeric sand, which hardens and discourages moss.
Moss settles in on its own where the path gets shade, stays damp, and sees light foot traffic. North-facing paths, spots under trees, and walks along a fence are ideal. You can speed things along by pressing small pieces of moss from elsewhere in your yard into the joints and keeping them moist for a few weeks.
Mossy brick can be slick in wet weather, so this look suits a stroll-through garden path better than the main route to your door. Skip pressure washing, which strips moss and erodes the brick surface.
2. Lay a Checkerboard of Brick and Pea Gravel
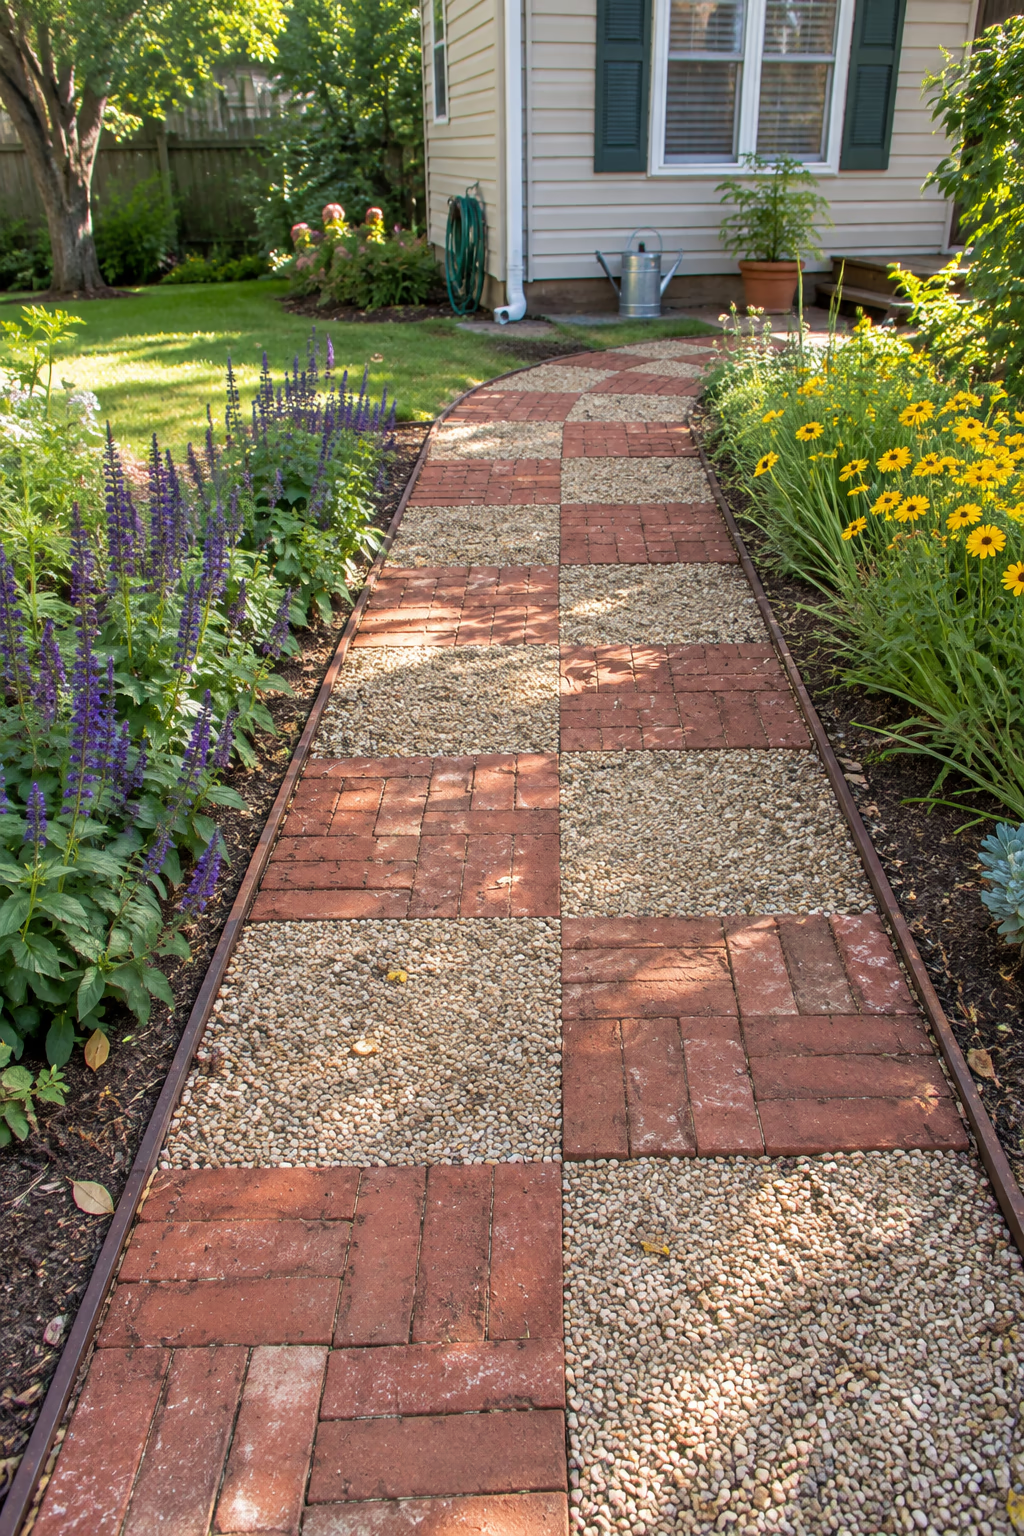
Bold pattern, good drainage, and lower cost
Alternate squares of brick with squares of pea gravel to create a playful grid. A common approach is to lay each brick square from four or six pavers in a basketweave block, roughly 16 inches across, and fill the alternating squares with 3/8-inch pea gravel over landscape fabric.
The pattern uses about half as many bricks as a solid path, so it saves money, and the gravel squares let rain soak in instead of running off. The contrast of crisp red blocks and soft tan or gray stone reads clearly from a distance, which makes it a great choice for a path you see from the kitchen window.
Use steel or brick edging along both sides to keep gravel from drifting into beds. Gravel can scatter onto the brick squares, so a quick sweep every week or two keeps the grid looking sharp.
3. Welcome Guests With a Basketweave Brick Front Walk
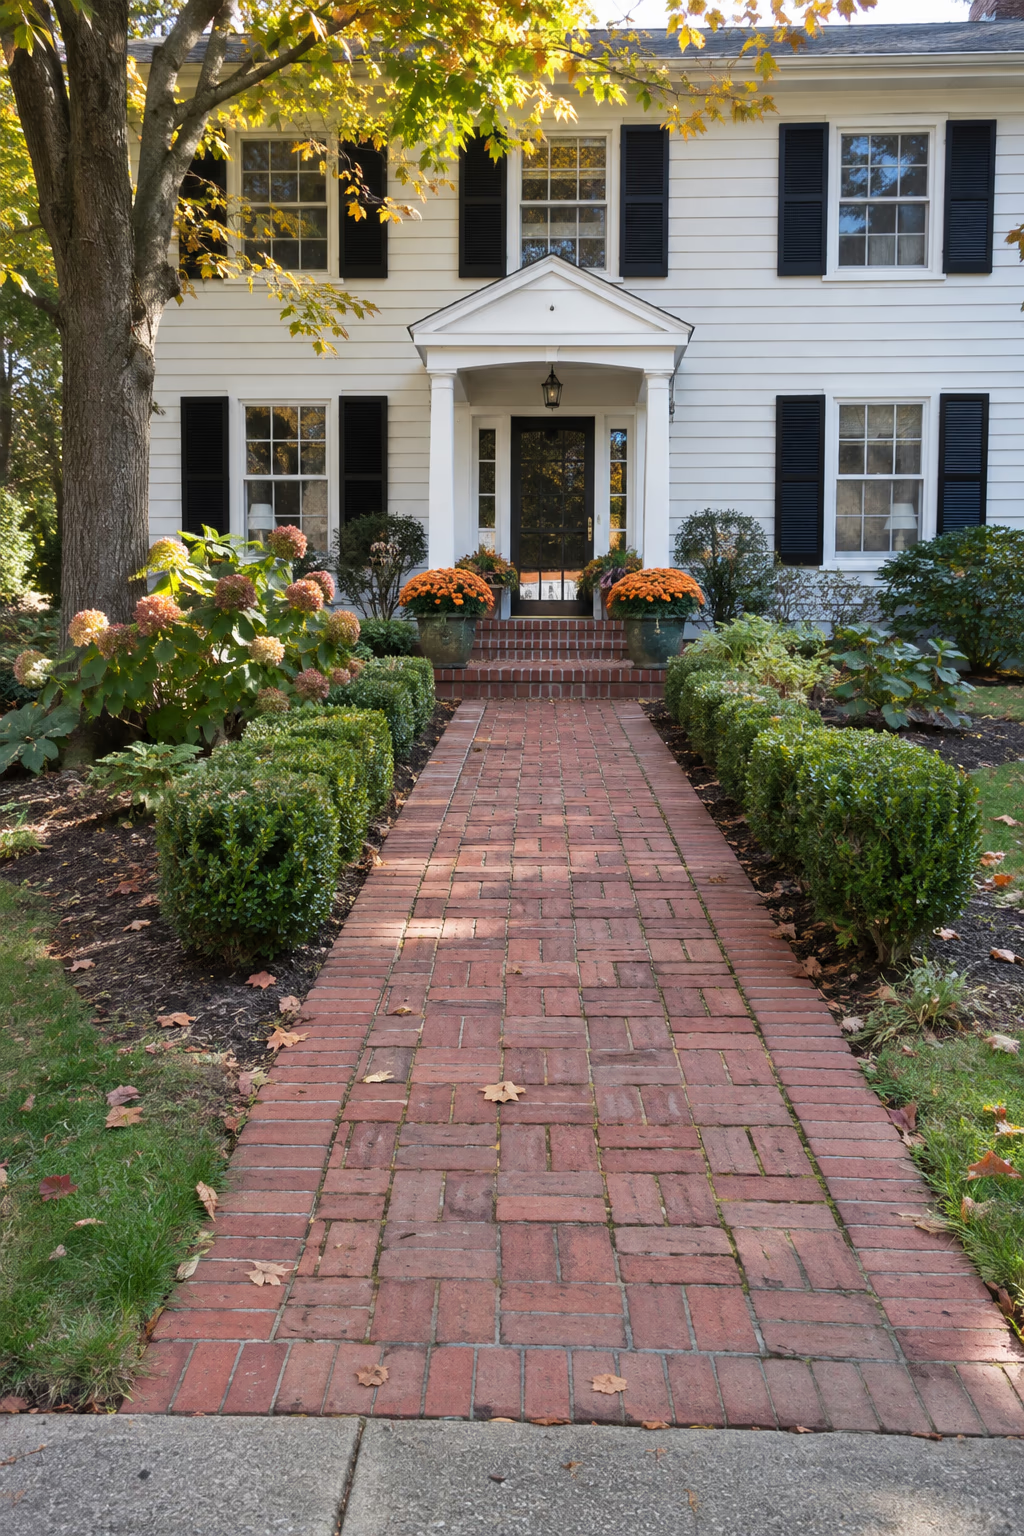
Classic curb appeal from the sidewalk to the door
Basketweave sets pairs of bricks side by side, alternating horizontal and vertical, so the walk looks woven. It is one of the easiest decorative patterns for a first-time installer because there are few cuts except at the edges.
A front walk should be at least 4 feet wide so two people can walk side by side, and 5 feet feels generous for a larger home. Choose true paving bricks that measure exactly 4 by 8 inches; basketweave only lines up when each brick is precisely half as wide as it is long.
Because the front walk takes daily traffic, invest in a 4- to 6-inch compacted gravel base and a solid edge restraint. Check whether your city or HOA has rules about the walk where it meets the public sidewalk.
4. Frame a Herringbone Path With a Soldier-Course Border
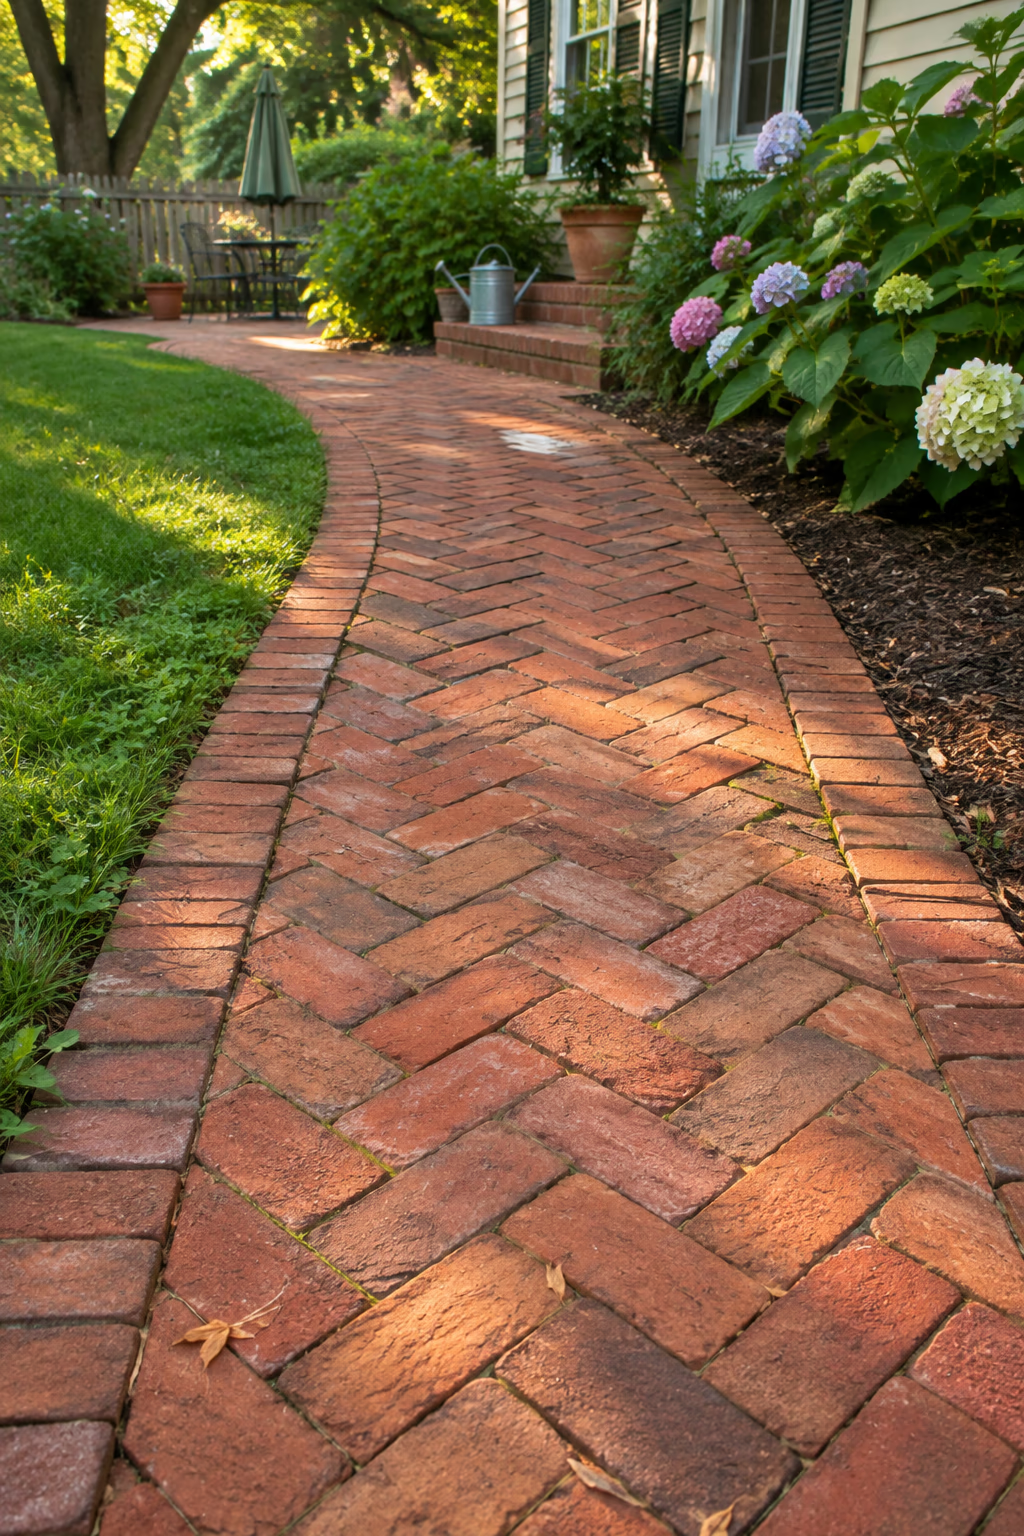
Strong zigzag pattern with a tailored edge
Herringbone sets bricks in an interlocking zigzag, usually at 45 or 90 degrees to the path. Along each side, a soldier course of bricks standing upright on end, or laid lengthwise across the edge, creates a crisp frame that hides the cut pieces of the pattern.
Herringbone is the strongest pattern for brick paving because the interlocking bricks resist shifting under foot and wheel traffic. The border gives the path a finished look and helps hold the field in place.
A 45-degree herringbone needs many angled cuts along the edges, so rent a wet saw with a masonry blade and plan on extra bricks for waste. A 90-degree layout requires fewer cuts and is easier for a weekend project.
5. Mix Reclaimed Bricks in Every Shade of Red and Brown
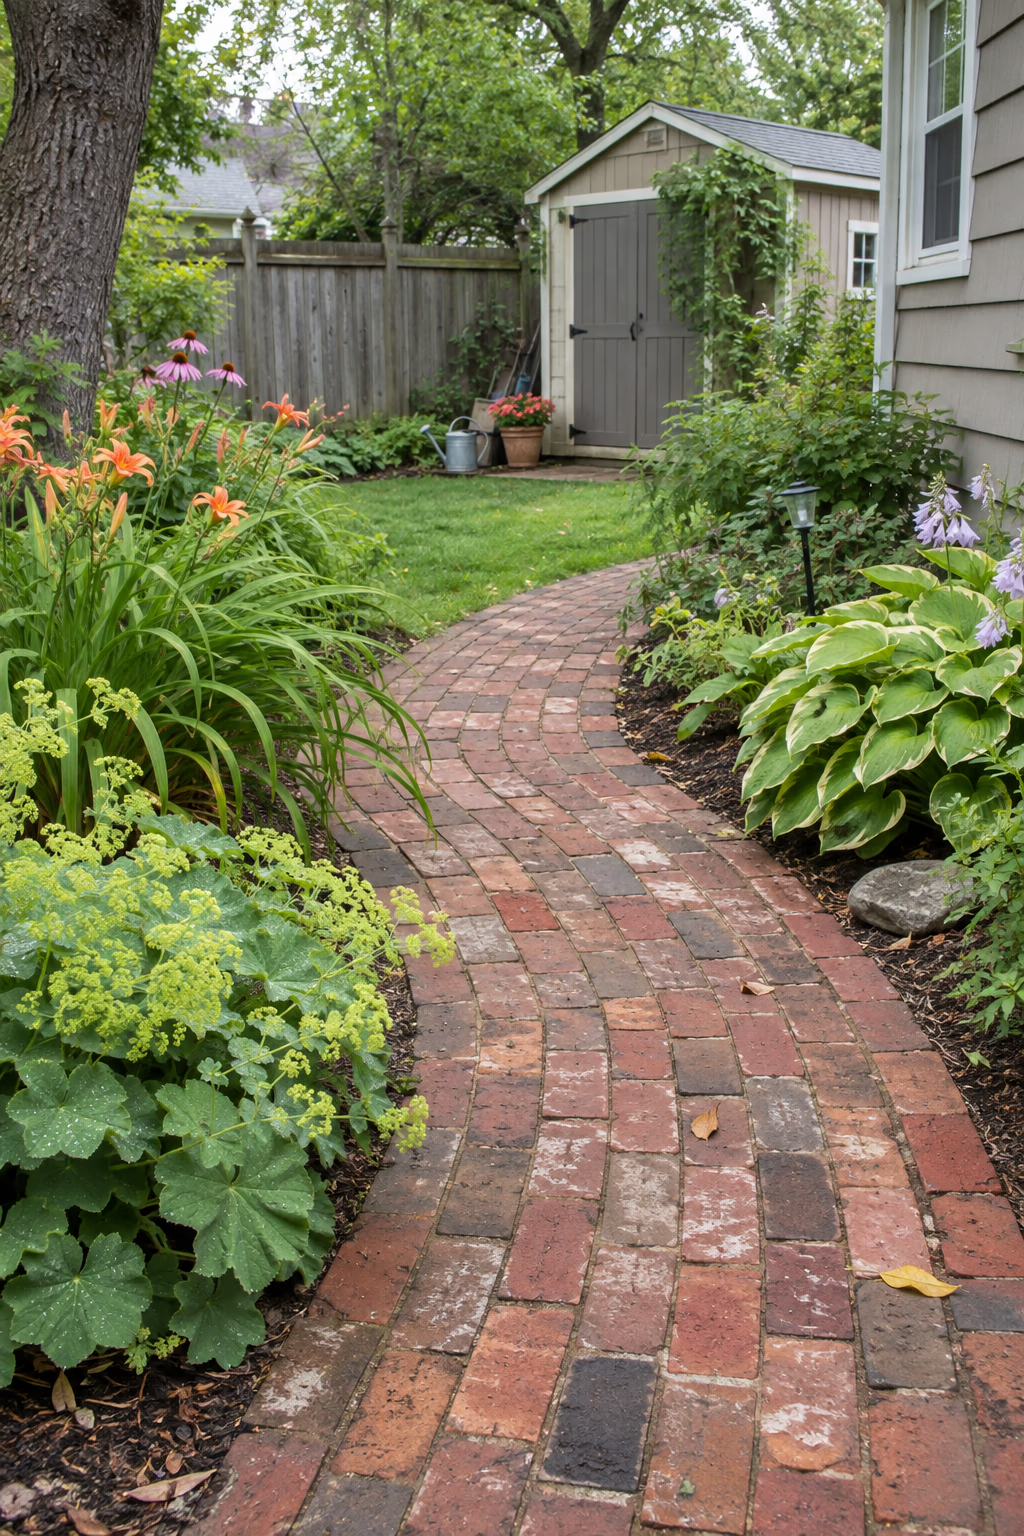
Character and budget savings in one
Salvaged brick from old chimneys, walls, and demolished buildings comes in a mix of brick reds, rust, chocolate brown, salmon, and even a few charred or glazed ends. Laying them together gives a path a warm, collected-over-time feel that new bricks can’t match.
Look for reclaimed brick through local classifieds, salvage yards, and renovation projects in your neighborhood. Shuffle the bricks from several pallets as you lay them so no single color clumps in one spot.
Not all old brick is suited to paving. Soft, underfired common bricks can crack and flake in freeze-thaw climates. In cold regions, test a few by soaking and freezing them over winter, or reserve the softest ones for edging and use harder bricks underfoot. Scrape off old mortar before laying them.
6. Run Brick Bands Across a Gravel Walk
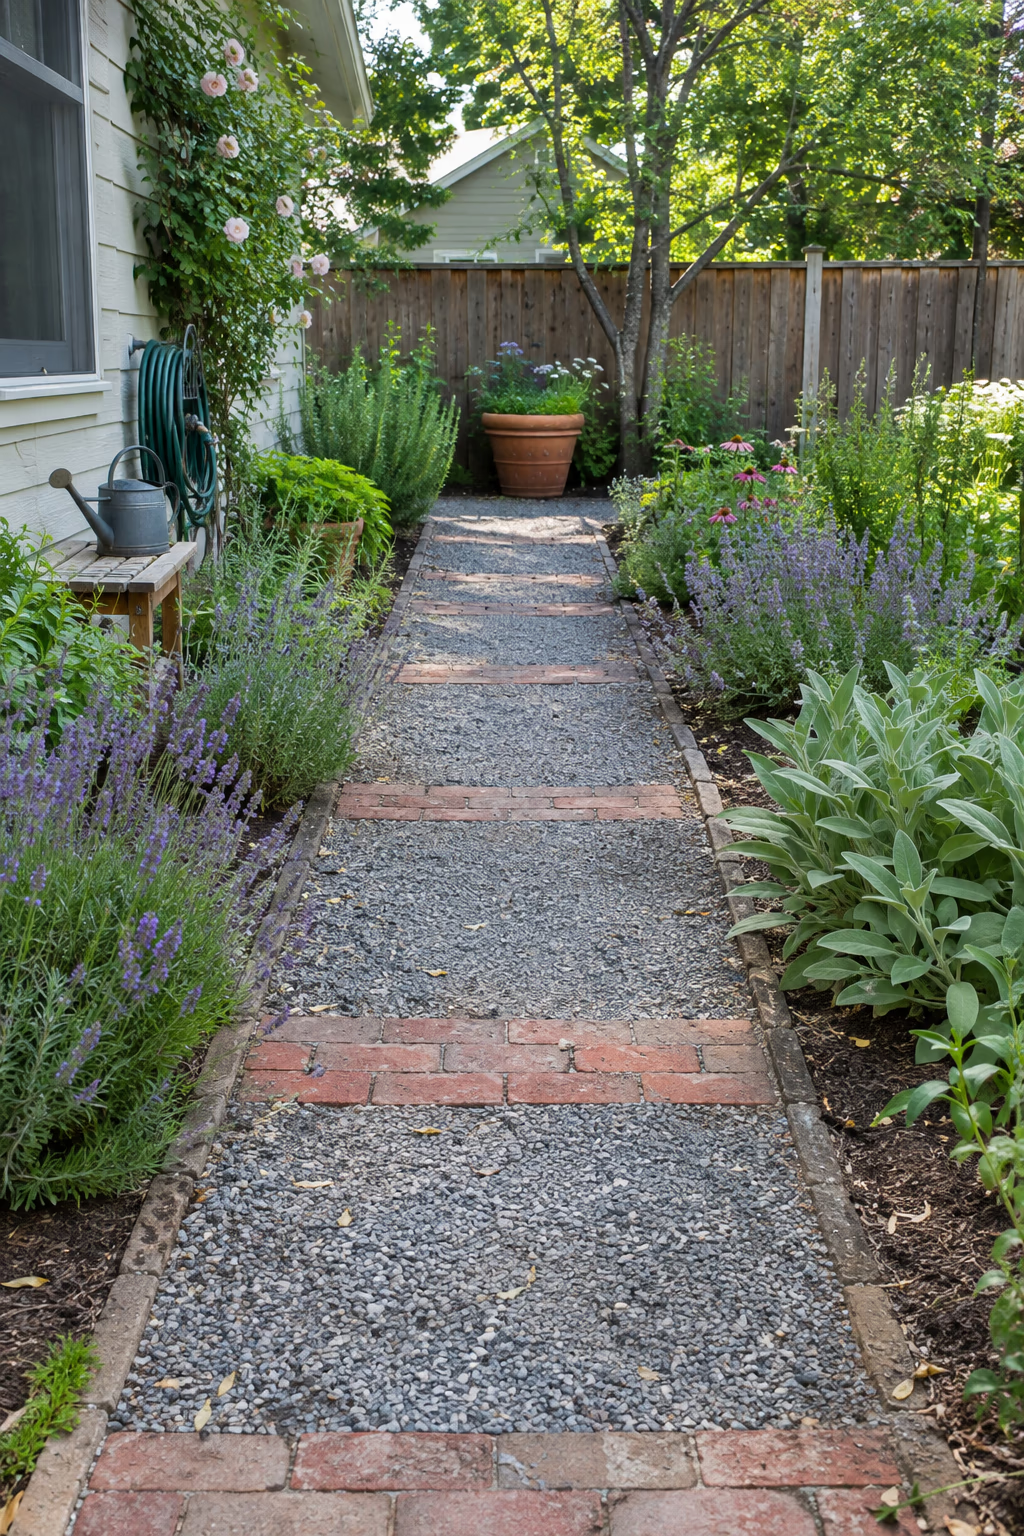
A rhythm that slows your pace
Instead of paving the whole path, lay a gravel walk and cross it every 3 to 4 feet with a band of brick two or three courses wide. The bands act like stripes that guide the eye down the path toward a bench, gate, or planter at the end.
This idea uses far fewer bricks than solid paving and is a great way to put a small stack of leftover bricks to use. The bands also help hold gravel in place on a gentle slope, acting like small check dams.
Set each band in a concrete or compacted base so it sits flush with the gravel surface; a raised lip becomes a tripping hazard. Crushed gravel with fines packs firmer than round pea gravel and is easier to walk on.
7. Set a Brick Circle Where Two Paths Meet
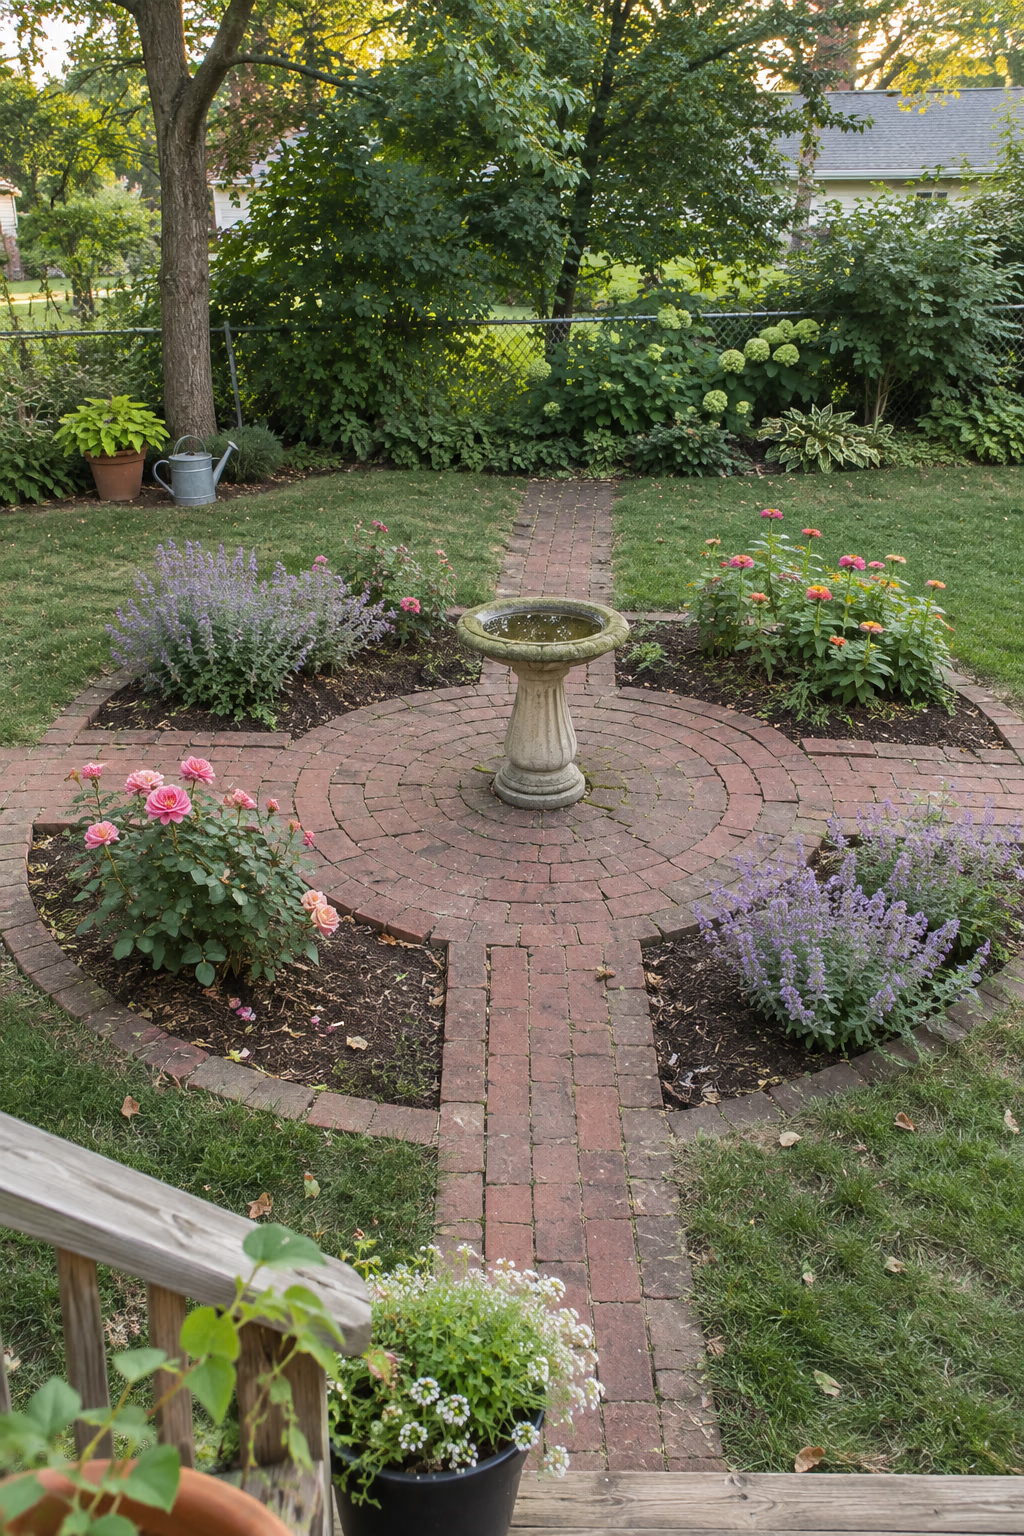
A natural pause point and focal spot
Where two paths cross, widen the junction into a circle of brick laid in concentric rings. A circle 6 to 8 feet across gives room for a birdbath, sundial, or large planter in the middle, with paths radiating out in each direction.
The rings draw attention and give the garden a structured, designed look, even in a small yard. A circle also solves the awkward corner problem where straight paths meet.
Concentric circles need wedge-shaped gaps or cut bricks near the center. Many landscape supply stores sell circle paver kits with precut pieces, which make the job far easier than cutting each brick by hand.
8. Lay a Wide Running Bond Path Through the Vegetable Garden
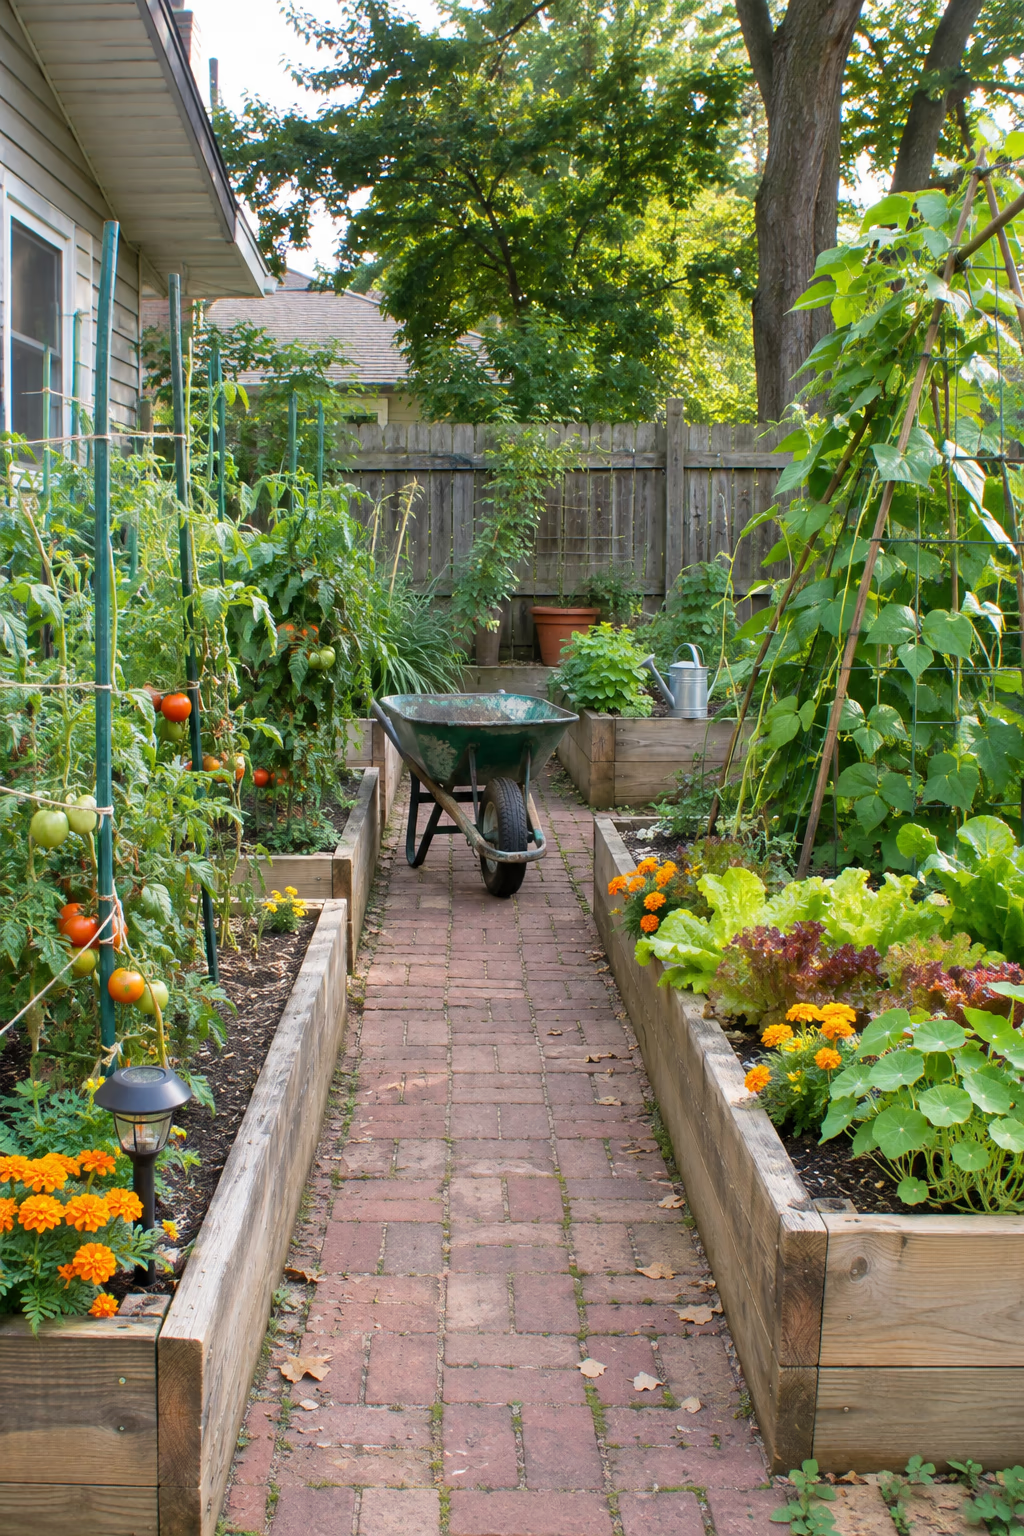
Room for wheelbarrows and clean boots
A main path through a vegetable garden should be at least 3 feet wide so you can push a wheelbarrow and kneel beside beds. Running bond, the simple staggered pattern of a brick wall, runs bricks along the length of the path and makes it feel longer and more direct.
Brick keeps muddy feet off the main route after rain, and its warm color looks at home among raised beds, tomatoes, and climbing beans. It is also easy to lift and relay a section if a bed needs to be reshaped later.
Set the path slightly below the surrounding soil level and add a solid edge so compost and mulch spill less onto the bricks. A soldier course of brick along each side makes a durable edge that won’t rot.
9. Pair Charcoal Brick With Ornamental Grasses
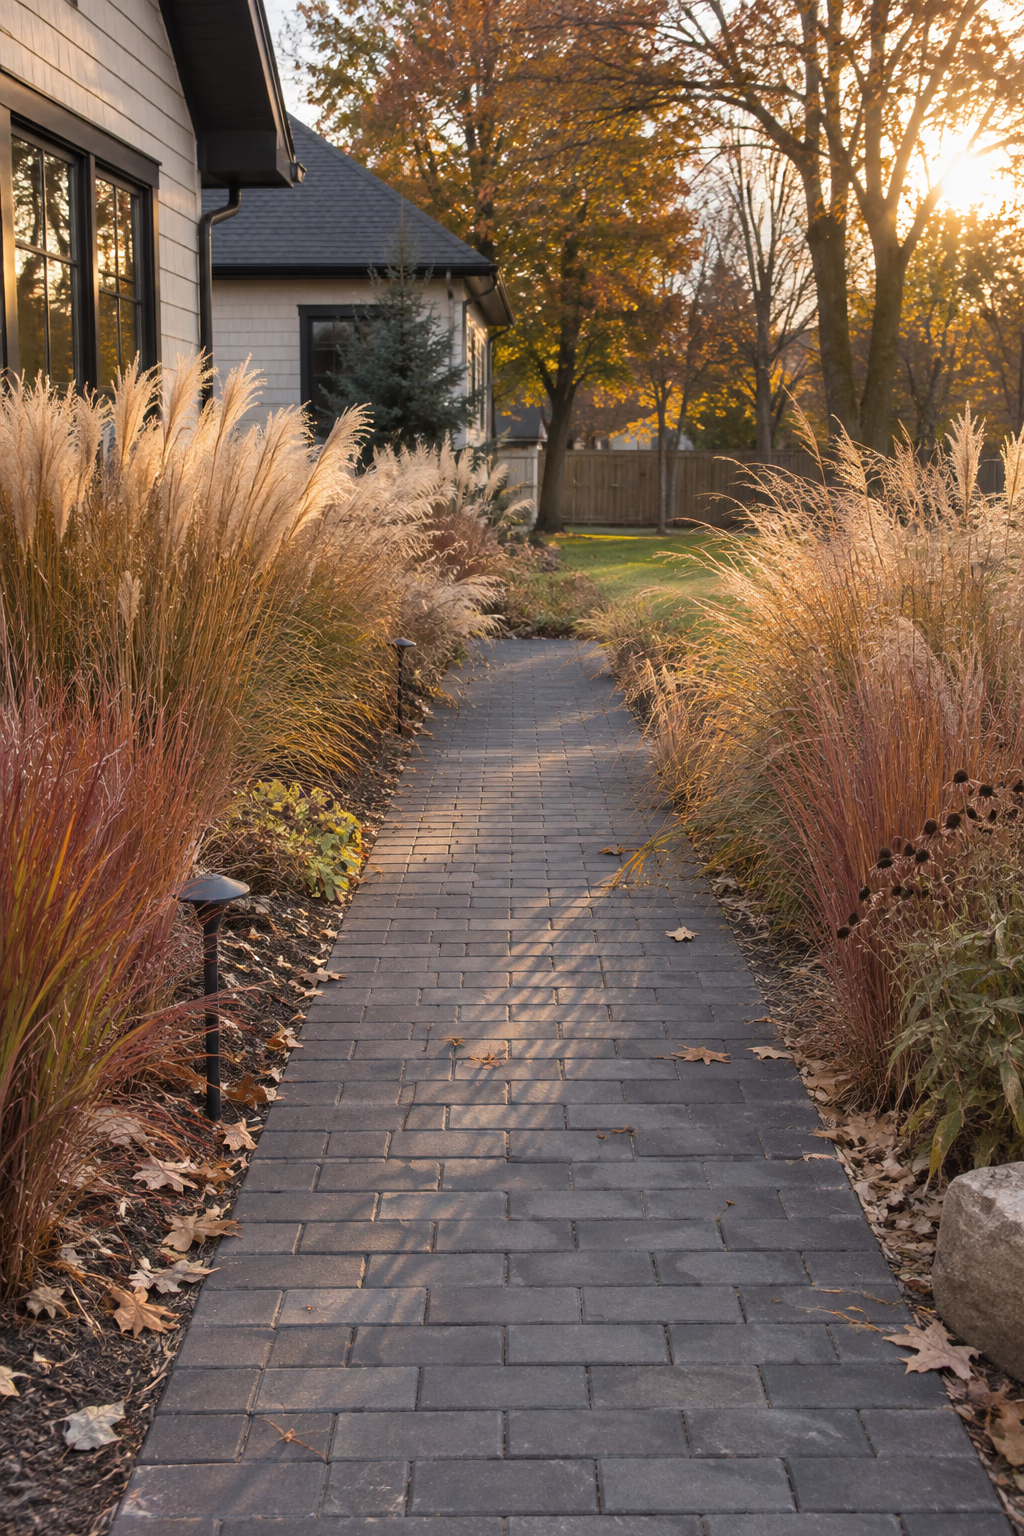
A modern take on a traditional material
Dark charcoal or smoky gray brick pavers give a contemporary edge to a garden path. Paired with pale ornamental grasses such as feather reed grass, little bluestem, or prairie dropseed, the dark surface makes the grasses glow, especially in fall and winter.
Keep the pattern simple, such as running bond or stack bond, with narrow joints and a clean straight edge. The look suits modern farmhouse, midcentury, and newer homes with dark window trim.
Dark brick absorbs heat and can feel hot underfoot in strong summer sun. It also shows pollen and dust more than red brick, so expect to sweep a little more often.
10. Let Plants Spill Over the Brick Edges
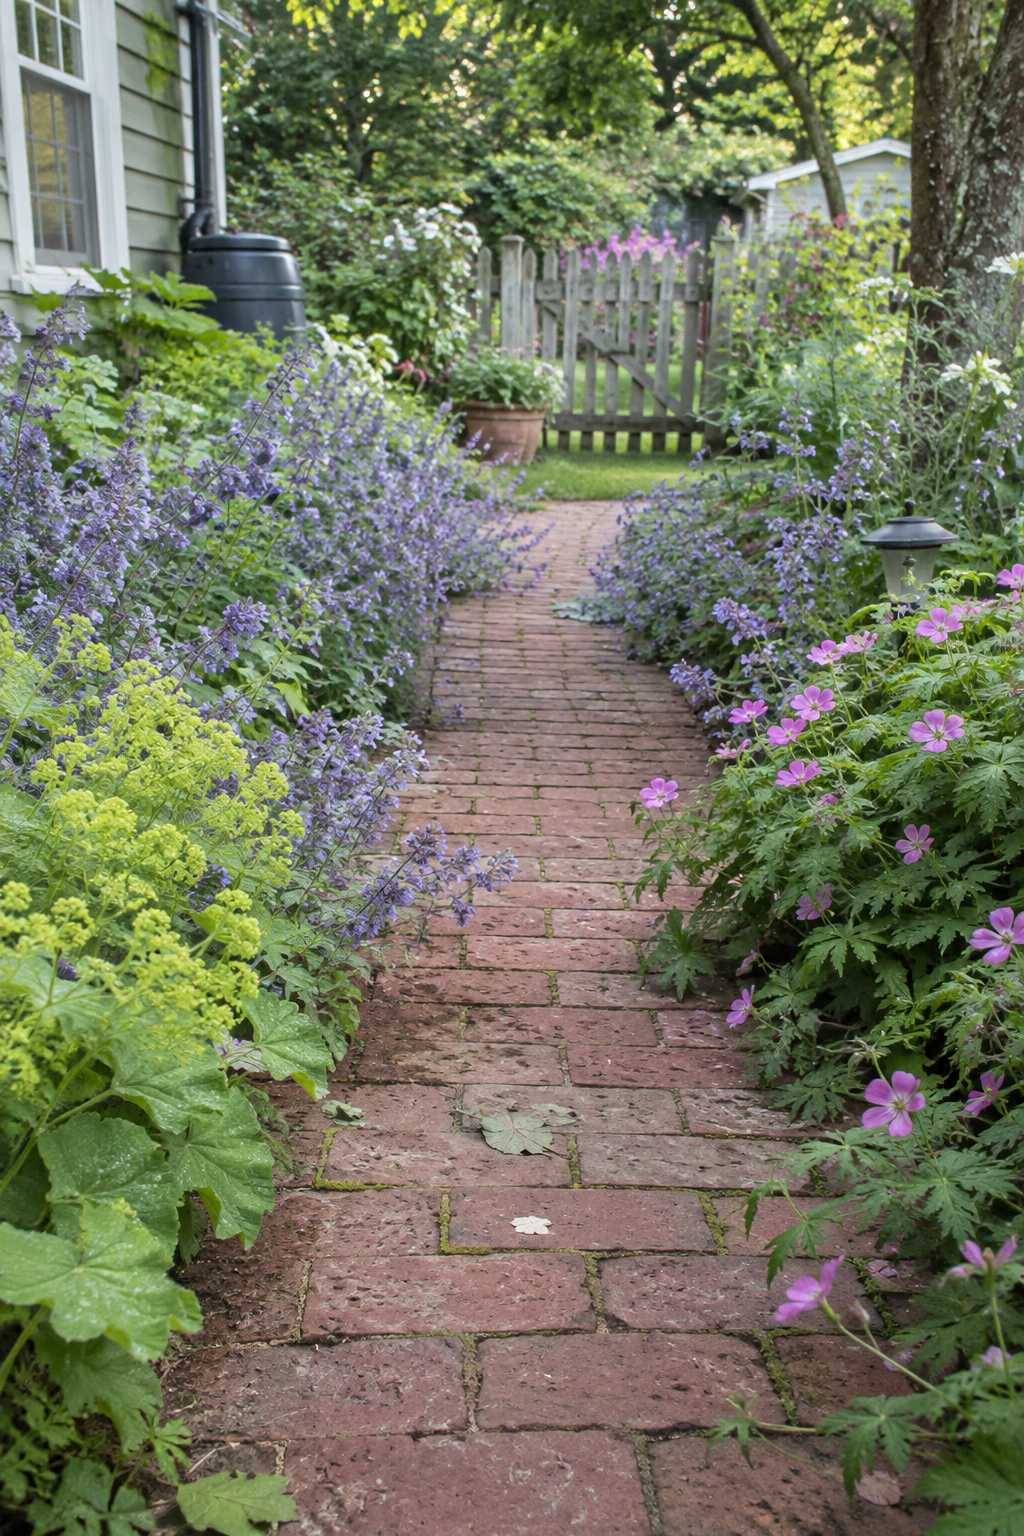
Soft billows that blur the lines
One of the most charming ways to finish a brick path is to plant low perennials that tumble over the edges. Catmint, lady’s mantle, hardy geranium, and dianthus all billow onto the bricks and soften a straight line in a single season.
The contrast between the solid, geometric brick and the loose foliage gives the path an easy, relaxed look. Silver and purple foliage looks particularly good against warm red tones.
Leave a clear walking width of at least 2 1/2 feet after the plants fill in, and trim them back in midsummer when they sprawl too far. Plants that stay wet against the brick can encourage algae, so choose sun-loving types for sunny paths.
11. Squeeze a Slim Brick Path Into a Side Yard
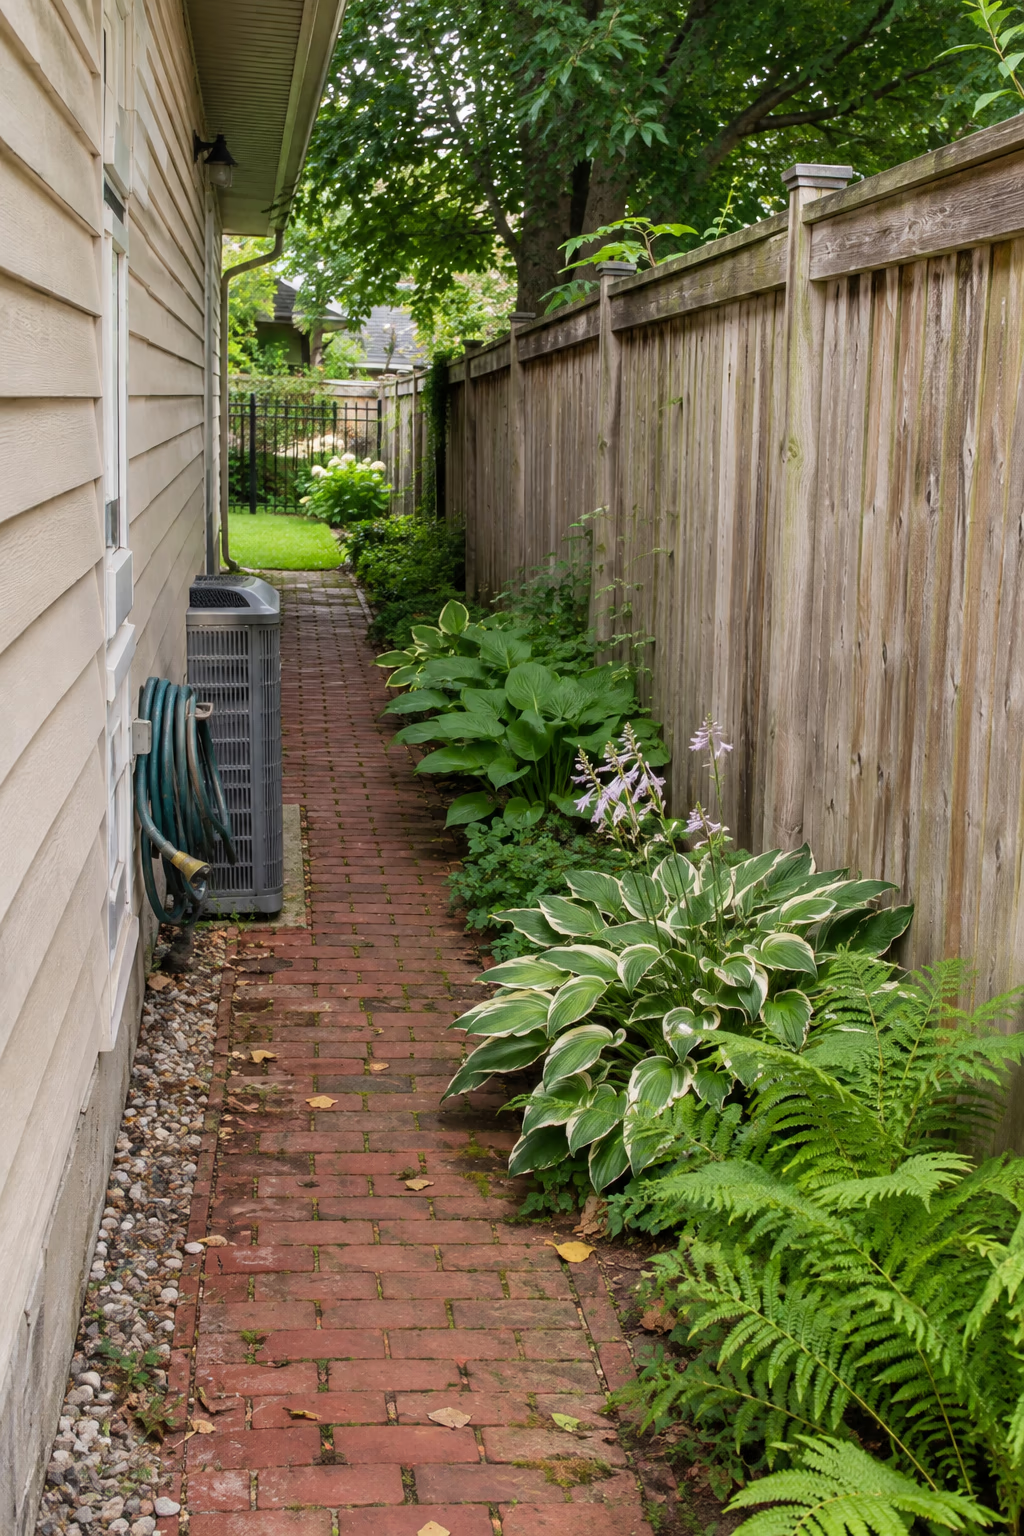
Turn a muddy passage into a usable route
The narrow strip between a house and a fence often becomes a muddy shortcut to the backyard. A brick path 24 to 30 inches wide makes it clean and usable and keeps it from feeling cramped.
Running the bricks lengthwise in running bond makes the space look longer and tidier, while a narrow strip of plantings such as hostas, ferns, or boxwood on one side adds life to a shady passage.
Slope the path slightly away from the foundation so rain drains away from the house. Before you dig, call 811 to locate buried utility lines; gas and electric lines often run through side yards.
12. Try a Pinwheel Pattern With Half Bricks
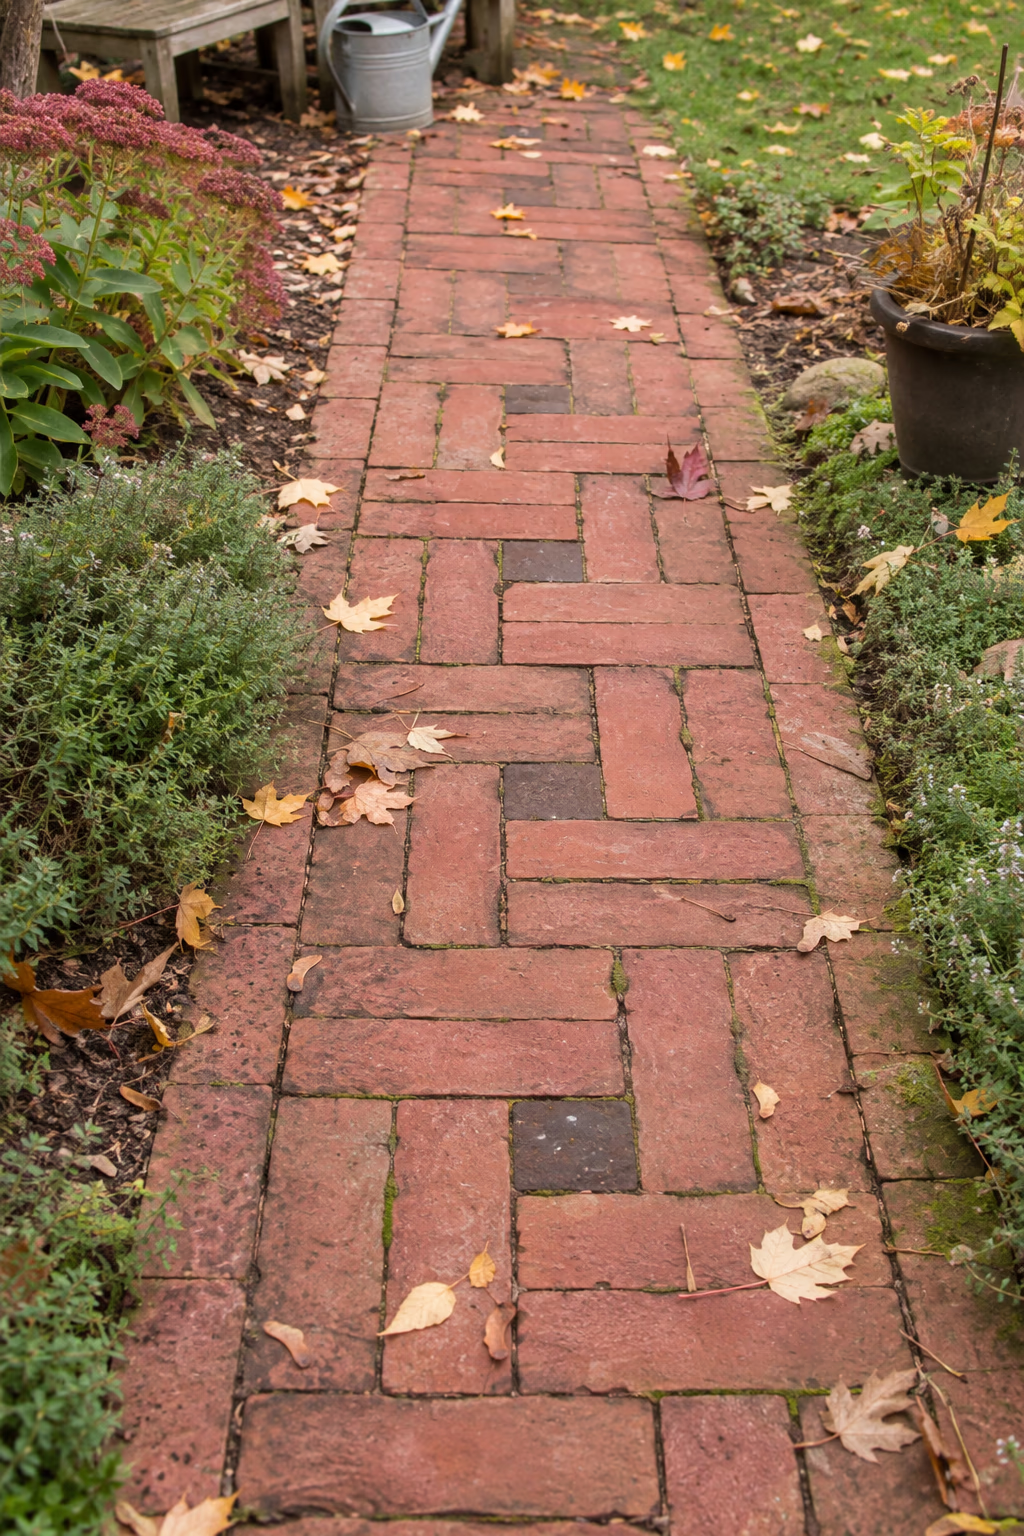
An unusual pattern that catches the eye
A pinwheel pattern arranges four whole bricks around a small square half brick in the center, so each block looks like it is spinning. Repeated down the path, it creates a lively texture that few neighbors will have.
Use a contrasting color for the center pieces, such as a dark brown or charcoal half brick inside a frame of red, to make the pattern stand out. A plain soldier border on each side keeps it from looking busy.
You’ll need to cut many half bricks or buy square pavers sized to fit. Lay out a few blocks dry on the ground before committing to be sure the dimensions work across the path width.
13. Build Shallow Brick Steps Into a Gentle Slope
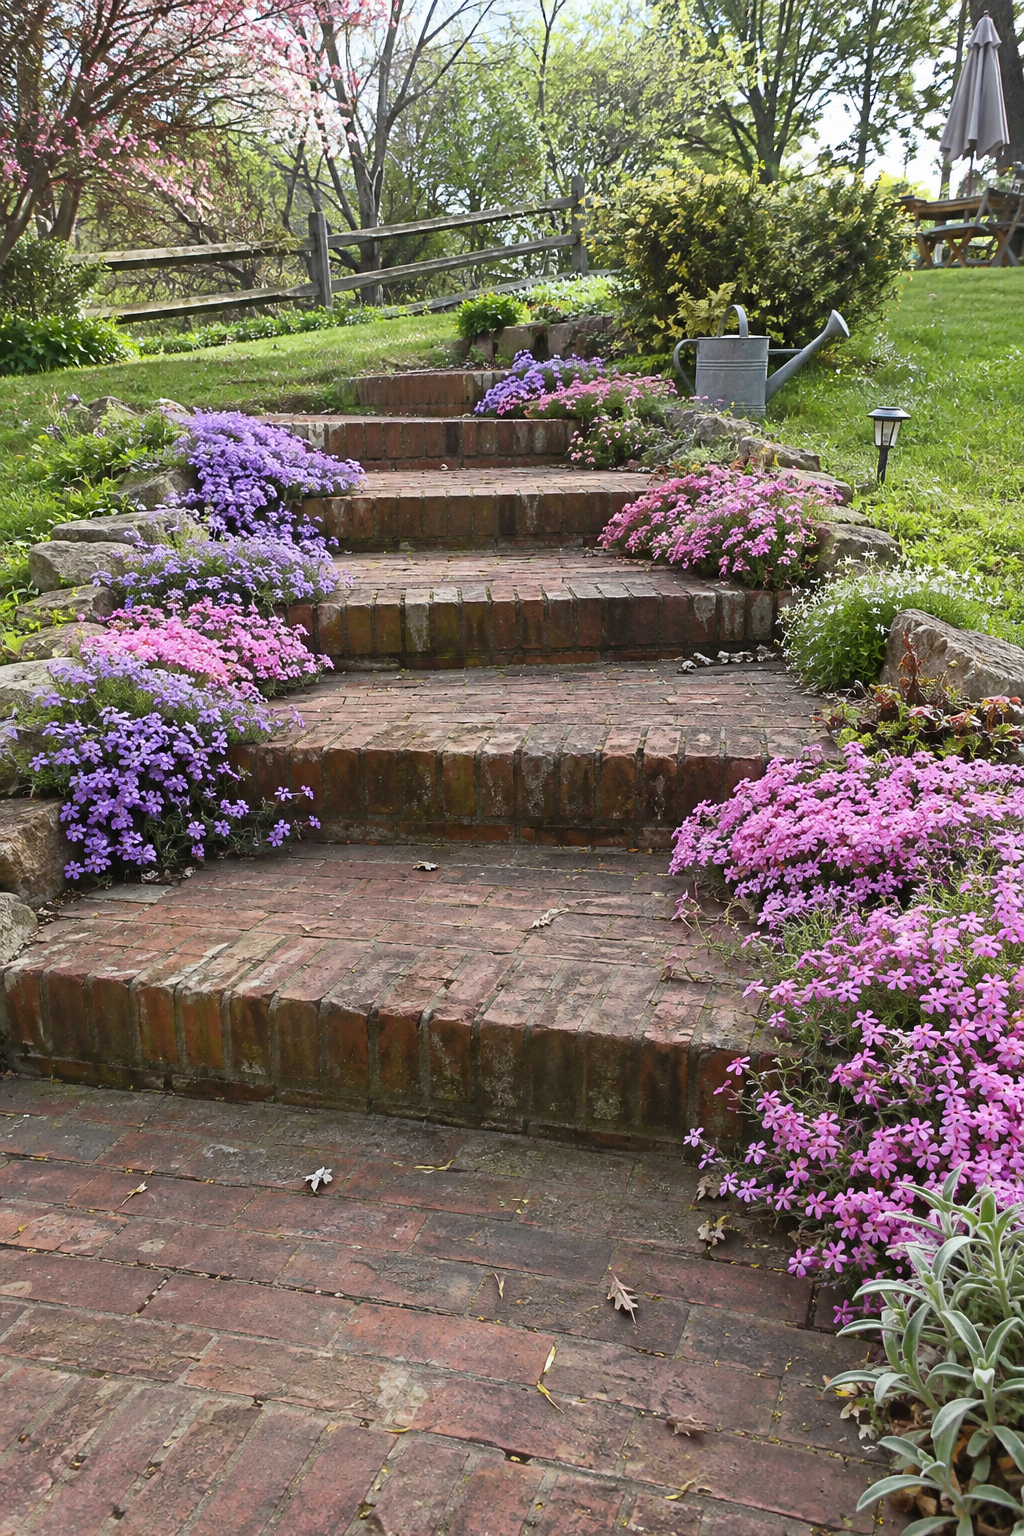
Safer footing on a hillside path
On a slope, a path can turn into a series of wide, shallow brick steps. Use brick on edge or a doubled course of brick for the riser, then pave each tread with brick behind it. Comfortable garden steps usually have risers of 5 to 6 inches and treads at least 14 to 16 inches deep.
Steps make a sloped yard easier and safer to walk and give the path a terraced, designed look. Plants such as creeping phlox or sedum can soften the ends of each step.
Brick risers need a solid footing, usually concrete, to keep them from shifting. Keep every step the same height; uneven risers are a common tripping hazard. For long or steep runs, check whether local codes require a handrail.
14. Angle a Diagonal Brick Path Through a Shade Garden
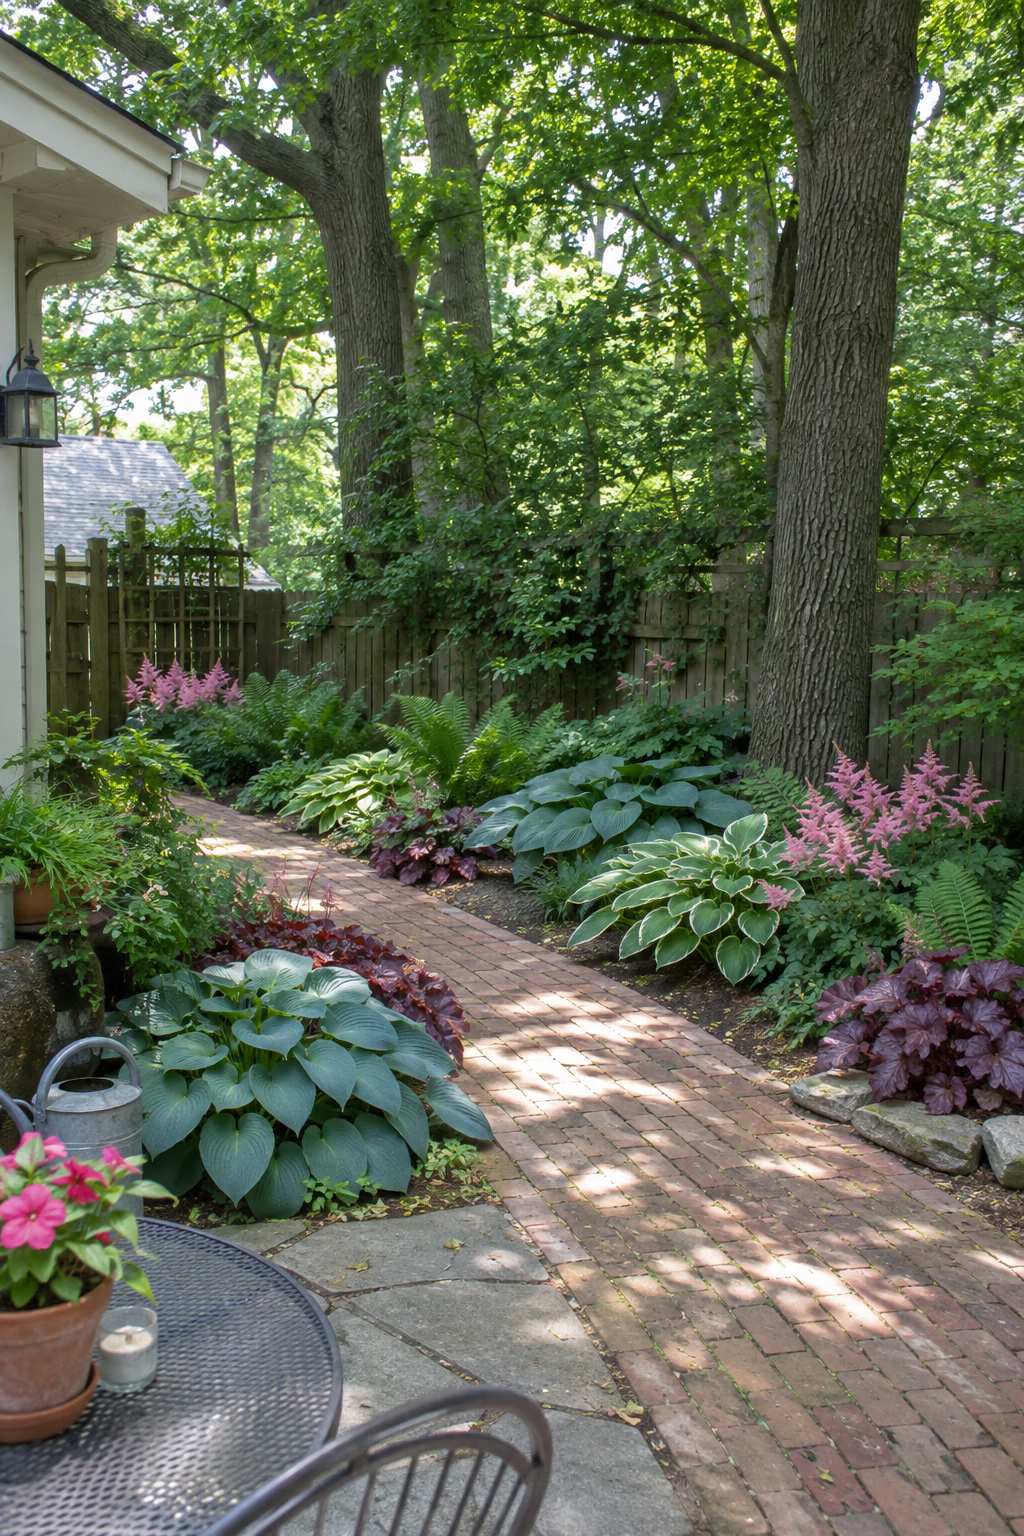
Make a small, shady corner feel bigger
Running a brick path diagonally across a rectangular yard creates the longest possible walking line and makes the space feel larger. Pair it with shade-loving plants such as hostas, ferns, astilbe, and heuchera for a cool, woodland feel.
Laying the bricks so their pattern also runs on the diagonal adds a subtle sense of movement. Light, rosy, or buff brick reflects more light than dark brick, which helps brighten a dim corner.
Shady paths stay damp longer, so moss and algae appear sooner. A stiff broom and occasional scrub with water and a mild cleaner keep the surface safer underfoot.
15. Piece Together a Broken Brick Mosaic
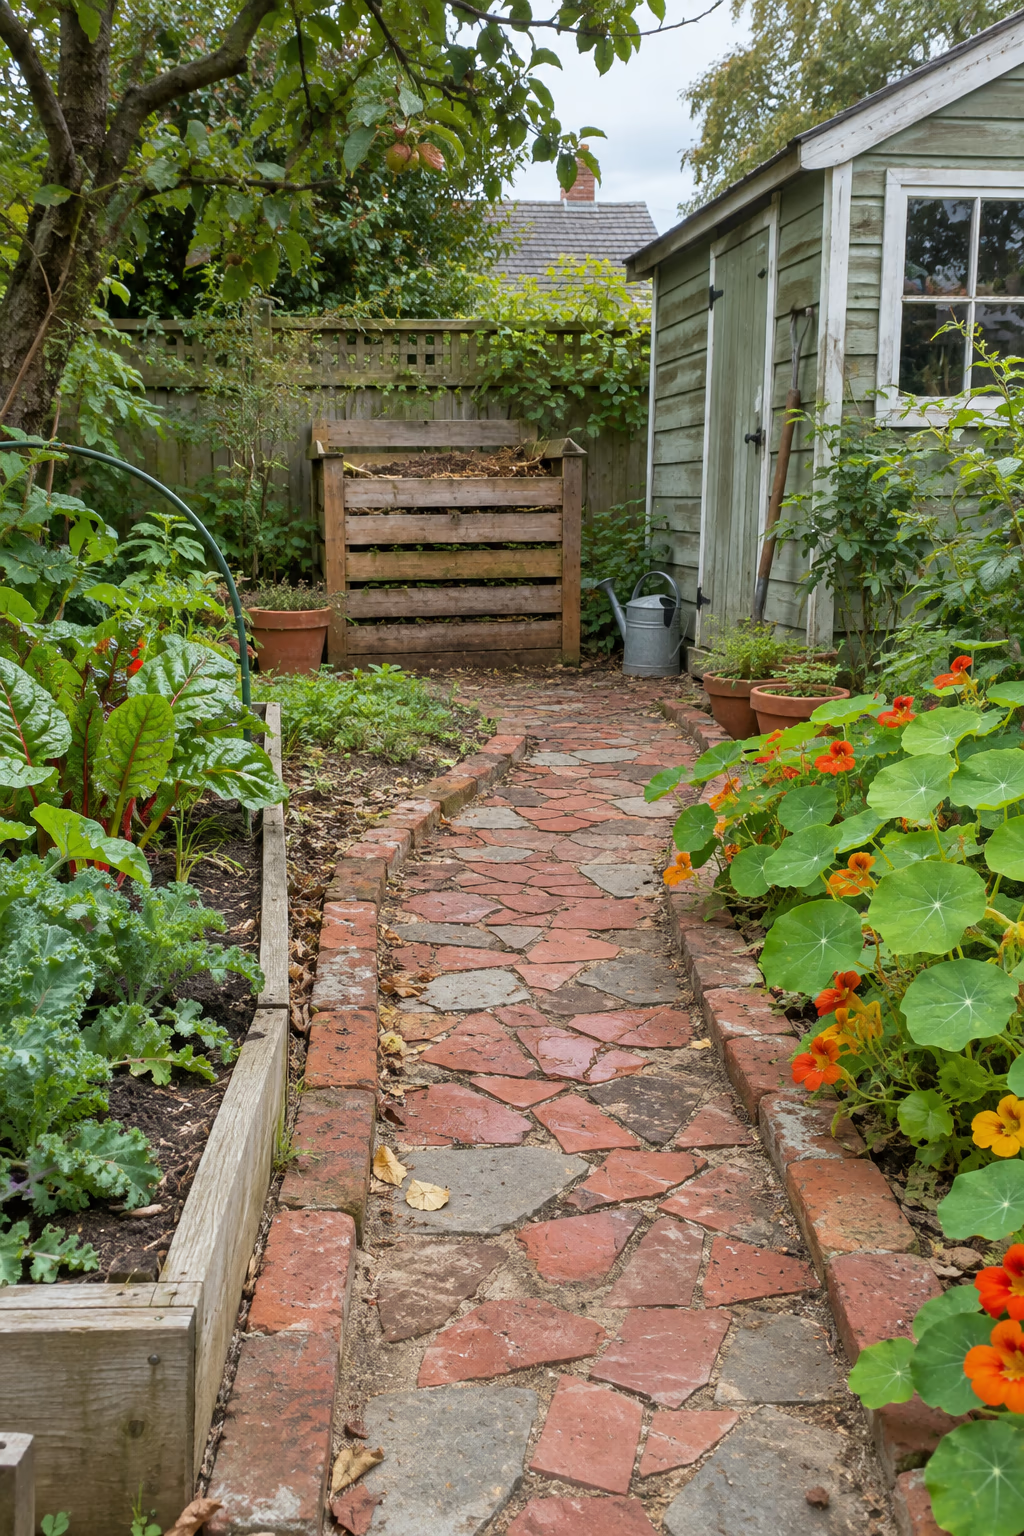
A creative use for chipped and cracked brick
Cracked and broken bricks from a demolished wall or old patio don’t need to go to the landfill. Fit the pieces together like a jigsaw on a sand bed, mixing reds, browns, and the occasional piece of stone or tile for a handmade, folk-art look.
This idea costs almost nothing if you have rubble on hand, and it works especially well for short, casual paths to a compost bin, shed, or kitchen garden.
A firm edge of whole bricks or steel edging keeps a mosaic from looking scattered and helps hold small pieces in place. Set fragments tightly and tamp them well, since small pieces shift more easily than whole bricks.
16. Choose a Stack Bond Path for a Modern Look
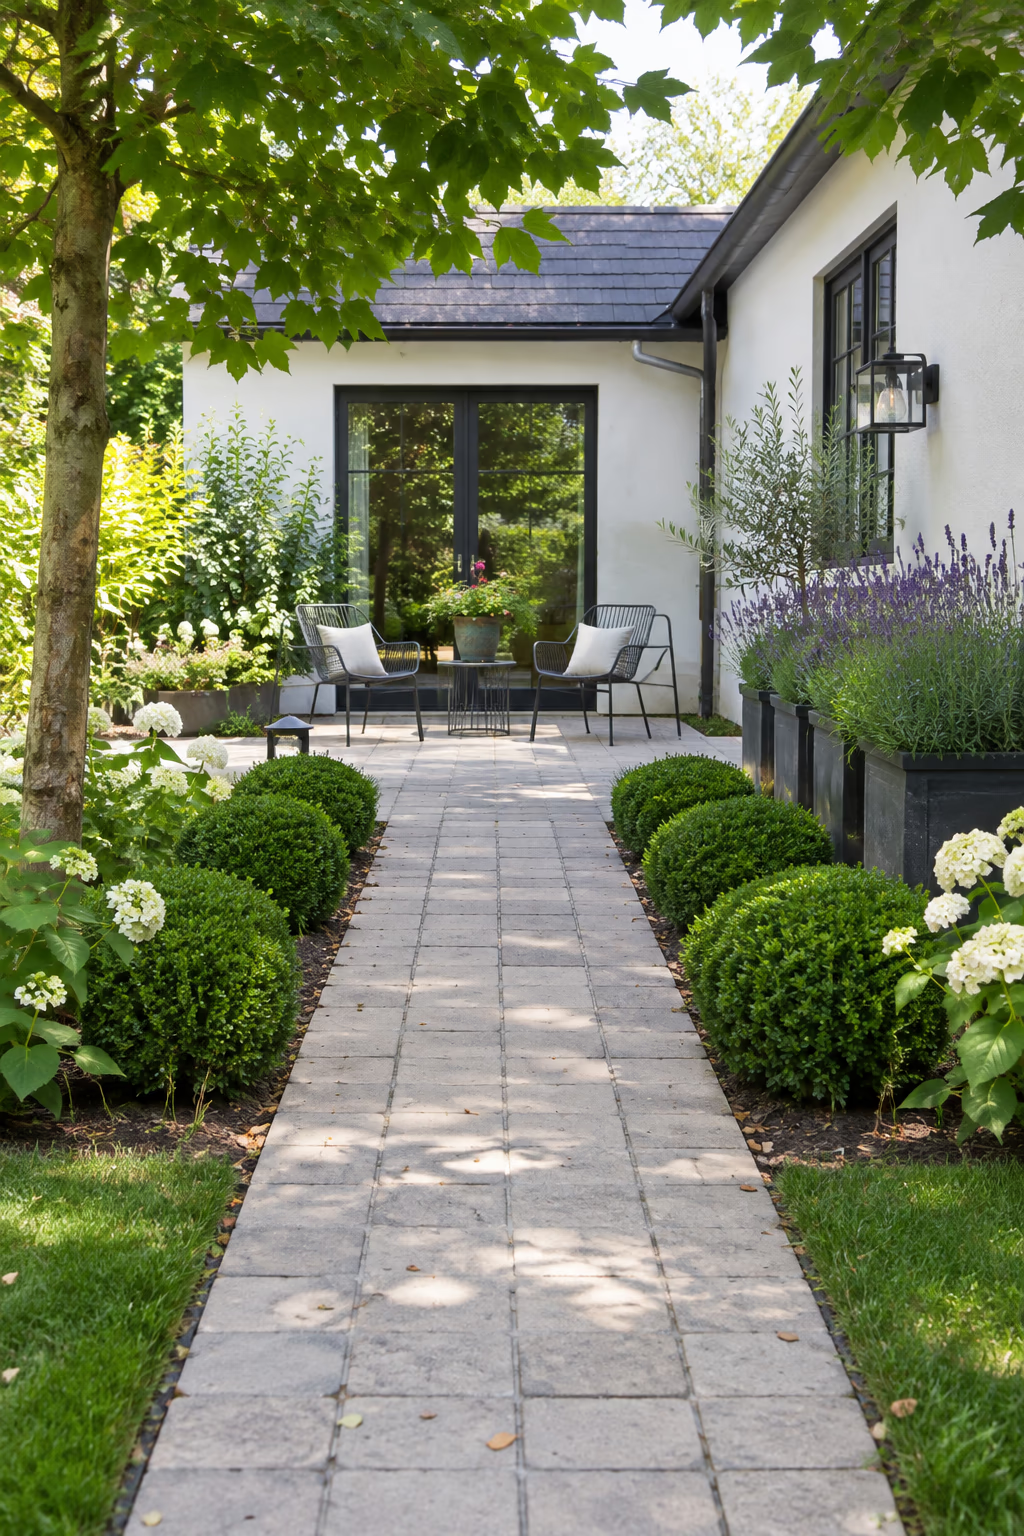
Clean grid lines with a contemporary feel
Stack bond lines up bricks in straight rows with all joints aligned, forming a neat grid. It looks crisp and modern, especially with a uniform brick color, thin joints, and a straight path leading to a patio or courtyard.
The pattern pairs well with clean-lined plantings, such as clipped boxwood, ornamental grasses, or a row of identical planters. Light gray or white-washed brick gives it an even more contemporary look.
Stack bond is the weakest pattern structurally, because the continuous joints let bricks shift more easily. Use it for foot traffic only, with a well-compacted base and a solid edge restraint.
17. Set Brick Stepping Pads Into the Lawn
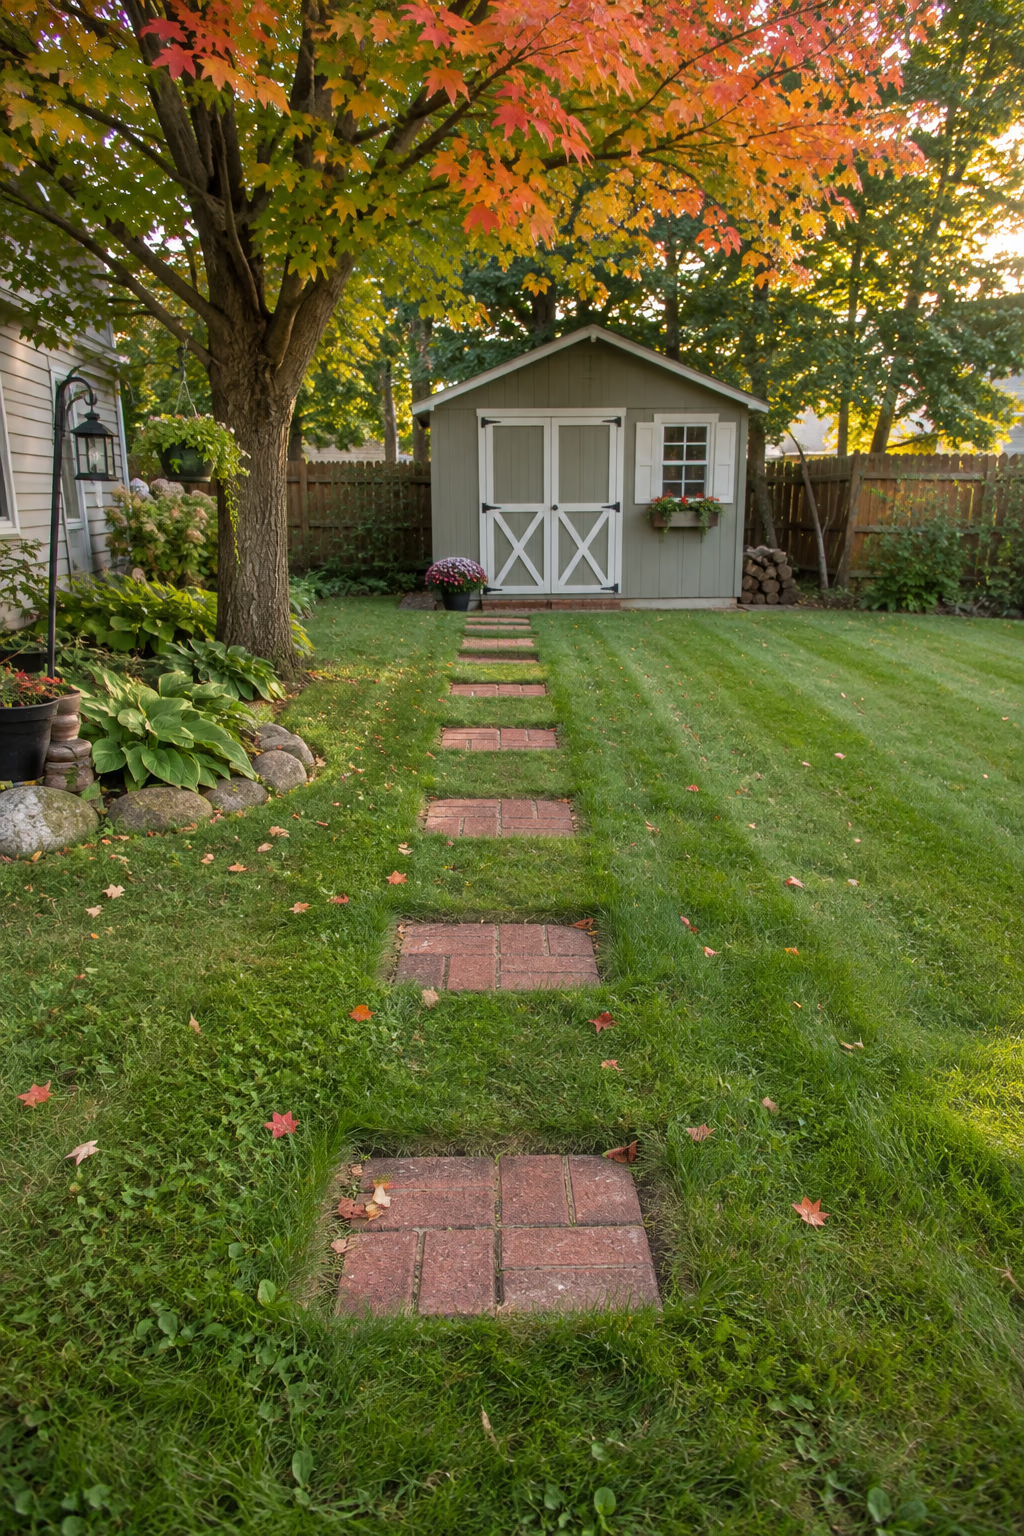
A lighter path that keeps the grass
Instead of a continuous path, set small pads of brick, each made from four to six pavers, into the lawn at a comfortable stride, usually about 24 inches center to center. The result is a casual route that crosses the grass without dividing it.
This option uses very few bricks and is a quick weekend project. It suits a route to a clothesline, shed, or back gate where a full path would feel too heavy.
Set each pad flush with or slightly below the grass so a mower can pass over it. Grass will creep over the edges, so trim around the pads a few times each season.
18. Border a Wood Chip Path With Bricks on End
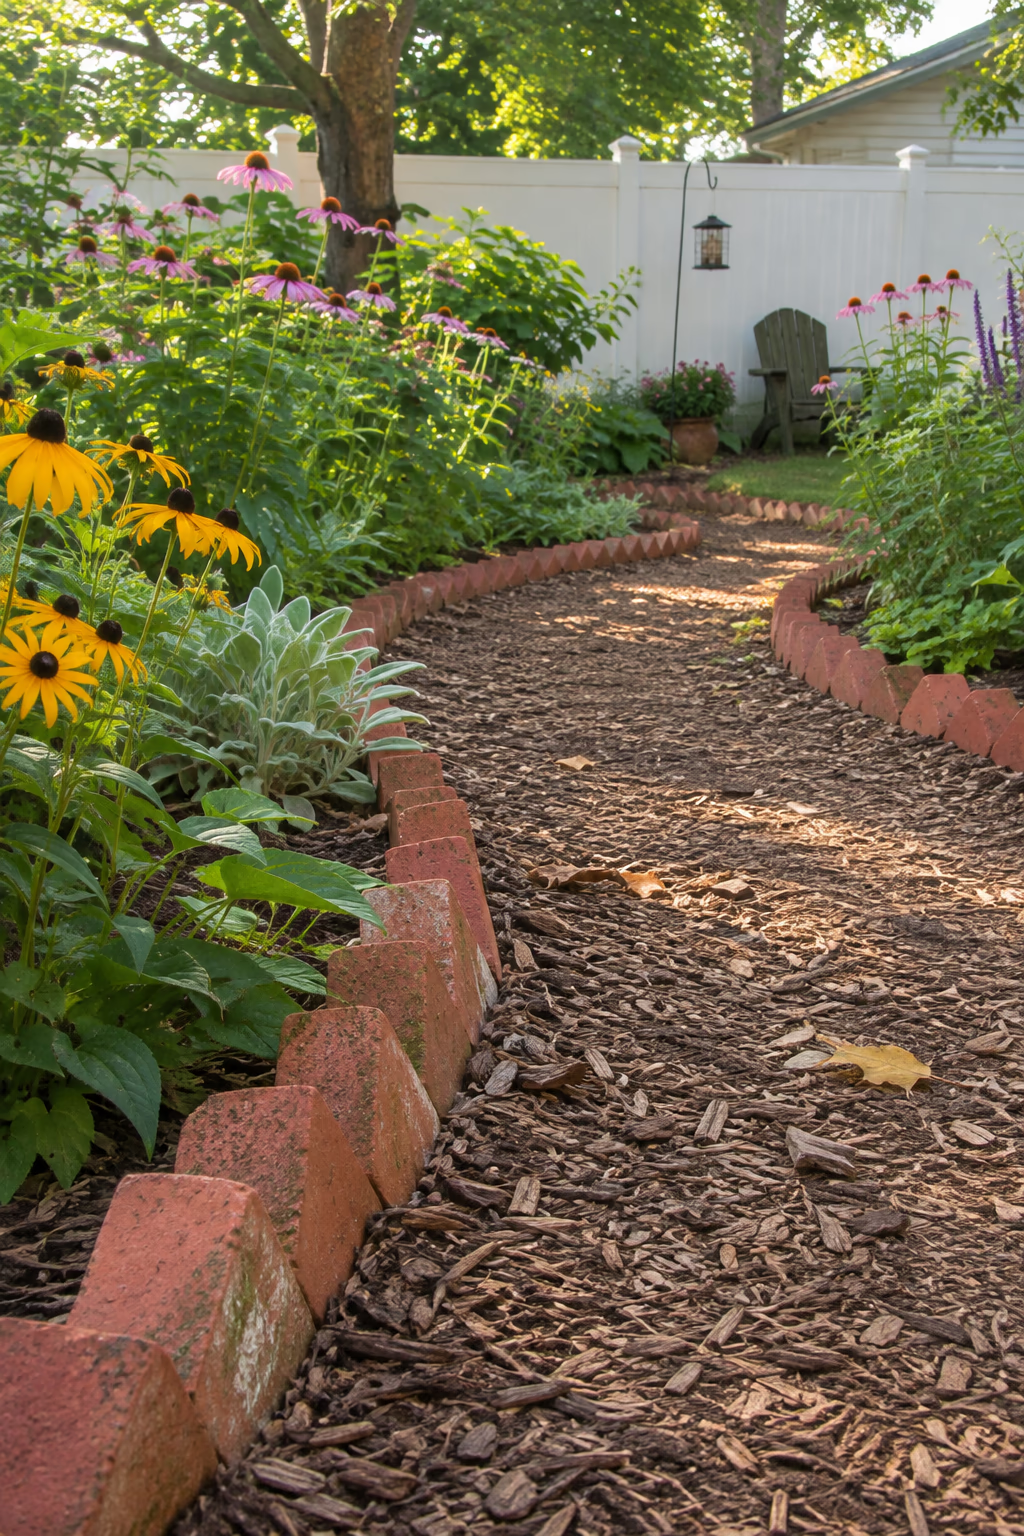
A budget path with a tidy frame
A wood chip or shredded bark path is inexpensive and soft underfoot. Edge it with a row of bricks set on end, either upright or at a slight angle to create a sawtooth line, and it looks far more finished.
The bricks keep mulch out of the lawn and planting beds, and the sawtooth edge adds a charming, old-fashioned detail. This is a smart use for odd lots of bricks that aren’t enough for a full path.
Bury each brick about halfway so frost and foot traffic don’t push it over. Wood chips break down, so plan on topping the path up with 2 to 3 inches of fresh mulch each year or two.
19. Widen the Path Into a Brick Landing for Two Chairs
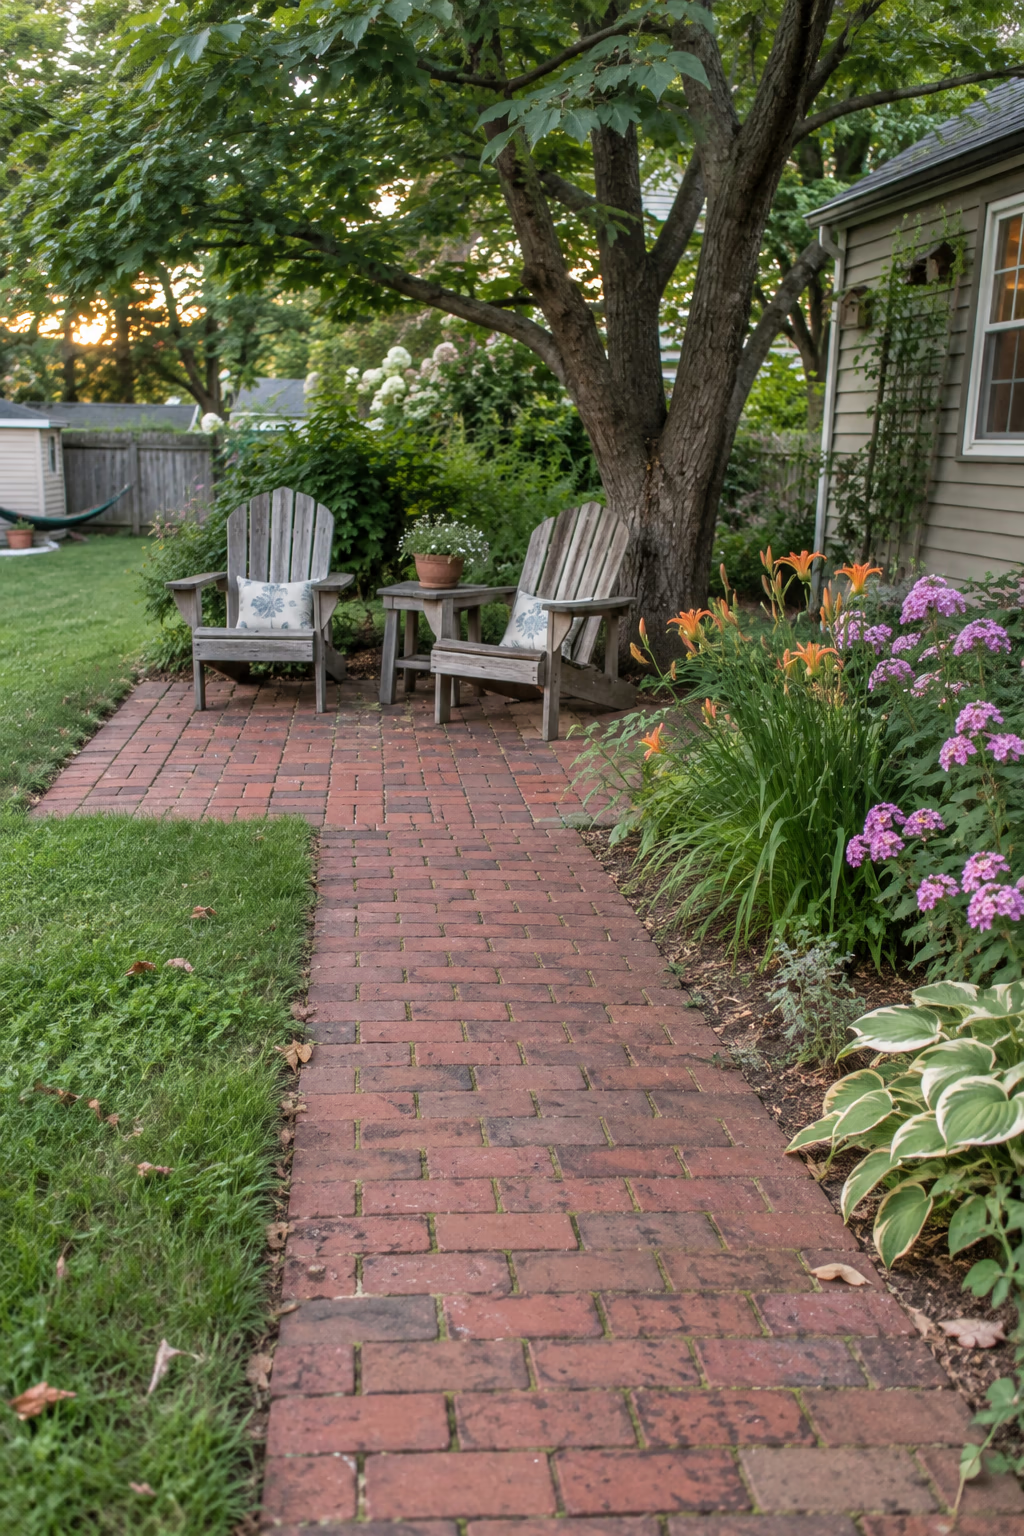
Give the path a purpose and a destination
A path that leads somewhere feels more inviting. Widen the end of your brick path into a small square or rectangular landing, about 8 by 8 feet, with room for a pair of chairs and a small table.
Lay the landing in the same brick as the path but turn the pattern, for instance switching from running bond to basketweave, to mark the change from walking space to sitting space.
A landing under a tree or beside a flower border is the perfect place for morning coffee. Check where the afternoon sun falls before choosing the spot, since brick holds heat late into summer evenings.
20. Light the Way With Low Path Lights
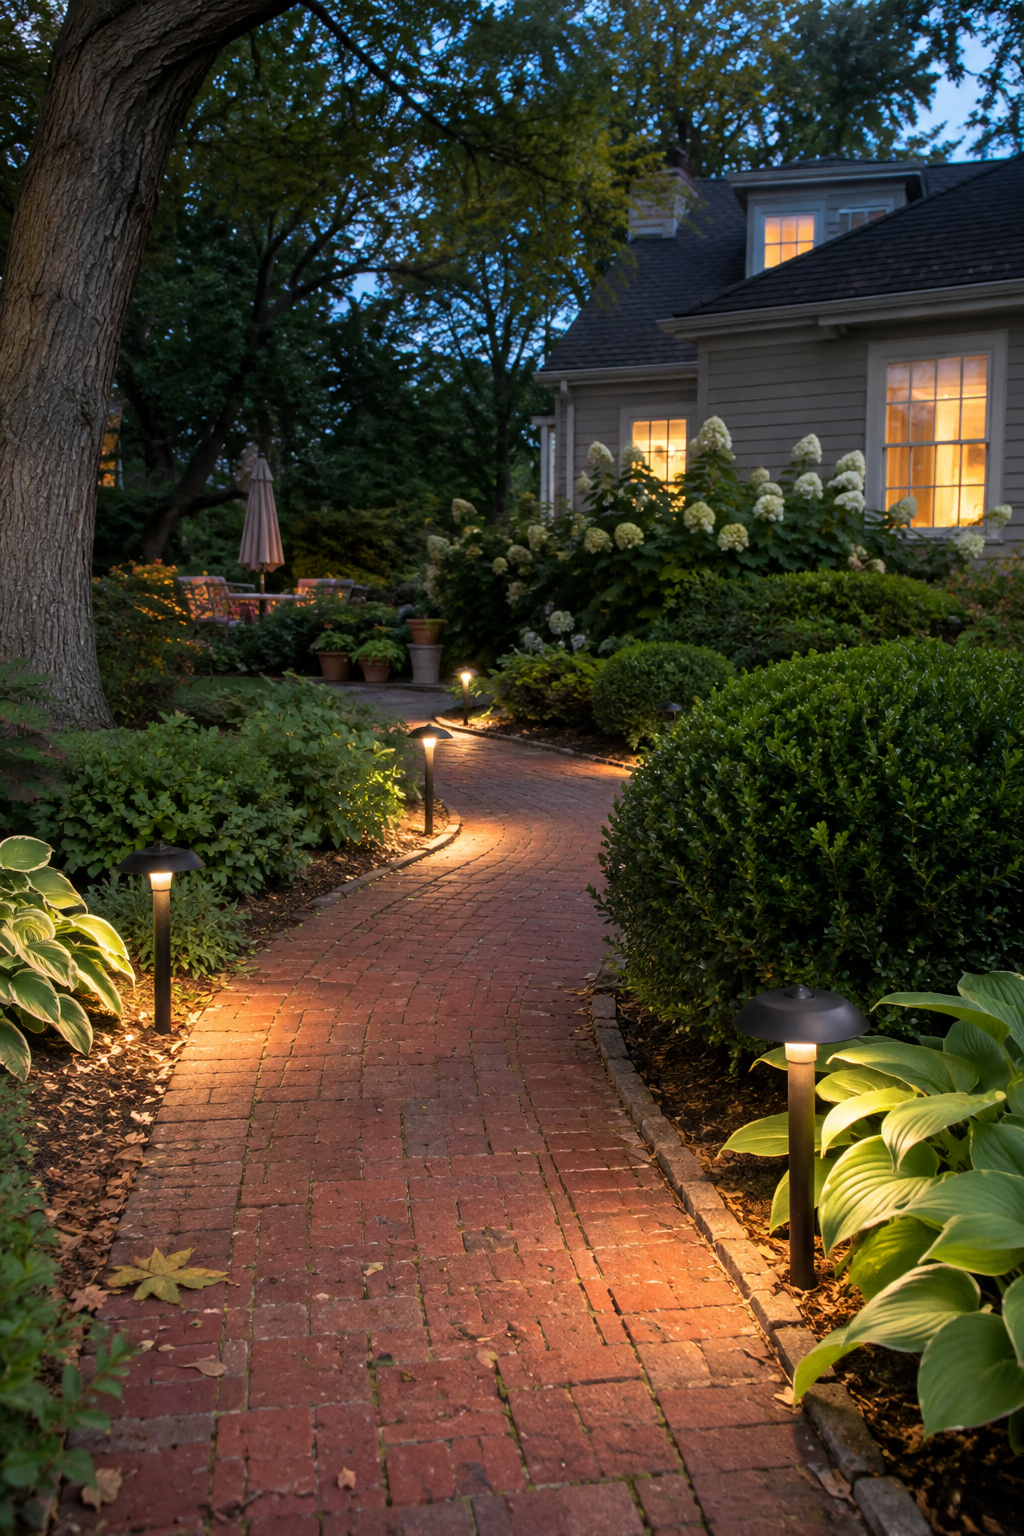
Safe footing and a warm evening glow
Low lights along a brick path make it safer at night and show off its texture after dark. Place fixtures every 6 to 10 feet, alternating sides, and aim for warm white light around 2700K, which flatters red brick.
Solar stake lights are the simplest option and need no wiring. Low-voltage systems cost more upfront but give brighter, more reliable light and can run on a timer.
Avoid placing lights so close together that the path looks like a runway; pools of light with soft shadows between them look more natural. Keep the fixtures back from the edge so they aren’t kicked or clipped by a mower.
21. Use Permeable Brick Pavers in a Soggy Yard
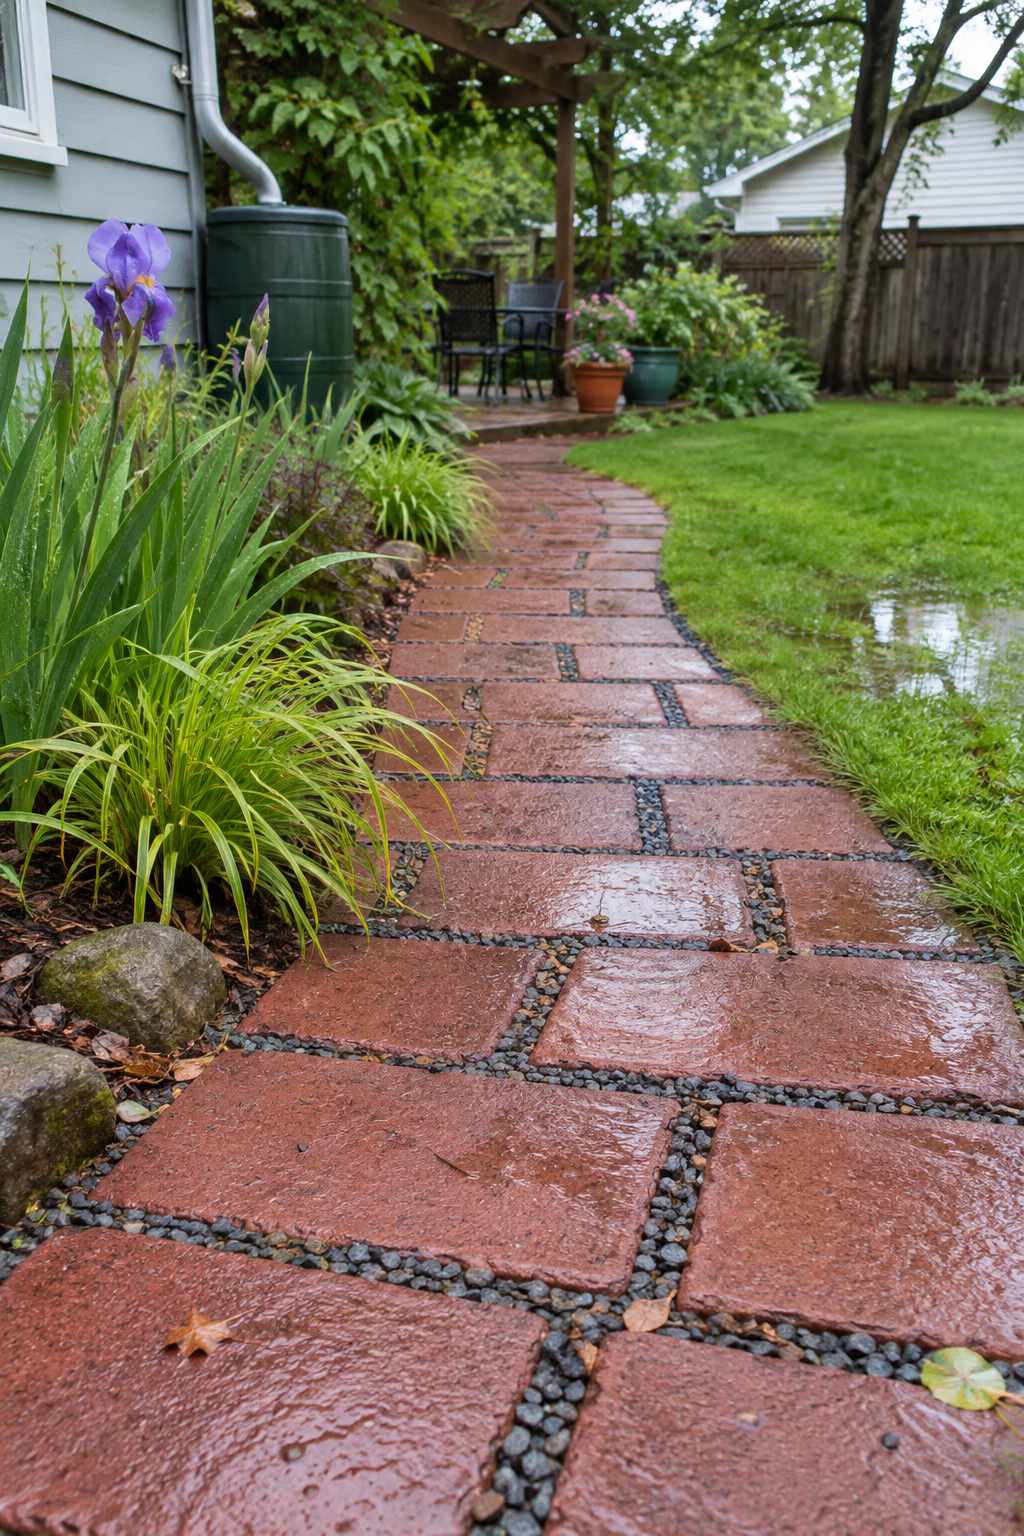
A brick path that handles heavy rain
Permeable clay pavers have spacer lugs that leave wider joints, which are filled with small crushed stone instead of sand. Rainwater drains through the joints into an open-graded gravel base below instead of puddling on the surface.
This is a great choice for yards with poor drainage, low spots, or local rules that limit hard surfaces. Some communities offer stormwater credits or rebates for permeable paving.
Permeable paving needs a deeper base than standard brick paths, often 8 inches or more of clean, open-graded stone, so it costs more to install. Sweep the joints occasionally and top them up with fresh stone to keep water flowing.
How to Plan Your Brick Garden Path
A brick path is a long-term project, so a little planning up front pays off for decades. Keep these tips in mind before you order bricks.
- Use paving-grade brick. Clay pavers rated for severe weathering hold up far better than wall or common brick, especially where winters bring freeze-thaw cycles.
- Size the path for its job. Allow 2 to 3 feet for a stroll path, 3 feet or more for a wheelbarrow route, and 4 to 5 feet for a front walk where two people walk together.
- Build a solid base. Most dry-laid brick paths need 4 to 6 inches of compacted crushed gravel plus about 1 inch of sand bedding; deeper bases help in cold or clay-heavy soils.
- Add edge restraint. Plastic or steel paver edging, or a buried soldier course, keeps bricks from creeping outward over time.
- Plan for drainage. Slope the path about 1/4 inch per foot to one side, and always away from your house’s foundation.
- Order extra and call first. Buy 5 to 10 percent more brick than you measure to cover cuts and breakage, and call 811 before you dig.
Frequently Asked Questions
Should a brick garden path be set in sand or mortar?
Most garden paths are dry-laid on a compacted gravel base with a sand bedding layer and sand-filled joints. This method flexes with frost, is easier for DIYers, and makes repairs simple. Mortared brick needs a concrete slab beneath it and is prone to cracking if not built carefully.
How do I keep weeds from growing between the bricks?
Tight joints filled with polymeric sand are the best defense, since the sand hardens once wet. A well-compacted base also helps. Weeds that seed into joints are easiest to pull when young, and a hand weeding tool or boiling water works well without harming the brick.
Can I use old house bricks for a garden path?
Yes, but check their condition. Hard, dense bricks with sharp edges usually hold up well, while soft or crumbly bricks can flake in freezing weather. In mild climates, most salvaged brick works fine; in cold climates, use the hardest bricks for the walking surface.
How much does a brick garden path cost?
Costs vary with region, brick type, and labor. Reclaimed brick you collect yourself can be very inexpensive, while new clay pavers cost more than concrete pavers. Professional installation, base preparation, and decorative patterns all add to the total, so get a few local quotes.
How long does a brick path last?
A well-built brick path with a proper base can last for many decades. Individual bricks may need to be reset if they sink or heave, but dry-laid paths are easy to repair by lifting and replacing a few bricks rather than rebuilding the whole path.
Final Thoughts
A brick path brings warmth, texture, and a sense of permanence to a garden. Whether you choose a mossy reclaimed walk, a crisp basketweave front path, or a playful brick and gravel grid, the material only gets better with age.
Start with a good base and the right brick for your climate, then let plants, moss, and time do the rest. Before long, your path will look as though it has always been part of your yard.