Most yards have one: a plain shed in the back corner with faded siding, a door that sticks, and a dim inside full of rakes and half-empty bags of potting mix. You walk past it every day without really seeing it.
That shed is one of the easiest places to make a big change in your yard. It already has walls, a roof, and a door, so a weekend of paint, a few plants, and some smart storage can turn it from an eyesore into a focal point. Most of these updates cost far less than a new outbuilding, and many can be done one at a time as your budget allows.
These 19 garden shed makeover ideas cover fresh paint colors, window boxes, flower borders, porches, paths, lighting, salvaged details, and interior upgrades that make the space more useful. Pick one quick project or combine several for a complete transformation.
1. Paint the Shed Sage Green With Crisp White Trim
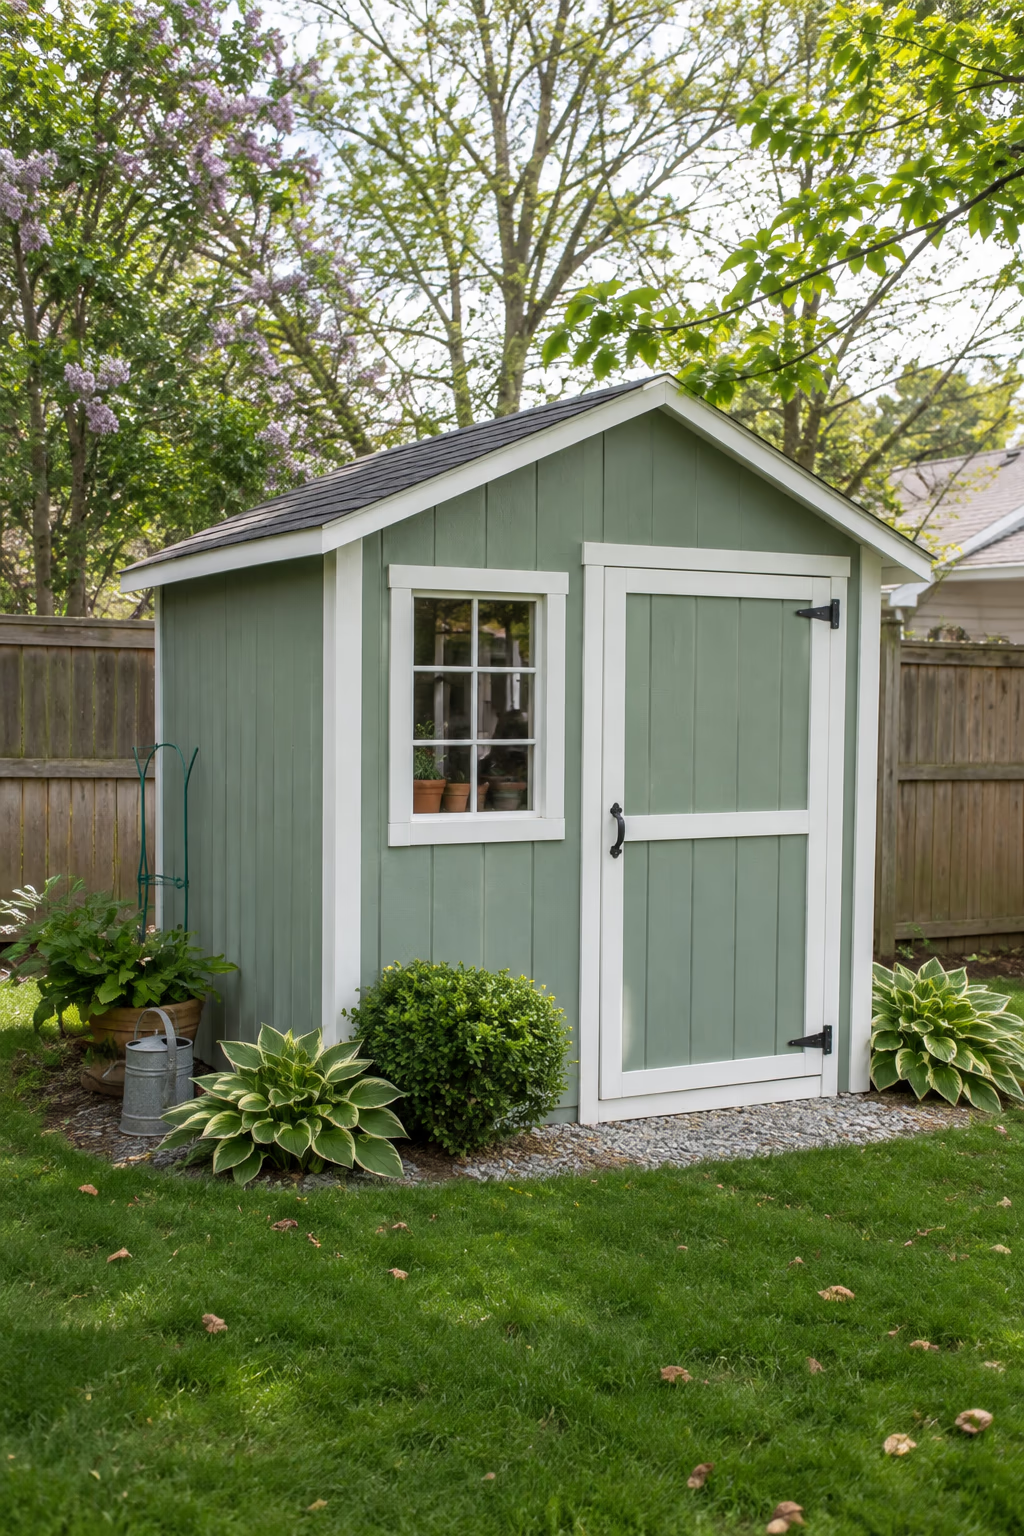
A soft color that settles into the garden
Sage green is one of the most-loved shed colors right now, and for good reason. It is muted enough to blend with foliage but light enough to look fresh. Pair it with bright white on the corner boards, door frame, and window trim so the shape of the building stands out.
Start by washing the siding with a garden hose and a soft brush or a power washer on a low setting, then let it dry for a full day. Scrape any peeling areas, replace soft or rotted trim, and spot-prime bare wood. Apply two coats of a quality exterior acrylic paint for the body color and two coats for the trim.
Check the paint can for minimum temperature limits and pick a dry stretch of weather. A satin or low-luster finish hides small flaws on rough wood siding better than gloss and is still easy to rinse clean.
2. Hang Window Boxes Filled With Trailing Flowers
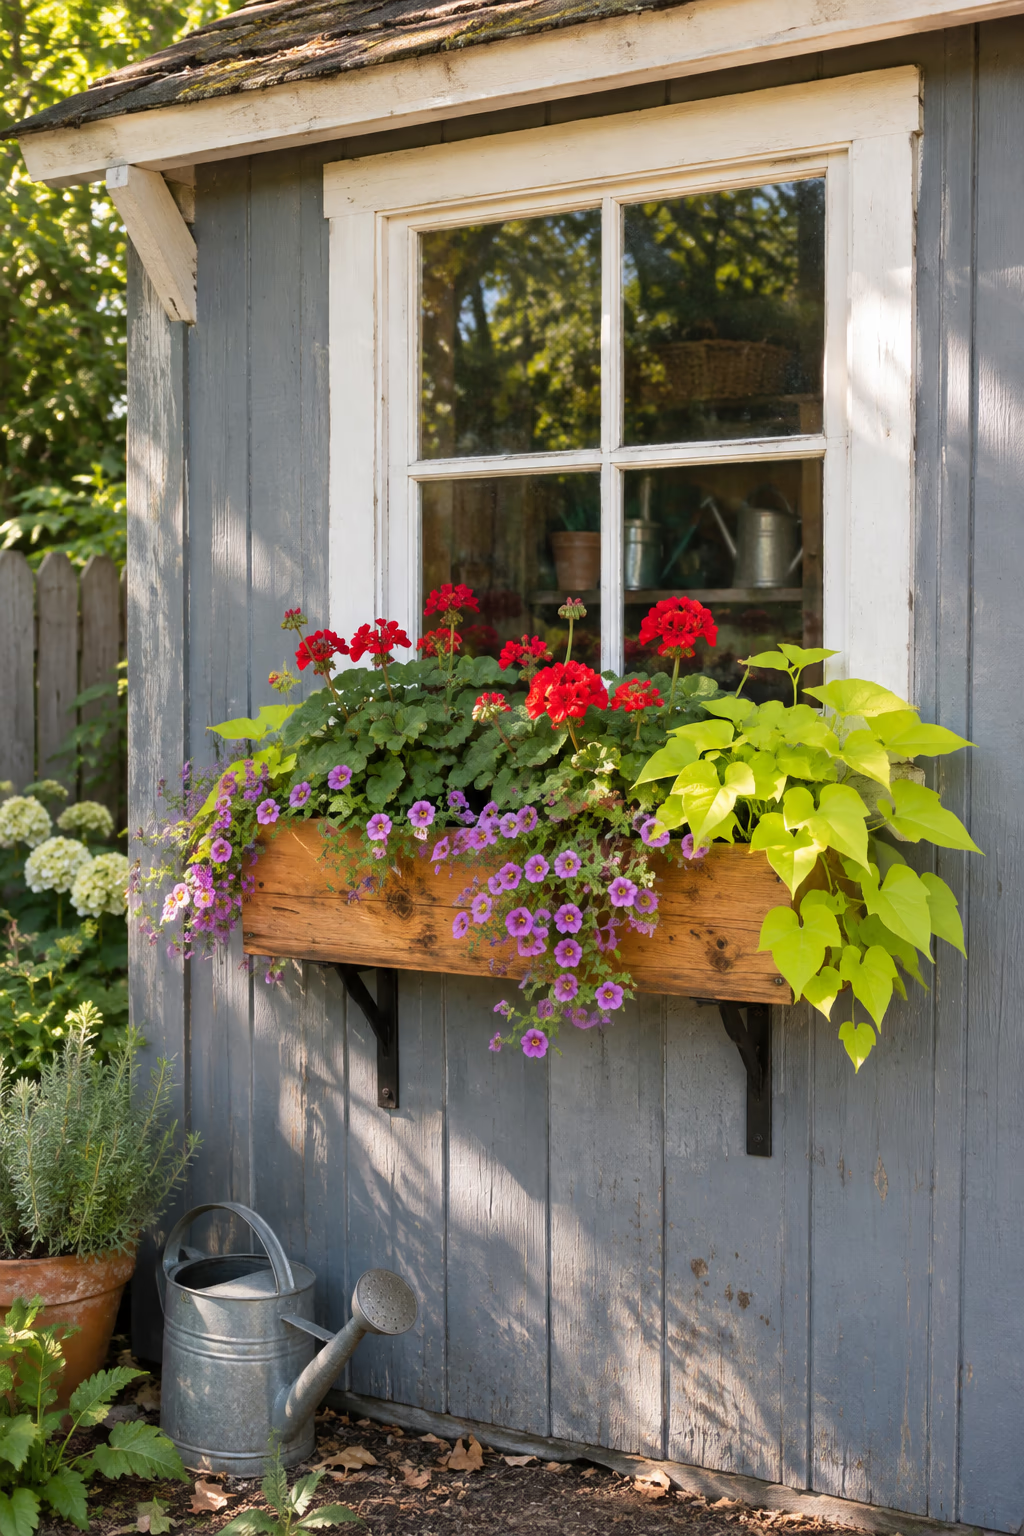
Instant cottage charm at eye level
A window box under each shed window adds color right where people look. Choose a box about as wide as the window, at least 8 inches deep, with drainage holes. Cedar, painted pine, or lightweight composite boxes all work well.
For sunny spots, try geraniums or petunias with trailing calibrachoa and sweet potato vine spilling over the front edge. In shade, use begonias, coleus, impatiens, and trailing ivy. Plant tightly so the box looks full from day one.
A planted box full of wet soil is heavy, so mount it with sturdy steel brackets screwed into the wall framing rather than just the siding. Window boxes dry out quickly in summer heat and may need water every day in July and August.
3. Wrap the Shed in a Cottage Flower Border
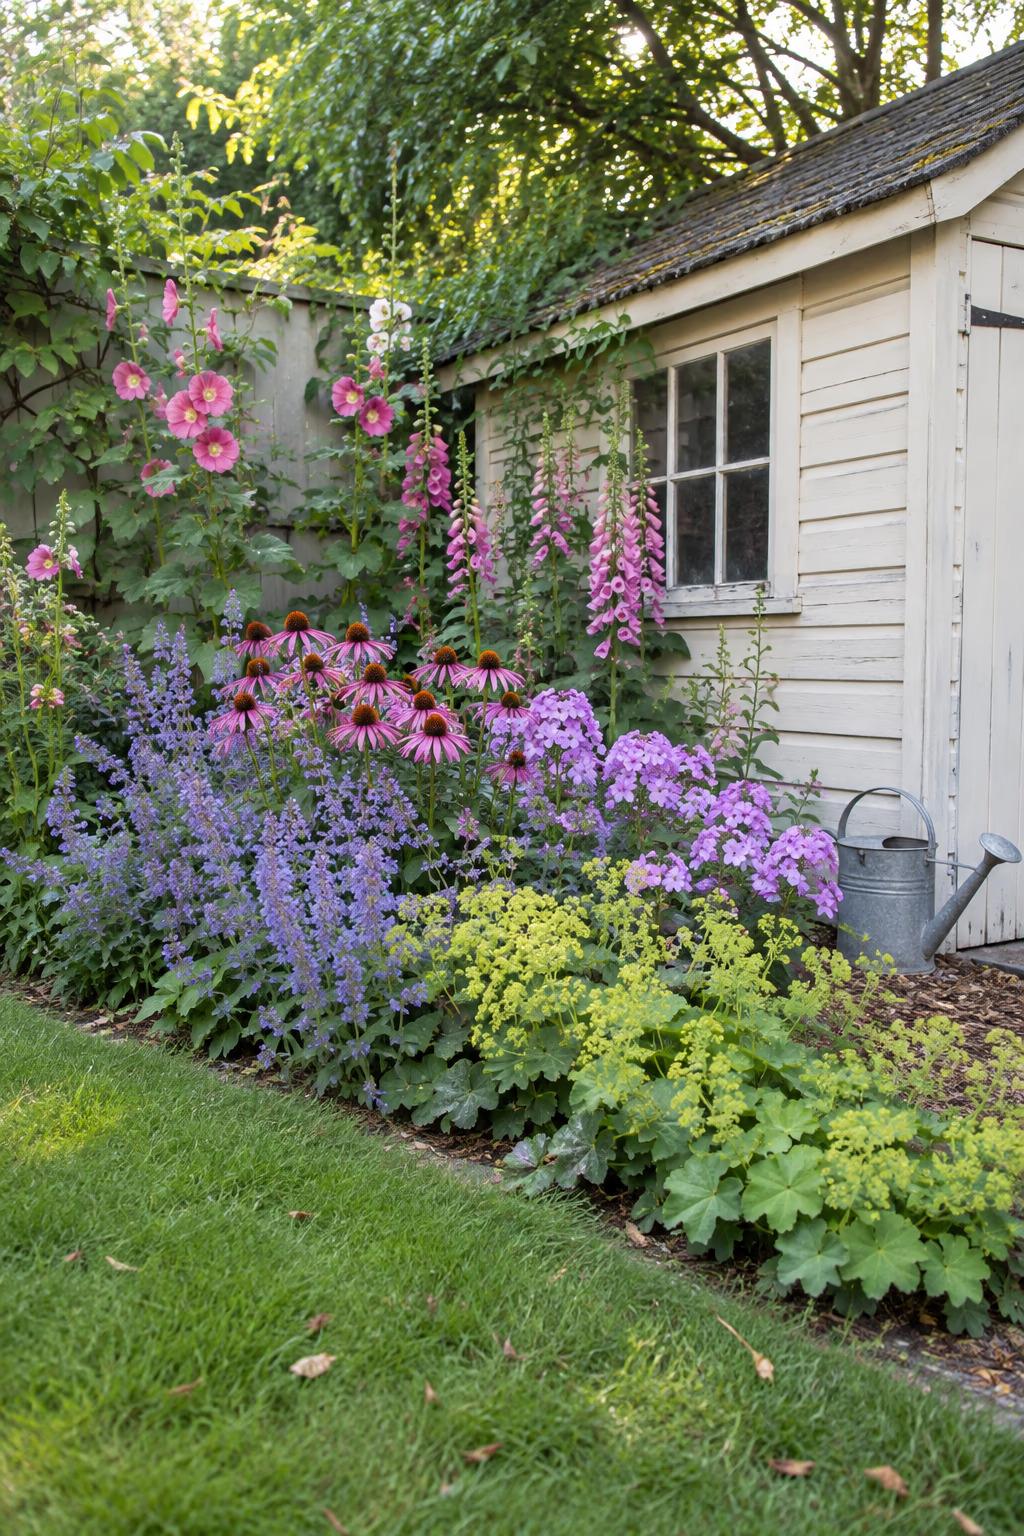
Make the shed part of the garden instead of apart from it
Nothing softens a boxy shed faster than flowers planted all around its base. Dig a bed 2 to 4 feet deep along the front and sides, then layer tall plants like hollyhocks and foxgloves at the back, mid-height perennials such as coneflowers, catmint, and phlox in the middle, and low edging plants like lady’s mantle or sweet alyssum at the front.
A loose, overflowing border makes the shed look like it has always belonged there. It also hides the bottom edge of the walls, which is often the most weathered part of an older building.
Leave a gap of at least 12 inches between the plants and the siding. That space lets air move, keeps moisture away from the wood, and gives you room to reach the walls for painting and repairs.
4. Go Bold With a Charcoal Black Exterior
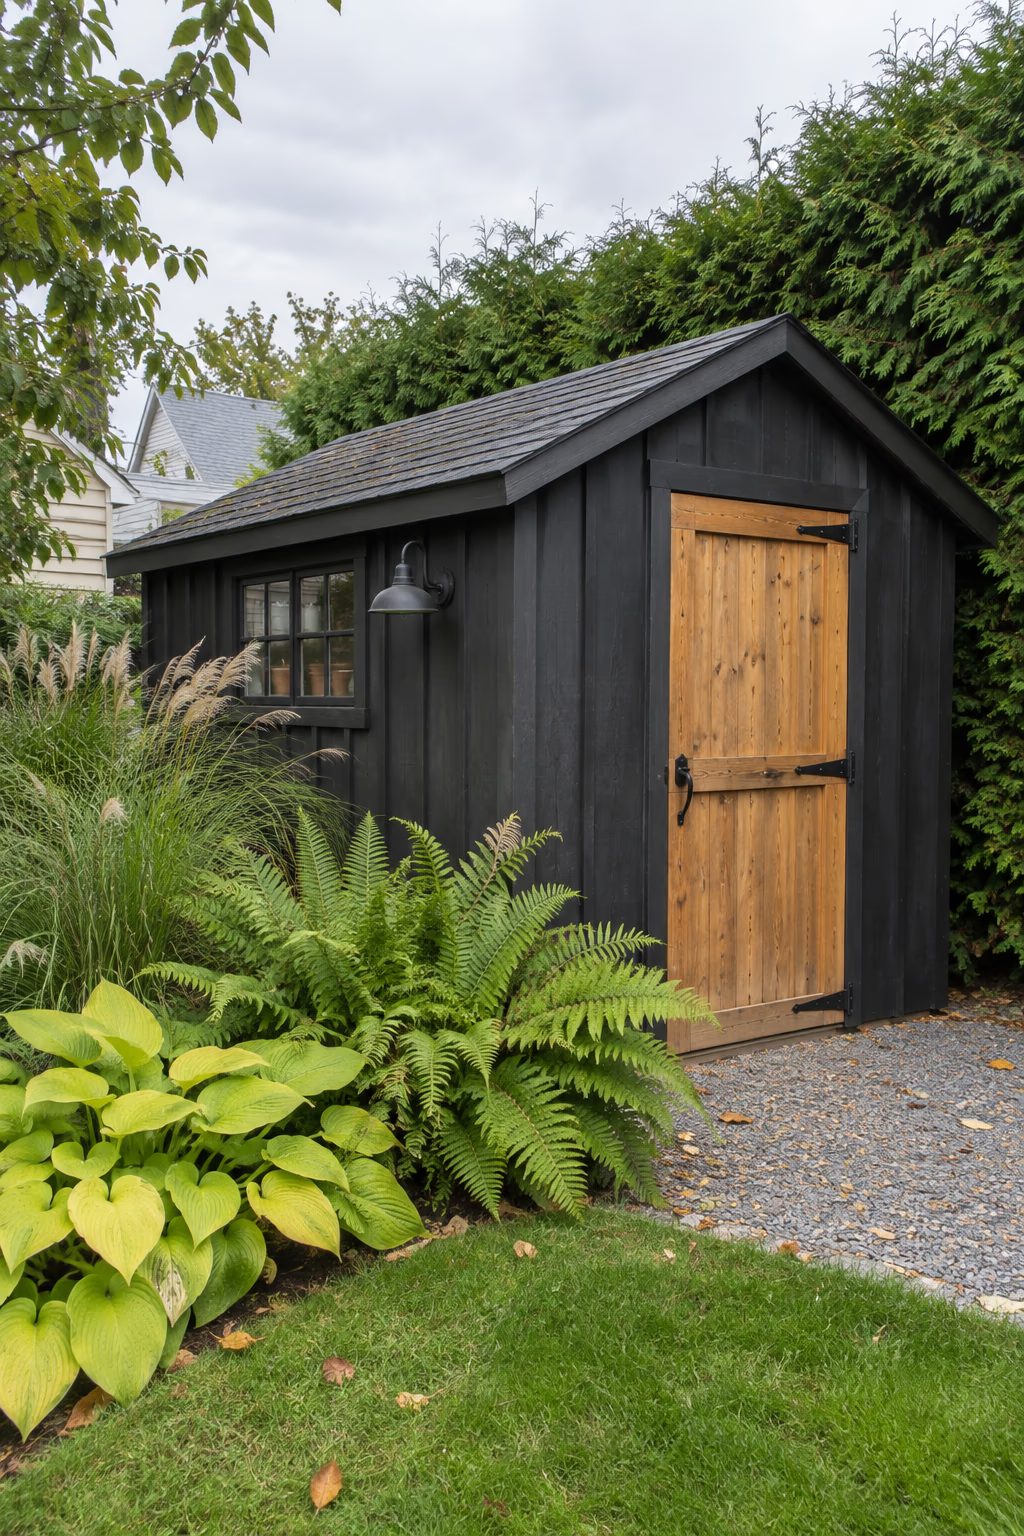
A dramatic backdrop that makes plants glow
A deep charcoal or soft black shed looks modern, hides dirt, and makes green leaves and bright blooms in front of it look even more vivid. It works especially well with natural wood doors, black metal hardware, and white or chartreuse plantings.
Dark colors also help a shed fade into the background in a shady corner or against a tall hedge, which can make a small yard feel larger.
Keep in mind that dark paint absorbs more heat. In hot, sunny climates it can make the inside of the shed noticeably warmer and may fade faster, so choose a paint rated for dark colors and avoid storing heat-sensitive items like paint or chemicals inside.
5. Turn the Interior Into a Cozy Garden Retreat
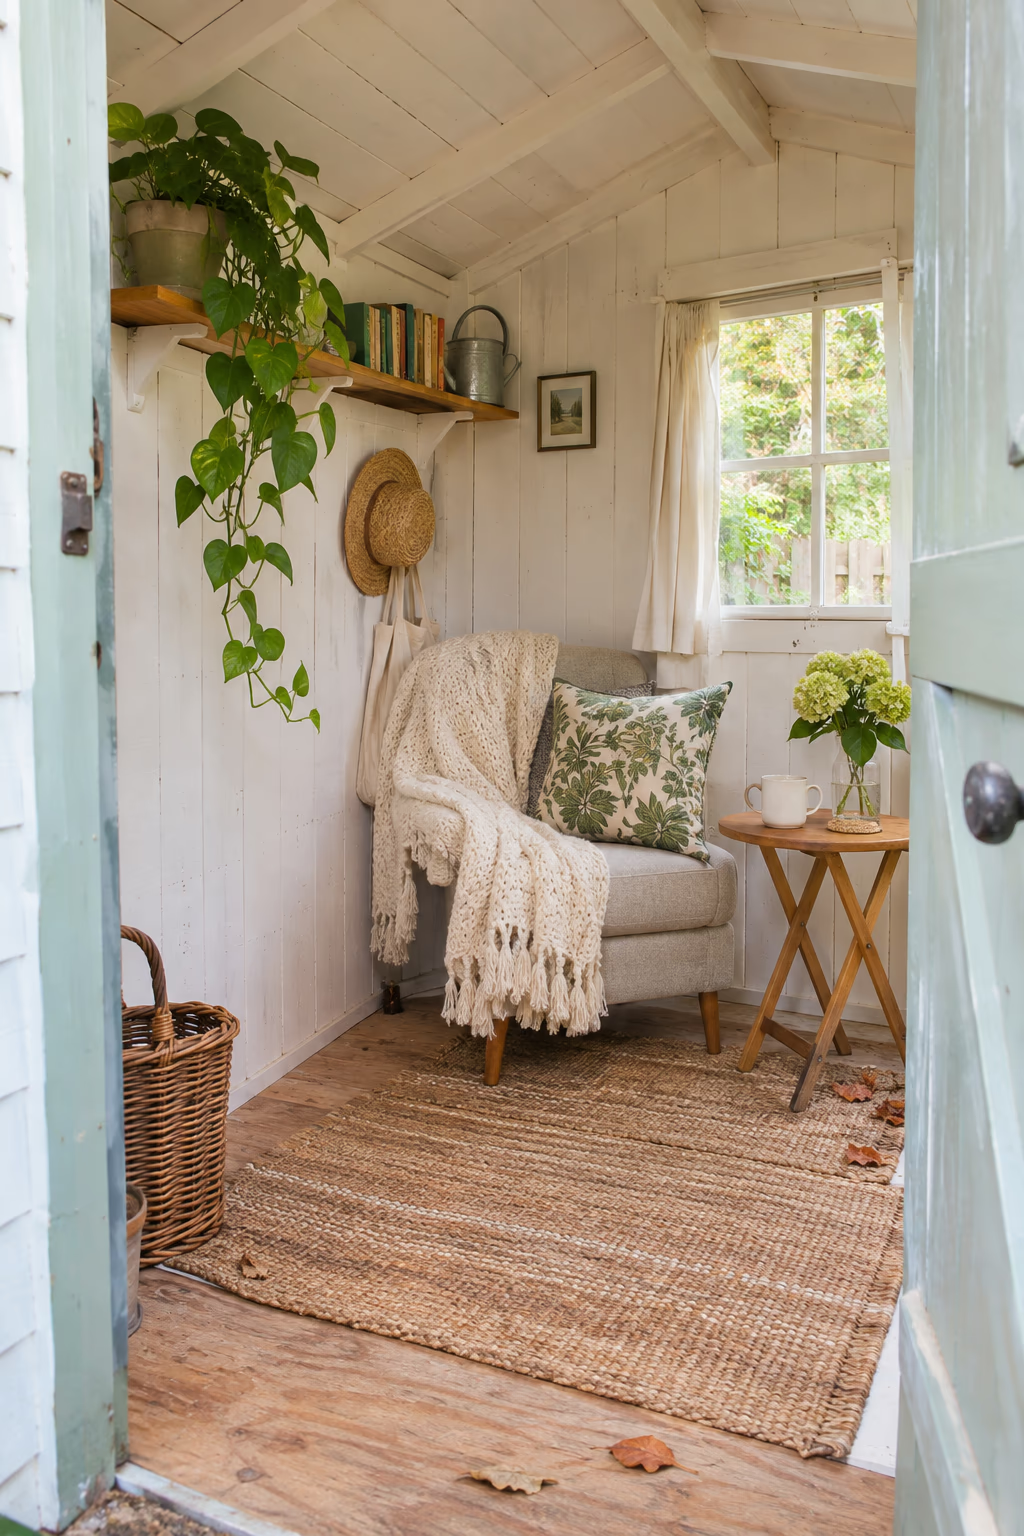
A quiet spot to read, craft, or enjoy the view
If you can move tools elsewhere, a shed makes a lovely little hideaway. Paint the inside walls a warm white, lay down an outdoor rug, and add a comfortable chair, a small side table, and a shelf for books, plants, or craft supplies. Simple cotton curtains on the windows soften the space.
Small sheds feel larger with light colors and fewer, well-chosen pieces. A fold-down wall desk or a narrow daybed can make the room useful without crowding it.
Seal gaps, fix any roof leaks, and consider insulation if you plan to spend time there in cold or hot months. Adding power for lights or a fan should be done by a licensed electrician, and you may need a permit if you plan to use the shed as a living or working space.
6. Paint the Door a Cheerful Accent Color
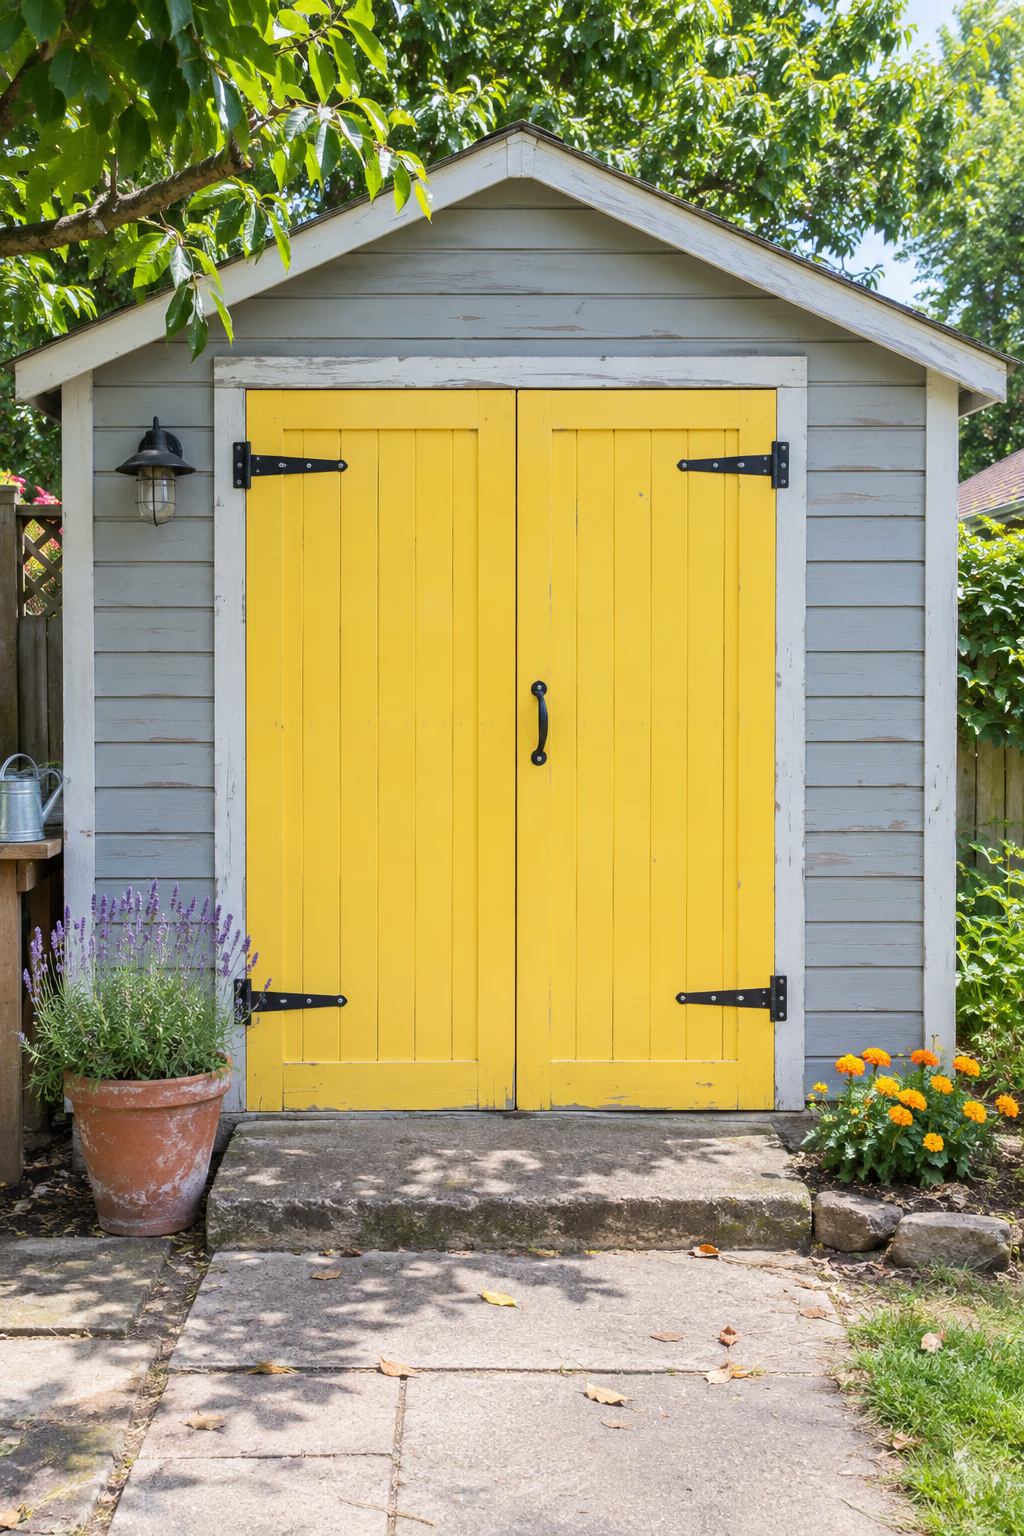
One small can of paint, a whole new personality
If you don’t want to repaint the entire shed, start with the door. A sunny yellow, robin’s egg blue, coral, or deep red door gives a neutral shed a playful focal point and guides the eye right to the entrance.
Pull the color from nearby flowers or your house’s front door so the yard feels connected. Remove the hardware first, sand lightly, prime if the old finish is glossy, and use exterior paint with good durability.
Finish with new hinges, a simple pull handle, or a latch in black or aged brass. Fresh hardware helps a painted door look intentional rather than like a quick touch-up.
7. Build a Potting Bench Along the Outside Wall
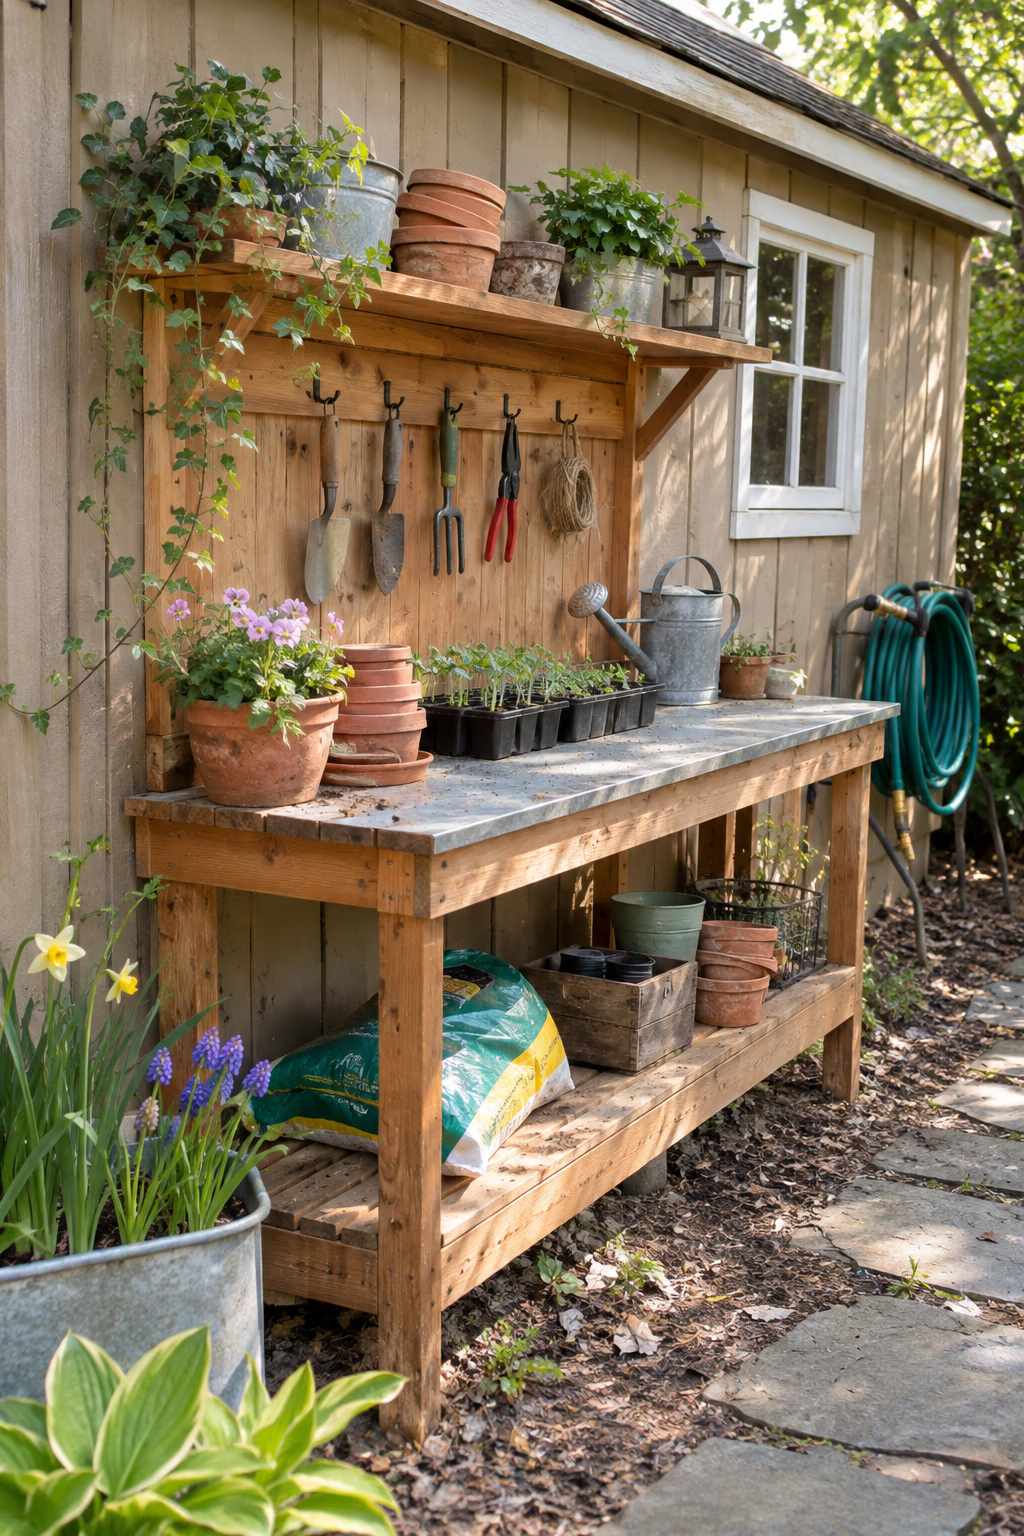
A handy workstation where you need it most
A potting bench attached to the side of the shed gives you a place to repot plants, start seeds, and clean tools without carrying everything indoors. A good working height is around 36 inches, with a top about 24 inches deep and a lower shelf for bags of soil and stacked pots.
Use cedar or pressure-treated lumber for the frame and a top of cedar boards, galvanized sheet metal, or exterior plywood sealed well against moisture. Add a few hooks on the wall above for trowels, pruners, and gloves.
Place the bench on the side with morning sun or light shade so it’s comfortable to use in summer. If possible, run a hose nearby so watering and cleanup are easy.
8. Add a Small Front Porch to the Shed
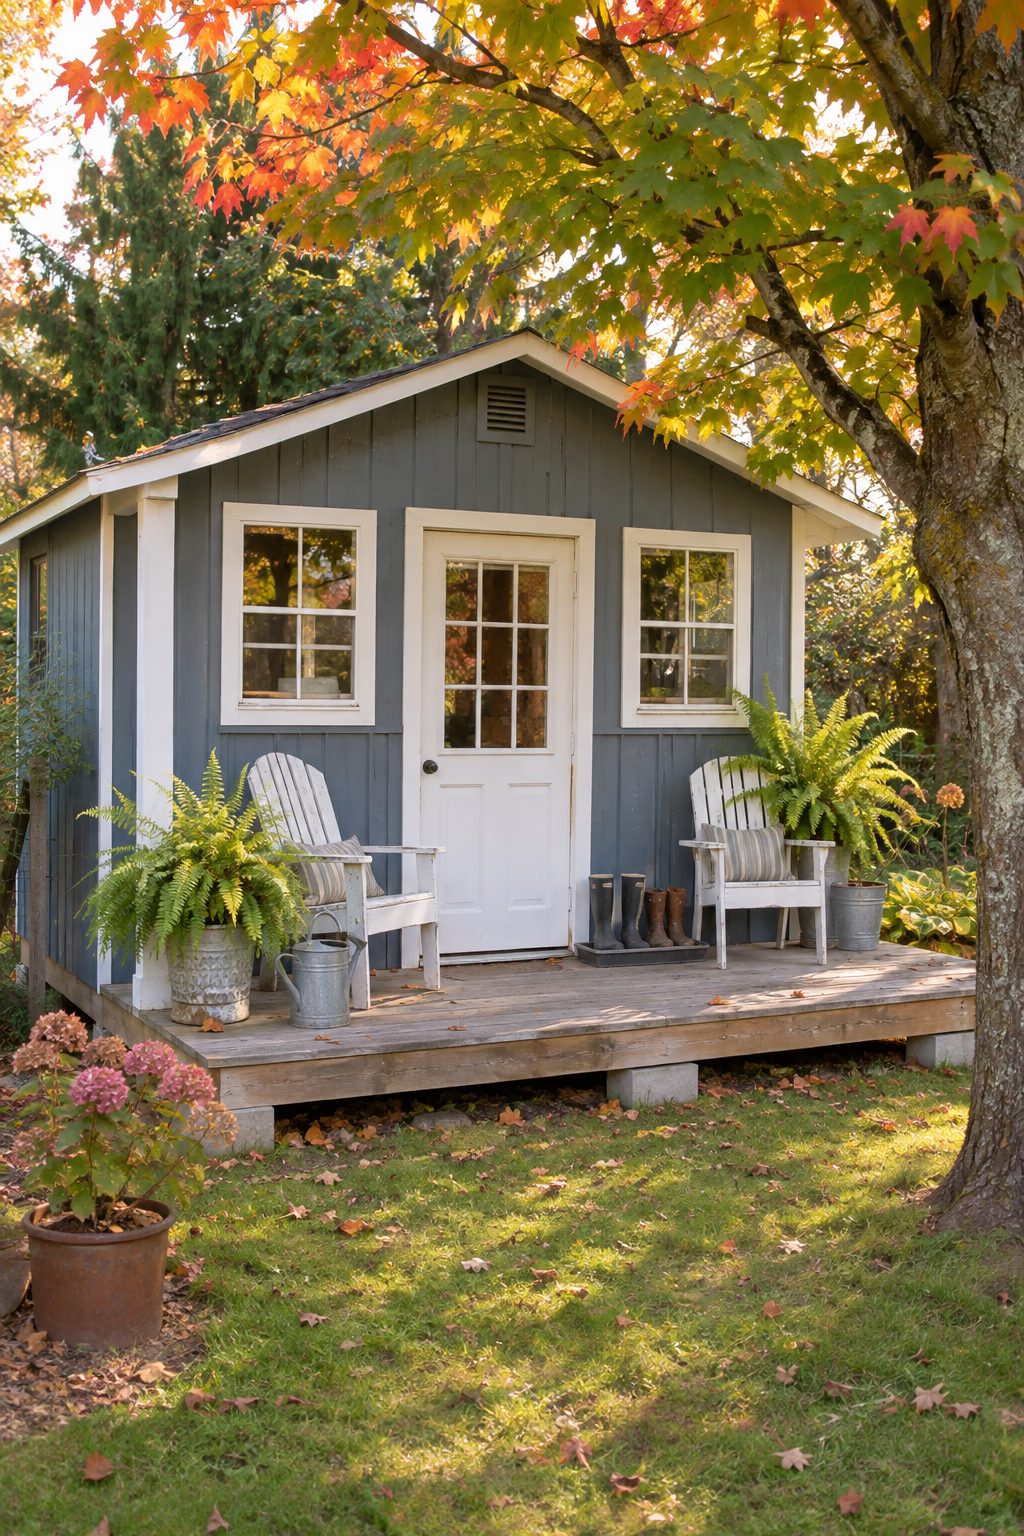
A raised spot that makes the shed feel like a tiny cottage
A simple deck platform across the front of the shed instantly gives it presence. Even a porch 4 feet deep is enough for a pair of chairs, a few potted plants, and a boot tray.
Build the frame from ground-contact pressure-treated lumber, set it on concrete deck blocks or footings, and top it with wood or composite decking. Keep the porch level with or just below the shed floor so the doorway stays easy to use.
Leave a small gap between the porch and the shed wall, or flash the connection, so rain doesn’t get trapped against the siding. If the porch is more than about 30 inches off the ground, local codes usually require a railing.
9. Lay a Curving Stepping Stone Path to the Door
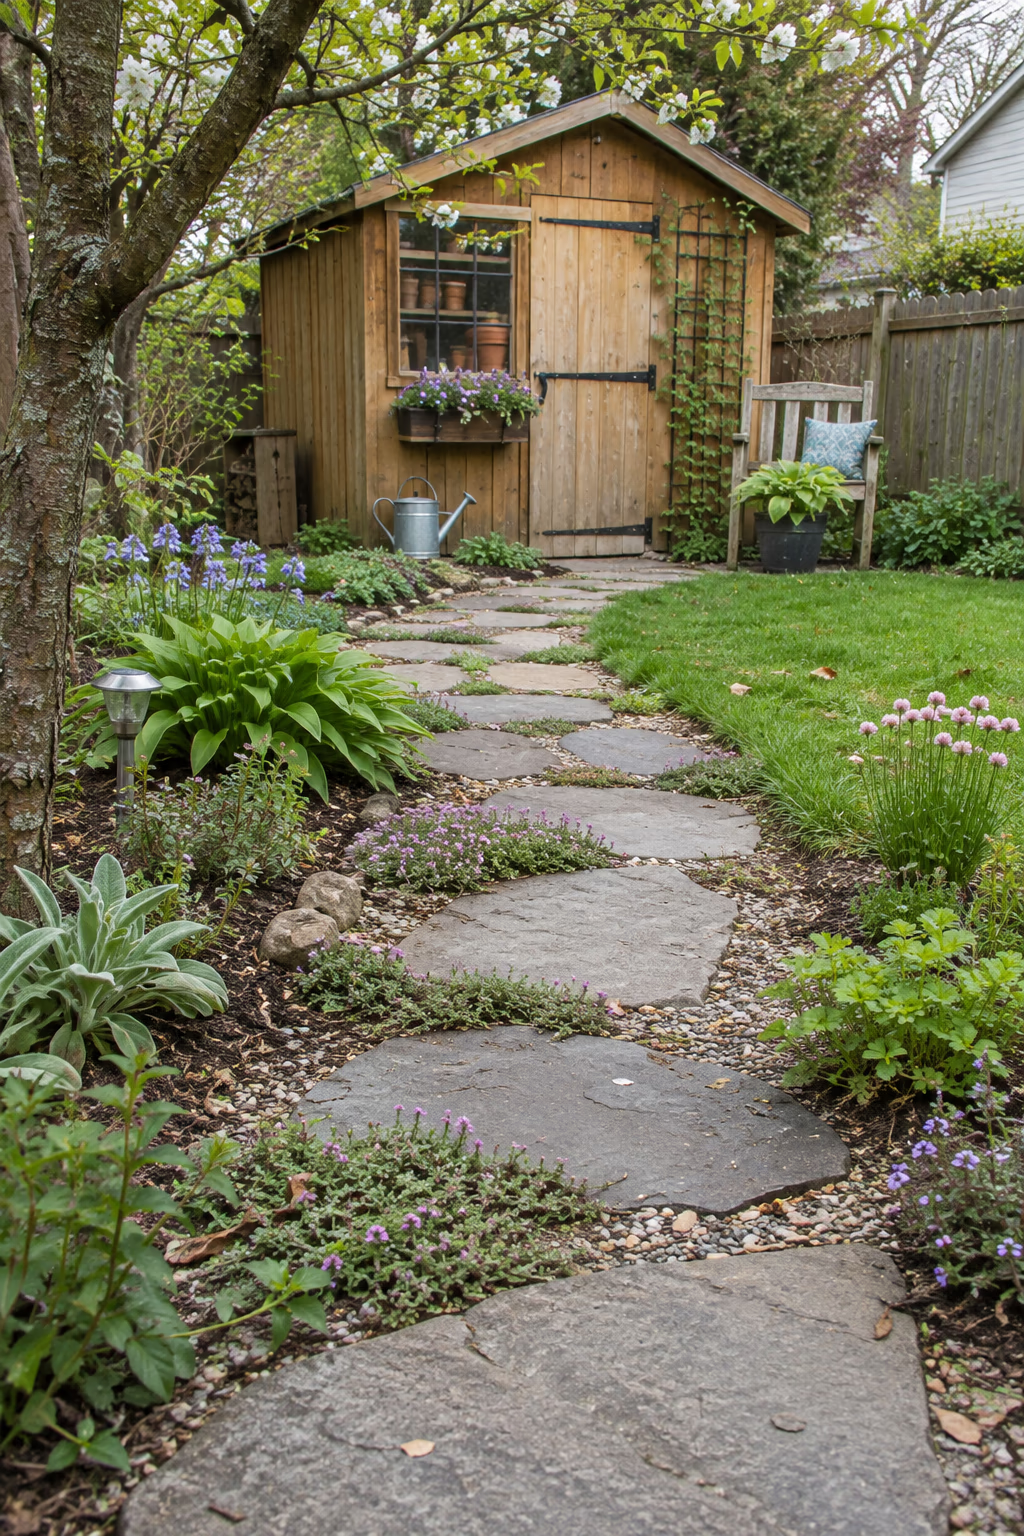
Turn the shed into a destination
A gentle path leading from the patio or back door to the shed makes the walk feel deliberate and keeps your shoes out of the mud. Flagstone, round concrete stepping stones, or large pavers set into gravel all work well.
Space the stones about 24 inches apart, center to center, to match a normal stride. Dig each one in so its top sits just above the surrounding grade, then set it on a 2-inch bed of sand or fine gravel so it doesn’t rock.
A slight curve looks more natural than a straight line in most backyards. Fill between stones with pea gravel, creeping thyme, or mulch, and avoid placing the path where water already collects after rain.
10. Organize Tools on a Pegboard Wall
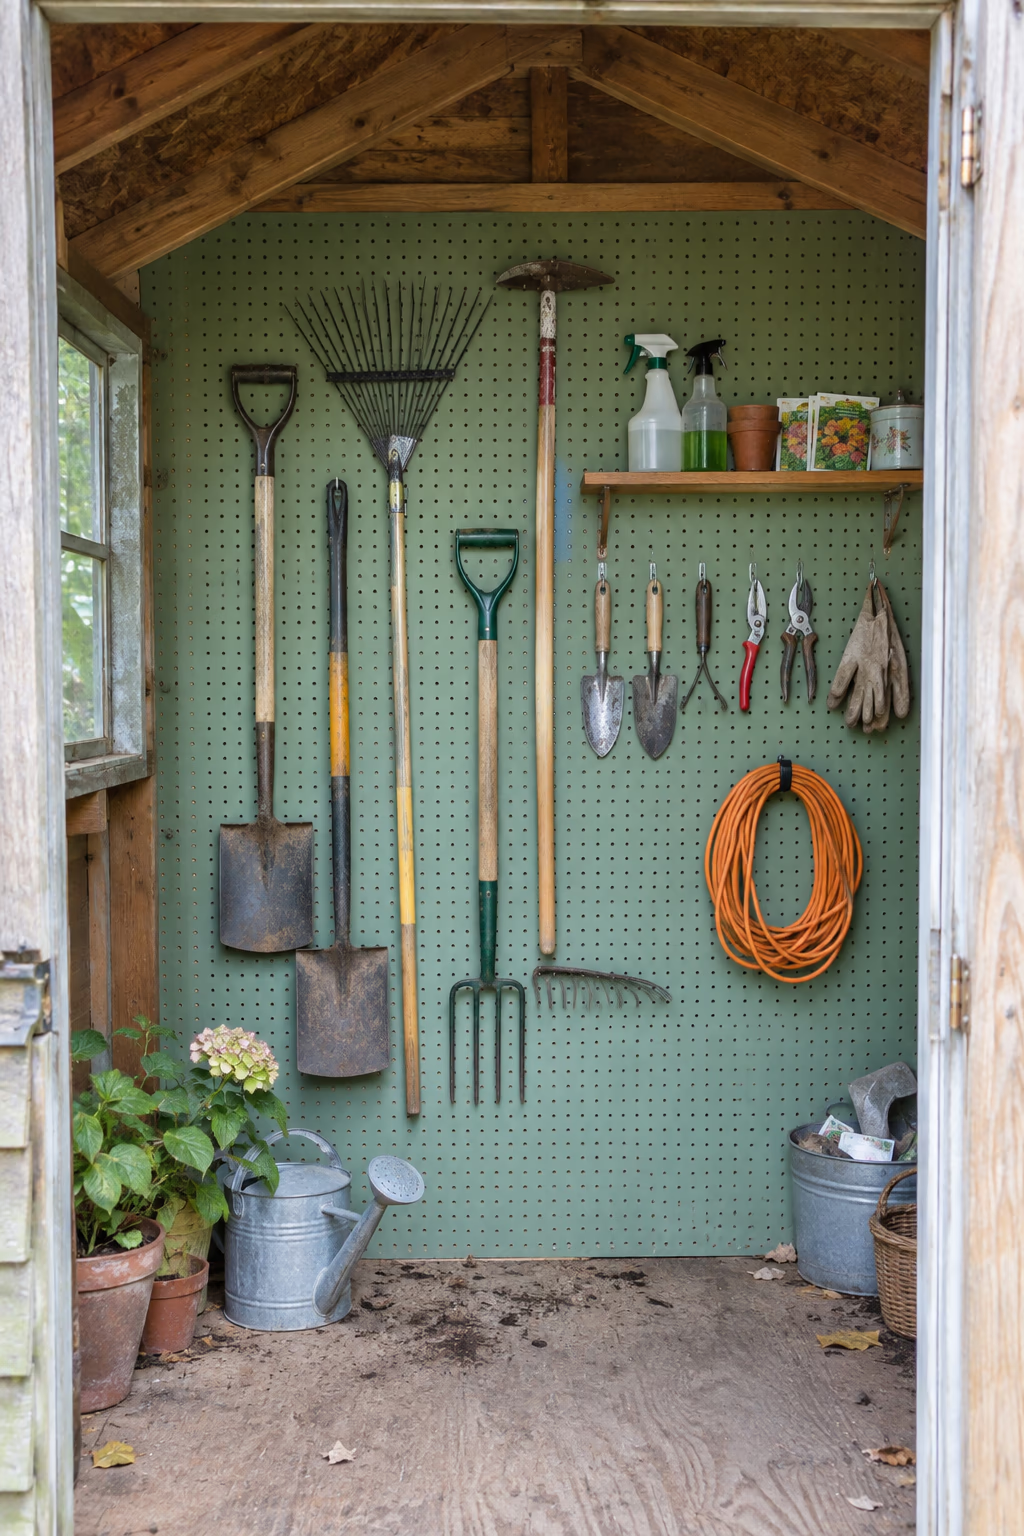
Find every tool in seconds
A wall of pegboard is one of the cheapest ways to bring order to a cluttered shed. Mount the panels on furring strips so the hooks have room behind the board, then hang shovels, rakes, hand tools, string trimmers, and extension cords where you can see them.
Paint the pegboard a cheerful color before hanging it, and outline each tool with a marker if you like knowing exactly where things go back. Add a narrow shelf or two for sprays, seed packets, and gloves.
Standard hardboard pegboard can swell in damp conditions, so in humid climates look for moisture-resistant or metal panels. Keep the heaviest items low and near the door to make them easier to lift.
11. Swap in Salvaged Windows and a Vintage Door
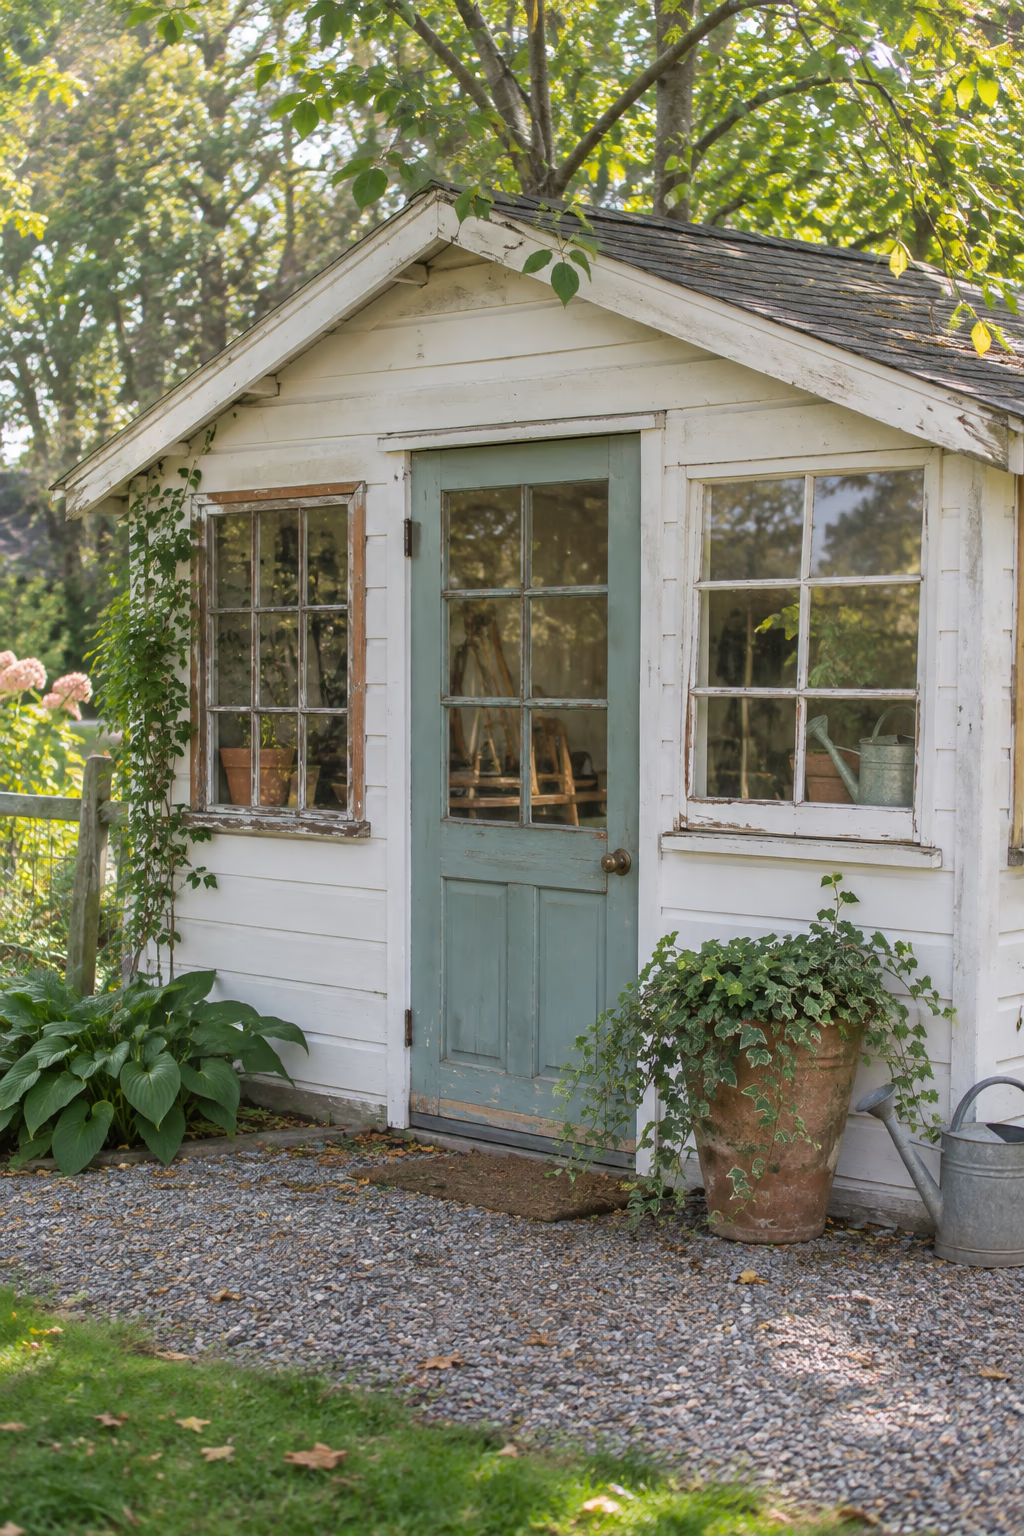
Old character that new sheds can’t match
Architectural salvage shops, online marketplaces, and local renovation outlets often sell old wood windows and doors for much less than new ones. A multi-pane window or a half-glass door can give a plain shed real cottage personality and let in much more daylight.
Measure carefully before you shop. It’s easier to reframe an opening to fit a window you already own than to hunt for a vintage piece in an exact size. Use exterior caulk, flashing above the frame, and fresh glazing putty to keep water out.
Old painted windows and doors may contain lead paint. Don’t dry-sand or scrape them without proper precautions; test the finish first and follow lead-safe practices if it comes back positive.
12. Train a Climbing Hydrangea Up the Shady Side
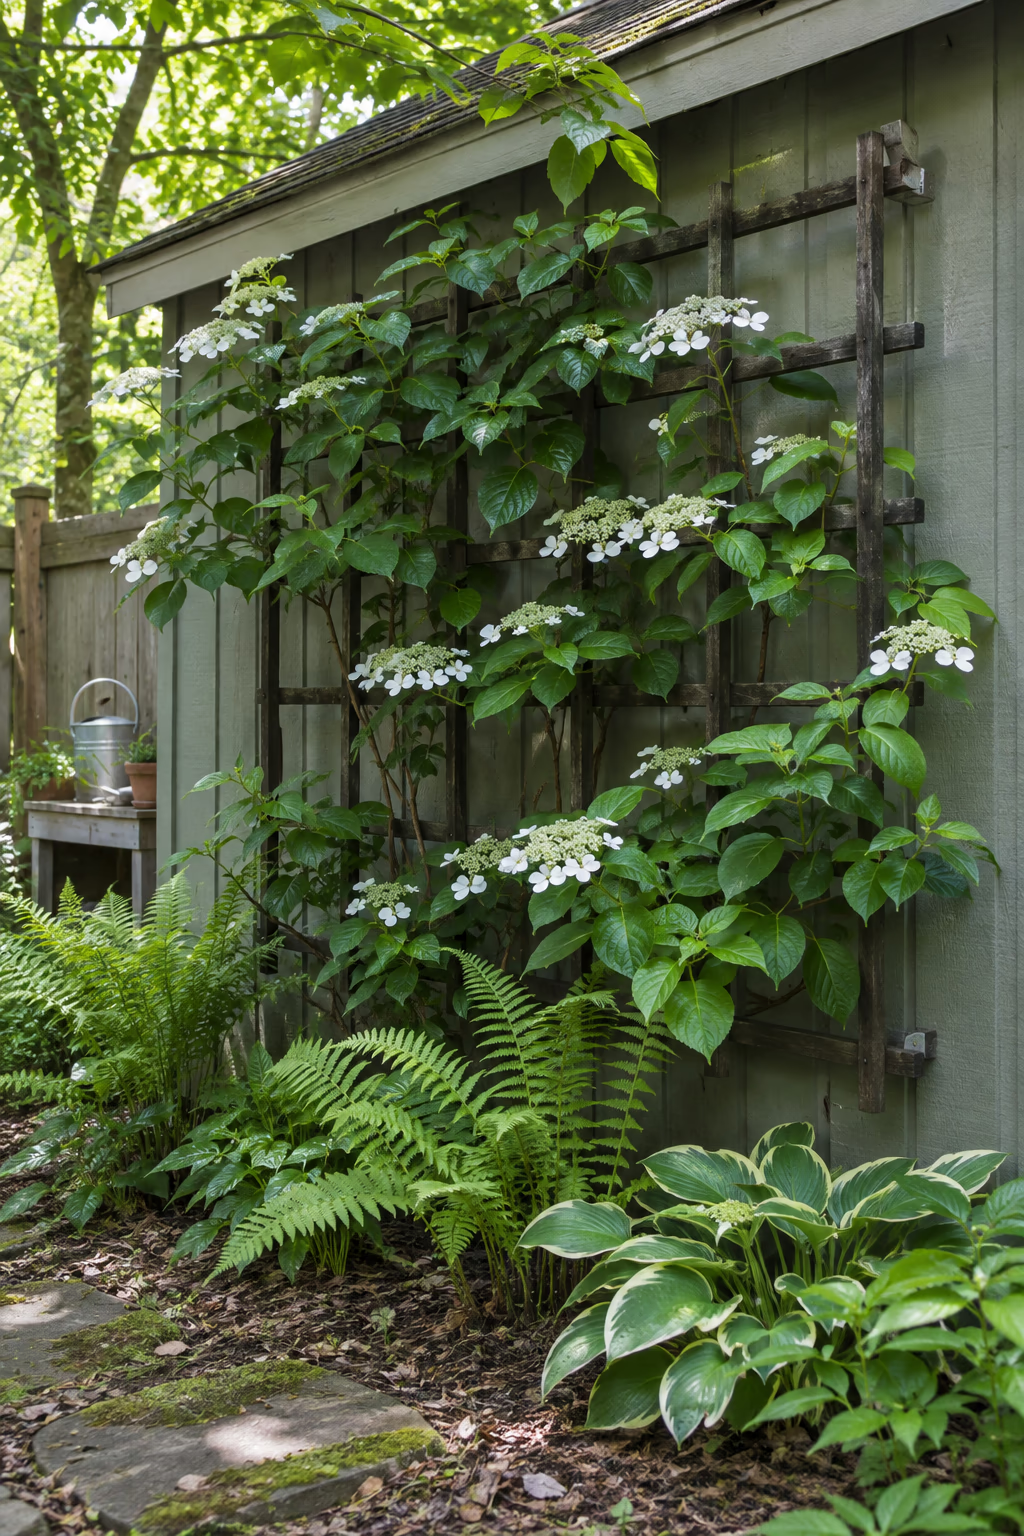
Lush greenery and white blooms where little else grows
Climbing hydrangea is one of the few flowering vines that’s happy in partial shade, making it a great fit for the north or east wall of a shed. It produces flat white flower clusters in early summer and has attractive peeling bark in winter. It is generally hardy in USDA zones 4 to 8.
The vine clings with small rootlets that can damage paint and hold moisture against wood. Instead of letting it grab the siding, attach a sturdy wooden or wire trellis a few inches away from the wall so air can circulate and you can still maintain the shed.
Be patient: climbing hydrangea grows slowly for its first few years before it really takes off. For faster coverage in sun, consider clematis or a climbing rose on the same trellis.
13. Dress Up Plain Panels With Board-and-Batten Trim
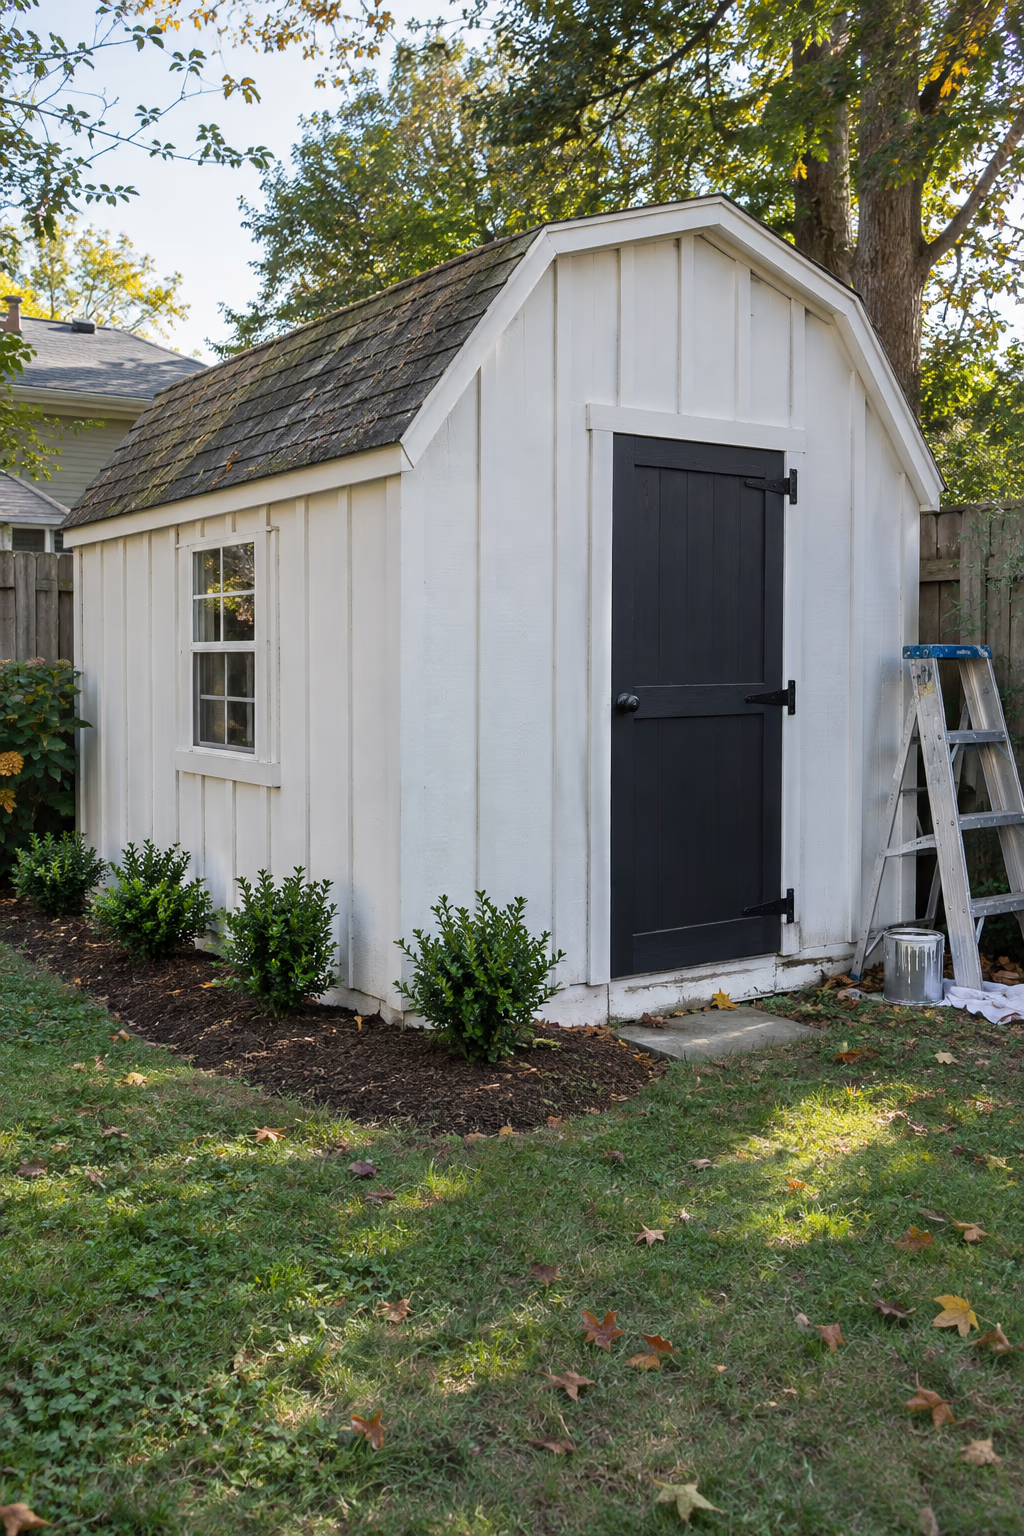
Farmhouse texture without new siding
Many prefab sheds have flat, grooved plywood siding that looks dated. Nailing vertical battens, such as 1×2 or 1×3 strips, every 12 to 16 inches over the existing panels creates the look of classic board-and-batten siding at a fraction of the cost.
Use rot-resistant cedar or primed exterior trim boards, fasten them into the studs where you can, and caulk the top edges. Paint the walls and battens the same color for a clean farmhouse look.
Before adding trim, press on the siding near the bottom edge. If it feels soft or is delaminating, replace that section first, because new battens won’t fix water damage underneath.
14. Mount a Barn Light Above the Entry
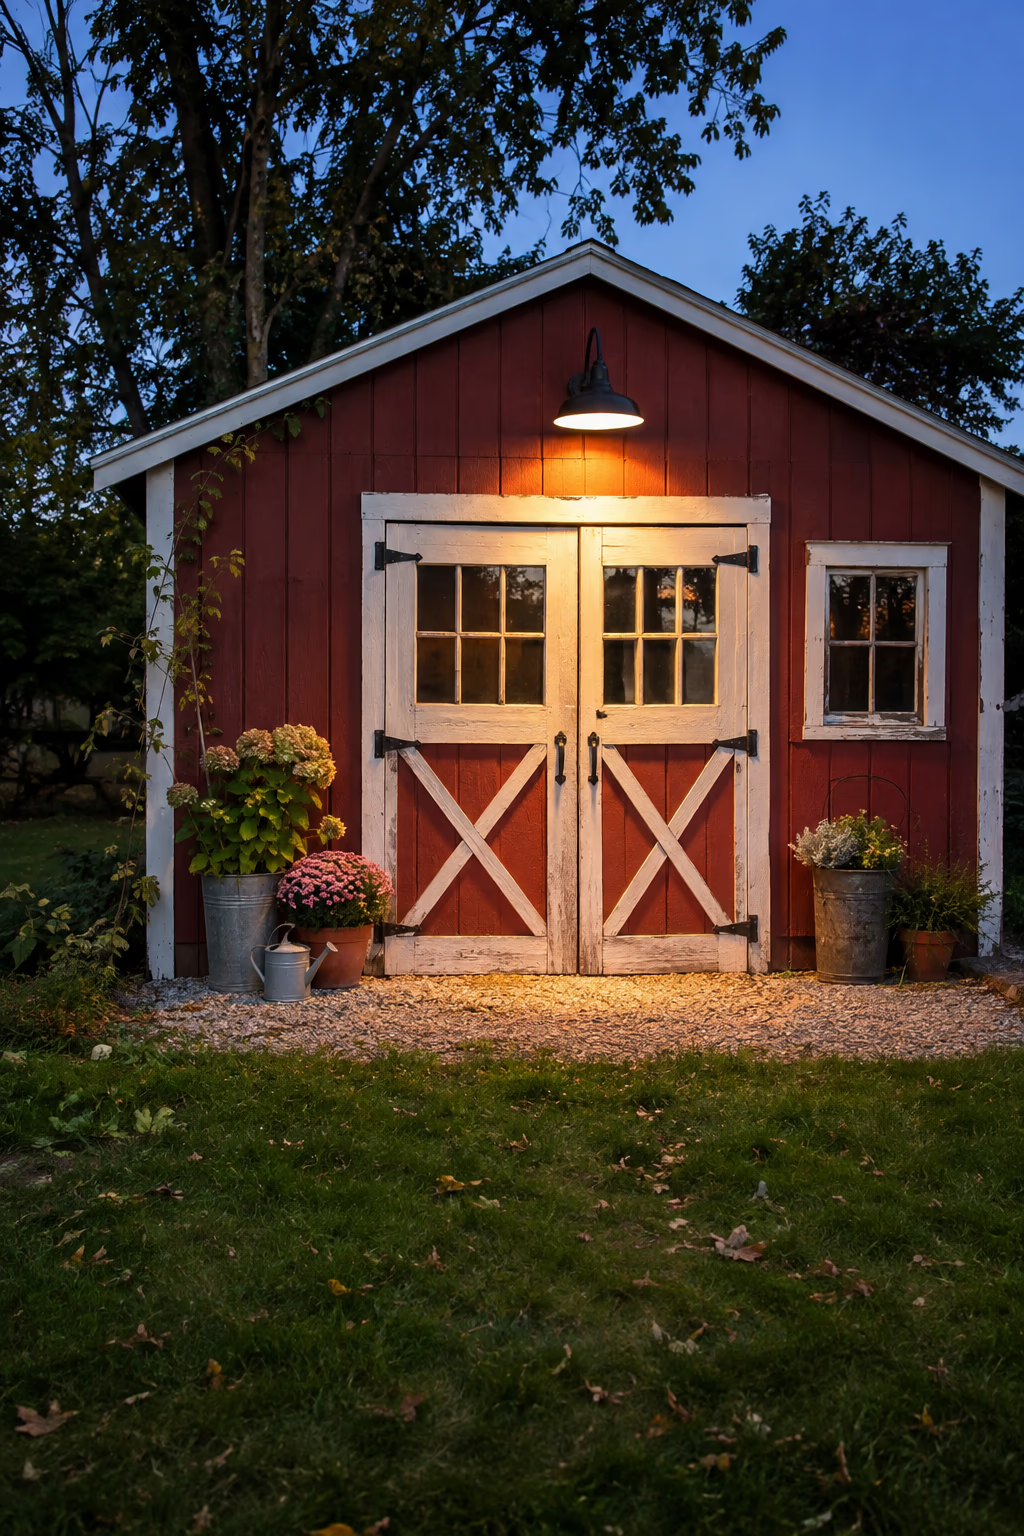
Practical light with plenty of style
A gooseneck barn light or a simple lantern over the shed door adds charm by day and makes it safer to grab a tool after dark. Black, galvanized, and dark bronze finishes all suit most shed styles.
If your shed doesn’t have power, a solar fixture with a separate panel is the easiest choice. Place the panel where it gets several hours of direct sun. Battery-powered motion lights work well inside for finding things quickly.
Hardwired outdoor lighting requires an outdoor-rated fixture, a buried electrical line, and GFCI protection. This is a job for a licensed electrician, and most areas require a permit.
15. Hang Painted Shutters Beside the Windows
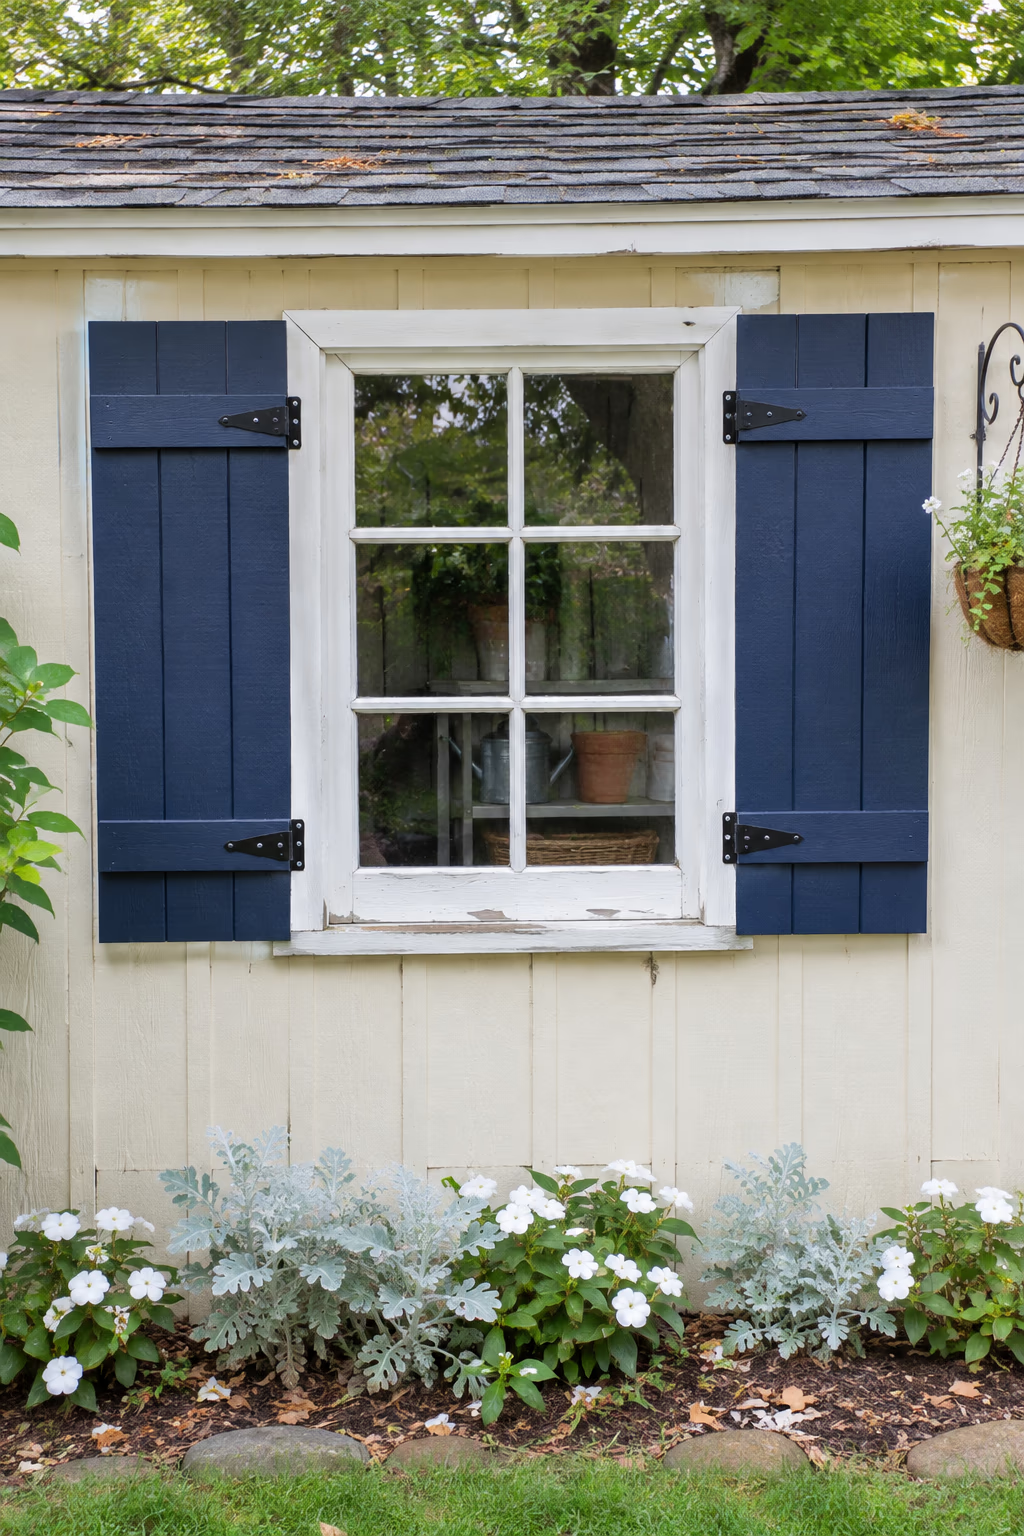
A small detail that makes a shed look finished
Shutters make a small building look more like a house. Simple board-and-batten or louvered shutters in a contrasting color, such as navy on a cream shed or white on a gray one, add instant curb appeal.
Size each shutter so it would cover half the window if closed. Shutters that are too narrow look like an afterthought. You can build them from cedar boards with a Z-brace on the back or buy inexpensive vinyl ones.
Mount them with a small gap behind so water can drain, and use stainless steel or exterior-rated screws to prevent rust stains on fresh paint.
16. Shade the Entry With a Pergola Overhang
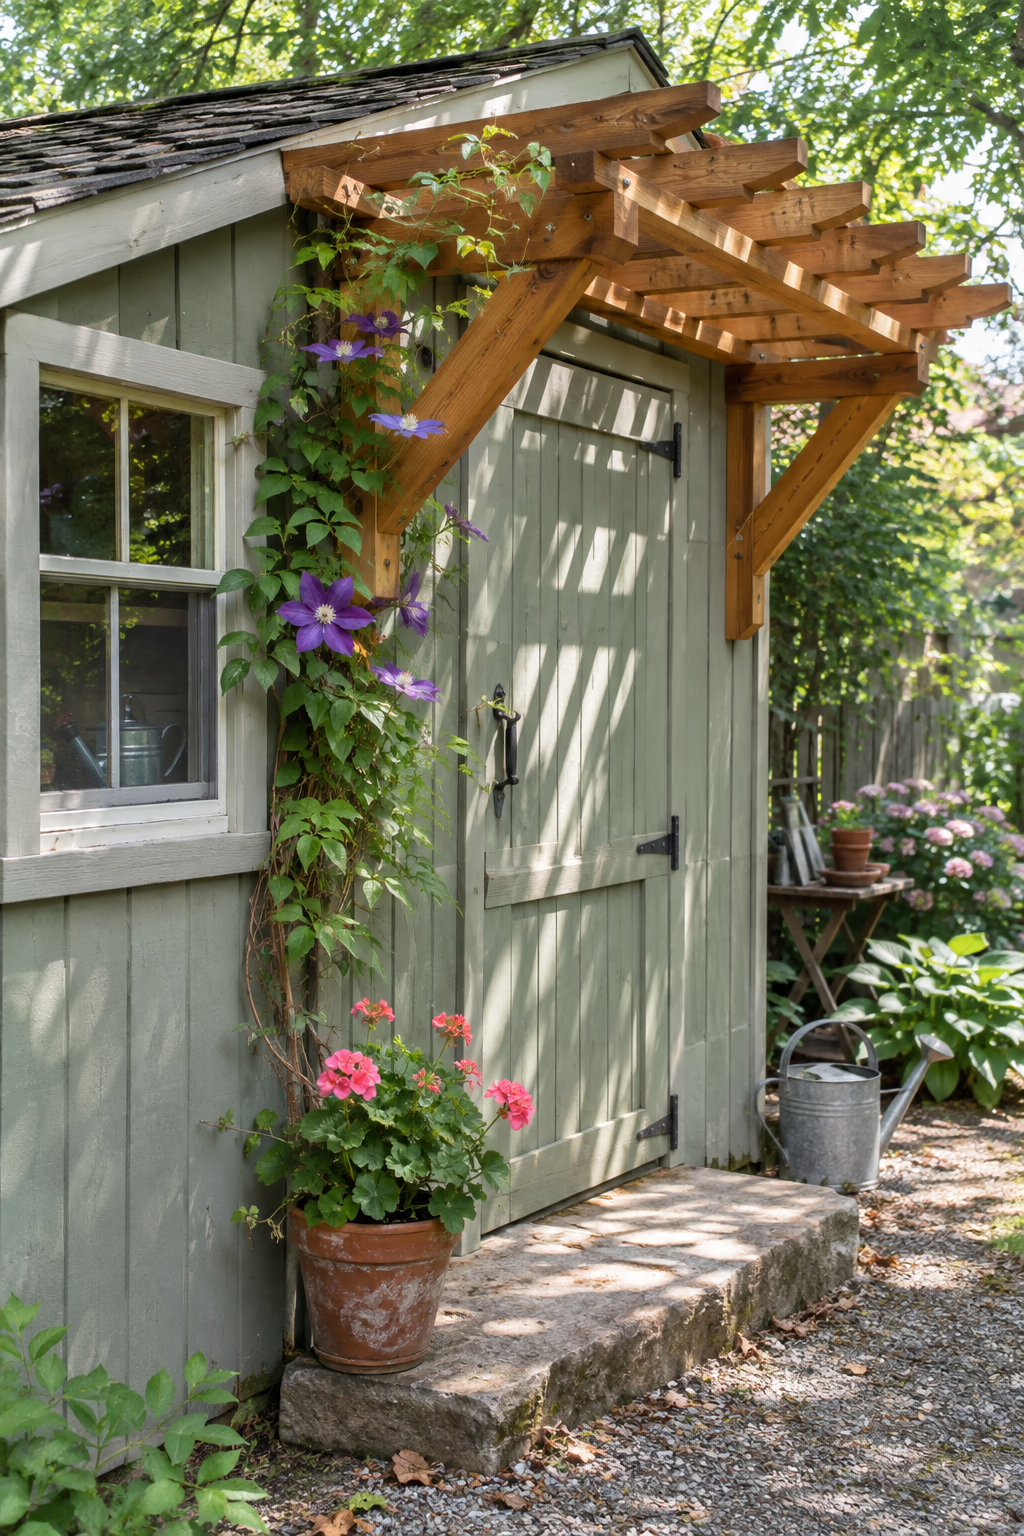
Architectural interest and a little relief from the sun
A small pergola-style overhang above the door adds depth to a flat front wall and gives climbing plants something to grow on. A typical design uses two angled brackets and a few rafter tails extending 24 to 36 inches from the wall.
Cedar is lightweight and rot-resistant for this kind of project. Bolt the support ledger into the shed framing, not just the siding, and stain or paint it to match the trim.
If you want real rain protection, add a solid roof of corrugated metal or clear polycarbonate panels to the frame. An open pergola looks great but won’t keep the doorway dry in a storm.
17. Top a Small Shed With a Living Sedum Roof
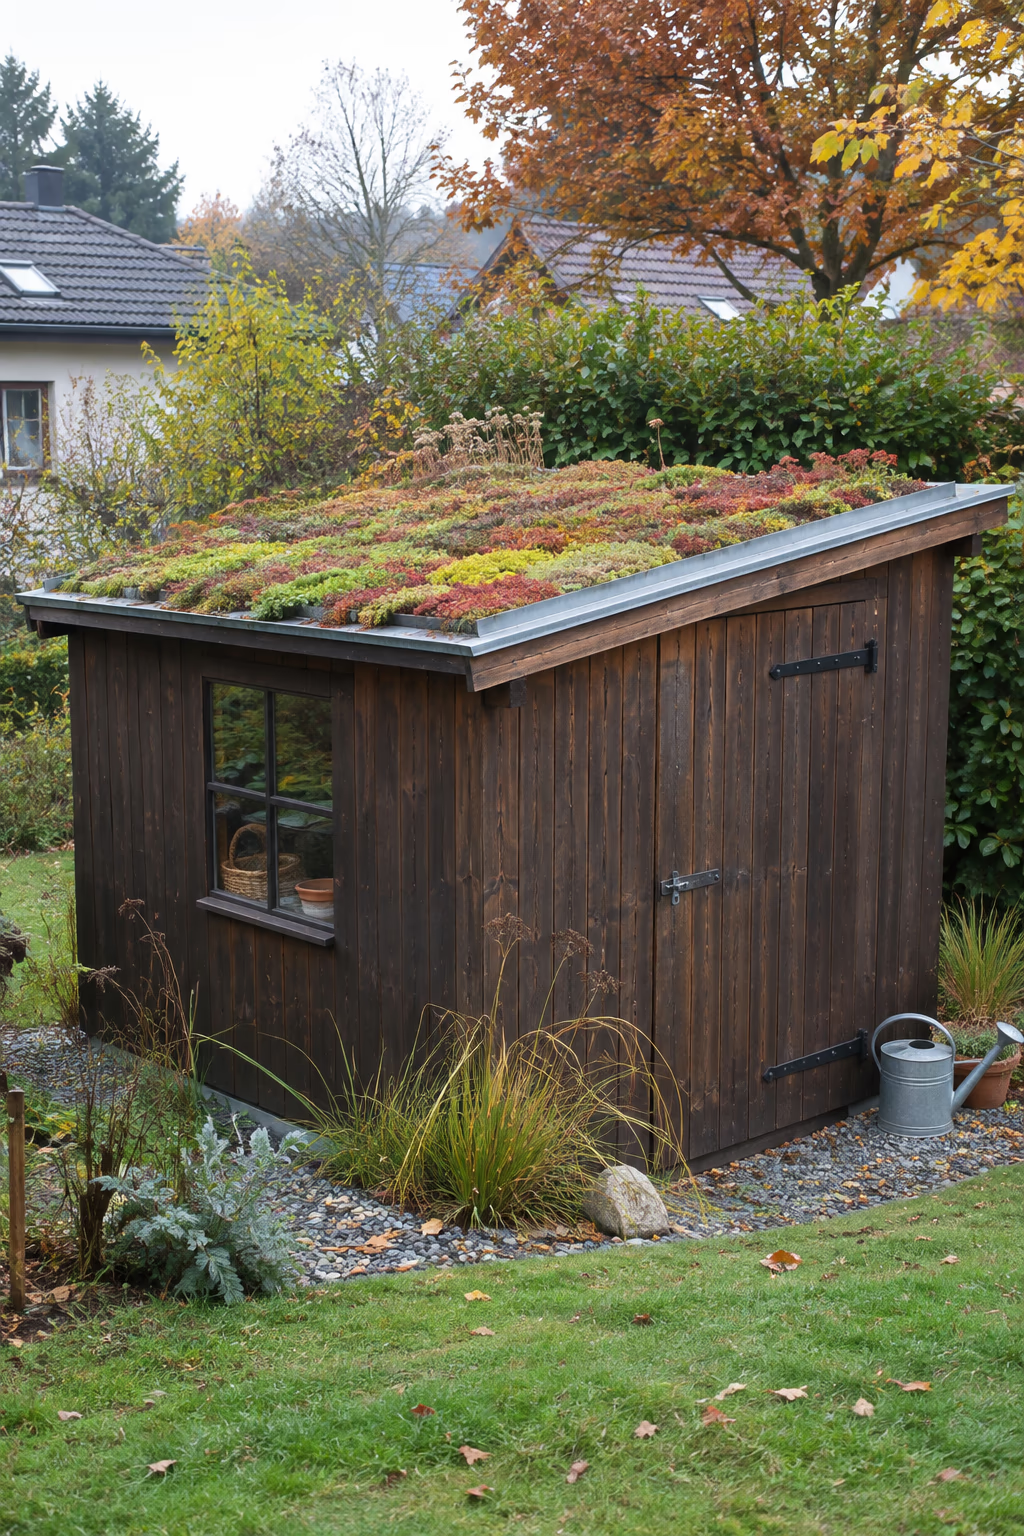
A green roof that catches the eye and slows runoff
Low-growing sedums planted in a shallow tray system on the roof can turn a small, low-slope shed into a living sculpture. Sedums tolerate heat, drought, and shallow soil, and many turn red or bronze in fall and winter.
A green roof needs a waterproof membrane, a root barrier, a drainage layer, a lightweight growing mix about 3 to 4 inches deep, and edging to keep everything in place. Pre-planted sedum trays or mats make installation much simpler.
Wet soil and plants are heavy, so have the roof structure checked before you start. Many standard sheds need extra rafters or bracing to carry the load safely, and steep roofs aren’t suitable.
18. Line the Inside Walls With Cedar Fence Boards
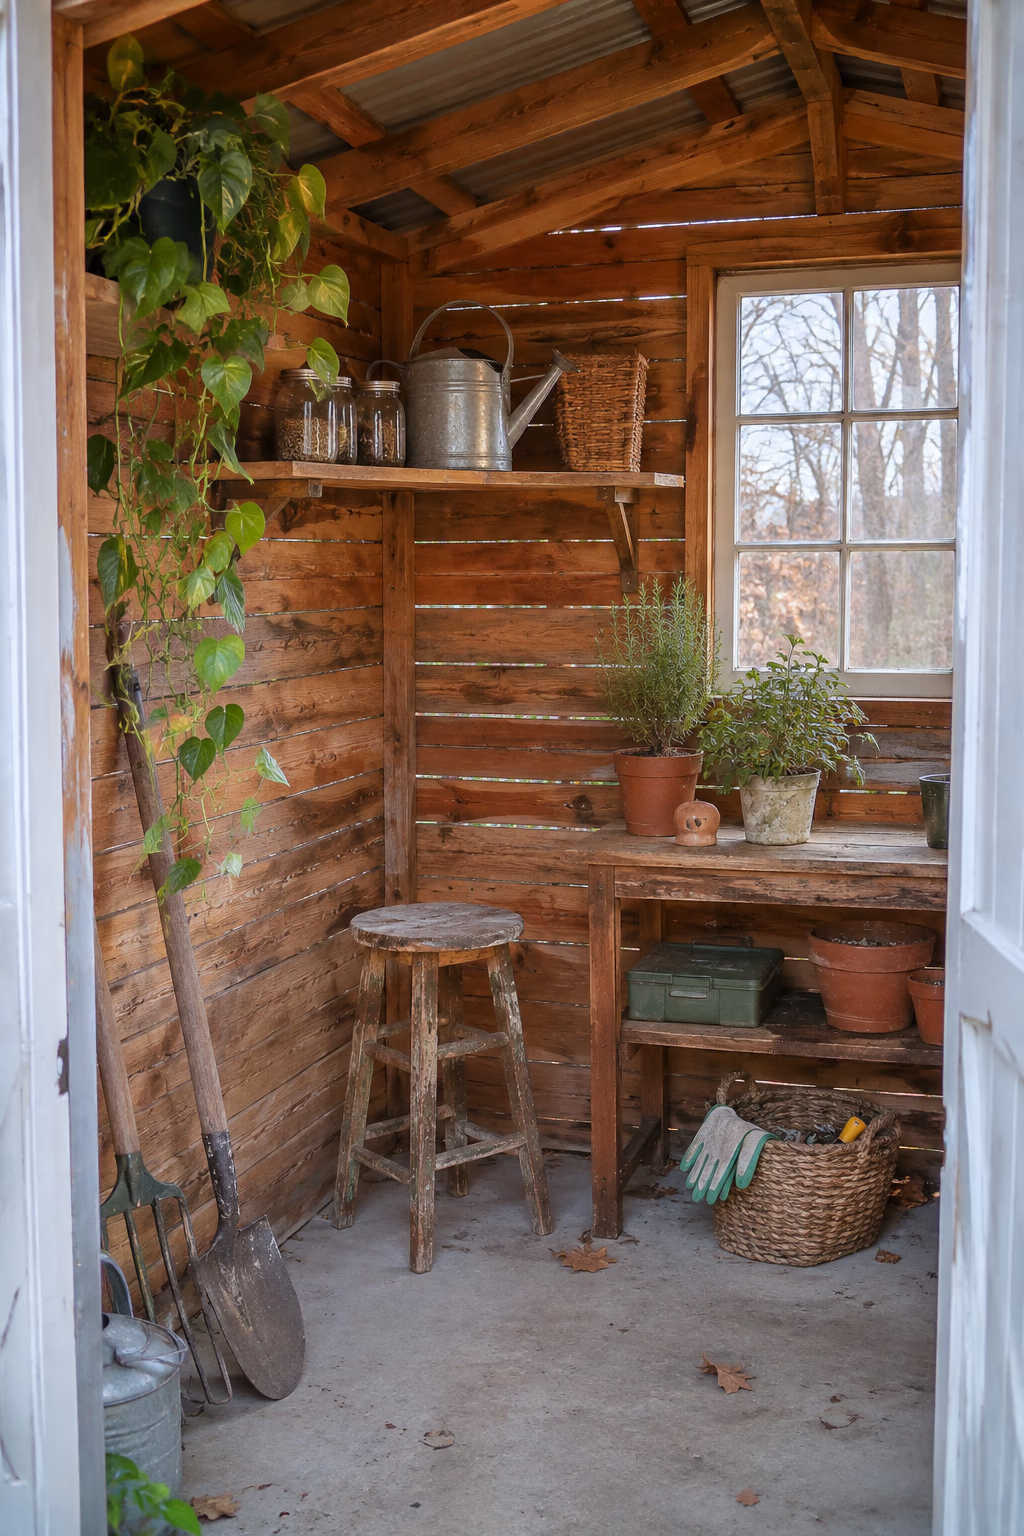
Warm, rustic paneling on a small budget
Cedar fence pickets are an inexpensive way to cover bare studs inside a shed. They add warm color, a pleasant scent, and enough texture to make a utility space feel finished.
Run the boards horizontally, nailing them into each stud, and leave small gaps between them for a relaxed, natural look. You can leave the wood unfinished or apply a clear water-based sealer to keep it from graying.
Pickets vary in thickness and straightness, so buy a few extra and sort out warped or split boards before you start. Wear a dust mask when cutting cedar, as the sawdust can irritate some people.
19. Add a Gutter and Rain Barrel to Water the Garden
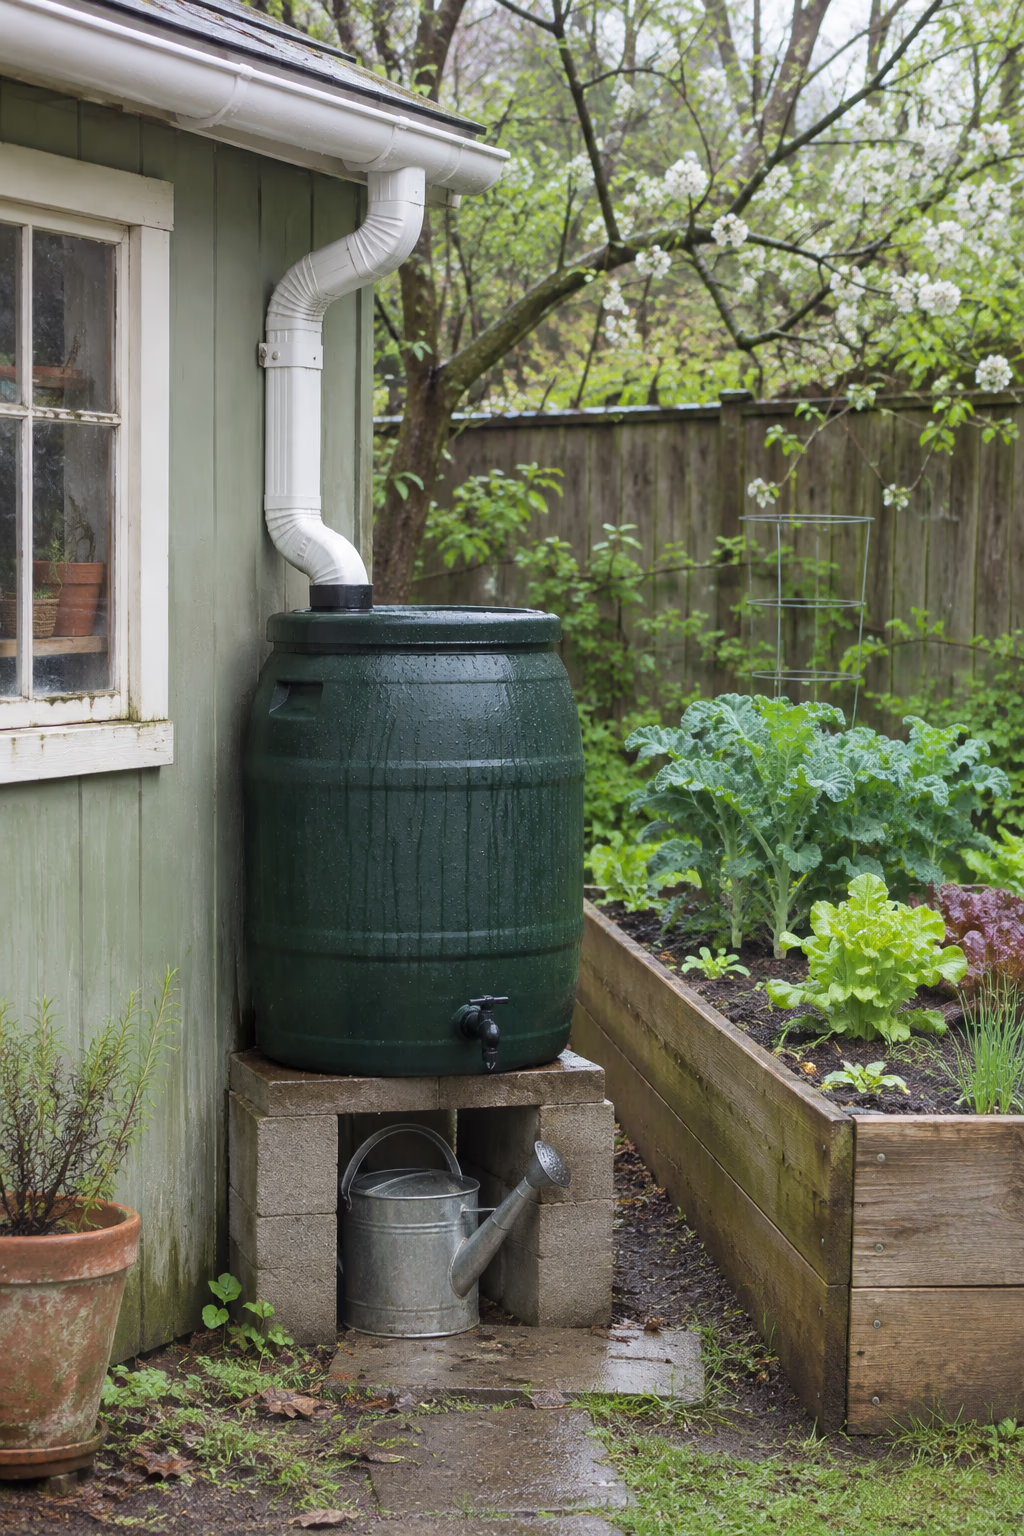
Free water right beside your planting beds
A short run of gutter along the shed’s lower roof edge and a downspout feeding a rain barrel turns the roof into a water collector. One inch of rain on a 100-square-foot roof can produce about 60 gallons.
Set the barrel on a sturdy, level stand of concrete blocks or pavers so a watering can fits under the spigot. Choose a barrel with a tight lid and a screen to keep out mosquitoes and debris, and add an overflow hose to direct extra water away from the shed’s foundation.
Rainwater harvesting rules vary by state and municipality, so check local regulations first. In cold climates, drain and disconnect the barrel before the first hard freeze.
How to Plan Your Garden Shed Makeover
A good shed makeover starts with a sound structure and a clear idea of how you want to use the space. A little planning keeps the project on budget and ensures the results last.
- Fix the basics first. Repair roof leaks, rotted trim, and sagging floors and correct drainage problems before spending money on paint or decor.
- Decide how you’ll use it. Storage, potting, a hobby room, and a quiet retreat each need different layouts, lighting, and shelving.
- Coordinate with your house. Borrow a trim color, roof tone, or door color from your home so the shed looks like part of the property.
- Use exterior-rated materials. Choose paints, fasteners, lumber, and fixtures made for outdoor use, since sheds face moisture and big temperature swings.
- Check local rules. Electrical work, porches, and changes to how a shed is used may need permits, and many HOAs have rules on colors and outbuildings.
- Work in phases. Start with paint and cleanup, add plants and a path next, and tackle bigger projects like power or a porch as your budget allows.
Frequently Asked Questions
What is the best paint for a wood garden shed?
A high-quality exterior acrylic latex paint is a good choice for most wood sheds because it stays flexible and resists peeling. Clean and dry the surface first, prime any bare or repaired wood, and apply two coats for the best coverage and durability.
How much does a garden shed makeover cost?
A simple refresh with paint, new hardware, and a few plants may cost a few hundred dollars. Adding a porch, new windows, insulation, or electrical service can raise the total into the thousands, so it helps to prioritize the changes you’ll notice most.
Can I paint a metal or vinyl shed?
Yes, with the right preparation. Metal sheds need cleaning, rust removal, and a rust-inhibiting primer, while vinyl and plastic sheds need a paint formulated to bond to those materials. Lighter colors are usually safer on vinyl, as dark paint can cause panels to warp in the sun.
Do I need a permit to make over my shed?
Painting, planting, and adding shelves rarely need a permit. Running electricity, adding plumbing, enlarging the structure, building a porch, or converting the shed into a living or office space often does. Check with your local building department and HOA before you begin.
How do I keep moisture out of my shed?
Make sure the shed sits on a level, well-drained base, keep soil and mulch from touching the siding, and maintain a sound roof. Gutters, vents, and sealing gaps around windows and doors also help reduce dampness and prevent mold.
Final Thoughts
The right garden shed makeover ideas can turn a forgotten storage box into one of the most charming parts of your yard. Fresh paint, a full window box, and a border of flowers might be all it takes to make the shed something you’re proud to look at.
Start with the repairs and the project that excites you most, then build on it over the seasons. With a few weekends of effort, your shed can become a hardworking, good-looking spot that makes time in the garden even more enjoyable.