Picture stepping out on a gray February morning, opening a small glass door, and walking into warm, damp air that smells like soil and tomato leaves. Seedlings line the bench, a potted lemon is blooming in the corner, and frost is still melting off the lawn outside.
That’s the magic of a backyard greenhouse. It stretches your growing season by weeks or even months, protects tender plants from cold snaps, and gives you a bright, sheltered spot to putter around in when the rest of the yard is asleep. Lately it has also become a favorite place to sit, read, and even host dinner.
These 21 backyard greenhouse ideas cover charming reclaimed-window builds, cedar kits, lean-tos, domes, hoop houses, and budget cold frames, plus smart ways to furnish, light, water, and ventilate the space. Whether you have a sprawling lot or a small patio, there’s an option here that fits your yard and your budget.
1. Build a Greenhouse From Reclaimed Windows
One-of-a-kind character on a salvage budget
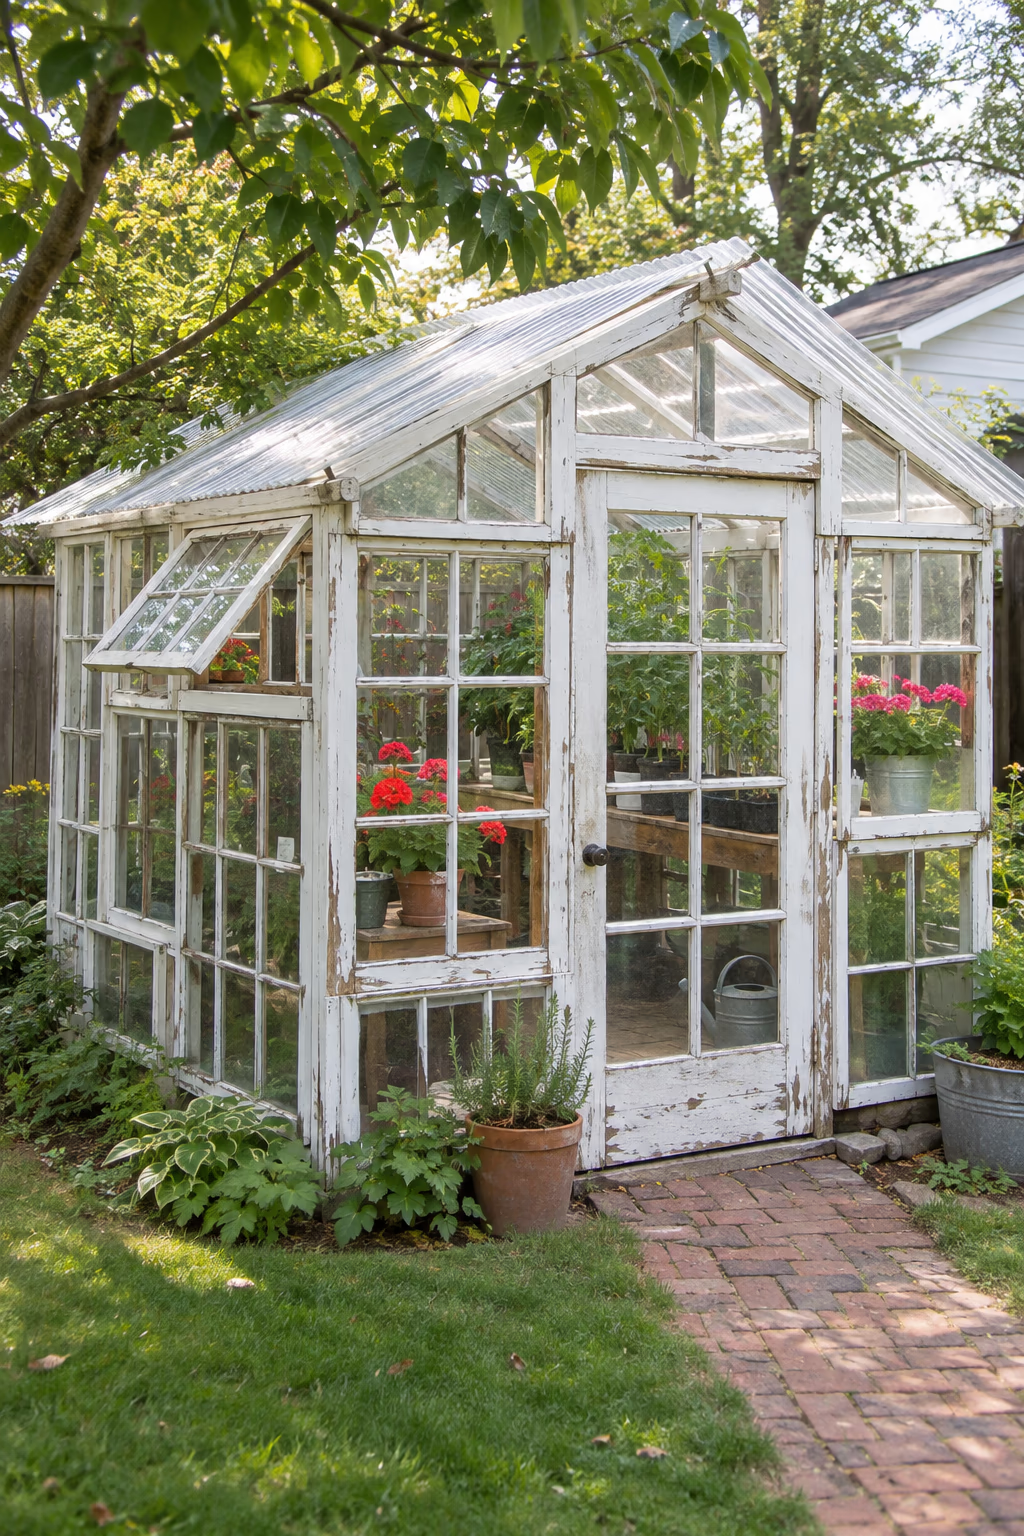
Old wood-framed windows make wonderful greenhouse walls. Collect a batch from salvage yards, renovation crews, or online marketplaces, then lay them out on the ground to plan a footprint, often around 8 by 8 or 8 by 10 feet. Build a simple 2×4 or 4×4 frame sized to the windows, screw each sash in place, and top it with clear corrugated polycarbonate, which is lighter and safer than glass overhead.
Mismatched sizes and peeling paint are part of the appeal. Paint the frame one unifying color, such as white, black, or soft green, so the patchwork looks intentional. Leave a few windows on hinges so they can swing open for ventilation.
Older windows may have lead-based paint, so test it, wear a mask when scraping, and seal any loose paint. Check every pane for cracks and re-glaze loose glass before installation, and keep heavy glazed sashes on the lower walls, not the roof.
2. Add a Cedar Greenhouse With a Built-In Potting Bench
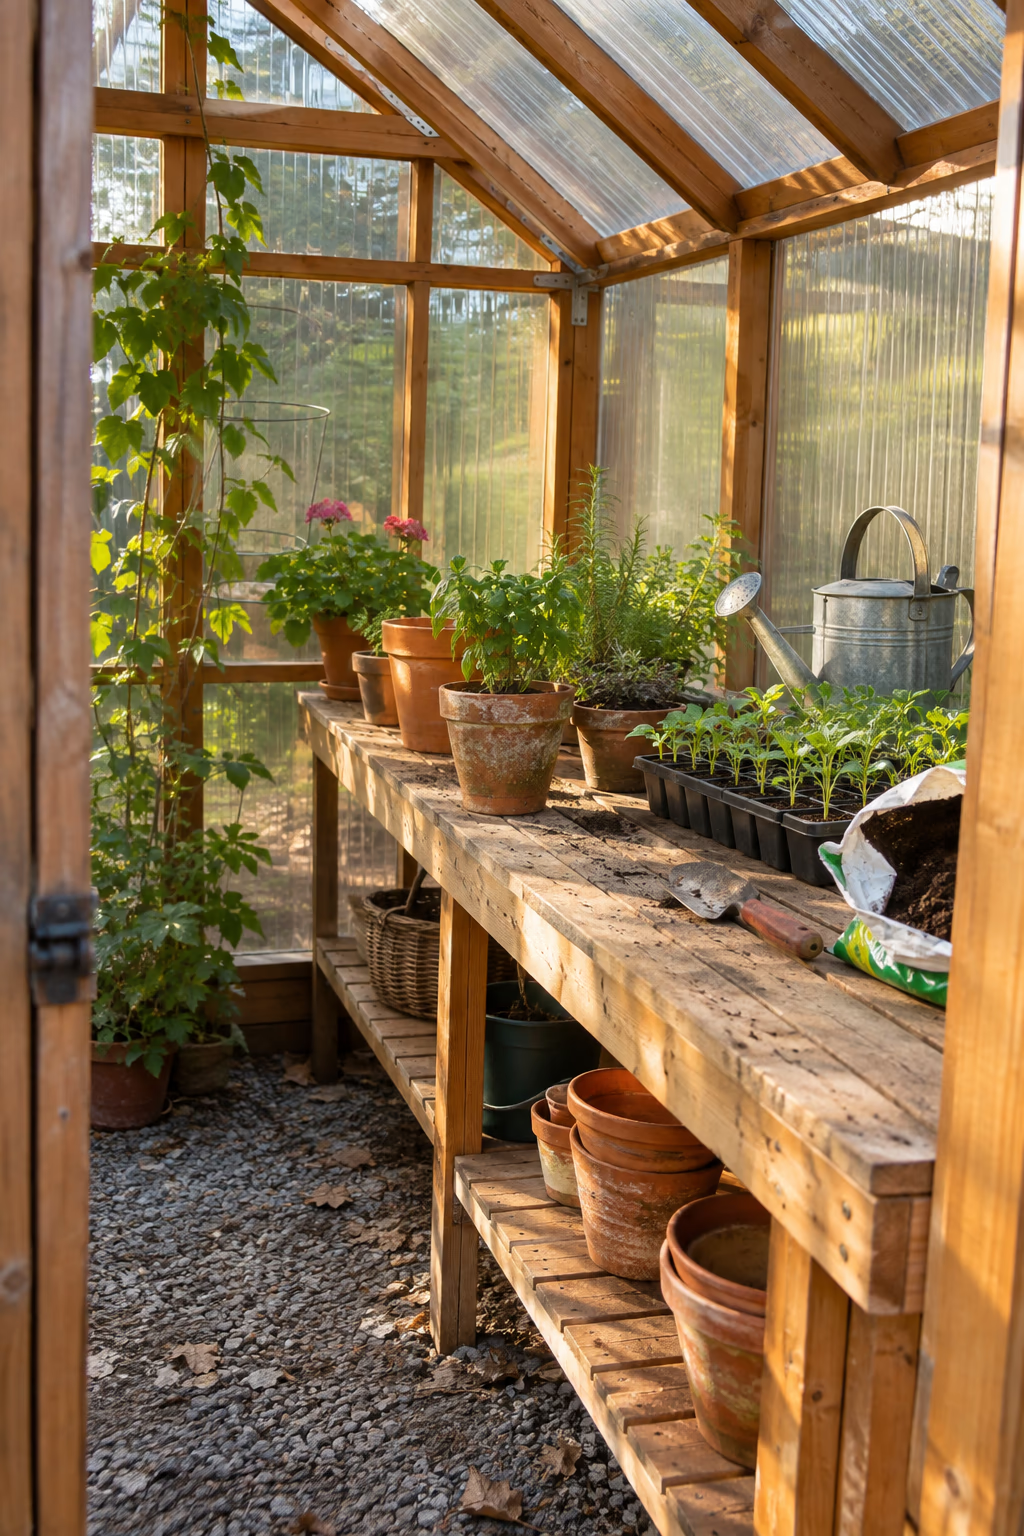
A warm wood look that works hard every season
Cedar is a natural fit for a backyard greenhouse because it resists rot and insects, handles humidity well, and weathers to a soft silver gray if left unfinished. Many kits and plans come in the 6-by-8 to 8-by-12-foot range with polycarbonate or glass panels set into a cedar frame.
The feature that makes it truly useful is a sturdy potting bench along one long wall. Aim for a work surface about 34 to 36 inches high, slatted so water and soil drain through, with a lower shelf for bags of mix, empty pots, and a watering can.
Cedar costs more than pressure-treated pine or metal framing, but it lasts for many years with little care. Set it on a level, well-drained base so the bottom rails stay out of standing water.
3. Style the Greenhouse as a Cozy Garden Lounge
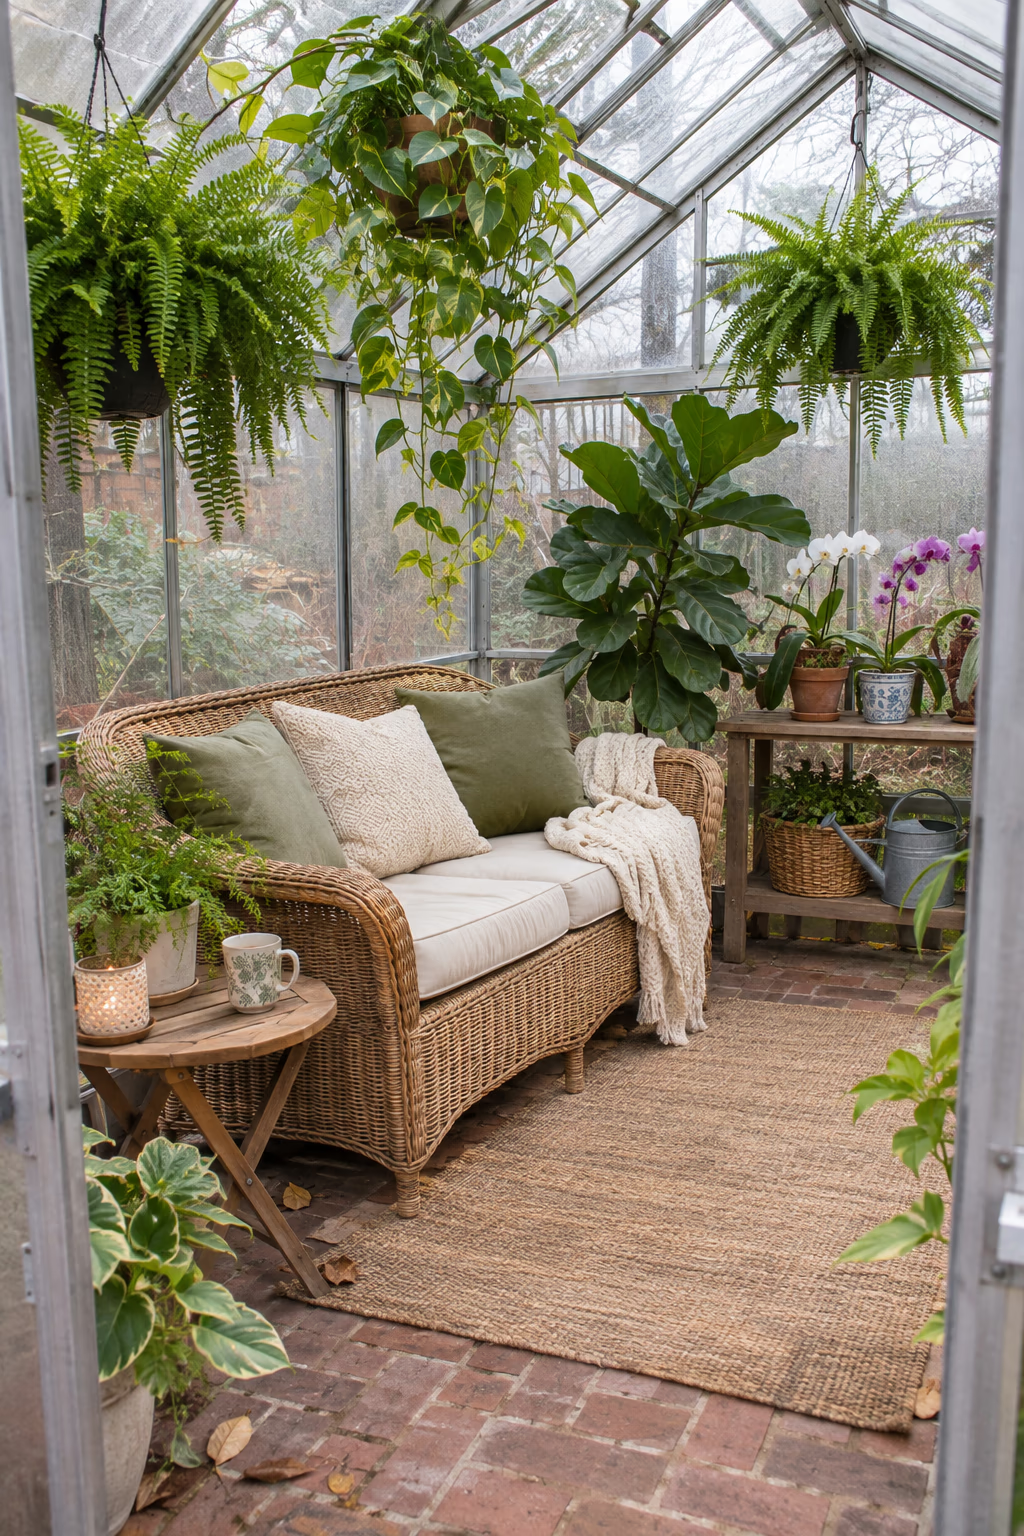
A sunny retreat you’ll want to spend time in
Decorating the greenhouse like a little garden room is one of the most popular directions right now. Clear one end for a pair of weather-resistant chairs or a small wicker loveseat, add an outdoor rug, a side table for coffee, and a few cushions in washable outdoor fabric.
Surround the seating with your showiest plants: hanging ferns, trailing pothos, a fiddle-leaf fig, or a bench of orchids and begonias. The plants do the decorating, and the glass walls make even a small space feel open and bright.
Greenhouses get hot fast on sunny days, often far hotter than the outdoor air. Plan for roof vents, a door you can prop open, and shade cloth for summer, and bring fabric cushions inside when not in use so they don’t mildew.
4. Paint the Greenhouse Frame Soft Sage Green
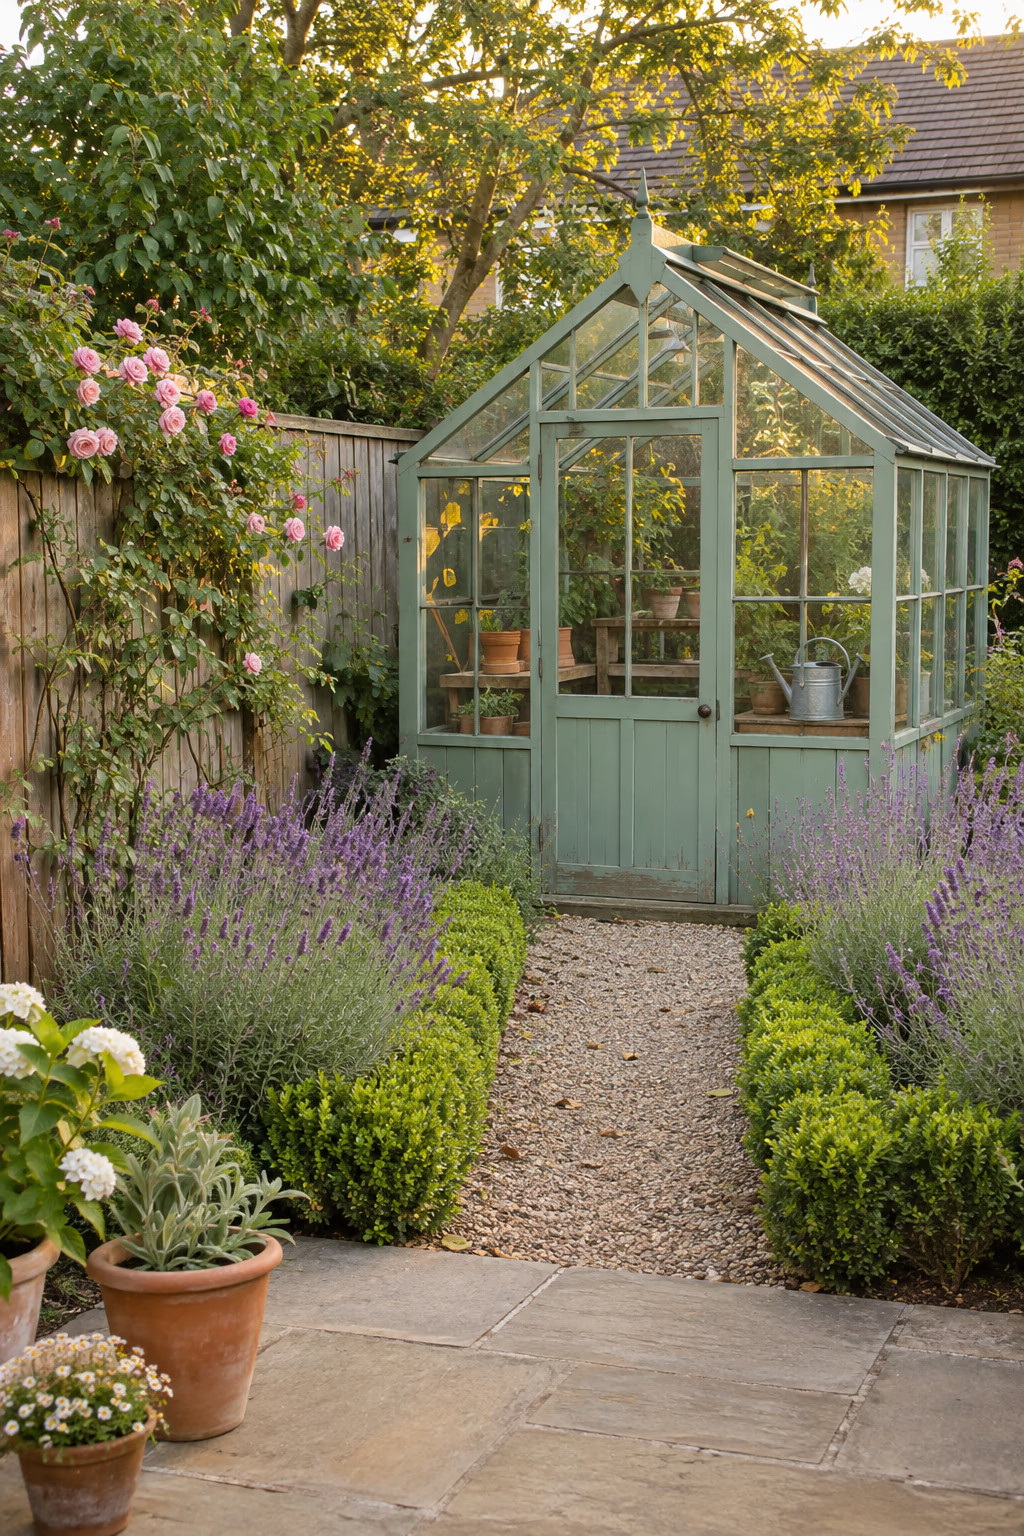
A calm color that blends into the garden
Painting the frame a muted sage, olive, or deep forest green helps a greenhouse settle into its surroundings instead of standing out like a white box. Green frames look especially good against boxwood, lavender, and climbing roses, and they hide dirt better than bright white.
On a wood frame, use exterior primer and a high-quality exterior acrylic paint. On aluminum or steel, clean and scuff the surface, then use a metal primer and paint rated for exterior metal. Tape off glazing carefully before you start.
Repainting a full greenhouse is fiddly work around all the panes. Choose the color before you assemble a kit if you can, since some manufacturers offer factory-finished green frames that hold up better than brushed-on paint.
5. Lean a Greenhouse Against a Sunny House Wall
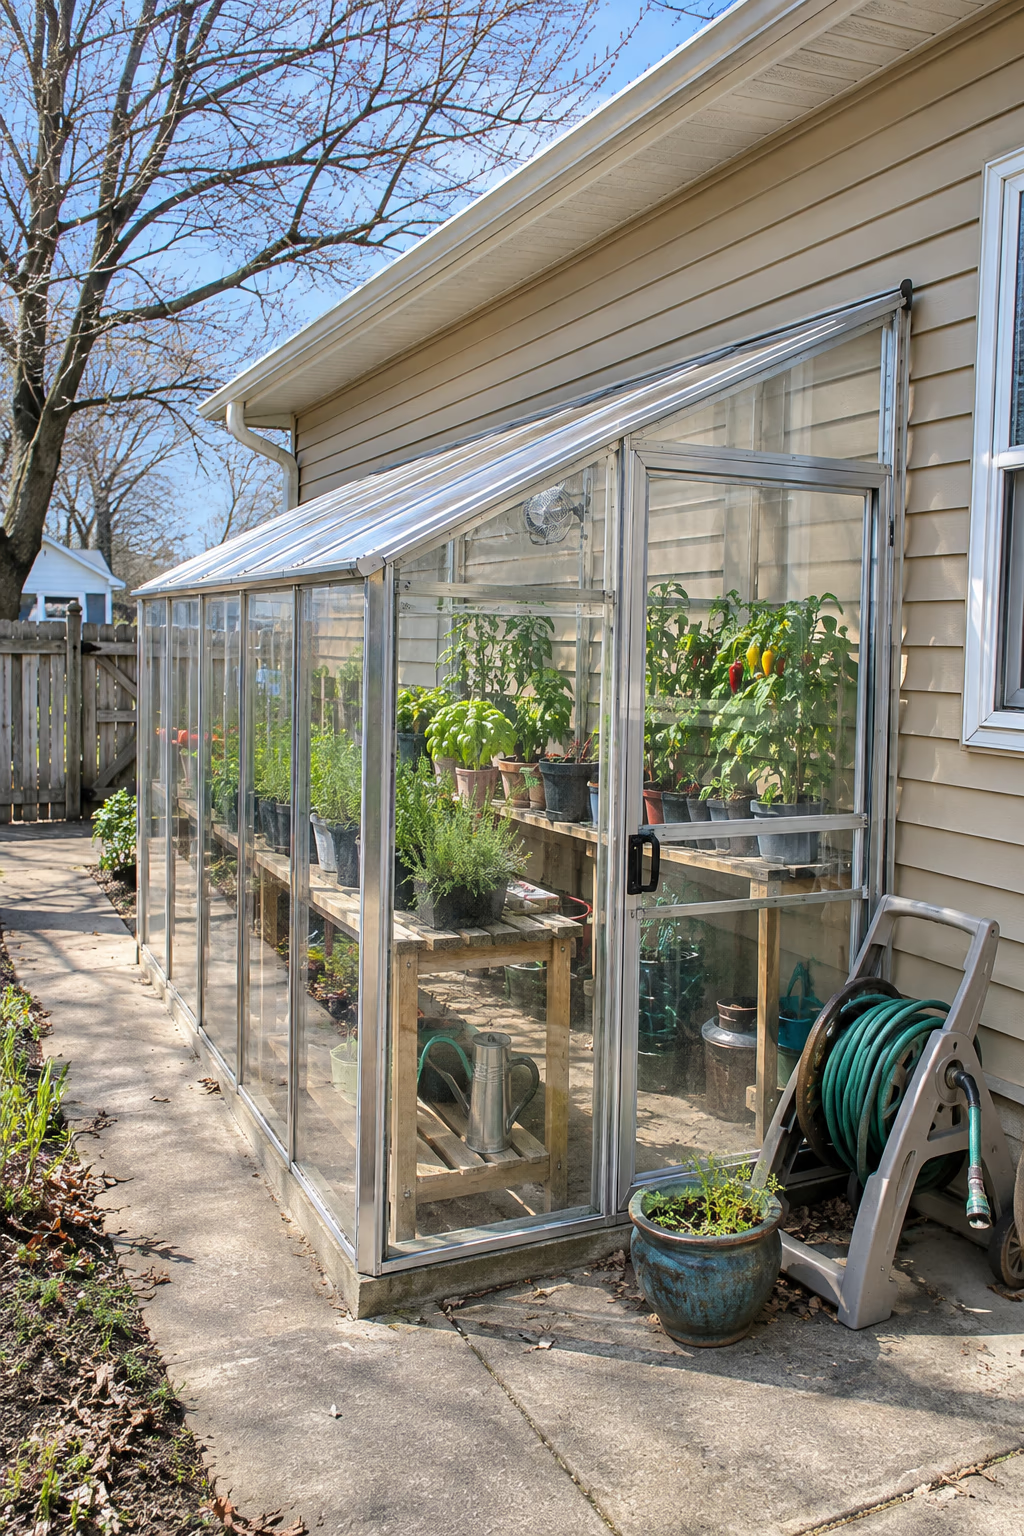
Borrow warmth and save space
A lean-to greenhouse has three walls and a sloped roof, with the fourth side attached to a house, garage, or fence wall. A south- or southeast-facing wall is ideal, since the building soaks up sun during the day and releases a little heat at night.
Lean-tos work well in narrow side yards and along patios, and they are often close enough to the house for easy access to water and electricity. A depth of 4 to 6 feet gives room for a bench and a walkway without taking over the yard.
Attaching to the house needs proper flashing so rain doesn’t run behind siding, and some towns treat an attached structure differently from a freestanding one. Check permit rules first, and keep the structure clear of dryer vents and windows you need to open.
6. Set a Glasshouse on a Low Brick Knee Wall
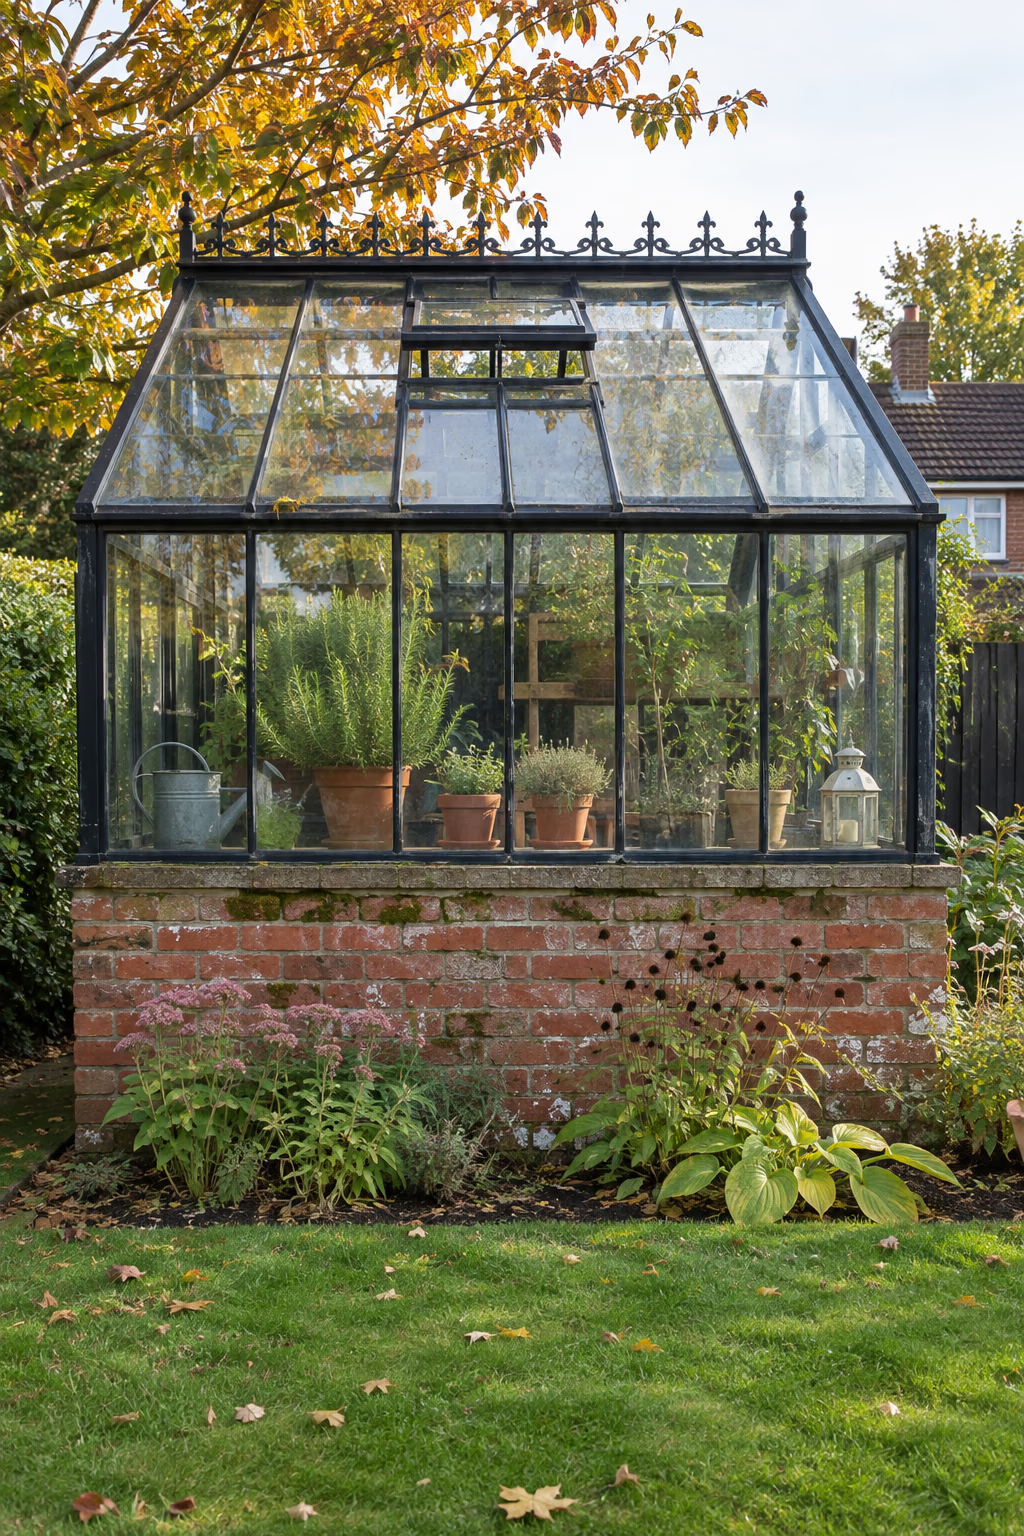
Classic English style with built-in durability
Setting glass walls on a brick or stone base about 24 to 30 inches high gives a greenhouse a timeless, Victorian-inspired look. The masonry holds heat, protects the lower glazing from mowers and wheelbarrows, and makes the structure look like a permanent part of the property.
Match the brick to your house or patio for a cohesive look, and run a wide sill along the top of the wall to hold potted herbs and seedlings. Inside, a brick or gravel floor keeps things easy to clean and drains well after watering.
A masonry base needs a proper footing below the frost line in cold climates, which adds cost and usually means a permit. Many homeowners hire a mason for the base and assemble a glass kit on top themselves.
7. Assemble a Polycarbonate Kit on a Gravel Pad
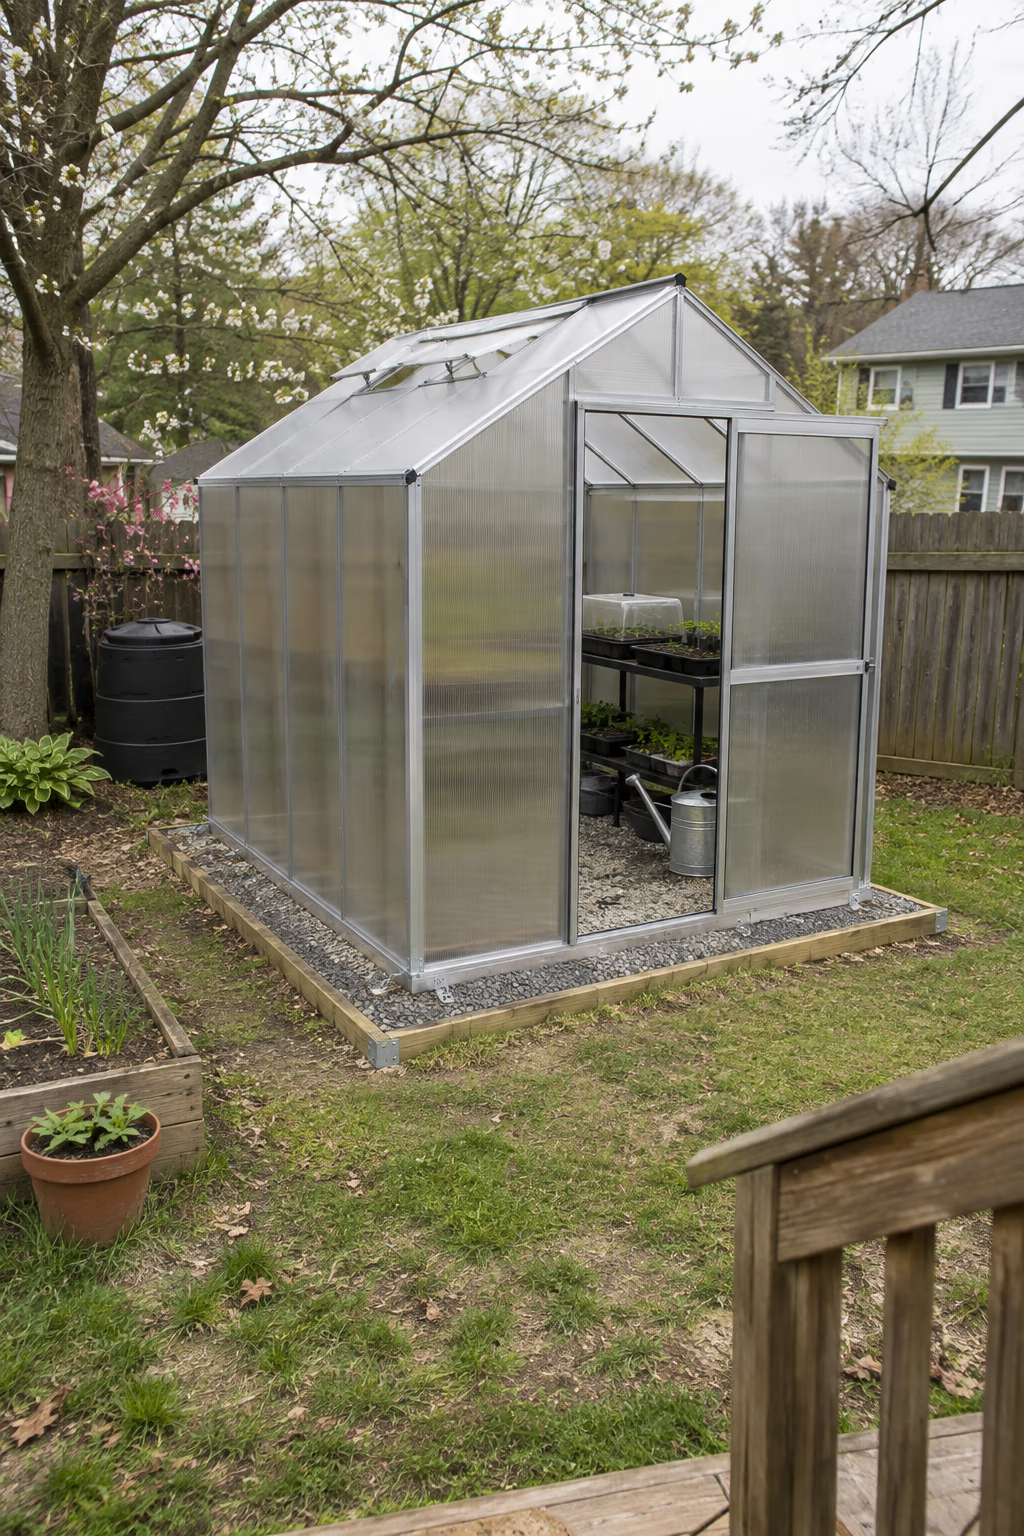
The easiest path to a walk-in greenhouse
Aluminum-framed kits with twin-wall polycarbonate panels are the most common choice for first-time greenhouse owners. Sizes like 6 by 8 or 8 by 10 feet fit most yards, and the panels diffuse light, which reduces scorching and spreads it evenly across plants.
The base matters as much as the kit. Dig out 4 inches of soil, build a simple pressure-treated timber frame, fill it with compacted crushed gravel, and anchor the greenhouse to the frame. Gravel drains water from the floor and keeps weeds down.
Budget kits can be flimsy in high winds and heavy snow. Look for ground anchors, a snow load rating suited to your area, and plan on a weekend of assembly with a second set of hands.
8. Host Dinners in a Greenhouse Dining Room
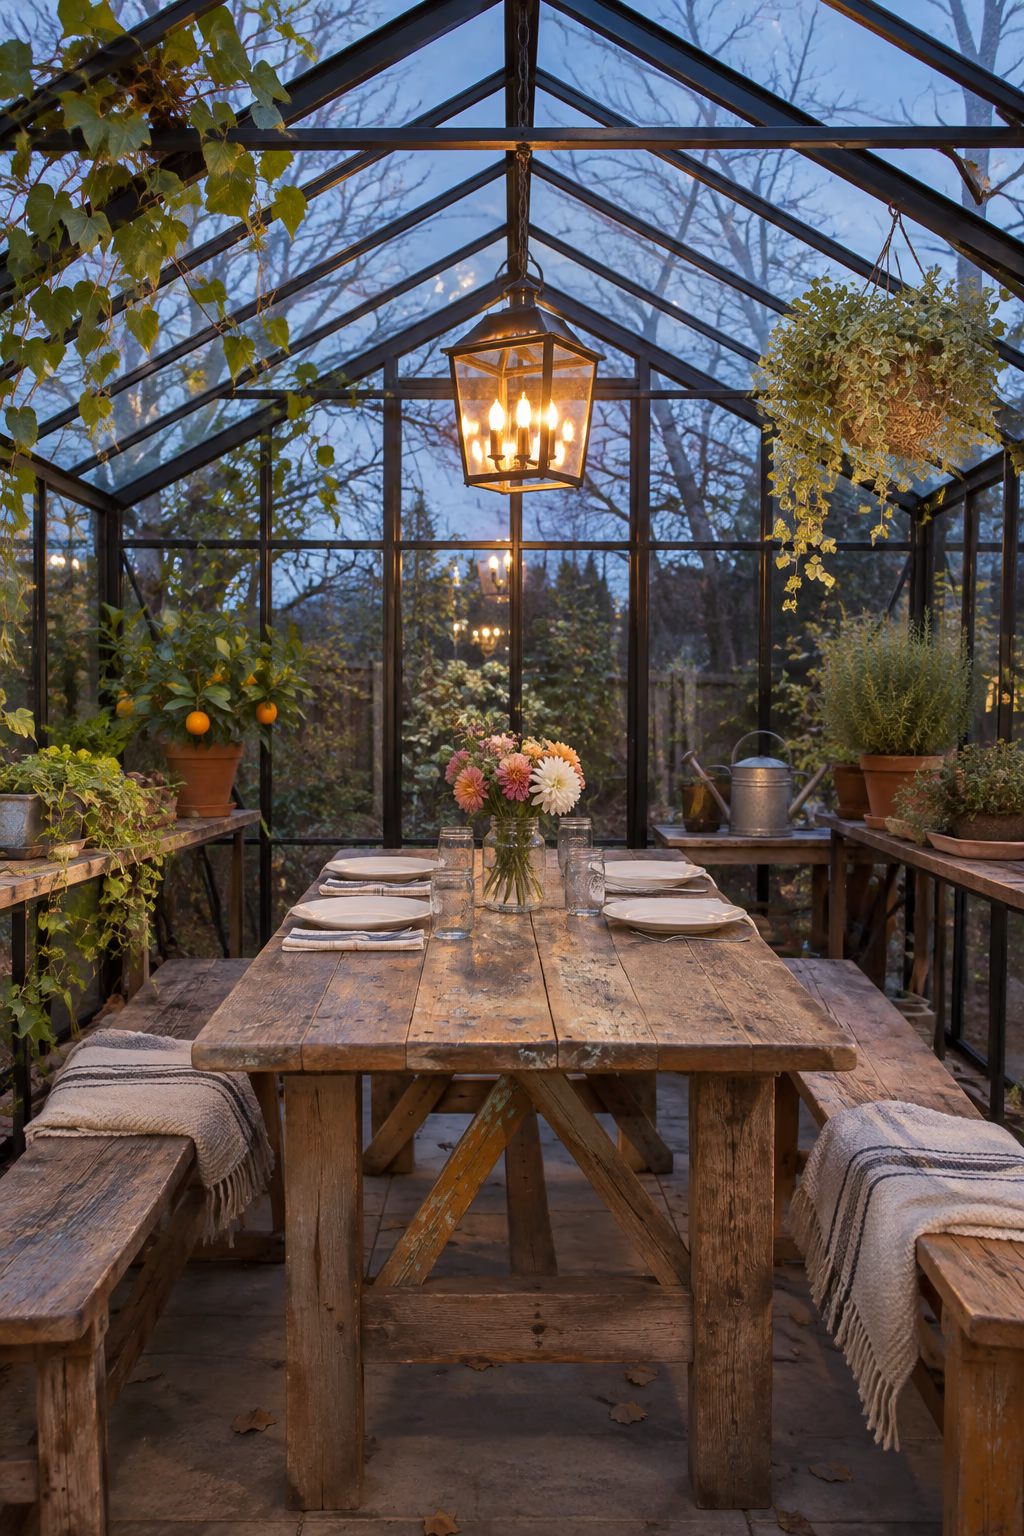
A magical spot for meals among the plants
A greenhouse can double as an outdoor dining room that works even on chilly spring and fall evenings. Place a farmhouse table and benches down the center, keep potted herbs, citrus, and trailing plants on the side benches, and hang a simple pendant or lantern from the roof frame.
The setting feels special without much decorating. Fragrant plants like rosemary, scented geraniums, and jasmine add to the experience, and the glass keeps out wind and light rain so meals aren’t cut short.
A dining greenhouse needs to be larger than a growing-only one, ideally at least 10 by 12 feet. Any hardwired lighting or outlets should be installed by a licensed electrician with GFCI protection, since greenhouses are damp environments.
9. Raise a Geodesic Dome for Year-Round Growing
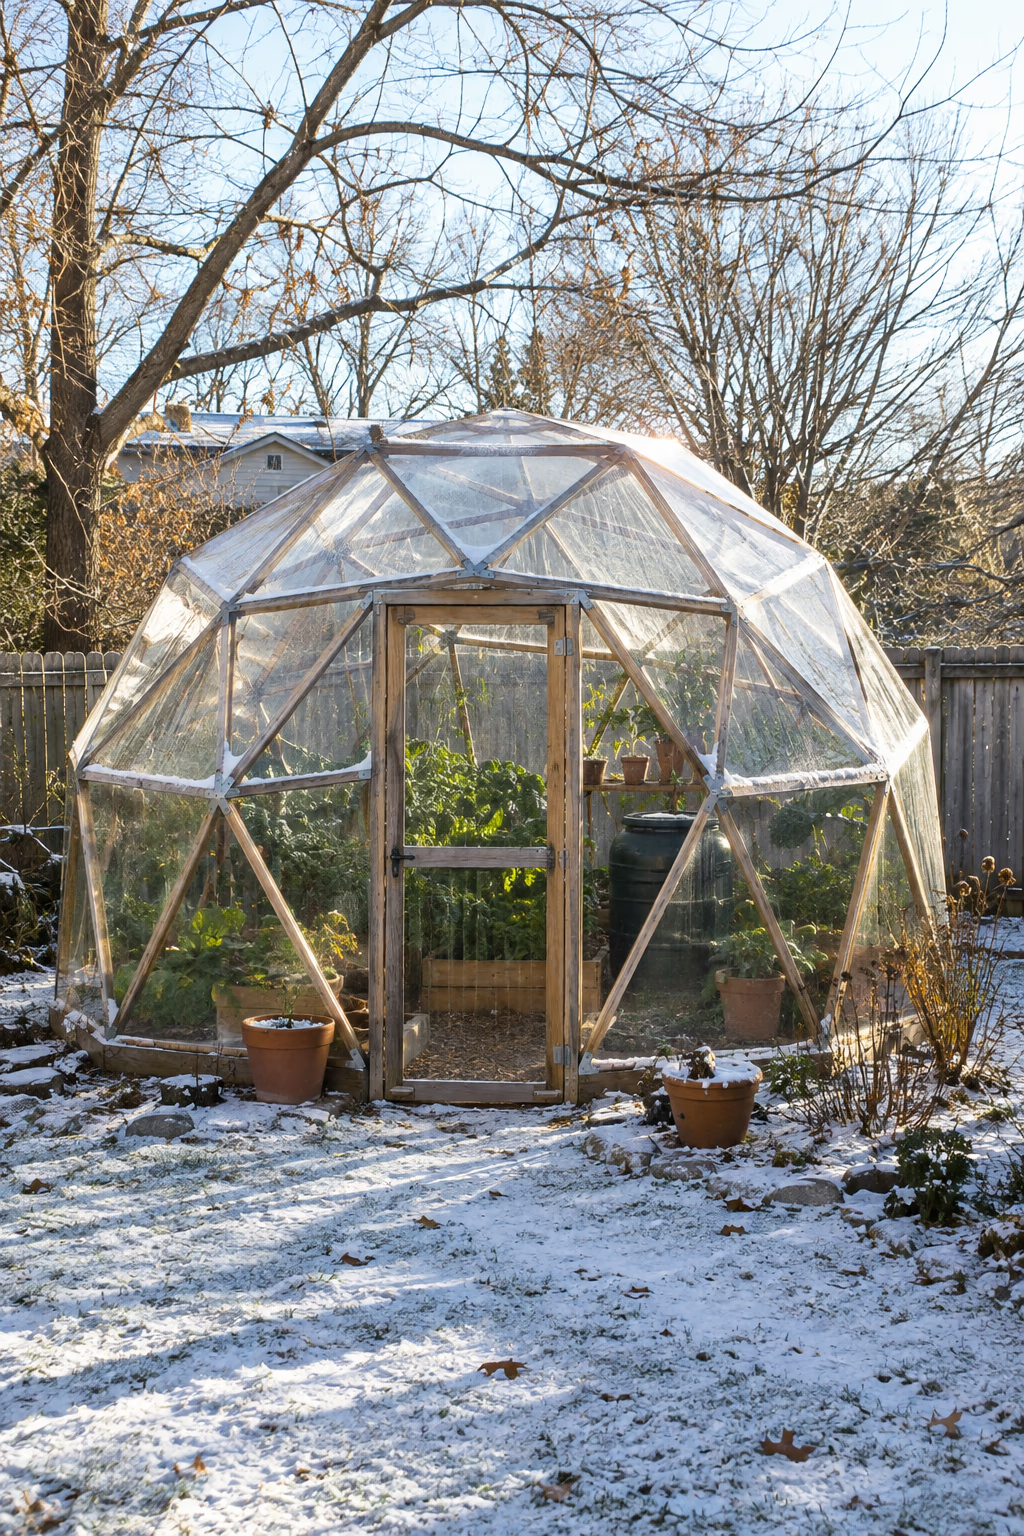
A striking shape that captures light from every angle
Geodesic dome greenhouses are built from a network of triangles that create a strong, efficient structure. The curved shape catches sunlight throughout the day, sheds snow and wind well, and encloses a lot of growing space with relatively little material.
Domes are available as kits, or handy homeowners can build one from wood struts and polycarbonate triangles. Many dome owners add a water barrel inside as thermal mass, which absorbs daytime warmth and releases it slowly at night.
The many seams in a dome can be tricky to seal, and curved walls make standard rectangular benches harder to fit. Plan circular or wedge-shaped benches, and be patient with caulking every joint.
10. Convert an Old Garden Shed Into a Greenhouse
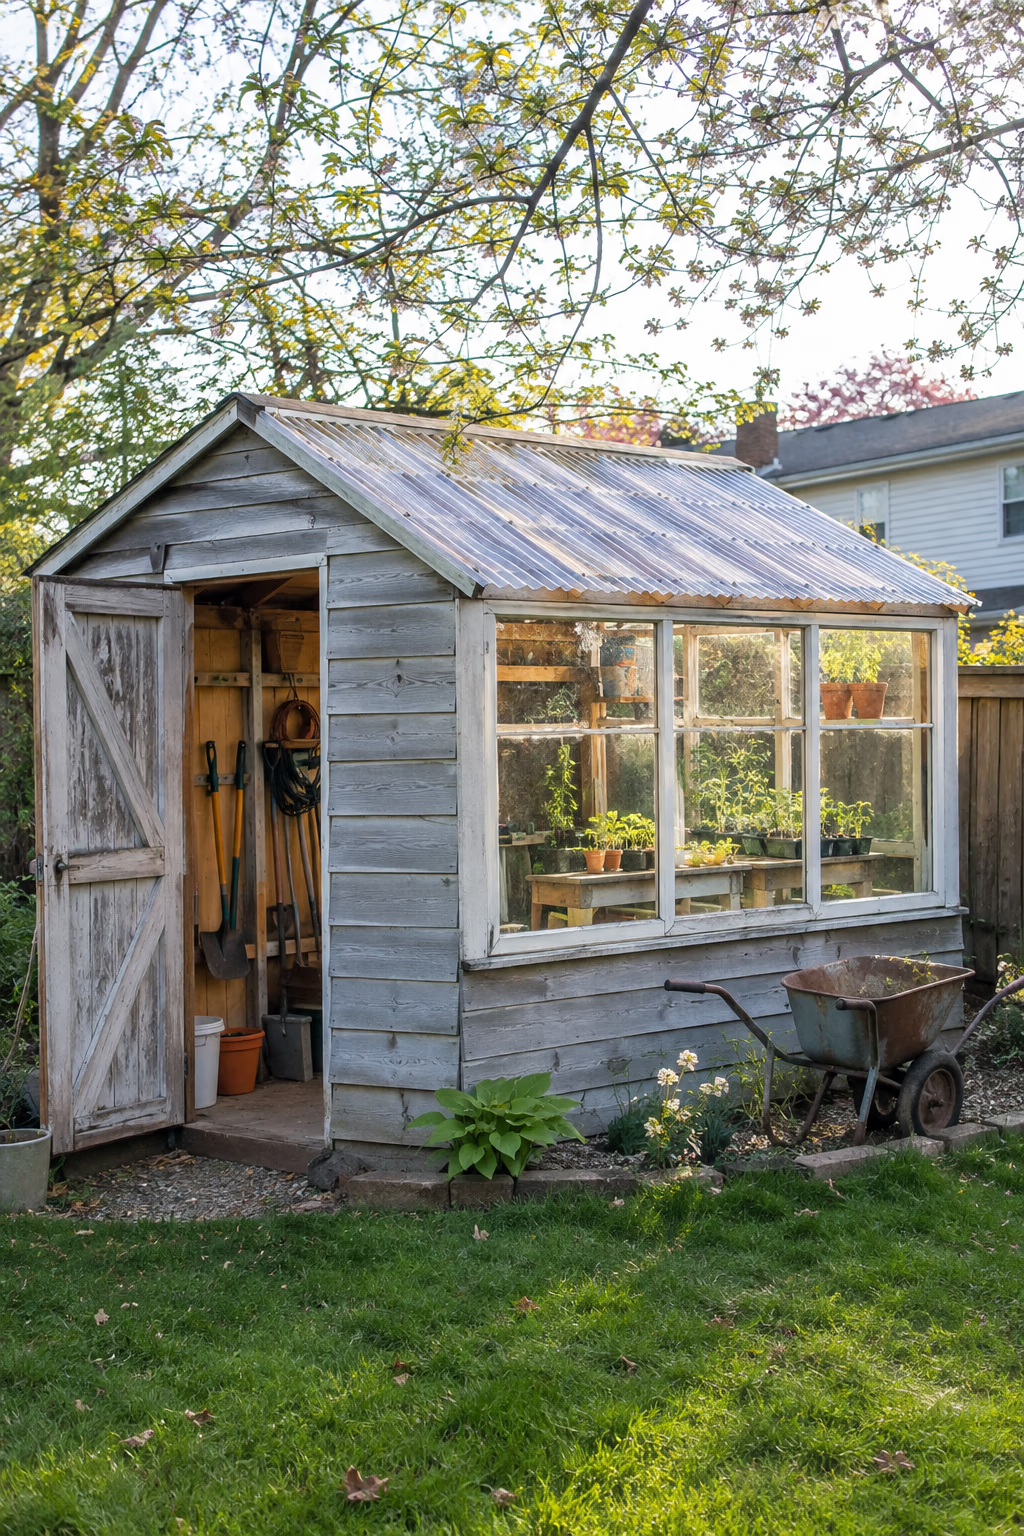
Give a tired structure a bright new purpose
If you already have a sturdy wooden shed, swapping part of the roof and one or two walls for clear panels can turn it into a greenhouse or a half-greenhouse, half-potting shed. Replace the south-facing roof slope with clear polycarbonate roofing and add larger windows along the sunniest wall.
Keep the shady side solid for storing tools, bags of soil, and garden supplies, and place growing benches along the bright side. This split arrangement is efficient for small yards where you can’t fit two separate structures.
Check that the shed frame is sound and free of rot before cutting into it. Removing roof sheathing changes how the structure handles loads, so add bracing as needed and use roofing panels rated for your snow and wind conditions.
11. Bend a Budget Hoop House Over Raised Beds
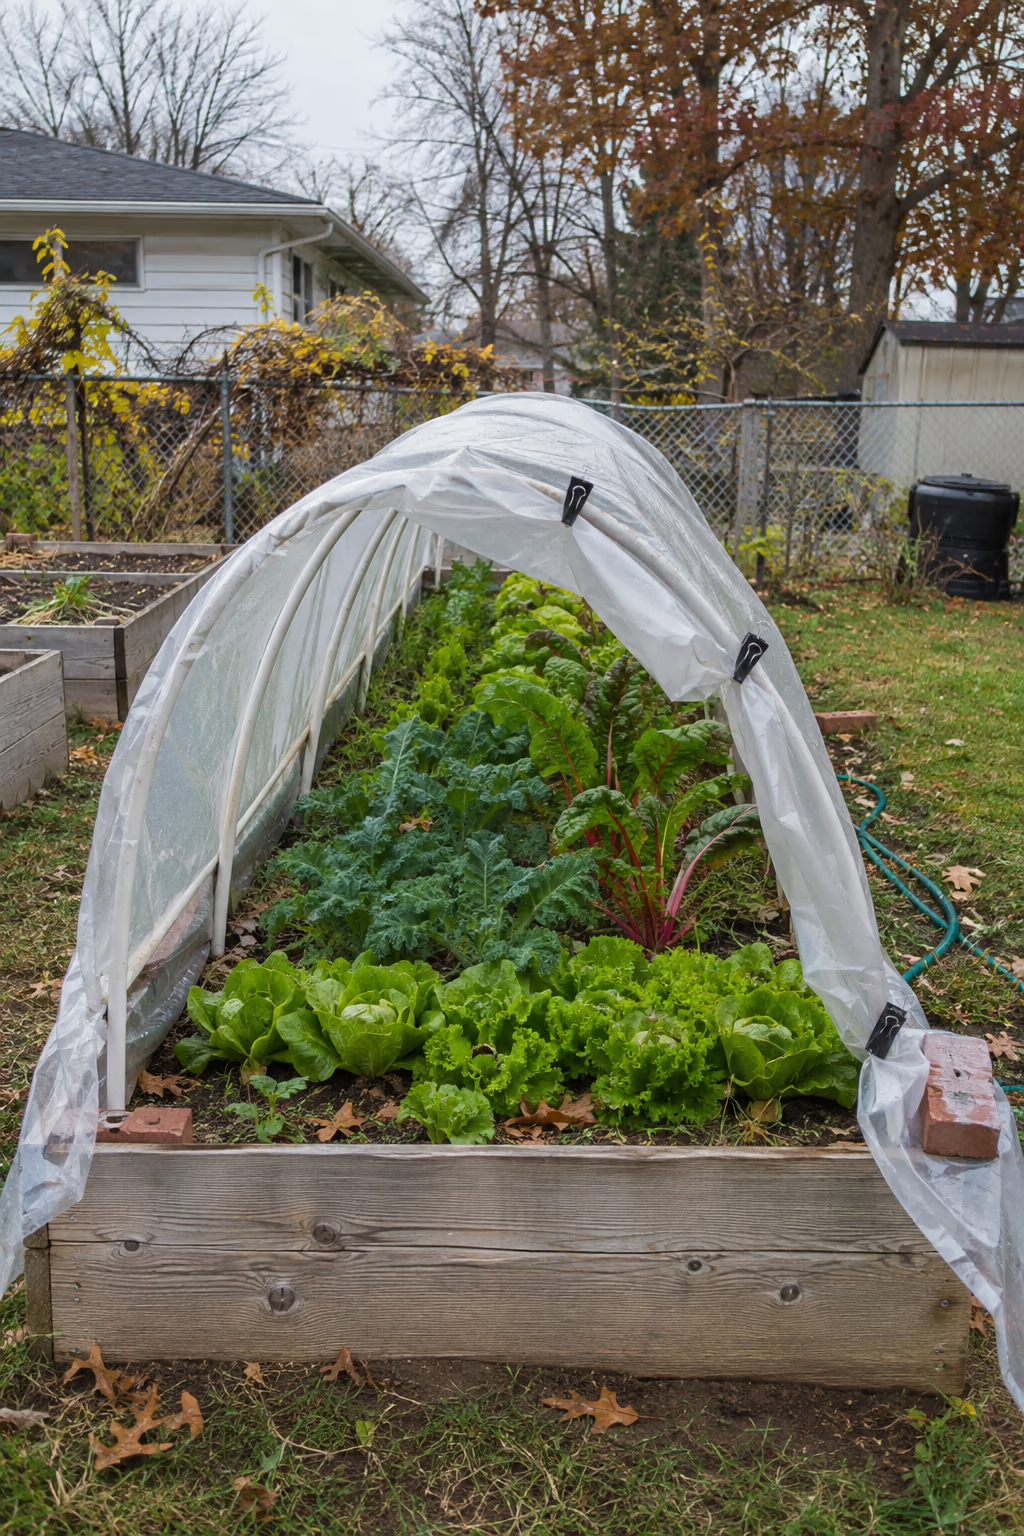
Maximum growing space for a minimum cost
A hoop house is one of the cheapest ways to grow under cover. Bend 3/4-inch PVC pipe or electrical conduit into arches, slip the ends over rebar stakes or attach them to the sides of raised beds, and stretch UV-treated greenhouse plastic over the top.
Hoops make it easy to cover a whole bed of greens, carrots, or peppers, and the plastic can be rolled up on the sides for ventilation on warm days. A walk-in version needs taller hoops, roughly 7 feet at the peak, and a simple framed door at each end.
Standard poly wears out and needs replacing every few years, and lightweight hoop houses can catch wind like a sail. Anchor them firmly, weight the plastic edges, and brush off heavy snow before it builds up.
12. Overwinter Potted Citrus in a Heated Greenhouse
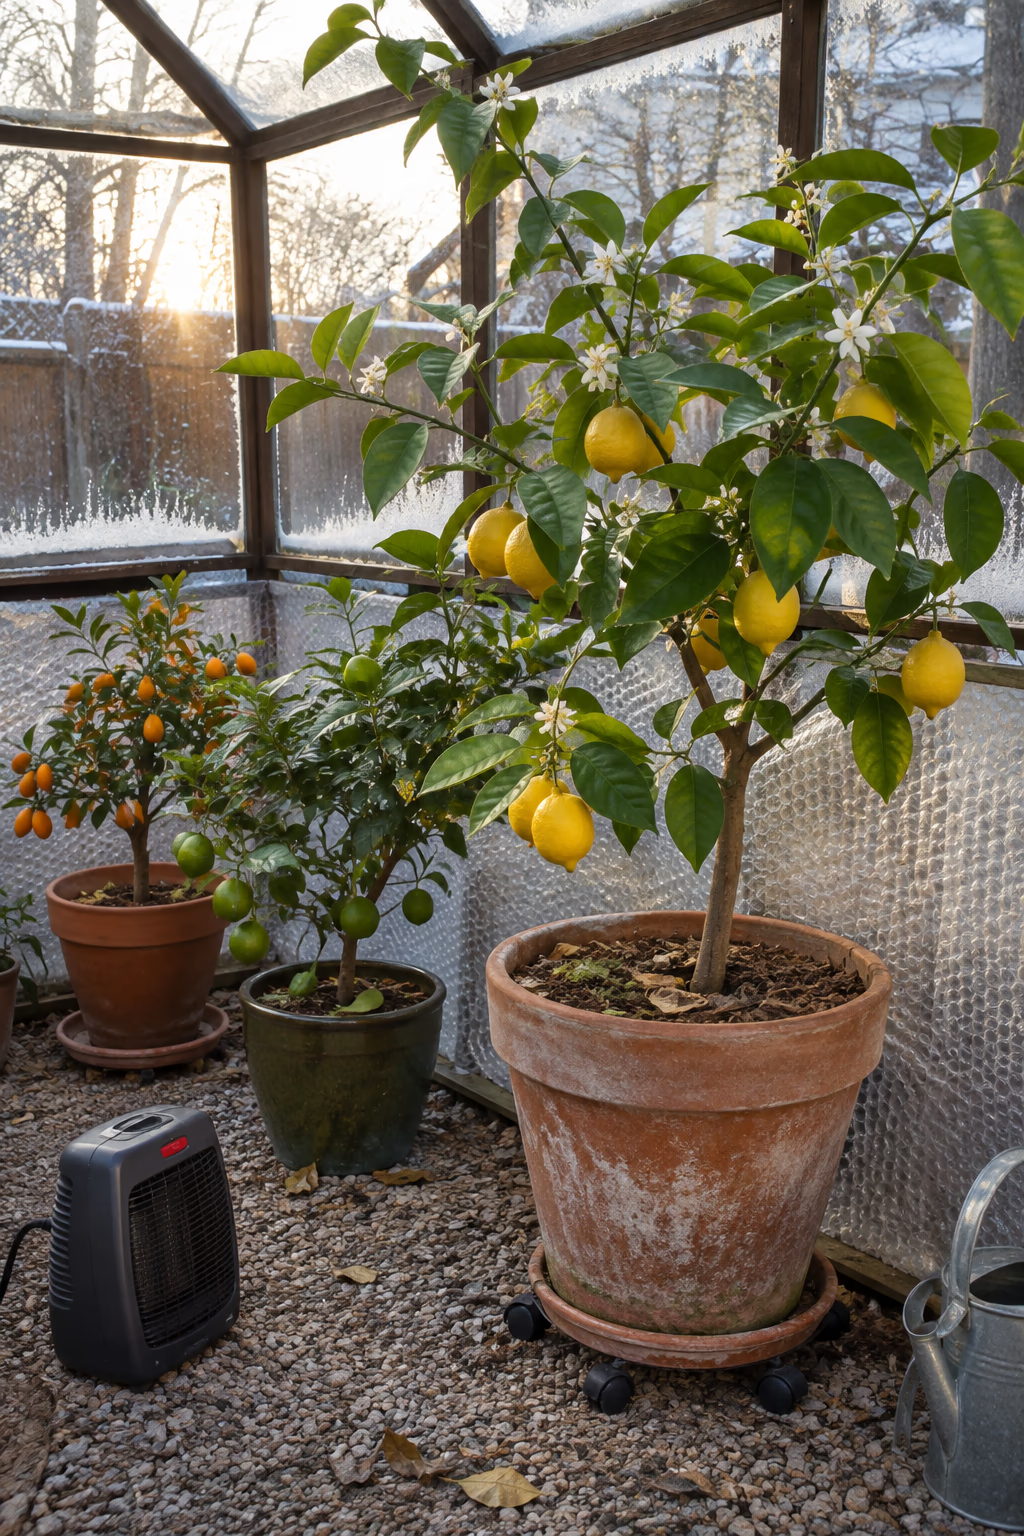
Fresh lemons even where winters are cold
A greenhouse is a perfect winter home for potted Meyer lemons, kumquats, calamondins, and dwarf limes. Move them in before nighttime temperatures dip near freezing, give them the brightest spot, and keep them in containers with casters or on a dolly so they’re easy to shift.
Most citrus is happiest with winter nights above about 40 degrees Fahrenheit. A thermostatically controlled electric greenhouse heater, rated for damp locations, can keep a small greenhouse above that threshold during cold spells. The bonus is fragrant blossoms in late winter.
Heating costs add up quickly in uninsulated structures. Line the inside with bubble insulation over winter, and water citrus less often during cool months, letting the top inch of soil dry out between waterings.
13. Hang Warm String Lights for an Evening Glow
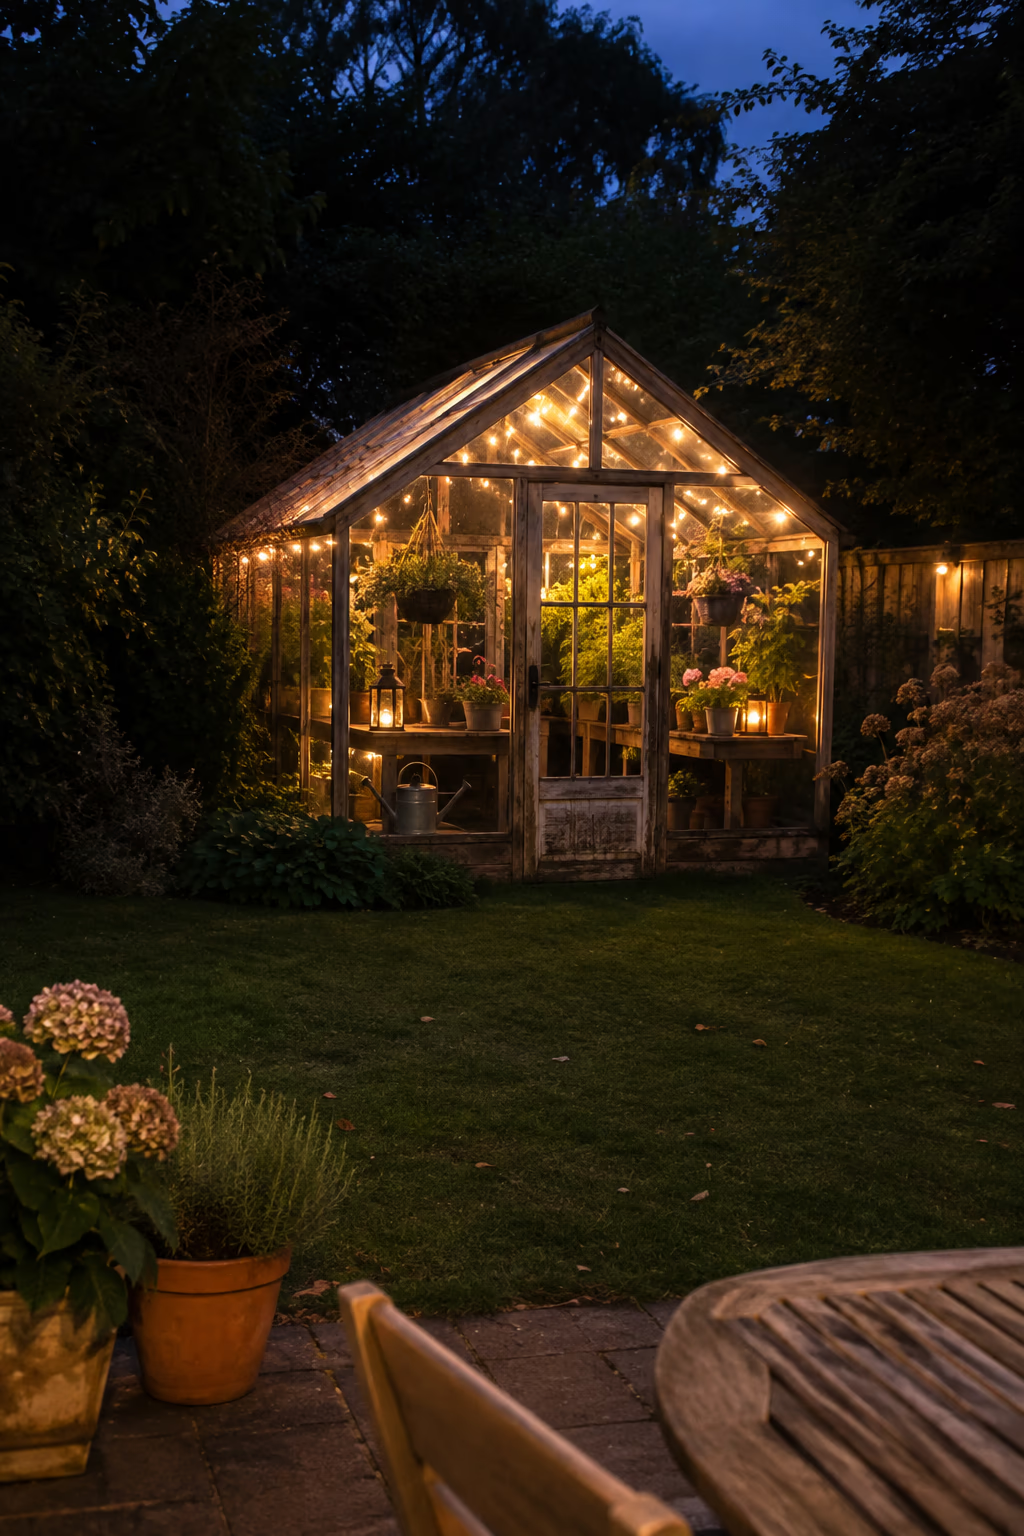
Turn the greenhouse into a lantern after dark
Draping string lights along the ridge and rafters makes a greenhouse glow like a lantern at night and gives you a reason to linger after sunset. Warm white bulbs look softest through glass, while café-style strings with larger bulbs add a festive touch for gatherings.
Solar-powered strings are a simple option if there’s no outlet nearby. Clip them to the frame with plastic hooks or zip ties rather than drilling, and add a few battery candles or lanterns on the benches for a layered glow.
Choose lights rated for outdoor use, since greenhouses stay humid. If you plug in, use a GFCI-protected outdoor outlet and keep connections off the floor and away from watering areas.
14. Line the Walls With Tiered Plant Shelving
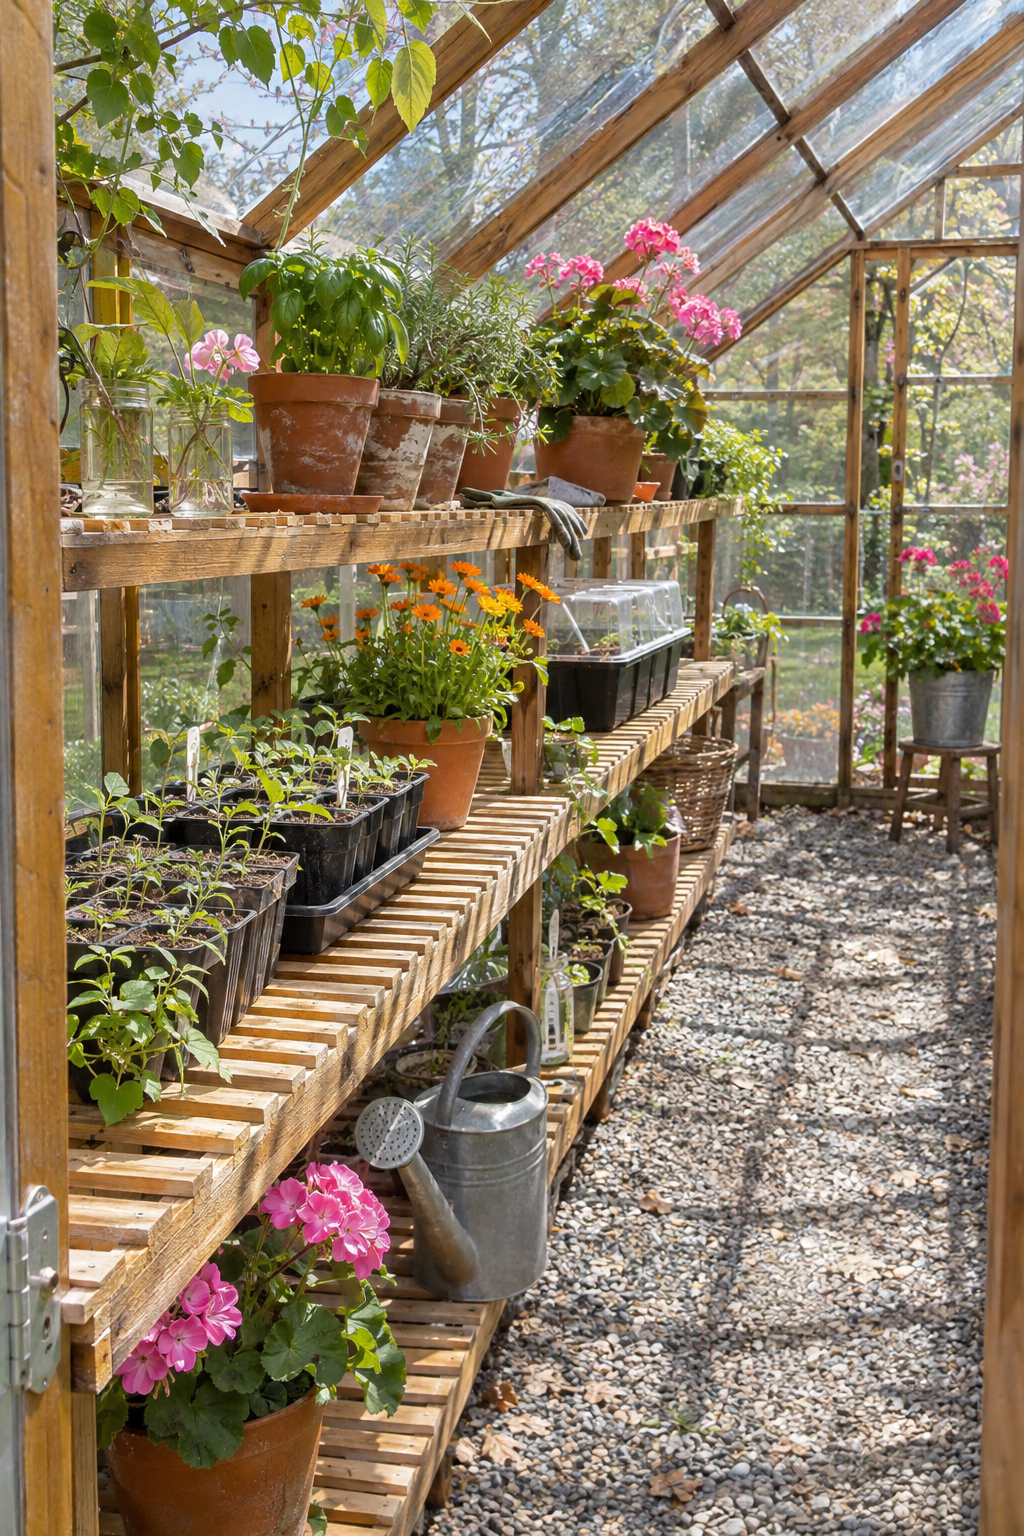
Double your growing space without a bigger footprint
Shelving is the quickest way to fit more plants into a small greenhouse. Run two or three tiers along the side walls, using slatted cedar, galvanized wire, or aluminum shelves that let light and water pass through to lower levels.
Put sun-loving plants like tomato and pepper seedlings on the top shelves and shade-tolerant plants such as ferns, lettuce starts, and cuttings lower down. Group pots by color or type for a tidy, display-ready look.
Shelves cast shadows, so keep the deepest units on the north side where they block the least light. Make sure every shelf is anchored to the frame or ground so a full load of wet pots can’t tip over.
15. Lay a Patterned Tile Floor Underfoot
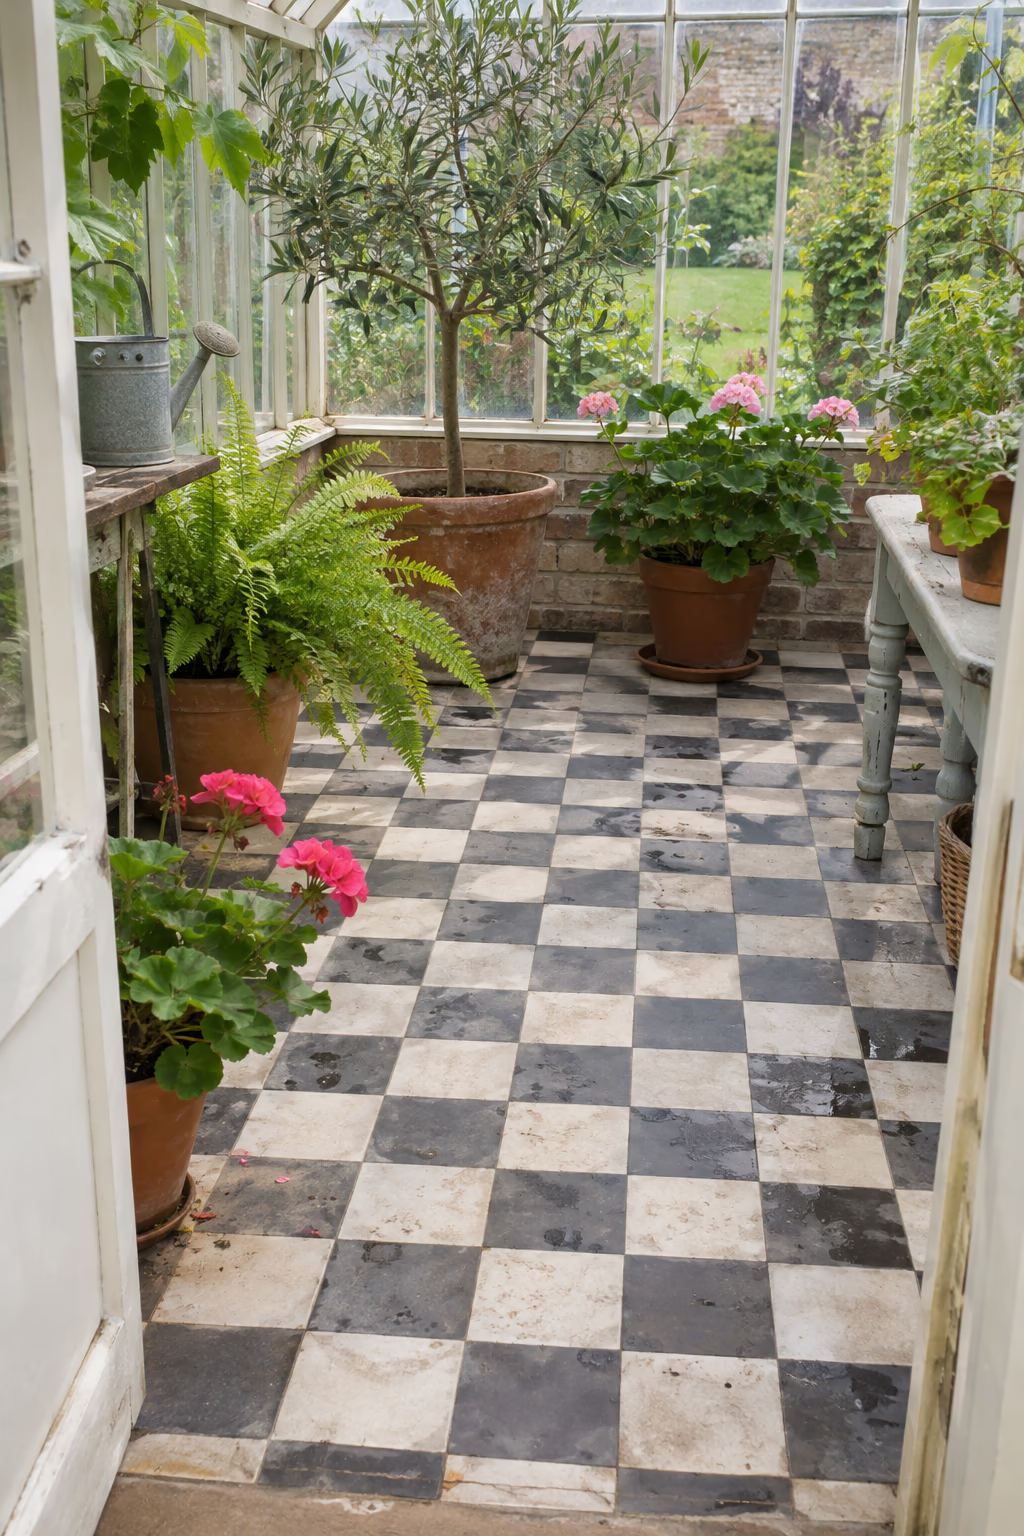
A decorative surface that handles water and mud
A floor of patterned cement or porcelain tile adds instant charm to a greenhouse and holds up well to spilled water and soil. Black-and-white checkerboard, terracotta hexagons, or encaustic-style patterns in blue and white all look striking under the glass.
Lay tile on a concrete slab or a compacted, level base, and choose a textured, slip-resistant finish since the floor will often be wet. Masonry floors also store daytime heat, which helps moderate nighttime temperatures.
Make sure the floor slopes slightly toward the door or a drain so water doesn’t pool. In freeze-prone areas, pick tile rated for outdoor and freeze-thaw use, and seal cement tile to resist staining.
16. Tuck a Mini Greenhouse Into a Patio Corner
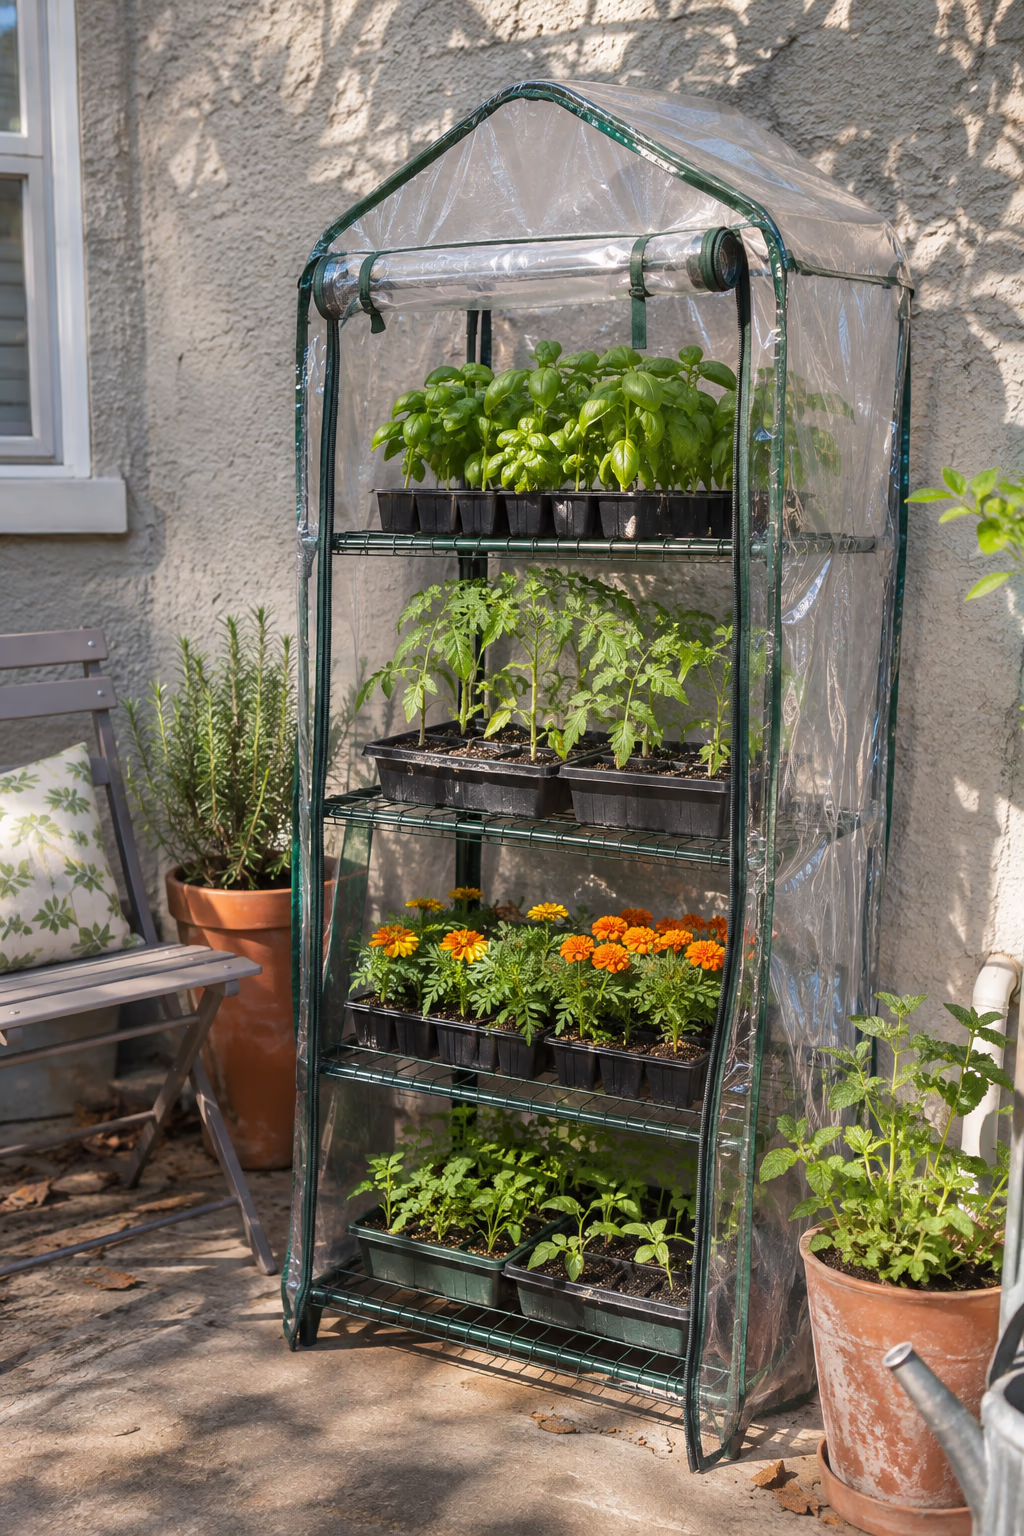
A small-space option that still extends the season
Not every yard has room for a walk-in structure. A mini greenhouse, often a 3- to 5-tier shelving unit with a zip-up clear cover or a small glass cabinet, fits on a patio, deck, or narrow side yard and holds dozens of seedlings and herbs.
Place it against a warm, sunny wall that blocks wind, and you’ll have a handy spot for starting seeds, hardening off transplants, or protecting tender herbs through early frosts. Small wood-and-glass cabinets also look lovely as a decorative feature on their own.
Mini greenhouses heat up and cool down quickly. Unzip or open the door on sunny days, and secure the frame to a wall or weight the base so it won’t blow over.
17. Center the Greenhouse in a Kitchen Garden
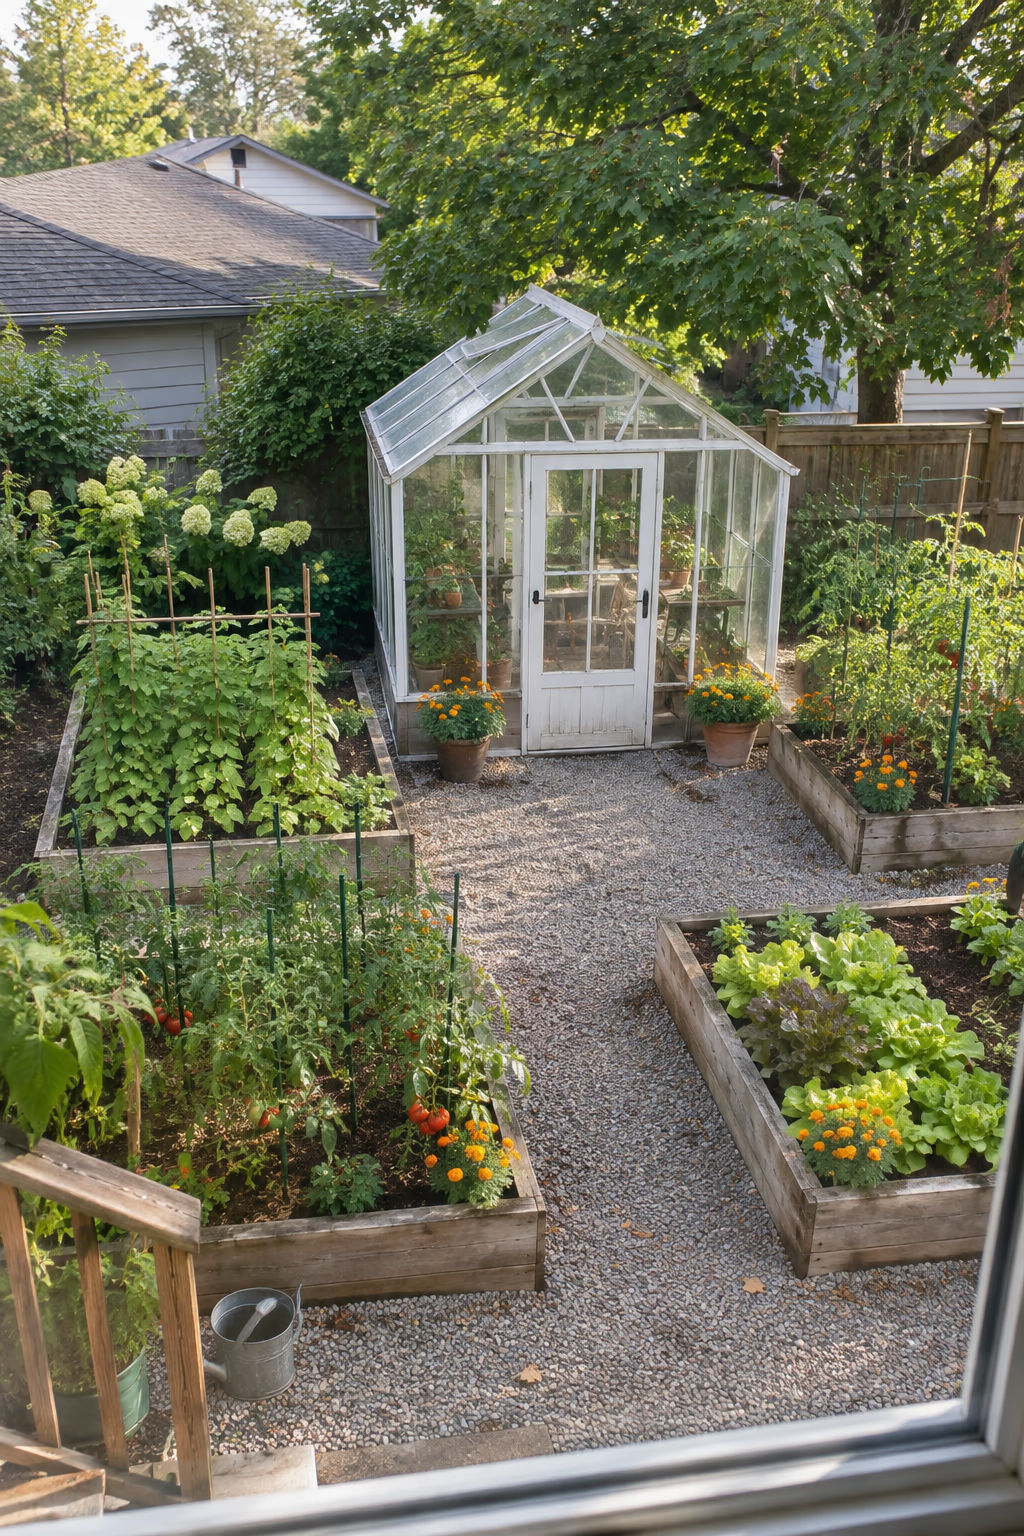
Make it the hub of your food-growing space
Positioning the greenhouse at the heart of a vegetable garden creates a natural flow: start seeds inside, then carry transplants a few steps to surrounding raised beds. Arrange beds symmetrically around it, with gravel or mulch paths wide enough for a wheelbarrow, about 3 feet.
The greenhouse becomes the visual anchor of the garden, especially when framed by espaliered fruit trees, trellised beans, or a border of marigolds and nasturtiums. It also gives you a sheltered place to store harvest baskets and tools.
Orient the greenhouse so its longest side faces south for the best winter light, and make sure taller crops like corn and pole beans won’t shade it during the growing season.
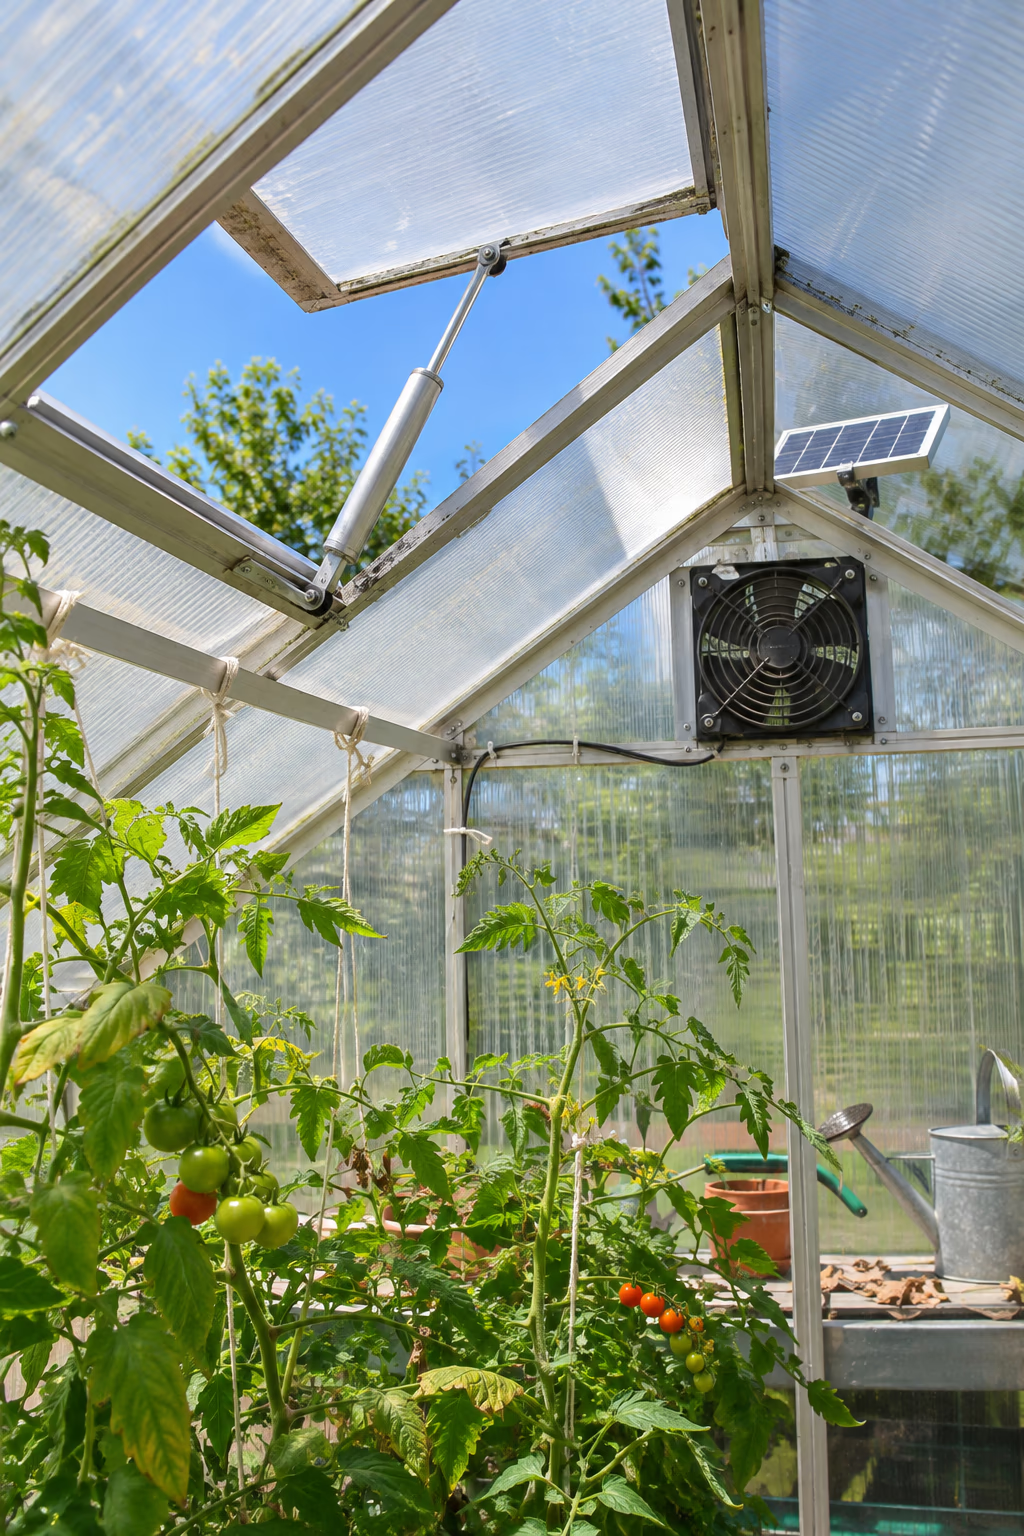
18. Install Automatic Vent Openers and a Solar Fan
Keep plants safe when you’re not home
Overheating is one of the most common greenhouse problems, and even a cool, sunny day can push inside temperatures dangerously high. Automatic roof vent openers solve this without electricity, using a wax-filled cylinder that expands as it warms and pushes the window open.
Add a small solar-powered exhaust fan near the roof peak to move hot air out, and a louvered intake vent low on the opposite wall. Together they create steady airflow that also helps prevent mold and fungal disease.
Automatic openers can usually be adjusted to start opening within a typical range of about 60 to 80 degrees Fahrenheit. Remove or latch them during storms, since a vent caught open in high wind can be damaged.
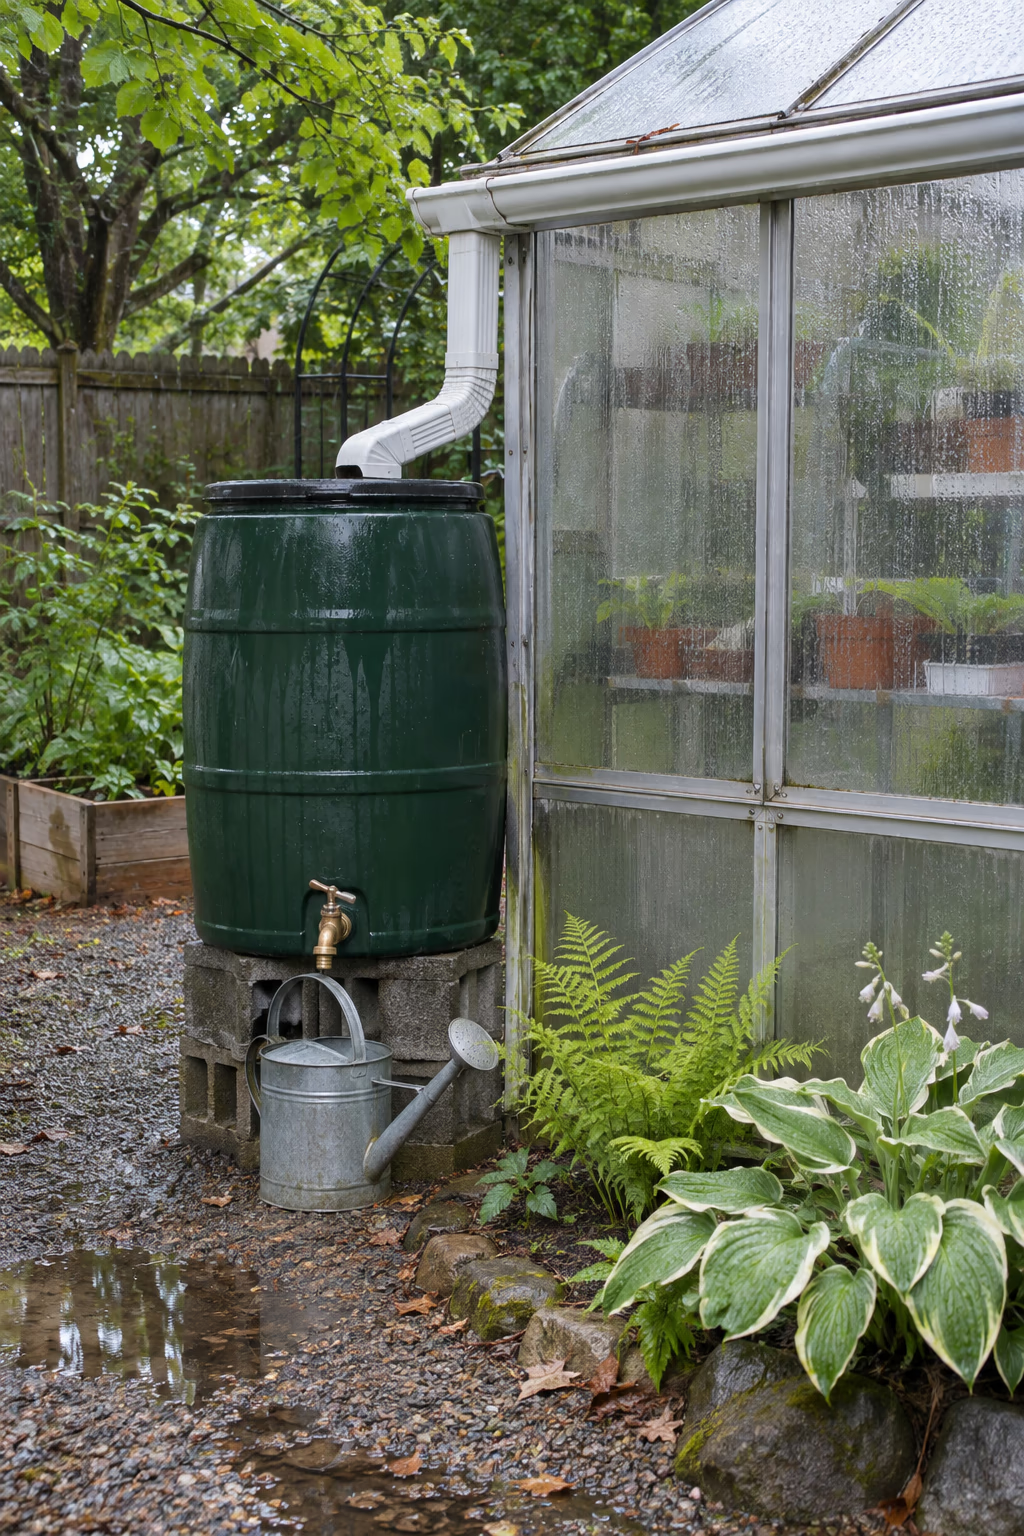
19. Catch Roof Runoff in a Rain Barrel
Free water right where you need it
A greenhouse roof sheds a surprising amount of water. Add a simple vinyl or aluminum gutter along the eave, run a downspout into a 50- to 60-gallon rain barrel, and you’ll have a ready supply for watering seedlings and potted plants.
Rainwater is free of the chlorine found in many municipal supplies, and plants generally respond well to it. Set the barrel on cinder blocks to raise the spigot high enough to fill a watering can, and add an overflow hose directed away from the greenhouse base.
Keep a fine screen on top to block mosquitoes and debris. A few states have rules about rainwater collection, so check local regulations, and drain the barrel before hard freezes so it doesn’t crack.
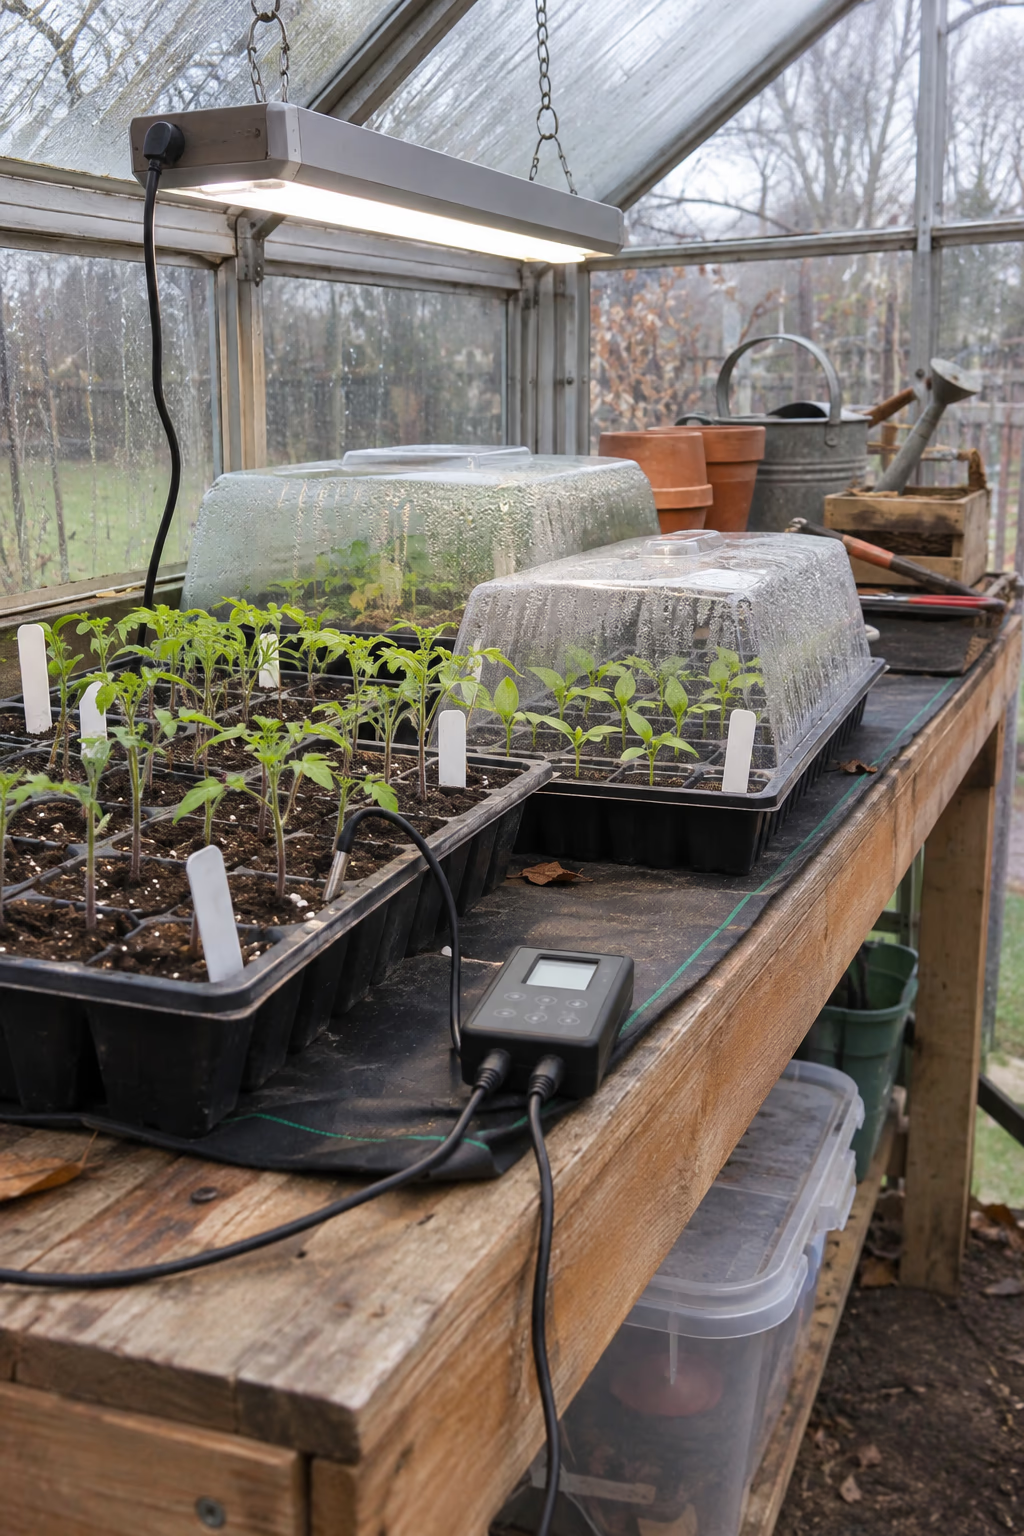
20. Start Seedlings on a Heated Propagation Bench
Get a head start on spring planting
A dedicated seed-starting bench is one of the best uses of a greenhouse. Set seedling heat mats on a sturdy bench, add trays of tomato, pepper, and flower seeds, and use a thermostat controller so the soil stays at the warm temperature most seeds prefer, roughly 70 to 80 degrees Fahrenheit.
Starting your own seedlings saves money compared with buying transplants and opens up hundreds of varieties you won’t find at the garden center. Clear humidity domes help seeds germinate, and you can remove them once sprouts appear.
Early spring days can be cloudy, so seedlings may stretch toward the light. Rotate trays every few days and consider a shop-style LED grow light over the bench for consistent growth.
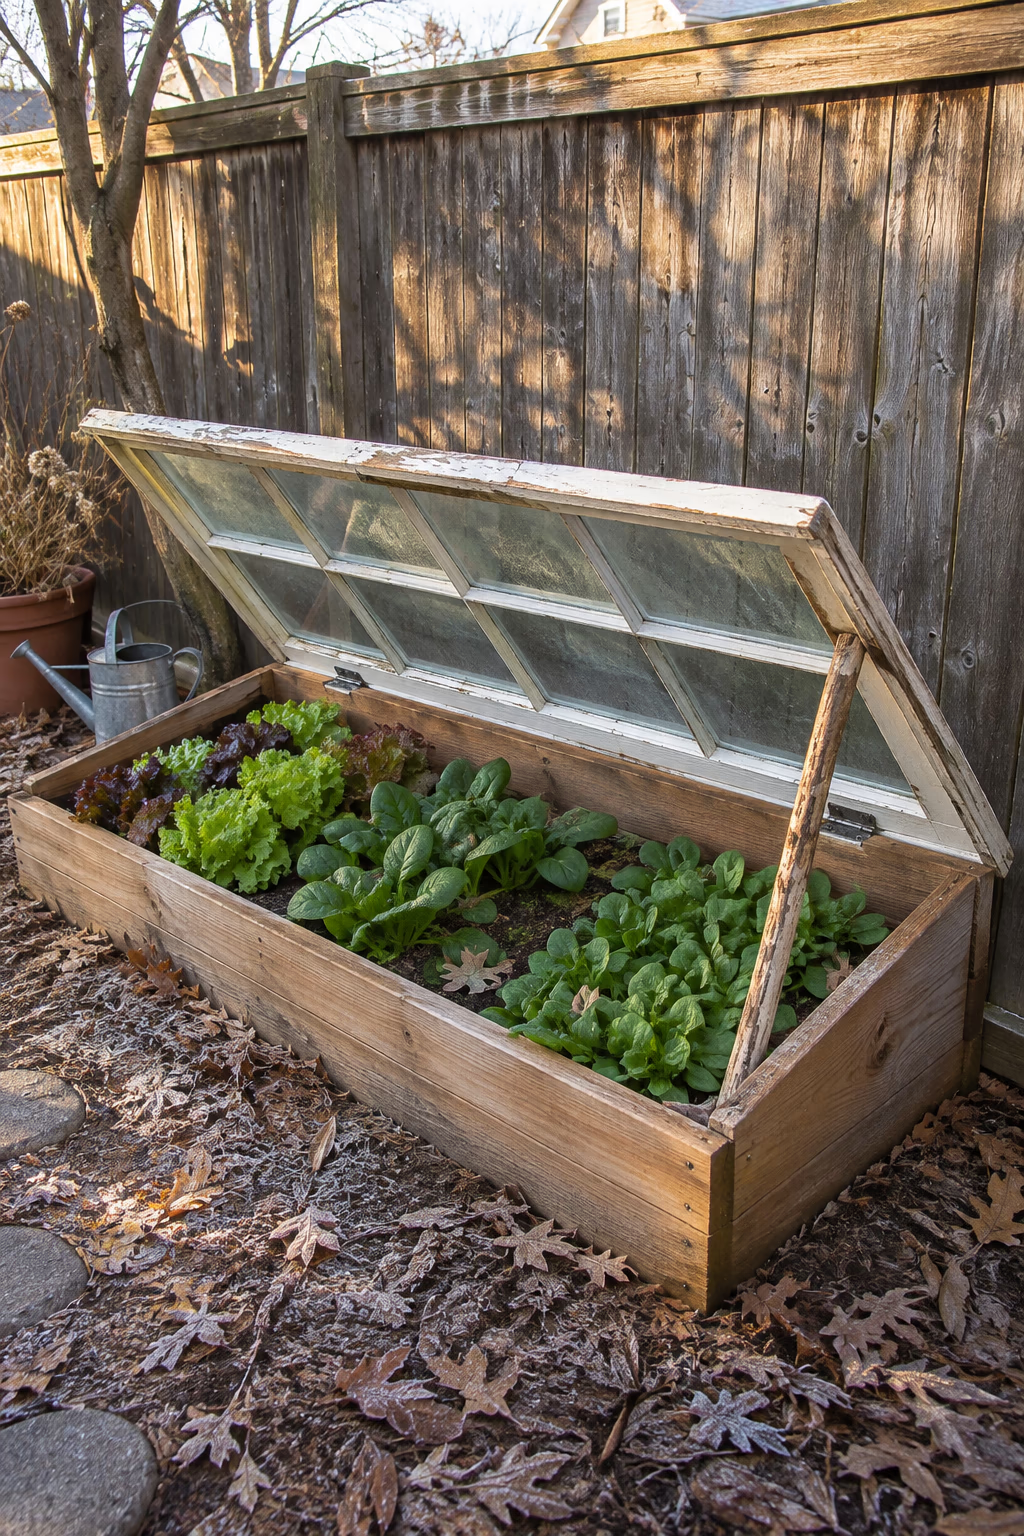
21. Build a Low Cold Frame Along the Fence
A simple starter greenhouse for any budget
A cold frame is essentially a bottomless box with a clear lid, angled to face the sun. Build one from cedar boards about 12 inches high at the back and 8 inches at the front, then top it with an old window or a polycarbonate lid on hinges.
Cold frames are perfect for growing lettuce, spinach, and other cool-season greens into early winter, and for hardening off seedlings in spring before they go into the garden. They also make a great test run before investing in a full greenhouse.
Prop the lid open on sunny days, even in winter, or the plants can cook inside. A notched stick or an automatic vent opener makes daily venting easy.
How to Plan Your Backyard Greenhouse
A greenhouse is a long-term investment of money and time, so a little planning upfront will help you choose the right size, style, and location for how you actually want to use it.
- Pick a sunny, level site. Aim for at least six hours of winter sun, ideally with the long side facing south, and avoid low spots where cold air and water collect.
- Size up from what you think you need. Most gardeners fill a greenhouse fast, so choose a model one size larger than your first plan if your budget and yard allow.
- Check permits and HOA rules. Many towns exempt small accessory structures under a certain size, but rules vary, and setbacks from property lines still apply.
- Plan water and power access. A nearby spigot and a GFCI-protected outlet make watering, fans, heaters, and lighting much easier.
- Build a solid foundation. Gravel, pavers, timber, or concrete bases keep the frame level, anchored against wind, and protected from moisture.
- Prioritize ventilation and shading. Roof vents, a door you can prop open, and shade cloth for summer help prevent overheating and disease.
Frequently Asked Questions
What is the best material for a backyard greenhouse?
Twin-wall polycarbonate is a popular all-around choice because it insulates better than single-pane glass, diffuses light, and resists breaking. Glass offers the clearest view and lasts longer but costs more and needs a stronger frame, while greenhouse plastic film is the cheapest option but needs replacing every few years.
Do I need a permit to build a greenhouse in my backyard?
It depends on your location and the size of the structure. Many areas allow small freestanding greenhouses without a permit, but larger ones, attached greenhouses, and anything with electrical or masonry work often require one. Contact your local building department and check HOA guidelines before you buy or build.
Can I use a greenhouse in winter without heat?
Yes, an unheated greenhouse can still protect hardy crops like kale, spinach, lettuce, and carrots through much of the winter in many regions. It typically stays several degrees warmer than outside at night. Tender plants like citrus, tomatoes, and peppers usually need supplemental heat during freezing weather.
How much does a backyard greenhouse cost?
Costs vary widely. A cold frame or small hoop house can cost under a hundred dollars to build, polycarbonate kits often run from several hundred to a few thousand dollars, and custom cedar, glass, or masonry greenhouses can cost considerably more once foundations and utilities are included.
Which direction should a greenhouse face?
In most of the United States, orienting the greenhouse so its longest side faces south captures the most winter light. If that’s not possible, east-facing sites with morning sun work well, while spots shaded by buildings or trees for much of the day are best avoided.
Final Thoughts
The right greenhouse turns a corner of your yard into a place where the growing season never quite ends. A reclaimed-window build, a cedar kit with a potting bench, or a simple cold frame along the fence can each bring fresh herbs, early tomatoes, and flowering citrus within reach.
Start with a size and style that suits your yard and your time, then add shelving, lighting, rain barrels, and seating as your confidence grows. Before long, your greenhouse may become your favorite room, even though it’s outside the house.