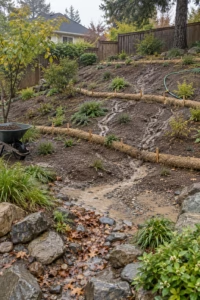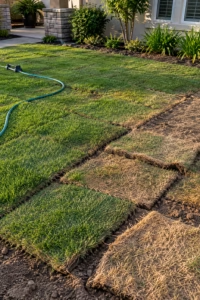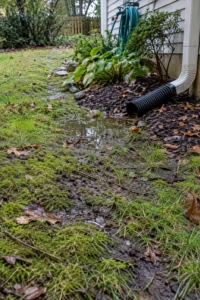
A few flat stones set into the grass can change how you move through a yard. Suddenly there’s a reason to wander past the roses, cut across to the shed without muddy shoes, or follow a quiet line of steppers toward a bench you’d forgotten was there.
Stepping stones are one of the easiest ways to add structure to a garden without pouring a full walkway. They cost less, let rain soak into the ground between them, and leave room for moss, gravel, or low plants to soften every edge. They also suit almost any style, from crisp modern yards to overgrown cottage borders.
These 19 stepping stone garden ideas cover modern concrete pads, shady moss trails, pond crossings, DIY imprinted and mosaic stones, kid-friendly paths, and practical routes to the gate or the vegetable beds. Pick one that fits your yard and budget, or combine a few to connect the spaces you use most.
1. Float Large Concrete Pads in Pale Gravel
A clean modern look that drains well
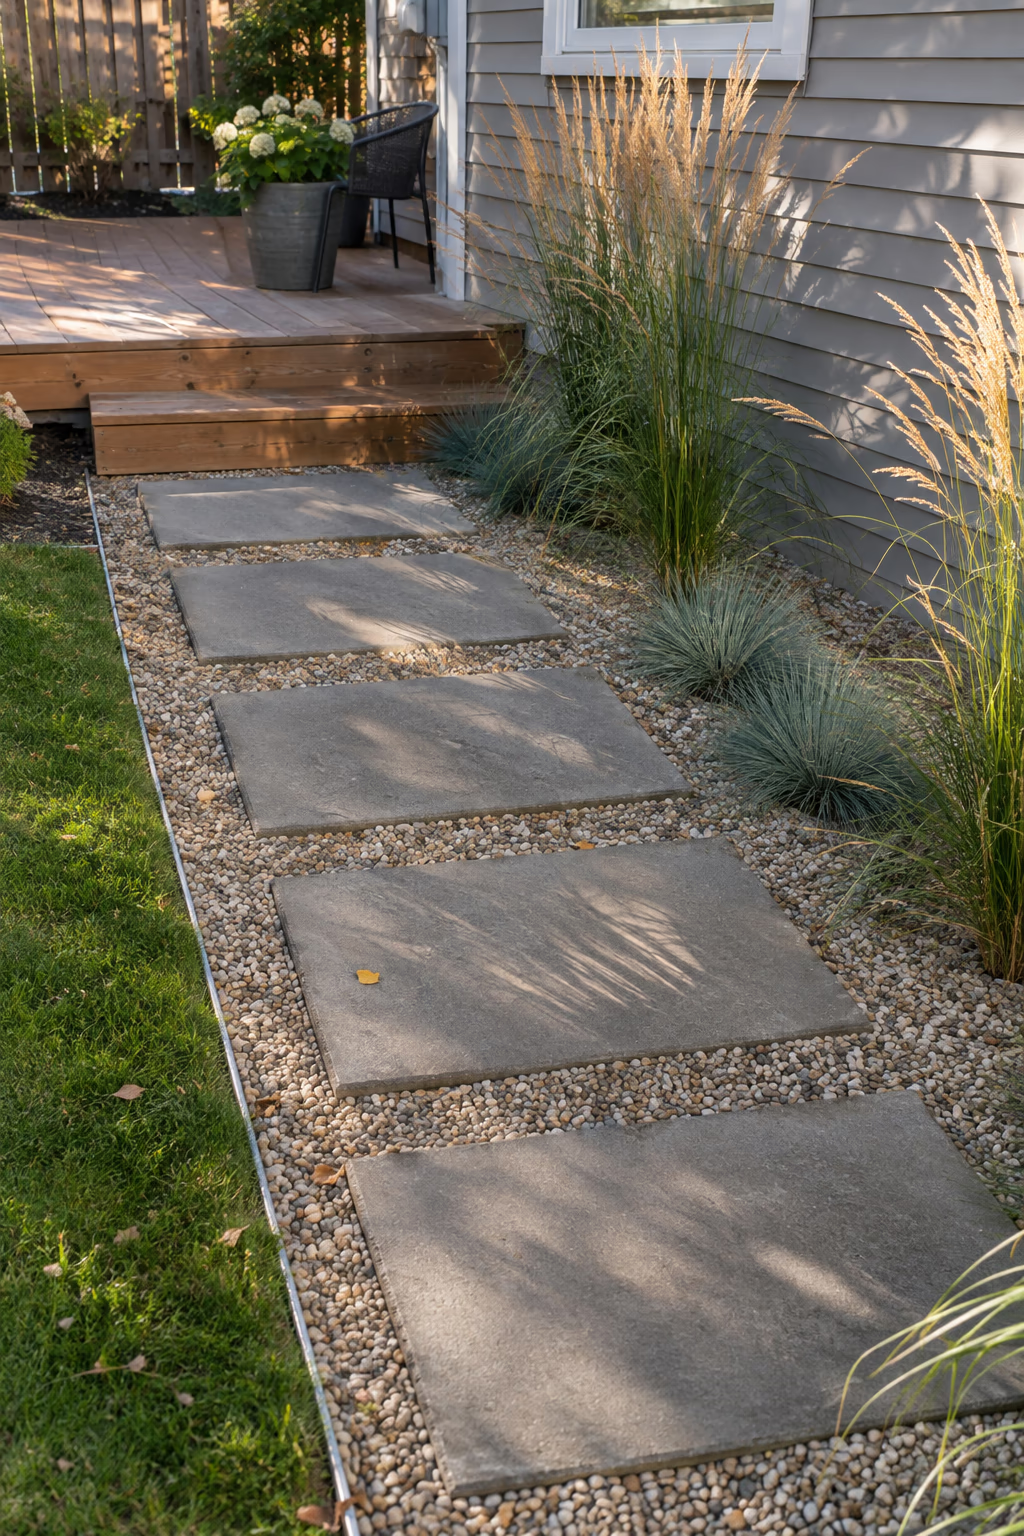
Oversized rectangular pads, about 24 by 36 inches or 24 by 48 inches, set in a bed of pale pea gravel or crushed granite look as if they’re hovering on the surface. Gray or charcoal precast concrete works well, and so does sawn bluestone if your budget allows. Space the pads 3 to 5 inches apart so the gravel reads as a crisp stripe between them.
The appeal is simplicity. The strong geometry gives a small yard a designed, architectural feel, and the gravel lets water drain straight into the soil instead of running toward the house. A few clumps of ornamental grass or low succulents along the edges keep it from feeling stark.
Build a proper base for each pad: dig out 4 to 6 inches, add compacted crushed stone, then a thin layer of sand to level. Pads this size are heavy, often 100 pounds or more, so move them with a hand truck or a helper. Steel or aluminum edging keeps the gravel from drifting into the lawn.
2. Wind Mossy Stepping Stones Through a Shade Garden
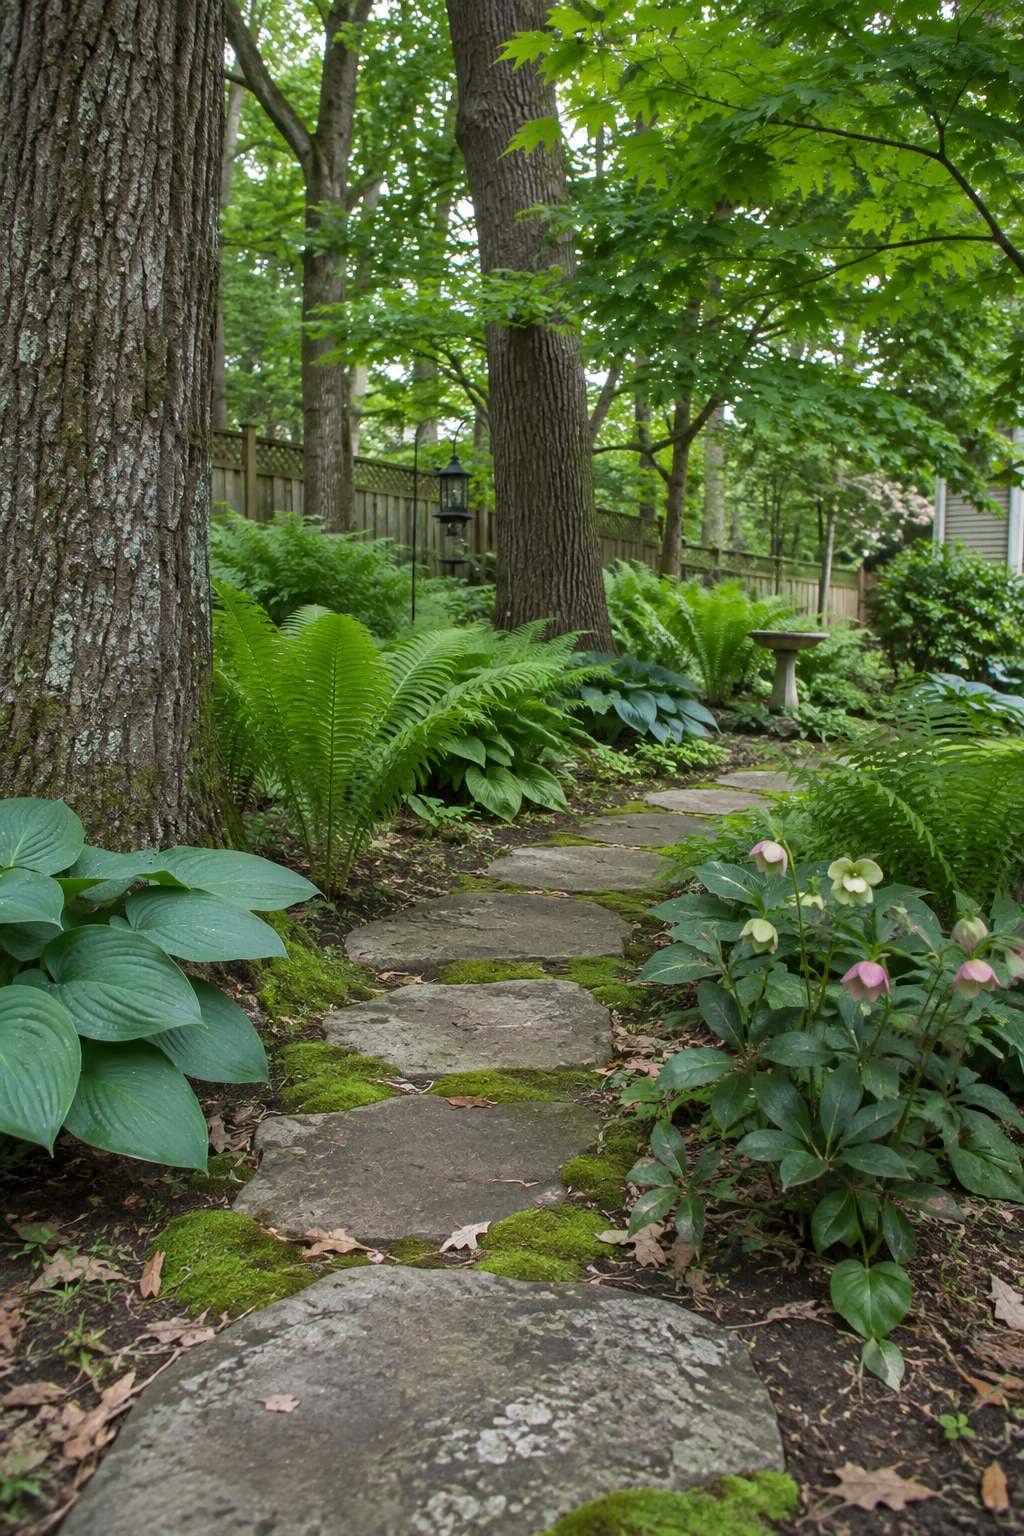
A woodland trail that grows more beautiful each year
In a shady corner under maples or oaks, irregular flagstones or weathered fieldstones laid in a gentle curve feel like a forest trail. Let moss fill the gaps naturally, or encourage it by pressing patches of local moss into damp, slightly acidic soil around each stone. Ferns, hostas, hellebores, and wild ginger make good companions along the edges.
Moss thrives where grass struggles, so this is a smart fix for thin, patchy lawn under trees. The soft green gaps and gray stone look calm in every season, and the path only gets better as lichen and moss creep onto the stones.
Moss needs steady moisture and shade to establish, so water lightly during dry spells for the first summer. Keep fallen leaves blown off in autumn, since a thick layer will smother it. Shaded stones can also turn slick when wet, so choose stones with a slightly rough surface.
3. Cross a Backyard Pond on Flat Stone Steppers
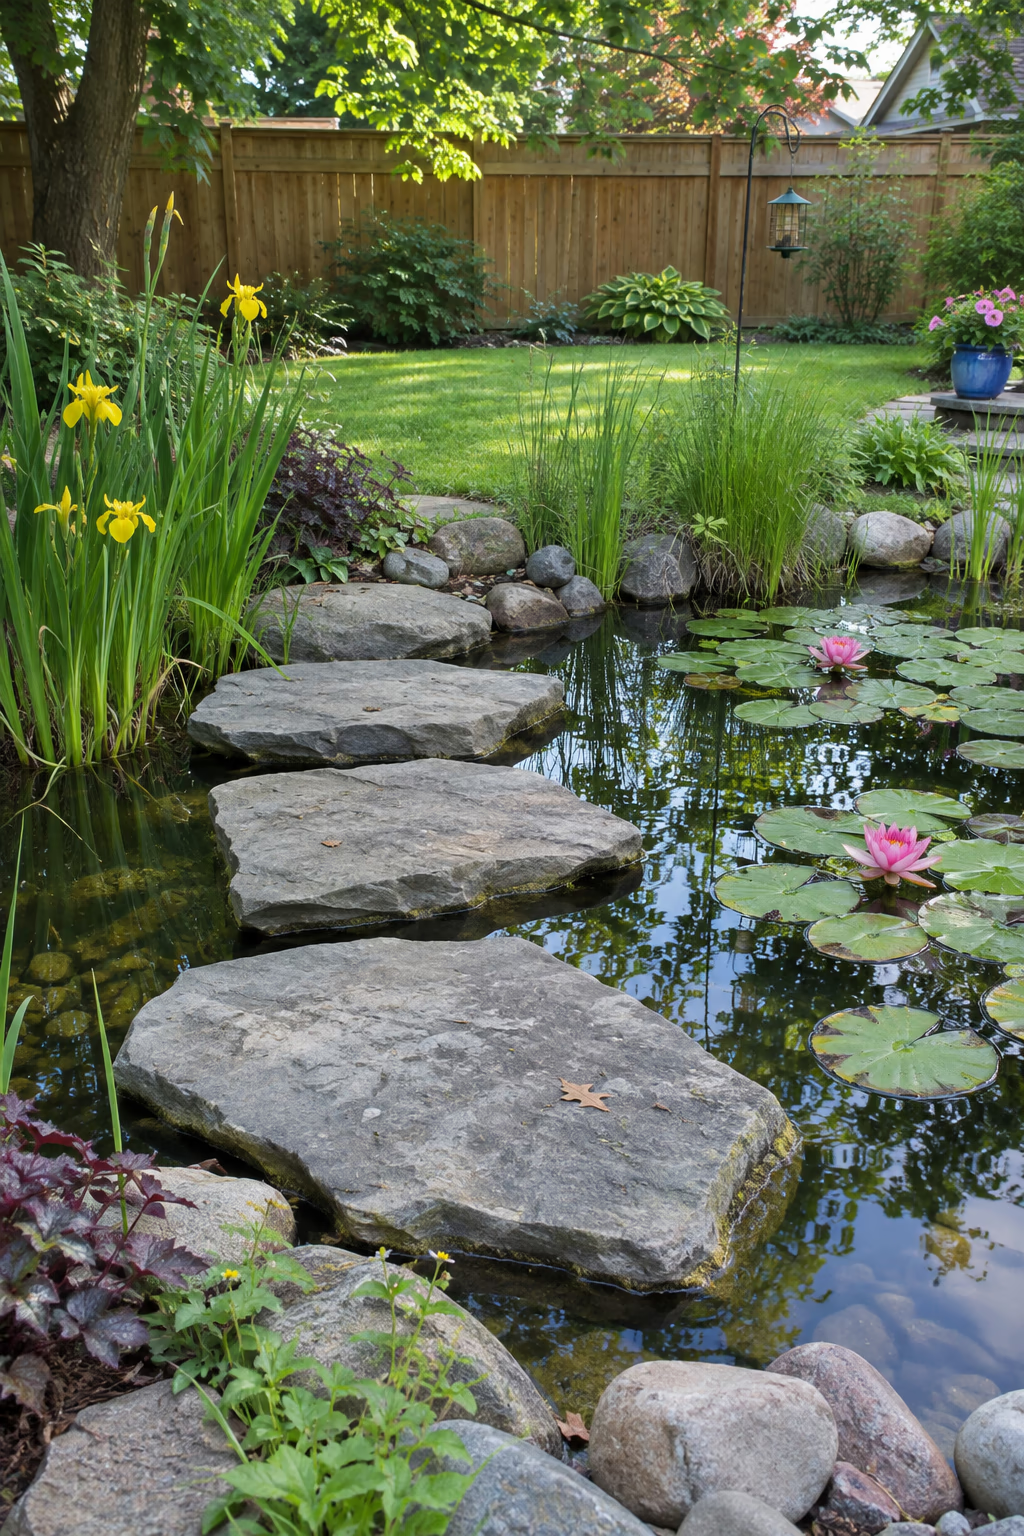
Turn a water feature into a place to walk
A short row of large, flat stones across a narrow part of a pond lets you walk right over the water and look down at the fish and lilies. Choose thick slabs at least 18 inches across with flat, textured tops, and set them about 2 to 4 inches above the waterline. Irises, rushes, and water lilies planted near the crossing make it look natural.
Few garden features feel as special as stepping across water. Even in a modest backyard pond, a stepping stone crossing turns something you look at into something you experience, and it photographs beautifully from almost any angle.
Each stone needs solid support, usually a concrete or stacked-block pier resting on a protective underlayment so the liner isn’t punctured. This is easiest to plan when building a new pond. Keep crossings over shallow water, and remember that pond rules can apply in some towns. If young children visit, supervision or a pond grid under the surface adds peace of mind.
4. Run a Line of Slab Steppers Across the Lawn
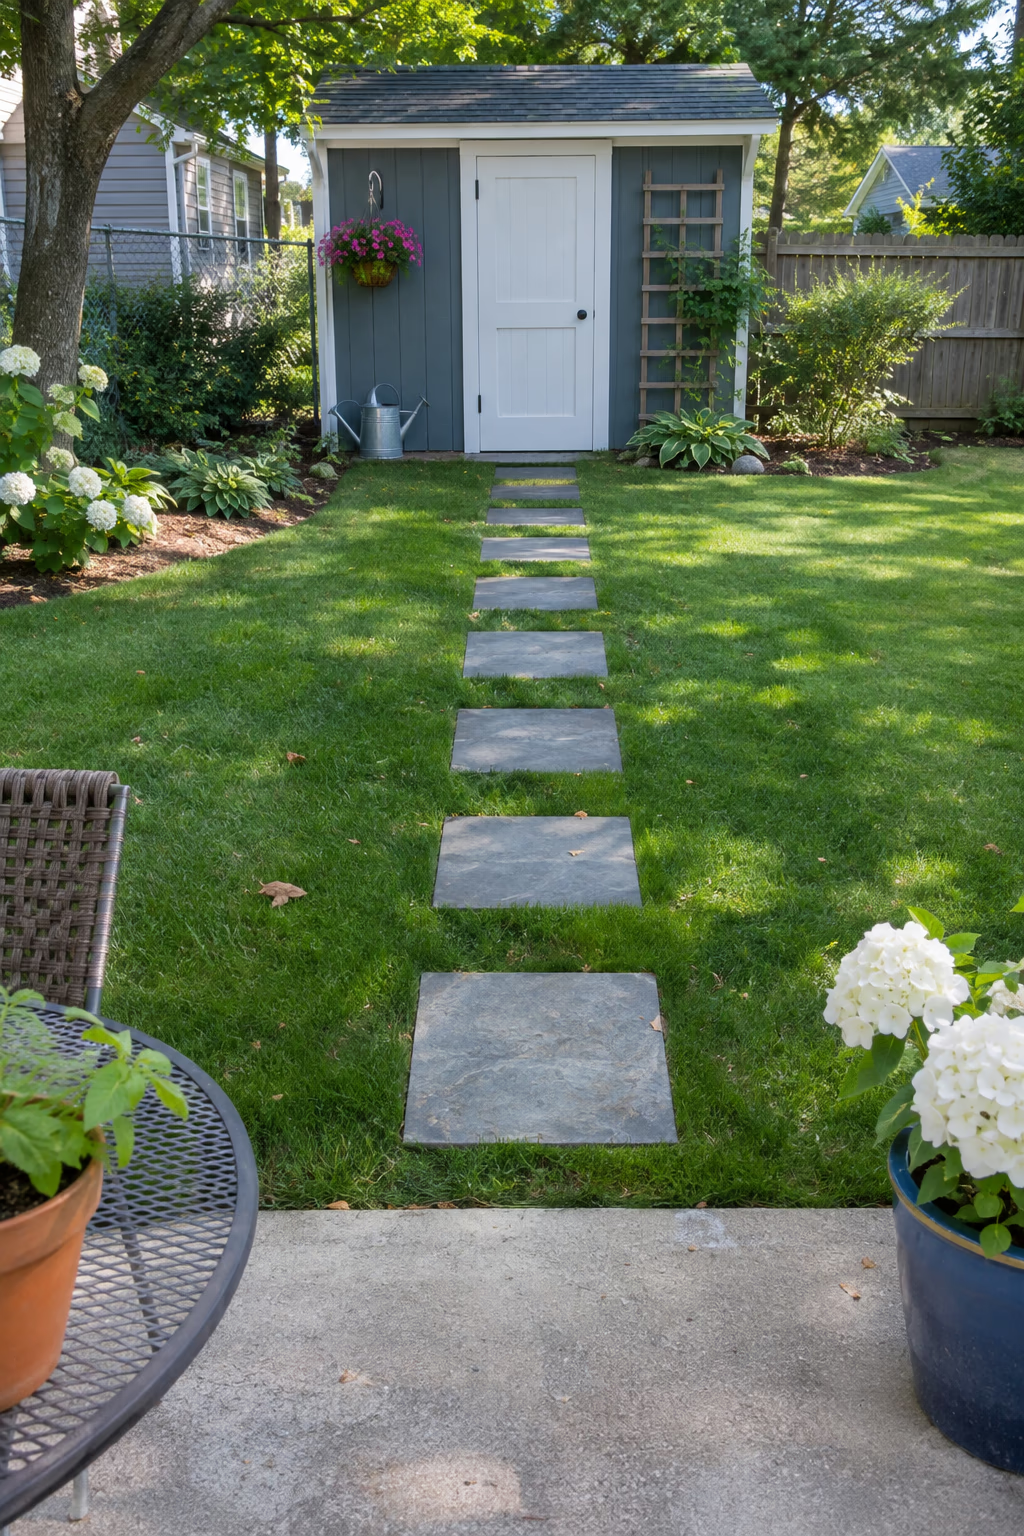
A simple shortcut that protects the grass
Wherever feet have already worn a bare track across the lawn, a row of slab steppers fixes the problem neatly. Square or rectangular concrete or bluestone pavers, 18 to 24 inches wide, work well. Set them about 24 inches apart from center to center, which matches a comfortable adult stride, and sink them so the tops sit level with the soil.
This idea is popular because it’s practical and affordable. You keep most of your lawn, stop the muddy wear path, and add a clean line that leads the eye from the patio to the shed, garden, or play area.
Setting the stones flush is the key detail. If they stick up, the mower will hit them, and if they sit too low, grass will grow over the edges. Cut around each stone with a flat spade, lift the sod, add an inch or two of sand, and tamp the stone down until it’s level with the surrounding soil.
5. Tuck Billowing Perennials Around Irregular Steppers
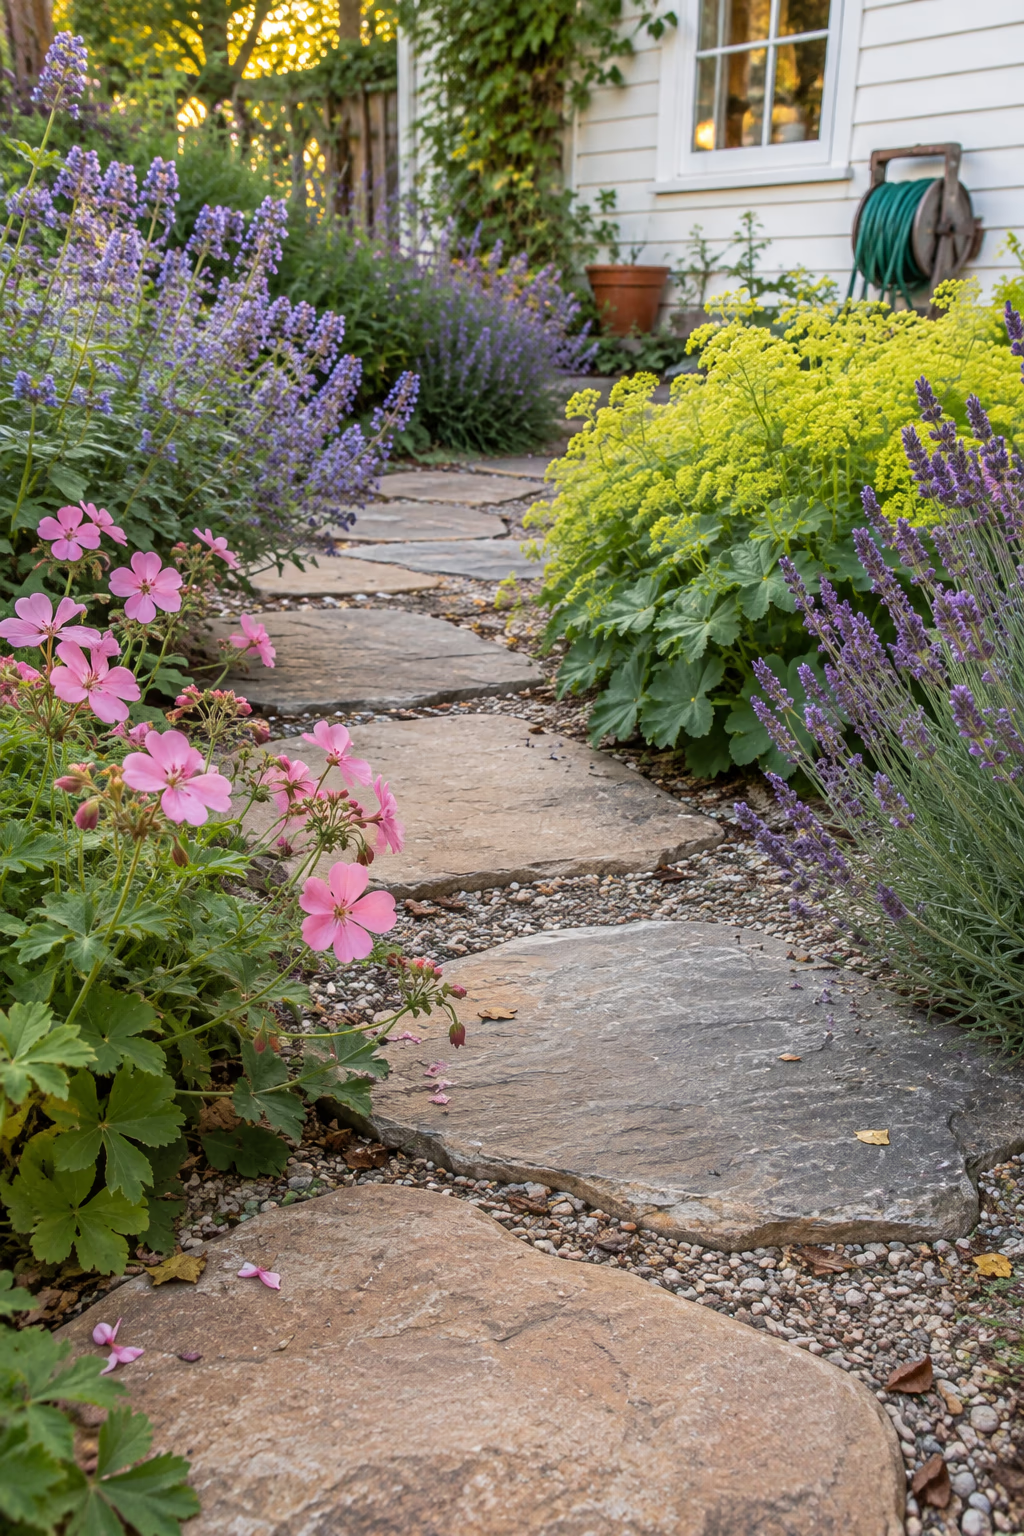
Let flowers spill over the edges for a relaxed feel
Lay irregular flagstone steppers through the middle of a flower bed instead of beside it, so the plants brush your ankles as you walk. Catmint, hardy geraniums, lady’s mantle, lavender, and low asters all spill gracefully onto stone edges. Fill the gaps between steppers with fine gravel or a thin layer of mulch.
This creates the soft, abundant look many gardeners love, and the stones double as access for weeding, deadheading, and cutting flowers without compacting the soil. It works especially well in sunny front beds where you want both color and a route to the hose spigot.
Leave at least 18 inches of clear stone surface so the path stays usable once plants fill in. Avoid thorny shrubs and plants that attract lots of bees right at the edges if anyone in the household is allergic. Shear back sprawling perennials in midsummer to keep the stones visible.
6. Set Dark Stones in Light Pebbles for Bold Contrast
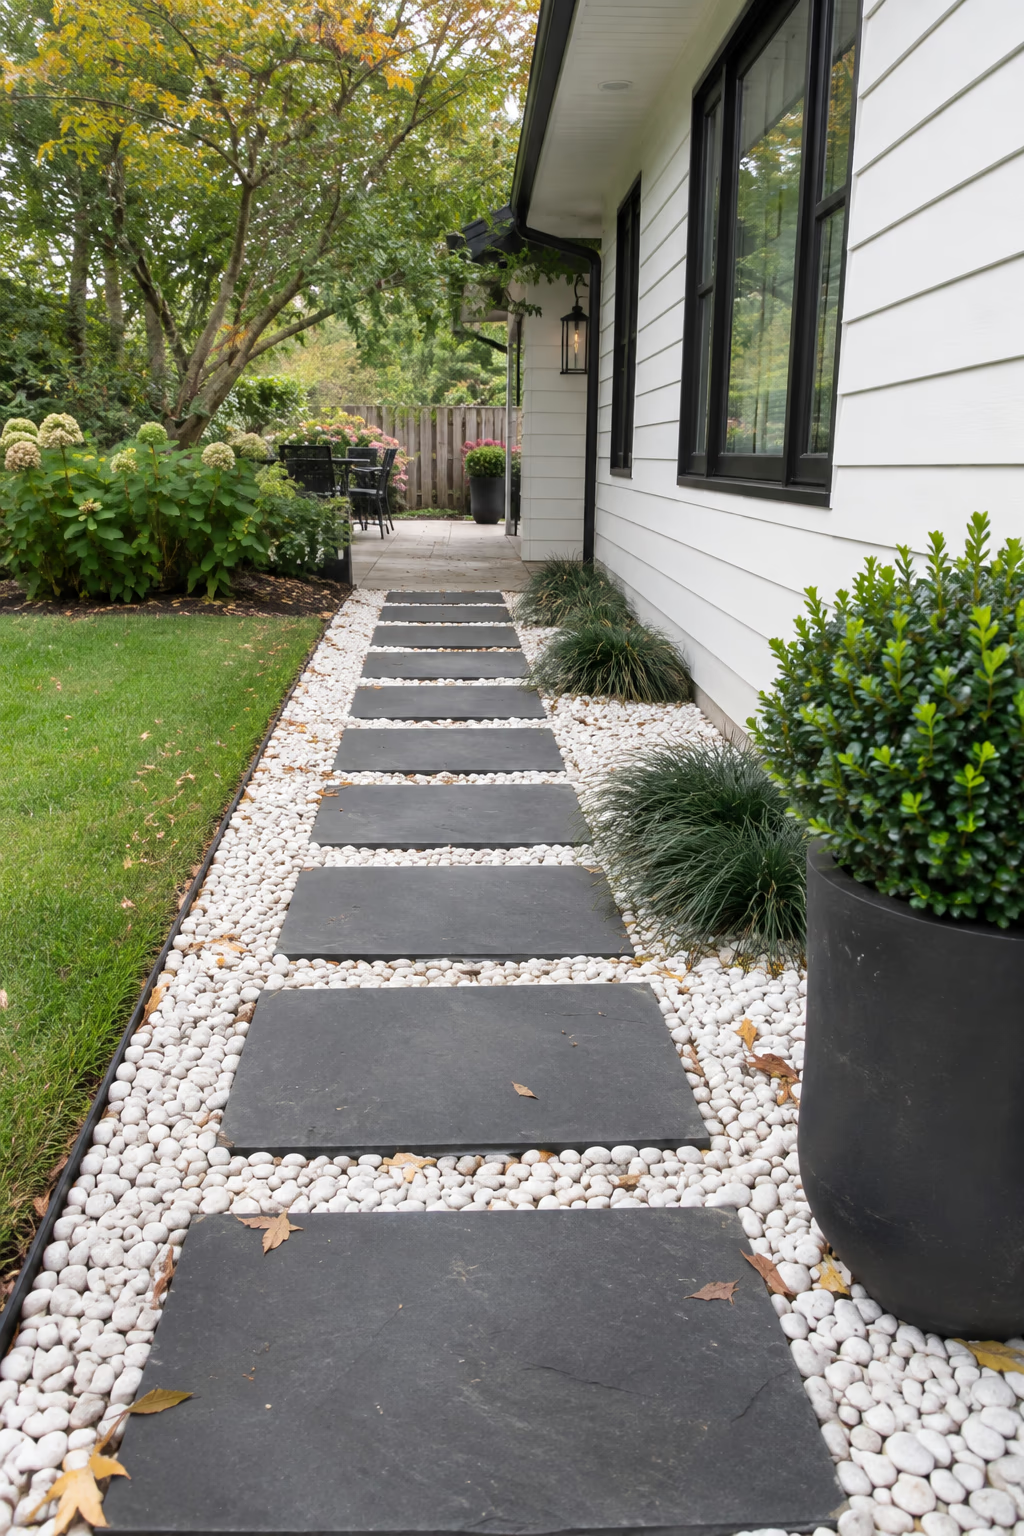
High-contrast paths that pop from a distance
Charcoal slate, black basalt, or dark gray concrete steppers set in a field of white or cream pebbles make a striking graphic path. You can also flip the scheme and set pale limestone or light concrete pads in dark river rock or black mulch. Smooth river pebbles about 1 inch across feel polished, while angular crushed stone packs more firmly.
Contrast gives even a simple straight path real presence. It defines the walking surface clearly, which helps at dusk, and it suits modern homes with dark trim or crisp white siding.
Light pebbles show leaves and dirt quickly, so this is best away from messy trees. Lay landscape fabric under the pebbles to slow weeds, and use edging to hold them in place. Round pebbles can roll underfoot, so keep them in the gaps rather than in the main walking line.
7. Light the Stepping Stones With Low Solar Fixtures
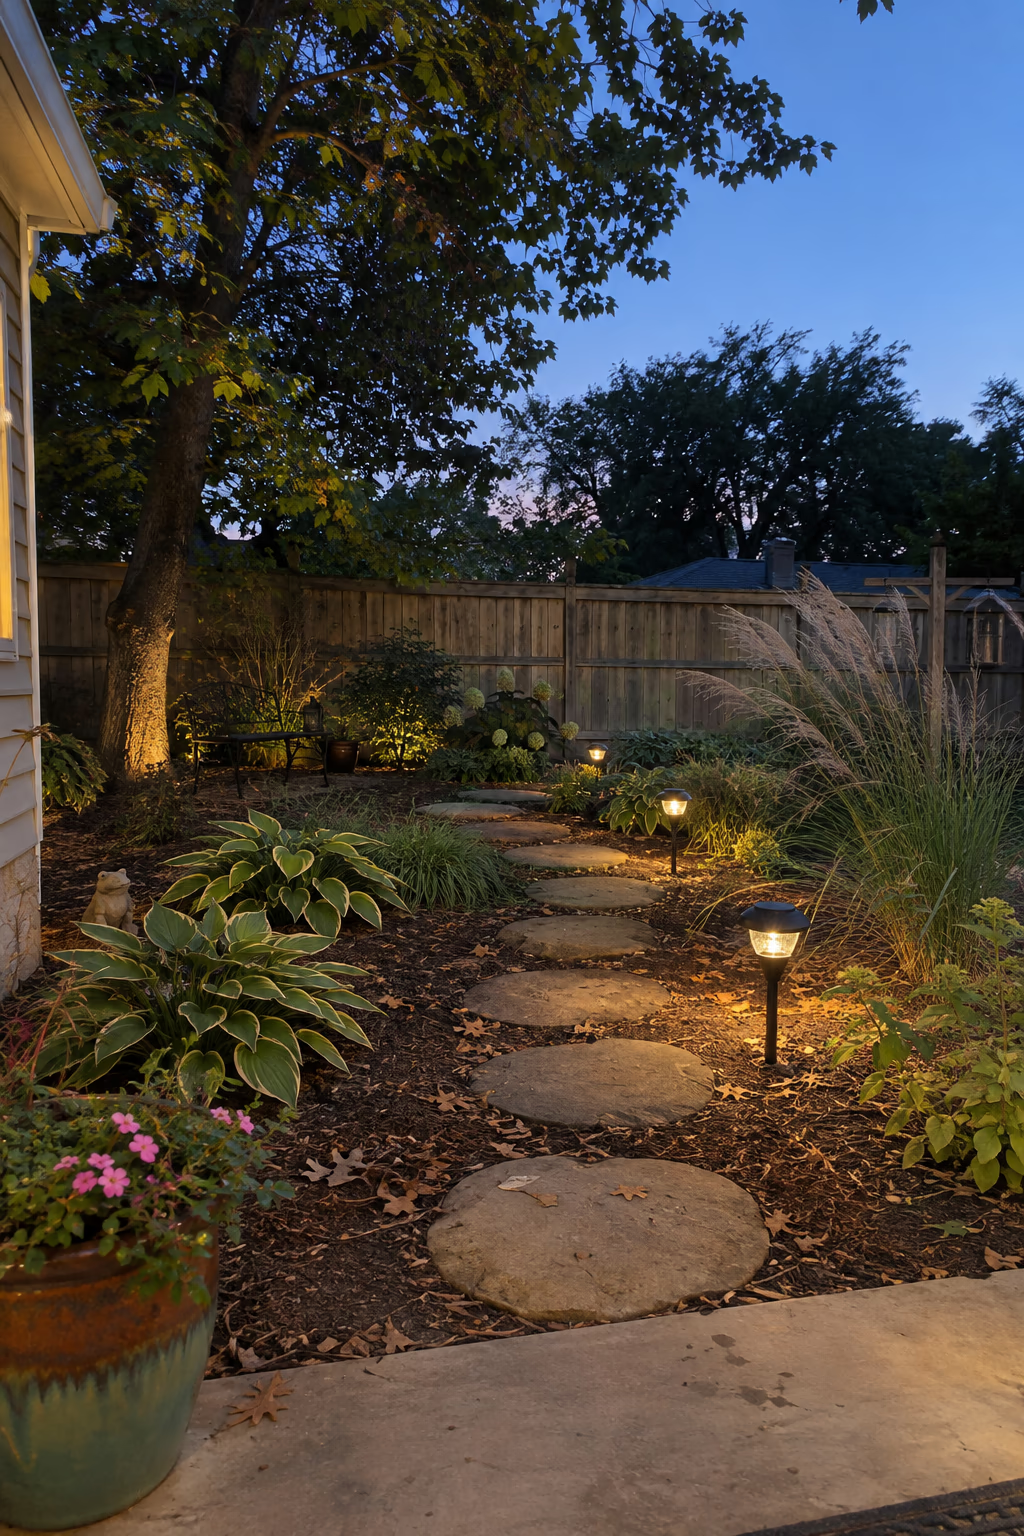
Make the path safe and inviting after dark
Short solar path lights, low bollards, or flat solar puck lights set into the ground between steppers let you follow the path at night. Place lights to one side, about every 4 to 6 feet, or tuck a puck beside every second or third stone. Warm white light, around 2700K, looks softer and more natural than cool blue light.
Lighting adds safety, since uneven stones are easy to trip on in the dark, and it turns the path into an evening feature. A glowing line of steppers leading to a fire pit or bench makes the whole yard feel usable after sunset.
Solar fixtures need several hours of direct sun to charge, so they may disappoint on a heavily shaded path. In that case, a low-voltage wired system is more reliable. Cheaper solar lights often fade within a season or two, so expect to replace batteries or fixtures over time.
8. Press Garden Leaves Into Homemade Concrete Steppers
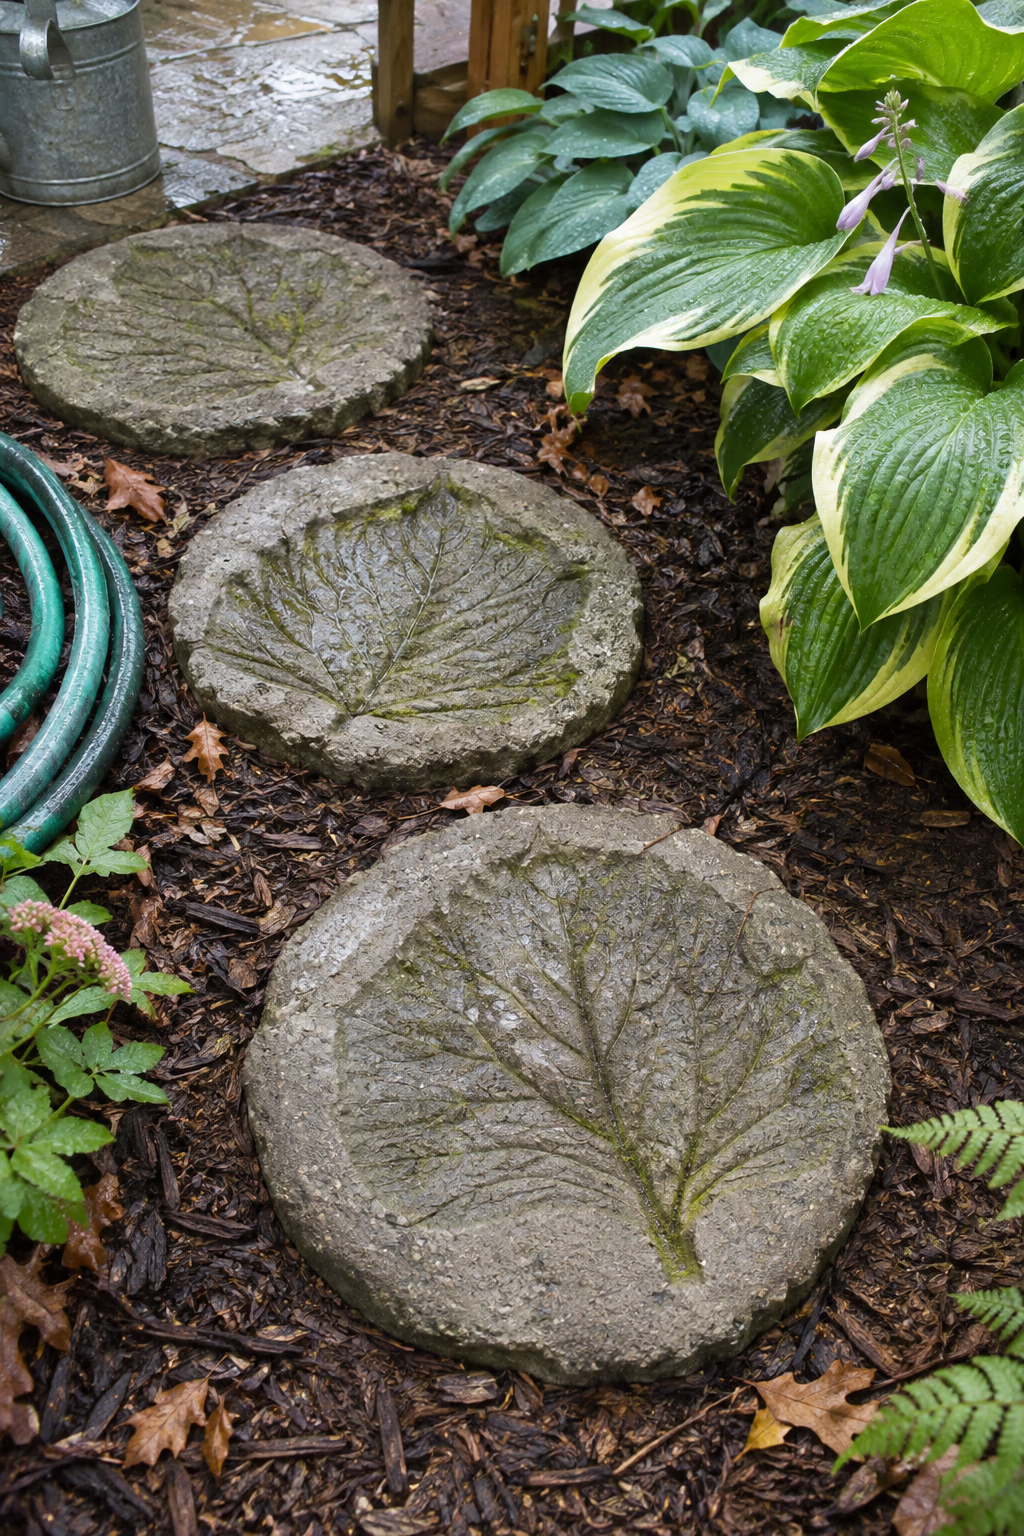
A beginner-friendly DIY with natural texture
Large, deeply veined leaves such as hosta, rhubarb, elephant ear, or castor bean make beautiful impressions in concrete. Pour concrete mix into a round mold or a plastic plant saucer about 2 inches deep, press a leaf vein-side down into the surface, and peel it off once the concrete has firmed up. Each stone records the shape of one plant from your own garden.
These steppers are inexpensive and satisfying to make on a weekend, and the botanical pattern looks lovely when moss settles into the veins. They’re also a good project to do with older kids or grandparents.
Keep the concrete damp under plastic for several days and let it cure fully, ideally two to four weeks, before walking on it. Add a layer of hardware cloth in the middle of the pour for strength. Wear gloves, since wet concrete can irritate skin. Castor bean is toxic, so handle its leaves carefully and keep them away from children.
9. Piece Together Mosaic Stepping Stones From Broken Tile
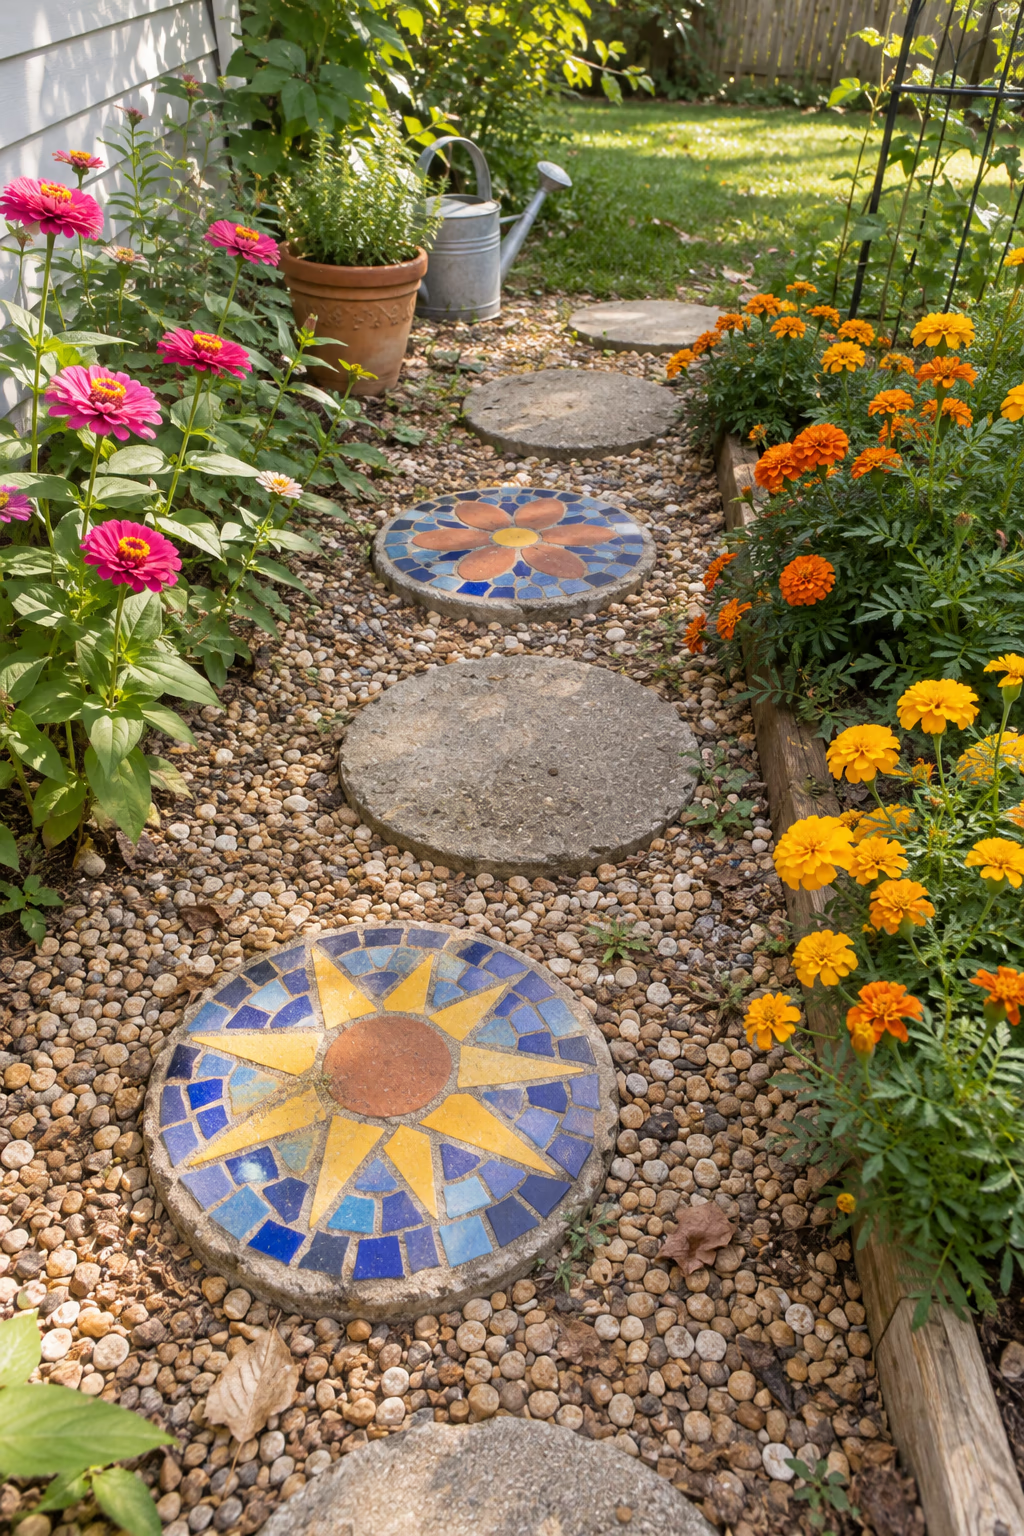
Add a pop of handmade color to the path
Mosaic steppers combine a concrete base with pieces of broken tile, glass, pottery, or colored pebbles. A simple method is to stick tile pieces face down on clear contact paper inside a mold, then pour concrete over the back. Sunbursts, flowers, dragonflies, and simple geometric patterns all work well.
A few mosaic stones scattered among plain steppers add personality without overwhelming the garden. They’re a great way to use leftover tile from a home project or chipped dishes you can’t bear to toss.
Glazed tile and glass can be slippery when wet, so keep the design flush and use plenty of textured grout or concrete around the pieces. In cold regions, use unglazed porcelain or frost-resistant tile and seal the finished stones, since water trapped behind loose pieces can freeze and pop them out.
10. Climb a Gentle Slope With Chunky Stone Slab Steps
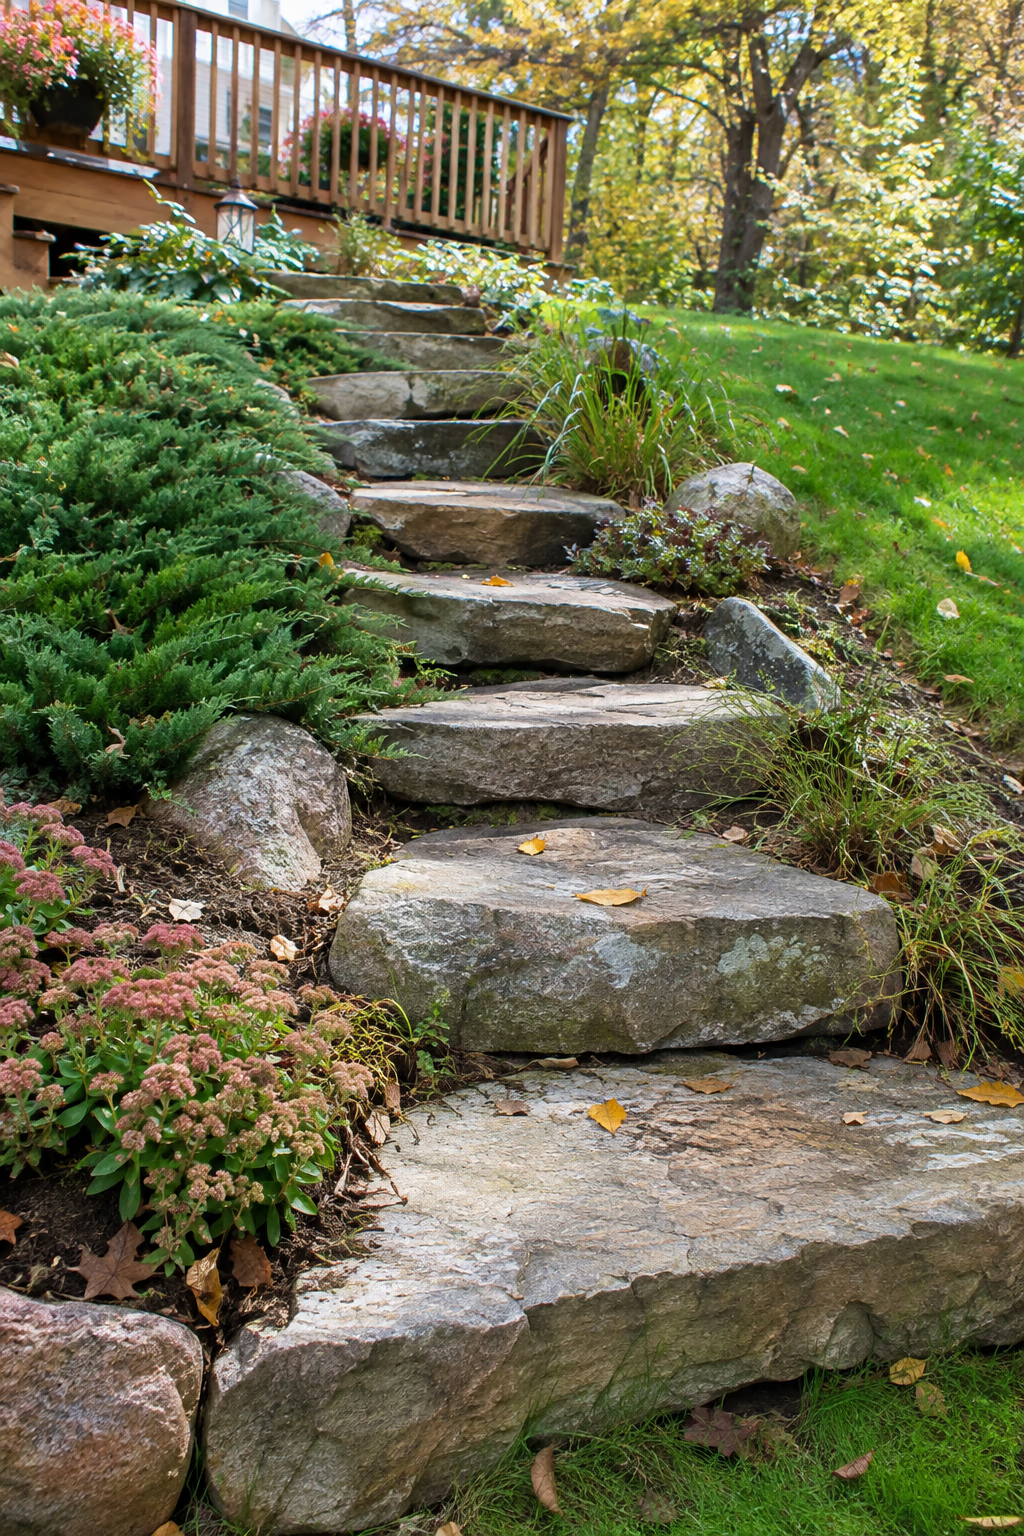
Turn an awkward bank into an easy walk
On a gentle hillside, thick stone slabs set into the slope work as both stepping stones and stairs. Use stones at least 4 to 6 inches thick, cut a level shelf into the hill for each one, and overlap or butt them so each step rises about 5 to 7 inches. Low groundcovers and small boulders along the sides help the steps blend into the hillside.
Slab steps follow the natural lie of the land, so they look as if they’ve always been there. They also stop the slick, worn track that forms when people scramble up a grassy bank.
Each slab must sit firmly on compacted gravel so it can’t rock or slide. Heavy stones may need delivery and placement by a landscaper. Steeper slopes, long runs, or steps near a public sidewalk may need handrails or permits, so check local codes before building.
11. Plant Dwarf Mondo Grass in a Checkerboard of Square Pavers
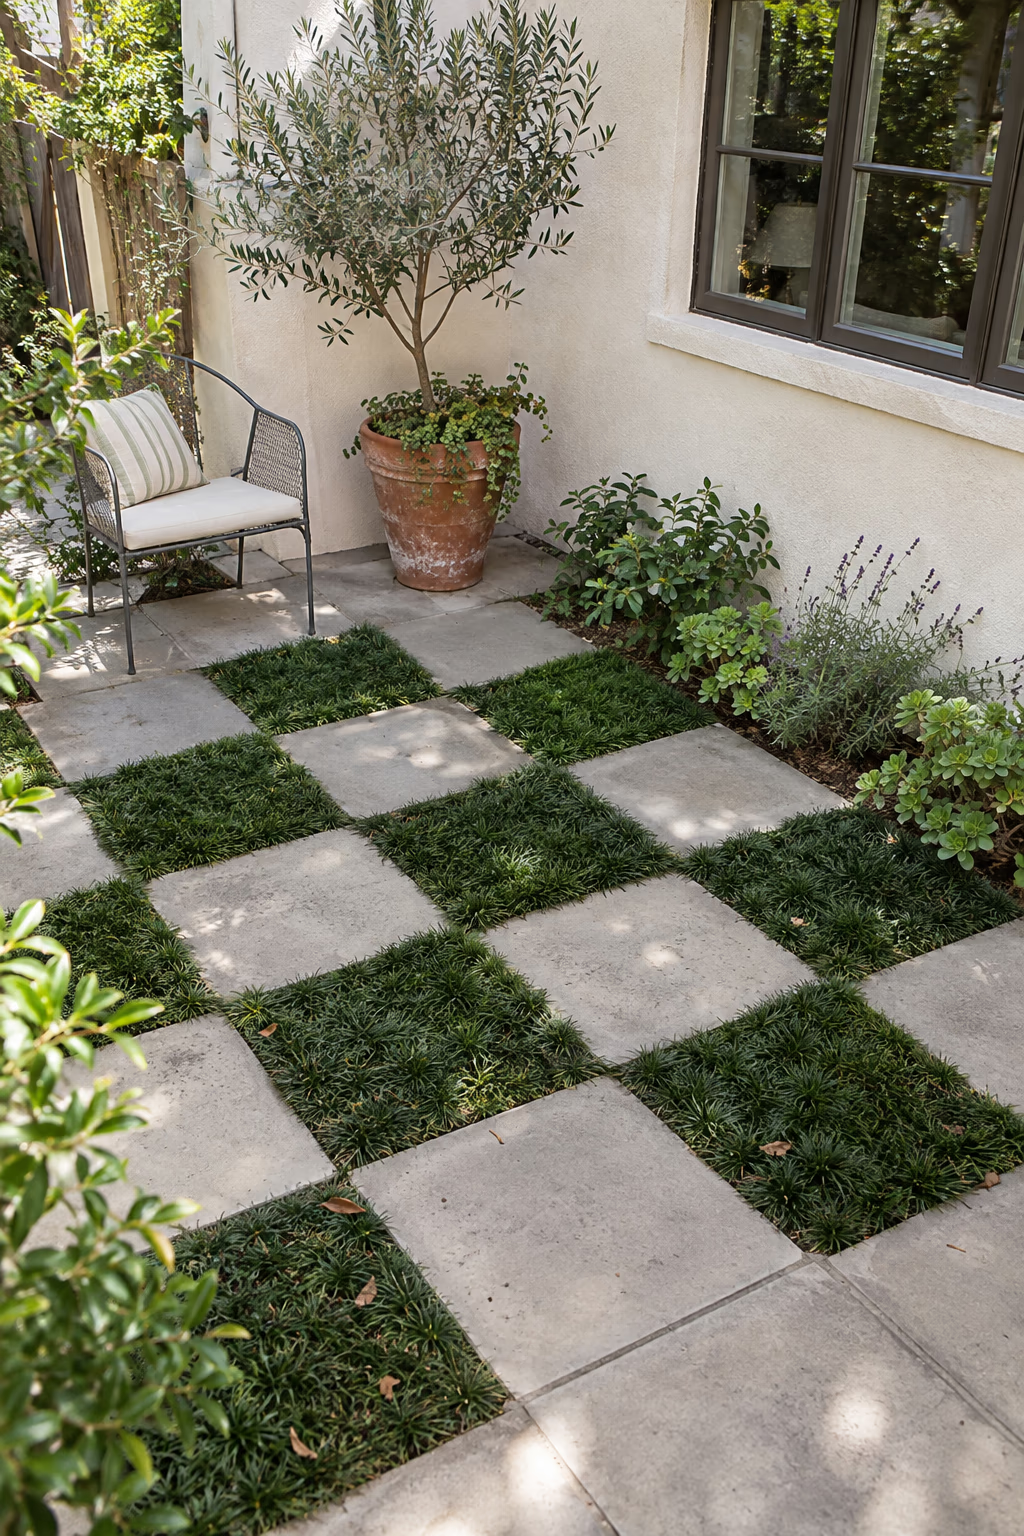
A living grid that softens a patio or side path
Alternate square concrete pavers, around 16 or 24 inches, with squares of dwarf mondo grass to create a checkerboard, or set the pavers in a grid with 3 to 4 inch planted joints. Dwarf mondo grass stays only a few inches tall, never needs mowing, and handles some light foot traffic.
The pattern feels tailored but green, and it’s a handsome way to break up a broad hardscaped area or a dull side yard. It also lets more rainwater soak in than solid paving would.
Dwarf mondo grass grows slowly and is reliably hardy mainly in warmer zones, roughly 7 through 10. In colder areas, try blue star creeper, low sedums, or moss instead. Plant plugs close together and water well the first season, since bare joints will fill with weeds before the groundcover knits together.
12. Arrange Round Steppers Into Shrinking Circles
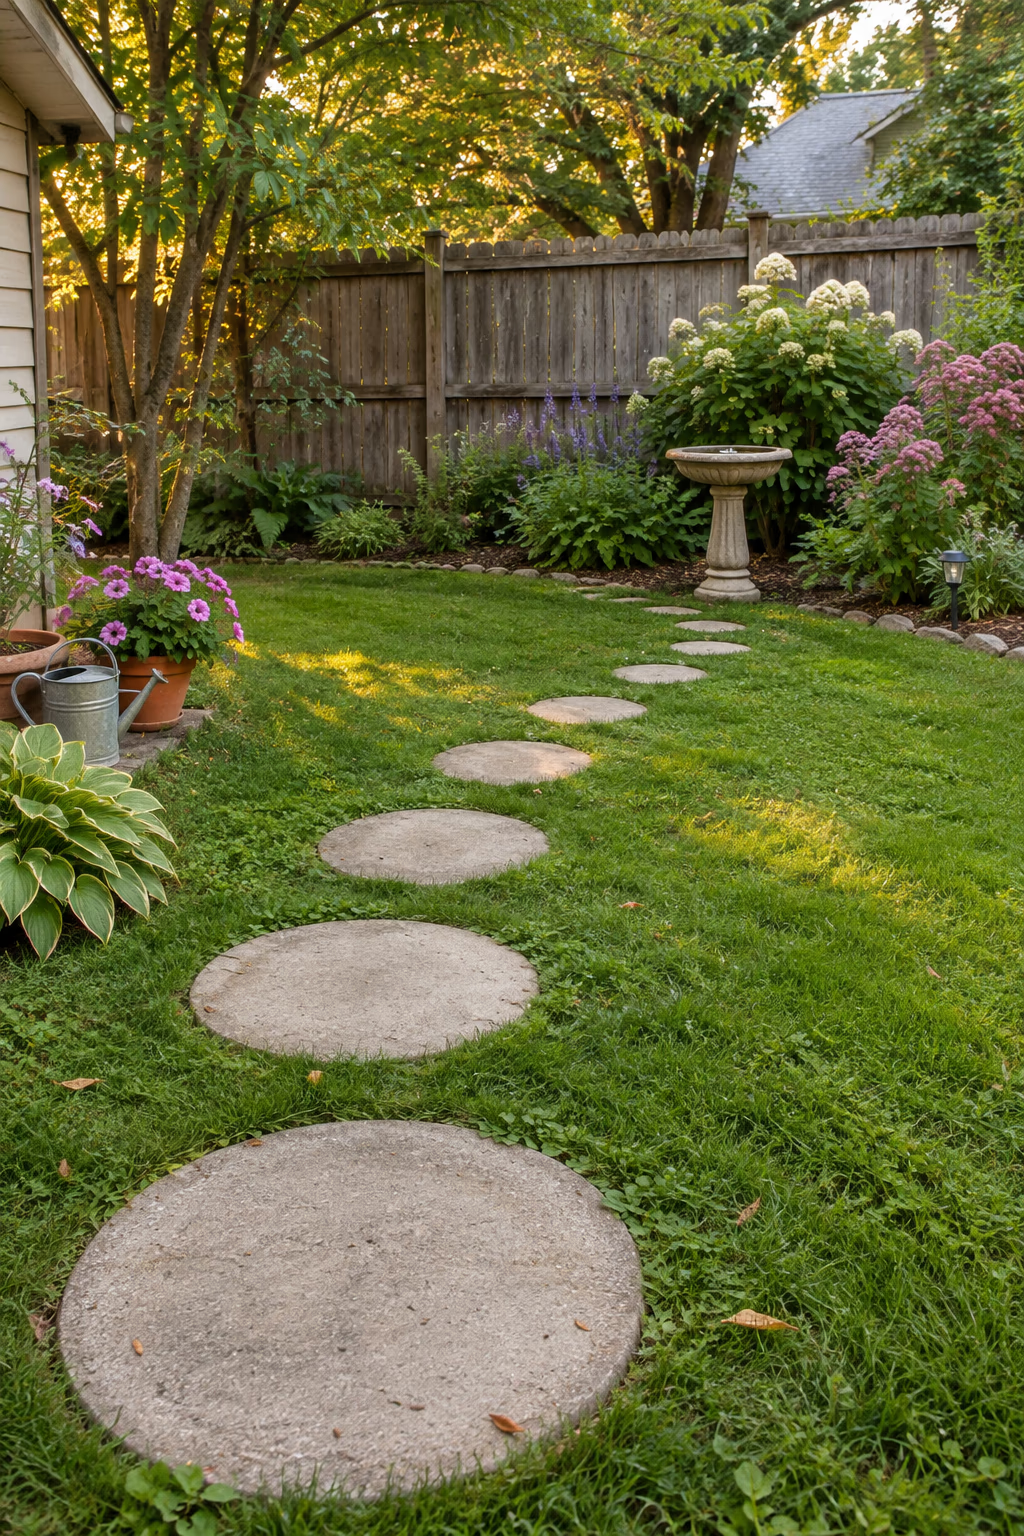
A playful branching trail with a sculptural feel
Round concrete or stone steppers in graduated sizes, starting at about 24 inches and shrinking to 12 inches, make an artful side trail that peels off a main path. Lay them in a gentle arc through lawn, gravel, or groundcover so they appear to drift away toward a birdbath, a planter, or a quiet corner.
Circles feel softer and friendlier than squares, and the shrinking sizes create a sense of depth that makes a small yard seem larger. It’s an easy way to add a touch of whimsy without any color or decoration.
The smallest circles aren’t comfortable for regular walking, so use this layout for secondary routes rather than the main path to the door. Set every round on a sand base and check that each is level so none tips when stepped on at the edge.
13. Lay Wood Rounds as Rustic Steppers in Bark Mulch
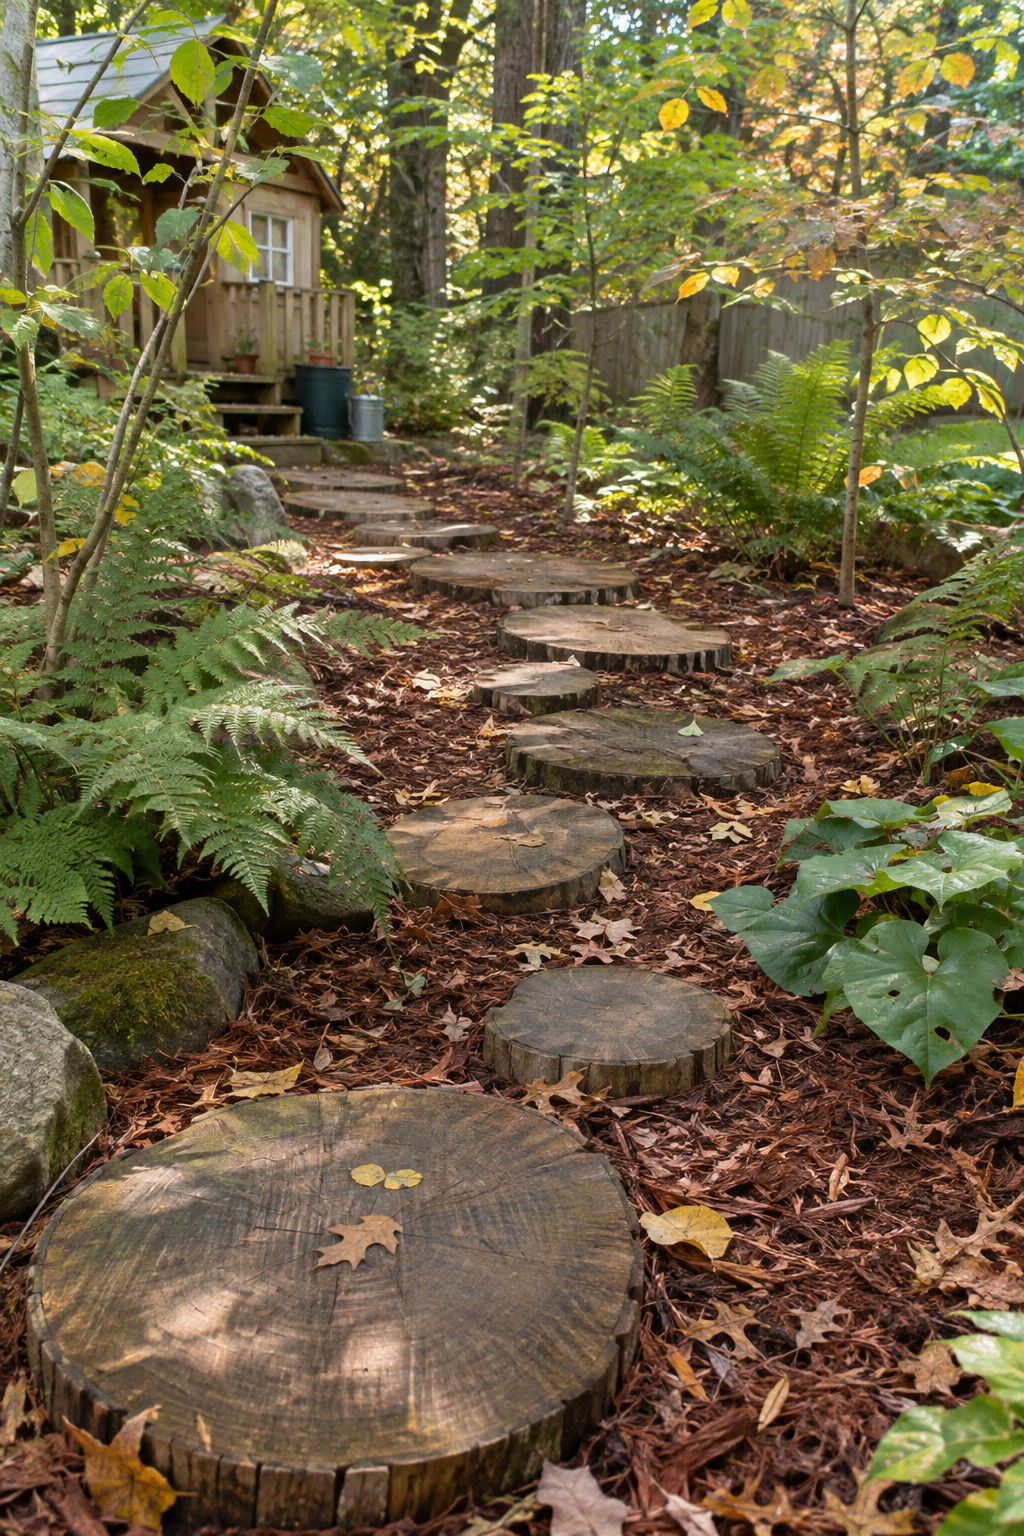
A cozy cabin look on a small budget
Slices of tree trunk, cut 3 to 4 inches thick and 12 to 20 inches across, make charming steppers in a woodland or play garden. Set them on a bed of gravel for drainage and fill around them with shredded bark mulch. Cedar, locust, and oak rounds tend to last longer than softer woods.
Wood rounds are often free or cheap if a neighbor or tree service has recently removed a tree. They feel warm underfoot and suit cottage, cabin, and children’s gardens.
Wood will eventually rot, crack, and grow slippery with algae, especially in damp shade. Expect to replace rounds every few years, and scrub them with a stiff brush if they get slick. Treating with a clear exterior wood preservative can extend their life, and stapling a square of hardware cloth to the top of each round adds grip.
14. Add Stepping Stones Between Vegetable Beds
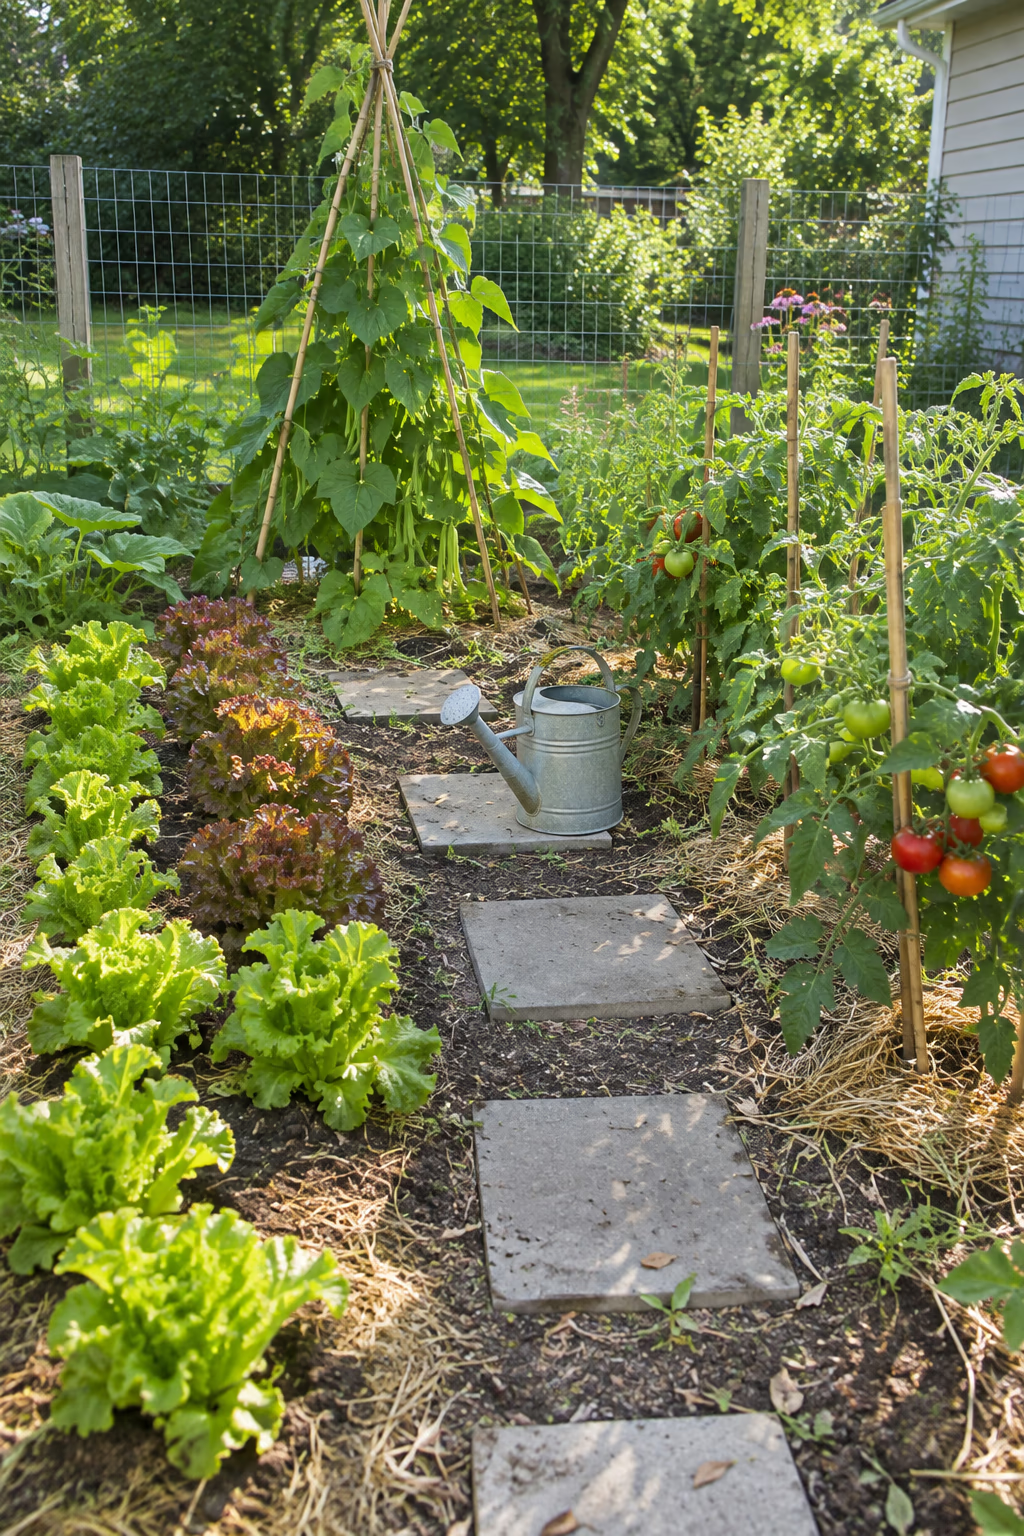
Keep boots clean and soil fluffy
Set a few 12 to 16 inch square concrete steppers in your in-ground vegetable garden so you can reach the middle of wide rows without stepping on the soil. Place them where you naturally stand to pick tomatoes, harvest lettuce, or tie up beans, then plant around them each season.
Stepping on garden soil compacts it and makes it harder for roots to grow. A few well-placed steppers protect the growing area and keep you out of the mud after a rainy day, which makes daily harvesting much more pleasant.
Keep the stones flat and stable so you can balance while carrying a basket or watering can. In a garden you till, lift the steppers before working the soil or plan permanent stone spots that you plant around. Lighter stones are easier to shift if you change your layout from year to year.
15. Paint a Hopscotch Trail of Stepping Stones for Kids
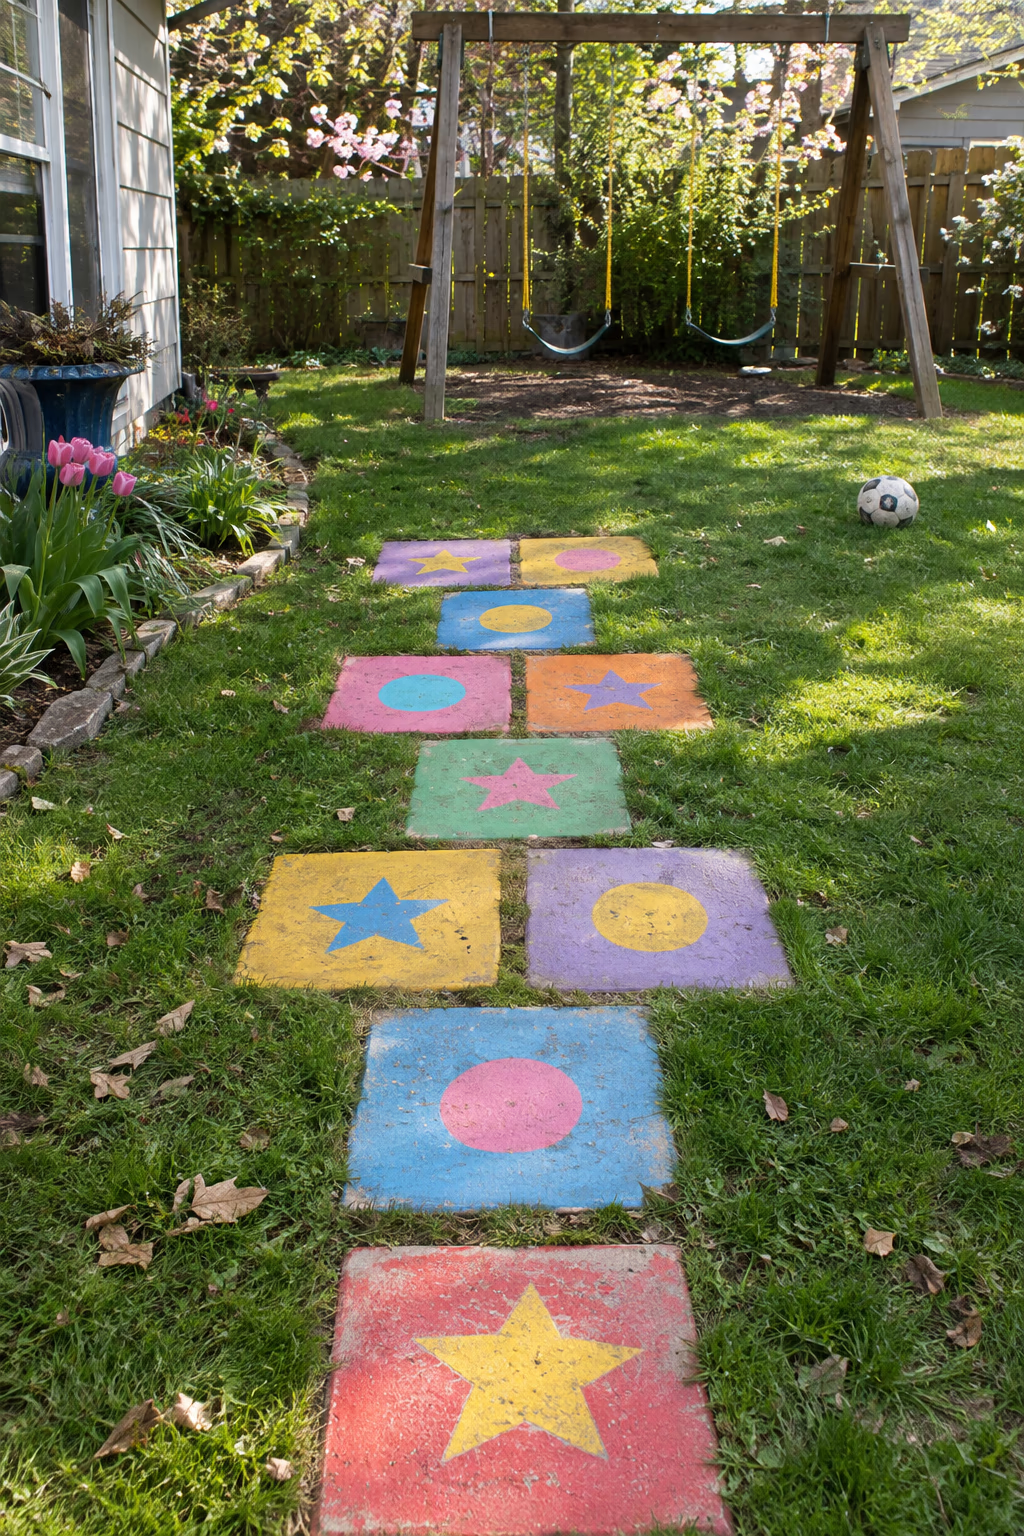
A path that doubles as a game
Lay square concrete steppers in the classic one-two-one hopscotch pattern, then paint simple numbers or bright shapes on each with outdoor masonry paint. Alternatively, use plain stones in alternating colors so children can invent their own hopping games. Set the trail near a play area or along the route to a swing set.
Kids love having a part of the yard that’s just for them, and a hopscotch path gets them moving outside. When they outgrow it, a fresh coat of neutral concrete stain turns it back into an ordinary garden path.
Use a paint or stain made for concrete and seal it to slow fading and wear. Keep the stones flush with the ground to reduce trips during energetic play, and avoid glossy finishes that get slippery when wet.
16. Lead the Way to a Hidden Bench With a Stepper Trail
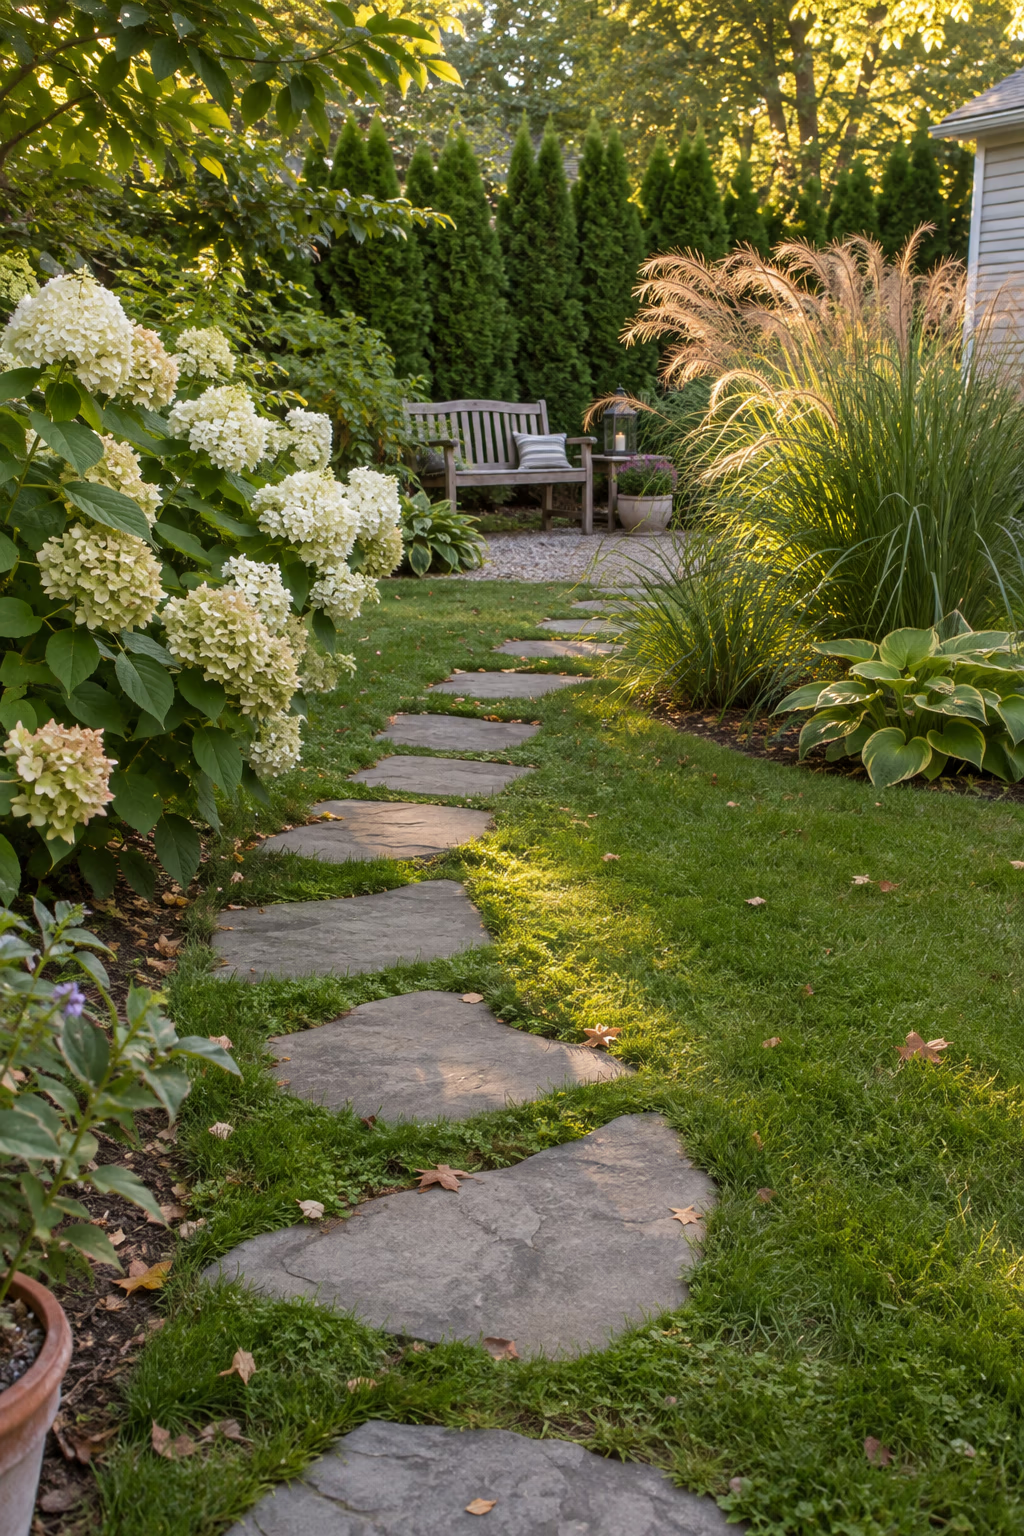
Create a little destination at the back of the yard
A curving line of steppers that disappears behind a shrub or small tree makes visitors curious about what lies beyond. End the trail at a simple bench, a pair of chairs, or a small gravel landing with a fire bowl. Tall grasses, hydrangeas, or a row of arborvitae can partly screen the spot.
A path that hints at a destination makes a yard feel larger and more layered. It also encourages you to actually use the back corner of the property instead of letting it become a forgotten storage zone.
Keep the route wide enough to carry a drink or a book comfortably, and widen the steppers to a small landing at the end so chairs sit level. If you add a fire feature, check local fire rules and keep it well away from fences and overhanging branches.
17. Put Grippy Steppers Around a Hot Tub or Outdoor Shower
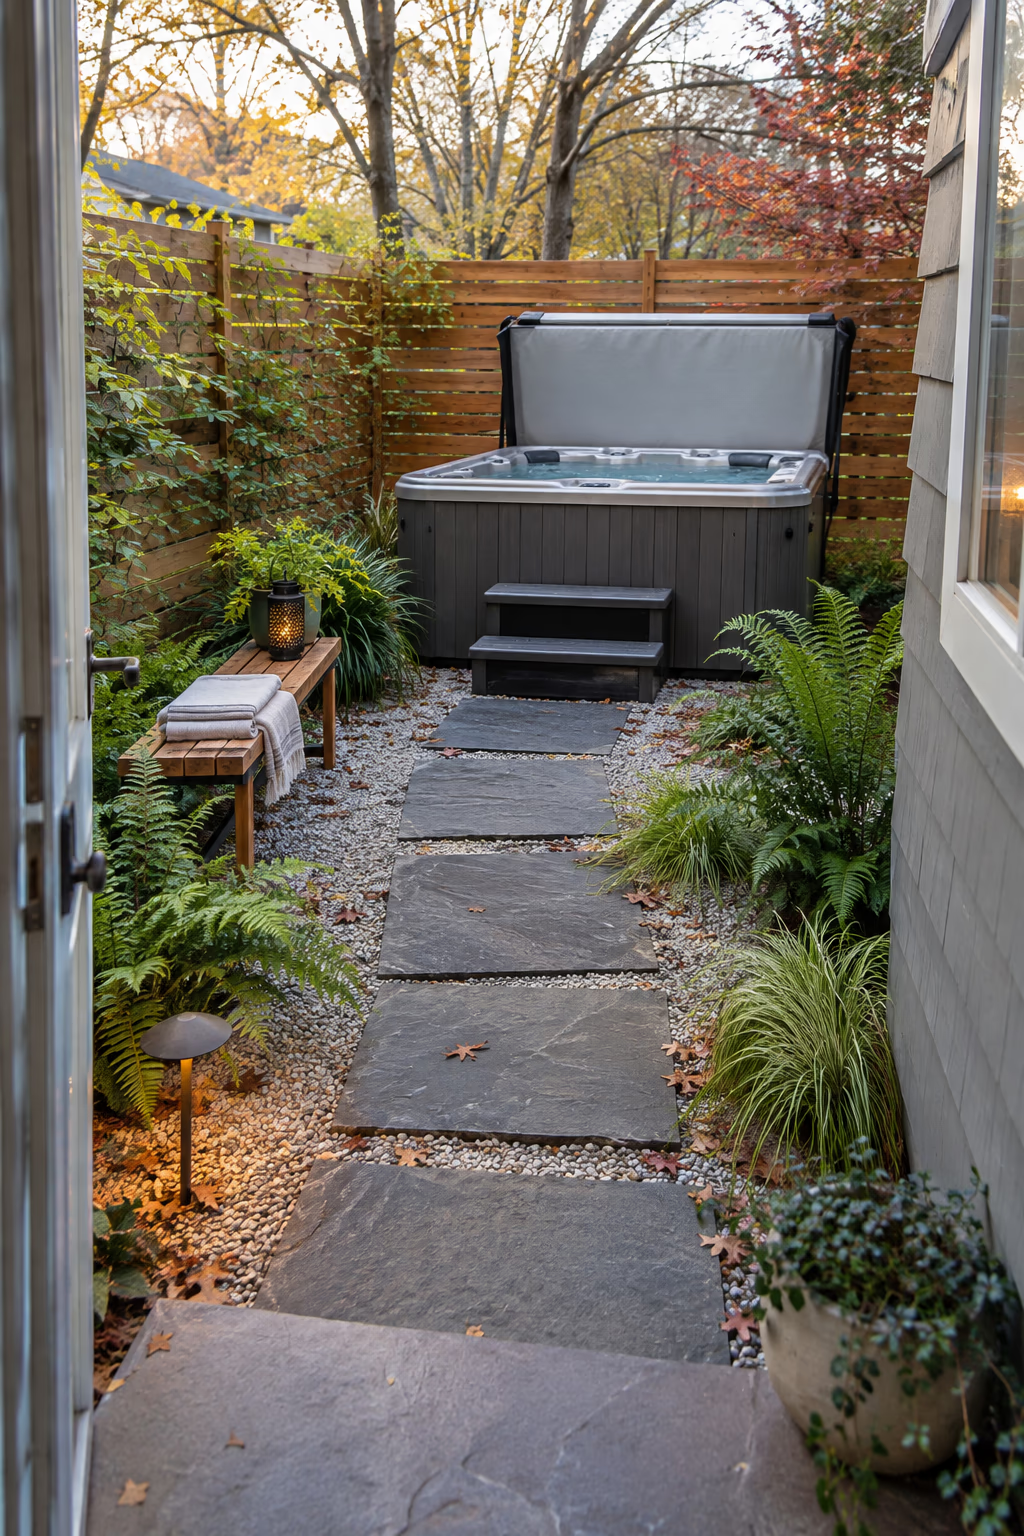
Protect bare feet from mud and stray gravel
Wet, bare feet need a surface that’s both smooth enough to be comfortable and textured enough to grip. Thermal-finish bluestone, textured concrete pads, or ribbed composite deck tiles set in gravel make a good route from the back door to a hot tub or outdoor shower. Ferns, grasses, and other moisture-loving plants nearby add a spa-like feel.
A defined path keeps grass, leaves, and dirt out of the water and saves you from tiptoeing across cold, muddy ground. It also gives the hot tub area a finished, intentional look instead of a tub sitting on the lawn.
Avoid polished stone or glazed tile, which can become dangerously slippery. Dark stones get very hot in summer sun, so pale materials are better in warm climates. Space steppers closer than usual, around 20 inches center to center, since people take shorter steps when barefoot and wet.
18. Give the Side Yard a Stepping Stone Route to the Gate
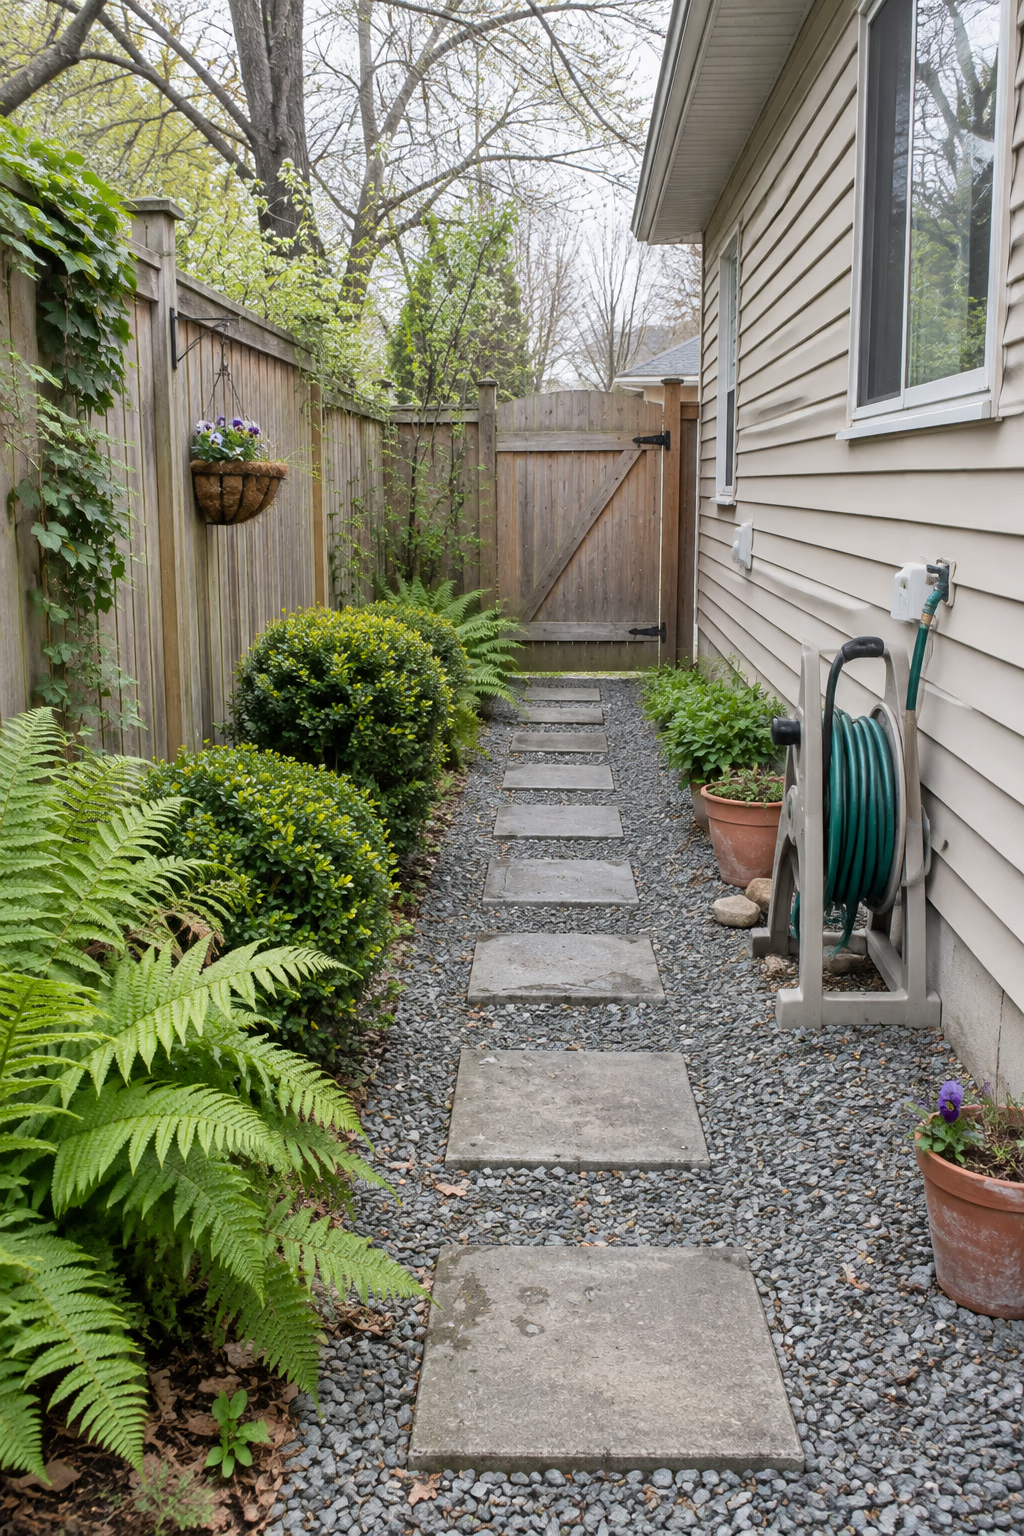
A tidy fix for a muddy utility strip
Narrow side yards often turn into muddy channels that lead to the trash cans, the hose, or the back gate. A straight run of 18 to 24 inch concrete steppers set in crushed gravel turns that strip into a clean, usable passage. Add a row of shade-tolerant shrubs or ferns along the fence to make it feel like part of the garden.
Side yards see a lot of daily traffic, so this is one of the most practical stepping stone projects you can tackle. Gravel and steppers drain far better than lawn in these shaded, often soggy spaces.
Make sure the path slopes slightly away from the house so water doesn’t collect near the foundation. Keep the steppers wide enough to roll trash bins over, or set them close together so wheels don’t sink into the gravel. Check your property line and any utility meters before you dig, and call 811 first.
19. Reuse Broken Concrete as Budget Stepping Stones
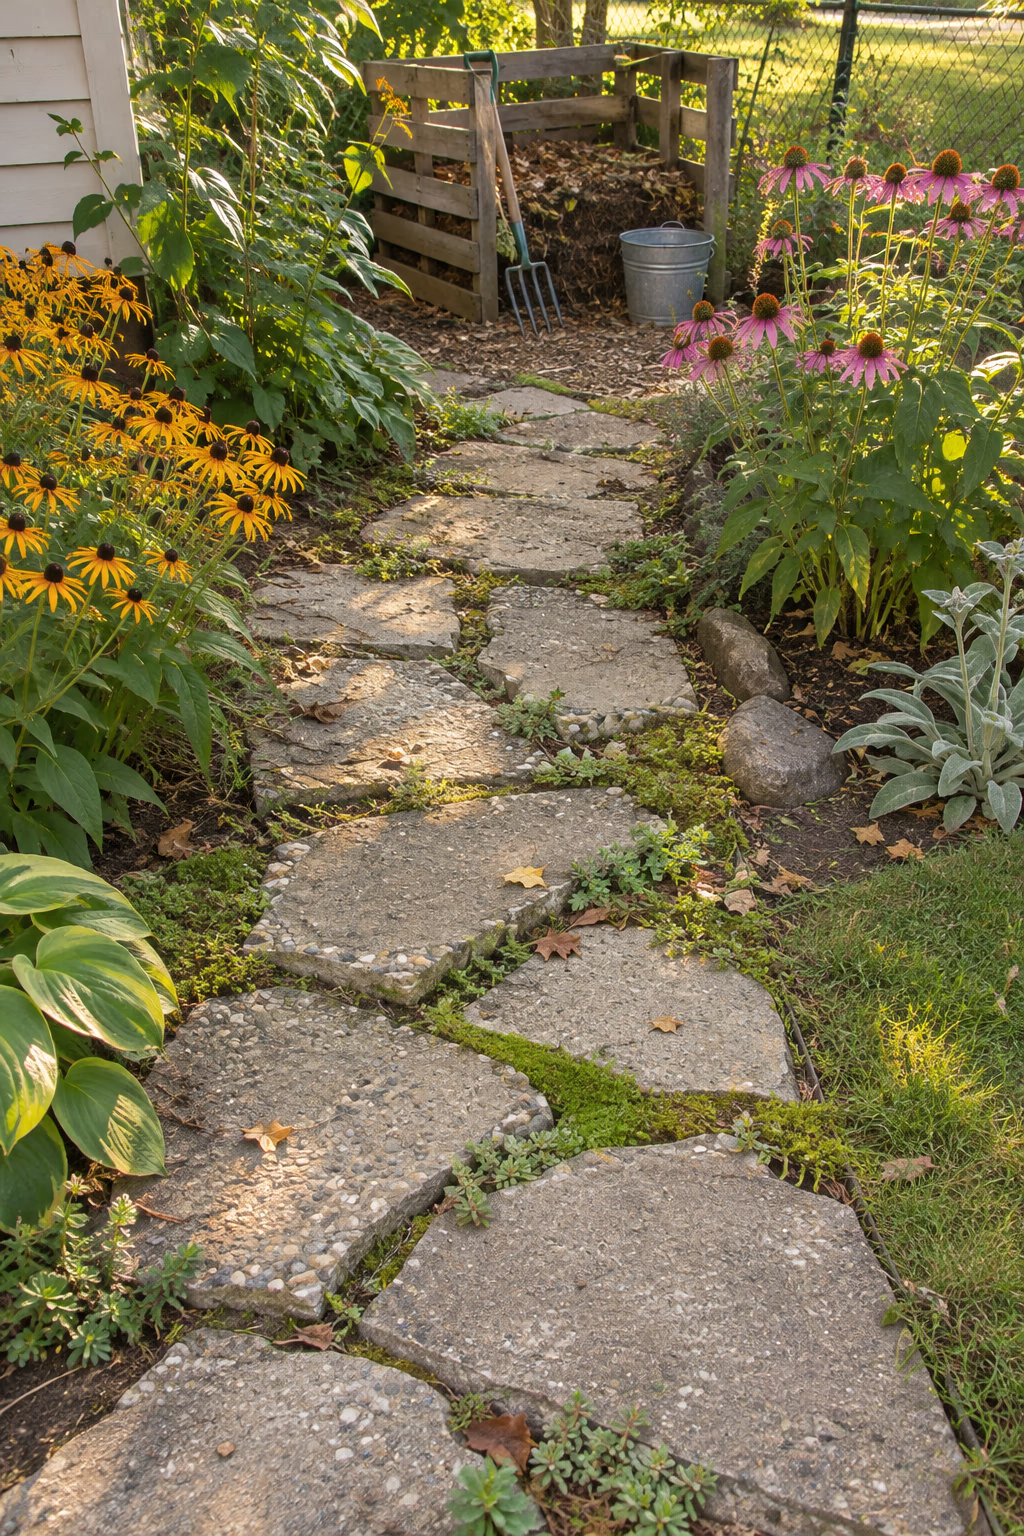
Turn demolition scraps into a rustic path
When an old patio or sidewalk is torn out, the flat chunks of broken concrete can become free stepping stones. Choose pieces 2 to 4 inches thick with one smooth face, lay them like irregular flagstone, and fill the gaps with soil, gravel, or groundcover. The exposed aggregate on broken edges gives each piece natural texture.
Reused concrete keeps heavy material out of the landfill and saves money on new stone. Once moss, thyme, or sedum softens the joints, the result looks surprisingly like a rustic flagstone path.
Wear gloves and eye protection when handling broken pieces, and knock off sharp edges with a hammer. Cut back any protruding rebar or wire mesh completely. Concrete chunks are heavy, so lift with your legs and use a wheelbarrow for anything larger than a doormat.
How to Plan Your Stepping Stone Garden
A stepping stone path is simple to build, but a little planning upfront keeps it comfortable, safe, and good-looking for years.
- Follow the natural route. Watch where people already walk and place the path along that line, since people tend to cut corners around paths that feel awkward.
- Size and space for comfort. Choose stones at least 18 inches across for main routes and space them about 22 to 26 inches center to center so the stride feels natural.
- Build a stable base. Set each stone on compacted gravel or sand so it can’t rock, and keep tops level with the ground to prevent trips and mower damage.
- Pick materials for your climate. In freezing regions, use dense natural stone or quality concrete, and avoid soft or glazed materials that can crack, flake, or ice over.
- Plan the gaps. Decide early whether lawn, gravel, mulch, moss, or groundcover will fill between stones, since that choice affects edging, drainage, and maintenance.
- Check before you dig. In the United States, call 811 to locate buried utilities, and review HOA rules or local codes for front-yard changes, slopes, and steps.
Frequently Asked Questions
How far apart should stepping stones be?
For most adults, about 22 to 26 inches from the center of one stone to the center of the next feels natural. Try walking the route first and marking your footsteps with flour or small stakes, then adjust spacing for children or barefoot areas.
What is the best material for garden stepping stones?
Natural flagstone, bluestone, and thick precast concrete are the most durable choices for everyday use. Wood rounds and homemade mosaic stones add charm but wear out faster and need more care.
Do stepping stones need a base underneath?
Yes, for anything that gets regular foot traffic. A few inches of compacted gravel topped with an inch of sand keeps stones level, improves drainage, and helps prevent them from sinking or tilting after rain and frost.
How much does a stepping stone path cost?
Costs depend on material and labor. A short DIY path with concrete steppers or reused materials can cost under a hundred dollars, while large natural stone slabs installed by a landscaper can run into the thousands. Getting a few local quotes helps you budget.
How do I keep weeds and grass from growing around stepping stones?
In gravel paths, landscape fabric and steel edging slow most weeds. In lawns, trim edges with a string trimmer or edging tool every few weeks. Filling gaps with a dense groundcover is another way to crowd out weeds naturally.
Final Thoughts
The best stepping stone garden ideas solve a real problem, such as a worn lawn track or a muddy side yard, while adding charm along the way. Whether you choose sleek concrete pads in gravel, a mossy woodland trail, or a handful of homemade leaf-imprint stones, each step can make your yard easier and more enjoyable to use.
Start with one short route, use stones that suit your climate, and give the plants between them time to fill in. Over a season or two, the path will settle into place and feel like it has always belonged there.