Walk past a garden where the raised beds have crisp brick curves, a neat strip of gravel at their feet, and herbs tumbling over a clean edge, and you notice the outline first. The plants matter, but the border is what makes the whole space look intentional.
A good border does more than look tidy. It holds soil in place, keeps grass and weeds from creeping in, gives the mower a clear line to follow, and ties your beds to the house, fence, or patio around them. It is also one of the easiest ways to upgrade a tired garden without rebuilding every bed.
These 25 raised garden bed border ideas cover low brick and timber borders, gravel and stone surrounds, metal edging, living edges of flowers and herbs, and thrifty upcycled options. Some are weekend projects, others take more effort, and all of them work in ordinary yards on real budgets.
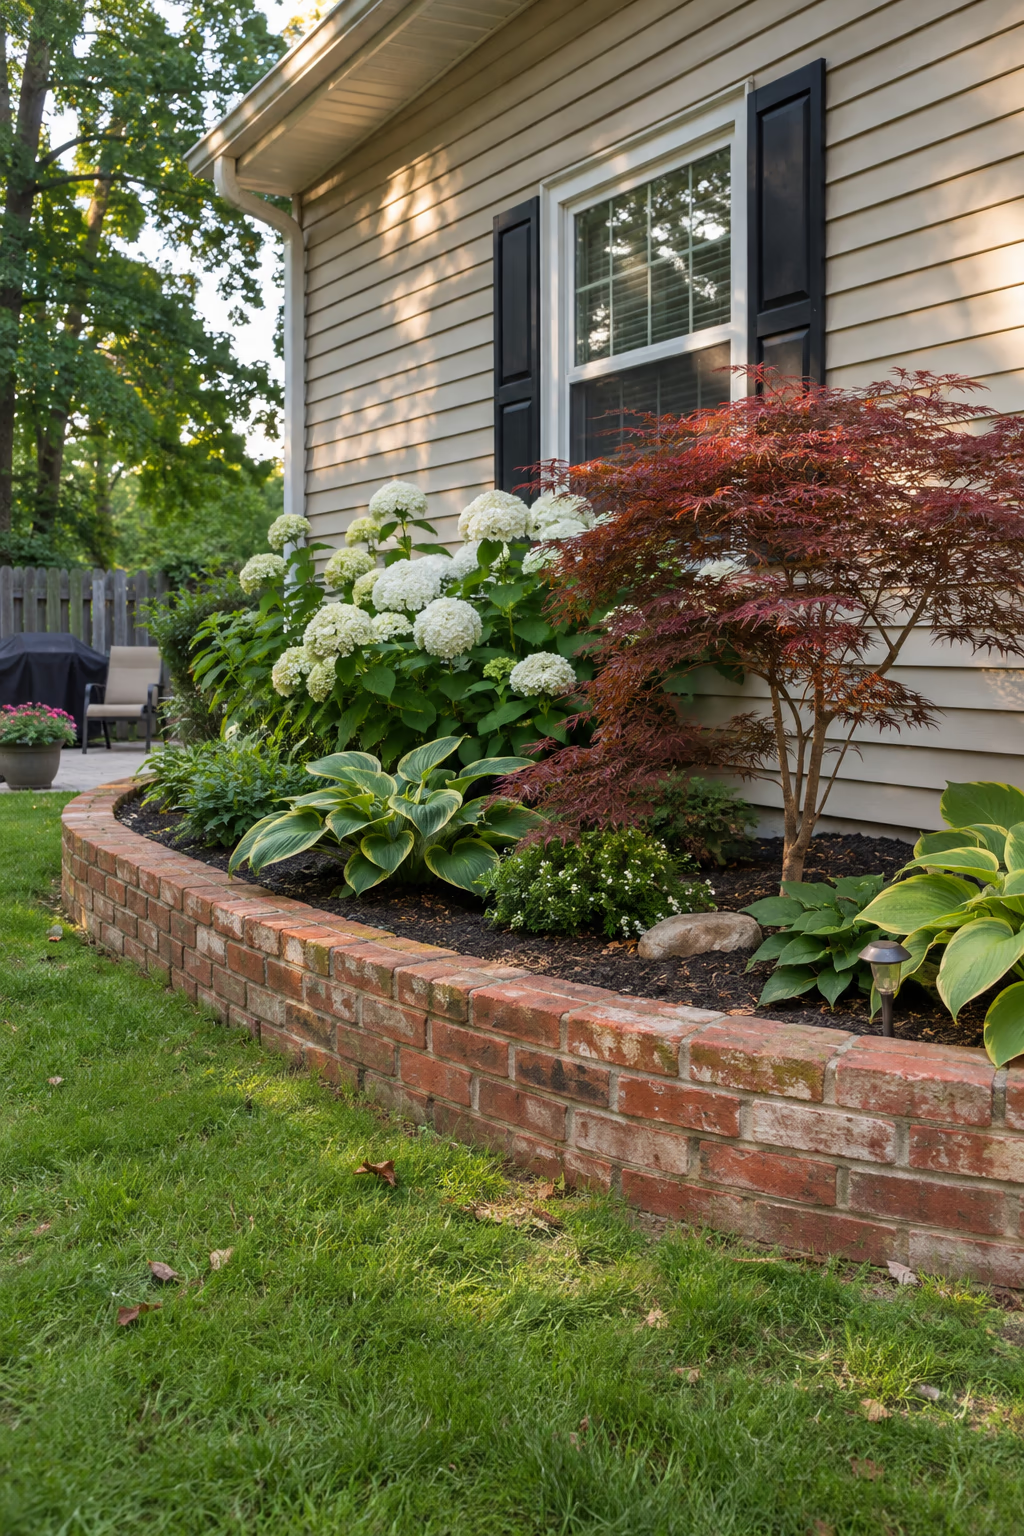
1. Curve a Brick Raised Border Around the House Corner
Warm, classic structure that softens hard corners
A low brick border that sweeps around the corner of the house turns an awkward right angle into a gentle curve. Two to four courses of brick, about 8 to 16 inches tall, are enough to hold soil for shrubs, perennials, or a small tree. Lay the bricks on a compacted gravel base or a poured footing, set them in mortar, and leave small gaps in the bottom course every few feet so water can drain out.
Brick works because it echoes the materials many homes already use for steps, chimneys, or foundations, so the bed looks like it has always been there. Reclaimed brick gives a softer, weathered look than new brick.
Keep the border at least a few inches away from siding, and make sure the soil inside sits below any weep holes or the top of the foundation. Soil piled against siding can trap moisture and invite insects.
2. Run a Long Timber Raised Border Along the Fence
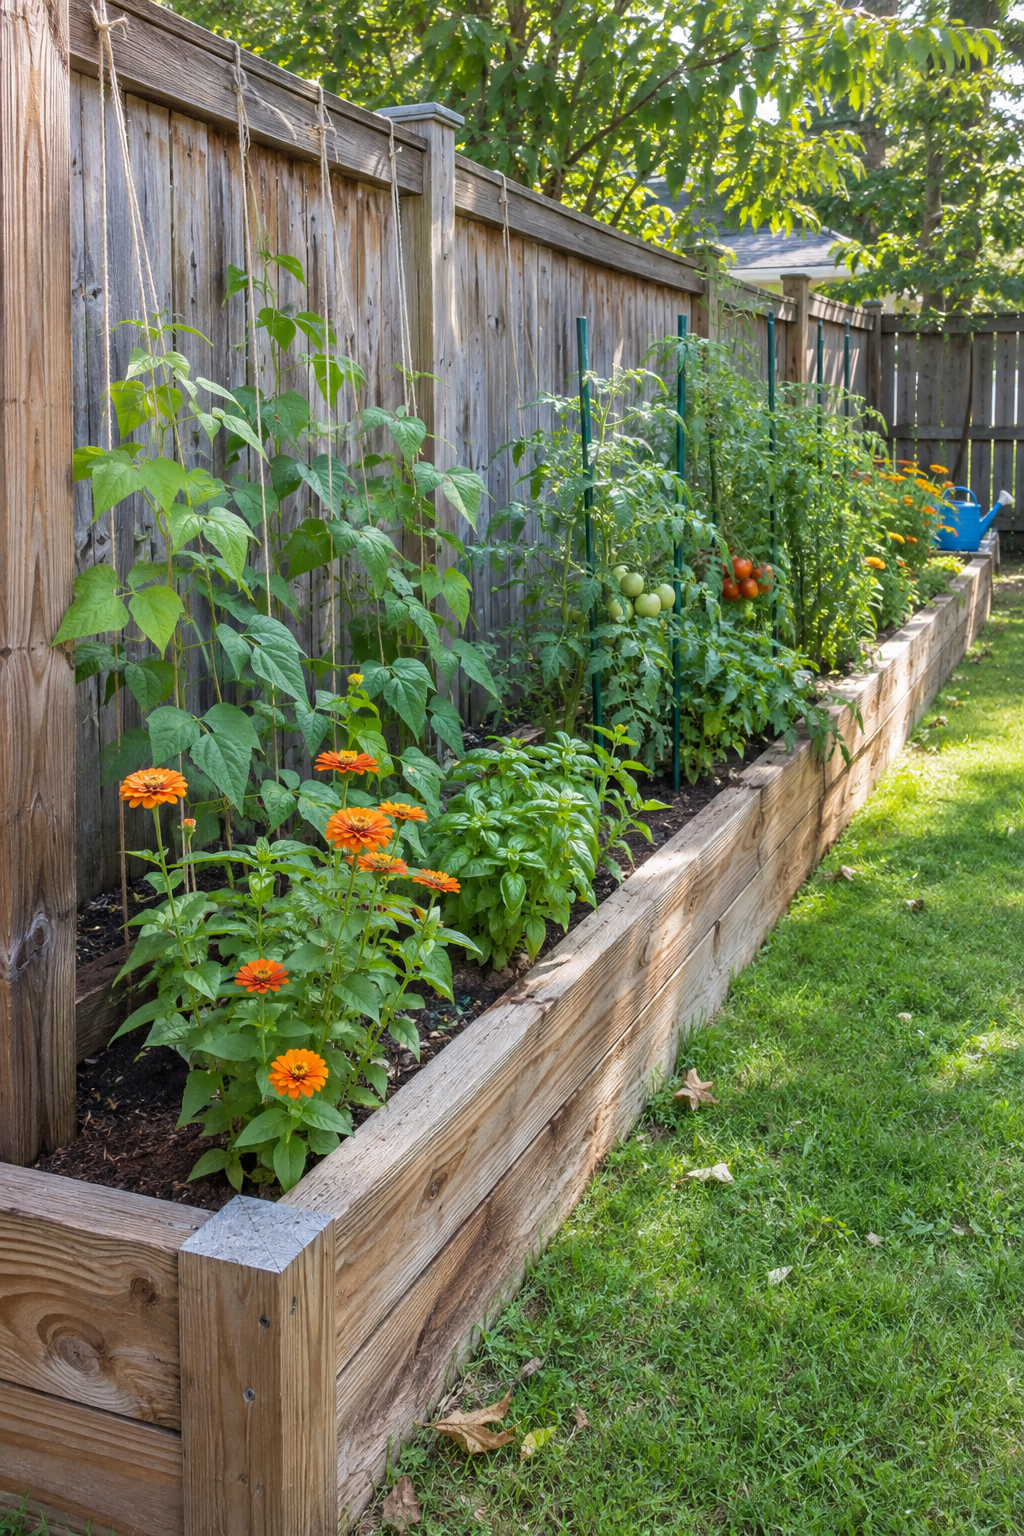
Turns a bare fence line into productive growing space
A long, narrow timber border built along a fence uses space that often gets ignored. Stack two or three courses of 2×6 or 2×8 boards to make a bed about 18 to 24 inches deep and as long as the fence allows. Corner posts and a middle stake every 4 to 6 feet keep long boards from bowing outward.
This layout looks orderly and gives climbing beans, cucumbers, or flowering vines a ready-made backdrop. A continuous run of wood also has a calm rhythm that suits both modern and farmhouse yards.
For food beds, untreated cedar or redwood is the usual choice because it resists rot naturally. Leave a gap of a few inches between the bed and the fence boards so the fence can dry out and does not rot faster.
3. Edge Raised Beds With a Crisp Pea Gravel Ribbon
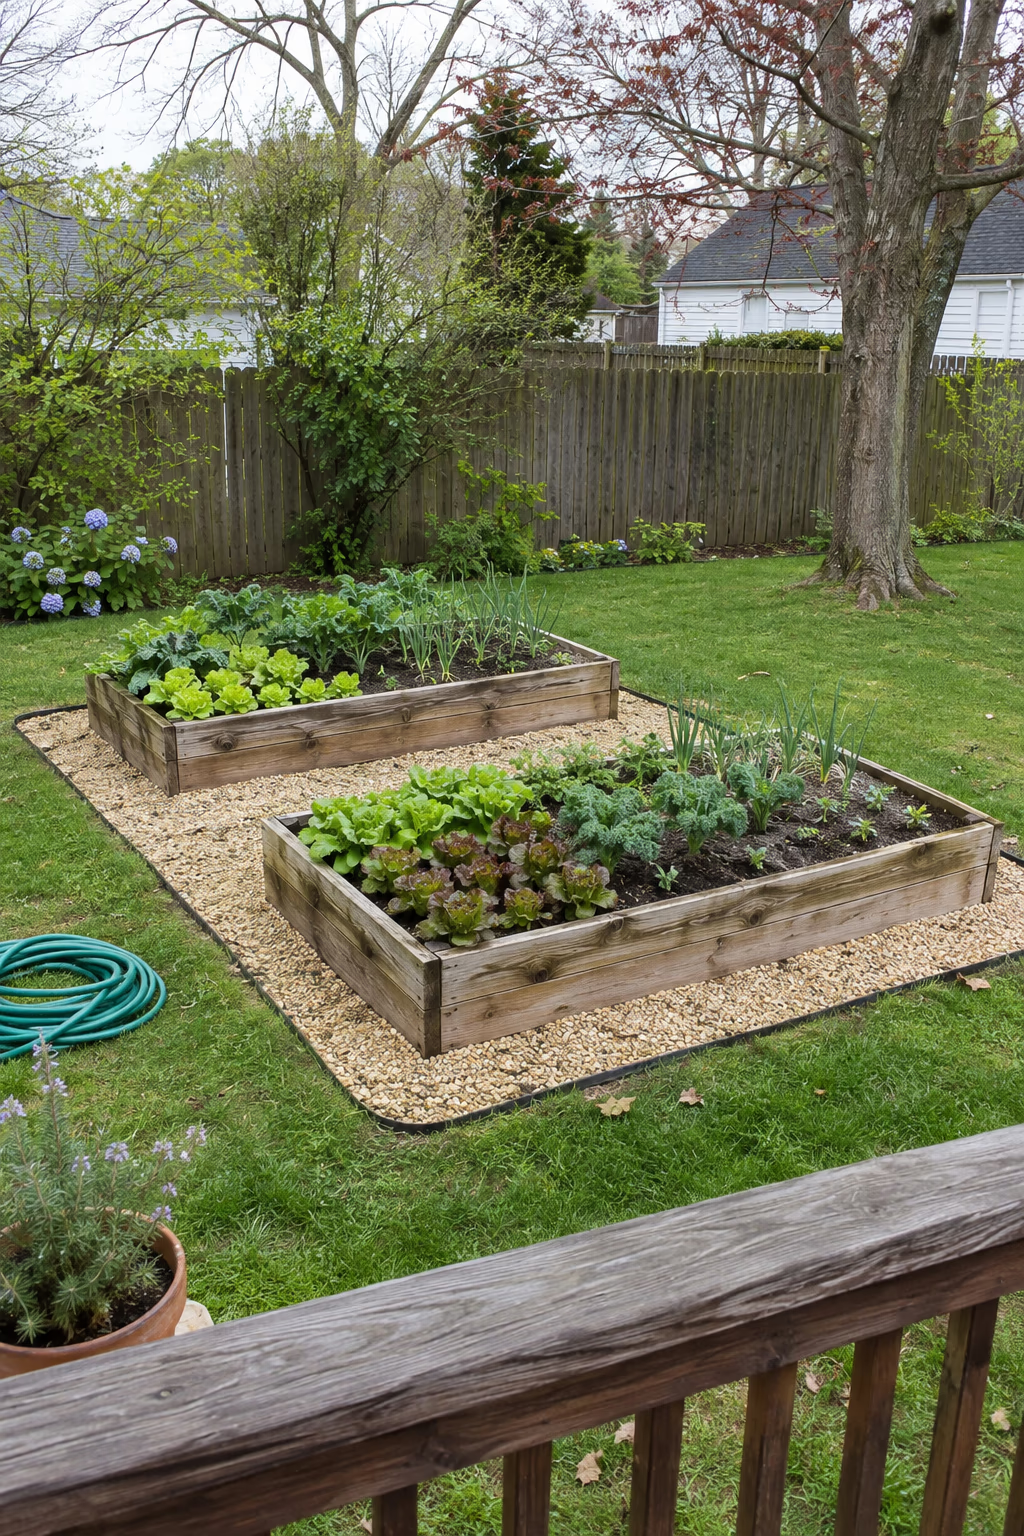
Clean lines, better drainage, and no muddy shoes
A ribbon of pea gravel 12 to 18 inches wide around each raised bed instantly sharpens the look of the whole garden. Remove the sod, dig down about 3 inches, lay a permeable fabric if you like, and fill with gravel. Steel or plastic edging on the outer side keeps the stones from spilling into the lawn.
Gravel lets rainwater soak in instead of puddling, so the area around your beds stays firm and clean after a storm. It also stops grass from creeping into the bed walls, which saves a lot of hand-trimming.
Pea gravel shifts underfoot and can be tracked around. For a firmer surface that stays put, choose crushed stone in a 3/8-inch size, and rake it level a couple of times a season.
4. Top a Stone Raised Border With a Brick Cap
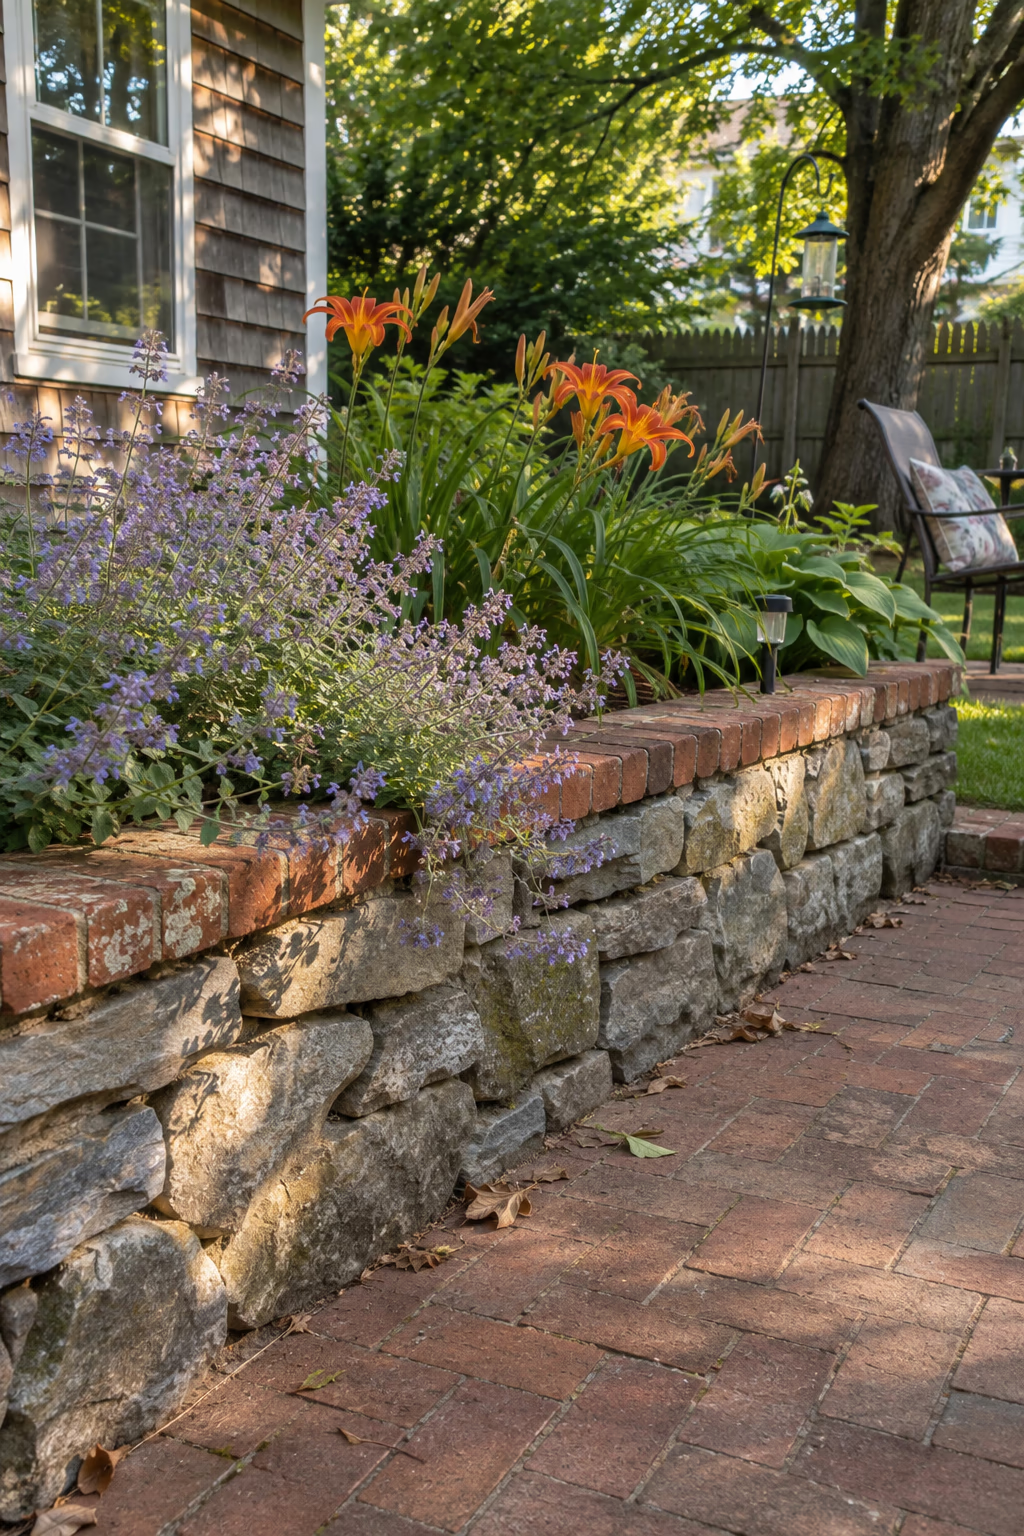
Two materials that make each other look better
A low stacked-stone border finished with a single row of brick along the top combines rustic texture with a tidy, finished edge. Build the stone wall 12 to 18 inches high, keep the top as level as possible, then mortar a row of bricks laid flat or on edge as a cap.
The brick cap hides uneven stone tops, gives you a smooth place to set down a trowel, and helps tie the bed to brick on the house or patio. It looks especially good in older neighborhoods where both materials appear nearby.
Mortared work needs a solid footing below the frost line in cold climates, or it can heave and crack. In mild regions, a deep compacted gravel base is often enough for a low border.
5. Plant a Bright Marigold Stripe Along the Bed Edge
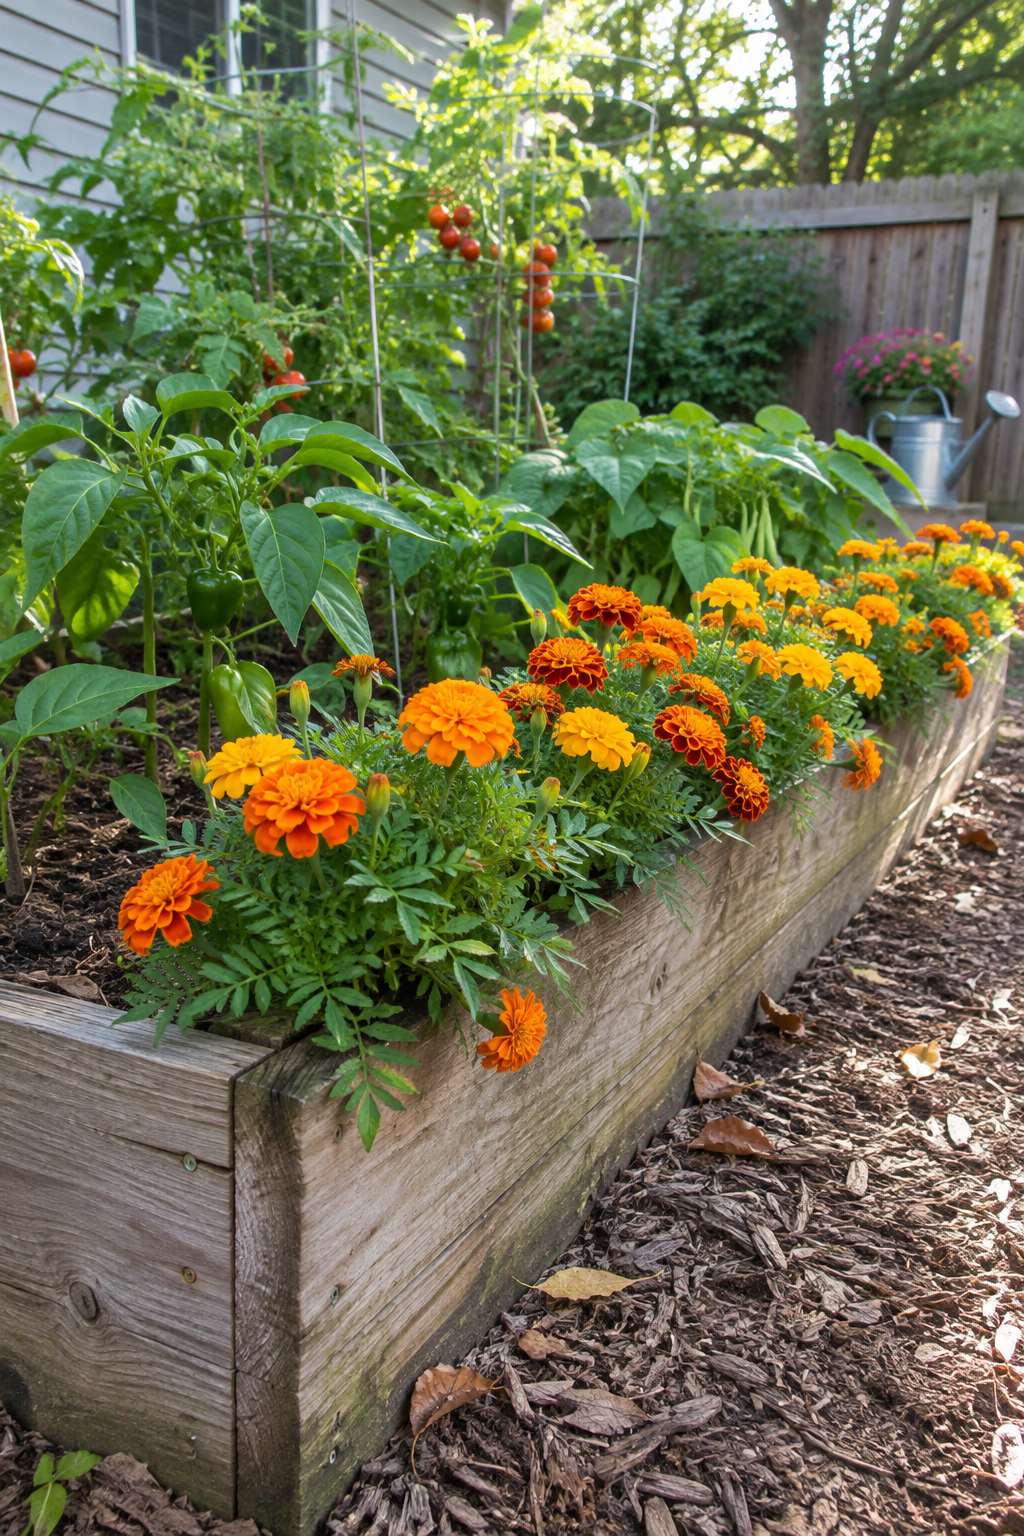
A cheerful band of color that frames the harvest
Plant a single row of French marigolds about 8 inches apart along the front edge of a raised vegetable bed. Their compact orange, gold, and rust blooms form a bright stripe from early summer until frost and spill just slightly over the top of the bed.
Marigolds are inexpensive, easy from seed or six-packs, and they handle heat well. The stripe gives a working vegetable bed a cottage-garden look and draws in pollinators that also visit nearby squash and tomatoes.
They are annuals, so you will replant each spring. Deadhead spent flowers every week or two to keep the color coming, and water at the base to avoid powdery mildew.
6. Separate Lawn and Raised Beds With Steel Edging Strips
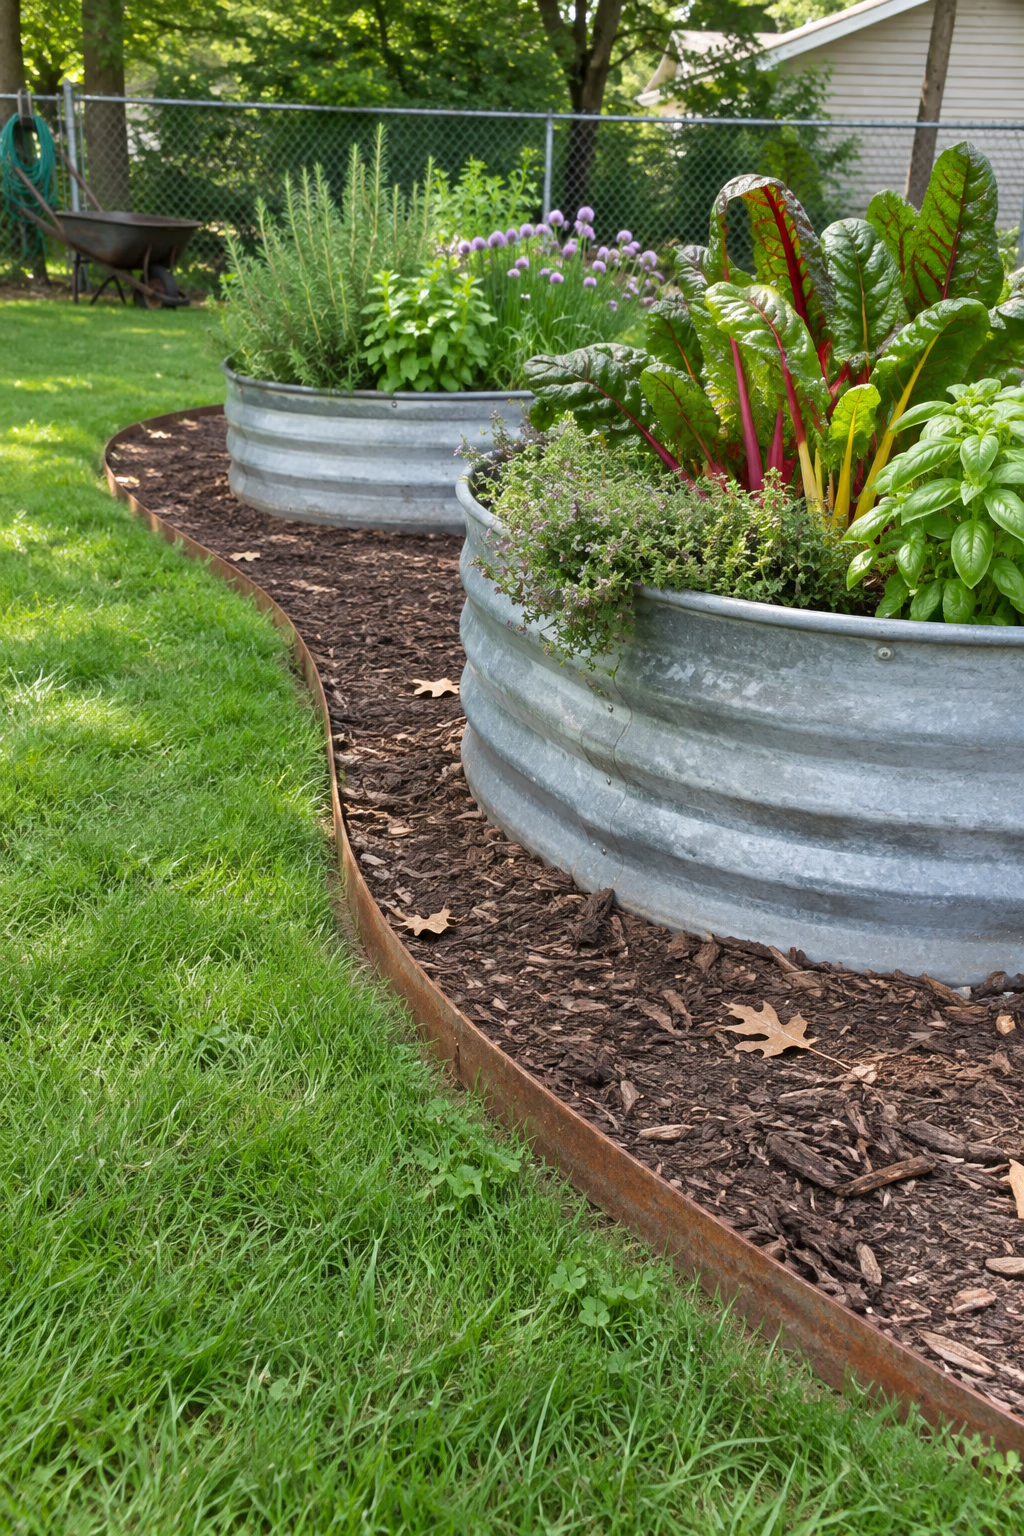
A thin, sharp line that holds back grass
Steel landscape edging, usually 4 to 6 inches tall and about 1/8 inch thick, can be driven into the soil a few inches out from your raised beds. It creates a narrow buffer between the lawn and the bed walls that you can fill with mulch or gravel.
The steel stays almost invisible from a distance, so the beds and lawn get the attention. It flexes into gentle curves and stops grass roots from tunneling under the bed frames.
Exposed steel edges can be sharp, so choose edging with a rolled or capped top if kids play nearby. Raw steel will rust to a brown patina, which many people like; galvanized or powder-coated steel holds its original color longer.
7. Lay a Brick Mowing Strip Around Each Raised Bed
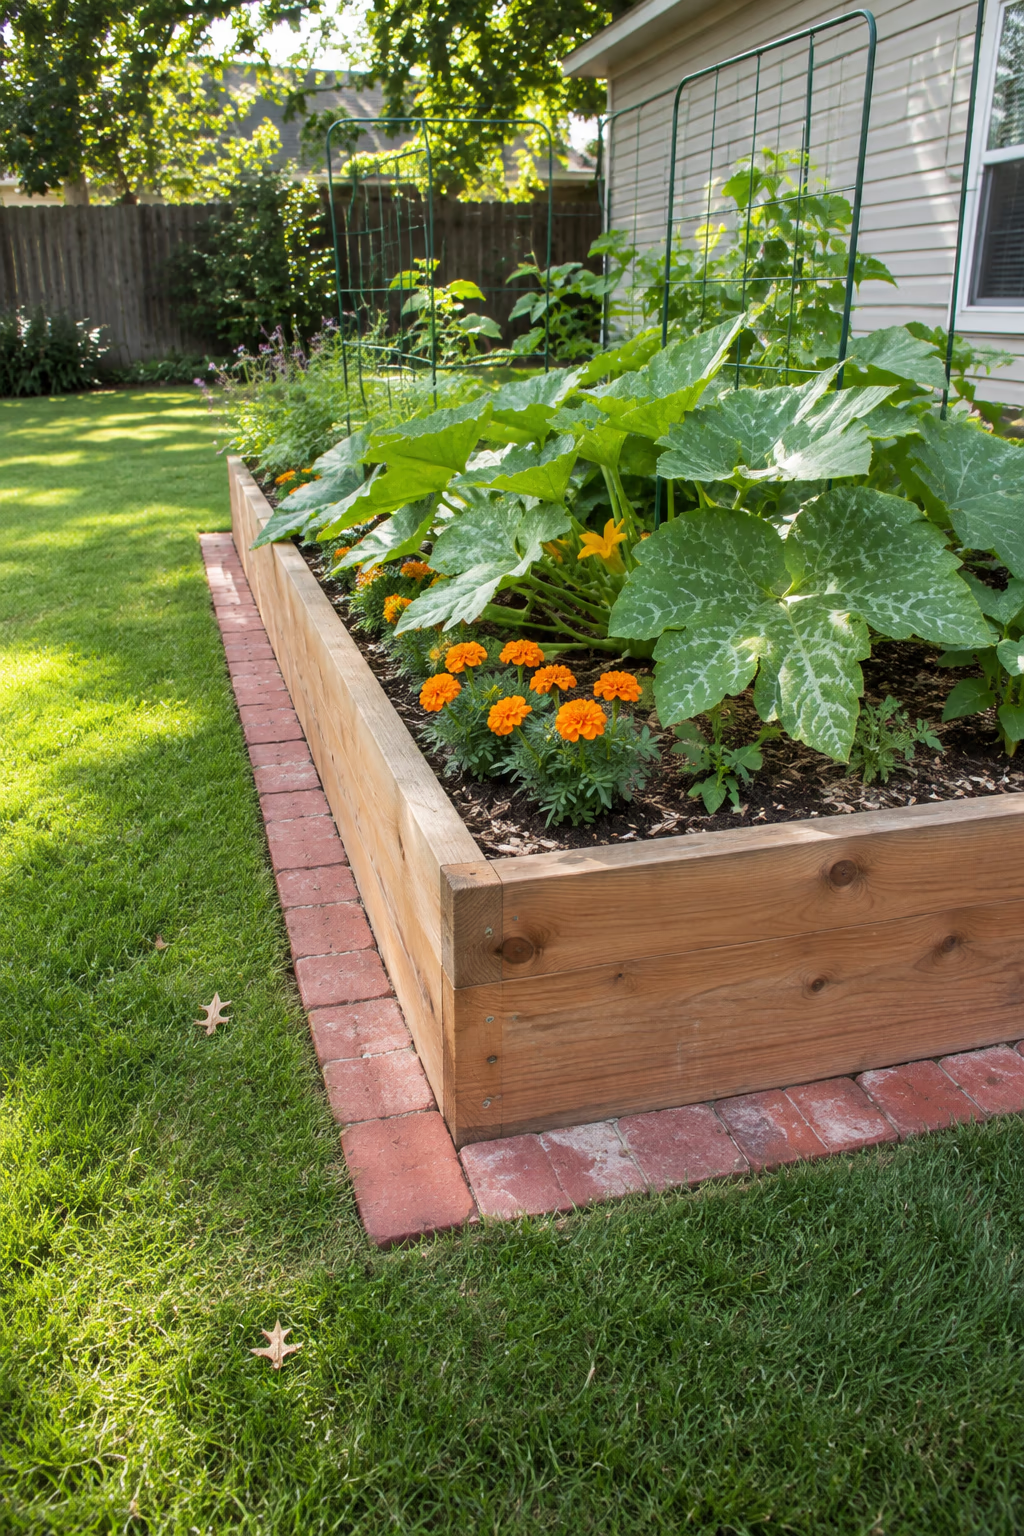
Mow right up to the bed without any trimming
A mowing strip is a row of bricks or pavers set flush with the lawn around the base of each bed. Dig a trench about 4 inches deep, add 2 inches of compacted sand or paver base, and lay bricks flat, end to end, so their tops sit level with the soil.
One mower wheel can roll along the bricks, so the blade cuts the grass right to the edge. That means little or no string trimming around wooden bed walls, which also keeps the wood from getting nicked.
Tap each brick level with a rubber mallet and sweep sand into the joints. Grass can still creep through gaps over time, so pull runners each spring before they take hold.
8. Weave a Willow Wattle Border Around a Raised Bed
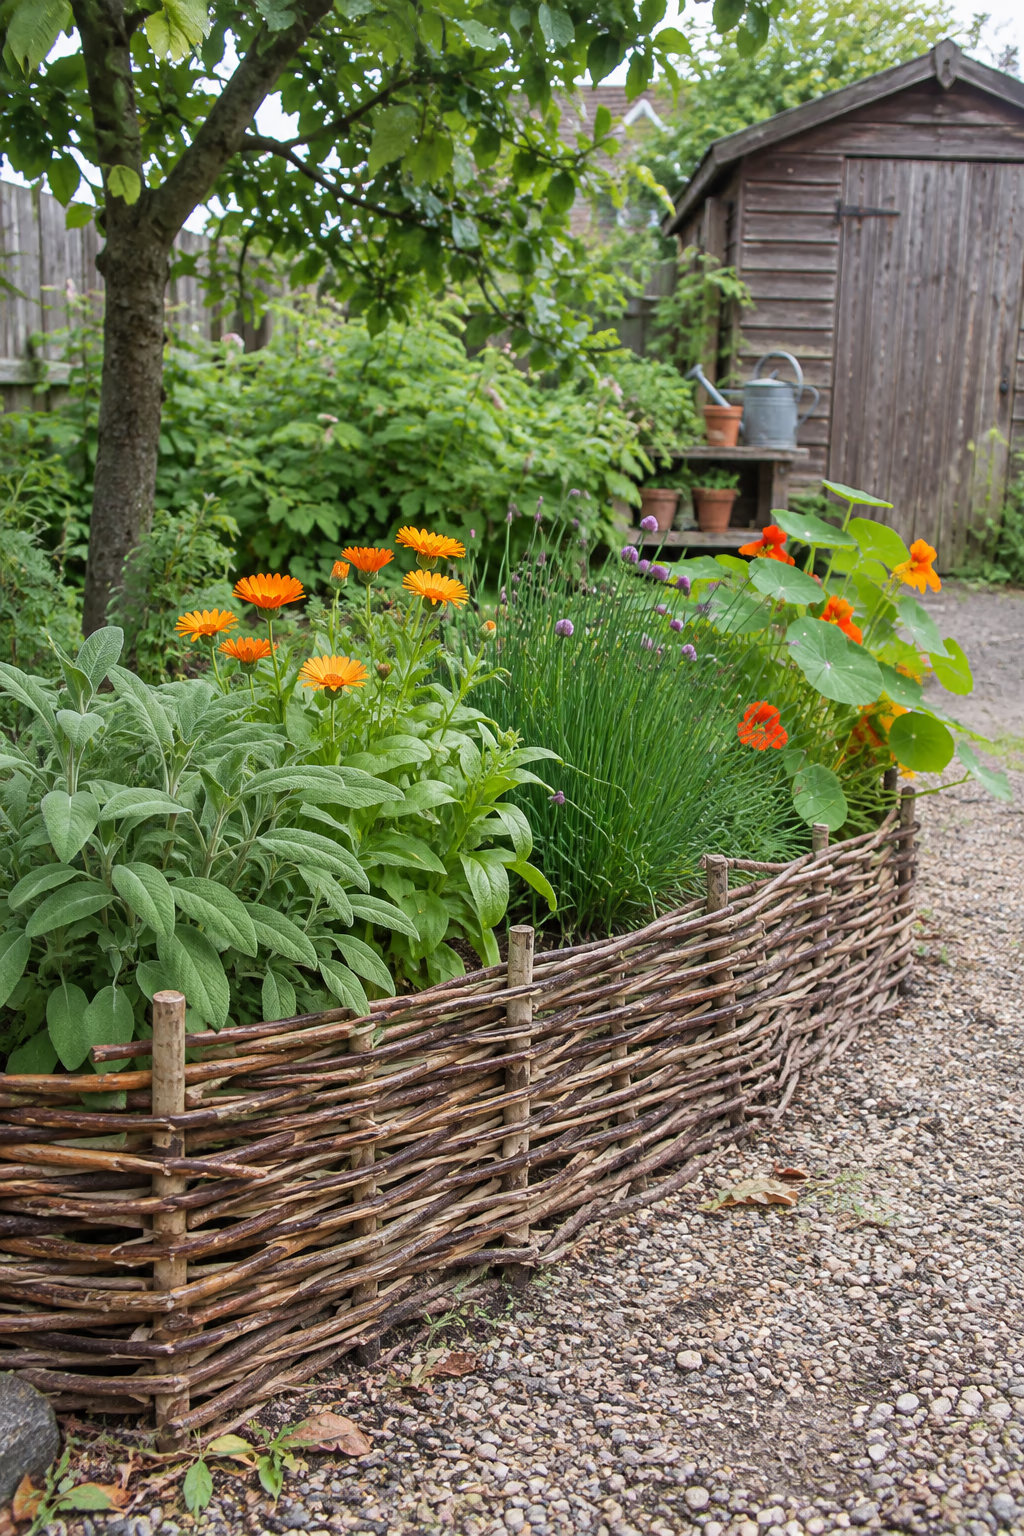
Old-fashioned charm made from flexible branches
Wattle is a low fence woven from pliable branches such as willow, hazel, or dogwood around upright stakes. Drive stakes about 12 inches apart, then weave long, freshly cut stems in and out, pressing each row down tight. A border 10 to 15 inches tall is enough to hold a shallow raised bed or line the front of a deeper one.
The woven texture suits cottage, herb, and kitchen gardens beautifully, and it costs very little if you have access to pruned branches. Many neighbors with willow or dogwood are happy to share prunings in late winter.
Wattle breaks down in a few seasons, especially where it touches damp soil. Line the inside with burlap to keep soil from sifting through, and plan to reweave or replace sections every two to four years.
9. Ring a Raised Bed With Smooth River Rock
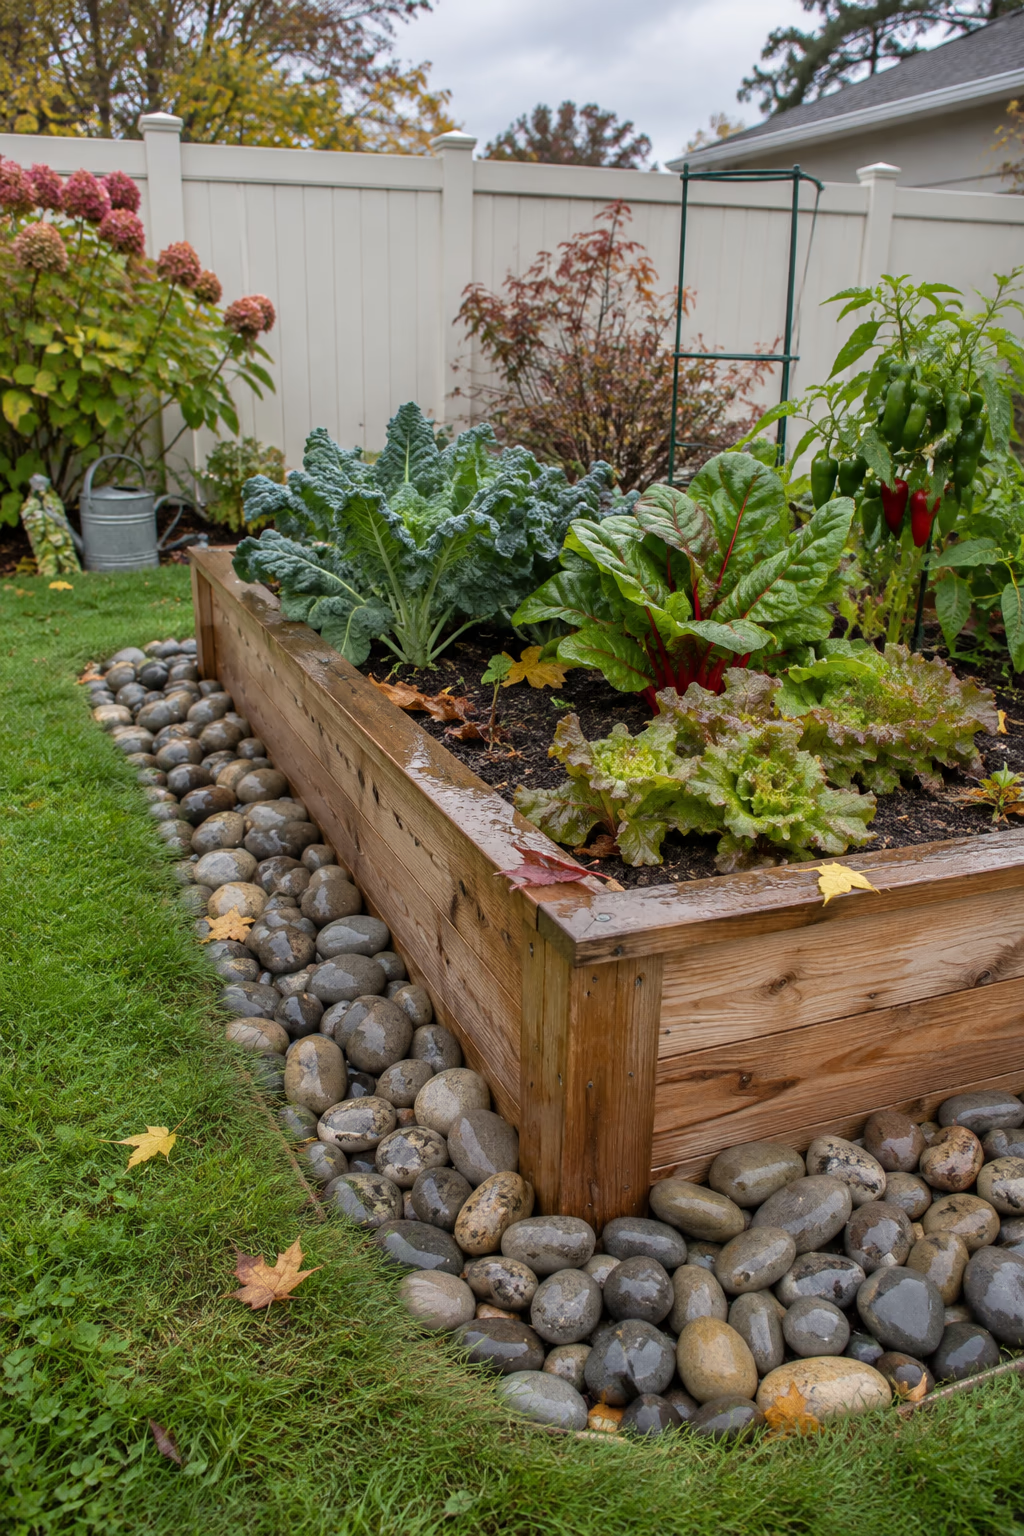
A natural apron that keeps splash and weeds down
A band of rounded river rock, 2 to 3 inches across and about 12 inches wide, makes a calm, natural apron around the base of a raised bed. Set it a couple of inches deep over landscape fabric, with a simple edge to keep it from wandering into the lawn.
The stones stop soil from splashing onto the bed walls during heavy rain, reduce weeds at the base, and look good next to wood, stone, or metal beds. Mixed gray and tan stones blend easily with most homes.
River rock is uncomfortable to walk on and can be hard to clear of leaves. Use it where you rarely step, such as along the back or sides of a bed, and use a firmer surface where you stand to work.
10. Pour a Smooth Concrete Curb for a Raised Border
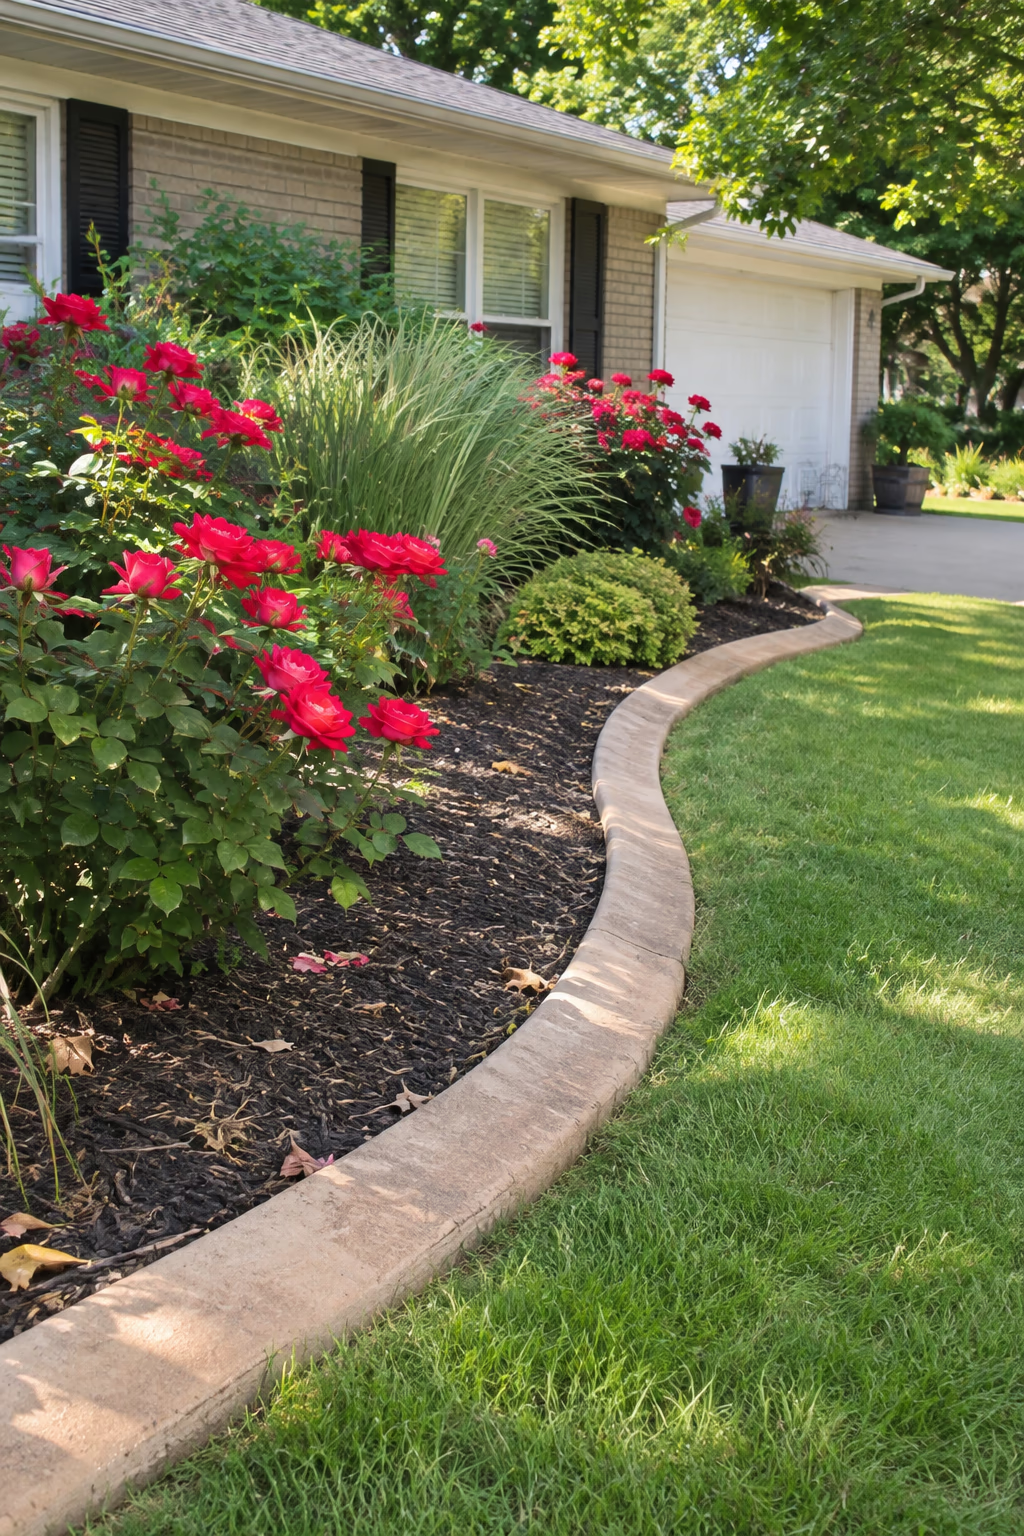
A permanent edge that never needs replacing
A continuous concrete curb, about 6 inches wide and a few inches above grade, creates a strong, lasting border around beds that are raised just slightly above the lawn. Many landscape crews use a curbing machine to extrude it in smooth curves, and it can be tinted in gray, tan, or warm earth tones.
Concrete curbing holds soil and mulch firmly, gives the mower a clean edge to follow, and does not rot, warp, or shift the way timber and plastic can.
It is hard to move once it is in, so lay out the shape with a garden hose and live with it for a few days before booking the job. Control joints every few feet help it crack neatly where it is supposed to.
11. Edge a Raised Bed With Upright Log Rounds
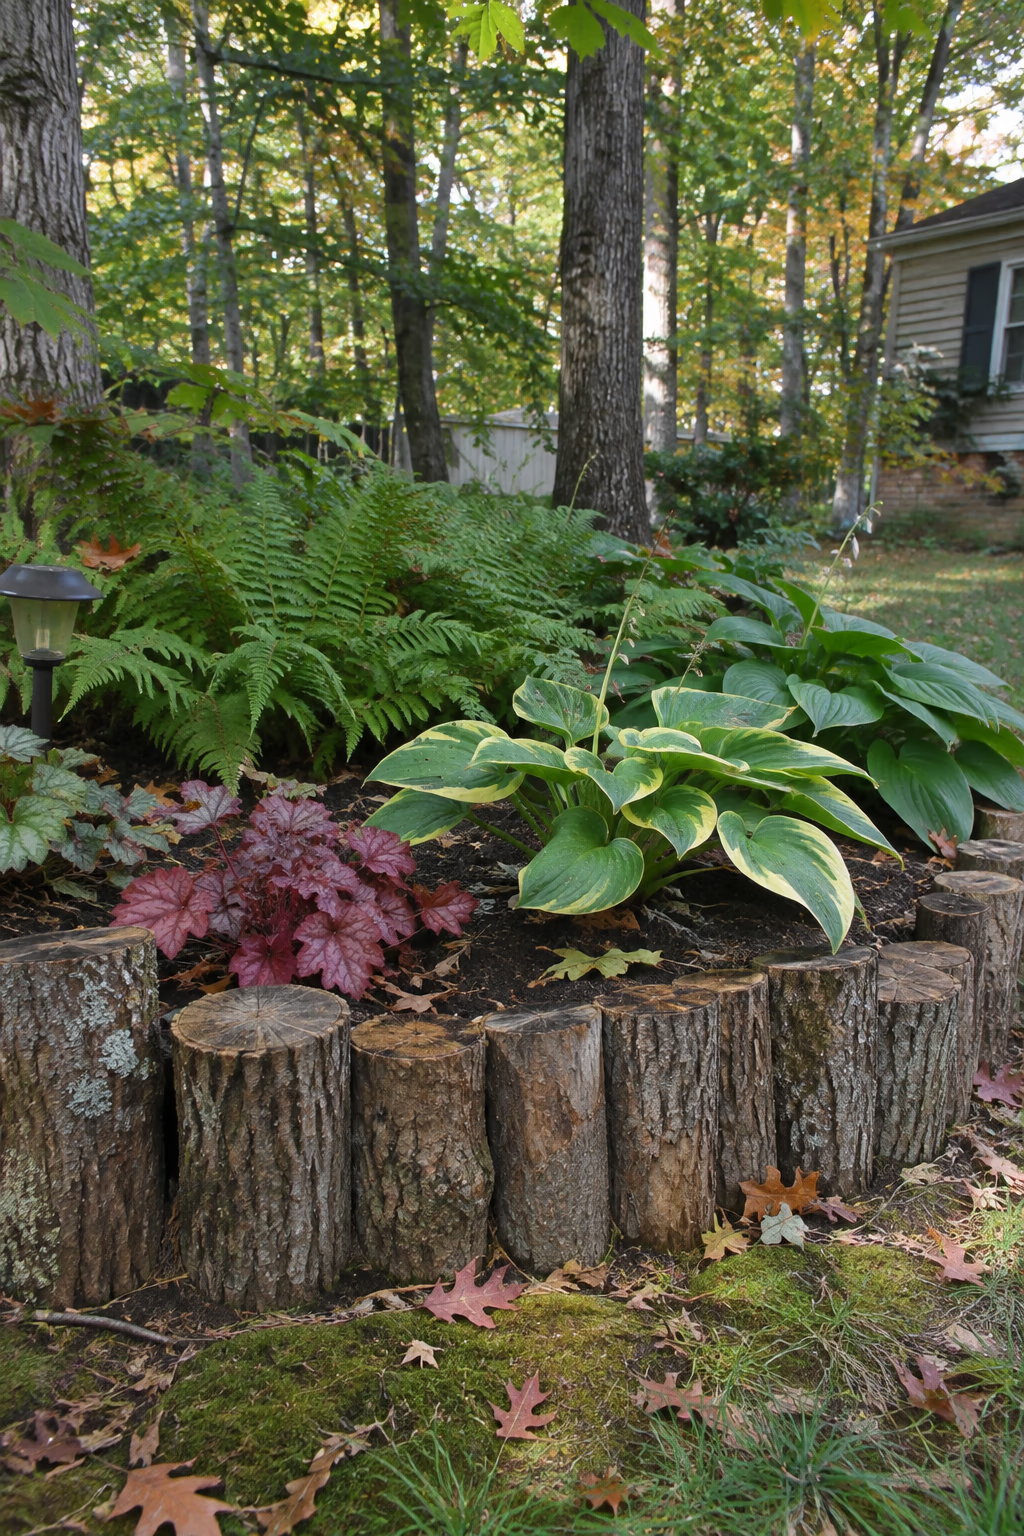
Rustic, free, and perfect for woodland yards
Short log sections set on end, side by side, make a charming border for a low raised bed. Cut logs 3 to 6 inches across into lengths of 12 to 18 inches, then bury each one about a third of its length in a trench so the tops form a slightly uneven, natural line.
This is a great use for wood from a recently pruned or removed tree, and it fits naturally into shady, wooded lots. The varied tops and bark give the bed a storybook look.
Logs in soil will rot, often within three to five years, and bark can shelter slugs. Use rot-resistant woods such as cedar, black locust, or oak when you can, and avoid wood from diseased trees.
12. Build a Cinder Block Border and Plant the Cores
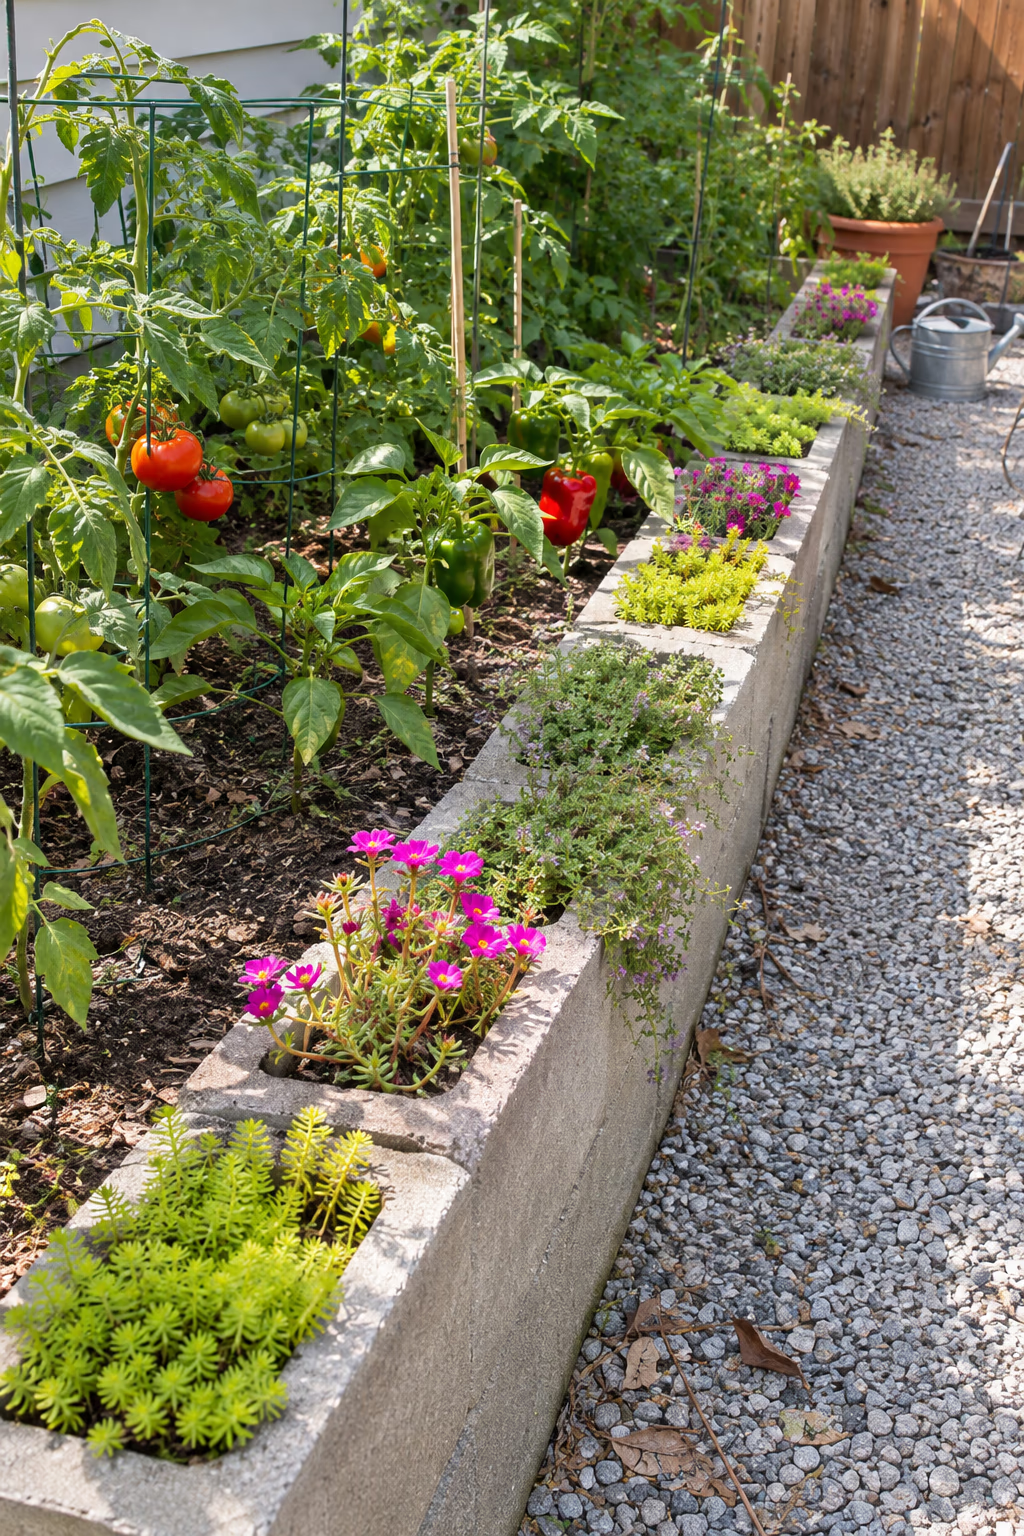
A budget border with dozens of built-in pockets
Standard 8x8x16-inch concrete blocks set in a single row make a quick, sturdy raised border. Turn them so the holes face up, level them on a bed of sand, and fill the cores with potting mix. Each pocket becomes a small planter for flowers, herbs, or trailing succulents.
Blocks are inexpensive, easy to find, and need no cutting or fasteners. Planting the cores softens the industrial look and adds an extra row of color right at the edge.
Concrete can slowly raise soil pH near the blocks, and the cores dry out fast in summer, so choose tough, drought-tolerant plants such as sedum, thyme, or portulaca and water them more often than the main bed.
13. Soften the Bed Edge With Creeping Thyme
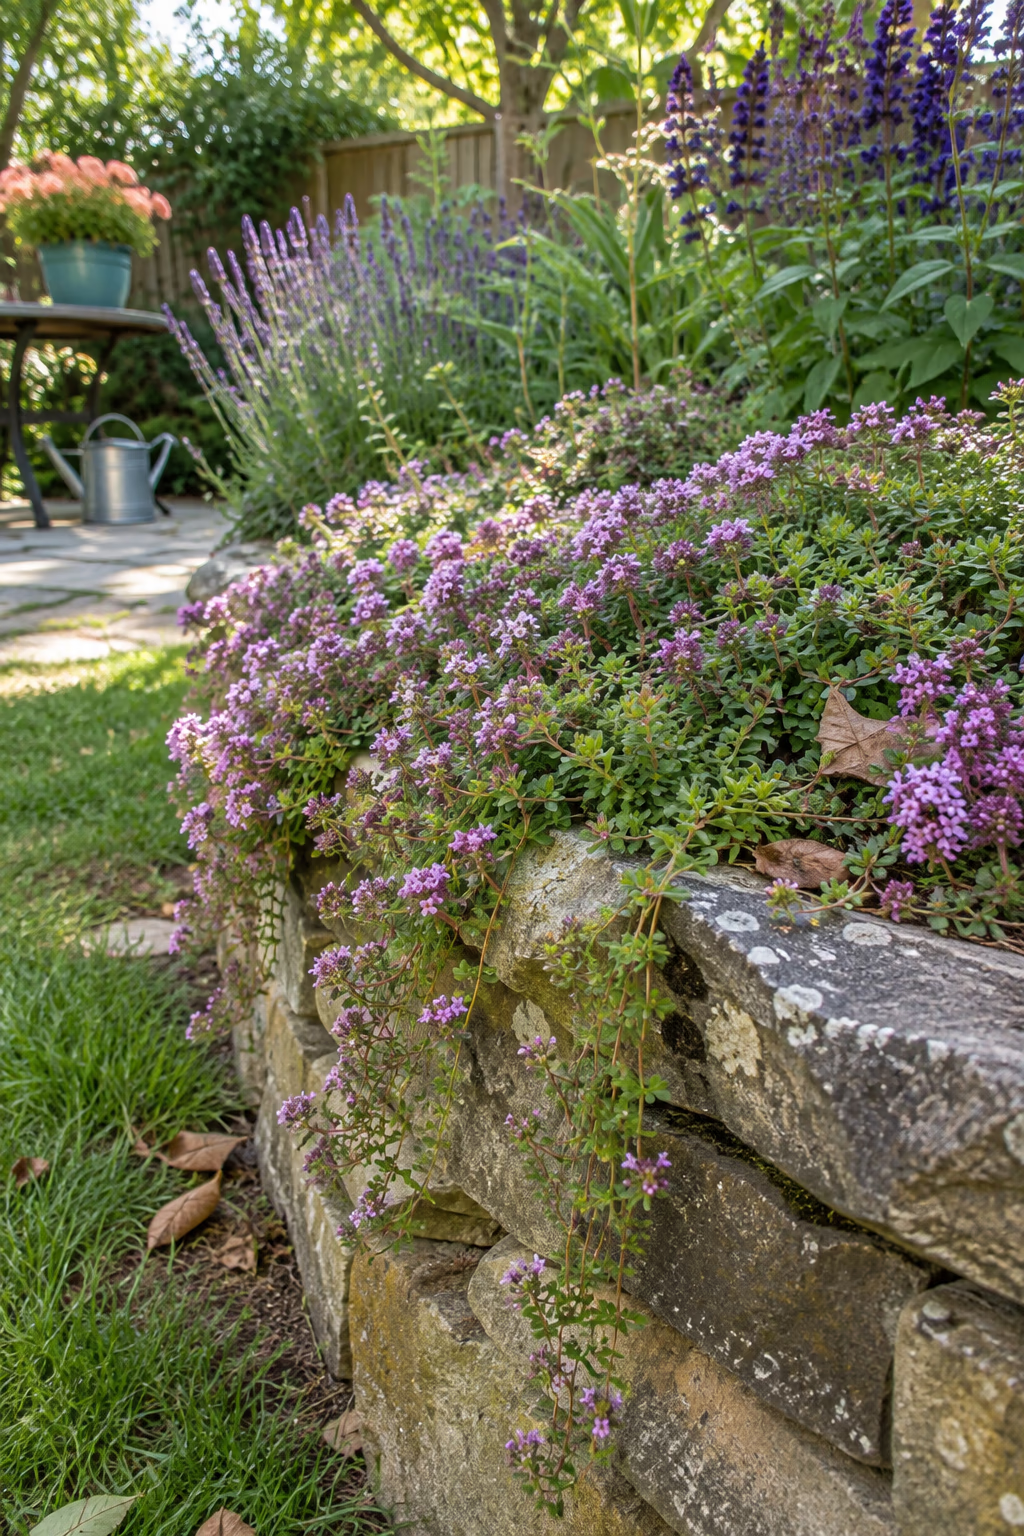
A fragrant living edge that spills over the side
Plant creeping thyme every 8 to 12 inches along the outer edge of a raised bed and let it trail over the side. Within a season or two it forms a soft mat of tiny leaves and pink, purple, or white flowers that drapes over wood, stone, or block.
The trailing growth hides plain bed walls, smells wonderful when brushed, and draws bees in early summer. It is a good way to make a new bed look settled quickly.
Creeping thyme needs full sun and sharp drainage, and it can rot in soggy, rich soil. Mix a little grit into the soil along the edge, and trim it lightly after flowering to keep it dense.
14. Hem a Raised Bed With a Miniature Boxwood Hedge
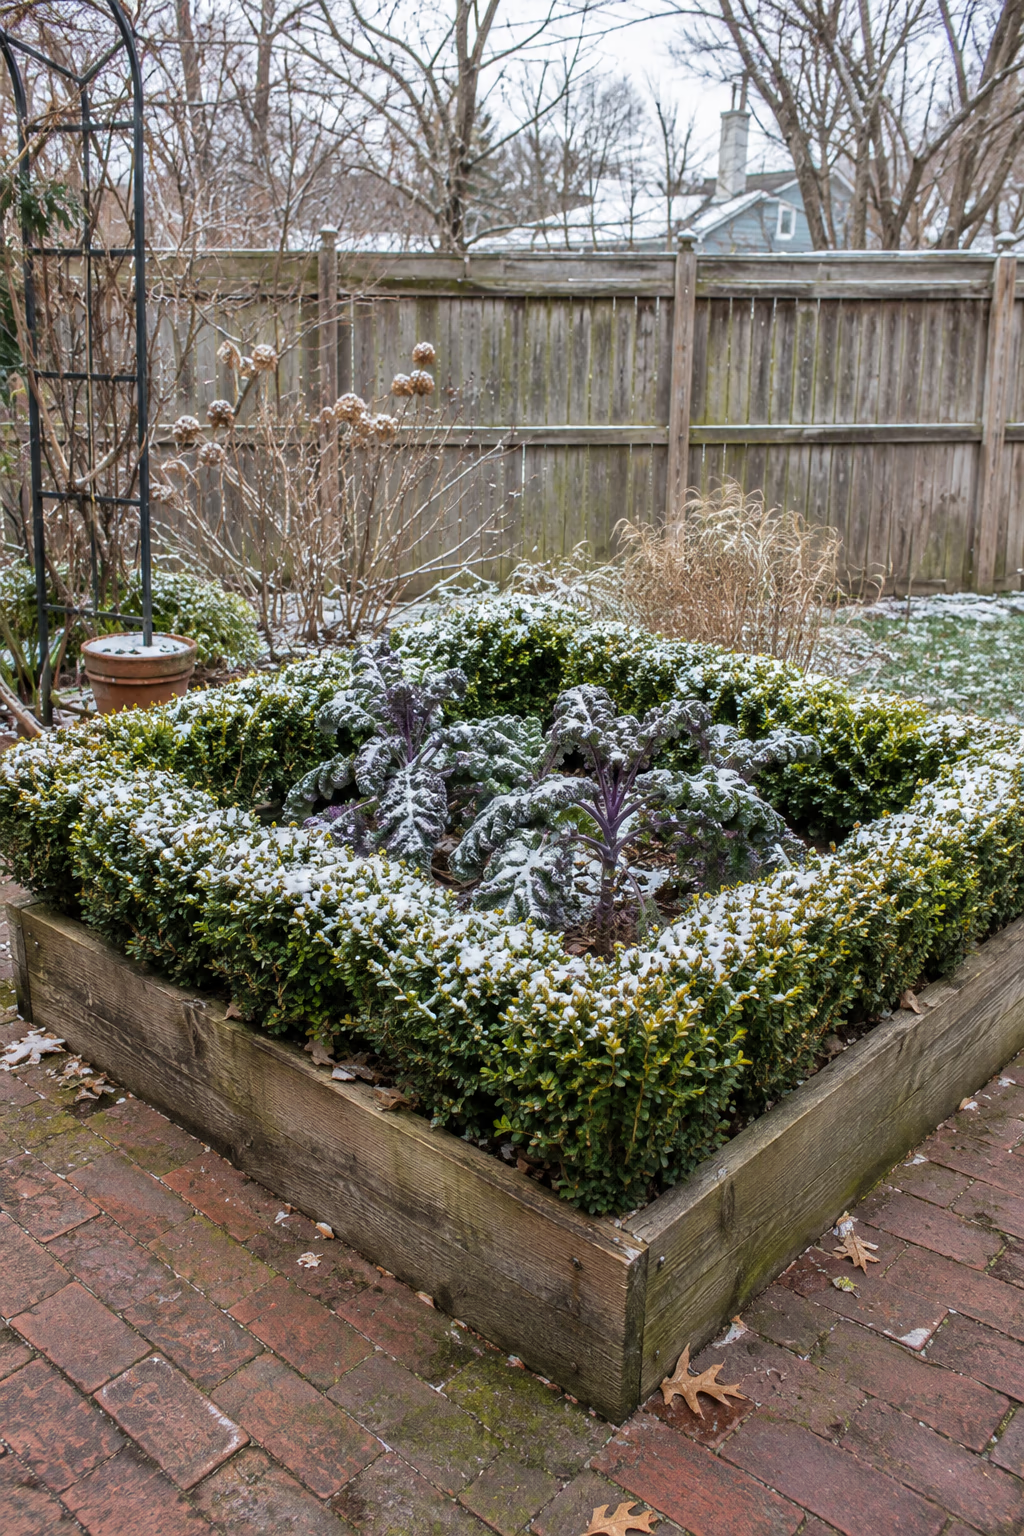
Year-round green structure with a formal feel
A clipped hedge 8 to 12 inches tall planted just inside the edge of a raised bed gives it a crisp, formal outline even in winter. Dwarf boxwood varieties work well, planted 8 to 12 inches apart and sheared once or twice a year.
The green frame makes even a messy vegetable bed look orderly, which is why the look appears so often in classic potager and kitchen gardens. It is especially pretty when snow sits on top of the clipped hedge.
The hedge takes up growing space and competes for water and nutrients. Boxwood blight is also a concern in many regions, so ask a local nursery about resistant varieties or alternatives such as dwarf yaupon holly or germander.
15. Frame Raised Beds With Recycled Composite Boards
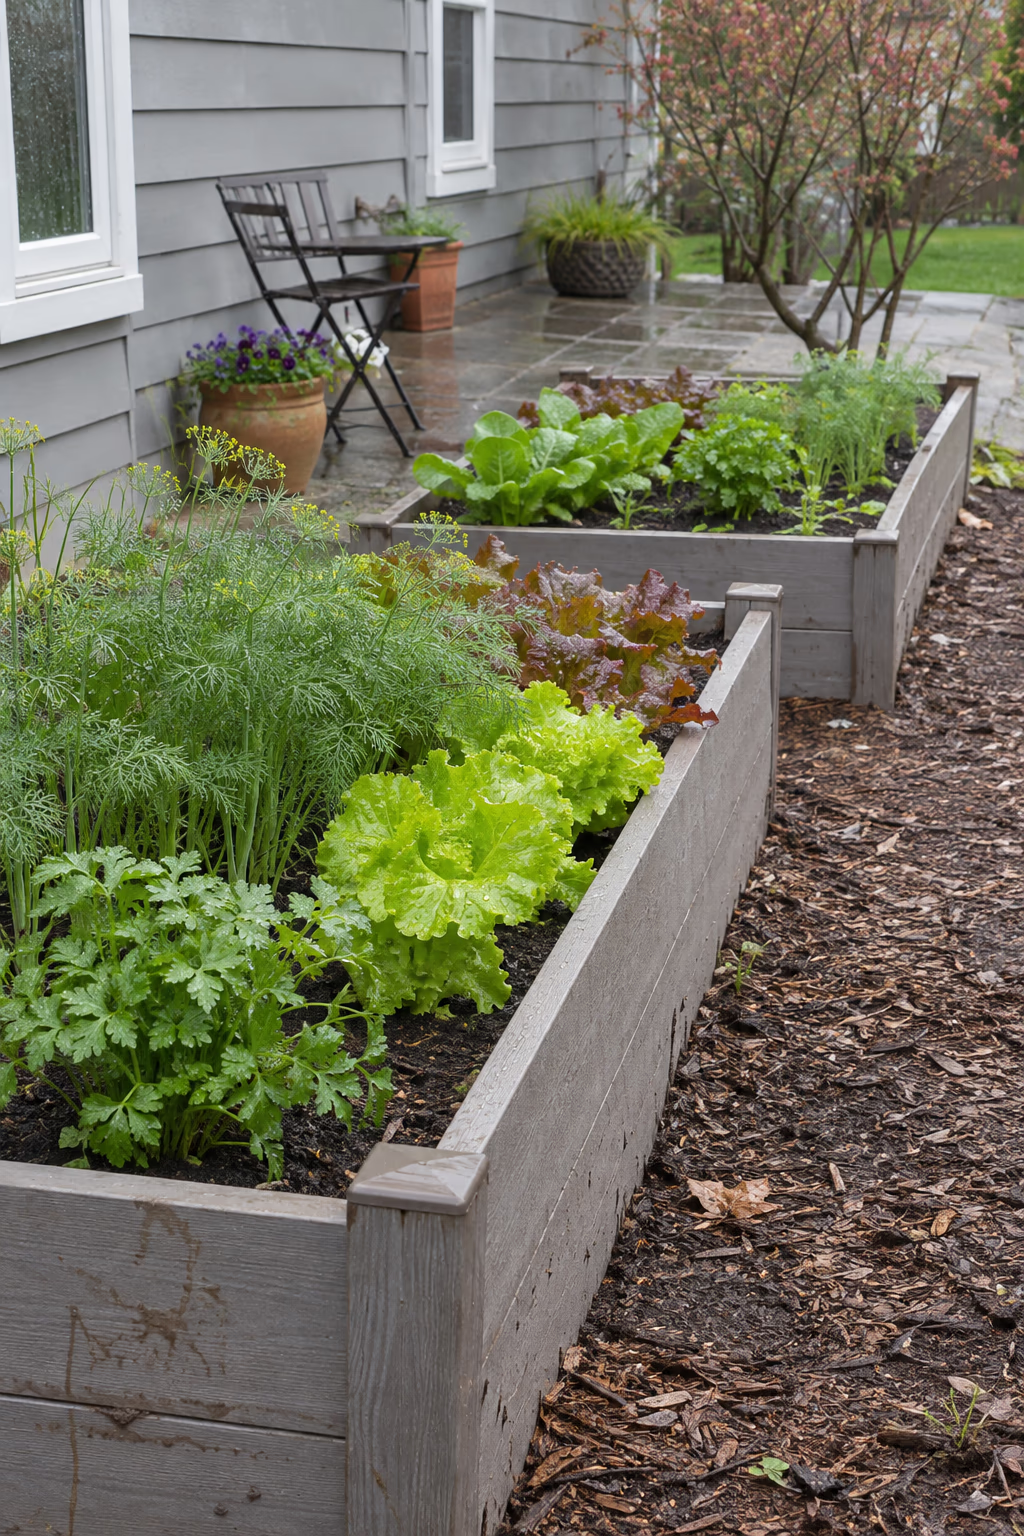
The look of wood without the rot
Composite boards made from recycled plastic and wood fibers can be used in place of lumber to build a low raised border or face an existing bed. They cut and fasten much like wood and come in gray, brown, and cedar-like tones.
Composite does not rot, splinter, or need staining, so a border built from it can last for many years with very little care. It is a smart choice in damp climates where wooden beds break down quickly.
It costs more than basic lumber and can sag over long spans, so add a support stake every 3 to 4 feet. Check that the product is rated for ground contact, and remember that dark colors get hot in full sun.
16. Bury Glass Bottles Neck-Down as a Border
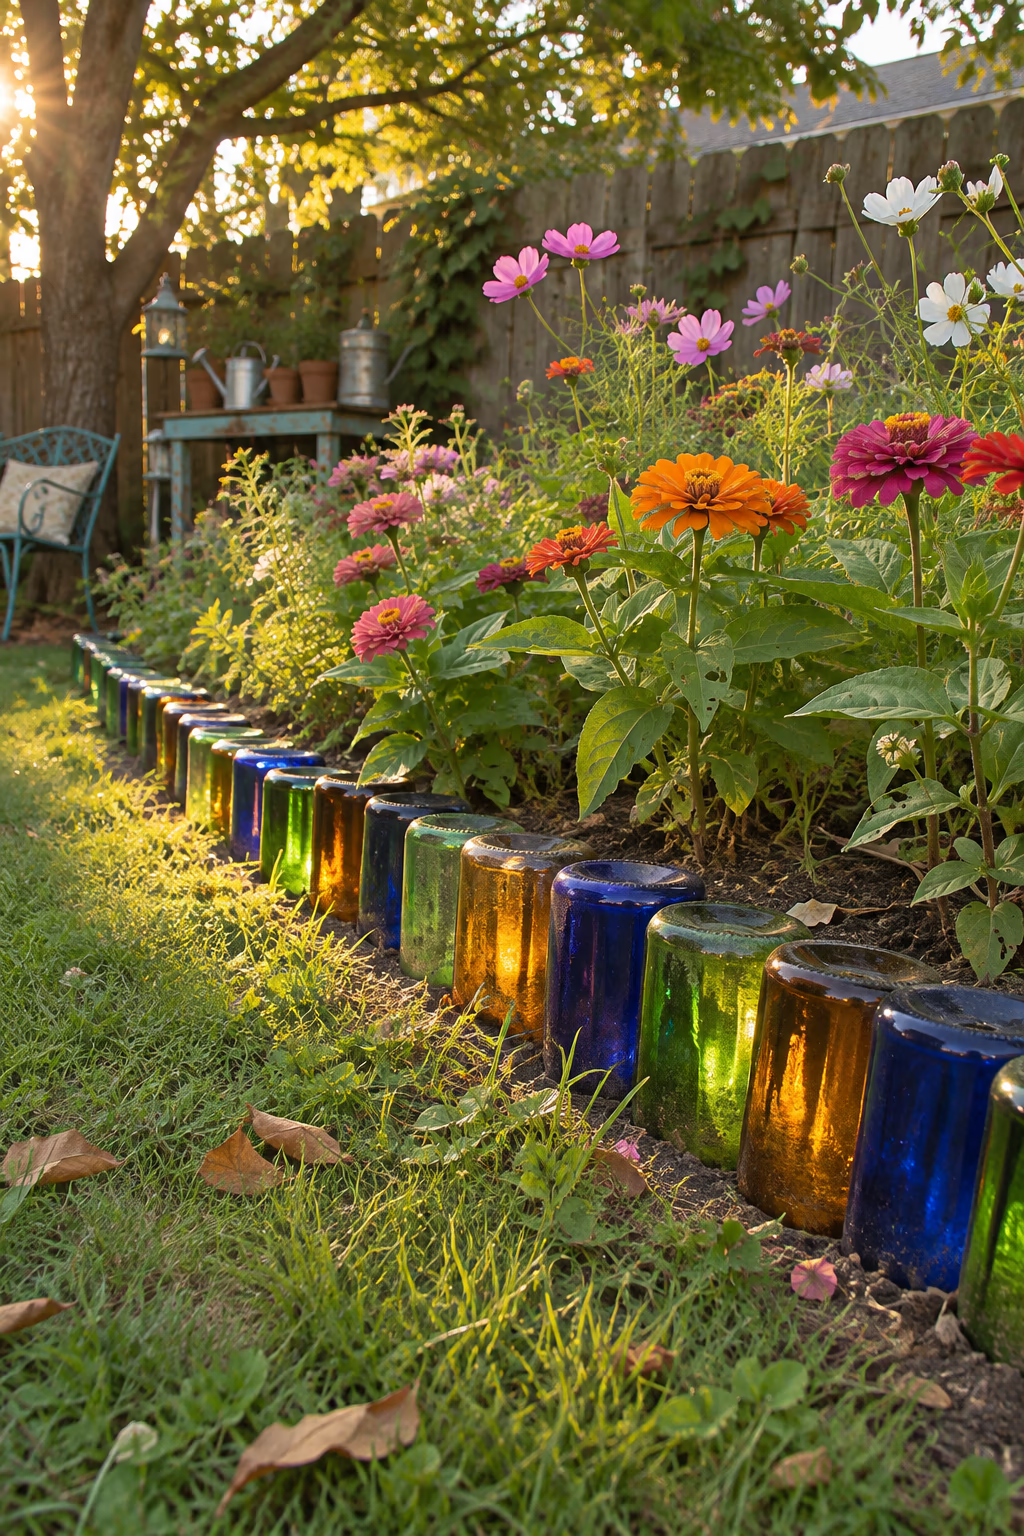
A sparkling, upcycled edge that catches the light
Empty glass bottles pushed neck-down into a trench make a quirky, colorful border along the base of a raised bed. Dig a trench about 6 inches deep, stand the bottles shoulder to shoulder, and backfill firmly so only the bottoms and a few inches of glass show.
Green, amber, and blue glass glows when the sun hits it, giving the border a playful look that suits eclectic and cottage gardens. It costs nothing if you collect bottles over time.
Use thick bottles and keep the border away from areas where kids play or where a mower could clip it. Wear gloves when installing, and replace any cracked bottle right away.
17. Stand Terracotta Rope-Top Tiles Along the Bed
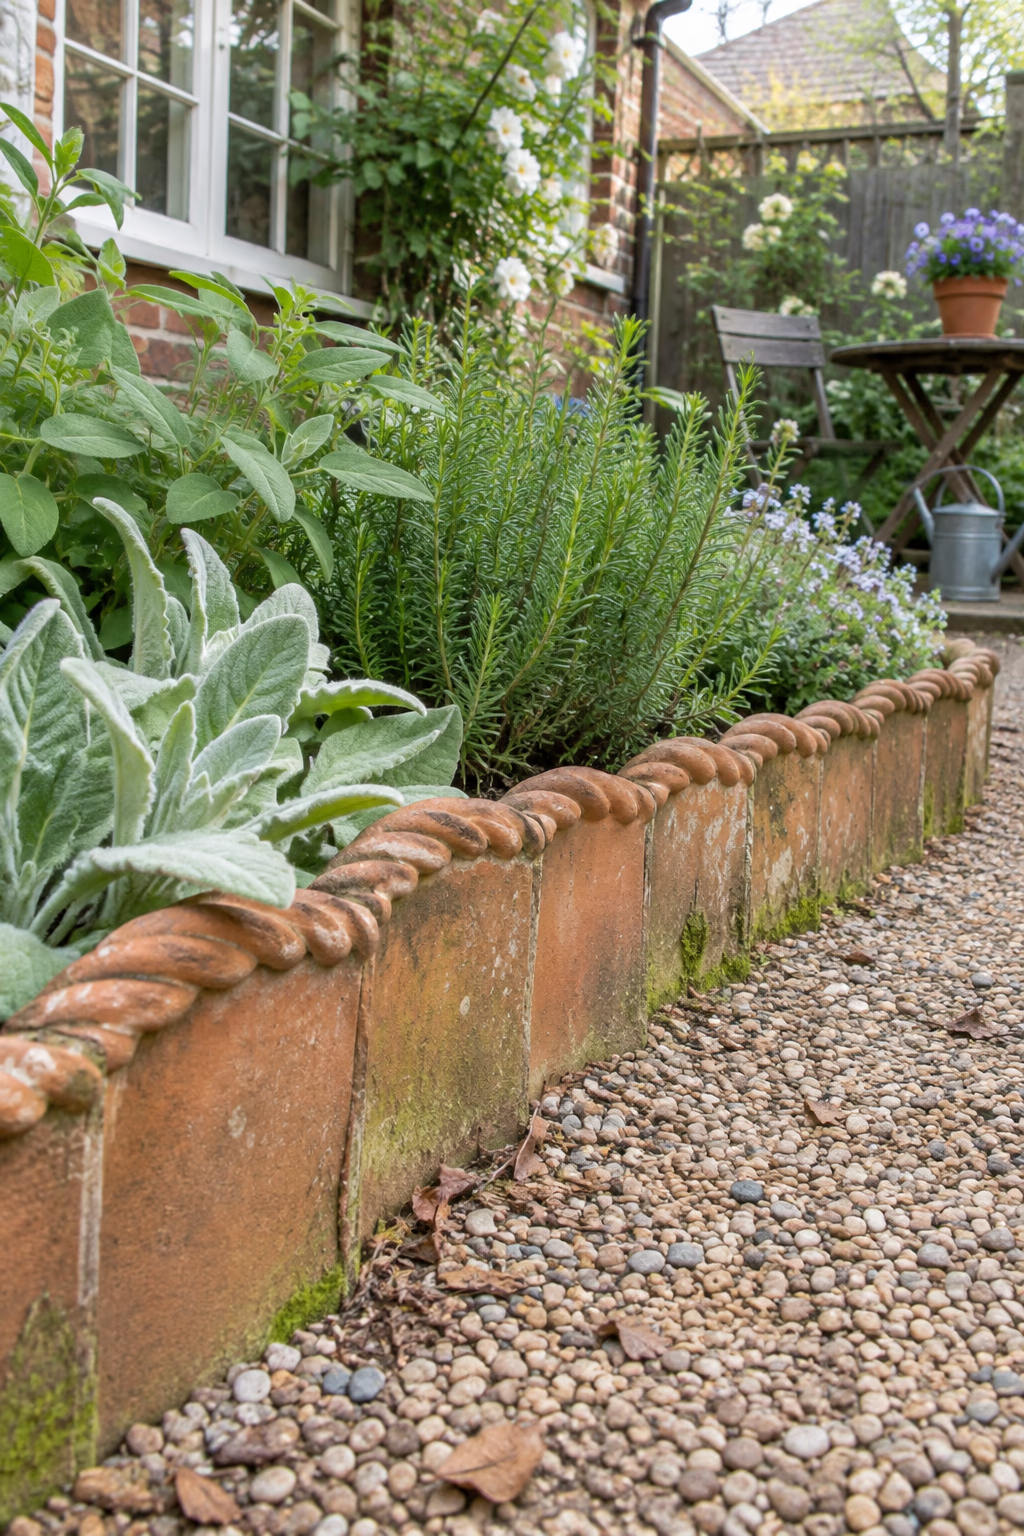
Victorian-style detail with a warm, earthy color
Rope-top edging tiles are short clay or terracotta panels with a twisted rope pattern along the top edge. Set them in a shallow trench of sand along the front of a low raised bed or between the bed and a path, burying each tile about a third of its height.
The warm terracotta color looks lovely next to herbs, gray-leaved plants, and gravel, and the decorative top adds old-garden character that plain edging cannot match.
Clay can crack in freeze-thaw cycles, so look for frost-resistant tiles if you garden in a cold climate. Concrete versions with the same rope pattern are a tougher, cheaper alternative.
18. Light the Border With Solar Stake Lights
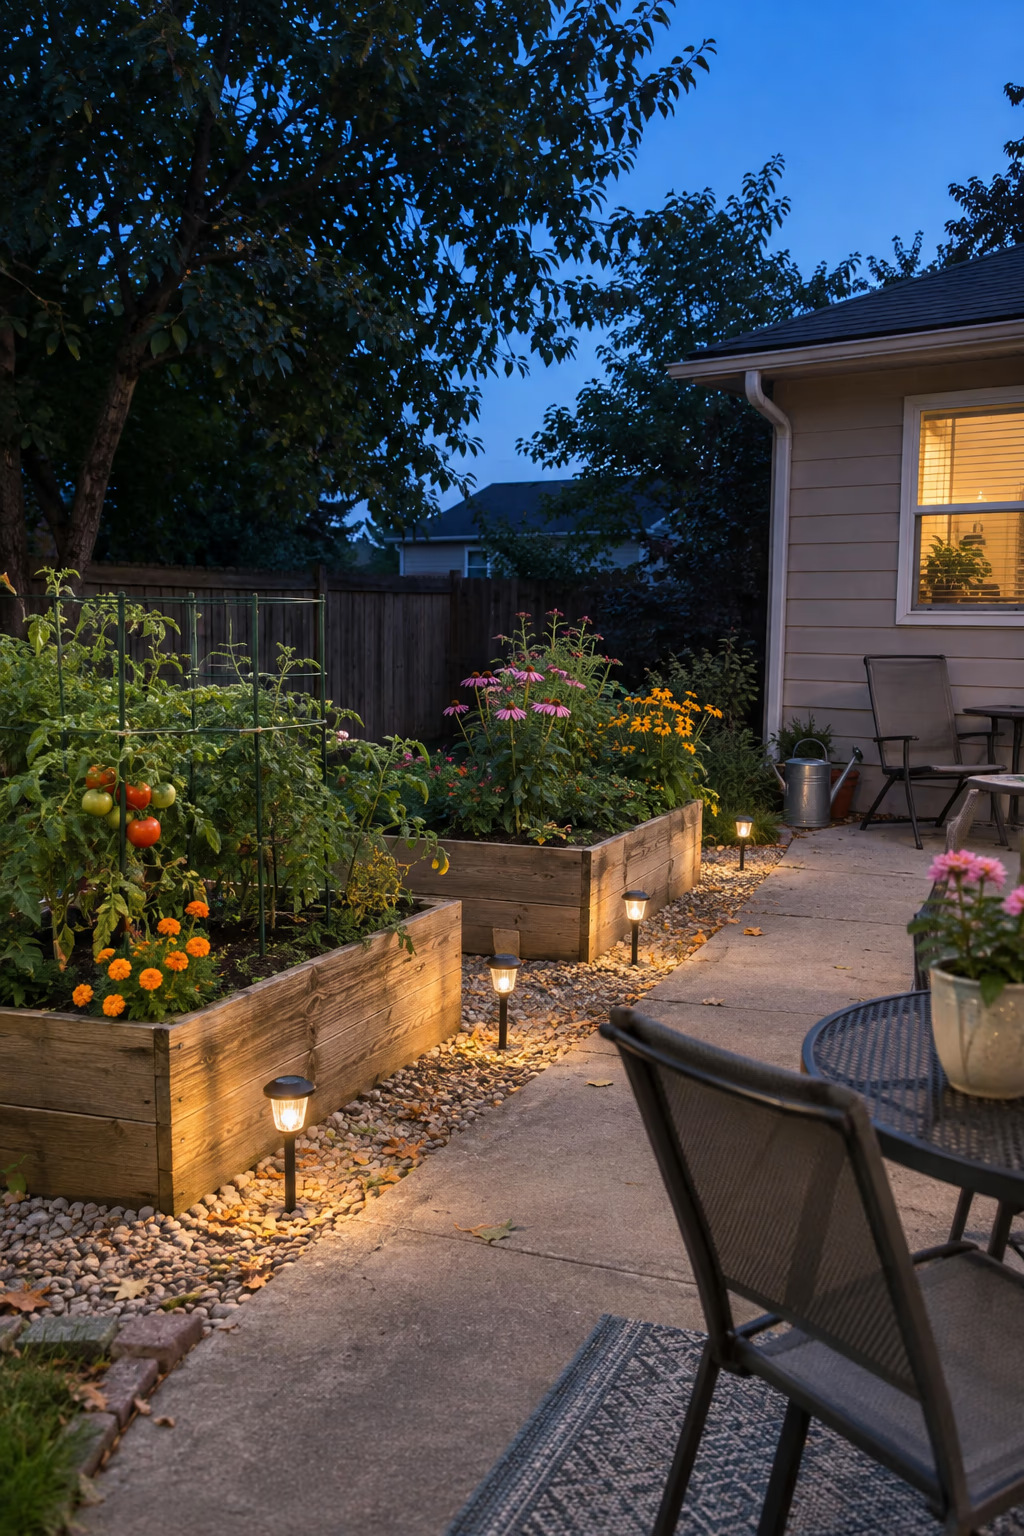
Show off your beds after dark with no wiring
Small solar stake lights placed every 3 to 4 feet along the outside of a raised bed border trace its outline after sunset. Choose warm white lights for a soft glow, and set them in the gravel or mulch surround so they do not shade your plants.
Lighting makes it easier to step around beds at night and lets you enjoy the garden from a patio on summer evenings. Solar lights need no electrician or trenching, so they are an easy finishing touch.
Solar stakes need several hours of direct sun to charge and are dimmer in winter. Inexpensive models may only last a season or two, so a few well-built lights usually beat a large set of cheap ones.
19. Plant an Edible Edge of Chives and Curly Parsley
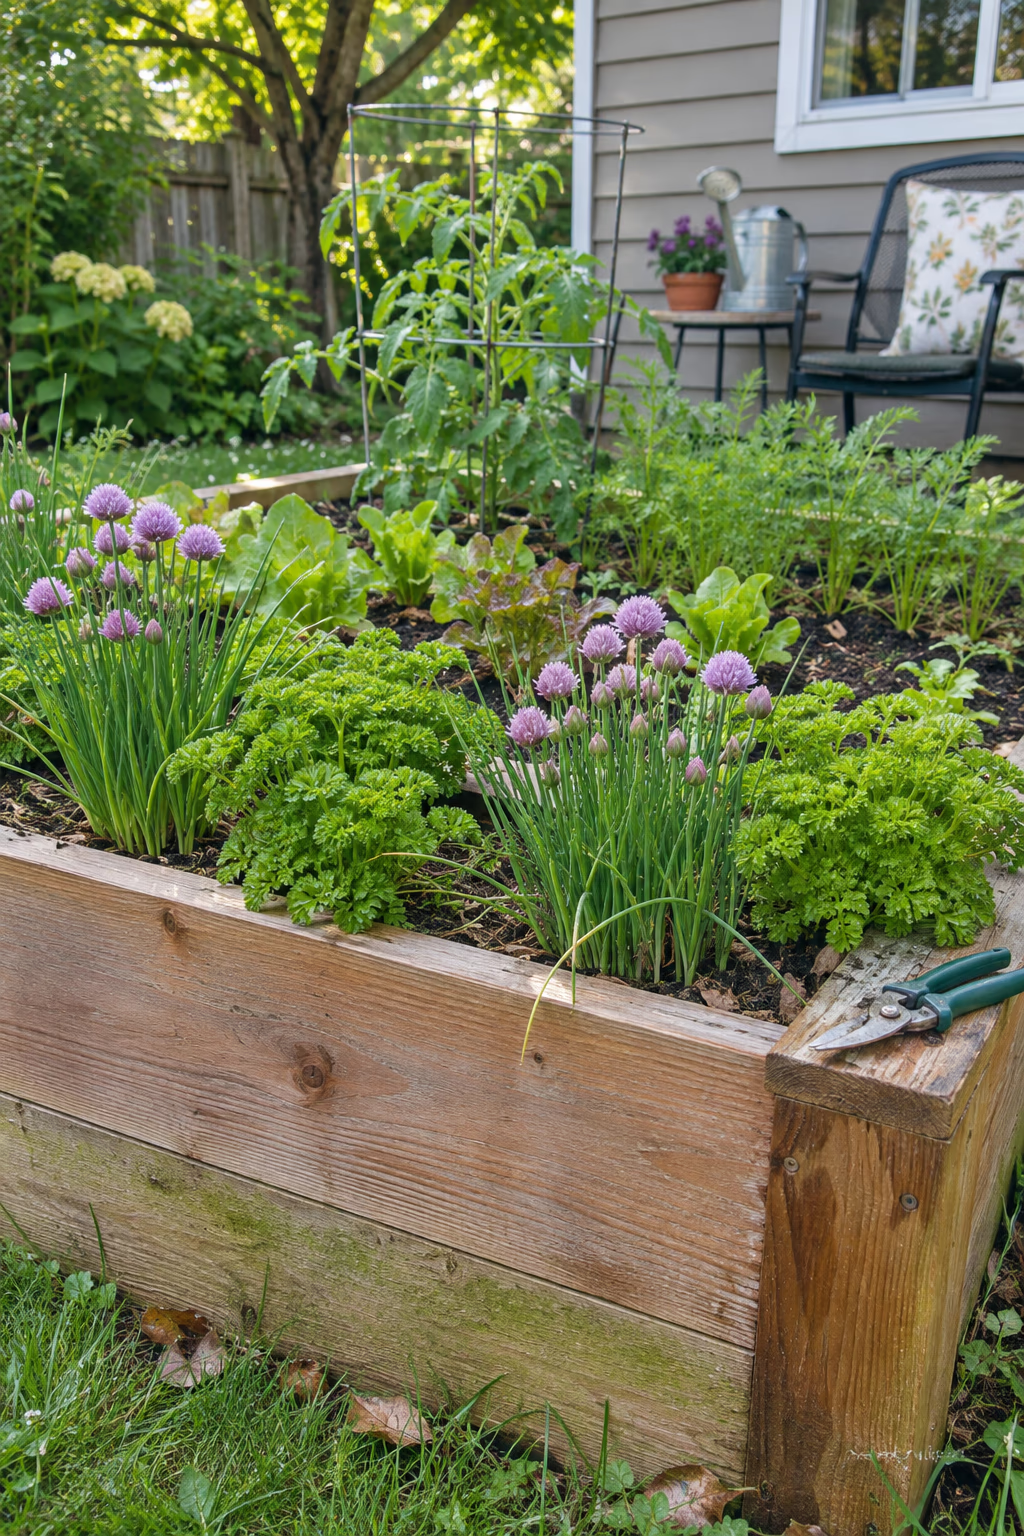
A border you can snip for dinner
Alternate clumps of chives and curly parsley along the front edge of a raised bed for a neat green border that is also useful in the kitchen. Space them about 8 inches apart so they knit together into a low, tidy line.
Chives add purple spring flowers and come back for years, while curly parsley gives a frilly, bright green texture. Together they make a working vegetable bed look finished, and they are right where you can reach them.
Parsley is a biennial and tends to bolt in its second year, so plan to replace it every year or two. Cut chive flowers before they set seed if you do not want seedlings popping up everywhere.
20. Stucco a Block Raised Border to Match the House
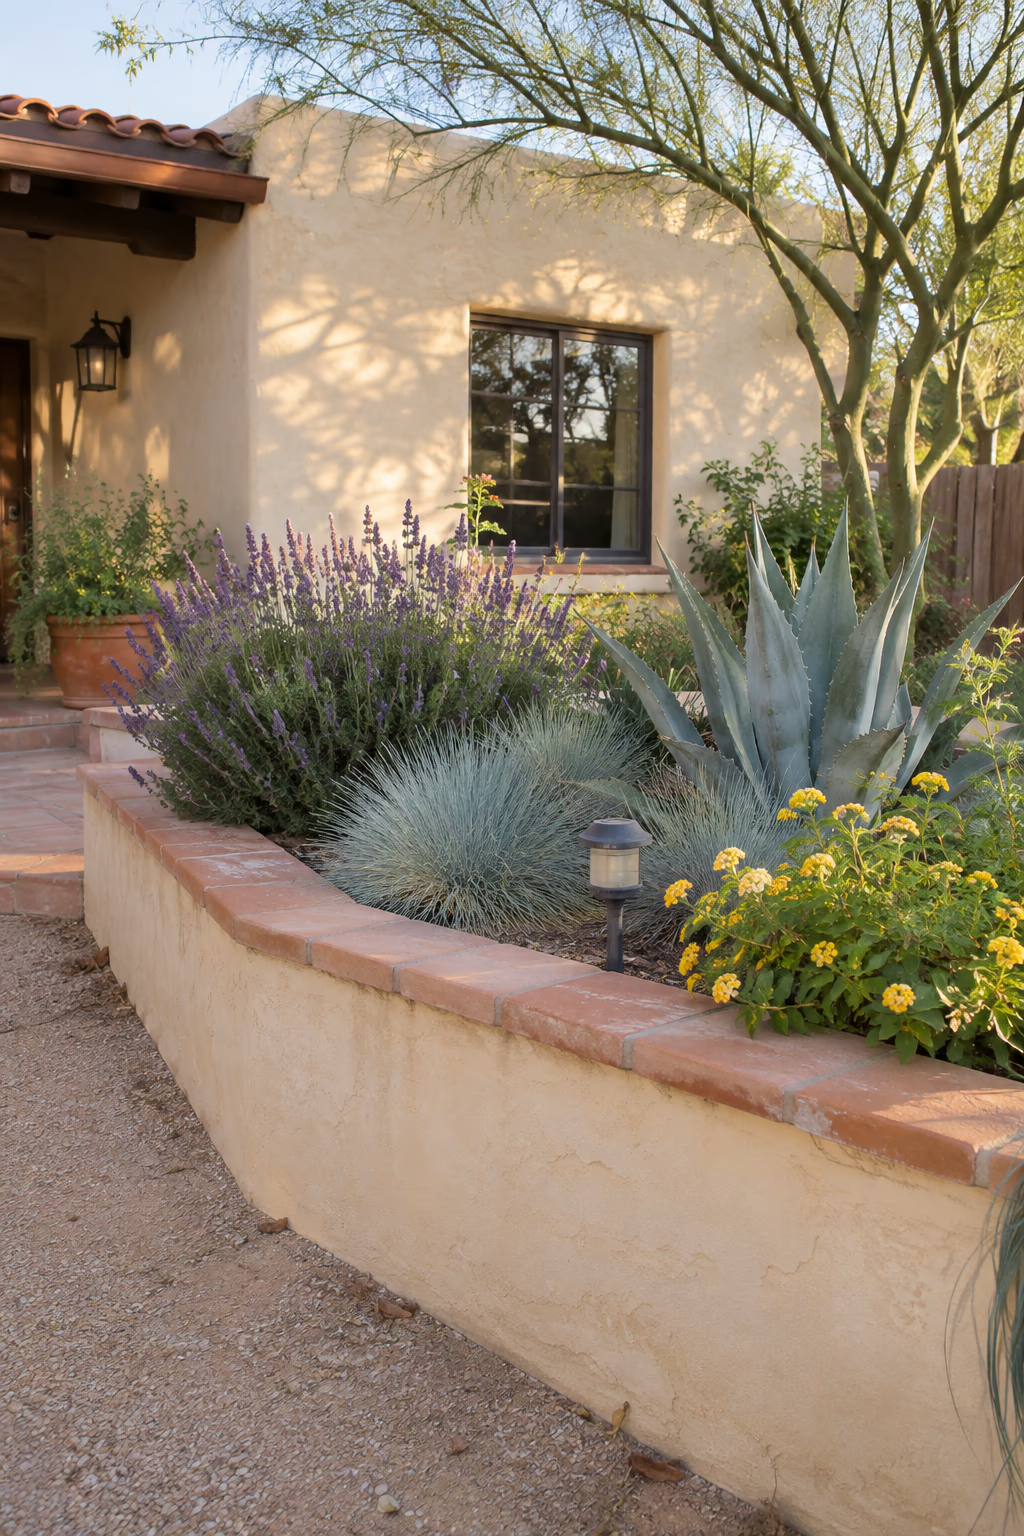
A built-in look that blends with the architecture
A low raised border built from concrete block and finished with stucco can be painted or tinted to match your home’s exterior. Walls 16 to 24 inches high work well near patios and entries, and a flat cap of brick, tile, or concrete gives them a finished top.
The smooth, solid walls look especially at home with stucco, adobe-style, and modern houses in the South and West. They also create a strong, permanent frame for drought-tolerant plants.
This is a bigger project that needs a proper footing, drainage holes, and waterproofing on the inside face so moisture does not stain the stucco. Many homeowners hire a mason, and some HOAs require approval for permanent structures.
21. Build a Raised Border From Stone-Filled Gabions
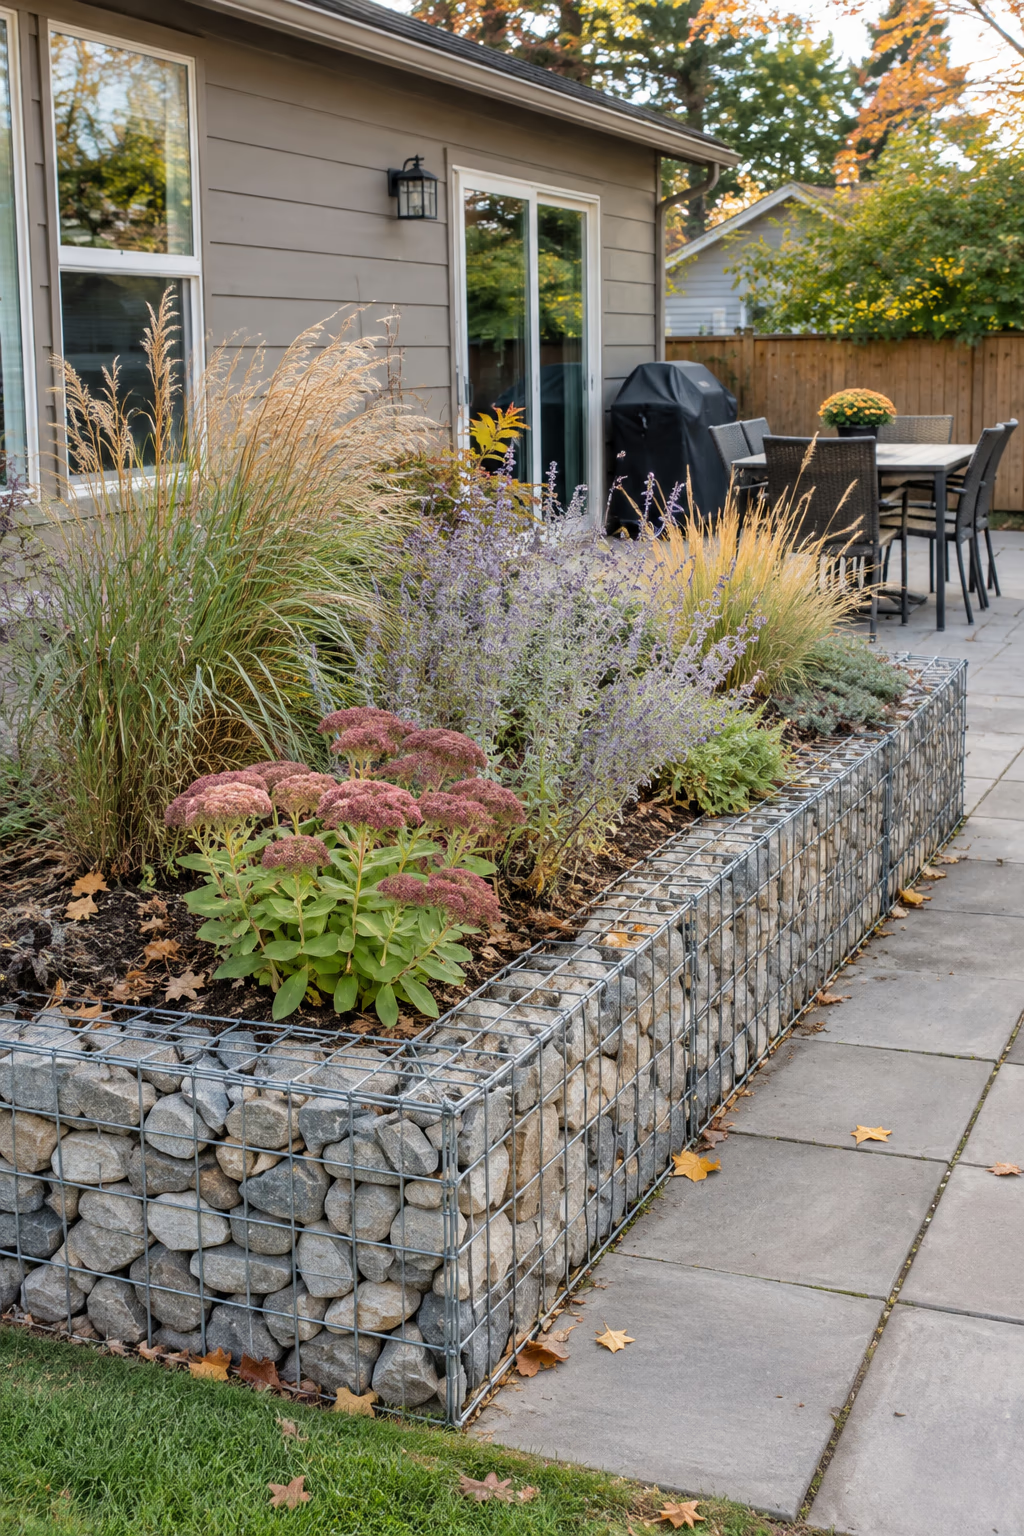
Modern, industrial texture that drains freely
Gabions are welded wire baskets filled with stone. Set a row of baskets about 12 inches wide and 18 to 24 inches tall around the outside of a bed, fill them with river rock, crushed stone, or broken concrete, and backfill the inside with soil.
Gabions drain well, never rot, and look striking in modern or industrial yards. Choosing stone that matches local rock makes them feel grounded rather than out of place.
Filled gabions are extremely heavy, so place the baskets exactly where you want them before filling. Use galvanized or coated wire so it does not rust through, and set the baskets on a level, compacted base.
22. Lay a Flagstone Kneeling Apron in Front of the Bed
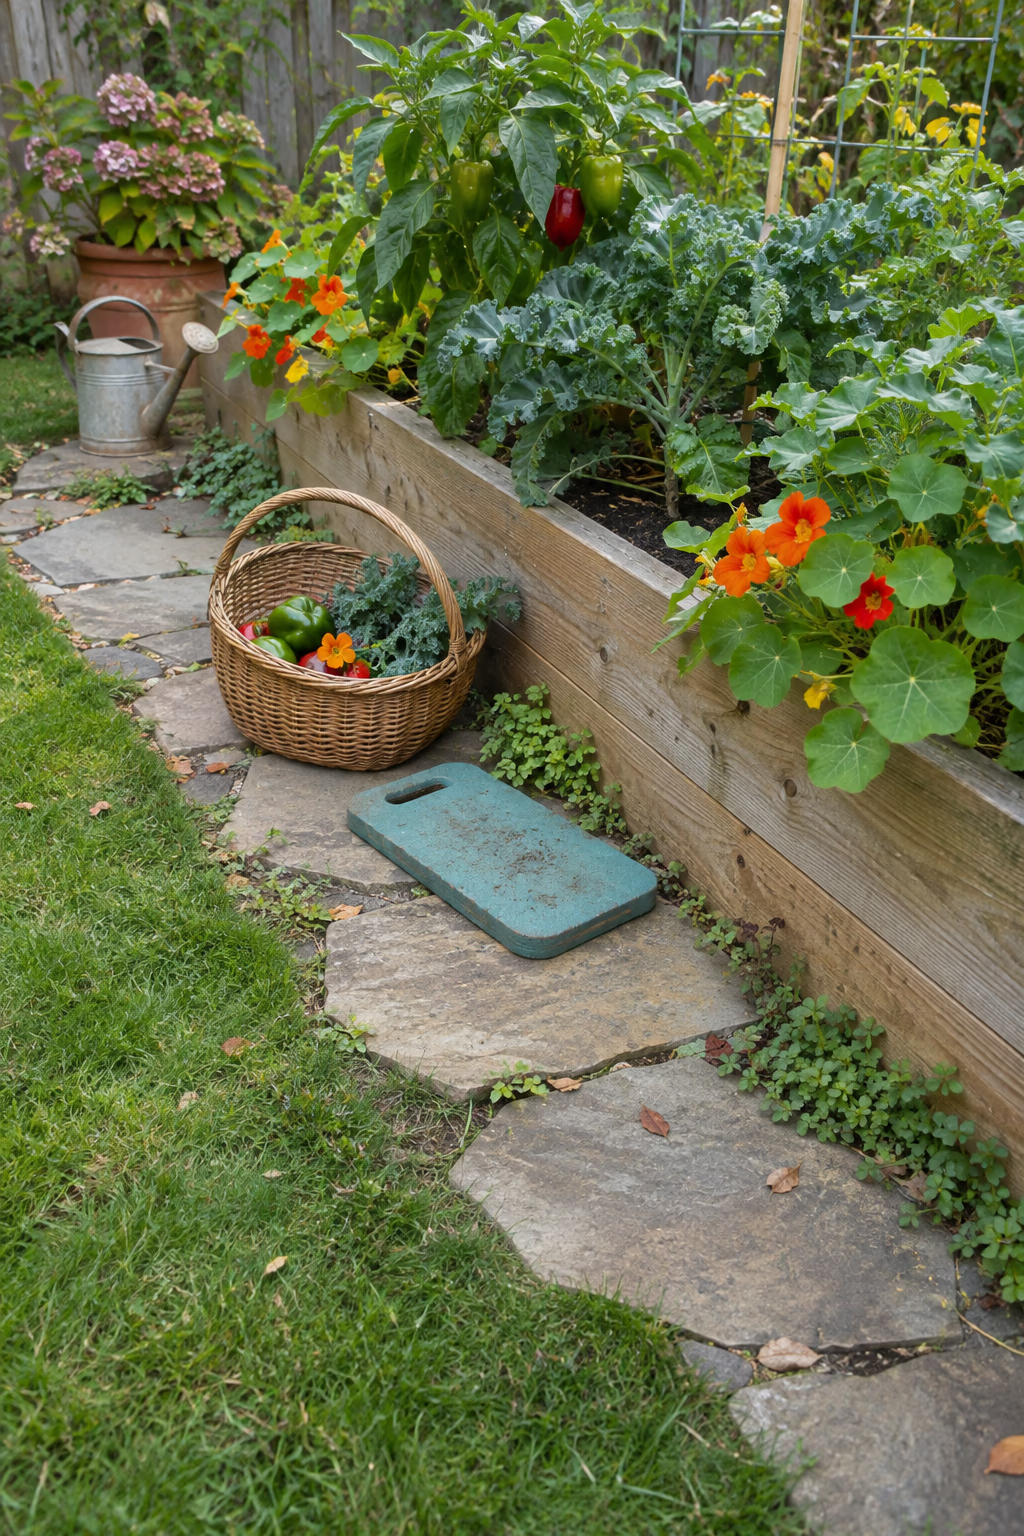
A firm, flat place to stand and work
Set large, flat flagstones in a band about 2 feet wide along the front of a raised bed. Bed them in a couple of inches of sand or stone dust so they sit flush with the surrounding ground and do not rock underfoot.
The apron gives you a dry, level spot to kneel, stand, or set down a basket while planting and harvesting. It also protects the lawn from wear and reads as a handsome stone border at the base of the bed.
Flagstone can be slippery when wet or mossy, especially in shade. Choose stone with a natural cleft texture, and fill the joints with gravel or low ground cover rather than leaving open gaps where weeds take root.
23. Set Reclaimed Roofing Slate on End as Edging
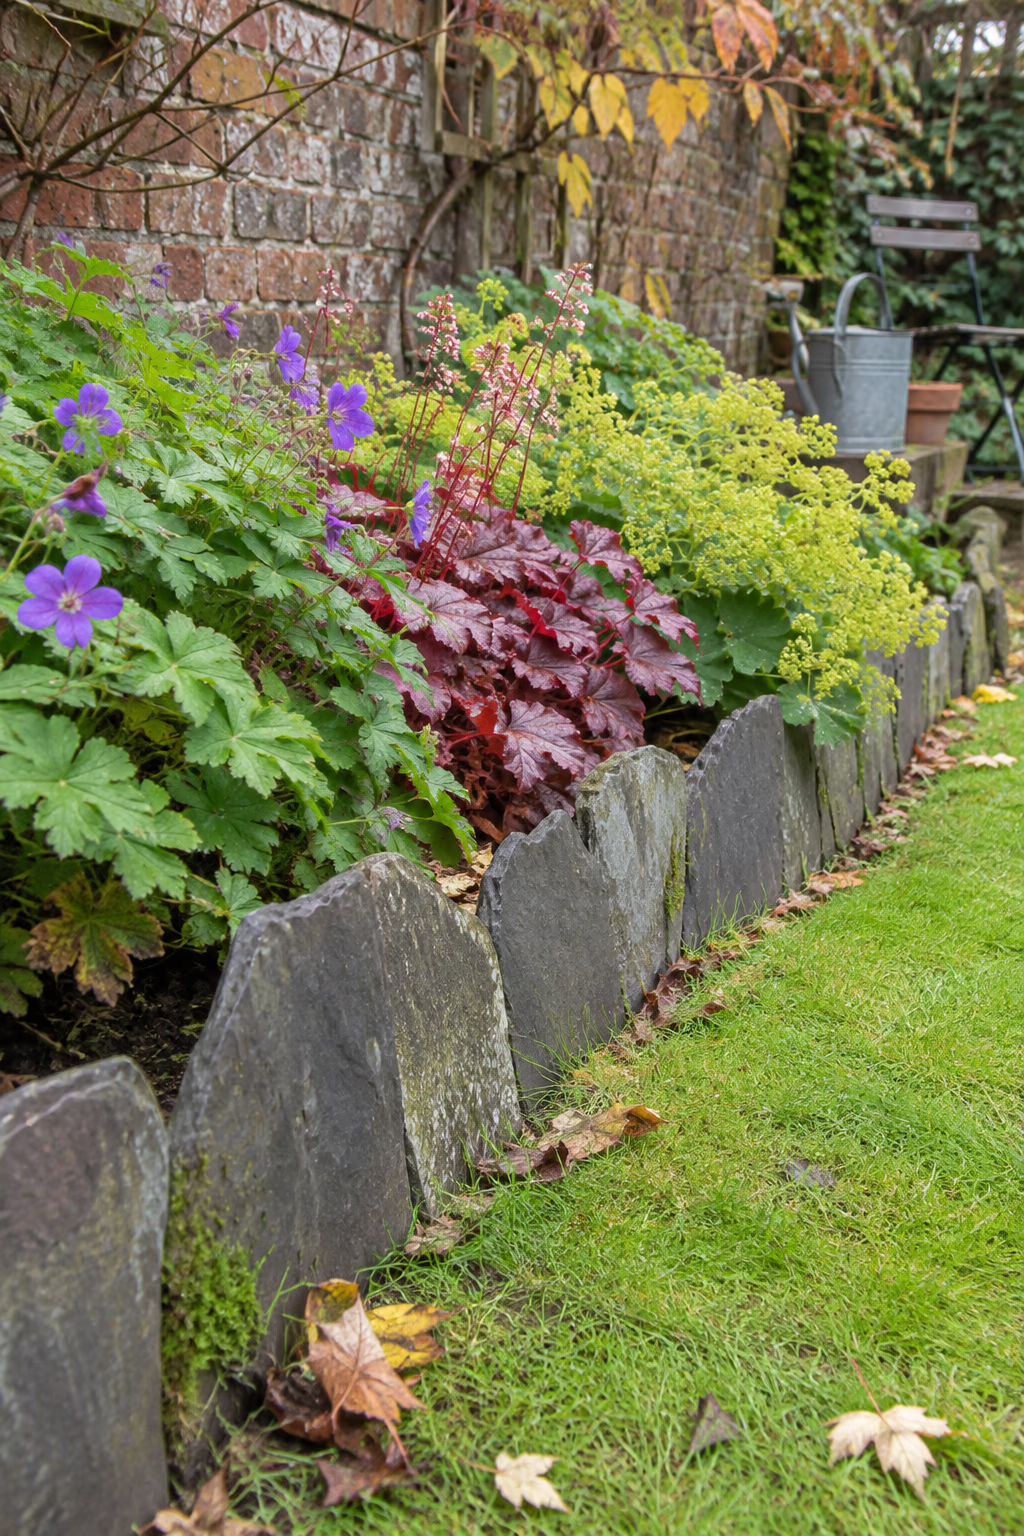
Dark, layered edges with a crafted look
Old roofing slates set on end in a narrow trench make a striking, low border along the base or top of a raised bed. Stand them upright in a single row, or angle them slightly in a sawtooth pattern, burying each about half its height.
The deep gray-blue color contrasts beautifully with green foliage and bright flowers, and reclaimed slate often comes cheap from roofers or salvage yards.
Slate edges can be sharp, so wear gloves and keep the border away from bare feet. Thin or cracked pieces can flake in hard freezes, so pick the thickest slates you can find.
24. Edge a Round Raised Bed With Scalloped Concrete Edgers
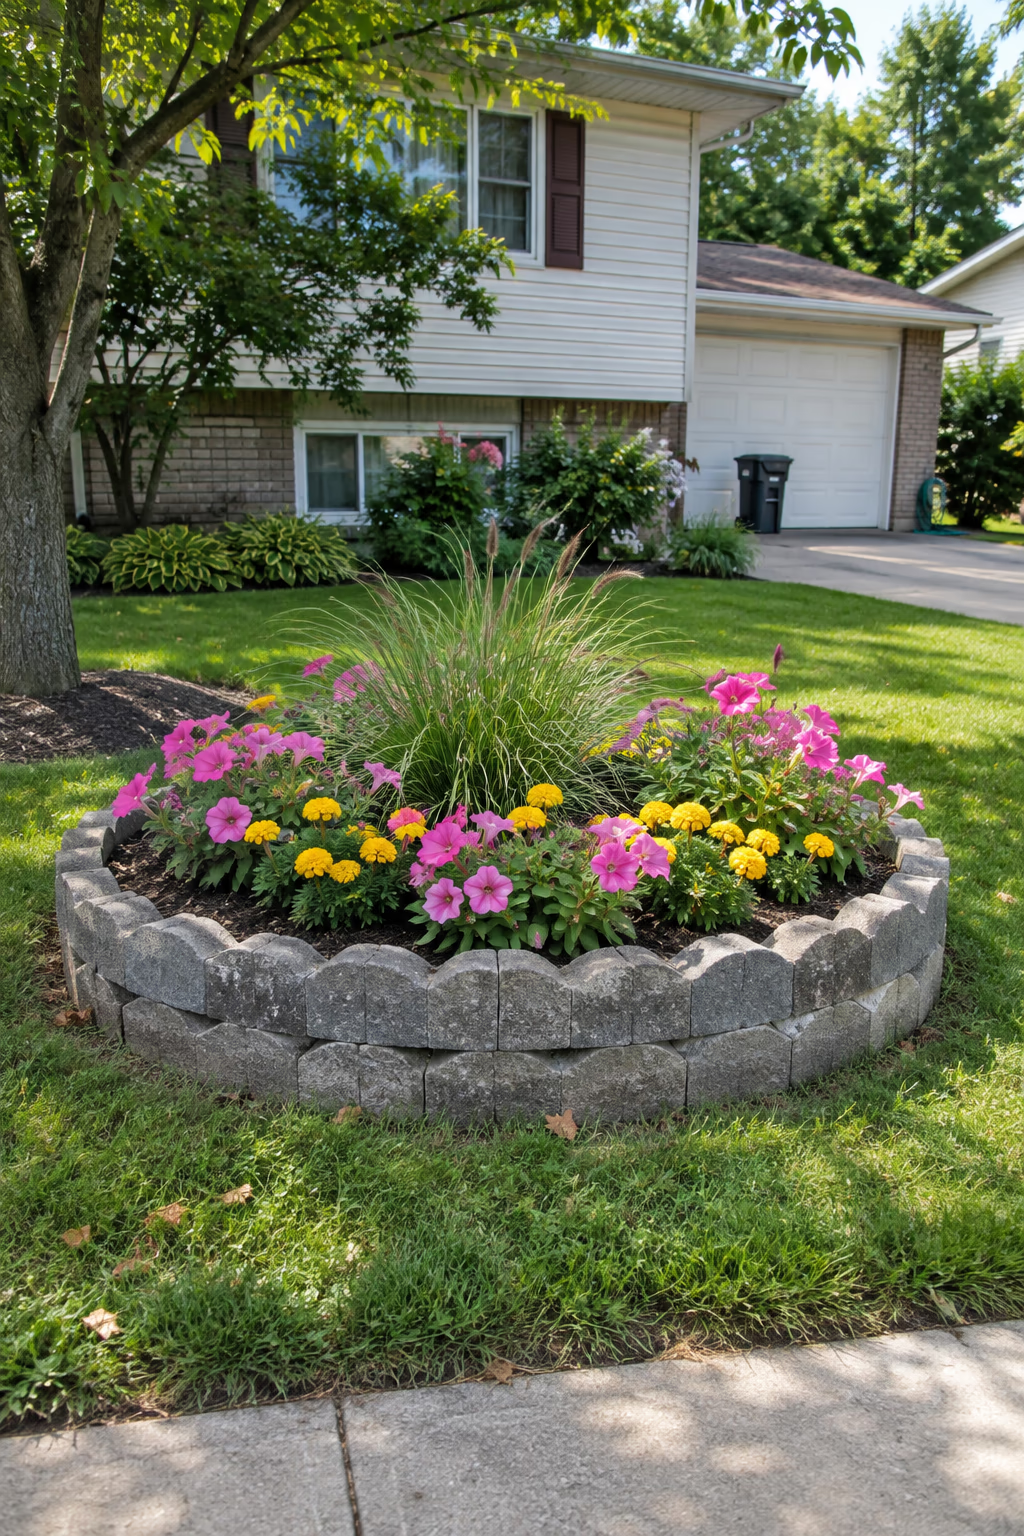
An easy, classic edge for a simple circle bed
Scalloped concrete edgers are sold at most home centers and fit together into a ring. Stack two or three rows, staggering the joints, to make a round raised bed 8 to 12 inches high around a tree, mailbox, or sunny patch of lawn.
They are affordable, need no tools beyond a shovel and level, and can be set up in an afternoon. The scalloped edge has a cheerful, traditional look that suits many suburban front yards.
Edgers that are only stacked can tip if pushed, so set the bottom row in a shallow trench. Avoid piling soil against a tree trunk, which can cause rot; keep the bed to the outer root zone instead.
25. Pin Bamboo Roll Edging Along a Low Border
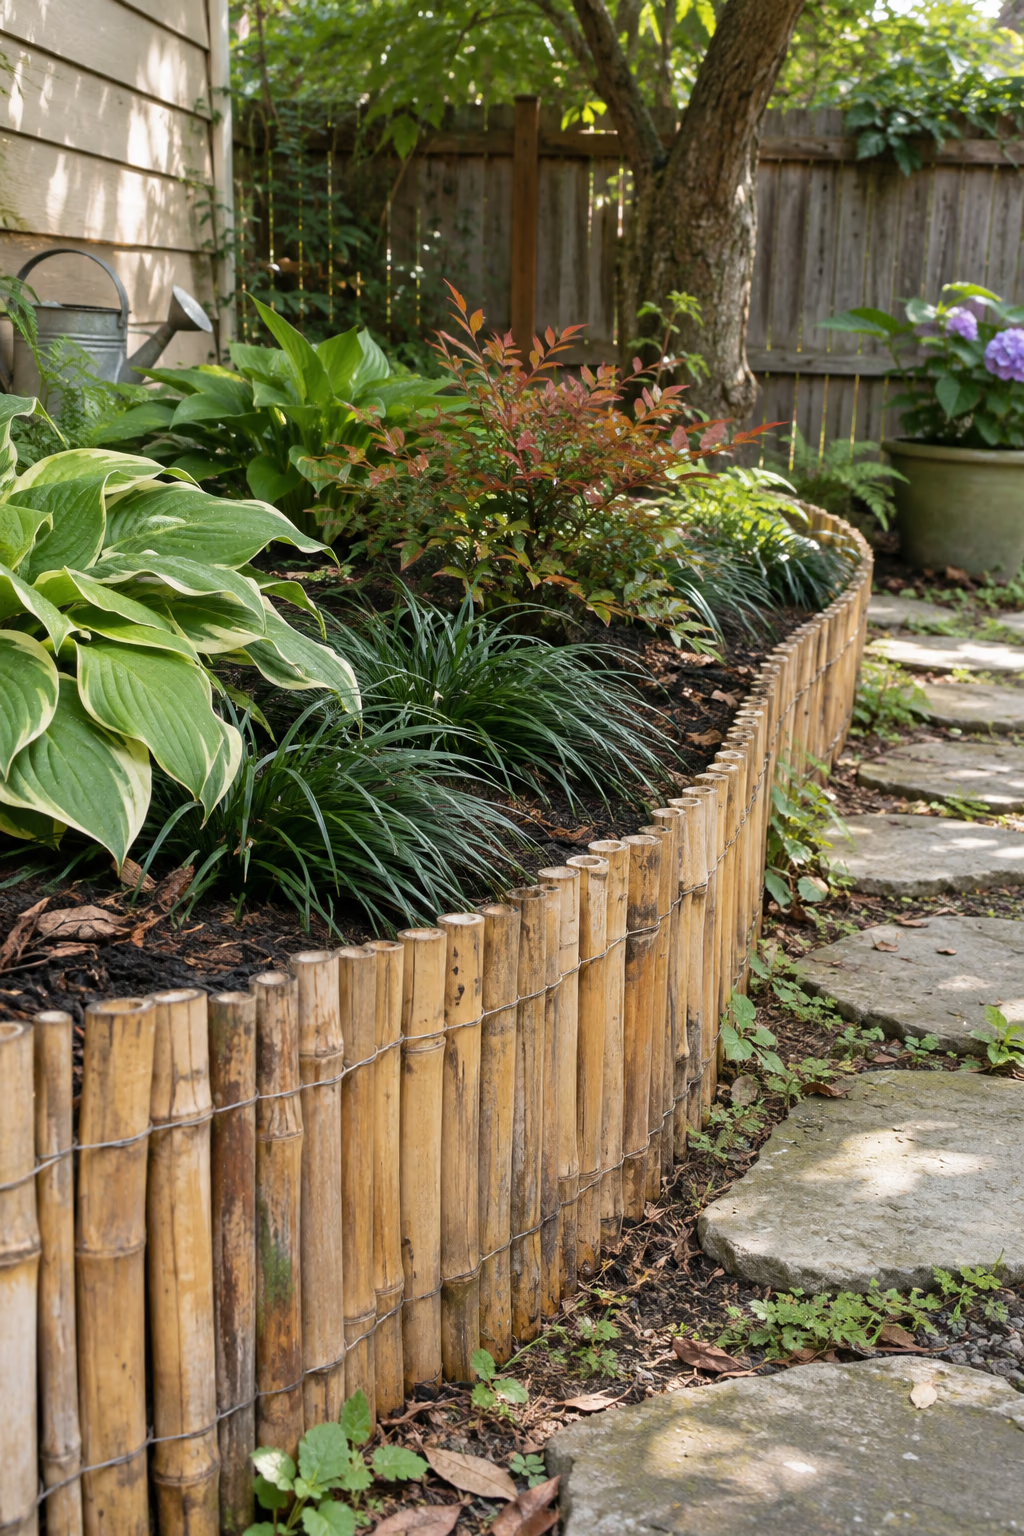
Quick, light, and naturally textured
Bamboo roll edging is made of short bamboo canes wired together into a flexible strip. Unroll it along the edge of a low raised bed, push it a couple of inches into the soil, and pin it with stakes every couple of feet.
It goes in within minutes, bends around curves, and adds a warm, natural texture that suits Asian-inspired, tropical, or casual cottage gardens. It is a handy fix for renters or anyone trying out a new bed shape.
Bamboo in soil weathers and rots within a few years, and the wire can rust. Treat it as a temporary or decorative border rather than a structural wall, and do not use it to hold back deep soil.
How to Plan Your Raised Garden Bed Border
The right border depends on how high your beds are, how much soil it needs to hold, and how much upkeep you are willing to do. A little planning helps you choose a border that looks good and lasts.
- Decide what the border must do. A border holding back 2 feet of soil needs to be a real wall, while a border that only separates lawn from mulch can be a thin strip or a row of plants.
- Match the materials to your home. Repeating brick, stone, wood tones, or stucco from the house makes the garden look planned and keeps it from feeling cluttered.
- Use food-safe materials near edibles. Untreated cedar, stone, brick, and metal are safe choices for vegetable beds. Many gardeners avoid old railroad ties and older pressure-treated lumber around food crops.
- Plan for drainage. Solid walls need gaps or weep holes so water can escape, and gravel or stone surrounds should slope gently away from the house.
- Think about mowing and access. Leave a mowing strip or path at least 18 to 24 inches wide between beds so you can kneel, push a wheelbarrow, and trim without damaging the border.
- Check the rules before you dig. Call 811 before trenching for footings or edging, and check HOA guidelines and local codes if you plan a permanent masonry wall near the property line.
Frequently Asked Questions
What is the cheapest way to add a border to a raised bed?
Free or low-cost options include gathered rocks, log rounds from pruned trees, woven branch wattle, buried glass bottles, and cinder blocks. A simple gravel ribbon or a row of marigolds or chives along the edge is also inexpensive and quick to install.
Should a raised bed border go inside or outside the bed frame?
It depends on the job. Structural borders such as brick, stone, and timber are the bed walls themselves. Edging strips, gravel bands, and mowing strips go outside the frame to protect it from grass and mowers, while living borders such as thyme or boxwood are planted just inside the edge.
How do I stop grass from growing into my raised bed border?
Install a physical barrier such as steel edging or a flush brick mowing strip, and keep a band of mulch or gravel between the lawn and the bed. Pull creeping grass runners in spring and early summer before they root into the bed.
What is the longest-lasting raised bed border material?
Brick, natural stone, poured concrete, gabions, and heavy steel can last for decades with little care. Composite boards also last a long time. Untreated wood, logs, wattle, and bamboo look great but usually need replacing within a few years.
How high should a raised garden bed border be?
For flowers and shallow-rooted herbs, 6 to 12 inches is often enough. Most vegetables do well in beds 12 to 18 inches deep, and borders of 24 inches or more reduce bending but need stronger construction to hold the extra soil.
Final Thoughts
The best raised garden bed border ideas make your beds look sharper and easier to care for at the same time. A curved brick wall, a ribbon of gravel, or a simple stripe of marigolds can change the whole feel of a yard with very little effort.
Start with the border that solves your biggest problem, whether that is creeping grass, muddy paths, or plain bed walls, and add finishing touches as the garden grows. With the right edge in place, your raised beds will look neat and welcoming all season long.